Template:Sanji Infobox
Fishman Island Saga
Return to Sabaody Arc
Straw Hat Reunion

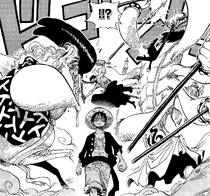
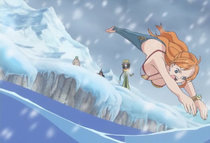
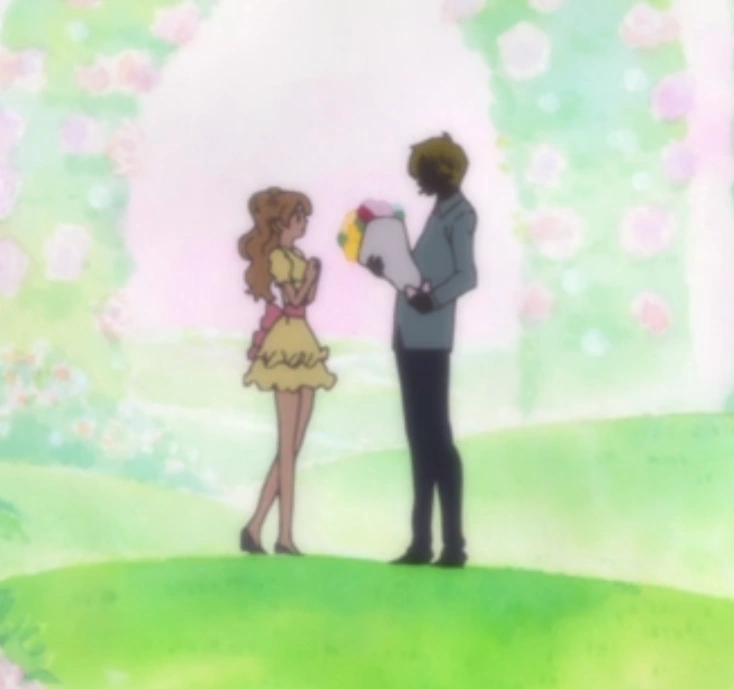
Sanji upon seeing a 'real' woman for the first time in two years.
Two years had passed and Sanji had conquered Ivankov's challenge and changed which eye his hair covered in the process. The okamas then gave Sanji a ride back to Sabaody Archipelago. After arriving to their destination, Sanji was overjoyed to see real women again. The okamas bid Sanji farewell and said that they hoped to see him again someday. Sanji responded by declaring that he would never return to Momoiro Island while giving the okamas the finger. Sanji thanked them for giving him a ride back and tell them to give Ivankov his best before running off to find Nami and Robin exclaiming that he had returned from "hell."[1]
After arriving at Shakky's bar, Sanji was furious to learn that Zoro was the first to return and happy that Nami had returned as well. He also thanked Duval for protecting the Thousand Sunny. During a conversation with Rayleigh, Sanji commented that Luffy must have gotten stronger training under the first mate of the Pirate King. Sanji also wondered how Nami had grown during these two years while having a nose bleed.[2]
He was later seen asking a fisherman for some fish, but the fisherman was worrying over a green-haired man who had accidentally gotten on a pirate ship. Sanji, suspecting it was Zoro, showed the old man Zoro's wanted poster (covering up "wanted" and his bounty value) and asked if that was the man. After the fisherman confirmed it, Sanji told the fisherman not to worry. Soon after, a large galleon burst from the water after being cut in two by Zoro.[3]
Sanji then got reacquainted with Zoro, who said that he wanted to go to the beach and fish. Sanji angrily stated that it would be a pain for the crew to search for him if he ended up getting lost and forced him to return to the Thousand Sunny. The two then started their usual bickering with Sanji threatening to pummel Zoro with the legs he trained during the two years in "hell."[4] He then spoke to Franky on the Den Den Mushi who told him to meet at the beach on Grove 42.[5]
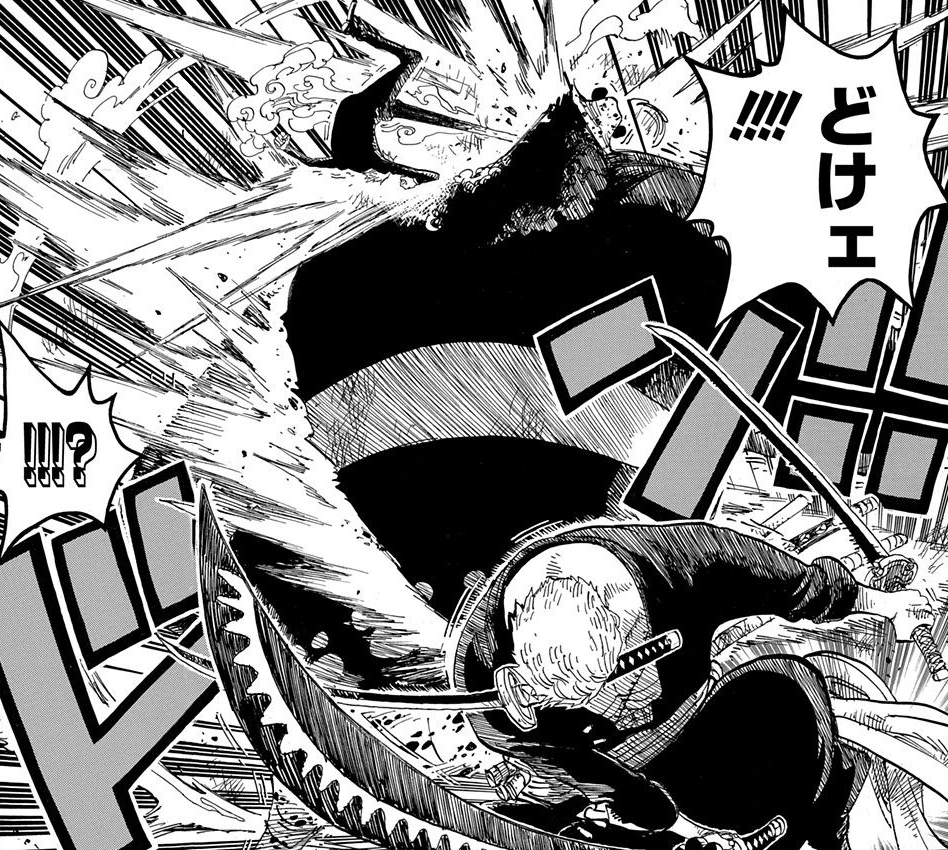
Sanji and Zoro defeat PX-7.
After getting a call from Franky, Sanji informed Zoro of the Straw Hats' meeting place, which was in Grove 42. He and Zoro started their usual arguing with Sanji speaking to Zoro like a child and Zoro saying that he will cut Sanji later. They heard a commotion coming from a nearby grove. When they went to investigate, they found Luffy, the Marines, the Pacifistas, and the crew of the Impostor Straw Hat Pirates.[6]
After reuniting with Luffy, Sanji and Zoro quickly destroyed a Pacifista with a Diable Jambe kick and a slash, respectively. The newly reformed Monster Trio then proceeded to the ship. On the way, they met Rayleigh. When Luffy told Rayleigh that he would become Pirate King, Sanji just smiled along with Zoro.[7]
As the Monster Trio continued to run away, they encountered more Marines. Perona aided the trio by fending off the Marines with her Negative Hollow. Sanji started staring perversely at her causing Perona to wonder if he was sick. Sanji, Zoro, and Luffy were then picked up by Chopper and a Giant Bird who then flew them back to the ship. Upon seeing Robin and Nami for the first time in 2 years, he suffered a massive nose bleed.[8]
Later when Boa Hancock aided the Straw Hats by intercepting a Marine ship, Sanji "turned to stone" simply at the sight of her and quickly became jealous of Luffy when he heard that he was friends with Hancock and was sent to the all-female Kuja island. He then suffered a pain in his heart when he 'sensed' his okama friends helping him. With the Marines held back by the Straw Hats' new allies, the crew submerged and headed for Fishman Island.[9]
Fishman Island Arc
Undersea Voyage
While sailing under the ocean, Sanji and the crew marveled at the site of the underwater world. As Nami started to explain the properties of the resin that was used to coat the ship, Sanji got another massive nosebleed just by seeing Nami move. Sanji propelled himself out of the coated ship and had to be grabbed and pulled back in by Luffy. When Franky told the crew that they owed a debt to Kuma for saving them from Kizaru and protecting the Thousand Sunny for two years, Sanji woke up and once again expressed his bitterness of getting sent to Momoiro while Luffy was sent to Amazon Lily. Brook attempted to cheer him up with a song, but Sanji declined because it would only make him feel worse.
As the ship descended further, the Straw Hats marveled at how dark it had become and how deep they had gone. However, with the help of their seacow, the Caribou Pirates caught up with the Straw Hats and prepared for battle. Caribou quickly set foot on the Thousand Sunny. Before his crew could follow, their seacow, which turned out to be Mohmoo, fled in fear after seeing Nami, Sanji, and Luffy, leaving Caribou behind. The Straw Hats then tied up Caribou as he begged for mercy. When Caribou looked at Nami in a perverted way, Sanji kicked him. He then promptly suffered another huge nose bleed from looking at Nami and had to receive a blood transfusion from Chopper. As they approached the gigantic 'underwater waterfall', Sanji regained consciousness
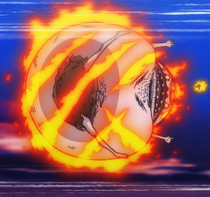
Sanji burns the Kraken's tentacle.
Sanji and the crew then encountered a Kraken. To fight the Kraken out in the sea, Sanji, Zoro, and Luffy use Flutter Kick Coating. Sanji displayed his new skills and techniques to give Luffy an opportunity to land a knock-out punch. The Monster Trio defeated the Kraken, but because they were not wearing life-lines, they got separated from the other Straw Hats as the ship went down the "underwater waterfall". Luffy successfully tamed the Kraken and named his Surume. However, Luffy's and Sanji's coating had popped so they had to share Zoro's. After some searching, the Monster Trio eventually found the Thousand Sunny and the rest of the Straw Hats just in time for Surume to save them from an Umibouzo. After reuniting with the ship, Sanji and everyone else were startled to hear an undersea volcano beginning to erupt.
While the rest of the crew were trying to get the ship to safety, Sanji was looking at pictures of Nami and Robin as a part of his rehabilitation therapy until the volcano erupted. He asked Nami how far it was until Fishman Island and had yet another nosebleed after looking at her. Surume carried the ship and jumped down through a trench to escape the eruption. Once they got to Fishman Island, he began thinking about all the mermaids and his uncontrollable nosebleeds came back. Chopper told him it would be best for him not to meet the mermaids because seeing them would cause him to lose too much blood and kill him. Sanji then proclaimed that he would rather die while giving perverted looks at mermaids than live a long life and not having his dream come true, much to Chopper and Usopp's shock. Burning with passion, he proclaimed loudly that he that would meet them.
The crew then encountered a gang of sea monsters led by Hammond, who gave the Straw Hats two options: join the New Fishman Pirates or die. Luffy rejected Hammond and the fishman prepared to attack. Franky activated Coup de Burst and the ship flew through the bubble surrounding Fishman Island. The ship then fell into a current and the Straw Hats got separated.
Trouble in the Underwater Paradise
Sanji, Luffy, Usopp, and Chopper were seen again in Keimi's house meeting and getting reacquainted with Keimi. Keimi introduced them to some of her friends, the Medaka Mermaid Quintuplets. When Keimi informed them that they were in the Mermaid Cafe's female dorm, Sanji almost got a nosebleed while in her apartment but controlled himself, saying he had vowed not to get a nosebleed or pass out while on Fishman Island.
Keimi then took the four Straw Hats to Mermaid Cove where Sanji met the objects of his dreams, beautiful mermaids. As a mermaid took his hand and greeted him, Sanji started to cry out tears of joy, saying he had found the All Blue, and that this is the day that he would die and could not know such a level of happiness otherwise.

Sanji plays with the mermaids.
Sanji then played with the mermaids with a perverted expression on his face. Sanji happily stated that he was going to live in Fishman Island. The four Straw Hats then hid when a royal gondola arrived in the mermaid cove. Ishilly hid Sanji by hugging him, pushing her breasts on Sanji's face. The Neptune Brothers appeared searching for the people who entered Fishman Island illegally. The mermaids denied that they had seen any intruders. As the Neptune Brothers were leaving, Sanji could not hold any longer and got a gigantic amount of blood pouring out of his nose in the shape of a mermaid, forcing the Straw Hats to reveal themselves.
Since Chopper had no blood of Sanji's type left (due to the previous events and its exceeding rarity), Luffy, Usopp, and Chopper began to beg for a blood donation to save Sanji, who was experiencing a critical bloodloss. Hammond and his group then appeared and told the story of how Fisher Tiger supposedly died. After a gruesome battle, Fisher Tiger suffered a critical bloodloss and could have been saved with a blood transfusion, but humans refused to help him. Hammond went on to say that because of the humans who left Fisher Tiger to die, there was a law that prevented fishman and merfolk from sharing blood with humans. The fishman pirates attempted to capture the four Straw Hats, but Luffy repelled them. Keimi stole the royal gondola and transports the Straw Hats to the town port, where most humans on the island should be.
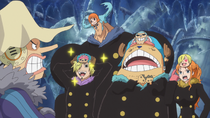
At the town port, Keimi and the four pirates found shelter in Madam Shyarly's Mermaid Cafe. Madam Shyarly provided them a room where they could treat Sanji. The Straw Hats luckily found blood donors for Sanji. After Sanji woke up, he was horrified to see that his blood donors are two okamas, Splash and Splatter.
Later, the Ammo Knights arrived to arrest him and Chopper because of Madam Shyarly's prediction and because of the false accusation for mermaid kidnappings. After Chopper fended off some of the knights, Sanji told him that he was going to see the Mermaid Princess. Chopper scolded Sanji, telling him that her beauty would instantly kill him.
Sanji then defeated the rest of the Ammo Knights. Sanji expressed his disappointment of having to give up his chance of going to Ryugu Palace since they were trying to handcuff him. Chopper scolded Sanji for overdoing things, but Sanji snapped back saying whats done is done. Sanji then complimented him on his Kung-Fu Point and the reindeer happily danced while claiming to not being happy. Sanji and Chopper then found a wounded Hatchan, who warns them of an impending attack by the New Fishmen Pirates.
Chopper then tended to Hatchan's wounds while the doctor and Sanji were met with accusations from the Fishman Island citizens. While the citizens demanded the return of the kidnapped mermaids, Sanji tried to explain that they did not kidnap anyone. While hovering above Coral Hill on top of Megalo, Luffy saw them and jumped down to meet them. Megalo, who was holding Princess Shirahoshi in his mouth, reached his limit and spit her out. While the Fishman Island citizens instantly concluded this as a Mermaid Princess kidnapping, Chopper yelled at Sanji to not turn around or else he would get another nosebleed and would truly die.


Sanji turns to stone upon seeing Shirahoshi, the Mermaid Princess.
After getting confirmation that the person standing behind him is the Mermaid Princess, Sanji decided to turn around and look even if it meant death. Instead of getting a nosebleed, Sanji became petrified. The citizens then tied up Sanji and his friends, but were interrupted by the arrival of Vander Decken IX. After Luffy pummeled Decken into the ground, he checked on Sanji, who reverted to his normal state. The princess and the entire group then hopped on Megalo and flew away. After Luffy punched back Wadatsumi, the entire group headed for the Sea Forest.
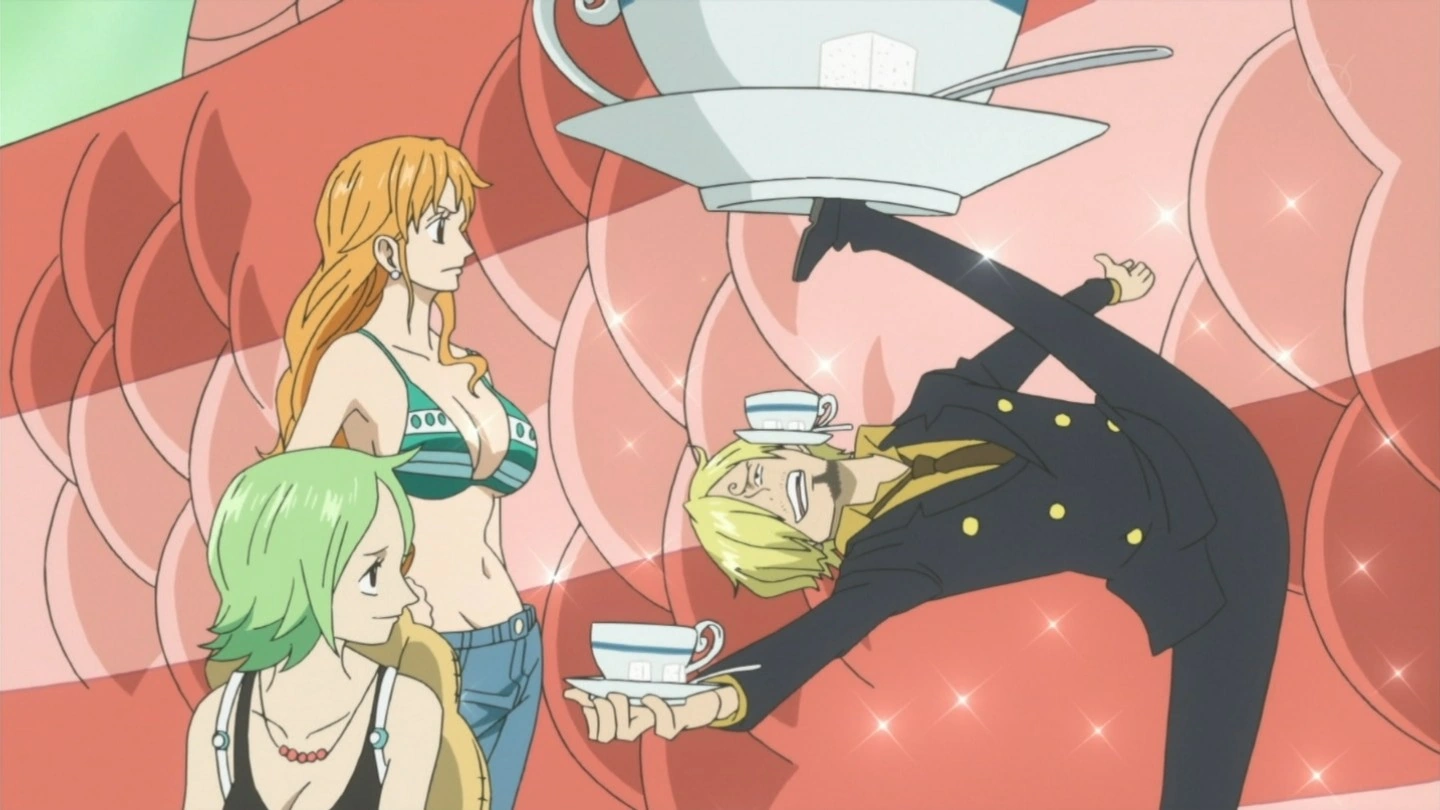
Sanji offering tea to Nami, Keimi, and Shirahoshi.
After reaching the Sea Forest and getting acquainted with Franky, Den, and Jinbe, Sanji displayed his old usual flirting personality in front of Shirahoshi. Nami and Keimi soon arrived and Sanji acted normally towards Nami indicating that he's finally cured of nosebleed tendencies. After Nami and Keimi informed the group about Hody Jones' rampage in the Ryugu Kingdom, Jinbe decided to explain the situation and reveal that he was responsible for setting Arlong loose into the East Blue.
Before Jinbe started his explanation, Sanji gave Keimi, Nami, and Shirahoshi some tea. Nami brushed Sanji off, saying that they were in the middle of a serious conversation. After Nami asked Jinbe about him setting Arlong loose, Sanji stated that he heard about Jinbe from Yosaku and he thought that Jinbe was as bad as Arlong and was surprised that he allied with Luffy. Sanji then informed the ex-Shichibukai about Nami's suffering at the hands of Arlong and warned him that what he said next would determine on whether or not he should be forgiven. Sanji then listened to Jinbe as he explained the fishmen and merfolk's dark past as well as the ideals of Queen Otohime and Fisher Tiger.
After Jinbe finished his story, Sanji was still angry at Jinbe. He calmed down when Nami said that she held no resentment against Jinbe since Arlong was the one to blame. Sanji then kicked a sleeping Luffy and is annoyed to see that Luffy slept through the whole story. Hatchan was about to reveal Hody's plan, but a visual Den Den Mushi appeared. The group then watched Hody's speech to Fishman Island.
Sanji and the group then listened to Hody's plan of recreating the Ryugu Kingdom with himself as the ruler as well as executing Neptune and the imprisoned Zoro, Usopp, and Brook. After Hody finished, Sanji stated that the New Fishman Pirates were trying to pick a fight and Luffy resolved to fight Hody. However, Jinbe told him not to. Franky and Chopper correctly guessed that it's because they are humans. Sanji remarked on how confusing it is coming from them.
Luffy remained insistent on going to Ryugu Palace so he fought with Jinbe to settle their little dispute. A duplicate of Robin suddenly appeared between them when they were charging at each other. Sanji jumped in to rescue "Robin", but the clone vanished so Luffy and Jinbe collided with Sanji instead. After the real Robin appeared, Jinbe once again tried to reason with Luffy. Sanji then asked Hatchan if Hody was the one who gave Hatchan his wounds, which he did not confirm or deny. Sanji then told Jinbe that they could not ignore the New Fishman Pirates and the Straw Hats also had a reason to fight. Jinbe came up with a plan that would make Luffy a hero instead of a villain. Sanji went to the Ryugu Palace to find Zoro, Usopp, Brook, and Pappug.
Battle for Fishman Island
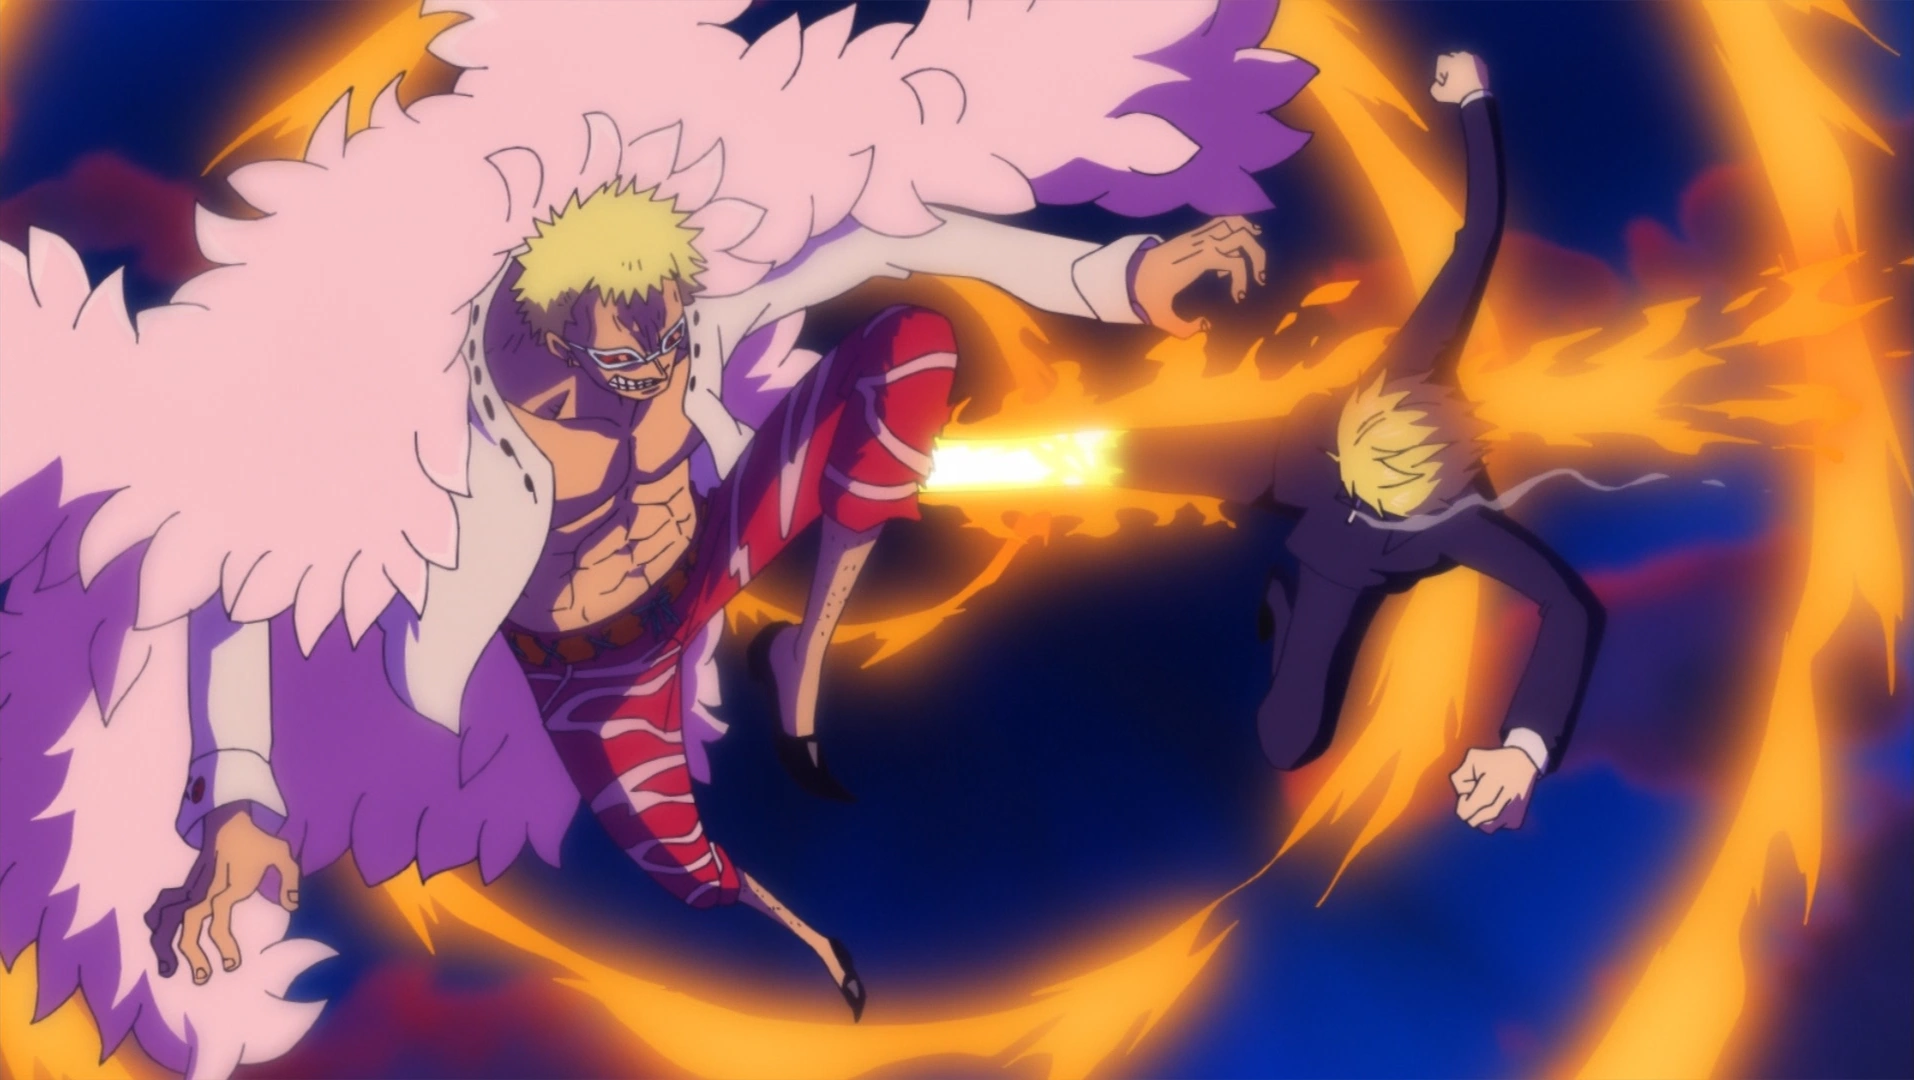
Sanji and Zoro repelling Ikaros and Dosun.
Sanji later appeared in Gyoncorde Plaza with the rest of the Straw Hats preparing to fight against the New Fishman Pirates. As the enemy began their attack, he started making calculations about how many enemies each one has to face. When Luffy unleashed his Haoshoku Haki, Sanji was impressed that his captain could use that ability. As the battle with the New Fishman Pirates initiated, Sanji faced off against the Sea Urchin Spike Squadron. Sanji once again thought back to his time in "hell" in which he continued running until he could fly. Sanji then used his new skill "Sky Walk" to evade his attackers. Sanji then intercepted a group of the fishmen pirates who were about to hurt the princess and then used Diable Jiamble to repel the pirates. Later, Ikaros tried to attack Luffy as he approached Hody. Sanji intercepted Ikaros and kicked him away.
Later, when Noah arrived and almost burst the island's bubble tracking Shirashoshi, Sanji went up into the air to follow it. He was stopped by Luffy, telling him it is his business and asked him to take care of the plaza with the others. Sanji helped him up, shooting him up right onto one of Noah's chains.
When Wadatsumi fell to the ground after having his attack deflected by Jinbe, Sanji got angry at the giant fishman for knocking over Nami as he fell down and kicked him in the head. Sanji and Jinbe then prepared to fight Wadatsumi.

Sanji defeating Wadatsumi.
After Luffy finally defeated Hody, Sanji was seen standing on an almost-spherical Wadatsumi, who kept asking whether he was surprised yet. While obviously neither him nor Jinbe were, they decided to execute their unseen plan. Jinbe attacked the giant with a powerful Fishman Karate technique, causing the giant to release all the air he sucked in. After Wadatsumi was launched into the sky, Sanji flew after him and appeared in front of his face and used his rage to engulf his entire body in flames. He then kicked Wadatsumi and scorched him up all over, sending the giant crashing back down.
After all the leaders of the New Fishman Pirates were defeated, the Straw Hats looked into the sky as Luffy tried to destroy Noah. When the Sea Kings appeared and stopped Noah from falling, saving the ship and the island at the same time, everyone on Fishman Island celebrated.
The After Battle Celebration and Departure
After the battle, Sanji was lying beside the Sunny, jealous that Robin had placed Chopper's head on her lap and not his. He then watched as Chopper performed a blood transfusion on Luffy using Jinbe's blood.
Later, while flying through the air on the Sunny, he commented that the crew shouldn't force Jinbe into a corner about joining if he has personal business to take care of. He then suggested staying at the Mermaid Cafe for a whole week at Shirahoshi's request.
Sanji then attended the honorary banquet with the rest of his friends at Ryugu Palace and was overjoyed beyond words when the mermaid dancers came out. He later turned to stone when some mermaids joined him, Chopper, and Brook while eating. Later, when Luffy looked over to some of his crew, he saw that Sanji had turned to stone, and Chopper told Luffy that Sanji lusted too much and was recovering. Sanji then listened to Jinbe's recap of what happened in the seats of power over the last two years.
When Luffy asked Zoro and Sanji if they sensed some kind of animal in the palace, they noticed it too and started searching. They arrived at the entrance of Hard-Shell Tower to find Shirahoshi being absorbed into Caribou's body using his Devil Fruit ability. After Luffy sent Caribou flying out of the palace, Shirahoshi took him in her hands and hugged him, much to Sanji's jealousy, saying he should have kicked Caribou. When Nami realized that Caribou had all the palace's treasures on him, she asked why they could not have tied him up instead of booting him out. Luffy and Zoro got defensive while Sanji smiles. Nami then threw the Monster Trio out of the palace so they could pursue Caribou.
When the Monster Trio found Caribou, he was already unconscious. The trio collected all the treasure and as they headed back to the palace, they arrived at the Candy Factory and met Big Mom's messengers: Pekoms and Tamago. Sanji demanded to know why they could not just wait for the factory to be repaired. When Sanji learned that Big Mom is not a male, he erroneously pictured her as an attractive, slim woman. He then asked what would happen if the payment is not made and Tamago explained that the island would be destroyed if the candy is not given. Sanji is presented when Luffy declared war on Big Mom.
After returning to the palace and informing the crew of what happened, the Monster Trio was beaten up by Nami for giving the treasure away. As they prepared to leave, Sanji stated how wonderful it was to see the Mermaid Princess and wished to stay another year on the island, only to be insulted by Zoro and the two bickered like usual. He said his goodbyes to the mermaids and stated they are the "All Blue" of his dream. After the crew (minus Zoro and Franky) promised Shirahoshi to take her to the surface someday, the Straw Hats left Fishman Island and headed towards the New World.
On their way to New World, Sanji decided to join Brook who was peeping on Nami while she was taking shower. Later they were both given a shock my Nami's Thunder Tempo attack and joined the crew on the deck who were fishing deep sea fishes. Sanji showed excitement in cooking the fishes of deep sea as a cook. Finally, when the crew reached New world, Sanji was seen with the crew remarking on raging flame seas of New World.
Dressrosa Saga
The following events are Non-Canon and therefore not considered part of the Canon story.
Episode of Luffy
| This is an empty section. Please help the wiki by adding information to it. |
Z's Ambition Arc
| This is an empty section. Please help the wiki by adding information to it. |
Glorious Island
| This is an empty section. Please help the wiki by adding information to it. |
One Piece Film: Z
| This is an empty section. Please help the wiki by adding information to it. |
Adventure of Nebulandia
The Straw Hats were lured onto Kinoko Island by the Foxy Pirates, who posed as a marooned crew. Luffy agreed to a Davy Back Fight rematch, and Sanji, Luffy, and Zoro took part in the first round, where they had to eat as many mushrooms as possible. However, the mushrooms caused the three of them to become lethargic, and they were captured along with Porche and Hamburg as the Foxy Pirate Komei revealed that this was part of his plan to take down the Straw Hats. Komei then captured Sanji, Zoro, Porche, and Hamburg and took them to Nebulandia, where he imprisoned them.[10]
Sanji and Zoro were later taken outside and chained to a rock formation along with the other captured Straw Hats in order to lure Luffy to Komei. However, Chopper and Brook came with an antidote and reinforcements, and Sanji and Zoro were freed and restored to their old selves. They then helped beat back the Marines, and the Straw Hats and Foxy Pirates returned to Kinoko Island afterwards, where they parted ways. The Straw Hat then held a banquet to celebrate their victory.[10]
Concludes non-canon section.
Punk Hazard Arc
Arriving at Punk Hazard
Soon after entering the New World, the crew spotted an island surrounded by a sea of flames. Sanji told Luffy that aside from the parts he had cut away, the fish that they had caught had been burnt to a crisp. The Straw Hats then received a distress call from someone who seemed to be in trouble and mentioned something about a samurai. Sanji then handed Luffy a deep-sea fish box lunch for sustenance on their exploration mission.[11]

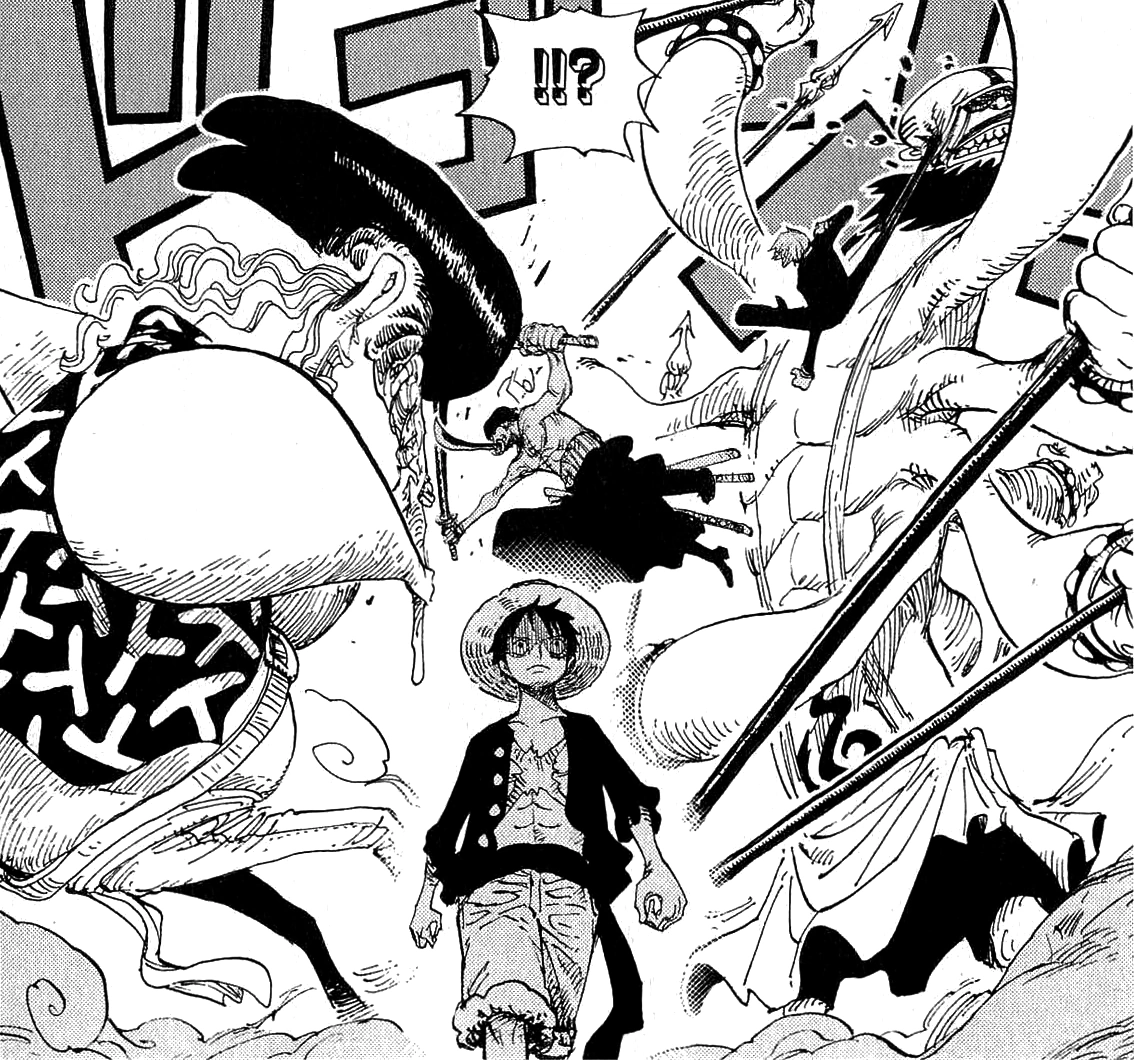
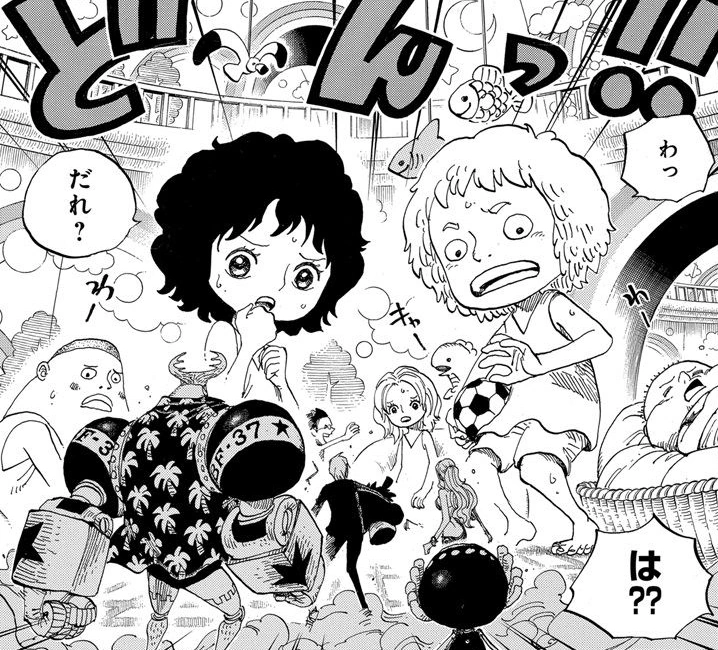
Sanji, Franky, Chopper, and Nami stumble upon the captive children.
While Usopp, Robin, Luffy, and Zoro were fighting a dragon, Sanji walked out onto the deck of the Thousand Sunny and found his remaining crewmates knocked out by sleeping gas. Sanji is shocked and tried to escape back into the cabin to warn the team on Punk Hazard, but unfortunately fainted before he reached the Den Den Mushi. Everyone on the Thousand Sunny, except for Brook, were then abducted by some unknown foes.[12] The captured Straw Hats later woke up in a cell and found parts of a samurai's still-living head. After putting the pieces of the head back together, the group got information from the samurai. Once they decided to break out, Franky used his Radical Beam to blast a hole in the wall, allowing the crew to escape. Before they left, Sanji picks up the samurai's head and decided to take responsibility for its safety. They ran down through the halls of the complex and stumbled upon a room filled with children in a variety of sizes. The children were excited to see them, but Sanji just wanted to escape the room before they were recaptured.[13]
While their pursuers came after them, the children begged the pirates to help them escape. Nami could not ignore their cries and decided to help them. At first Sanji protested, but Nami was firm in her decision. Sanji then accepted Nami's choice and attacked one of the men in the gas masks. He and Franky stayed behind to hold off their pursuers.[14] Their opponents tried to fire poison gas, but Sanji knocked off all their gas masks and destroyed their air tanks, preventing them from doing so. This also revealed that the masked people possessed ram horns, making him wonder if they were sheep.[15] This was confirmed when Sanji and Franky defeated the masked men and found out that they had goat legs as well. Franky, Sanji, and the samurai's head then met up with Nami, Chopper, and the children and busted out of PH-006 and ran into the G-5 Marines, Smoker, Tashigi, and Law.[16]

Sanji complains that the headband Usopp made to identify the scrambled Straw Hats ruins Nami's pretty face.
To avoid combat, they immediately turned around to find another exit. As they were running away, Law used his ability to rearrange the personalities of the Straw Hat Pirates, putting Sanji in Nami's body and Chopper in Sanji's body.[17] Sanji, overjoyed that he was in her body, tried to get indecent pictures of Nami, but there were no cameras to be found, and Nami (in Franky's body) acted out in rage. They then met up with Zoro, Luffy, Robin, Usopp, and Brook, all the while Sanji fondled Nami's body by groping her, much to her frustration. The Straw Hats took shelter in the back side of the facility, tied up Brownbeard, and brought each other up to speed on the current situation. The Straw Hats then interrogated Brownbeard and learned about a man known as Caesar Clown.[18] Kin'emon later left the group to find his torso and Sanji (in Nami's body) and Brook volunteered to go search for him while having perverted thoughts. Unfortunately for Sanji, Nami made Zoro go with them.[19] While Sanji's group went looking for Kin'emon, Chopper (in Sanji's body) discovered that the children were being drugged and experimented on. When Luffy decided to go look for Caesar, Chopper and Nami decided to stay behind to watch the children. Sanji's group then saw the Yeti Cool Brothers' massive footprints and decide to follow them, thinking they might belong to a legendary snowman. When they reached the edge of a cliff, they encountered the yetis and got shot at with KYP gas, knocking them out and sending them falling off the cliff towards an icicle trap. Fortunately, Zoro destroyed the trap before falling into unconsciousness.[20]
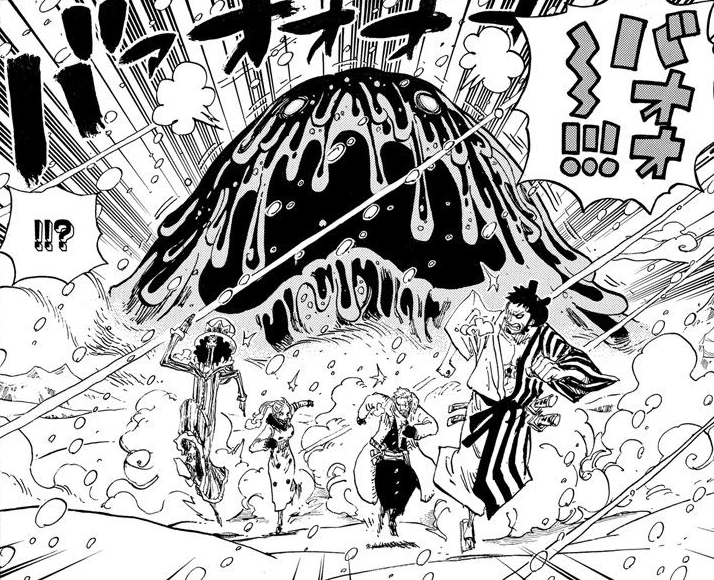
When Caesar's subordinates came to collect their "corpses", Sanji woke up and attacks them before he violently woke up Brook and Zoro. Sanji then started to argue with Zoro about taking off to find Kin'emon in the first place. Sanji then wondered if Kin'emon was around. As they were walking, each of them managed to step over Kin'emon's frozen body until Zoro noticed him laying there. Stomping on his face to revive him, Sanji pulled him out of the ground asking if he's alright. Berating the samurai for his hubris in being rescued and ignoring the cold, Kin'emon still did not understand why pirates would be willing to help. Reminding him about their agreement, and after the samurai got his body back, Sanji reaffirmed that he would be beat him to a pulp. When Kin'emon finally expressed his gratitude, Sanji was surprised that the samurai knew how to thank someone, making an off-hand comment that more people should be frozen. Sanji's group then ran into Brownbeards' men, but the centaurs choose to run instead of fighting. While they were on their way to the lake to retrieve Kin'emon's torso, they saw a 'mountain'. Sanji, Zoro, and Brook then stared at the slime and comment that it is doing something mysterious.[21]
A Weapon of Mass Destruction

Sanji diving into the poisoned lake to search for Kin'emon's torso.
Sanji continued to watch the slime shoot itself over the lake with the others. Brook then claimed to have read about the Slime in a book which Sanji asked to borrow. Fish then started floating to the surface of the water, which had been poisoned by Smiley's toxins. Sanji then took off his clothes and jumped into the lake to search for Kin'emon's torso.[22] While searching for the torso, Sanji noticed that the slime's toxins were quickly spreading throughout the lake. Using Kenbunshoku Haki to sense where the torso is, he commented on the difficulty distinguishing it from the life force of the fishes in the lake due to being in a foreign body. Luckily, he then found the torso inside a shark's mouth and proceeded to kick the shark, causing it to release Kin'emon's upper body. Sanji grabbed the body and realized that the toxins are about to completely engulf the entire lake. He then used Blue Walk to make a narrow escape.[23]

Smiley chasing the Straw Hats and Kin'emon.
After Kin'emon's body was completely put back together, Sanji scolded Kin'emon for being kind and apologetic. Once the group noticed that they were completely surrounded by the slimes, Sanji scolded Zoro and Brook for not doing anything about it. Kin'emon proceeded to attack the Slimes with his Kitsunebi-ryu to cut the slimes as well as the fire caused by the subsequent explosion, and clear a path for the four of them.[23]
Sanji was later seen fleeing from Smiley along with Zoro, Brook and Kin'emon. He then watched with the others as the slime began to change its shape. Resuming its attack again, Zoro and the others began to run again, deciding to head for the research facility to find Kin'emon's son.[24] As they ran from Smiley, they come across the giant piece of candy left by Caesar for Smiley, and a small dragon made by Vegapunk. They then saw a screen appear with Caesar on it but chose to continue running.[25]

Brownbeard and the others crashing into Caesar's lab.
After witnessing Smiley explode, Sanji, Kin'emon, Brook, and Zoro ran extremely fast attempting to get away from the poisonous gas cloud. They then saw the small dragon flying quickly, and Zoro proposed the idea to ride on its back and fly away.[26] Struggling to catch up to it, Sanji was able to rush ahead after feeding his perverse nature. He then caught the dragon, allowing the group to finally ride it. Eventually meeting up with Nami, Usopp, and Brownbeard, the two groups turned their attention to Caesar's lab where Zoro and Kin'emon were able to cut down the iron shutter, allowing them to enter.[27]
After the G-5 Marines plugged up the hole made by Kin'emon and Zoro, they prepared to arrest the Straw Hats and Brownbeard. As Law was telling Smoker and Tashigi not to get in their way, Nami asked Law to switch Sanji and Nami's bodies back (Sanji was obviously not happy about this). Law complied and switched them back. Nami, noticing that she was wearing a different coat, punched Sanji and accused him for peeping at her body. Usopp then told Sanji about an earlier confrontation with Caesar and Sanji expressed his relief that it was his own body that took damage and not Nami's. Law then told everyone present about a way off the island but would have two hours to escape. Everyone then split into three teams. Sanji went with Kin'emon, Zoro, Nami, Brook, and Usopp while the G-5 Marines went with Tashigi. Sanji's group decided to rescue the abducted children.[28]
Sanji attacking Vergo with Diable Jambe.
One of Caesar's henchmen fired a cannon at the wall of Building A, letting the gas in. As the gate exiting Building A was closing, Sanji and the others made a dash for it. They managed to escape to the passageway to Building B before the gate sealed completely.[29] While riding on Brownbeard's back, Sanji sensed a new presence behind them. While Brownbeard, Kin'emon, and the other Straw Hats continued through Building B, Sanji rushed back to the passageway to confront the new arrival. He saved the G-5 Marines and Tashigi from further harm by attacking Vergo directly.[30]
Sanji began to fiercely fight Vergo, stating that he was someone his captain would hate. After sending Vergo crashing headfirst into a wall, Sanji stated that Vergo's body was harder than iron. As the fight went on, Vergo ended up cracking Sanji's right shin bone. The Building A gate then opened, letting the gas flow into the passageway. Sanji and Vergo continued to battle while Tashigi and the G-5 Marines escape to Building B.[31] The gate to Building B slide shut, but Sanji managed to escape with two Marines. Sanji stated that Vergo quit the fight and stormed off somewhere. The Marines cheered for him, but Sanji knew that he would not be able to continue fighting for long with his injured leg.[32]
Sanji, Tashigi, and the surviving G-5 Marines went through the area where the small dragon attacked the Straw Hat Pirates, Kin'emon, and Brownbeard. Because of the surrounding fire caused by the dragon, a tank exploded, blowing up the wall and letting the deadly gas inside.[33] Sanji and the group then run for their lives. To help the G-5 Marines escape Shinokuni, Sanji kicked them to a safe distance as the group fled to the Biscuits Room.[34] After reaching the Biscuits Room, they saw Zoro and Monet fighting. Zoro and Sanji then comically yelled at each other despite the serious situation. Sanji left Tashigi and Zoro to handle Monet while he and the G-5 Marines started to head towards Nami and Robin's position.[35]
As Chopper was torn between sedating the berserk children and saving Mocha, Sanji and the G-5 Marines suddenly appeared to help them. On Sanji's orders, they immediately proceeded on sedating the children. While Chopper tended to Mocha's condition, Sanji, Nami, Robin, the children, and the G-5 with them made haste to Building R.[36] They later ran into Zoro and Tashigi, and Sanji was not happy to see Zoro carrying the Marine captain.[37] After Luffy defeated Caesar, Sanji's group reunited with him.[38]
Once everyone reached Building R safely, they boarded a rail cart and made their escape.[39]
Aftermath
After the defeat of Buffalo and Baby 5 and the capture of Caesar Clown, everyone took a moment to rest and relax. Sanji prepared one of his Attack Cuisine recipes and gave food to Kin'emon and Momonosuke. Momonosuke was hesitant to eat at first, but his father encouraged him to do so. Everyone enjoyed a feast together.[40]
After the party ended, the Straw Hats left with Law, Kin'emon, and Momonosuke as Tashigi and her men took the children away from Punk Hazard.[41]
Sanji and the rest of the Straw Hats then set sail for their next destination, Dressrosa. When Luffy informed his crew of the alliance formed with the Heart Pirates, Sanji informed Law that he and Luffy have two different ideas of what "alliance" means, causing the Shichibukai to sweatdrop, having heard the same thing from Usopp earlier. With everyone gathered around, Law proceeded to explain about Doflamingo's connection to the underworld and the plan to decimate Kaido's forces.[42]
Later that evening, when Nami told him, Brook, and Kin'emon that Momonosuke was taking a bath together with Robin, they all got very jealous. When Momonosuke and Robin came out of the bath, wearing towels, they all yelled at him out of a fit of rage, only to get reprimanded by Nami, who hit them all. Momonosuke then rubbed his advantage with Nami and Robin in their faces, by pressing his face into Nami's chest and glaring at them with a malicious smile, much to their dismay.[43] On the next morning, everyone read the news about Doflamingo's resignation from the Shichibukai. They read that the paper also explained about Luffy and Law's alliance and the alliance between Kid, Hawkins, and Apoo.[44]
Dressrosa Arc
The Next Objective
After Law contacted Doflamingo to inform him that they would bring Caesar to Green Bit, Sanji was concerned about how many men Doflamingo would bring with him, but Law told him that would not be an issue. Sanji then had a meal with the rest of the crew while Kin'emon and Momonosuke told them the story about how they were shipwrecked and drifted to Dressrosa, how Momonosuke was separated from his father, and how Kanjuro was captured. The Thousand Sunny later approached Dressrosa.[45]
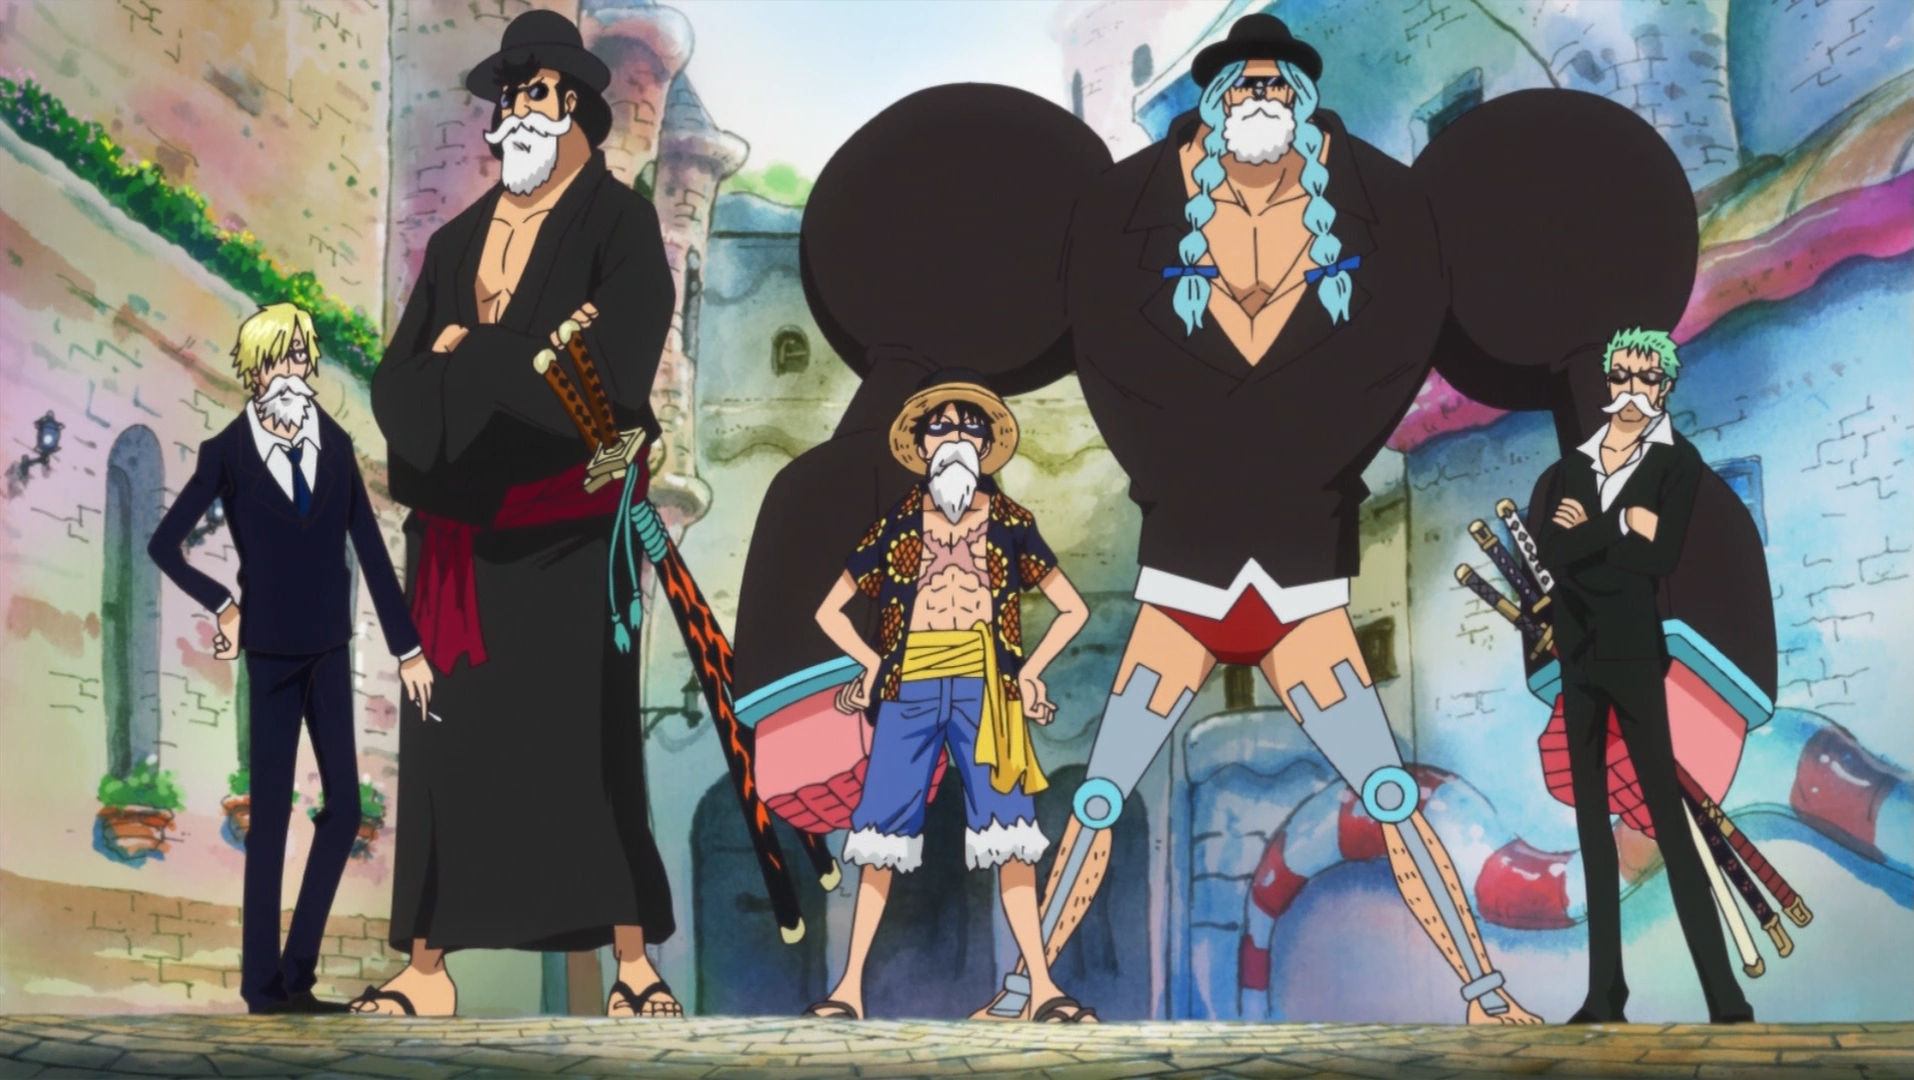
Sanji and his group incognito.
Sanji, enticed by the great smells coming from the island, went with Zoro, Luffy, Franky and Kin'emon to save Kanujro and destroy the SAD factory. They saw the many wonders of Dressrosa, including fragrant flowers, delicious food, beautiful women, and living toys. After getting disguises so no one would recognize them from the newspaper, the group headed to a restaurant to grab a bite to eat. Sanji questioned why no one is concerned over Doflamingo giving up his spot as King. Later, they found some thugs taking advantage of a blind man while taking away his money in roulette.[46] After Luffy called the thugs' bluff, they witnessed the blind man used some gravity-like ability on the thugs.[47]
After the man left without saying who he was, a commotion started with various people having their posessions mysteriously stolen. A bystander claimed that it was the work of fairies. Zoro get instantly worked up when he noticed that Shusui was missing. He managed to spot the thief holding his sword and immediately gave chase. Sanji followed him out of concern for his bad sense of direction.[48]
Eventually, Zoro stopped running, having lost sight of the thief. While looking around, Sanji was attracted to a beautiful woman named Violet. Zoro ran off, separating from Sanji. Sanji was furious at first, but then he decided to forget about Zoro and enjoy himself. While Sanji was daydreaming, Violet approached him and used him to elude the police. As Sanji become enamored with her, she asked him to escort her and help kill a certain man.[49] While escorting Violet, Sanji took out a sniper targeting them.[50]
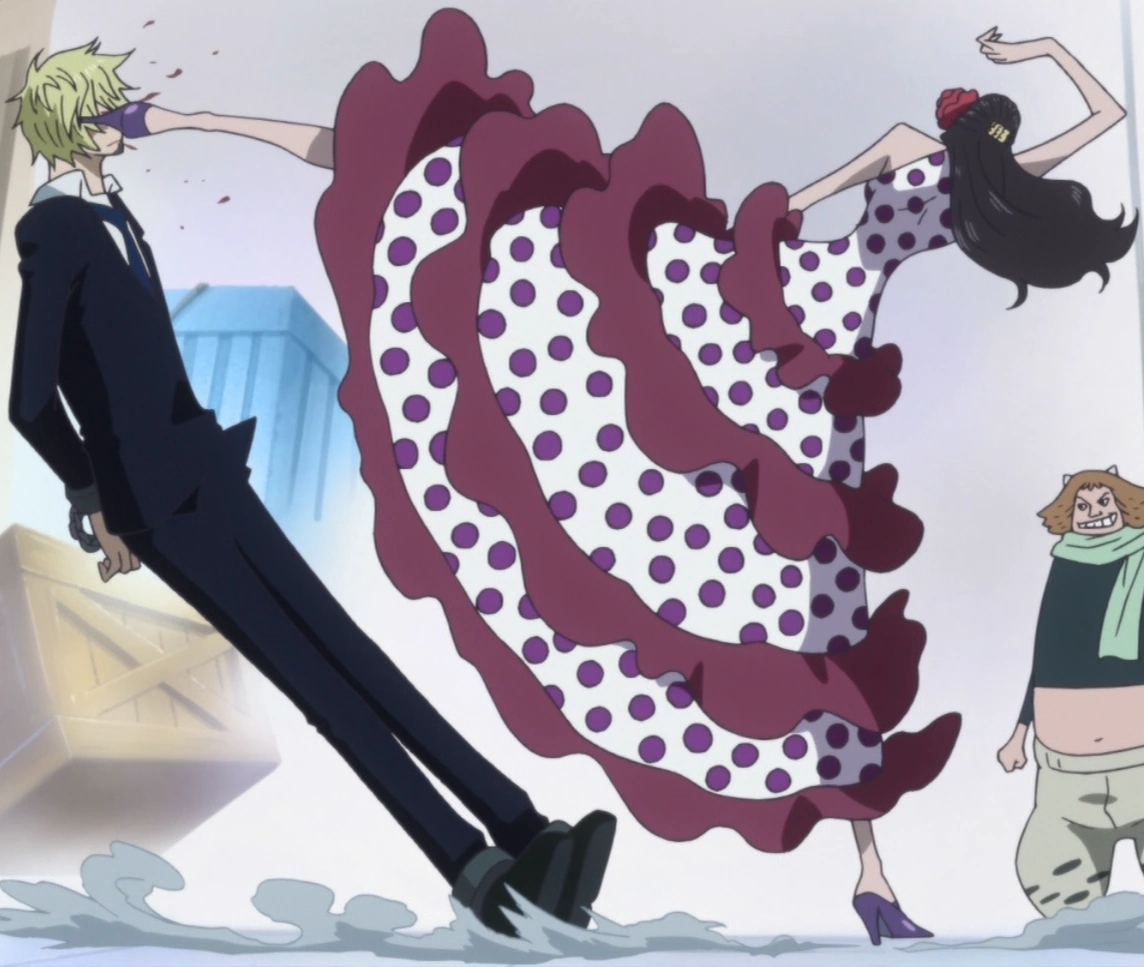

Violet kicking Sanji.
Violet then lured Sanji into a trap set up by her group called the Trébol Army. After Sanji was beaten badly, Violet commented on how pathetic Sanji was for being so weak towards women.[51] However, Sanji never lost faith in her and his kind words moved Violet, which led her to betray her comrades. After defeating them, Violet then revealed to Sanji that the news about Doflamingo's resignation was a false report.[52] With this newfound knowledge, Sanji contacted Law and informed him that Doflamingo never quit the Shichibukai and warned him to get out of Green Bit.[53]
Sanji then contacted Franky, who told him to go to the flower field. After Franky assured Sanji that Nami will be fine with Brook and Chopper with her, Sanji saw a video broadcast from the Corrida Colosseum, which showed Luffy (as Lucy) participating in the tournament. Violet gave Sanji a map to the factory, under the guise of a toy house. Sanji, in turn, instructed Violet to wait for him at the western port. Right after this exchange, Kin'emon suddenly appeared and surprised Sanji, who proceed to defeat the men pursuing Kin'emon. Having learned that Kanjuro is held at the toy house, Kin'emon asks Sanji to accompany him.[54]
Sanji and Kin'emon then witnessed Luffy's clash with Chinjao on the video broadcast. Kin'emon wants to save Kanjuro as soon as possible, but Sanji tells him to wait as there are Marines surrounding the Corrida Colosseum.[55] Sanji then scolds Kin'emon for cheering Luffy's battle along with the crowd. Kin'emon replies with his belief that once a man enters a competition, he must aim for the top to be acknowledged as a real man.[56]
Sanji and Kin'emon later reunited with Zoro, who was running back to the Thousand Sunny with a dwarf named Wicca. Violet appeared and informed Sanji that the ship had been taken over by Jora and was heading for Green Bit.[57]

Sanji fighting Doflamingo.
Sanji decided to go save the Sunny while Zoro and Kin'emon stayed behind at the Corrida Colosseum. On the way to Green Bit, Violet informed Sanji about the Marines present in the country.[58] Before parting ways with Violet, she assured him that she would be protected by the government. She also told him that their ship was under attack and Sanji immediately headed there using Sky Walk.[59] Later on, just when Doflamingo was about to attack the Thousand Sunny, Sanji intercepted him in the nick of time.[60]
A Change of Plans
Despite Sanji's best efforts to fend off Doflamingo, he was soon immobilized by his strings. When Doflamingo was about to deal a lethal blow to Sanji, Law intervened by using Shambles, and teleported Sanji, Caesar, and himself to the Thousand Sunny. Law asked Sanji about the status of the operation in Dressrosa only to learn that Zoro's group needed more time. Law revealed that he had Caesar's heart inside of him and Law's heart was hidden in the Thousand Sunny. After giving Caesar his heart back, Law instructed Nami's group to head for Zo. Nami's group was reluctant to leave behind the other Straw Hats, but they complied when they realized that the ship was facing threats from both Doflamingo and Issho. Sanji noticed that Law was so fixated on Doflamingo when the plan's true objective was supposed to be defeating Kaido. After blocking an attack from Doflamingo, Law informed the Straw Hats about Doflamingo's Devil Fruit powers and instructed them to go to a place without clouds. Law then took Jora hostage, giving Nami's group enough time to escape, using Coup de Burst.[61]
After sailing far away from Dressrosa, Sanji contacted Franky and Usopp and told them to take care of Robin. He figured that Law's plan was to have Doflamingo and Kaido fight each other and assured Chopper that Law will be fine if he can escape. Sanji then talked to Momonosuke who began recounting the first time he saw Doflamingo. However, Sanji was thinking about Violet while Momonosuke was telling his story.[59]
Sanji's team later engaged in a conference call with Luffy and Franky's group after Zoro managed to make contact with their captain at the Corrida Colosseum. After everyone was brought up to speed and learned about the true situation on Dressrosa, Sanji decided to sail back to Dressrosa to carry out their assault on Doflamingo, much to the dismay of Nami, Chopper, and Brook.[62]
On the way back, the group on the Sunny heard the skirmish occurring at the Corrida Colosseum through the Den Den Mushi and was shocked to hear that an admiral was also present in Dressrosa. The return trip was cut short by the appearance of the Big Mom Pirates, who were after Caesar. The scientist informed Sanji's group that he made dealings with Big Mom in the past and begged them not to let her crew capture him. Franky told Sanji not to lead the Big Mom Pirates closer to Dressrosa or else Thunder Soldier's rebellion would be ruined. Luffy gave Sanji's group permission to continue on to Zou and allowed Sanji to counterattack against Big Mom's ship.[63]
The Next Island
The group on the Thousand Sunny managed to deal some damage to the enemy pirate ship and escaped the Big Mom Pirates thanks to a fog Nami created.[64] They arrived at Zou the next day. After forcing Caesar to take them on the giant elephant's back, they came across Sheepshead chasing after Tristan. After saving Tristan and running from Sheepshead, they found Zou's ruined city covered in poison gas and the devastated Mink Tribe. Pedro begged Sanji and his group to help Inuarashi and Nekomamushi.[65]
Sanji defeats Sheepshead with Diable Mouton Shot.
Some time later, Caesar Clown attempted to berate the others for exploring the island and wanted to stay safe on the ship, but Sanji used his heart as leverage to get Caesar to cooperate. They traveled the island and Sanji managed to save Nami, Brook, and Momonosuke from Sheepshead by defeating the latter.[66]
After fending off the Beasts Pirates left behind on Zou and forcing Caesar to neutralize the poison gas, Sanji's group saved the Mink Tribe by treating their injuries, gaining their gratitude.[67][68]
After the defeat of the Donquixote Pirates at Dressrosa, Sanji's bounty raised to ![]() 177,000,000, and his wanted poster bore a picture of his actual face, albeit with a lovestruck expression. Unlike the rest of the crew, the conditions of redeeming his bounty had uniquely changed to "Only Alive".[69]
177,000,000, and his wanted poster bore a picture of his actual face, albeit with a lovestruck expression. Unlike the rest of the crew, the conditions of redeeming his bounty had uniquely changed to "Only Alive".[69]
Yonko Saga
The following events are Non-Canon and therefore not considered part of the Canon story.
Heart of Gold
The Straw Hats were sailing when they suddenly encountered Myskina Olga and her steed Elizabeth and brought them onboard. Olga attempted to make the Straw Hats give her food through force, but Sanji emerged from the kitchen and gave her food out of simple goodwill. The Straw Hats talked to Olga and found out she was from the lost island of Alchemi, and could lead them to an extremely valuable treasure known as Pure Gold. They managed to convince Olga to take them there, and they set sail for Pure Gold.[70]
However, they came under attack by the Treasure Pirates, who were after Olga and were also in search of Pure Gold. The Treasure Pirates had camouflaged their fleet and snuck up on the Straw Hats, but Sanji, Luffy, Zoro, and Usopp sensed them with Kenbunshoku Haki, and Sanji recognized that the camouflaging was the work of a Devil Fruit. The Treasure Pirates, led by Mad Treasure, attacked the Straw Hats, but the Straw Hats managed to easily repel them. However, during the battle, Olga's ring fell into the ocean. The ring contained a sliver of gold, causing a giant fish named Bonbori to arrive and consume it. The Thousand Sunny was drawn into its mouth, but as the Straw Hats tried sailing away from it, Olga told them to go inside it. They entered Bonbori's mouth, but were followed by the Treasure Pirates, who attacked them with cannon fire. This caused the Sunny to head for Bonbori's uvula, and though Luffy managed to redirect the ship, he was shot by Naomi Drunk and sent flying far away. Olga then rode Elizabeth toward Luffy as the Sunny fell into Bonbori's throat.[70]
After falling through the throat, the Treasure Pirates managed to capture Nami, Usopp, Chopper, Robin, and Brook, and Sanji, Zoro, and Franky ended up with the Thousand Sunny in Bonbori's second stomach, where they grounded it on an island. As they worked to repair the Sunny, they later reunited with Luffy, who was traveling with Olga's father Myskina Acier. Upon finding out that their crewmates and Olga were captured by Mad Treasure, Sanji used Sky Walk to race toward Alchemi while Luffy, Acier, and Zoro raced after him on Luffy's water lizard Chavez. They reached Alchemi, but the coastline leading to the temple containing their kidnapped comrades was heavily guarded by the Treasure Pirates. However, Sanji and Zoro took on the enemy pirates, allowing Luffy and Acier to enter the temple.[70]
Sanji confronted Psycho P, whose Iro Iro no Mi powers allowed him to camouflage himself. However, Sanji managed to locate and attack Psycho P despite the latter's invisibility and much to his shock. Sanji then revealed that he had desired Psycho P's Devil Fruit ostensibly because it helped him fulfill his dreams, but really because he wanted to spy on women's baths. Psycho P scoffed at the notion of dreams, causing Sanji to ignite himself and attack him with several fiery kicks in an attack called "Remember My Dream". Sanji then finished off Psycho P by kicking him into the temple wall.[70]
After defeating the Treasure Pirates, Sanji and Zoro rode on Chavez to another part of Alchemi, where Luffy had just defeated Mad Treasure. Bonbori started having dry heaves, and when Franky arrived with the Sunny, the Straw Hats, Olga, and Acier rode up Bonbori's throat as it vomited them out. They then watched as the Pure Gold was assimilated into Bonbori's lamp, and the next morning, they dropped Olga and Acier off on an island. Nami then revealed that she had stolen a Vivre Card leading to an entertainment city known as Gran Tesoro, and the Straw Hats headed there.[70]
One Piece Film: Gold Episode 0
On the Thousand Sunny, the Straw Hats were having a barbecue. While cooking, Sanji watched the volleyball game between Nami and Chopper versus Robin and Franky. After the volleyball game, the Straw Hats discussed what they will do once they reached Gran Tesoro. After hearing Nami will bet in the casino, Usopp became concerned so he demonstrated a showed to perform at the city. After Usopp and Luffy played around in sumo matches, Franky challenged Luffy. Sanji spectated and cheered while they were wrestling. Sometime later, Luffy and Franky decided to use their signature attacks, but Nami interrupted and punched them because they could have destroyed the ship. Moments later, the Straw Hats approached the City of Dreams.[71]
One Piece Film: Gold
The Straw Hats entered Gran Tesoro, and were showered with gold in the entrance. They emerged into a pool of liquid gold that had a concert venue around it, but were immediately attacked by the Long Long Pirates, who intended to rob them and pay off their debts. Sanji was attacked by Balong of the Long Long Pirates, but he shattered his weapons before defeating him. The Straw Hats defeated the Long Long Pirates, and watched as the proprietor of Gran Tesoro, Gild Tesoro, encased the remaining enemy pirates in gold.[72]
The Straw Hats landed and were approached by Baccarat, who offered to give them a VIP stay in Gran Tesoro due to their fame. She drove them through Gran Tesoro in a turtle car and took them to the VIP hotel at the heart of the ship, where the Straw Hats donned new outfits as they began their dream vacation. They went to a casino, where Baccarat gave them ![]() 20,000,000 worth in tokens. The Straw Hats had a lot of luck with the games, earning lots of tokens, and Baccarat took them to the VIP lounge where they had the chance to become millionaires. The Straw Hats played a dice game there and won, and were approached by Gild Tesoro, who challenged them. They lost, but it was revealed that Baccarat had taken Luffy's luck away with her Devil Fruit power, so they refused to hand over their money. This caused Tesoro and his subordinates to retaliate with force, and as Sanji prepared to fight, Baccarat cried out that she had injured her leg. This caused Sanji to race to her, but it was only a ruse that allowed Baccarat to touch him and take away his luck, which caused his cigarette to fall and catch his jacket on fire. Tesoro managed to capture Zoro and gave the Straw Hats until 12:00 the next night to repay their debt, or else he would kill Zoro.[72]
20,000,000 worth in tokens. The Straw Hats had a lot of luck with the games, earning lots of tokens, and Baccarat took them to the VIP lounge where they had the chance to become millionaires. The Straw Hats played a dice game there and won, and were approached by Gild Tesoro, who challenged them. They lost, but it was revealed that Baccarat had taken Luffy's luck away with her Devil Fruit power, so they refused to hand over their money. This caused Tesoro and his subordinates to retaliate with force, and as Sanji prepared to fight, Baccarat cried out that she had injured her leg. This caused Sanji to race to her, but it was only a ruse that allowed Baccarat to touch him and take away his luck, which caused his cigarette to fall and catch his jacket on fire. Tesoro managed to capture Zoro and gave the Straw Hats until 12:00 the next night to repay their debt, or else he would kill Zoro.[72]
The Straw Hats went outside, where they encountered an acquaintance of Nami's named Carina. They went to a diner with Carina, who revealed to them that a massive portion of Tesoro's wealth was contained in the Hyper Suite Room near the top of the hotel, which they could steal to repay their debt. The Straw Hats agreed to this plan, and afterwards, Carina revealed to everyone except Luffy her true plan, which was to direct seawater out of every fountain on Gran Tesoro and free everyone from Tesoro's control over them. The Straw Hats then slept in a hotel, and tried on disguises later in the day to prepare for their mission.[72]
They congregated outside the hotel, and Carina outlined the details of the plan. While Team A, Luffy and Franky, would infiltrate the hotel and disable several Eizo Den Den Mushi that served as security cameras, the rest of them, Team B, would sneak inside and make their way to the door to the Hyper Suite Room. The teams then split, and Team B snuck into the hotel. Carina distracted a group of workers transporting a giant dice container, allowing the Straw Hats to hide inside it, and they were wheeled into a storage room where they met back up with Carina. After getting past a few security guards, Team B entered a hallway that led to the staircase to the Hyper Suite Room, but the hall was guarded by owls with spotlights beaming from their eyes. With Chopper's help, Team B managed to pass through the hall, and they communicated with Team A so the latter could disconnect the Eizo Den Den Mushi watching over the staircase. However, Luffy was discovered and the alarm was raised, causing Team B to be discovered by security guards and chased back down the hall they came from.[72]
Team B took refuge in a hidden hallway, but were approached by the World Noble Saint Camael and his entourage. However, the team ambushed the World Nobles, stole their clothing, and emerged disguised as the World Nobles. Tricking the security guards into thinking they were World Nobles, Team B intimidated them into allowing them back through the hallway, and they raced up the staircase to the Hyper Suite Room. However, they opened the door to find themselves in the middle of an entertainment venue, as part of a trap designed by Gild Tesoro and Carina. Sanji attacked Tesoro, but Tesoro overwhelmed him with gold tendrils before capturing him and his crewmates. Tesoro prepared to begin the entertainment spectacle by executing Zoro as the Straw Hats' bodies slowly became encased in gold, when suddenly seawater sprayed from every fountain, as Carina had intended for Luffy and Franky to do. The Straw Hats were freed from their gold encasement and reunited with Luffy, Zoro, and Franky, but Tesoro suddenly blew up the hotel, sending a massive deluge of liquid gold on them. However, Sanji, Robin, and Franky carried their crewmates into the air to safety.[72]
Tesoro reemerged inside a giant gold golem and confronted the Straw Hats, and as Luffy battled him, the other Straw Hats and Carina were confronted by Baccarat, Tanaka, and Dice, who were given golden armor and weapons by Tesoro. Tanaka jumped into the ground and popped in and out around Sanji and Robin, shooting at them from random areas with his gun. Sanji and Robin were unable to keep up with Tanaka's movements, and Sanji tried kicking him, but he phased into the wall and emerged behind Sanji, pointing his gun at him. However, Robin grabbed Tanaka with her Devil Fruit powers, and Tanaka was trapped due to not being able to phase through organic objects. Sanji then raced toward Tanaka and barraged his face with Diable Jambe kicks, defeating him.[72]
Luffy eventually managed to overpower Tesoro, and Tesoro turned his golem into liquid gold, swamping everyone on Gran Tesoro except Luffy with it and preventing them from moving. However, Luffy managed to defeat Tesoro, freeing everyone on Gran Tesoro from his control, and they rejoiced. Suddenly, a timer appeared, and Carina stated that the ship would sink once it reached zero. The Straw Hats returned to the Thousand Sunny, but found out that the timer was a ruse in order to allow Carina to take control of Gran Tesoro. However, they held no hard feelings, and were forced to sail away once the Marine fleet nearby started chasing them.[72]
Concludes non-canon section.
Zou Arc
Big Mom's Invitation
Several days later, Sanji spent his time happily on Zou, flirting with any mink woman he saw. He and Nami then saw Pekoms and Capone Bege arrive at the island and interact with the minks. Caesar begged Sanji to protect him from the Big Mom Pirates again, but Sanji said they did not need him anymore and asked why Big Mom wanted him anyway. After hearing Caesar's explanation, Sanji told him that he deserved what was coming. However, Sanji realized that they also had bad blood with Big Mom, and decided for him and Brook to talk to Bege and Pekoms.[73]
Sanji's shock at having his true heritage exposed and learning he is about to be married.
The two groups met in the forest, and Pekoms thanked Sanji for saving his people. The mink revealed that they had orders to capture Caesar as well as do something that would tear the Straw Hats apart, but told Sanji he would repay them by leaving the crew intact as long as they got Caesar. However, Bege shot Pekoms and captured Sanji's group and Caesar, taking them inside his body fortress. Inside, he presented Sanji an invitation to Big Mom's tea party, where he was arranged to be married to the 35th daughter of the Charlotte Family, Pudding.[73]
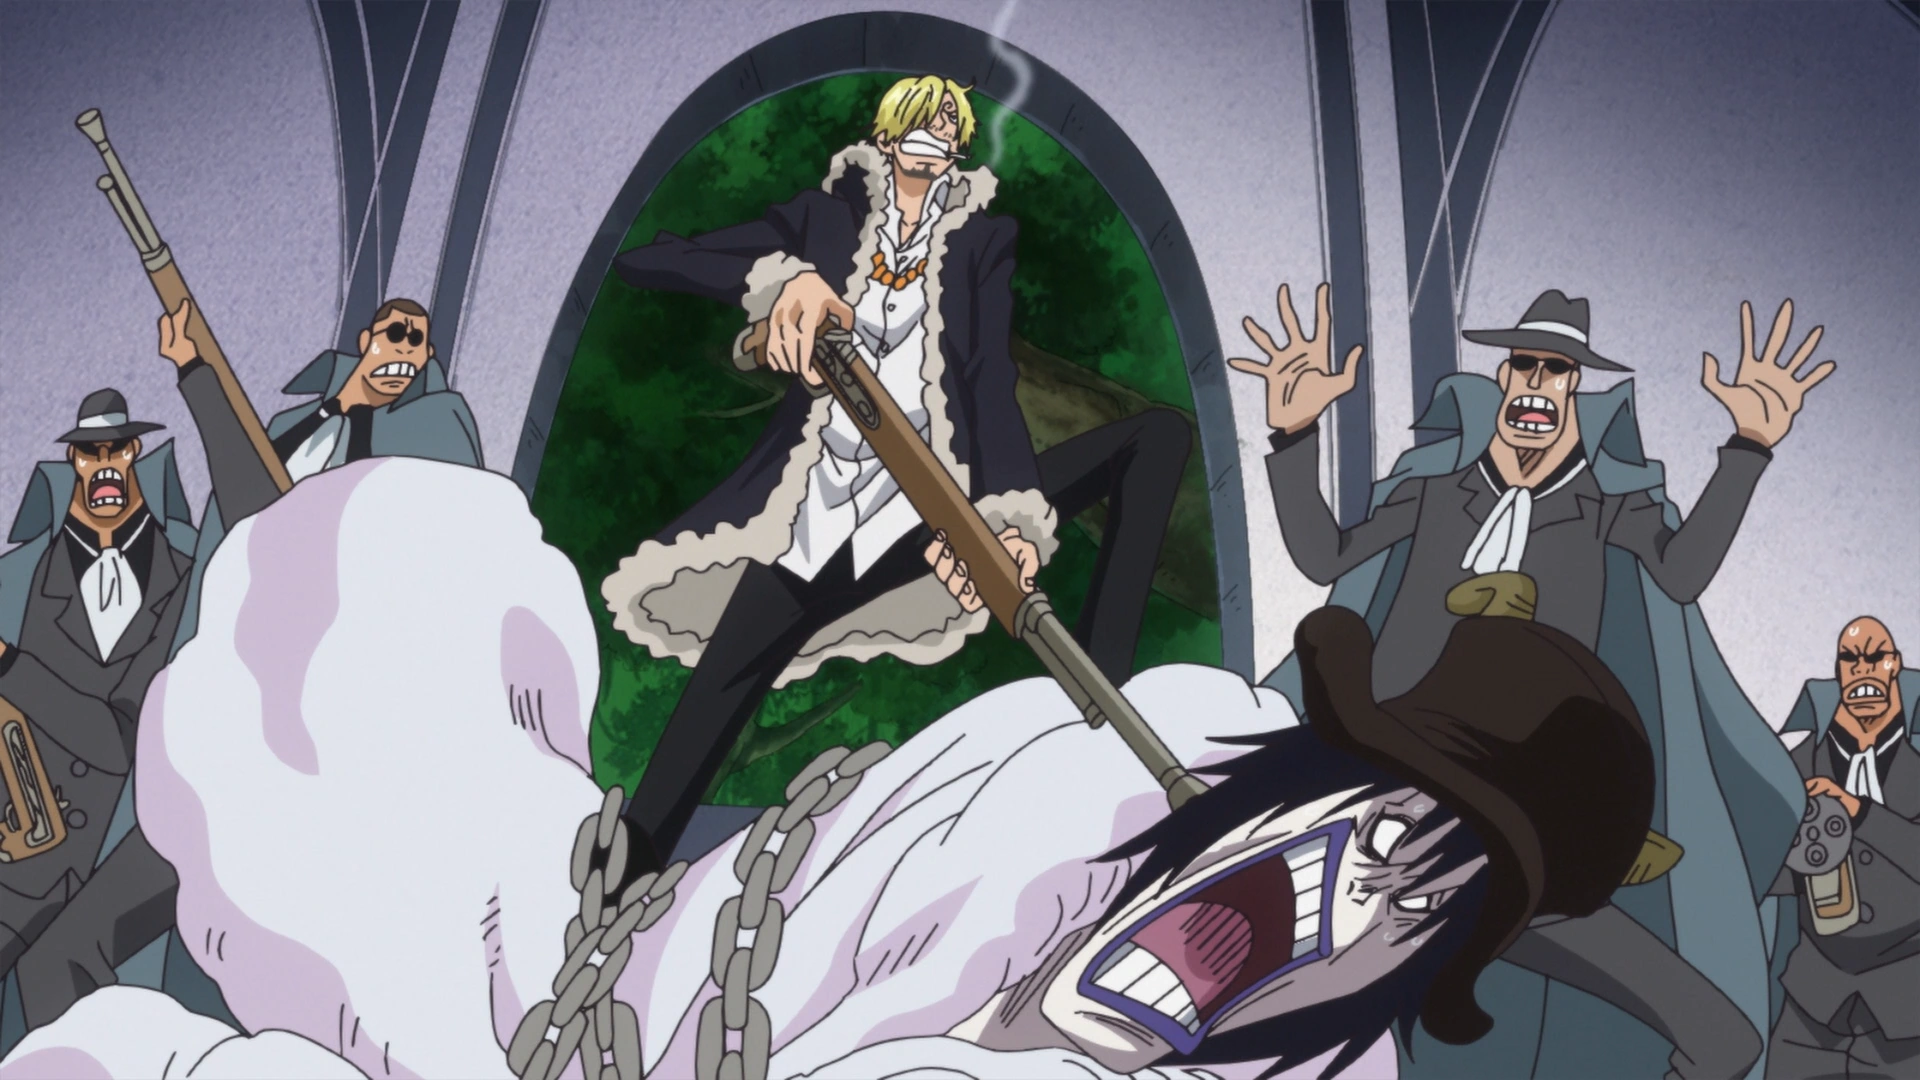

Sanji holding Caesar as a hostage.
Sanji refused to attend the wedding, but Bege threatened him and his crewmates with physical force. Bege's subordinate, Vito, then told Sanji a piece of information that shocked him. He then asked for a pen and paper and gave his crewmates a note explaining his whereabouts to be delivered to the rest of the crew when they arrived. He apologized to his crew, explaining it wasn't his intention to hide things from them. Sensing Nekomamushi nearby and choosing to resolve the marriage issue himself, he threw Nami, Chopper, and Brook out of Bege's body. Sanji prevented Bege's men from going after his crewmates by holding Caesar at gunpoint, knowing that Caesar and himself were too vital to be harmed. After Bege noticed that Nekomamushi was standing behind him, Nami, Chopper, and Brook plead for Sanji to stay with them. Sanji promised that he would return before Bege fled with him and Caesar.[74]
Totto Land Arc
Arriving at Whole Cake Island
On board Big Mom's ship, Baron Tamago attempted to persuade Sanji to join the Big Mom Pirates. Tamago explained that it was his father's wish, that Big Mom respected his pirating past and his culinary skill set, and that she would likely offer him a good position in her crew. In response, Sanji declared that he cut ties with his father a long time ago, and that he would never cook for a crew that was willing to discard one of their own. Vito then arrived with a picture of his bride-to-be and showed it to Sanji. When he saw that Pudding was beautiful, Sanji became love-struck.[75]
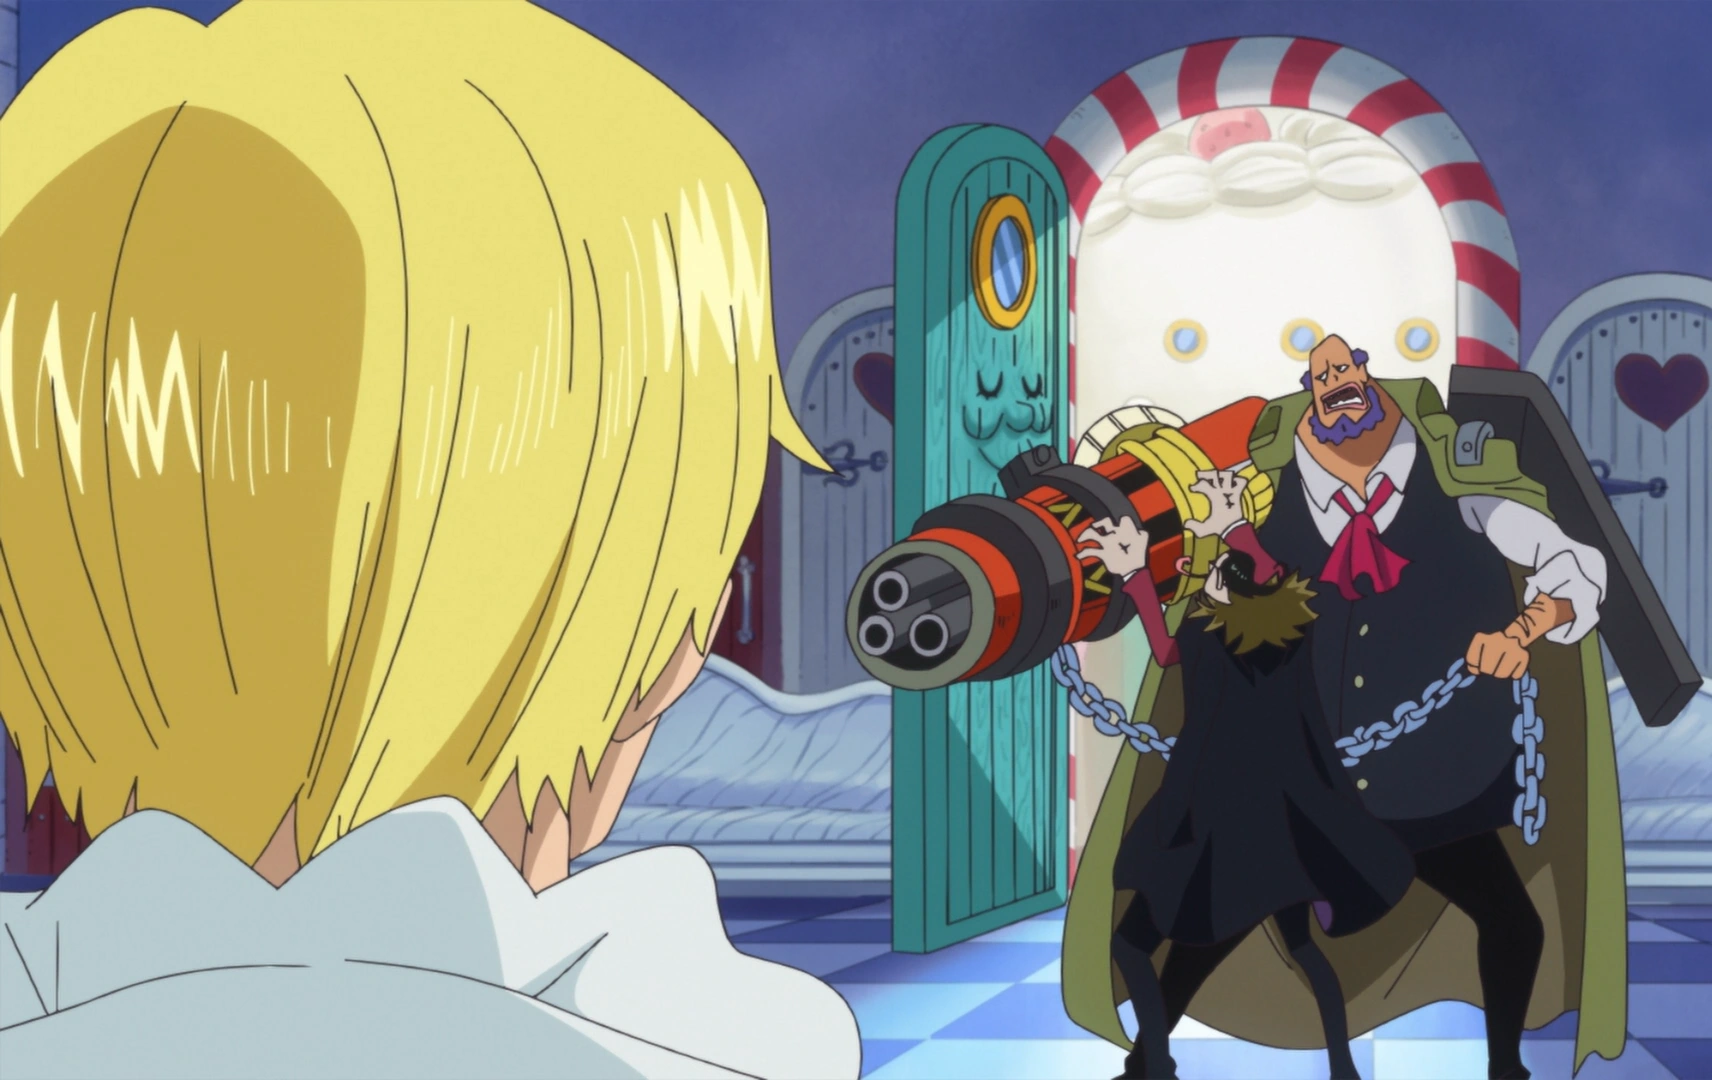
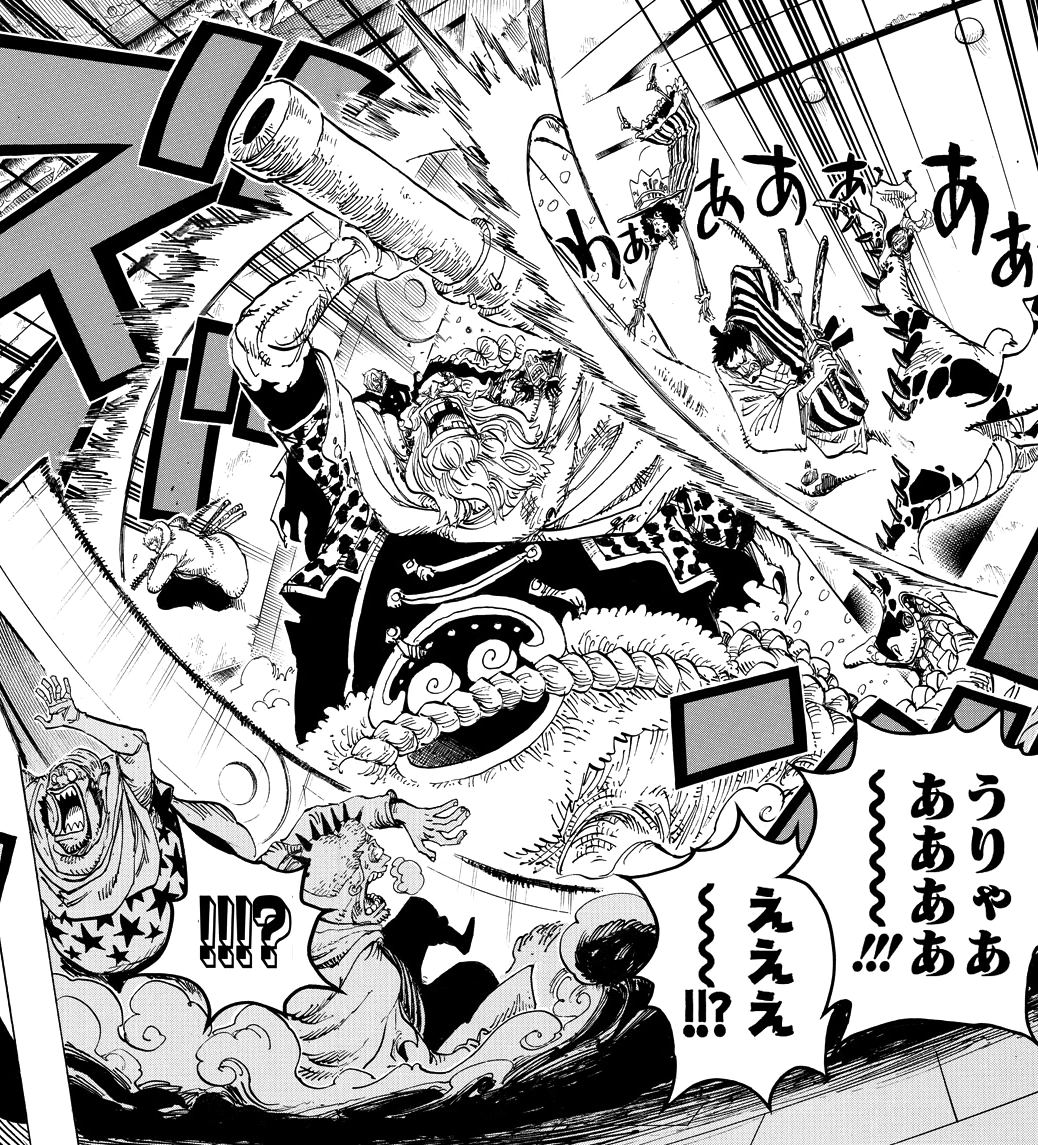
Gotti threatens Sanji over the latter's rudeness.
Vito then tried to engage Sanji in a conversation about a comic strip which featured Sanji's family, and their routine fights with the Marines. The strip was intended to be propaganda to brainwash children into idolizing the Marines, but Vito ended up idolizing Germa 66 and was honored to meet Sanji. Sanji became irritated at being associated with the army, and told Vito that he has nothing to do with them. Annoyed, Sanji returned to his private quarters, but Vito followed him in. After Vito reminded an imprisoned Caesar that Sanji's upcoming marriage will bring the Charlotte and Vinsmoke families together, Sanji reiterated his refusal to marry and told Vito to get out. Gotti, furious at Sanji's disrespect towards Vito, aimed his weapon at Sanji as Vito tried to calm Gotti. Unfazed by Gotti's threats, Sanji repeated his earlier order (this time, directed at both Vito and Gotti) to leave, which enraged Gotti further. A woman then intervened, reminding Gotti of Sanji's family connections and the retribution which would be exacted against Capone if Sanji was harmed in any way. As the woman gave Gotti a scolding, Sanji remarked to himself on the similarity between the woman and another person.[76]
Sanji meets Pudding for the first time.
Three days before Luffy and his team arrived at Cacao Island,[77] Sanji met Pudding for the first time. Despite their immediate mutual attraction, Sanji informed Pudding that he would not accede to the wedding because it would force his removal from his crew.[78]
Just prior to disembarking on Whole Cake Island, Caesar asked for his heart back. Sanji nonchalantly gave it to Vito instead, much to Caesar's chagrin.[79]
A Family Reunion
With the ocean-going Germa Kingdom assembling at Whole Cake Island, Sanji returned home and reunited with his family for the first time since leaving them 13 years ago. He had a hostile reunion with his younger brother, Vinsmoke Yonji, who was trying to admonish him for refusing to comply with the arranged marriage plans. Sanji then overpowered Yonji in a fight, breaking Yonji's face in the process.[80]
Sanji later conversed with his elder sister, Vinsmoke Reiju, in the Germa Kingdom's royal castle. Reiju attempted to convince Sanji to accept his royal heritage, saying that he would have power, wealth, luxury, and loyal soldiers at his disposal. However, when Sanji reiterated his break from the family and his continued refusal to go through with the wedding, Reiju commented that she likes his fiancée. At that moment, his father, Vinsmoke Judge, arrived to speak to Sanji, who greeted him coldly and refused to acknowledge him as his father. After speaking briefly about Yonji, Judge challenged Sanji to settle their quarrel with physical force.[81]
Sanji battles his father.
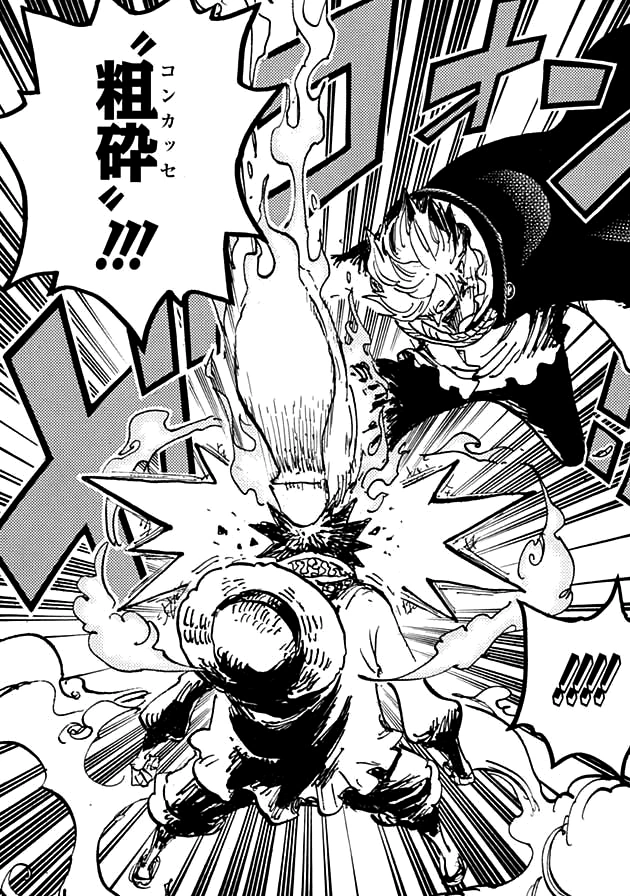
Judge and Sanji began their duel in a courtyard outside the castle. During their fight, the two traded both physical and verbal blows, with Sanji continually refusing to recognize his former family and even states he doesn't care what happens to them when Big Mom punishes them for his refusal. This is punctuated by Sanji's brief recollections of the abuse he'd received from his family as a child. Judge used his advanced technology and spear to overpower Sanji, who activated Diable Jambe in response. Judge then called upon his men to form a wall between the two of them. As Sanji yelled at the soldiers to get out of his way, Judge stabbed through one of his men with his spear, blowing away an off-guard Sanji with electrical energy.[82]
Back inside the Germa castle, Judge spoke with Sanji as he was being treated by Reiju. Sanji denounced his family again, telling them that, despite his hopes that they may have improved, they were even worse now than when he'd left them thirteen years ago. Judge countered by telling Sanji that he had never considered Sanji a true son of his, and had only sought him out as a dispensible means of sealing his alliance with Big Mom, which would guarantee the success of the Vinsmokes' attempts to reconquer the North Blue. While Sanji was distracted by Judge's comments, Judge then had Reiju cuff Sanji with exploding wristlets (the keys to which are in Big Mom's possession), threatening Sanji's most valued assets (his hands) in order to ensure his compliance with the approaching wedding.[83] Sanji tried to remove the wristlets, only for Reiju to stop him as a warning alarm was triggered. When left alone on the balcony sometime later, Sanji looked at his shackled hands and yelled out in frustration.[84]
On the day before the wedding, Sanji was seen trembling and grasping his upper left arm while watching from the castle balcony as his two older brothers returned to the Germa Kingdom.[85]

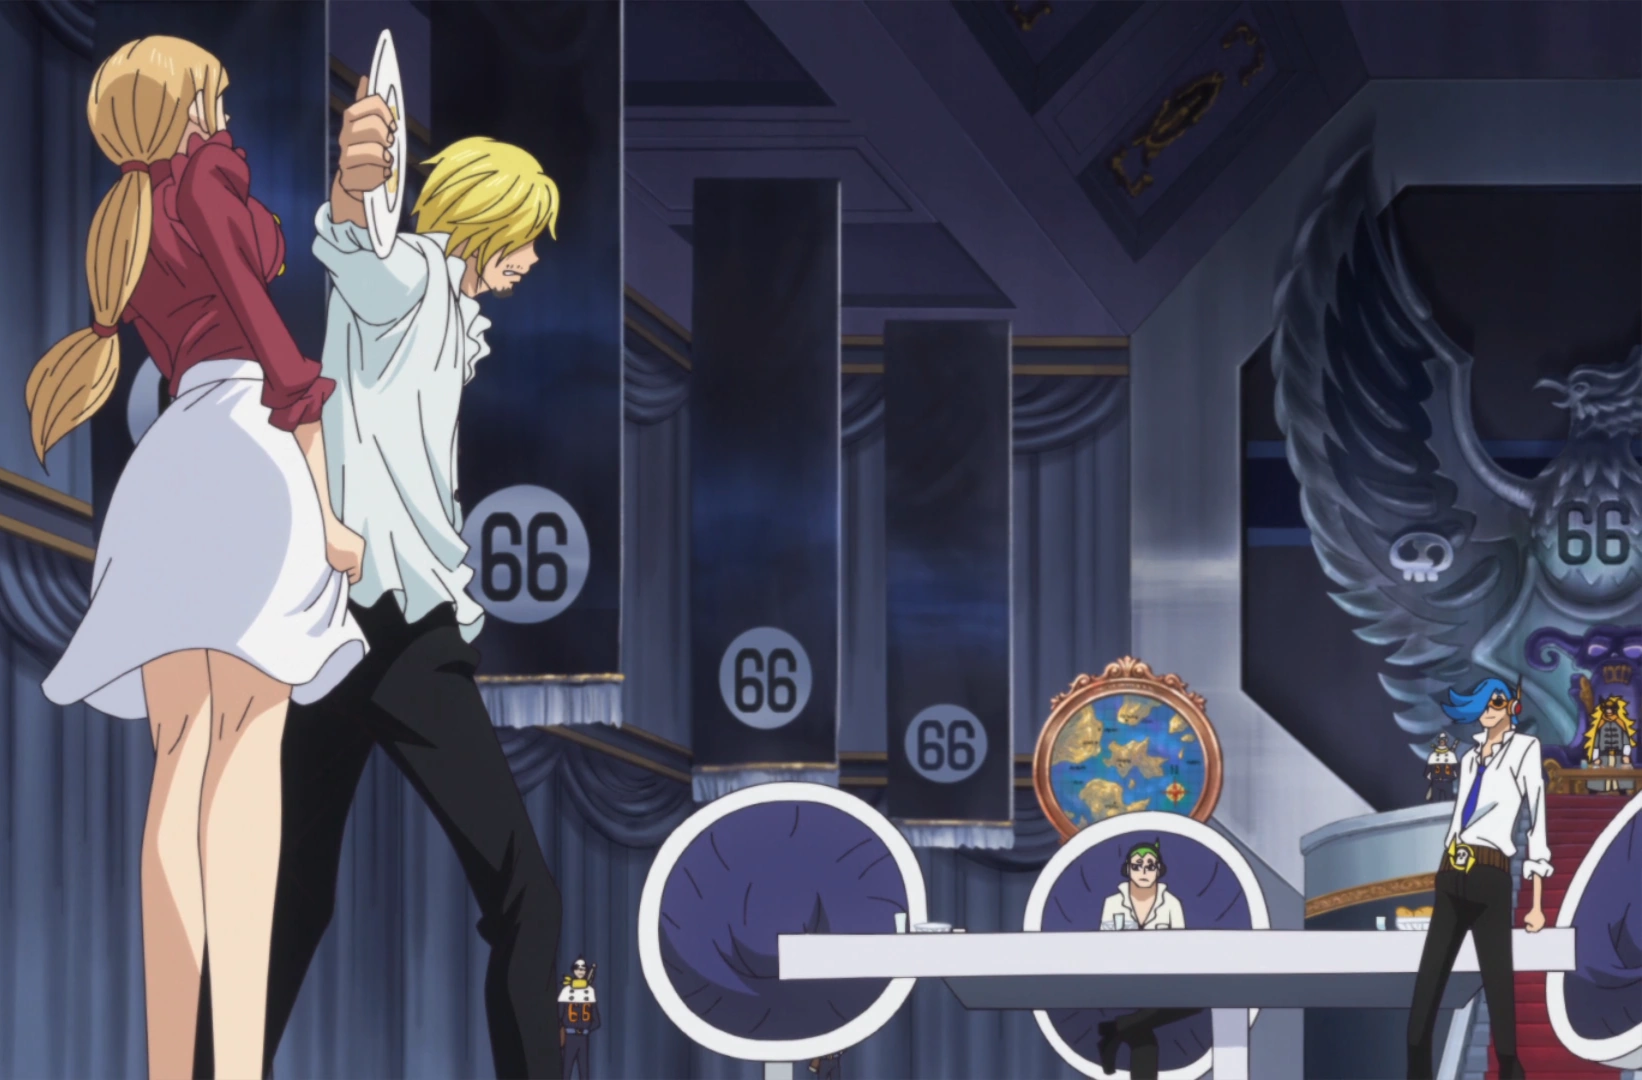
Sanji confronts Niji over the latter's behavior.
Sometime later, Sanji was having a meal with his father and siblings. Sanji told Niji to finish what was on his plate, but Niji refused and was irritated when Sanji called him a spoiled prince who does not know the value of food. Niji then angrily called the head chef and threw his plate at her. Sanji caught the plate and scorned Niji for trying to hurt a woman. Sanji then ate the food that fell on the floor and praised the head chef for her cooking, making her cry tears of joy. Niji attempted to kick Sanji, but Judge quickly stopped him. Sanji declared that he stood against everything his family stood for. Judge then showed Sanji a photo of Zeff and threatened to have him killed if Sanji disobeyed. After reminiscing of his time at the Baratie, Sanji found Cosette lying on the floor severely injured and suspected it was Niji's doing. Yonji appeared and offered Sanji to take him to their brother. Yonji then led Sanji to a room filled with large containers containing Germa soldiers.[86]
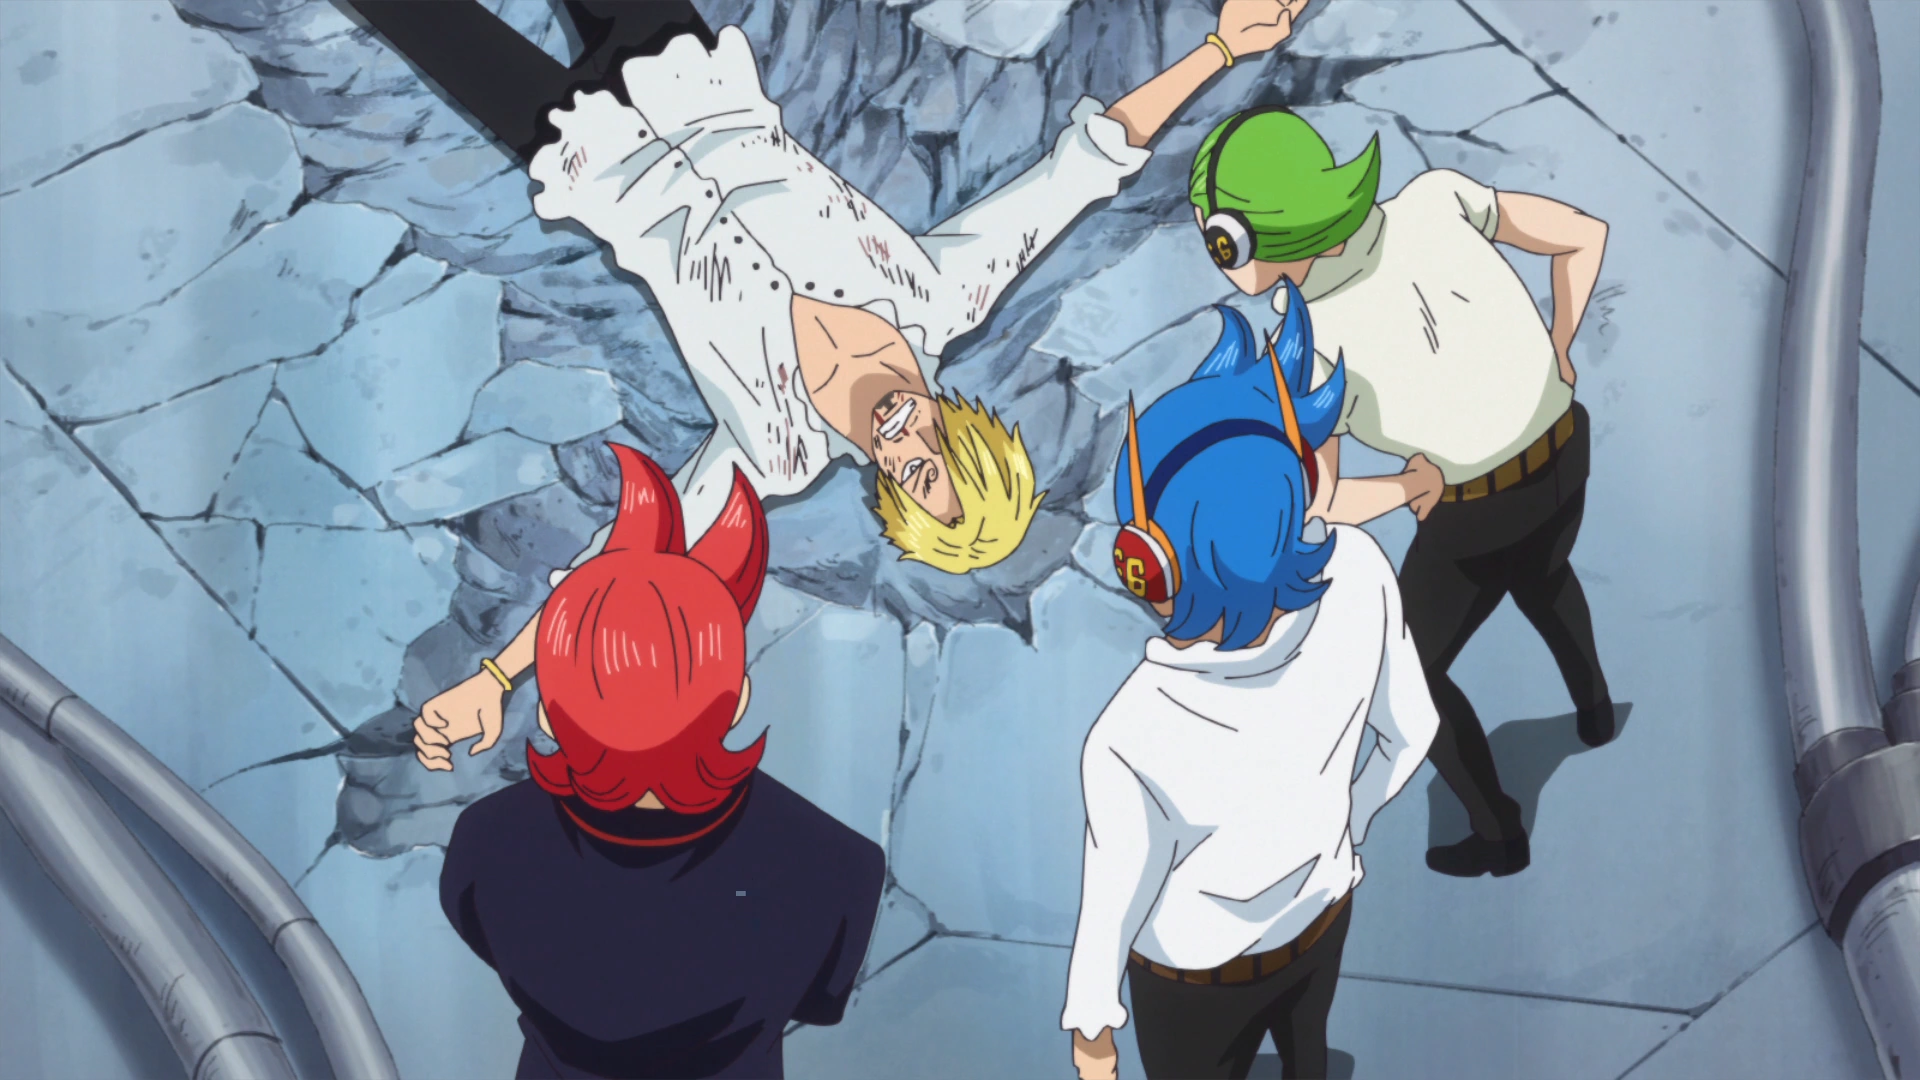

Sanji is overpowered by his brothers.
As Sanji stared at the Germa soldiers, Yonji explained to him about their father's past partnership with Vegapunk, the research they were conducting, and that the soldiers are actually cloned humans. Ichiji and Niji appeared shortly afterwards and Sanji immediately attacked Niji out of anger. Sanji kicked Niji in the face and broke his jaw, but before Sanji could attack any further, Ichiji reminded Sanji of what would happend to Zeff should he fight back and while his younger brother was distracted, Niji quickly fixed his face, got back up, and knocked Sanji down. Ichiji then welcomed Sanji home and reminded Sanji on his inferior status in the family, causing some painful memories for Sanji.[87] After beating him while he lay on the floor, Sanji's brothers left the room as doctors tended to him, but Reiju entered and ordered the doctors away. Reiju asked why Sanji had decided to return to the family given that they had given him virtually no pleasant memories and expressed curiosity over why he had to go though more pain for a restaurant owner.[88]
At a changing room, Reiju placed a gelatinous mask on Sanji, which returned his swollen face to normal. Reiju explained that his face was still injured, but his current state would still be better for his meeting with Pudding. Reiju also said that even though Pudding's last name would not change upon marriage, Sanji would still be able to live a happy life with her if she likes him. Sanji got angry, but Reiju reminded him that it was his choice to come back and that this was the extent of the help she would give him. Reiju then asked where Sanji got his chivalry from. After reminiscing of Zeff's teachings, Sanji answered that he was just following the old laws of the universe. Sanji was then brought out to go to the Whole Cake Chateau for the gift exchange with Big Mom, and the Germa 66 soldiers cheered Sanji on as the Vinsmoke Family boarded a carriage pulled by a large cat. Sanji sat in sullen silence in the back of the carriage between Niji and Yonji.[89]
A Big Decision and a Cruel Revelation


Sanji rejects Luffy and claims to have embraced his heritage.
On the way to the Whole Cake Chateau, Luffy and Nami caught up to the carriage. Sanji was shocked to see them as Luffy leaped onto the carriage, asking Sanji to return with him. Remembering Judge's warnings, Sanji kicked Luffy off the carriage and coldly told him to leave. Luffy refused to listen and Yonji was about to fight him. Sanji stopped his brother and volunteered to handle Luffy himself.[90]
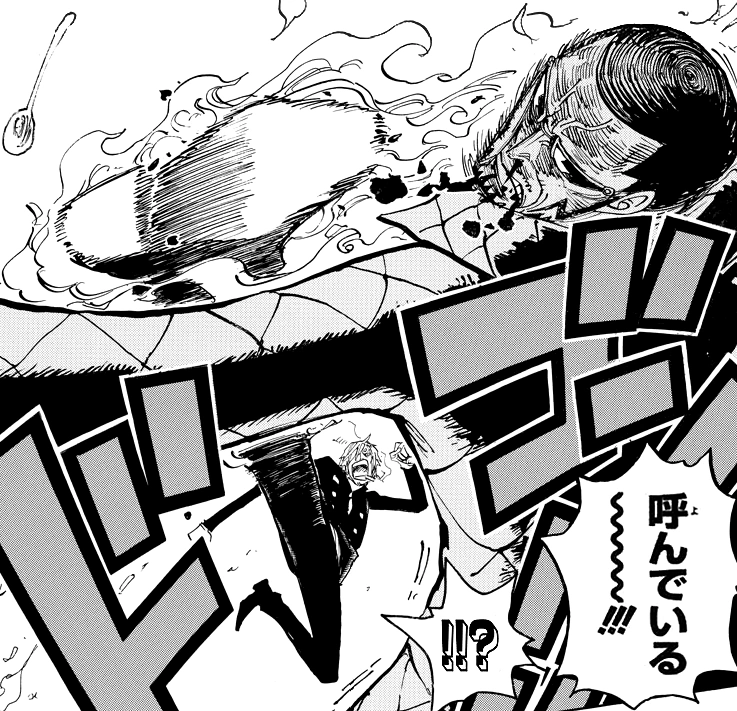
Sanji attacks Luffy.
As Sanji approached Luffy, he further insulted the latter before kicking him in the face. Luffy withstood the attack and remained on his feet. Sanji continued the confrontation by repeatedly kicking Luffy until he finally collapsed. Nami then slapped Sanji in anguish for his insults. After Sanji returned to his family's carriage, Luffy yelled to Sanji, saying that he knew that Sanji never meant what he said. Luffy declared that he would wait for Sanji and would gladly starve to death if he does not return. Luffy went on saying that he would not eat any food unless it is made by Sanji's hands. While hearing Luffy's words, Sanji cried tears of regret.[91]
Sanji agrees to marry Pudding.
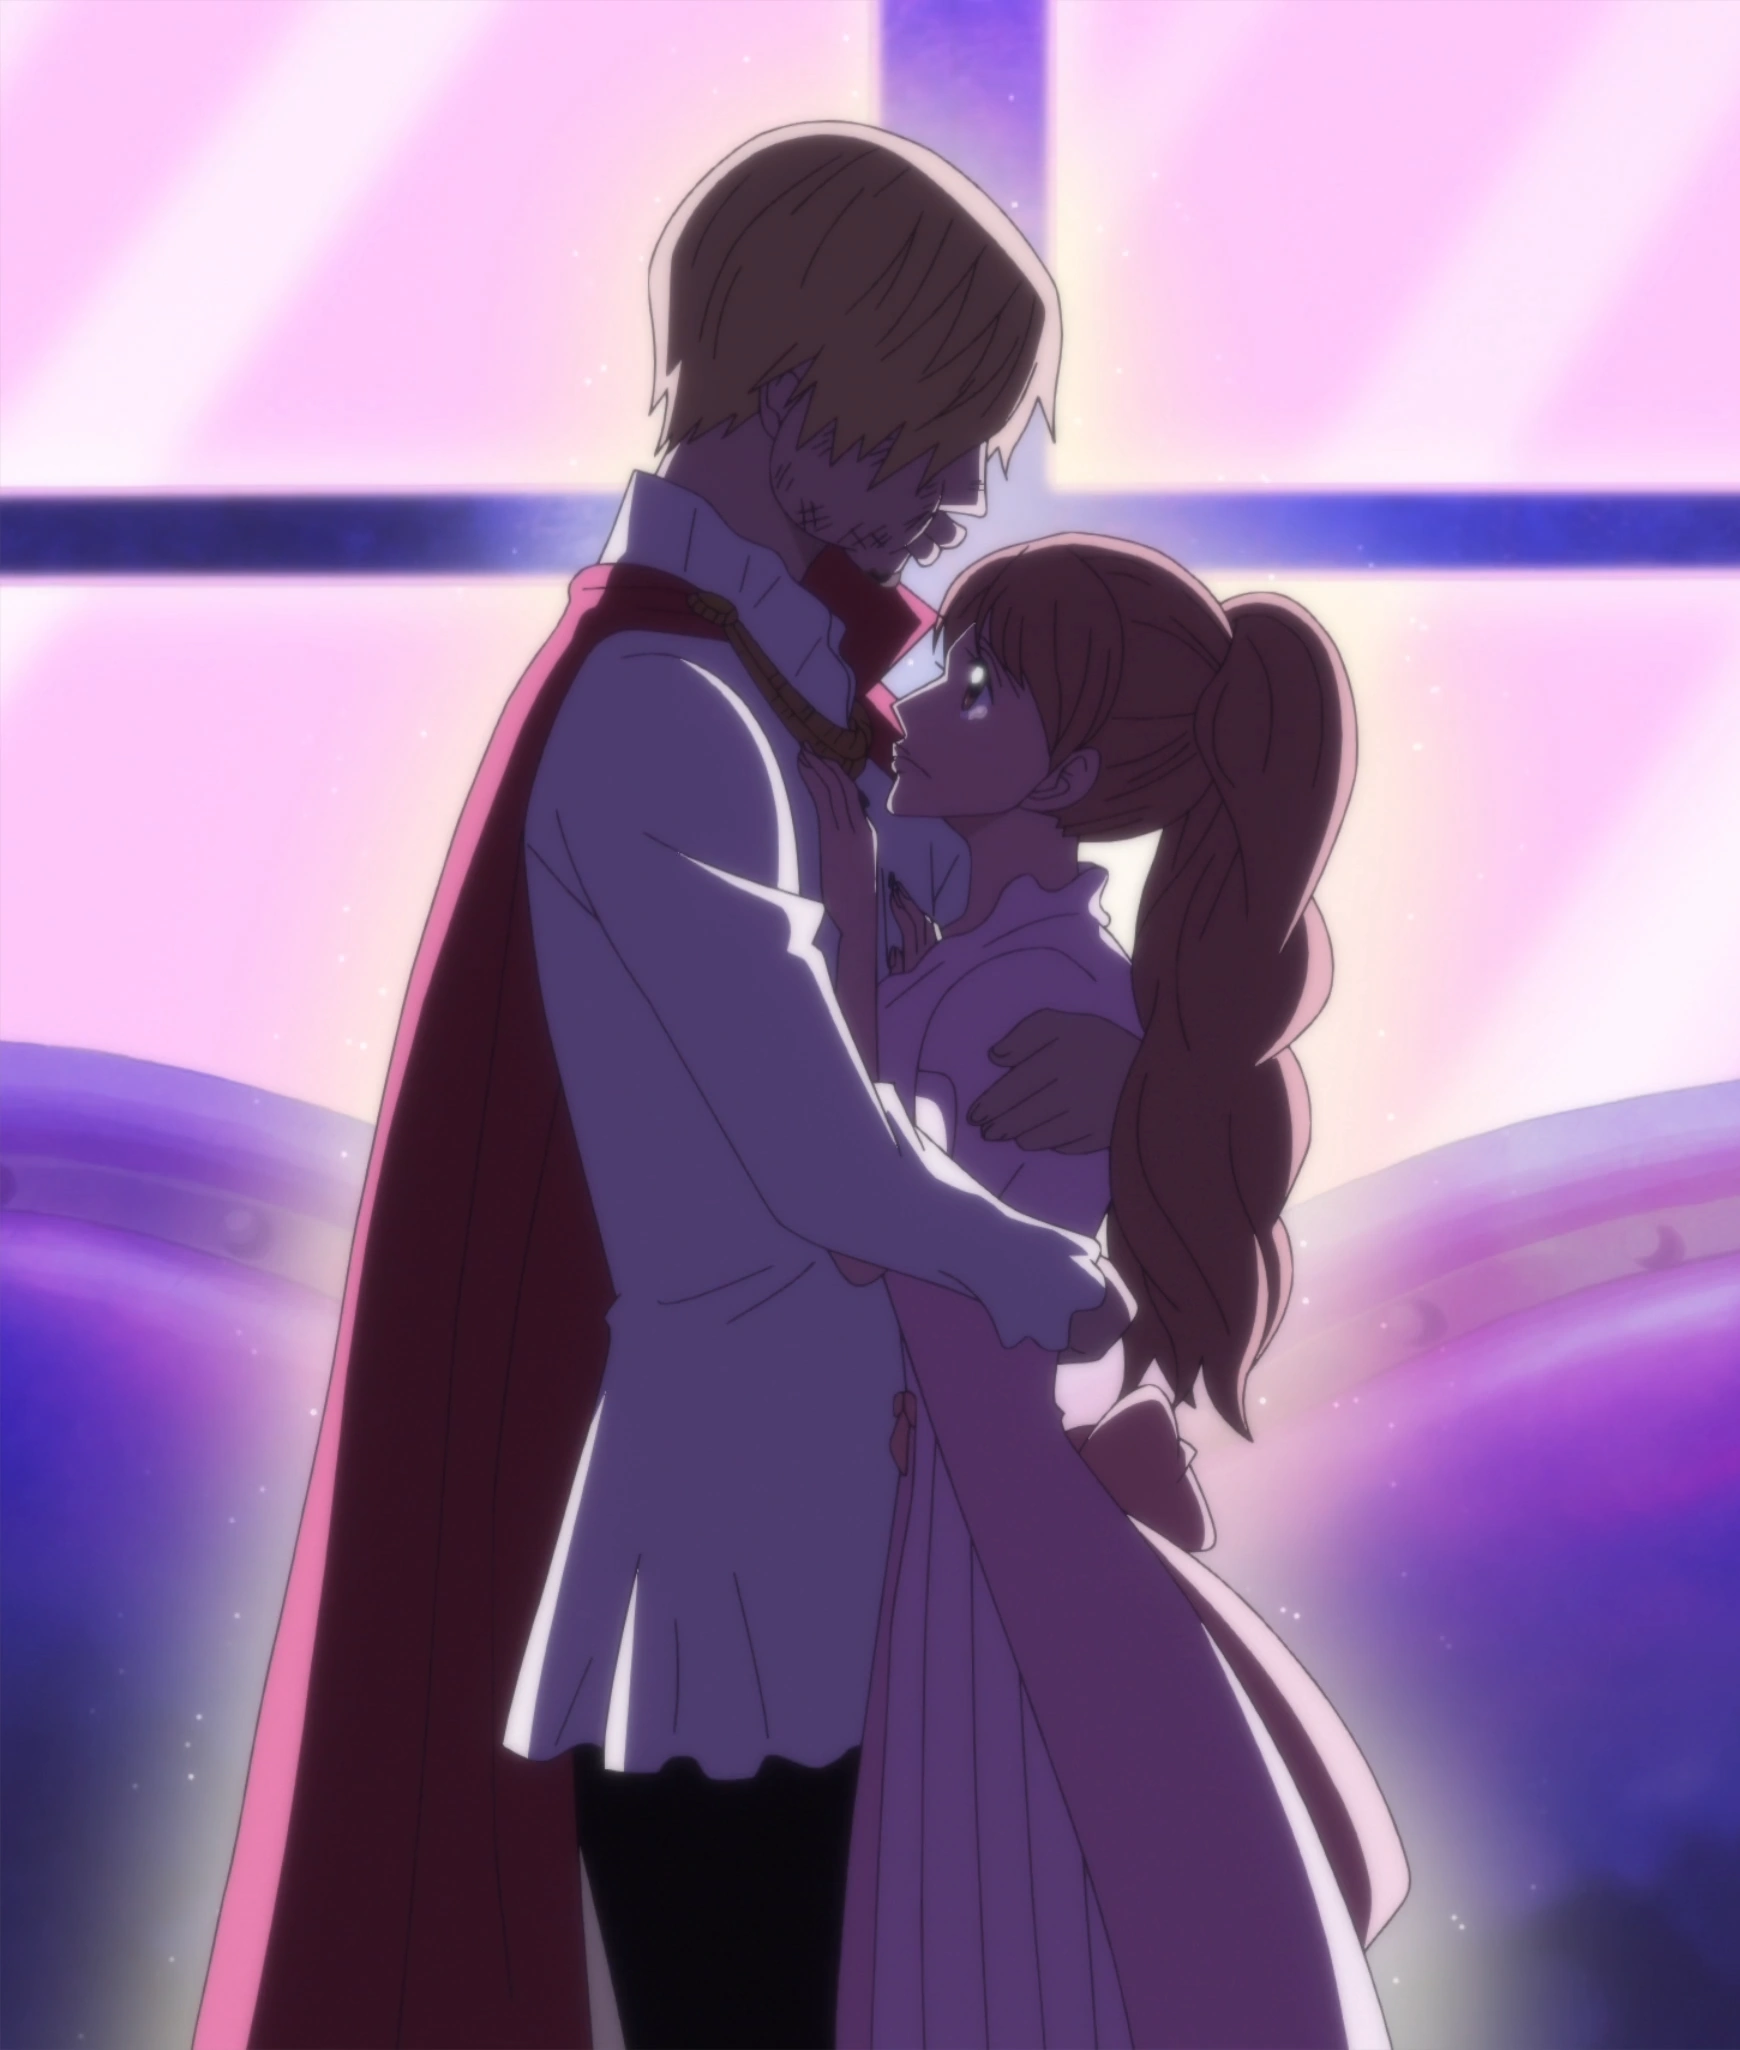
As the Vinsmoke carriage approached Big Mom's castle, Sanji witnessed an army heading towards Luffy and Nami's location. After arriving at the castle, the Vinsmoke Family, Pudding, and Big Mom had a meal together. During the meal, Pudding asked Sanji to speak with her in private. In Pudding's room, Pudding apologized to Sanji for not bringing him to Luffy as she originally planned. Sanji showed Pudding his injured face and the explosive wristlets, much to Pudding's shock. He then explained to her how his family treated him and the reason he left them in the first place as well as how they were blackmailing him into going through with the marriage. Seeing no way to escape without endangering his hands and those dear to him, Sanji explained to Pudding his intention to ask Big Mom to let his friends go in exchange for him not running away. As Pudding cried over Sanji's grief, he hugged her and told her his decision to marry her.[92]
Sometime later, Sanji had a conversation with Big Mom and requested her to allow his friends to leave Whole Cake Island in exchange for him not running away. Big Mom then stated that as long Sanji complied with the wedding, she would be willing to overlook Luffy's transgression against her. Sanji thanked her and promised to make Pudding happy.[93]
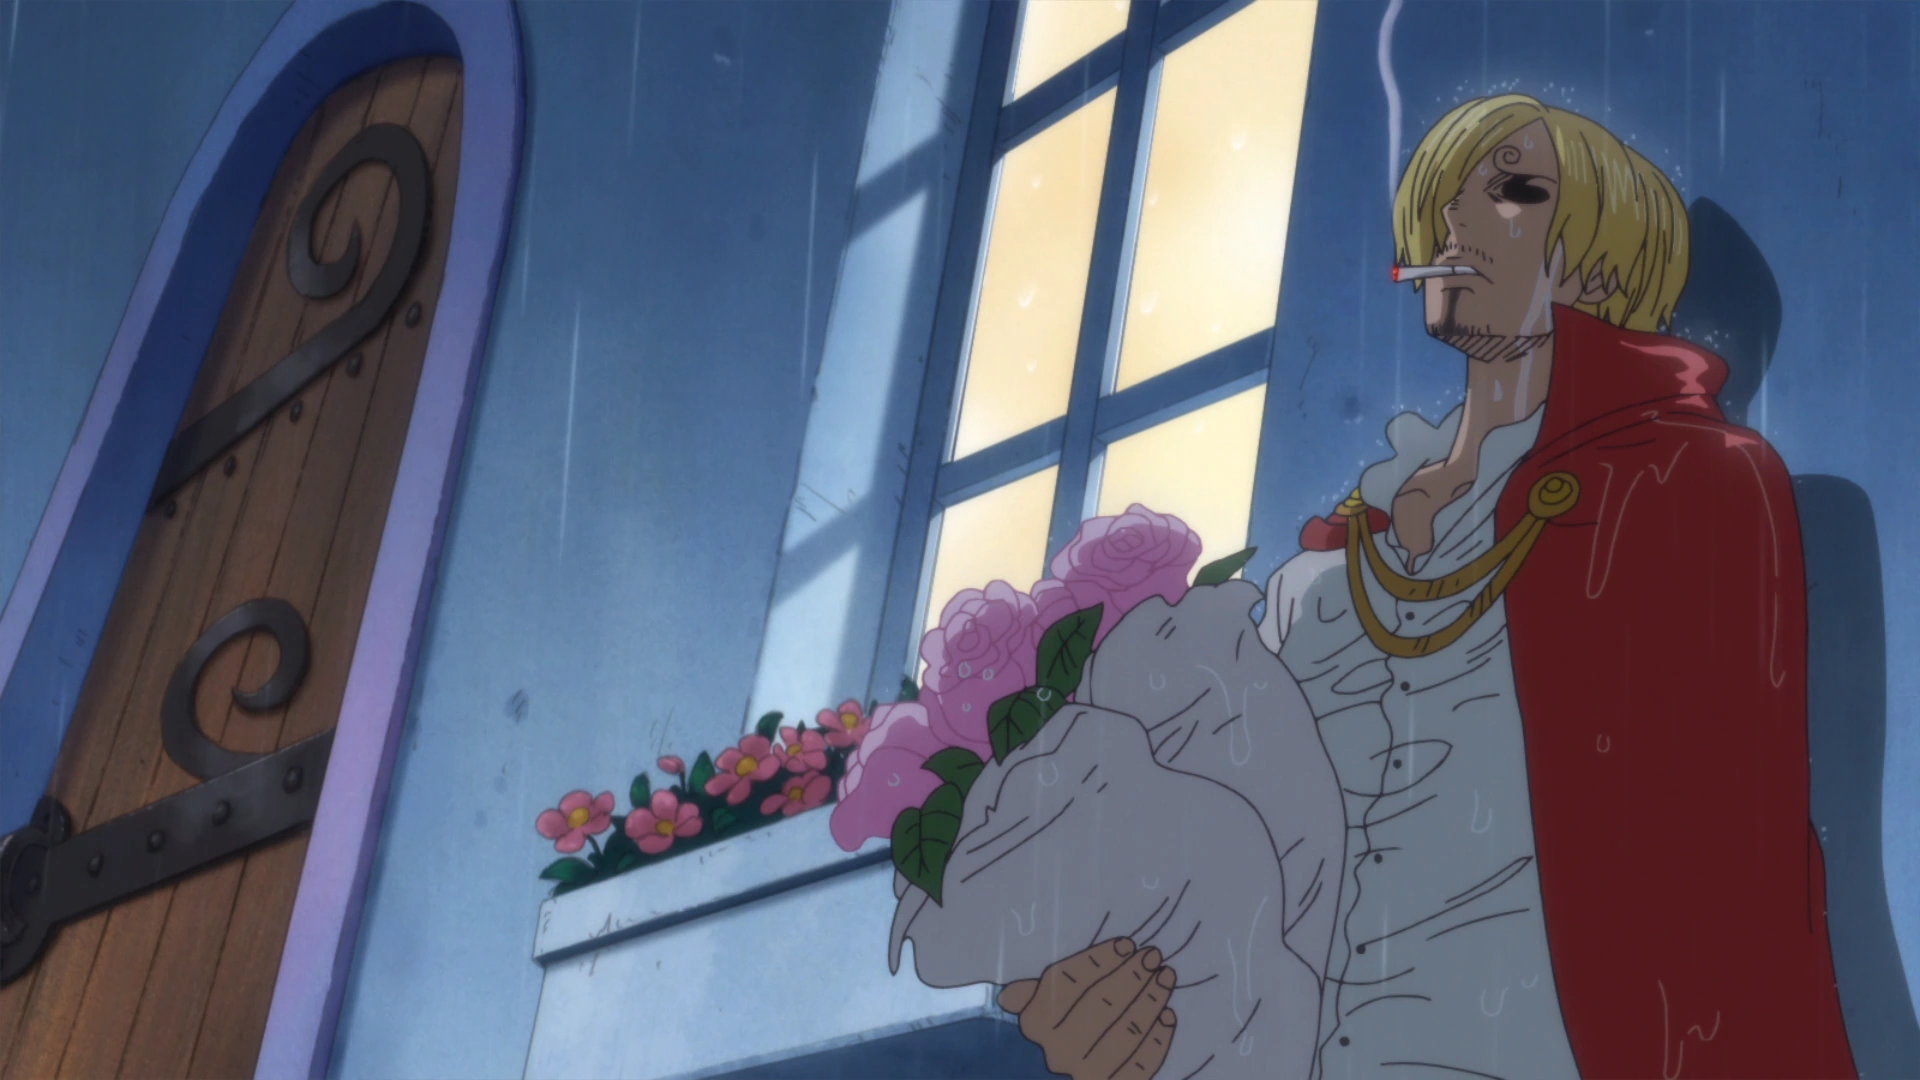
While sitting alone in a guest room, Sanji silently prayed that his friends not do anything rash.[94] Out of concern for Pudding, Sanji tried thinking positive thoughts and acting like his usual cheerful self. He then went outside to pick up some flowers.[95] He later acquired some food in order to cook a meal for Pudding, who had not eaten lunch, and the servant who delivered the food told him about his crewmates' statuses.[96]

Sanji learns about Pudding's true nature and her plan to assassinate his family.
Once Sanji finished preparing a bento for Pudding, which turned out to be (in his opinion) vulgar looking due to making it out of habit, he went to Pudding's room, but the door would not allow him in. He then decided to enter Pudding's room from the balcony. He then spotted Reiju in Pudding's room and overheard Pudding as she showed her sinister side and stated Big Mom's plan to kill the entire Vinsmoke Family during the wedding. Sanji stood outside in the rain in shocked silence.[97]
As Pudding continued insulting Sanji in front of Reiju, Sanji stood quietly and shed a tear as he tried lighting a cigarette. Sanji later left the balcony while Pudding altered Reiju's memories.[98]
He then went to the infirmary and after subduing and tying up the guard, he spoke to Reiju when she regained consciousness. He told her about what happened between her and Pudding and she accepted his explanation. To Sanji's shock, she proceeded to tell him that they should act as if they knew nothing, and allow the assassination of their family (whom she referred to collectively as "murderers") to go ahead during the tea party. She then revealed to Sanji the circumstances behind his birth, explaining that their mother had given her life to ensure that Sanji's capacity to feel emotions would not be corrupted by their father's plans. An upset Sanji nonetheless continued to resist, not wanting Reiju to be killed along with their father and brothers, but Reiju informed Sanji that she had switched out his exploding wristlets with fakes and urged him to leave Whole Cake Island with the other Straw Hats.[99]
References
- ↑ One Piece Manga and Anime — Vol. 61 Chapter 598 and Episode 517.
- ↑ One Piece Manga and Anime — Vol. 61 Chapter 598 and Episode 518.
- ↑ One Piece Manga and Anime — Vol. 61 Chapter 599 and Episode 518.
- ↑ One Piece Manga and Anime — Vol. 61 Chapter 600 and Episode 519.
- ↑ One Piece Manga and Anime — Vol. 61 Chapter 601 and Episode 521.
- ↑ One Piece Manga and Anime — Vol. 61 Chapter 601 and Episode 521.
- ↑ One Piece Manga and Anime — Vol. 61 Chapter 601 and Episode 521.
- ↑ One Piece Manga and Anime — Vol. 61 Chapter 602 and Episode 522.
- ↑ One Piece Manga and Anime — Vol. 61 Chapter 602 and Episode 522.
- ↑ 10.0 10.1 Adventure of Nebulandia
- ↑ One Piece Manga and Anime — Vol. 66 Chapter 655 and Episode 579, Sanji sees Luffy and the others off for Punk Hazard
- ↑ One Piece Manga and Anime — Vol. 66 Chapter 656 and Episode 580, Sanji and the other Straw Hats on the ships are captured
- ↑ One Piece Manga and Anime — Vol. 67 Chapter 657 and Episode 582, Sanji encounters the children
- ↑ One Piece Manga and Anime — Vol. 67 Chapter 658 and Episode 583, Sanji and Franky fight Caesar's underlings
- ↑ One Piece Manga and Anime — Vol. 67 Chapter 659 and Episode 584, Sanji discovers the masked men's horns
- ↑ One Piece Manga and Anime — Vol. 67 Chapter 660 and Episode 585, Sanji and his group exit the lab and run into Law and the Marines
- ↑ One Piece Manga and Anime — Vol. 67 Chapter 661 and Episode 586, Sanji is put inside Nami's body
- ↑ One Piece Manga and Anime — Vol. 67 Chapter 663 and Episode 588, Sanji and co. meet up with the rest of their crew.
- ↑ One Piece Manga and Anime — Vol. 67 Chapter 665 and Episode 591, Sanji accompanies Zoro and Brook in the search for Kin'emon.
- ↑ One Piece Manga and Anime — Vol. 68 Chapter 669 and Episode 595, Sanji, Brook and Zoro are caught by the Yeti Cool Brother's sleeping gas.
- ↑ One Piece Manga and Anime — Vol. 68 Chapter 670 and Episode 596, Sanji and the others see Smiley.
- ↑ One Piece Manga and Anime — Vol. 68 Chapter 671 and Episode 597, Sanji dives in the cold water.
- ↑ 23.0 23.1 One Piece Manga and Anime — Vol. 68 Chapter 672 and Episode 598.
- ↑ One Piece Manga and Anime — Vol. 68 Chapter 673 and Episode 599, Sanji, Zoro, Brook and Kin'emon set course to the facility
- ↑ One Piece Manga and Anime — Vol. 68 Chapter 675 and Episode 601, Sanji and the others flee from Smiley.
- ↑ One Piece Manga and Anime — Vol. 68 Chapter 676 and Episode 602, Sanji's group see the dragon.
- ↑ One Piece Manga and Anime — Vol. 68 Chapter 677 and Episode 603, Zoro and Nami's groups meet up, and escape into Caesar's lab.
- ↑ One Piece Manga and Anime — Vol. 68 Chapter 678 and Episode 604, inside the lab, Sanji joins the group that aims to rescue the children.
- ↑ One Piece Manga and Anime — Vol. 69 Chapter 679 and Episode 605, Sanji and his group reach the passageway.
- ↑ One Piece Manga and Anime — Vol. 69 Chapter 680 and Episode 606, Sanji comes to the Marines' rescue.
- ↑ One Piece Manga and Anime — Vol. 69 Chapter 681 and Episode 607, Sanji vs Vergo.
- ↑ One Piece Manga and Anime — Vol. 69 Chapter 682 and Episode 608, Vergo ceases the fight and Sanji escapes from the gas.
- ↑ One Piece Manga and Anime — Vol. 69 Chapter 684 and Episode 610, Sanji and the Marines are shocked by the incoming gas.
- ↑ One Piece Manga and Anime — Vol. 69 Chapter 685 and Episode 611, Sanji kicks the Marines to safety
- ↑ One Piece Manga and Anime — Vol. 69 Chapter 686 and Episode 612, Sanji and the Marines pass Zoro and follow Nami and Robin's track.
- ↑ One Piece Manga and Anime — Vol. 69 Chapter 688 and Episode 614, Sanji and the Marines apprehend the children and run for it
- ↑ One Piece Manga and Anime — Vol. 70 Chapter 691 and Episode 617, Sanji reunites with Zoro.
- ↑ One Piece Manga and Anime — Vol. 70 Chapter 692 and Episode 618, everyone reunites at the rail cart.
- ↑ One Piece Manga and Anime — Vol. 70 Chapter 694 and Episode 620, everyone escapes by rail cart.
- ↑ One Piece Manga and Anime — Vol. 70 Chapter 696 and Episode 622, Sanji prepares the meal for the feast everyone's having.
- ↑ One Piece Manga and Anime — Vol. 70 Chapter 697 and Episode 623, the Straw Hats, Law, Kin'emon and his son leave Punk Hazard.
- ↑ One Piece Manga and Anime — Vol. 70 Chapter 698 and Episodes 624–625, Law explains their alliance and his plan.
- ↑ One Piece Manga and Anime — Vol. 70 Chapter 699 (p. 12-14) and Episode 625.
- ↑ One Piece Manga and Anime — Vol. 70 Chapter 699 (p. 15-19) and Episode 628, the group read about Doflamingo's resignation in the newspaper.
- ↑ One Piece Manga and Anime — Vol. 70 Chapter 700 and Episode 629, the Straw Hats, Law, Kin'emon and Momonosuke approach Dressrosa.
- ↑ One Piece Manga and Anime — Vol. 71 Chapter 701 and Episode 630.
- ↑ One Piece Manga and Anime — Vol. 71 Chapter 701 (p. 16-19) and Episode 631.
- ↑ One Piece Manga and Anime — Vol. 71 Chapter 702 and Episode 631.
- ↑ One Piece Manga and Anime — Vol. 71 Chapter 703 and Episode 632.
- ↑ One Piece Manga and Anime — Vol. 71 Chapter 705 and Episode 635.
- ↑ One Piece Manga and Anime — Vol. 72 Chapter 712 (p. 2-7) and Episode 640.
- ↑ One Piece Manga and Anime — Vol. 72 Chapter 712 (p. 7-12) and Episode 642.
- ↑ One Piece Manga and Anime — Vol. 71 Chapter 711 (p. 18-19) and Episodes 641–642.
- ↑ One Piece Manga and Anime — Vol. 72 Chapter 713 and Episode 643.
- ↑ One Piece Manga and Anime — Vol. 72 Chapter 717 and Episode 647.
- ↑ One Piece Manga and Anime — Vol. 72 Chapter 718 and Episode 648.
- ↑ One Piece Manga and Anime — Vol. 73 Chapter 722 and Episode 652.
- ↑ One Piece Manga and Anime — Vol. 73 Chapter 723 and Episode 653.
- ↑ 59.0 59.1 One Piece Manga and Anime — Vol. 73 Chapter 725 and Episode 656.
- ↑ One Piece Manga and Anime — Vol. 73 Chapter 723 and Episode 654.
- ↑ One Piece Manga and Anime — Vol. 73 Chapter 724 and Episode 655.
- ↑ One Piece Manga and Anime — Vol. 73 Chapter 729 and Episode 661.
- ↑ One Piece Manga and Anime — Vol. 73 Chapter 730 and Episode 662.
- ↑ One Piece Manga and Anime — Vol. 81 Chapter 807 and Episode 756.
- ↑ One Piece Manga — Vol. 81 Chapter 810.
- ↑ One Piece Manga — Vol. 79 Chapter 795.
- ↑ One Piece Manga — Vol. 81 Chapter 807.
- ↑ One Piece Manga — Vol. 81 Chapter 811.
- ↑ One Piece Manga — Vol. 80 Chapter 801.
- ↑ 70.0 70.1 70.2 70.3 70.4 Heart of Gold
- ↑ One Piece Film: Gold Episode 0
- ↑ 72.0 72.1 72.2 72.3 72.4 72.5 72.6 One Piece Movie — One Piece Film: Gold.
- ↑ 73.0 73.1 One Piece Manga — Vol. 81 Chapter 812.
- ↑ One Piece Manga — Vol. 81 Chapter 813.
- ↑ One Piece Manga — Vol. 82 Chapter 824.
- ↑ One Piece Manga — Vol. 82 Chapter 825.
- ↑ One Piece Manga — Vol. 82 Chapter 827 (p. 17), Big Mom inquires into Sanji's whereabouts.
- ↑ One Piece Manga — Vol. 83 Chapter 828 (p. 9-12), Charlotte Pudding recounts her meeting with Sanji.
- ↑ One Piece Manga — Vol. 83 Chapter 834, Sanji is shown, in Caesar's flashback, giving Caesar's heart to Vito.
- ↑ One Piece Manga — Vol. 83 Chapter 833.
- ↑ One Piece Manga — Vol. 83 Chapter 832.
- ↑ One Piece Manga — Vol. 83 Chapter 833.
- ↑ One Piece Manga — Vol. 83 Chapter 833.
- ↑ One Piece Manga — Vol. 83 Chapter 834.
- ↑ One Piece Manga — Vol. 83 Chapter 838.
- ↑ One Piece Manga — Vol. 84 Chapter 839.
- ↑ One Piece Manga — Vol. 84 Chapter 840.
- ↑ One Piece Manga — Vol. 84 Chapter 841.
- ↑ One Piece Manga — Vol. 84 Chapter 842.
- ↑ One Piece Manga — Vol. 84 Chapter 843.
- ↑ One Piece Manga — Vol. 84 Chapter 844.
- ↑ One Piece Manga — Vol. 84 Chapter 845.
- ↑ One Piece Manga — Vol. 84 Chapter 846.
- ↑ One Piece Manga — Vol. 84 Chapter 847.
- ↑ One Piece Manga — Vol. 84 Chapter 848.
- ↑ One Piece Manga — Vol. 85 Chapter 849.
- ↑ One Piece Manga — Vol. 85 Chapter 850.
- ↑ One Piece Manga — Vol. 85 Chapter 851.
- ↑ One Piece Manga — Vol. 85 Chapter 852.
Template:Sanji Infobox