Template:Monkey D. Luffy Infobox
Past
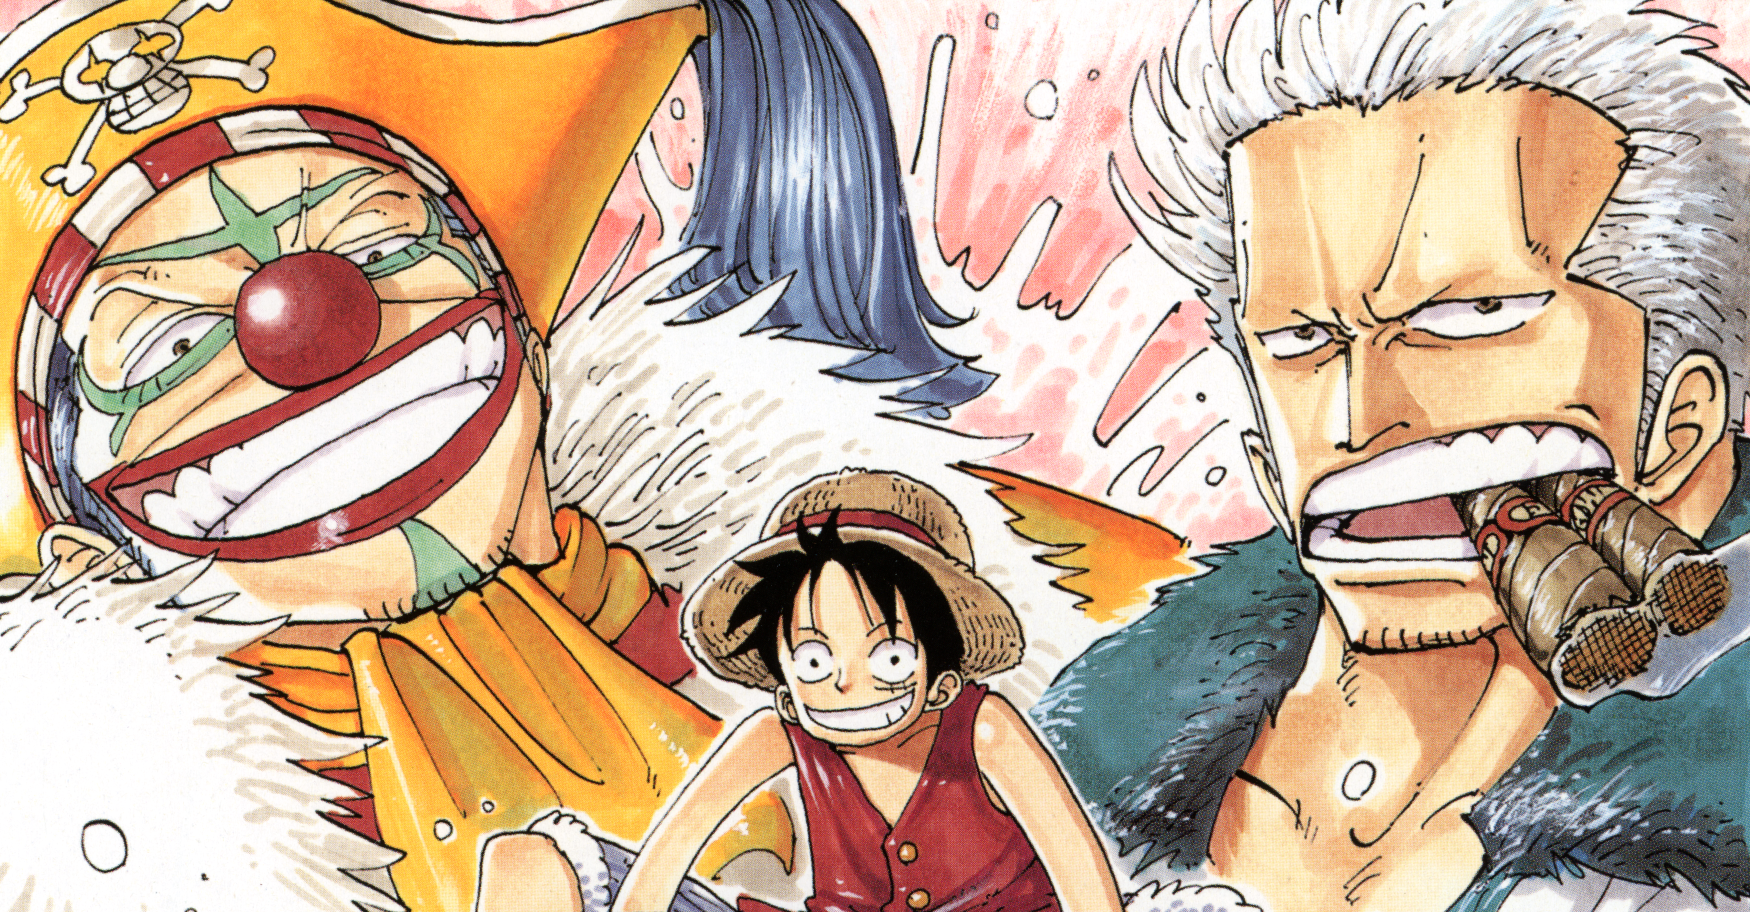
Shanks and the Straw Hat
| — Shanks to Silvers Rayleigh, talking about Luffy |
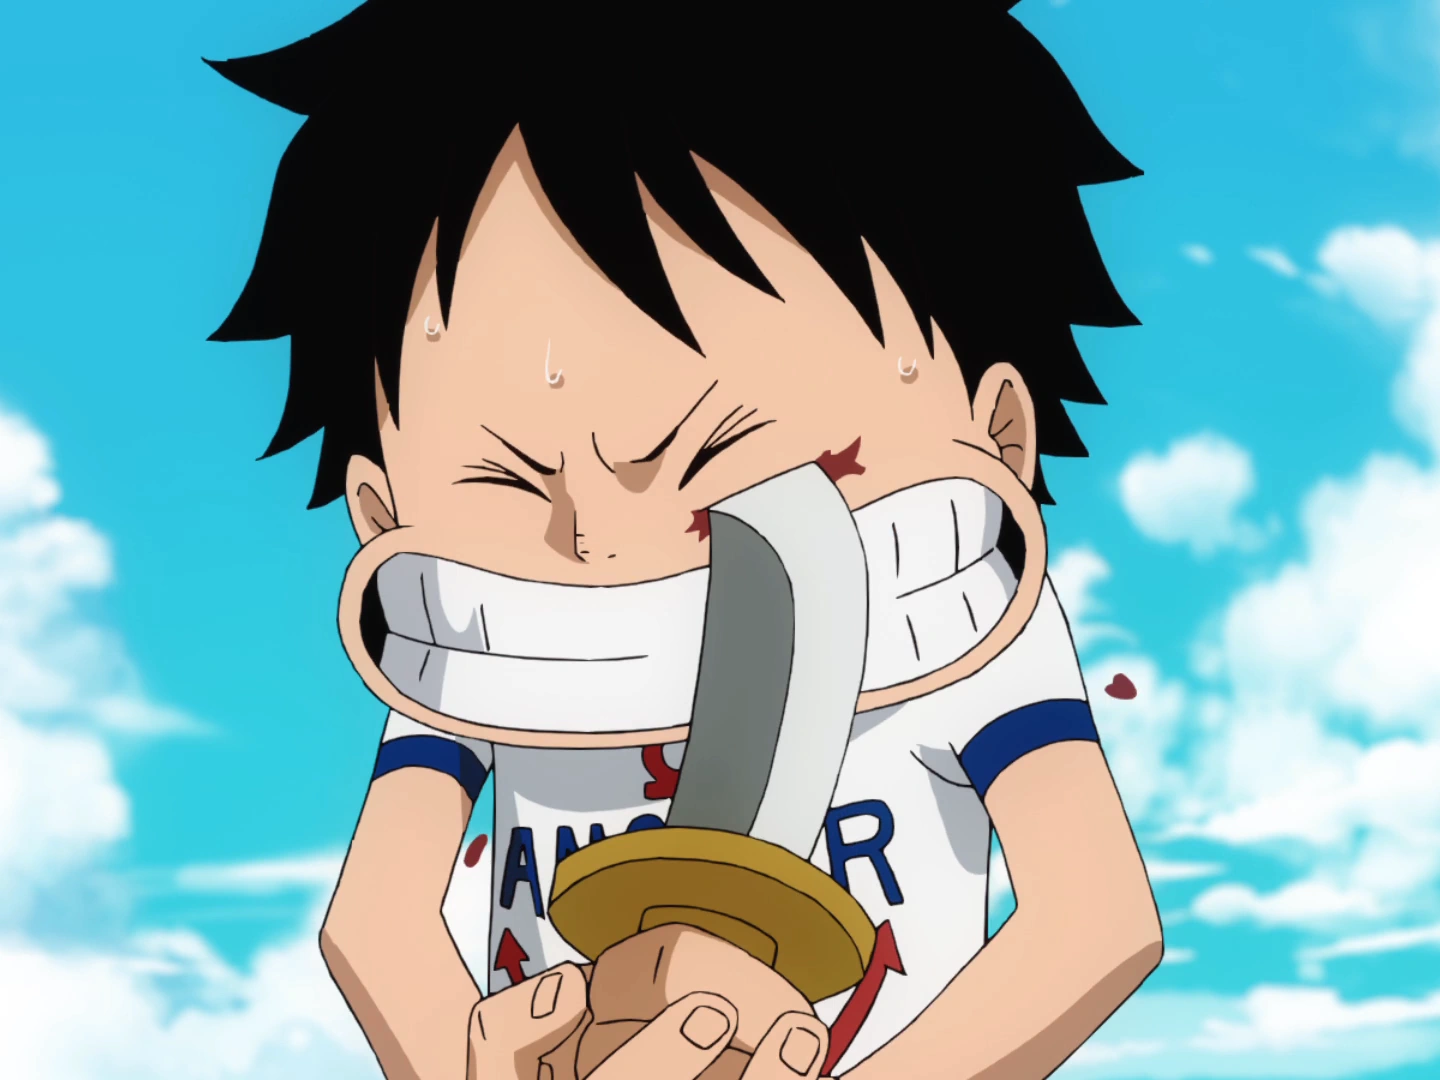
Luffy inflicting the scar on his face.
Luffy was born in Foosha Village in East Blue. When he was seven years old, he met and befriended a crew of pirates led by a captain named Red Haired Shanks. Luffy was inspired to become a pirate by Shanks and his crew. He once stabbed himself with a knife under his left eye to prove himself to Shanks so that he could join them in their adventures. However, later, Shanks refused to bring Luffy, stating that he was still too young to join Shanks' crew.[1]
During a scene with Shanks and Higuma, a local mountain bandit that insulted Shanks and his crew, Luffy accidentally ate a Devil Fruit known as the Gomu Gomu no Mi and unwittingly turned himself into a rubber human. Initially, this situation affected Luffy badly as it means he will never be able to swim again, which is a great weakness to anyone who wishes to journey the seas. This, however, does not deter Luffy's dream and he continued aspiring to become a pirate.[1]
Later, Luffy stood up to Higuma on behalf of Shanks. However, he was easily defeated and became a hostage. His captors were easily defeated by the Red-Haired Pirates, but the bandit leader Higuma has fled out to sea with Luffy.[1]
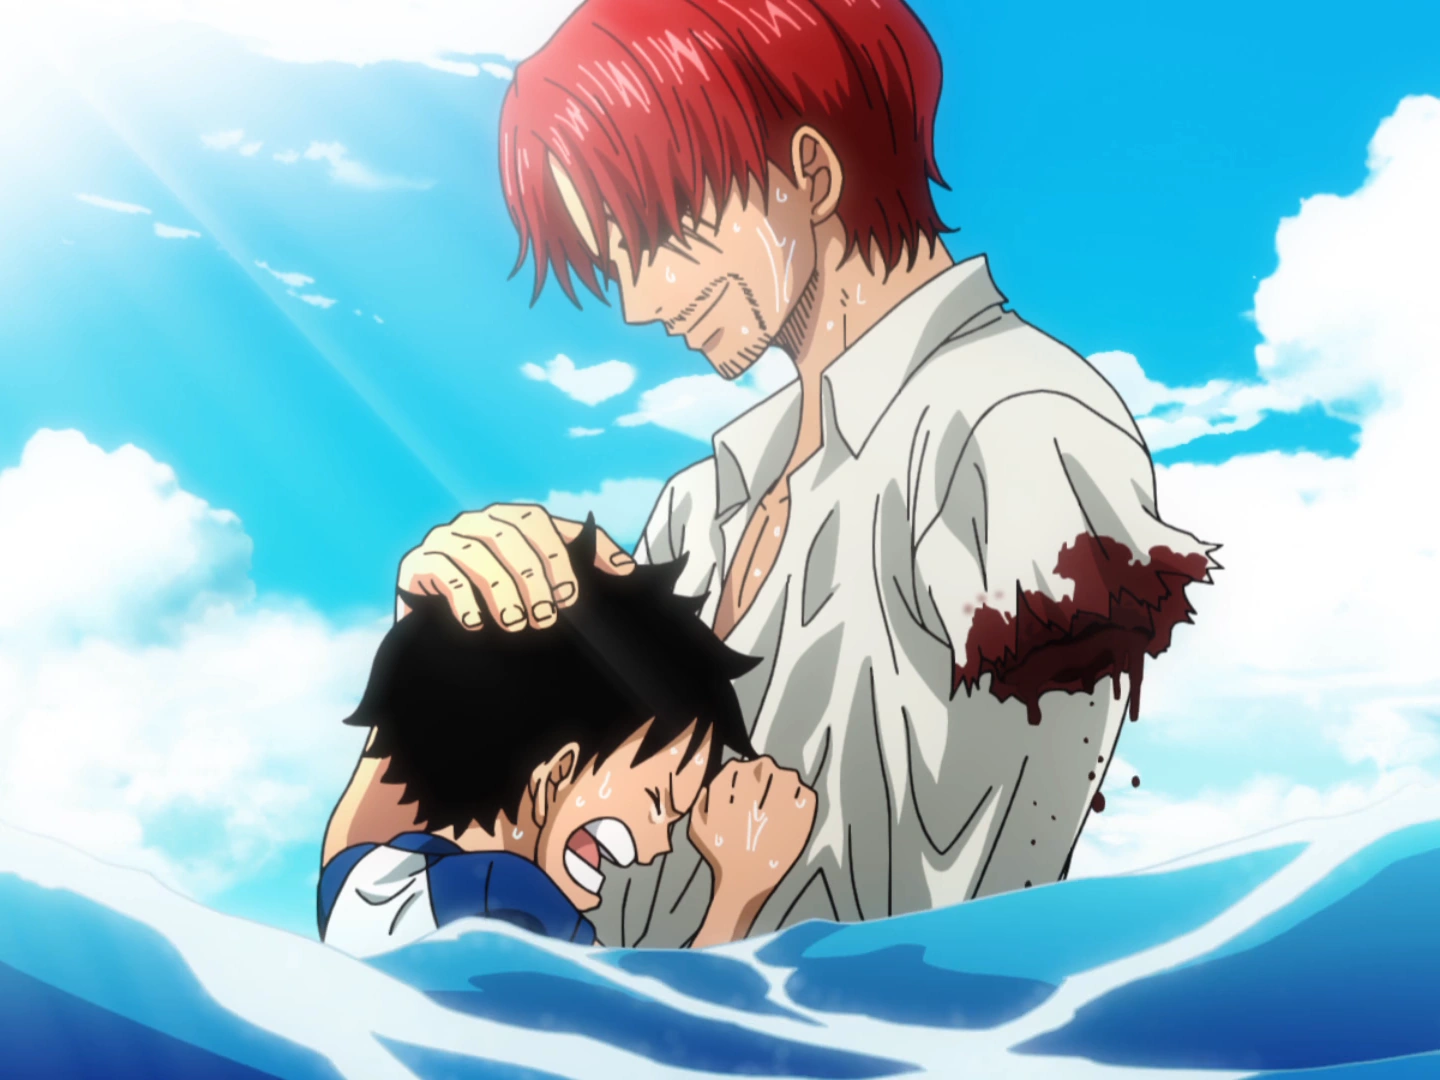
Shanks loses his left arm while saving Luffy.
While out at sea, Higuma threw Luffy in the ocean, only to be attacked by a sea king. Moments later while he was laughing at Luffy, Higuma was eaten. Though Shanks manages to save Luffy, he paid a high price: his left arm was lost to the sea king.[1]
Shortly after, Shanks set sail along with his crew, but before leaving, he and Luffy promised each other that one day Luffy will surpass Shanks and become the Pirate King. Shanks then leaves Luffy his straw hat as a parting gift, telling him to return it once he surpasses him.[1]
Meeting Portgas D. Ace
Luffy's New Family: Bandits and Brothers
Sometime later, Monkey D. Garp took Luffy into the care of Curly Dadan, which was the first time Luffy meets Portgas D. Ace. Garp took him to Dadan, while Luffy refused. Garp picked him up, knocked on the door and put him down. He then got spit on by the newly arrived Ace, and the two angrily glare at each other.[2]
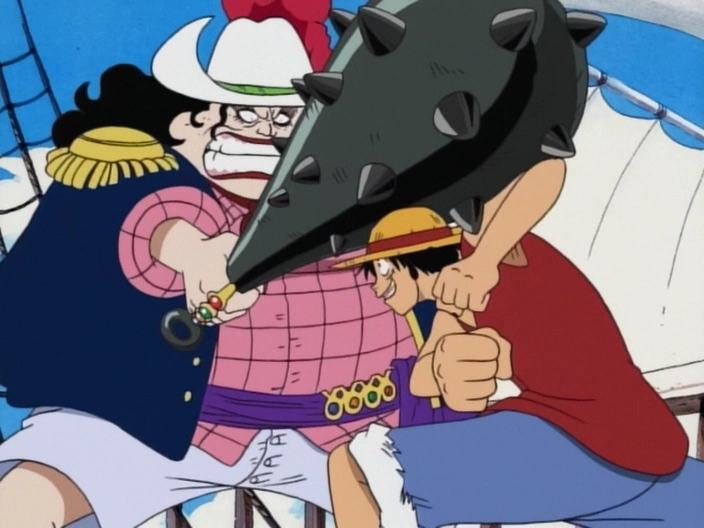
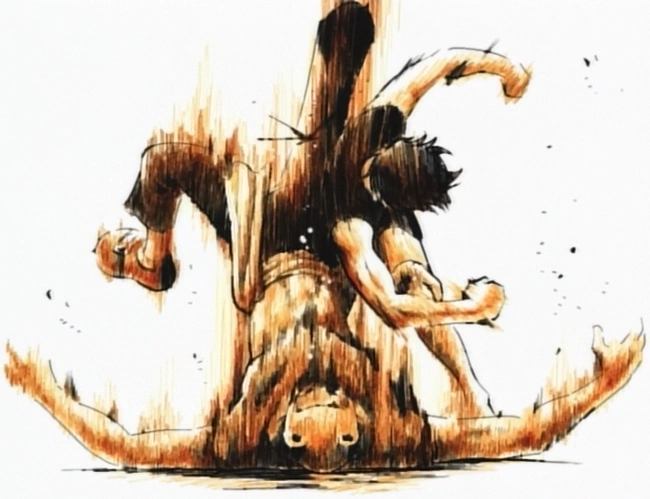
Thinking back about the recent incident with Higuma, he told Dadan and the rest of the bandits that he hates bandits. Dadan bitterly scolded him for saying something like that, telling him he can stay at their hideout or starve to death. Luffy took a look at the meat-eating Ace, asking if he can have a piece. He then got scolded by Dadan, telling him he can do fine with just rice and water, but he saw Ace leave and followed him. Luffy said to Ace that he was not angry at Ace for spitting on him (since it was not something to get worked up about, and he is also thinking about Shank's behavior) and wanted to be friends. Ace responded by knocking a tree down at Luffy. Luffy then followed Ace across a bridge. Ace noticed him and knocked him off of the bridge. Luffy returned to Dadan's house a week later and told Dadan that he was being chased by wolves and fell off a cliff. Luffy got sent to bed without any treatment for his wounds. The next day, Ace went out again and Luffy followed, wanting to start a friendship, only to get shunned by Ace. After three months of persistently trying to follow Ace, Luffy eventually came across the Gray Terminal. Luffy overheard Ace and Sabo's conversation about buying a pirate ship. Luffy showed up to them and said that he wanted to be a pirate too. Ace and Sabo then tied Luffy to a tree and decided that they should kill Luffy to keep their secret safe. While Luffy panicked, Ace and Sabo have a hard time deciding who should kill Luffy since both Ace and Sabo have never killed anyone before. They heard someone coming and they untied Luffy and hid in the bushes. Porchemy of the Bluejam Pirates arrived searching for stolen money. Luffy then wandered off and got caught by Porchemy. Luffy yelled out Ace's name. Porchemy, recognizing that name, took Luffy away for interrogation.
Porchemy then dragged Luffy into a small house and tied him up. Luffy stated that he was not going to say anything. Porchemy then hit Luffy with a giant hammer, and discovered Luffy's Devil Fruit powers that prevent him from getting harmed by the hammer. Porchemy then used spiked gloves that are effective against Luffy. However, Luffy refused to yield. Porchemy lost his patience, drew a sword and was about to kill Luffy when Ace and Sabo arrived. They cut Luffy loose and defeated Porchemy. Out in the woods, Ace asked Luffy why he did not tell Porchemy about the whereabouts of Ace and Sabo's treasure. Luffy then told Ace that he wanted a friend, that he had no parents who can take care of him, and most importantly, that he did not want to be alone. After that, Ace and Sabo started to trust Luffy and he joined the two and the trio started making a name for themselves.
Luffy, Ace, and Sabo sharing sake to become "sworn brothers".
Later on, Luffy was shown fighting Ace with the former losing (for the 50th time). After that, along with Sabo, they went to hunt gators, look for trash in the Gray Terminal, and eat and run. However, while they were running from the restaurant, they saw a man that called out Sabo's name. After they escape, Ace and Luffy started questioning him by choking him and forcing him to tell them who the man was. Sabo said that the man who called out to him was his dad, a noble. He told Ace and Luffy that at the time when he was a noble, even though he had parents, he was still lonely. He later joined Ace and Luffy when they shout out their dreams, and said that he wanted to draw a map of the world. However, the trio soon realized that they could not agree to be subordinates of the brother who might become captain on their pirate ship. Ace came up with an idea, telling Luffy and Sabo that they all could become brothers by exchanging sake that he stole from Dadan. As long as they have this bond, it will not matter where they are.
The Sabo Incident
One day, the Bluejam pirates captured the trio, and Bluejam told the trio that Sabo's father hired Captain Bluejam to get rid of Ace and Luffy and bring Sabo back to him. Sabo pleaded with his father to stop hurting his brothers. He said that he will do whatever his father commanded him to do if they stop hurting Ace and Luffy. Ace and Luffy protested, but his father agreed to the deal and ordered Sabo to come home. Sabo agreed to the deal. As he walked away, Ace and Luffy begged him to stay. As Sabo walked away with his father, tears were running down his face.
Luffy and Ace were carried away by the pirates, and they agreed to a deal that the Bluejam Pirates will let them go if they carried cargo to a marked location in Gray Terminal. Later, Bluejam revealed to Luffy and Ace that the cargo that they had carried was oil and gunpowder and that the Gray Terminal will be engulfed with flames. Luffy and Ace reacted angrily but were quickly apprehended by the pirates. Bluejam then informed them that all of them- the brother and the pirates- will die and that the nobles tricked them. They lost their sanity, and Bluejam asked Ace where the brother's treasure was stored. Later that night, the flames started and Luffy and Ace managed to cut themselves loose after being tied up. Luffy and Ace then ran for their lives.
While trying to escape, the two ran into Bluejam once more. Bluejam decided that if he was to die, that he will take the two with him; however, he first asked Ace one last time to reveal the location of their treasure. While Luffy was against it, Ace was willing to let the pirates have the treasure to ensure Luffy's safety. However, after Ace told Bluejam where the treasure was, Bluejam had his crew restrain Ace and Luffy. As Bluejam began to badmouth Sabo, Ace verbally retaliated, spurring Luffy to bite his captor's arm. The pirate responded by slashing him across the face with his sword; before the pirate could finish Luffy off, though, Ace let out a scream of rage, unbeknown to everyone there (including himself) that he was wielding Haki. The blast knocked everyone out, aside from Luffy and Bluejam. Bluejam almost killed Ace, but then Dadan appeared to rescue the two boys. Although she said that they should all run away, Ace refused to run from his enemy. Luffy decided to stay and fight as well, but Dadan forbid of it, remaining in his place. Luffy was then taken back by the bandits to recover at home.
Luffy awoke the next day, crying and saying that he wanted to know if Ace, Dadan, and Sabo were all right. After Dogura went to check the remaining ashes of Gray Terminal, Luffy was very upset for not being allowed to go look for Ace and Dadan. Suddenly, Ace arrived carrying Dadan on his back, Luffy jumped over to Ace, crying in relief for Ace being alive. He said that Luffy should not worry about him being dead, because he won't die, hitting Luffy on his head. Ace told how he and Dadan got out of the burning Terminal after beating Bluejam, and Dadan rested while getting healed with the medicines Ace stole from the town. Later that day, while outside playing with two beetles, Luffy saw Dogura coming back from the forest, and told him that Dadan and Ace were already home. Dogura then told them that while looking for Ace and Dadan, he went to the city, and saw Sabo setting sail on a boat, and then get shot by a ship. Ace attacked Dogura, accusing him for lying, but he replied he's not lying, nor dreaming, and he saw it with his own eyes. Luffy realized that Sabo was not happy at all for coming back to the city, and started to cry, Ace tried to go to the city to avenge him, but was stopped by Dadan, because she was afraid of Ace being killed, blaming the country for killing Sabo, not only the nobles. Since Ace was still too angry, he was tied up to a tree, while Luffy cried the whole night.[3]
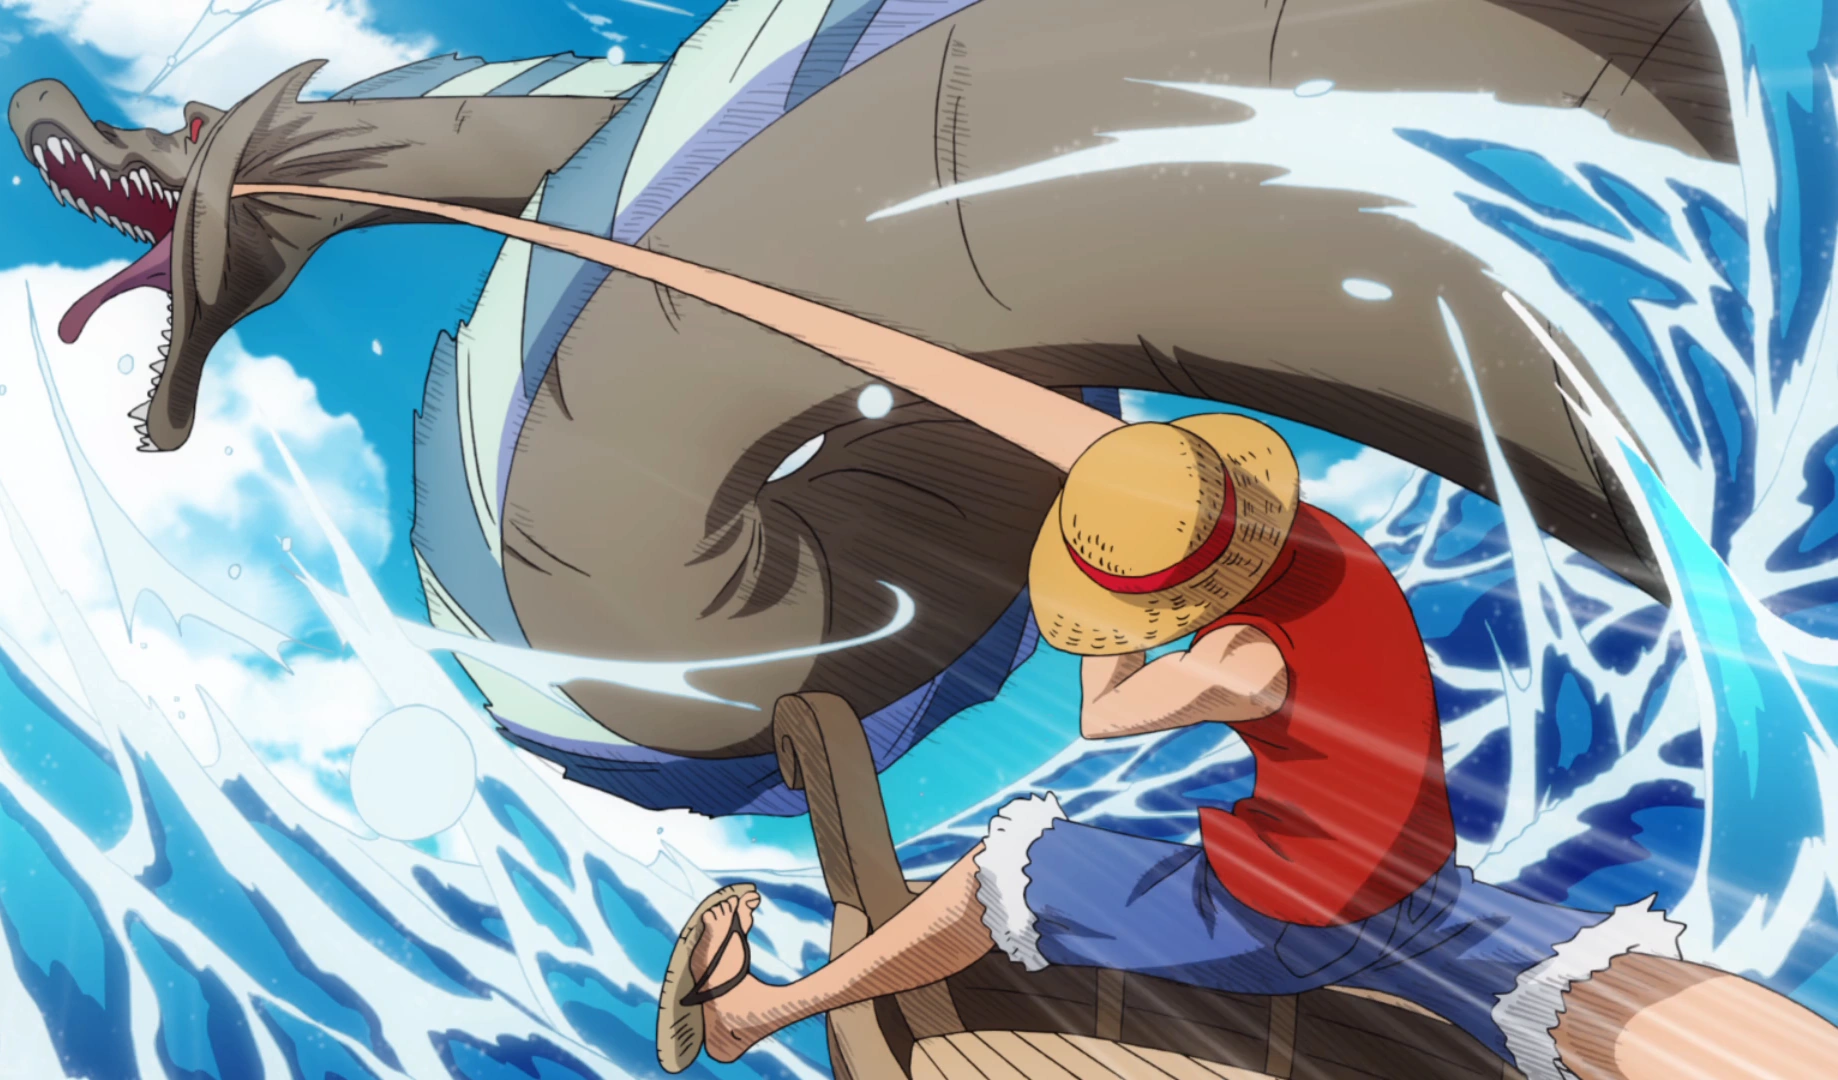
Luffy punching out the Lord of the Coast with his improved Gomu Gomu no Pistol.
A while later, Luffy, still mourning Sabo, asked Ace to never die, to which Ace made the promise to Luffy that he will not leave his "crybaby brother" alone. Luffy then decided that he wanted to be much stronger. After years of training, stealing food from the royal town and growing with Ace, Luffy witnessed Ace's departure at seventeen when he himself was fourteen.
Waiting three more years, Luffy decided to train some more, finally mastering his Gomu Gomu no Pistol and other various attacks. Ready to depart when he turns seventeen, he thanked Dadan and the bandits, then waved goodbye to the rest of the village, saying he was the third, after Sabo and Ace, to depart.
East Blue Saga
Romance Dawn Arc
Luffy's First Battles and Crewmembers

Alvida ineffectively strikes her mace against Luffy's rubber body.
Luffy leaves his village on a small boat with a barrel. He then waits out upon the open sea for the Lord of the Coast. With his attack named "Gomu Gomu no Pistol", he punchs the Sea King in the face. With plans to create his own Jolly Roger and to get at least ten crew members, he then decides to begin his journey as a pirate and sails on. Luffy declares that he will become the Pirate King.[1]
While sailing across the ocean, Luffy accidentally comes across a whirlpool. To escape from it, Luffy hides inside a barrel he brought in his boat as the whirlpool sucks his boat in. He and his barrel are recovered some time later by some pirates who were in the service of Alvida. Luffy then jumps out from his barrel much to their surprise and meets up with Coby. Luffy encourages Coby to follow his dreams of becoming a Marine. After defeating Alvida, Luffy is able to free Coby from his servitude and acquires a small boat. As he and Coby are sailing to the next island so that Coby could enlist in the Marines, Luffy decides to seek a infamous pirate hunter who is imprisoned there. Luffy decides to ask the forementioned pirate hunter, Roronoa Zoro, to become the first of his crew.[4]

Luffy asking the bounty hunter Zoro to become the first of his crew.
Upon arriving in Shells Town, Luffy and Coby learn the truth about Zoro through a small girl named Rika. Rika states Zoro was imprisoned for false reasons, and that Zoro had rescued her mother and herself from Helmeppo, who was harassing the customers in the bar with his pet wolf. [5] With this in mind, Luffy decides to free Zoro from Captain Morgan and Helmeppo.[5] With the promise of giving Zoro's swords back if he would join Luffy's crew,[6] Luffy goes into the Marine Base and earns Morgan's wrath.[6] After witnessing Zoro's unique fighting style, Luffy fights with Morgan and defeats the Marine captain. The Marines, seeing their corrupt leader finally defeated, rejoices and allows Luffy and Zoro to go unpunished. However, since Luffy and Zoro were pirates, the Marines asks them to leave the island.
As they were leaving, Commander Ripper asks about Coby's past. To help Coby fulfill his dream, Luffy pretends that they are not friends and provokes Coby into starting a brief fight between them. After Luffy beat Coby, Luffy and Zoro upon leaving are saluted by Coby and the Marines for their efforts. Luffy and Zoro then sails on to their next destination.[7]
Orange Town Arc
The Encounter with the Clown
While sailing, Luffy was enlightened that neither he nor Zoro knew how to navigate. With this, they decided to get a navigator for their crew. While pondering on this, Luffy decided to get them some food. Luffy spotted a bird named Pinky flying above and decided to catch it. Unfortunately, the bird instead caught him and flew away with Luffy in his beak. Luckily, the bird was shot at and Luffy was dropped in the middle of Orange Town.[8] While in Orange Town, Luffy met up with Nami and asked her to become the navigator of his crew when he learned of her abilities. Nami was initially not thrilled at first at Luffy's offer and instead tricked him into being captured. Nami tied Luffy up and brought him before Buggy The Clown. Nami lied and said that Luffy was her boss and ordered her to steal Buggys charts and asked if she could join his crew, which he agreed. Then a confused Luffy was locked in a cage while the crew partied. Buggy then ordered Nami to fire a cannon ball at Luffy which Nami refused. Just as she was about to be attacked, Zoro came to Luffy's rescue. Zoro then defeated most of the crew. Luffy and his companions were able to escape from Buggy. Unfortunately, Luffy had been locked in a cage and the three had learned that Buggy had eaten the Bara Bara no Mi, as well as Zoro gaining a not-quite-lethal stab wound.

Luffy defeats Mohji with one punch.
Luffy decided to battle against Buggy and his crew. Using one of Buggy's cannonballs against him, Luffy was able to take out most of Buggy's crew. Later, Mohji and his lion Ritchie show up and battles Luffy. Luffy easily takes out Ritchie with Gomu Gomu no Tsuchi. Luffy is then angry with Mohji for destroying Chouchou's treasure and defeats Mohji with one punch. With most of Buggy's crew defeated, Luffy and Zoro battled against Buggy and his second mate, Cabaji, respectively. During the battle, Luffy's hat got torn and Luffy learned of Buggy and Shanks serving together on the same pirate ship in the past. With fierce determination for his treasure, Buggy decided to attack Nami as well. Luckily during the fray however, Nami was able tie Buggy's body parts up so that Luffy could deliver the final blow.
After defeating Buggy, Luffy and his companions found themselves in a situation. Due to Luffy knocking out the village chief, Boodle, the villagers got mad at them and decided to chase them. Luckily for Luffy and his companions, Chouchou decided to repay his debt with Luffy by stopping the angry villagers. As Luffy and his companions decided to sail on to the next island, they were thanked by Boodle for all their hard work. Luffy, with his new navigator, Nami, then sailed on to the next destination.[9]
Syrup Village Arc
The Man in a Chest
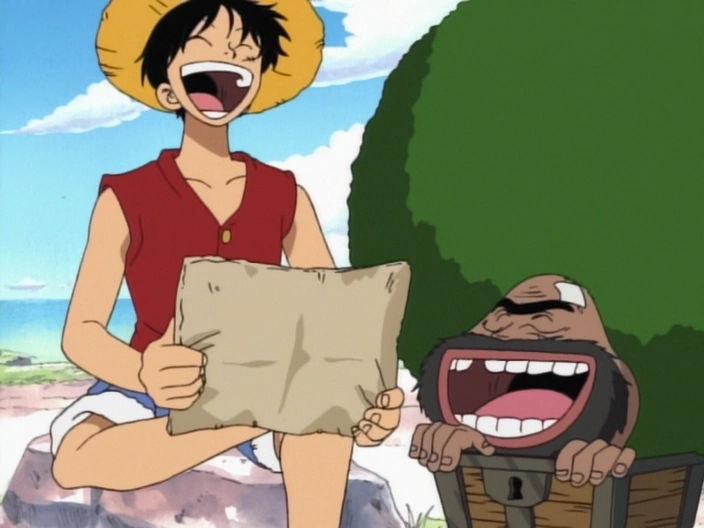
Luffy and Gaimon laughing over their mutual inability to read a map.
After sailing for awhile and getting his hat re-stitched thanks to Nami, Luffy and his crew then went to an island in hopes of finding some food and possibly a new crew member. The island they came however was deserted and was apparently filled with all sorts of strange animals. As Luffy and Nami explored the forest, a mysterious voice called out to them. This voice threatened them with forest judgment unless they left the island. Luffy was then shot at but was unaffected due to his powers. Nami and Luffy then found that the shot came from a man with a large green afro in a box, Gaimon. After sorting out the misunderstandings, Gaimon, Luffy, and Nami talked about One Piece and the Grand Line. Gaimon then explained his predicament and his past. Luffy, learning about this, decided to help Gaimon. Luffy, with his powers, scaled the hill where Gaimon's treasure was supposedly located. However when he found the treasure boxes, Luffy revealed that they were unfortunately empty. Gaimon however, was grateful that he was able to learn the truth before he died. Afterwards, Luffy then decided to continue on his journey. As Luffy and his crew were leaving, Luffy asked Gaimon if he could come along too. Gaimon replied however that could not join them as he had some responsibility for the animals on the island. With some thanks from Gaimon, Luffy then sailed off to the next island. In the anime, these series of events happened after Luffy and his crew defeated Kuro.[10]
Meeting a Liar
Luffy and his crew then came upon Gecko Islands. Upon landing, they met Usopp, the local troublemaker of Syrup Village. After some misunderstanding about coming to the island, Usopp told Luffy and his crew that they could get a ship from the owner of the large mansion in town.[11] Luffy and his crew, following Usopp,[12] then learned of Usopp's father and his relationship with the mansion's owner, Kaya. Later while talking with Usopp about his father on a cliff, Luffy and Usopp overheard a scheme to both kill Kaya and steal her fortunes being discussed by the caretaker, Klahadore, and Jango.[13] They learned that the caretaker was actually Captain Kuro and he had been planning this for the past three years. Luffy, not liking this, revealed himself to Kuro and Jango, and accidentally got hypnotized by Jango. Luffy then fell off the cliff. Luckily, because of his rubber body, Luffy was able to survive.[14]
Later upon learning that no one would believe Usopp, Luffy and his crew decided to help Usopp defend his village.[15] They then set a trap for Kuro's crew at the coast where Kuro and Jango discussed their plans. Early the next day however, they suddenly realized that the pirates would attack from the other coast. Luffy realizing this, asked Usopp for directions and dashed ahead. Unfortunately, Luffy misinterpreted on where to go and ended up going back to the village.[16] Luffy, along with Zoro, were then luckily able to find the right coast and give Nami and Usopp a hand.[17]
In the midst of the battle, Luffy accidentally got hypnotized by Jango again. Luckily, this was a good thing as Luffy was able to beat most of the pirates. Just as Luffy was about to crush the pirates with the figurehead of Kuro's ship, he was hypnotized once again and fell asleep.[18] Luffy was then awoken by Nami and got one of Jango's rings lodged at the back of his head. In the anime, this scene was altered so Luffy instead caught it in his mouth.[19]
Luffy defeats Kuro with Gomu Gomu no Kane.
Luffy then seeing Usopp's determination to save Kaya and his village, decided to fight Kuro who had gotten there.[20] Kuro questions why Luffy, an outside to the village, would fight upon their behalf. Luffy responds, telling him that there is someone in the village he doesn't want to die.[21]
In the midst of the fight with Kuro, he and the caretaker discussed briefly on what a pirate was. With firm belief, Luffy boldly told Kuro that Usopp was better than him. After witnessing Kuro's ability and the slaughter of some of Kuro's own crew,[22] Luffy defeated Kuro. Luffy then threw an unconscious Kuro back to his crew and told them to remember him.[23]

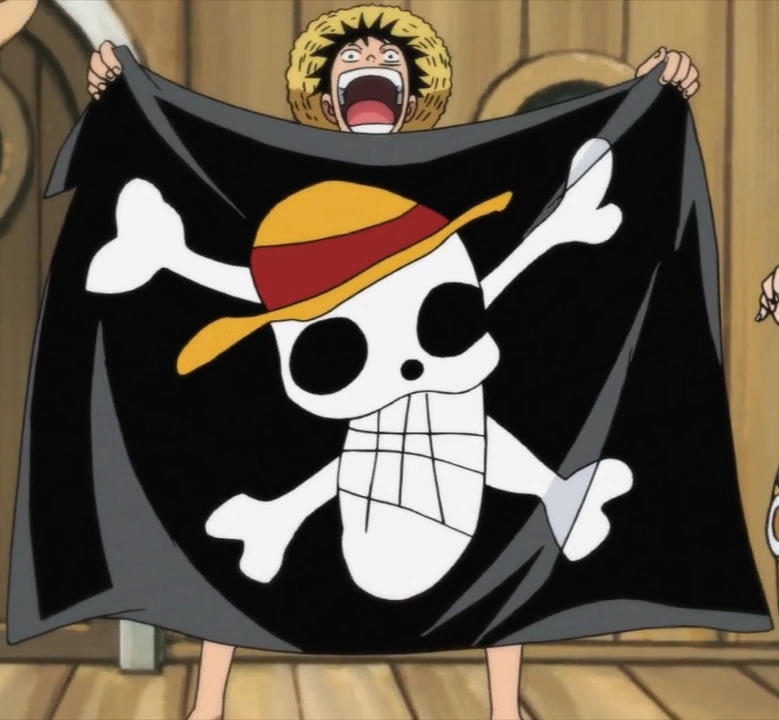
Luffy's attempt to draw his Jolly Roger.
Later, after everything settled down, Luffy and his crew were given a ship for helping save Kaya. The ship, the Going Merry, impressed Luffy a lot. Luffy and his crew then saw Usopp rolling down the hill with a large backpack. They then offered Usopp a place on the crew for which Usopp accepted. Luffy, his crew, and his new crewmate, Usopp, then sailed off on their new ship.[24]
While sailing on the Going Merry, Luffy decided to draw his Jolly Roger. His drawing, however, was poorly executed. Everyone aboard joked about it failing to strike fear into opponents hearts when they see Luffy's flag. Fortunately, Usopp was able to draw a better version of Luffy's design. With this, Luffy's crew decided to paint it on the sails.[25]
Great Gold Pirate
The following events are Non-Canon and therefore not considered part of the Canon story.
On the Going Merry, while Luffy and Zoro was starving to death, a group of thieves came to steal their treasure supplies. Luffy wrecked their getaway boat, which had a kid who was the hostage of the thieves. Suddenly, a pirate ship lead by a large, ferocious, Aztec Indian like man named El Drago, appeared. The thieves worked for his pirate crew, so, El Drago, using his Devil Fruit ability, while aiming at Luffy, destroyed the thieves' getaway boat. Luffy and the kid fell in the sea and Zoro jumped in to save them. As a result, Luffy and Zoro were separated from Nami and Usopp.[26]
The kid's name was Tobio and he wanted to become a pirate like Woonan, the Great Gold Pirate, who according to the legend obtained almost one third of the world's gold and disappeared with it to a remote island. Tobio lived with his grandfather, Ganzo, who owned a floating Oden stand, so Luffy and Zoro went there hastily to eat. There, Luffy and Zoro learned from Tobio that El Drago was determined to find Woonan's loot, too. And he had the treasure map which had the coordinates of the location of Woonan's treasure in possession. So, Luffy decided he also wanted to meet Woonan. When Luffy and Zoro were about to leave, Gonzo told them that it would cost them for all the Oden they ate. And they so happened not to have any money on them at all. So they were stuck with the bill and Gonzo tied them in chains.[27]
Then, while Tobio was daydreaming in the soars of the island they believed Woonan disappeared to, a small breeze threw Luffy's hat to him. Then, Tobio argued with his grandfather and ran in the forest with Luffy's hat. As a result, Luffy, while chained with Zoro, ran after Tobio and when they found him, they were all lost in the forest. Meanwhile, El Drago, who Usopp and Nami as hostages, found Woonan's castle and tried to bring it down so he could find the treasure. With all the ruckus, Luffy was able to find El Drago and his crew and while still chained with Zoro he escaped with Usopp, Nami and Tobio. Nami managed to steal the treasure map from El Drago, unlocked the chains and the crew realized where the treasure actually was. They all went to find it and while climbing a mountain, they found Ganzo, who turned out to be a childhood friend of Woonan's and realized where the treasure was. Luffy and company eventually found a house at the top of the mountain, but shortly afterwards they were attacked by El Drago and his pirate crew. Luffy fought with El Drago and managed to defeat him by throwing back his own attack.[28]
Finally, with El Drago's pirate crew defeated, Luffy and the others went inside the house hoping to find Woonan and the treasure at a hidden chamber inside. It turned out it was the resting place of Woonan himself and that he returned all the gold he stole to its rightful owners. So, Luffy and the Straw Hats bid farewell to Tobio and Gonzo and sailed away to their next adventure.[29]
Concludes non-canon section.
Baratie Arc
Battle for the Baratie
A short time after Jolly Roger was painted, Luffy began practicing firing the cannon. Luffy's shots were horribly misplaced and he missed hitting the island all together. Usopp helped Luffy and they were able to shoot a nearby island on their first try. Later, as Luffy and his crew were discussing who they should get next, somebody had climbed aboard the ship and called out to them.[30]
After a brief bout with Luffy, Johnny, the one who had climbed aboard, revealed that he came aboard to get at people who fired at him and Yosaku while they were on the nearby island. Luffy and Usopp, realizing their mistake, asked for forgiveness. Johnny explains Yosaku had become sick and was bleeding from previous injuries. Nami explained that Yosaku was suffering from scurvy. Luffy and Usopp helped Yosaku gain his strength back by giving him lime juice. Seeing this, it was mutually agreed amongst Luffy's crew that they need a chef to supply them during their long voyage. Johnny, grateful for their help, told Luffy where he could get a chef. With this info, Luffy and crew then sailed to the sailing restaurant, Baratie.[31]
Upon arrival in Baratie, Luffy and his crew unfortunately met up with the Marine Lieutenant, Ironfist Fullbody. With orders from Fullbody, his men shot a cannonball at Luffy and his crew. Luffy luckily diverted it away with his Gomu Gomu no Fusen technique. Unfortunately, he redirected the shot to the restaurant ship. For damaging the ship, Luffy was brought before the restaurant's owner, Zeff. Since Luffy had no money at the time to repay for the damages done, Zeff asked Luffy to repay him by working in the restaurant for one year.[32]
Luffy, not wanting to wait for a whole year, tried to negotiate with Zeff. Unfortunately the negotiations did not go so well and the two of them ended up creating and falling through a hole in the restaurant. The two then landed in between an argument between the second head chef, Sanji, and Fullbody. Luffy then watched as Gin, one of Fullbody's prisoners demanded food, but was instead denied and kicked out. After witnessing Sanji give the pirate some food despite having no money, Luffy declared that he had found a good chef for his crew.[33]
As Luffy argued with Sanji about the latter joining the former's crew, Gin interrupted and warned Luffy not to go to the Grand Line. Later, after Gin left, Luffy was put to work. Only making things more difficult in the kitchen, Luffy was told to take some orders from the customers. Upon encountering the rest of his crew relaxing in the restaurant, he tried to dirty Zoro's drink with his booger. This scheme however failed as Zoro easily saw through this plot and shoved the tainted water down Luffy's throat.[34]
Two days of work later, the Dreadnaught Sabre, the flagship of Don Krieg, the most feared pirate of the East Blue and Gin's captain, came to the Baratie. Its owner demanded food and, after he was fed by Sanji, claimed that he would take over the restaurant ship.[35] As he announced his plans, Chef Zeff appeared and offered food in exchange for a peaceful agreement to leave. Krieg was shocked to learn "Red Leg" Zeff was still alive and told Luffy and all aboard about his past as a famous pirate who successfully sailed the Red Line.[36]
The Baratie was suddenly attacked and they headed topside to investigate.[37] Luffy learns that Nami has stolen their treasure and has escaped on their boat. He heads back to the Baratie with Zoro.[38]
After witnessing a fight between Zoro and Dracule Mihawk,[39] who had chased after Krieg and destroyed his ship, Luffy told Usopp, Johnny, Yosaku, and Zoro to try to catch up with Nami, who had taken the Going Merry. Luffy then decided to repay his debt to Zeff by fighting off Krieg's pirates which Zeff accepted.[40]
While Sanji battled a man claiming to be invincible and to have never bled in battle, Pearl, Luffy is attacked by Don Krieg. He is sent reeling from an attack and is tossed into the back of Pearl's head, causing him to bleed for the first time ever.[41] Scared at the sight of his own blood, Pearl then threatened to burn everyone including Luffy due to fear. Luckily, with Sanji's help and one of Don Krieg's attacks redirected by Luffy's Gomu Gomu Bazooka, Pearl was knocked out.[42]
Gin, who had taken Zeff hostage, tried to reason with everyone to back down from the fight.[43] After hearing Sanji's explanation for why he would die for the Baratie, Luffy destroys the Baratie's fin in order to stop the pirates from attacking.[44] Luffy then explained to Sanji that he was not repaying Zeff at all by letting himself die.
Luffy battling Krieg.
As Gin and Sanji battled, Don Krieg decided to fight Luffy. He fired a shuriken bomb and impaled Luffy with several sharp spikes. However, Luffy continued to assert that he believed he was stronger than Krieg.[45] As Krieg prepared to launch his poison bomb, MH5, Luffy stole two gas masks from two of Krieg's men for Sanji and Gin. Unable to find one for himself, Luffy found a gas mask laying beside him. After the bomb was fired and the gas subsided, it was revealed that Gin had given his mask to Luffy.[46] Enraged by Krieg's act, Luffy then charged at Krieg and resumed their fight.[47]
Luffy breaks Krieg's armor.
Although Krieg revealed another secret weapon, a spear with an explosive tip, Luffy still managed to press on, shattering the tip of the spear.[48] He finally managed to crack Krieg's armor with a Gomu Gomu no Bazooka.[49] However, Krieg had one last trick up his sleeve. With a net, Krieg attempted to drag Luffy with him into the ocean.
In retaliation, Luffy grabbed Kreig's face with his legs and slammed him onto the porch of the Baratie. With this, Luffy finally defeated Don Krieg. However, despite Luffy defeating Krieg, he still fell into the ocean, making it more of a stalemate. Luckily, Sanji then dove in after Luffy and thus saved him from drowning.[50]
After awakening from being knocked out conscious by falling into the ocean, Luffy was told by Sanji of Gin's final words to Luffy. Seeing as his debt to Zeff was finally repaid, Luffy then once again tried to convince Sanji to join his crew. Though rejected once again by the chef, Luffy and Sanji talk about Sanji's dream of finding All Blue. After discussing about Sanji's dream for awhile, Luffy and Sanji decide to join the other chefs for a meal.[51]
During the meal, Zeff and the other chefs angered Sanji by saying the soup he made was bad. Luffy on the other hand, thought the soup was good and asked them why they acted as such. Zeff and the others then explained themselves to Luffy and asked him to take Sanji along with him.[51] Luffy however, refused to take Sanji along unless he agreed to go by his own free will. Just as Luffy and the chefs were discussing, a half eaten Yosaku came barging into the restaurant.[52]
After Luffy freed Yosaku from the Panda Shark, Yosaku explained to Luffy that the others needed his abilities to deal with the situation with Nami. Just as Luffy and Yosaku were about to leave, Sanji decided to join Luffy's crew. After making some preparations, acquiring the Shimashima Shopping to travel on, and witnessing Sanji's farewell to Zeff and the other chefs, Luffy, Yosaku, and Luffy's new chef, Sanji, sailed on to find Nami.[53]
Arlong Park Arc
Encounter with the Worst Man of the East Blue
Sanji laughing at Luffy's attempt to draw what a Fishman looks like.
Luffy sailed to the last known location of Nami. On their journey, he was informed by Yosaku that Nami was headed to a place called Arlong Park, which was ruled by a fishman named Arlong. Arlong was originally under one of the great lords of the sea, Jinbe a fishman Shichibukai, who was very strong compared to Don Krieg. Luffy however did not pay much attention to what Yosaku was saying and instead attempted to draw some interpretations of what a fishman would look like. Being unable to grasp the situation fully any further, Luffy then simply just stated that they will understand it when they get there.[54] With that, Luffy decided to join in a meal prepared by Sanji. As Luffy and company were enjoying the meal, a giant sea cow called Mohmoo appeared before them and attacked them. The monster however was beaten off easily by Luffy and Sanji. With the monster subdued, Luffy and company decided to continue their meal.[55] After finishing their meal, they hooked Mohmoo up to the ship and used him to travel on further to Arlong Park.[56]
Eventually Luffy and company reached Commi Island where Arlong Park was located. However, due to some unfortunate events, the Shimashima Shopping was hurled further into the island, through a forest, and onto Zoro.[57] After recovering from the wreckage, Luffy was then informed by Zoro and further by Johnny about the current situation, that Usopp had been captured and then killed by Nami.[58] Nami then suddenly showed up where Luffy and company were. With her on the scene, Luffy tried to reason with Nami to come back to his crew. Nami however refused Luffy's pleas and told him and the rest of his crew to get out before it is too late. Unable to reason any further, Luffy simply then decided to fall asleep in the middle of the road with the intention of not leaving the island without Nami. After a while, Luffy woke up to find out that Usopp was alive and in actuality saved by Nami. Luffy and crew were then greeted by Nami's sister, Nojiko, who decided to tell them why Nami was with Arlong's crew. This she hoped would explain things to them so they could then leave.[59] Luffy however refused to listen to Nami's past as it would mean that he would then have to leave. With that in mind, Luffy alone left as Nojiko told about Nami's past to the rest of his crew.[60]
As Luffy wandered into Cocoyasi Village, he noticed a pinwheel on top of Genzo, a town officer. After a while, Luffy noticed a commotion in town. Seeing Nami amongst the other people, Luffy offered to help. However much to his confusion, she once again told at him to leave and hurriedly left out of town leaving Luffy to ponder what exactly was happening.[61]
Destruction of Arlong Park

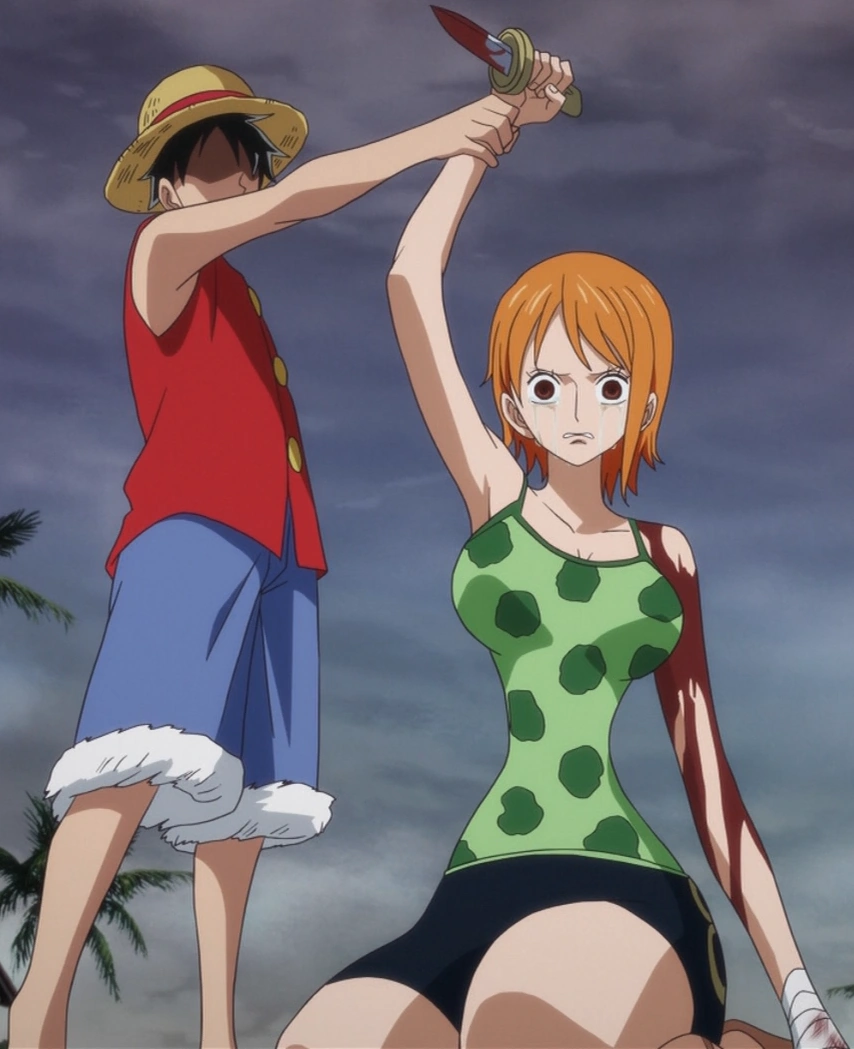
Luffy stops Nami from stabbing herself in anger over Arlong's treachery.
Later, Luffy witnessed Nami stabbing her Arlong tattoo with a pair of scissors. He stopped her and was once again told to leave by a crying Nami. However, Nami gave in and finally asked Luffy for help. With that, Luffy placed his straw hat on her head and agreed to help her. With the rest of his crew, Luffy then barged into Arlong Park and called out for Arlong.[62] Within Arlong Park, Luffy and his crew began fighting against Arlong and the rest of his fishmen.
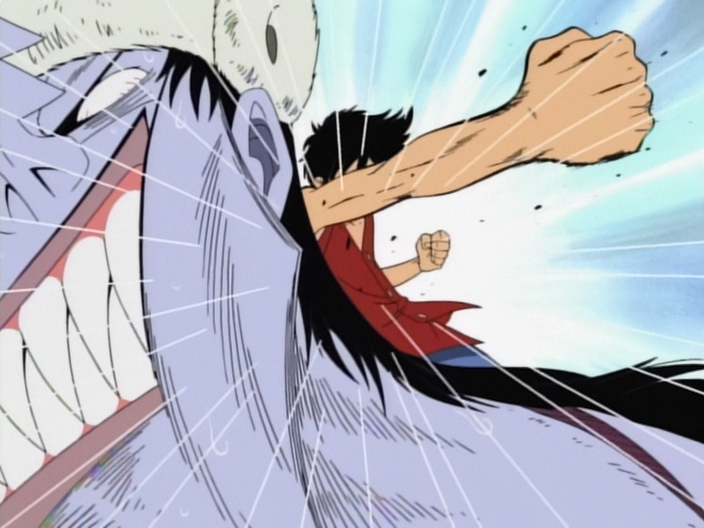

Luffy starts his battle with Arlong by punching him.
In the midst of the battle, the octopus fishman, Hatchan, called out for Mohmoo to aid in the fight. As the monster came forward, Luffy embedded his feet in the ground and twisted his body. He then grabbed onto Mohmoo's horns and spun the monster off far away. As Luffy spun the creature, the majority of Arlong's fishmen were all completely knocked out.[63] While the attack was able to take out most of the fishmen, it left Luffy unable to move due to his feet being stuck in the ground. As Luffy's crew attempted to protect him from the fishmen's attacks, Arlong approached towards Luffy. Arlong pulled up luffy while still stuck in the cement block and announced he was aware of the devil fruit weakness. He threw Luffy into the pool knowing that Luffy would be unable to move in the water. Luffy immediately tried to stop Arlong before the fishman could throw him in. His efforts were in vain, however, and Luffy was thrown into the water with the cement block encasing his feet by Arlong.[64]
Unable to do anything but hold his breath, Luffy sank to the bottom of the pool as the rest of his crew were forced to deal with their fishman opponents. Fortunately, however, Genzo and Nojiko decided to dive in after Luffy in order to rescue him.[65] Initially, they could not do anything to help Luffy because of the cement block. However through quick thinking, they were able to at least keep Luffy from drowning by pulling his head up to the surface. This way they could get the water out of Luffy's system as they figured out a way to free him from the block.[66] After several incidental events with Luffy's crew, Sanji then dove into the water.[67] and broke the block encasing Luffy's feet. With his feet freed, Luffy's neck snapped back to normal and his body was catapulted into the air. With himself saved, Luffy immediately saved Zoro from Arlong and began pummeling the fishman with several of his attacks. Arlong however merely got back up from the attacks and the battle between Luffy and Arlong began.[68]
Arlong, as he attacked, explained to Luffy that humans are completely inferior to fishmen due to what they are incapable of doing. Luffy however countered by stating that he himself is incapable of doing certain things but he has friends who he can depend on for such problems. As the argument continued, Luffy was able to smash Arlong in the face and broke the fishman's teeth. Arlong however rectified the situation by pulling out his broken set of teeth and growing a new one. The fishman then pulled out two sets of his teeth and attacked Luffy with them.[69] Luffy managed to grab a nearby fishman and use him as a shield. As Luffy witnessed this, he came up with a good idea. The next moment that Luffy got an opportunity, he kicked a set of teeth out of Arlong's mouth and began fighting with them in his mouth like Arlong. While Luffy then got a good shot and bit Arlong with his own teeth, the attack however did not do much damage and Arlong countered instead by biting Luffy's arm. Fortunately, however, Luffy slammed Arlong onto the ground before he could do any real damage.[70]
As Luffy stood up to recover from that last attack from Arlong, he noticed that Arlong had dove into the pool nearby. Luffy then found himself dodging Arlong's high speed attacks using his nose like a spear. After several attacks, the fishman dove back to the water to repeat his barrage of attacks on Luffy. Luffy however countered Arlong's attacks by catching him with his hands positioned like a net and kicked the fishman in the chest onto the ground. This attack however angered the fishman and Arlong began to attack Luffy more viciously. With Kiribachi, a massive sword with a saw for a blade, Arlong then chased Luffy up across Arlong Tower. The two then ended up in the highest room of the tower, the room where Nami was forced to draw maps for Arlong.[71]

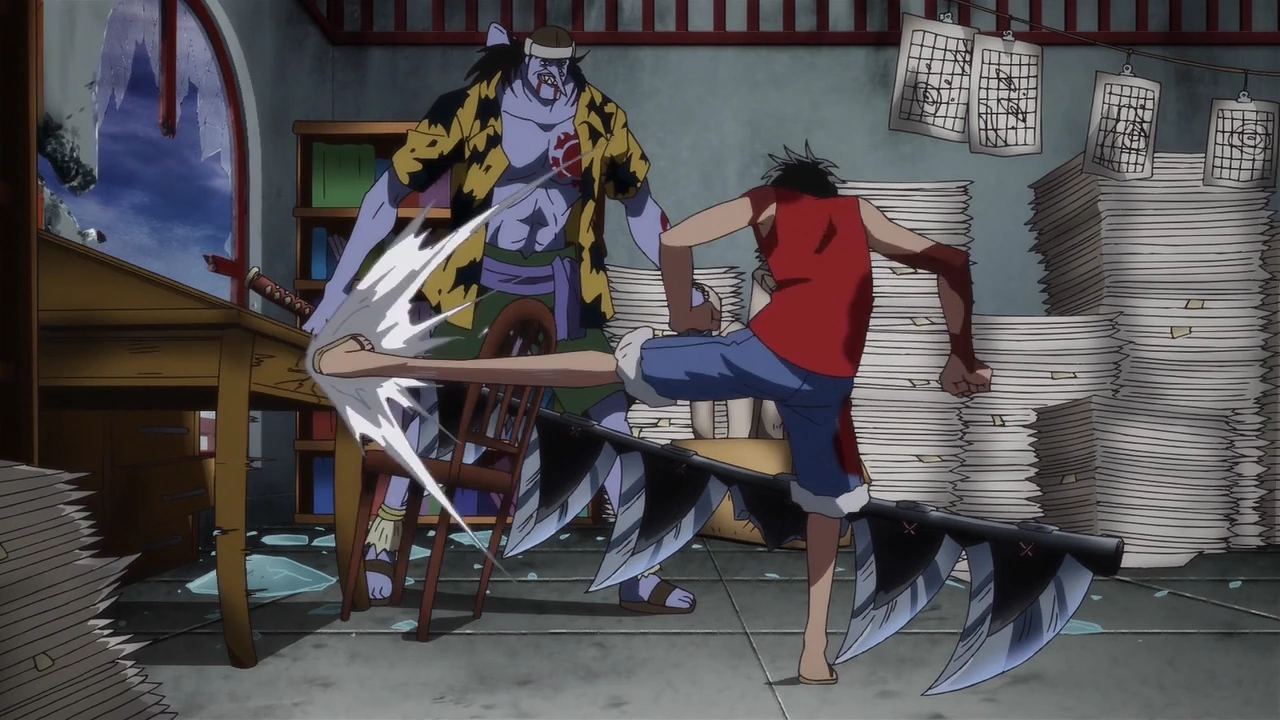
Luffy wrecks the cartography room where Arlong had used Nami in.
Within the room, Luffy was then explained by Arlong what the room was used for, and how Nami had been used for the last eight years to fulfill the fishman's desires. Luffy remained relatively calm, until Arlong said that Luffy could not "use" Nami like he could, which enraged Luffy.[71] With this, Luffy broke Arlong's Kiribachi and started wrecking the room. Arlong, angered by this, grabbed Luffy and bit him. Luffy however then countered by breaking Arlong's nose, stating that he did not care if the fishmen are so great or about charts, but that he now knew how to help Nami. Luffy then said that she hated being in the room and he was gonna destroy it for her. Although Arlong lunged at Luffy with a spinning bite attack and bit deep into Luffy, he managed to swing his outstretched leg down and send him straight to the bottom of the tower through several floors of concrete. With that, Luffy had defeated Arlong. That last attack however broke the stability of the entire tower and the whole thing collapsed with Luffy still inside it.[72]
With Arlong and his gang defeated, and Arlong Park completely destroyed, Luffy rose from the wreckage and proclaimed Nami his friend. Before they could celebrate for long, the Marine Captain Nezumi decided to take everything that Arlong had stolen. Although the Marine was beaten up and sent packing away with his men, he took out his vengeance by reporting Luffy in to his higher ups.[73]
After the whole commotion at Arlong Park, Luffy was sent to Dr. Nako to heal his wounds along with the others who were injured. As Luffy watched the doctor re-stitch Zoro's wounds, the doctor gave Luffy the idea that his crew should have a doctor. For the next several days, Luffy and his crew then celebrated alongside the people of Commi Island over being finally freed from Arlong. As Luffy was looking for some more meat to eat in the party, he came across Genzo at Bell-mère's grave. There, Luffy promised to Genzo that he would take care of Nami and not hurt her feelings.[74]
After all the partying, Luffy and crew were ready to set sail once again. They thus bid their farewell to the villagers of Cocoyasi Village as well as Johnny and Yosaku. Nami came running towards the Going Merry and told them to immediately raise the anchor. As Nami went through the villagers and jumped on board the Going Merry, Luffy and the rest immediately realized that she had stolen the wallets of the villagers as she passed through. After this final hilarious incident, Luffy and his crew then set sail once again with Nami.[75]
Loguetown Arc
Arrival at Loguetown
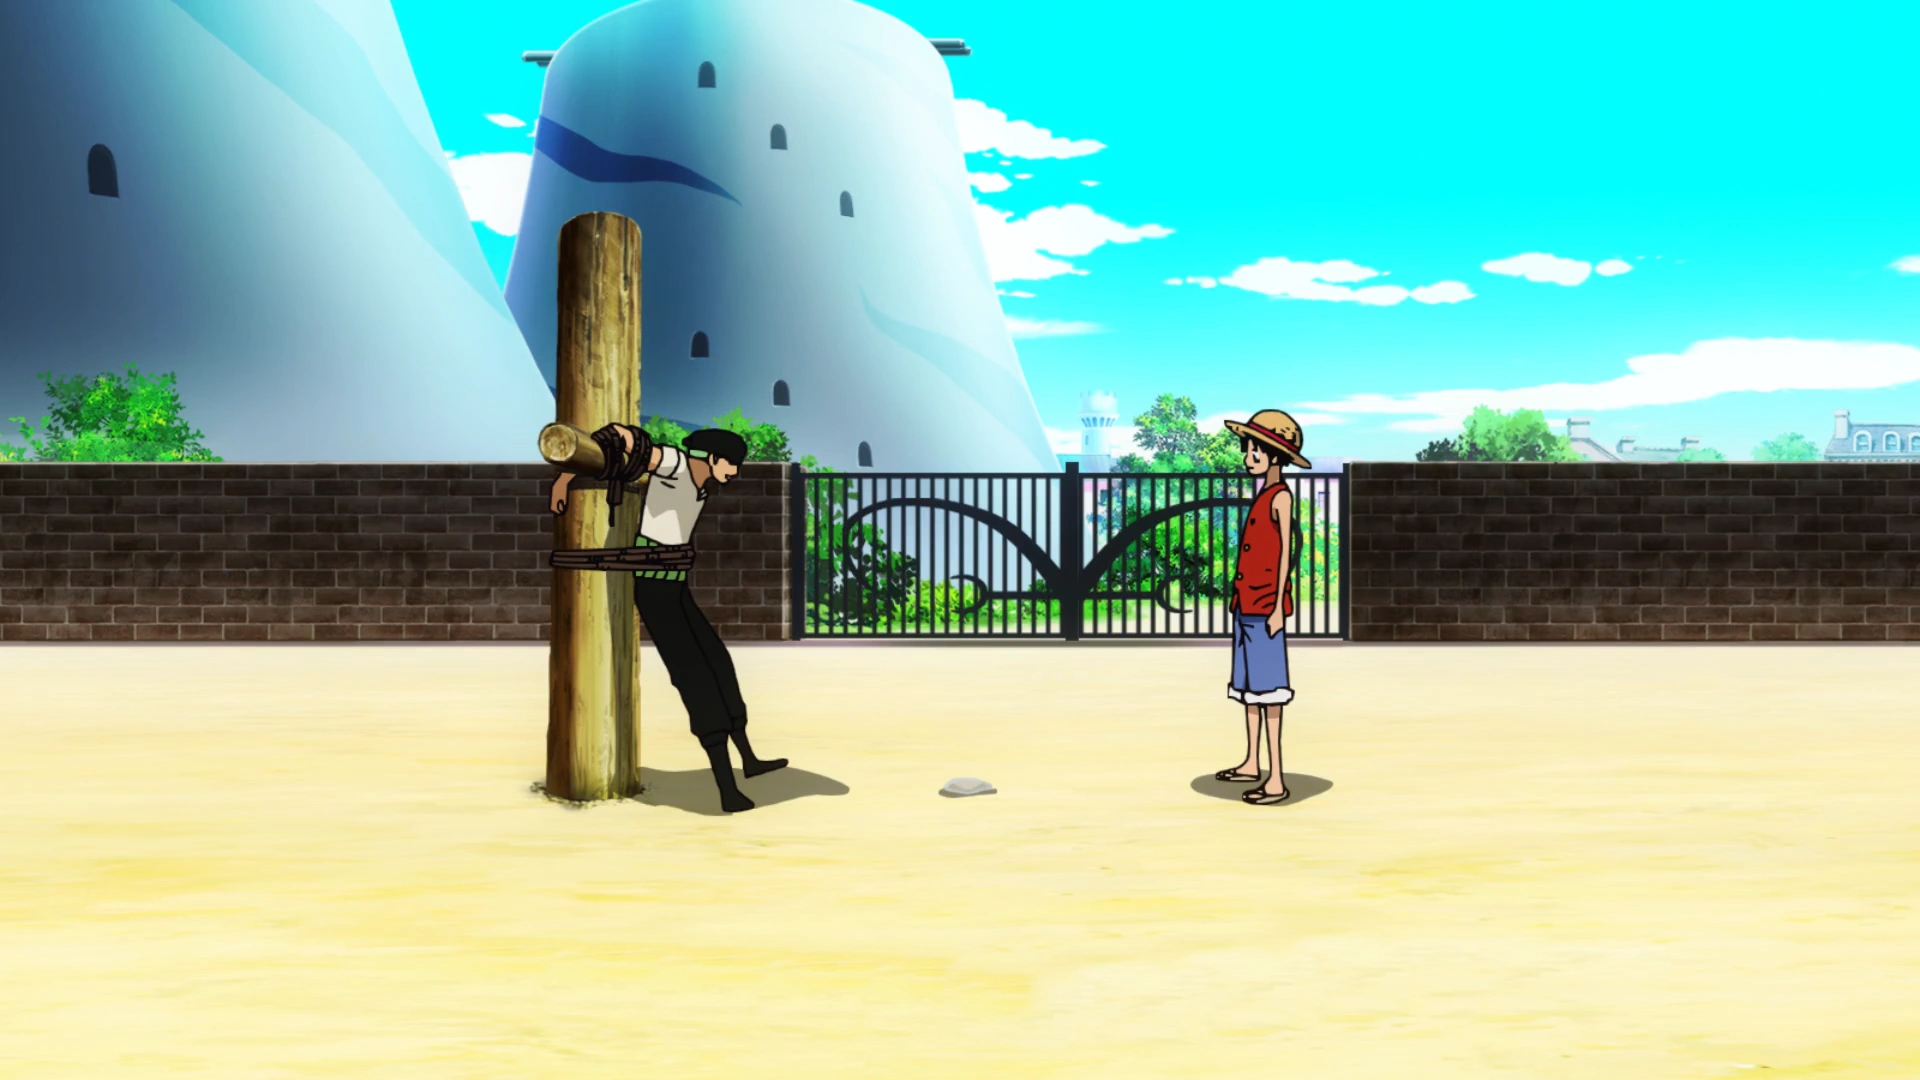
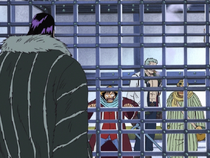
Luffy smiling as he is about to be executed by Buggy.
As Luffy and crew sailed towards the Grand Line, they were startled by a wanted poster included within a newspaper bought by Nami. The wanted poster was of Luffy and included his first bounty of ![]() 30,000,000. Luffy had become the most wanted pirate in all of the East Blue.[76] As the crew sailed on, the island where Loguetown was located came into sight. Wanting to see the place where Gol D. Roger was born and executed, and also to refresh the crew's supplies for the voyage ahead, Luffy and crew decided to dock in the place. Upon arriving there, Luffy decided to visit the scaffold where Gol D. Roger was executed.[77]
30,000,000. Luffy had become the most wanted pirate in all of the East Blue.[76] As the crew sailed on, the island where Loguetown was located came into sight. Wanting to see the place where Gol D. Roger was born and executed, and also to refresh the crew's supplies for the voyage ahead, Luffy and crew decided to dock in the place. Upon arriving there, Luffy decided to visit the scaffold where Gol D. Roger was executed.[77]
As Luffy explored the scaffold, he was ambushed by Buggy and his crew, and a now skinny Alvida. Luffy was then all of a sudden trapped in a wooden restraint by Cabaji and sentenced to death by Buggy.[78] With the execution being publicly shown atop the scaffold before all of the people of Loguetown, Luffy was asked by Buggy if he had any last words. To this Luffy shouted out that he will become the next Pirate King. (This was seen by Bartolomeo, although not revealed until much later.) As he stated this, Zoro and Sanji came to Luffy's rescue. However, despite their efforts to get to their captain through Buggy's crew, they were not fast enough. Despite his inescapable situation, Luffy merely smiled and said he was sorry as Buggy's sword came down. However just as Buggy's sword was about to decapitate Luffy, a lightning bolt suddenly struck the platform, shocking Buggy and freeing Luffy.[79] As Luffy ran to his ship through the raging storm that suddenly appeared in Loguetown, Luffy was stopped by the Marine Captain, Smoker. Despite all his efforts Luffy was unable to fend off Smoker and was caught. Just as Smoker was about to gain the upper hand on Luffy, Dragon, Luffy's father, stopped him (unbeknownst to Luffy). A big gust of wind then came by and freed Luffy from Smoker.[80]
Luffy looks back at how far he and his crew traversed up Reverse Mountain.
Not knowing exactly what happened, Luffy continued escaping towards his ship. Back onboard the Going Merry with the rest of his crew, they decided to enact a ritual before going to the Grand Line. After escaping from the Sea Kings dwelling there, Luffy and crew continued sailing through the storm and towards the Reverse Mountain.[81]
Luffy and his crew soon came upon the mountain and headed into the canal that was the entrance. Despite some tough maneuvering which was helped by Luffy using his Gomu Gomu no Fusen technique to bounce the Going Merry away from the gate, the ship was able to go into the canal. Within the canal, they then rode it up to the top of the mountain. Reaching the top, Luffy and crew saw and entered into the Grand Line.[82]
Alabasta Saga
Reverse Mountain Arc
Traversing Reverse Mountain and Meeting Laboon
Nami navigates the Straw hats up the Reverse Mountain where the four ocean currents converge creating an upward draft.[83] They came to an unexpected surprise, a gigantic whale was in their way. Fortunately, Luffy was able to slow down the Going Merry before it could hit the whale by firing a cannon. However in the process, Luffy's favorite seat, the Going Merry's figurehead, was broken. Angered by this, Luffy punched the whale's eye to the shock of the rest of Luffy's crew. The whale in response to Luffy's attack swallowed the Going Merry. Fortunately Luffy was able to grab the whale's tooth and jump on to it's back before it could swallow him along with his ship and his crew. As Luffy desperately tried to persuade the whale to spit out his ship and his crew while on it's back, Luffy found a hatch on the whale's back leading into the very whale itself.[84]
Unable to do anything else from the outside, Luffy entered the whale from the hatch. While inside the whale, Luffy accidentally bumped into two strangely dressed characters and into the whale's stomach as the whale began thrashing at the Red Line from the outside. Within the whale's stomach, Luffy was reunited with his crew and witnessed a scene between the two characters he bumped into earlier and an old man living in the whale. From the scene, Luffy learned that two characters, Miss Wednesday and Mr. 9, were planning to kill the whale for food and not even allow the old man, Crocus, to stand in their way. Seeing this and Crocus' attempts to save the whale, Luffy took out the two trouble makers. For doing this, Luffy and his crew were led out of the whale by Crocus.[85]

Luffy paints over Laboon's scars as a mark of their promise to meet again.
As Luffy's crew and ship were led out through a canal in the whale and outside to nearby cape, Luffy and his crew were told about the whale, Laboon's tale. From it, Luffy learned that Laboon had been waiting for over fifty years for some pirate friends of his who left him behind in the cape to circle the Grand Line. Luffy also learned that after Laboon heard in disbelief that the pirates might have abandon him, the whale was ramming the mountain itself in a futile attempt to reunite with them. Seeing Laboon's loyalty, Luffy decided to ease the lonely whale's pain, by ramming the Going Merry's mast into an open wound. Having caught the whale's attention, Luffy and the whale began to battle. In the middle of it however, Luffy told Laboon that they'd have to put on hold since he's planning to circle the Grand Line. With this statement, Luffy touched Laboon's feelings and the whale in response agreed. Having given hope once again to Laboon, Luffy painted a crudely drawn painting of his Jolly Roger on Laboon's scars as symbol of their pact to meet once again.[86]
After rekindling Laboon's hopes once again, Luffy and the rest of his crew suddenly realized that their compass does not work. With that matter at hand, Luffy and the rest were then taught by Crocus about how the Grand Line works and how they needed a special compass called a Log Pose. Having discovered one of these compasses earlier after beating the two characters earlier, Luffy presented it to Nami but unfortunately broke while in a small scuffle with Sanji. Fortunately, Crocus had an extra one for Luffy and his crew to use. In the midst of what was happening, Luffy and his crew also encountered again the two characters who tried to kill Laboon. Learning that these two needed to report back to the company they working for, Luffy and the rest were requested by them to give them a ride back to their island of Whiskey Peak. Though a bit suspicious, upon learning that Whiskey Peak is on one of the paths that the Straw Hats needed to follow to travel the Grand Line anyway, Luffy and his crew took the two aboard and sailed towards Whiskey Peak, leaving Laboon with the promise of returning once again.[87]
Whiskey Peak Arc
Pirate-Loving Town of Whiskey Peak
Upon arriving in Whiskey Peak, Luffy and his crew were caught by surprise. Though the two characters that they took aboard left before they could land, Luffy and his crew were welcomed graciously by the townspeople of Whiskey Peak.[88] There, Luffy and his crew were treated as gods with a grand party. Luffy even ate more then the cooks could put out. Eventually, Luffy passed out from all the excitement of such a celebratory day.[89] However when he awoke later that night, Luffy came to a shocking sight. Scattered everywhere before Luffy, were the beaten up bodies of the townspeople that served him and his crew.


Luffy and Zoro effortlessly dispatch Mr. 5 and Miss Valentine during their duel.
Upon learning from one of them that they were defeated by Zoro, Luffy thought that Zoro had beat them up as an act of ungratefulness. Confronting Zoro, Luffy and his first crew mate collided into a battle that apparently nothing could deter them from. The two were so immersed in their battle against one another that they completely ignored and defeated two other characters in same scene, Mr. 5 and Miss Valentine, who were apparently distracting them for some reason. It was only however when Nami stepped in and interrupted their fight that the two calmed down to listen to reason.[90]
Having been subdued, Luffy learned everything that happened while he was asleep. He also learned that one of the two strangely dressed characters that tried to kill Laboon before, Miss Wednesday, was actually Princess Nefeltari Vivi of the kingdom of Alabasta in disguise. From her, Luffy learned that she, along with her pet duck Carue and loyal retainer Igaram, had infiltrated a secret criminal organization known as Baroque Works in order to learn the organization's reasons for meddling in their country's affairs. From Vivi also, Luffy and his crew not only learned of Baroque Works' scheme to take over Alabasta but also that the criminal organization was led by none other than the Royal Shichibukai, Crocodile. Having gotten involved in all this, Luffy and his crew decided to help Vivi by taking her and Carue to Alabasta while Igaram distracted Baroque Works with a disguise. However in the midst of this plan, Luffy and the rest witnessed Igaram's ship blow up.[91] Miss All Sunday, Crocodile's partner and vice president of Baroque Works suddenly announces herself as she sits on the ship's sails. Fortunately, apart from some tense formalities between them and her, Luffy and his crew did not have to fight her as she let them go for her own reasons. Luffy and his crew were also warned by her of their next destination and even offered them an alternate route. Luffy however declined her offer despite protests from the rest of his crew.[92]
Having survived from the ordeals of Whiskey Peak, and gaining a mission to help a princess, Luffy and his crew sailed forth Whiskey Peak to their next destination, Little Garden.[93]
Little Garden Arc
Adventure in a Prehistoric Land
Luffy, Vivi, and Carue befriend and dine with the giant Dorry at his home.
Luffy and his crew eventually arrive in Little Garden. The jungle island fascinated Luffy, not only because of the adventure it could provide, but also because it contained all sorts of prehistoric animals, which ranged from sabre-tooth lions to dinosaurs. Luffy decided to venture out from their ship and explore. Vivi decided to travel with Luffy to escape her boredom. Luffy learned about the reason the island was like this. The reason being that because of the Grand Line's unique environmental conditions, the islands within in develop much more differently than they normally would, and the very island they were on was still in the dinosaur era. As Luffy ventured around the island with Vivi and Carue, the three soon discovered something much larger than the dinosaurs on the island. In the midst of Luffy messing around with a Brontosaurus, the other members of the crew met a giant.[94]
Meeting Dorry, Luffy and his companions were invited over to the giant's place. There, Luffy was treated to some dinosaur meat and got acquainted with Dorry. From the giant, Luffy learned that he was staying on Little Garden in order to settle an argument with another fellow giant, Brogy, in battle. As the matter was being discussed, the island's volcano erupted, signaling the next match between the giants. With it, Luffy saw a gigantic clash between two giant warriors that awed him.[95] Eventually the match ended in a tie and thus Luffy continued talking with Dorry. Learning further about Little Garden's magnetic field from Dorry, Luffy also learned about two of his crew staying with Brogy. Just as things seemed going well at the moment, something suddenly shocked Luffy and those with him. A barrel of rum that Dorry was drinking exploded. Since the rum was taken from Luffy's ship and given to Dorry by Brogy, Luffy and his crew were suspected of sabotaging the barrel. With this, Luffy and Dorry got into a fight.[96] Fortunately, Luffy was able to knock Dorry down during their fight. However with this sudden turn of events, Luffy started to suspect that his crew weren't the only ones in the island as neither they nor Brogy would do such a thing. But before Luffy and those with him could do anything else, the volcano erupted again and Dorry in response got up.[97]
With the next match being signaled and knowing that the giants' fight was tainted by someone else, Luffy tried to convince Dorry to not go. Luffy's words however did not reach Dorry's ears due to the giant's pride and instead Luffy was pinned down by Dorry with the giant's home. Unable to get out of this predicament to help Dorry, Luffy suddenly encountered Usopp, who had wandered into Dorry's home. Reunited with his crew mate, Luffy and Vivi recounted what had just happened and were likewise filled in by Usopp.[98] As Luffy and his companions were figuring out what to do next, they heard the awful scream of Dorry being defeated by Brogy due to the tainted fight. Angered even more by this, Luffy was filled with more determination to find out who blasphemed the giants' fight. Luffy fortunately did not have to wait long though to find out who it was, as two of the perpetrators of the crime, Mr. 5 and Miss Valentine, suddenly came before Luffy and his companions, bringing a beaten up Carue. Because of his current predicament, Luffy was unable to aid his companions and was hit with an explosive kick caused by Mr. 5's Bomu Bomu no Mi powers. Unable to protect Vivi from these Baroque Works agents, Luffy and the other two with him were left for dead.[99]
As Luffy and the two with him were lying, they decided to get revenge for the atrocity caused by the Baroque Works agents. They eventually got back on their feet and charged immediately to where the Baroque Works agents were holding their friends.[100]
Enraged Luffy, Usopp and Carue charge in to save their friends from Baroque Works.
Luffy and company arrived and found that their friends were being made into candles by Mr. 3's Doru Doru no Mi powers.[101] Luffy engaged in a battle with the artist while his comrades battled with the rest of the agents. Despite some complications from Mr. 3 and his partner, Miss Goldenweek, Luffy was able to free his captured friends with a little help from Usopp.[102]
After finishing off Mr. 3, Luffy rejoined the rest of his crew to the marvelous relief. Due to the giants' weapons being worn out from one hundred years worth of fighting, Dorry was actually okay and had instead passed out from the wound inflicted. With everything done, Luffy and the rest went back to Dorry's place to treat his wounds. As Luffy and everyone were resting from the ordeal and wondering how to deal with the island's magnetic field, they were rejoined by Sanji, who brought with him some great news and stuff while everything else was happening. From Sanji, Luffy and the rest learned that not only did Sanji trick Crocodile into thinking they were all dead by pretending to be Mr. 3 via a Den Den Mushi call, but the cook also brought with him the solution to their current problem, an Eternal Pose to Alabasta. With the Eternal Pose, Luffy and crew bid their farewells to the giants and set off.[103]
As Luffy and crew sailed off from Little Garden, they were provided by the giants with an act of gratitude. With help from the giants' strength, Luffy and crew were able to pass through a giant goldfish and sail on.
Drum Island Arc
Adventure in a Doctorless Kingdom
Nami suddenly came down with a terrible sickness. The crew decided to alter their course from Alabasta and instead look for a nearby island to have Nami treated by a doctor.[104] The crew is suddenly attacked by Wapol who demands their log pose. The crew fight back and Luffy knocks him off the boat so they can continue forward as Wapol's crew curses them and warns them they'll get their revenge.[105] The crew eventually comes to a snow-covered land called Drum Island, which is renowned for their advances in medicine. There the current inhabitants try to scare away the crew until Vivi lowers her head with Luffy in humility. The "leader" of the islanders, Dalton, tells the villagers to take the crew to the nearest town, however, Zoro and Carue were left behind.[106] At the village, Dalton tells the crew about the "witch" of the island, Dr. Kureha, who is the only doctor left on the island. To make matters worse, there is no way to contact her as she lives on top of the mountain in the castle previously occupied by King Wapol. Hearing this, Luffy, along with Sanji, decides to carry Nami up the mountain to the castle.[107]
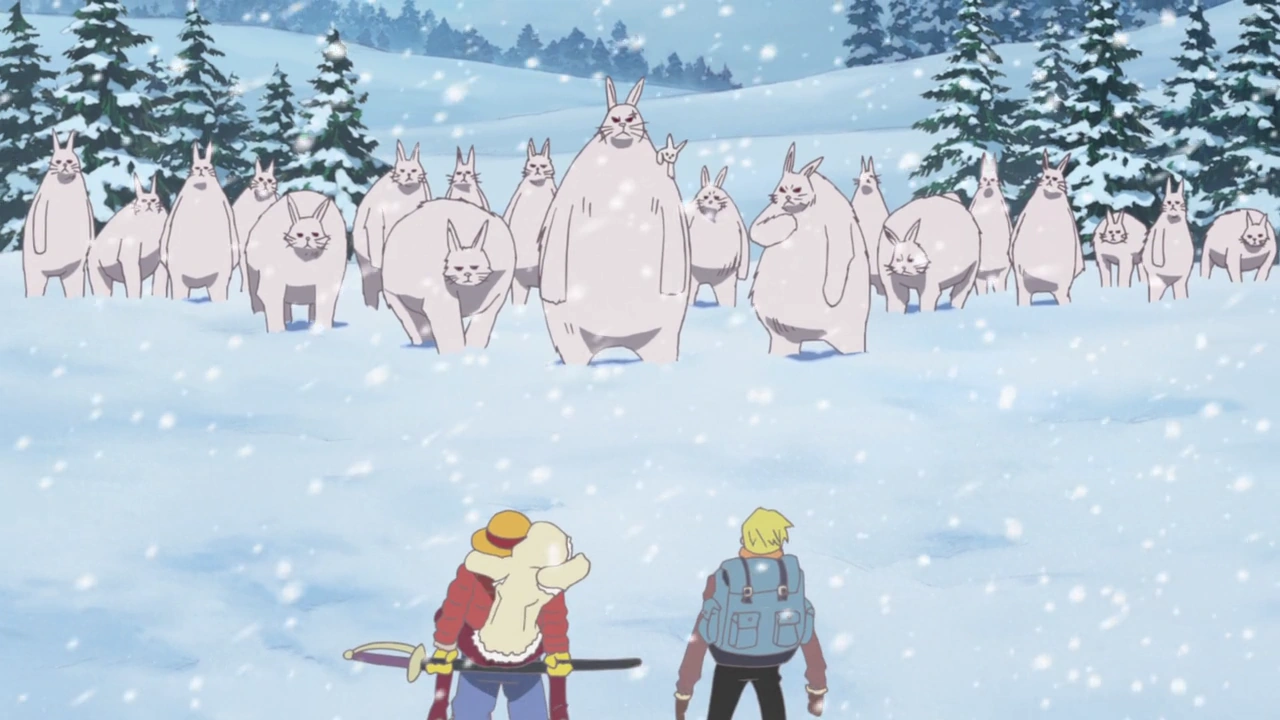

Luffy and Sanji beleaguered by Lapahns.
On the way up, Sanji, Luffy, and Nami run into some Lapahn, which are man-eating rabbits. Sanji fights off the Lapahn's as Luffy, carrying Nami, cannot attack or be hit at the risk of Nami being injured as well.[108] Later, the Lapahn's cause an avalanche, forcing Luffy and Sanji to escape downhill.[109] Unfortunately, the group is about to run into a sharp and rocky cliff when Sanji rescues them by kicking them out of the way, but in the process Sanji is knocked unconscious. In the aftermath of the avalanche the village Usopp and Vivi are at is buried along with Wapol and his crew. Wapol survives and sets up the mountain with Chess and Kuromarimo. Back at the mountain, Luffy, now carrying Nami and Sanji, saves a buried Lapahn.[110] Soon, Wapol catches up to Luffy, and attacks him after Luffy shows his back to them. Luffy unable to attack, runs away. However Chess and Kuromarimo catch up and are about to strike Luffy, when a large group Lapahn's save him in repayment for Luffy saving one of them earlier.[111]
Luffy protects Hiluluk's flag.
When Luffy climbs the mountain and reaches the top, he nearly falls and is rescued by Chopper and taken in by Dr. Kureha.[111] Later, Luffy and Sanji awaken and see Chopper for the first time, they try to cook and eat Chopper,[112] until he turns into a giant form and smashes them down, which greatly impresses Luffy. Luffy asks Dr. Kureha to join his crew, but she declines.[113]
Finally, Wapol arrives at the castle and begins arguing with Dr. Kureha when suddenly Luffy punches him hard.[114] Wapol then retaliates using his Baku Baku no Mi powers to turn into a house with cannons and fuse Chess and Kuromarimo into Chessmarimo. Wapol then shoots Dr. Hiluluk's flag a symbol Chopper highly values. Wapol shoots once again but Luffy protects the flag.[115] Finally the fight begins and Chopper begins fighting Chessmarimo and Luffy fights Wapol. However, Luffy is distracted by Choppers fight (because of Chopper's ability to transform into several different forms thanks to the Rumble Ball) letting Wapol escape into the castle.[116]
Luffy defeats Wapol with Gomu Gomu no Bazooka.
After Chopper wins, Luffy goes in and kicks a now thin Wapol who was harassing Nami. Wapol decides to open the weapons room and eat the weapons but Nami had stolen his one-of-a-kind key. Wapol is chased up to the top of the castle where he tries to attack using his special cannon, but fails due to the snow birds living in there.[117] Wapol then tries to eat Luffy but is stopped so Wapol turns his tongue into a cannon for one final attack but Luffy dodges it and sends him flying getting him stuck in the roof. Luffy then, ignoring Wapol's pleas for mercy and empty promises and send him flying far away.[118]
The Straw Hats regroup at the summit and Dalton thanks Luffy and Chopper.[119] After some persuasion, Chopper decides to go with Luffy and his crew, with Dr. Kureha's blessing. As Chopper leaves, Dr. Kureha initiates Hiluluk's finished research, a powder that makes pink colored snow fall. Chopper seeing it, starts crying loudly. The Straw Hats formally welcome Chopper to the crew and head to their planned destination, Alabasta.[120]
Alabasta Arc
An Okama, a Brother, and a Desert Crossing


Luffy and the crew witnessing Mr. 2's ability to copy the appearances of others.
With his new doctor on board, Luffy and his crew journeyed onward to Alabasta with Vivi and Carue. A few days later, while fishing with Usopp and Carue, Luffy and crew picked up something strange as they passed through the sulfuric steam of an undersea volcano. The thing they accidentally picked up was the okama Mr. 2 Bon Kurei. Having passed the steam the same time as Mr. 2's ship was passing through, Luffy and his fellow fishermen accidentally hooked the Baroque Works agent.[121]
Not initially knowing who this was, Luffy and along with some of his crew immediately became friends with this flamboyant man as he put on a show for them with his Mane Mane no Mi. It wasn't until Mr. 2's crew came to pick him up that Luffy and his crew realize that he was an enemy. Fortunately, since Mr. 2 did not likewise know who they were, Luffy and his crew were spared at the time. However, since they were fortunate to meet such an opponent ahead of time, Luffy and his crew decided to take measures to protect themselves from his powers. Taking advice from Zoro, Luffy along with his crew and traveling companions wrapped bandages covering an X on their left wrists. This was so they could tell whether the person before them was the okama in disguise or not.
Luffy and the crew being saved by his big brother Ace from Smoker.
Upon arriving at the port of Nanohana in Alabasta, Luffy immediately ran off ahead of his crew in search in food. Not caring for the recklessness of his actions, his search for food leads him to a restaurant. In his haste to get to the restaurant, Luffy accidentally slammed two men straight through the back of the restaurant and through several houses. To his surprise, one of the men he knocked into was Smoker. Recognizing the Marine, Luffy instantly ran away and was soon being chased by Smoker and his Marines all over the town. In the midst of the commotion, Luffy was saved by the other man he knocked over, his brother Ace.[122]
Regrouping with his crew back on the Going Merry, Luffy explained things to them about Ace. As Luffy was talking, Ace appeared and momentarily asked Luffy and his crew to join the crew he was under, the Whitebeard Pirates. Though Luffy bluntly refused the offer and even stated that he would fight against Ace's captain, Edward Newgate, for the position of Pirate King, the brothers parted ways on friendly terms. Before sailing off however, Luffy received a strange piece of paper from his brother so that they can meet again, and got a little more aid with Ace obliterating some Baroque Works Billions and their ships.
After sailing across the Sandora river and reaching the other side, Luffy and his crew began their journey to Yuba where Vivi hopes to persuade the rebel leader, Kohza, and his troops there to stop the senseless violence. Upon landing, there was a little incident wherein Luffy defeated and acquired 100 Kung-Fu Dugong apprentices. Though he could not bring such a large group along with him, he had formed an everlasting deep bond with the creatures. As Luffy and his crew were further explained by Vivi about the Dugongs, they passed through the once green town of Erumalu and were further enlightened regarding the problems and conspiracies facing Alabasta.[123]
After traversing across the huge desert of Alabasta and acquiring a new companion, Eyelash the camel, Luffy and his fellow travelers reached Yuba. There however, they discover that town was plagued by sandstorms and deserted except for one old man. This old man, Toto, was an old acquaintance of Vivi, and from him Luffy and the others learned that the rebellion had transferred bases due to the drought and sandstorms in Yuba. Though Toto was initially hostile to Luffy's group thinking that they were people wanting to join in the rebellion, he changed his hostilities towards them once he recognized Vivi and offered them shelter for the night.[124]
As the rest took up Toto's offer, Luffy however decided to help Toto in his desperate search for water to restore the oasis of Yuba. Though slightly incapable of digging and falling asleep midway in digging, Luffy's efforts however helped Toto dig up some water. The next day as Luffy and the others prepared to travel to the rebel's new base, Luffy was given some of the water he dug up as present from Toto. With this Luffy and the others departed Yuba. Just as they were beginning their journey to Katorea, the rebel's new base, Luffy did something that surprised the rest of them. He announced to all of them that he "quits".
As Luffy's comrades asked him to stopped with this seemingly childish act, he explained to them his reasons. He explained to them that even if they stopped the rebels, Crocodile will not be stopped. To completely solve the matter, Luffy explained that Crocodile himself must be defeated. As Luffy surprised everyone in his insight over the entire situation, Luffy told Vivi that her desire to save everyone was naïve as people die. This little statement started an argument between the two of them which escalated in small battle. As Vivi explained herself and told Luffy that risking her life to save everyone was the only thing she could risk, Luffy asked her why she will not risk the Straw Hats' lives as well since they were her friends. Having stated this, Luffy moved Vivi to tears by his statement of trust and friendship.
Seeing her in this state and seeing how she was the one who wanted Crocodile to be beat up, Luffy asked her where they could find him.[125]
Meeting Crocodile at Rainbase
Having understood each other, Vivi tells Luffy and his crew where to find Crocodile, Rainbase. Regardless of the fact that Officer Agents would be awaiting there, Luffy and his group pressed forward to confront the Shichibukai. Upon arriving at Rainbase, Luffy and Usopp were sent by the rest to ask for some much needed water after much journeying in the desert island. However, upon finding water in a bar, the two accidentally encountered Smoker and Tashigi. Soon enough, another large commotion was caused with Luffy and his crew being chased all around by the Marines. Regardless of the commotion however, Luffy and some of his crew managed to escape from the pursuing Marines and headed into Crocodile's casino, Rain Dinners.[126]
Though Luffy and his crew mates with him managed to get into the casino, they however entered without Vivi to help them identify what Crocodile really looked like. To make matters worse, Smoker had caught with them and started chasing them all around the casino. As they were running around, Luffy and those with him were tricked into falling through a trap door by the casino. Having fallen for the trick, Luffy and the others, including Smoker, found themselves trapped in a seastone cage. As they were pondering their current predicament, they were greeted by Crocodile.

Luffy, his crew, and Smoker captured by Crocodile.
Having finally met the one who orchestrated the whole mess in Alabasta, Luffy and the others with him were unable to do get at Crocodile because of the cage they were in. As the situation developed with Vivi being brought before Crocodile by Miss All Sunday and the powers of the Devil Fruit Crocodile ate, the Suna Suna no Mi, were revealed, Luffy and the rest learned of Crocodile's awful master plan as he mockingly explained it before them. As it went further, Luffy and the others found themselves being placed in a little game the Shichibukai decided to challenge Vivi in.[127]
The Shichibukai explained before Luffy and the rest that due to events being carried out, they needed to get to Alubarna, the capital of Alabasta, fast in order to stop the upcoming war. However, due to the situation Luffy and those encaged with him, Vivi would have to get a key that Crocodile presented and threw into a pit, where it was eaten by a Bananawani. Explaining further that he deciding to self destruct the room they were in, Crocodile presented before Vivi in front of Luffy and the rest, the choice between getting to Alubarna in time or saving Luffy and those with him before the room completely floods. As Crocodile was explaining this challenge to Vivi, Luffy overheard Toto being mentioned by the Shichibukai and soon learned that it was Crocodile that was causing the sandstorms that plagued Yuba.
Angered by Crocodile's cruelty, Luffy urged Vivi to get the key so that he and the rest can beat Crocodile. Despite Luffy's encouragement, a single Bananawani proved too much for Vivi as it and the rest of group entered the slowly flooding room. Though all seems lost, amidst the ensuing chaos, Luffy and everyone heard a Den Den Mushi ring.
Recognizing Sanji's voice calling from the Den Den Mushi, Luffy and the others realized that there was still hope as Sanji and Chopper weren't captured. As events unfolded with this new development, Luffy and the rest found themselves depending on Vivi finding someone from the outside to get them out. In an attempt to free themselves, Luffy and the others tried to coax one of the Bananawani into biting open the cage. Though their attempt at breaking the cage through this failed, their hopes were however revived as Sanji finally showed up at the scene. With him, the key that Crocodile was found alongside a familiar foe, Mr. 3. Though the Baroque Works agent that came out of the Bananawani threw the key, Luffy and the others with him were however still able to escape the cage via Mr. 3's wax powers. Escaping just in the nick of time, Luffy and the others were able to get out. As the room flooded and they escaped, Luffy told Zoro to grab Smoker along with them.[128]
Having saved the Marine, Luffy and his companions were allowed to go free to get Alubarna. As they were thinking of a way to get to Alubarna fast they were greeted by Chopper who brought Scissors, a giant crab friend of Eyelashes whom they can ride on. However just as they were getting aboard, Vivi was literally hooked by Crocodile. Fortunately, Luffy freed her just in time as she was taken away. With Vivi safe, Luffy told his crew to go on as he faced off the Shichibukai by himself. As Luffy prepared to face Crocodile, he was told that the Shichibukai would humor him for three minutes. After that, Crocodile would leave for Alubarna to complete his scheme. With the time limit in mind, Luffy fought ferociously against his opponent. Though he attacked the best he could, it was however apparent that no matter how much Luffy attacked, he could not damage Crocodile.
As they continued to fight one another, Luffy's arm was dehydrated by Crocodile. Using the water given by Toto however, Luffy was able to restore himself. Remembering the old man, Luffy declares that no matter how much Crocodile attacks Yuba with sandstorms, it will never be destroyed. As Luffy declared this, his three minutes were up.[129]
As the three minutes ended, Luffy witnessed Crocodile decide to do something horrible. Spurred on by Luffy, Crocodile created a massive sandstorm and sent it towards Yuba. Seeing this new development, Luffy desperately tried to stop Crocodile. Unfortunately in midst of all this, Luffy was impaled by the Shichibukai and left for dead in the sand.
Despite being heavily wounded and buried in the sand however, Luffy still struggled with the will to fight. As he struggled, in a surprise turn of events Luffy was suddenly pulled out by Miss All Sunday. Having been pulled out from his sandy grave, Luffy was left in the care of Pell, the hero of Alabasta that the Baroque Works agent defeated awhile back.[130]
Battling Crocodile for the 2nd and 3rd Time
With Pell's help, Luffy was able to recover from his wounds and get a ride to Alubarna via Pell's Devil Fruit, the Tori Tori no Mi, Model: Falcon. Through various events that happened in the city, by the time that the two arrived at Alubarna, a great battle was being waged by the rebels and the royal army in the city square with a sandstorm covering the place. As they arrived, they got just in time to save Vivi, who was dropped by Crocodile from the palace walls. With Vivi safe, Luffy flung himself up the walls to face Crocodile again.[131]
Luffy dehydrated and defeated by Crocodile once again at the palace.
During his previous fight, Luffy noticed that water made Crocodile unable to turn into sand as he and the water barrel that Toto gave were pierced by Crocodile's hook. Realizing this, he brought a huge barrel of water to aid him in his rematch against the Shichibukai. As Luffy thus fought Crocodile again, he soon realized that his barrel of water could easily be jeopardized. Figuring this out, Luffy decided to switch tactics by drinking all of his water and storing it within himself, essentially become what he dubbed "Mizu Luffy". While this new tactic infuriated his opponent, it however proved effective for Luffy. Though Luffy was aided greatly by water this time around, the fight however just made his opponent really mad.
Having landed some good hits on Crocodile and angering the Shichibukai as well, Luffy had incurred the Shichibukai to use his most powerful technique. Though Luffy was able to evade Crocodile's devastating powers of erosion, he unfortunately got caught by his opponent. As Crocodile's hand held Luffy, he was severely dehydrated and was once again left for dead. Fortunately however, some water bubbles that Luffy misfired earlier revived him from his near death state. Rejuvenated once again, Luffy set off in search of his foe. Learning from Tashigi while on his search, Luffy headed to royal Alabasta tomb.[132]
As he ran, the wound from his chest unfortunately opened, and Luffy, feeling unusually faint, briefly fell unconscious. Recovering himself, Luffy noticed a passageway and ran down into the tomb. Eventually Luffy caught up with his foe once again in the collapsing ruins. Encountering each other, the two fought each other again, however having been severely wounded from his previous matches with Crocodile, Luffy used his own bloody body to negate Crocodile's powers this time around.


Luffy finally defeats Crocodile with Gomu Gomu no Storm.
As the climatic battle between Luffy and Crocodile commenced, Luffy was struck by Crocodile's poison hook. This however did not deter Luffy's resolve against his opponent. As the battle continued, Luffy kicked Crocodile into the air. Upon doing so, Luffy was blasted with one of Crocodile's powerful techniques. Luffy however withstood the attack and prepared to retaliate. Using a series of moves, Luffy propelled himself up to Crocodile to deliver the final blow. As a last resort, Crocodile tried to stop Luffy by turning his hand into blades.
This however did not stop Luffy as he broke through the sand created weapons with his bare fist and delivered a flurry of punches onto his opponent.[133] Delivering the punches, Luffy attacked Crocodile with such force that it penetrated a layer of pure bedrock and sent Crocodile flying, defeating the Shichibukai finally. Falling back into the ruins, Luffy was thanked by Nefeltari Cobra for all he had done.
After being given the vial of antidote to Crocodile's poison from Miss All Sunday, Luffy mustered what was left of his strength to carry both the king and the former Baroque Works agent out of the ruins. Having used the last of his strength, Luffy was then carried by the king to his crew.[134]
Farewell to Alabasta and Vivi
For their valiant heroism in saving Alabasta, Luffy and his crew were treated secretly as VIPs by the royalty for three days. Having fully recovered from his wounds from the battle with Crocodile on the third day, Luffy and his crew decided to leave before the awaiting Marines could catch them. Just as they were heading back to the Going Merry which was secured by Mr. 2 Bon Kurei before the Marines could find it, Luffy and the others offered Vivi the choice of joining the crew. They gave her until noon the next day.[135]


Luffy and the crew showing their X mark of camaraderie as a silent farewell to Vivi.
Setting sail with the reformed Bon Kurei and his men the next day, Luffy and his crew encountered the blockade the Marines set up to capture them. Through a tearful sacrifice by Mr. 2, Luffy and his crew were able to escape the blockade to go to the rendezvous point to pick up Vivi. Arriving there, they found that Vivi had come as promised. However to their disappointment, she told them that she still had responsibilities as Alabasta's princess and could not come along. Despite this, Vivi asked them that if they ever meet again, would she be accepted to come along again.[136]
While Luffy and the others wanted to reply out loud to Vivi that she would still be accepted, they could not out of fear that the nearby Marines would implicate her as a criminal. Instead however, they quietly showed her the mark that they used to protect themselves if Mr. 2 impersonated one of them, a sign of their friendship. Having delivered their silent response to their friend, Luffy and his crew set sail away from Alabasta and onto their next adventure.
Though depressed about not having Vivi on the crew, Luffy and the other came across a new development. Nico Robin, a.k.a. Miss All-Sunday from Baroque Works, had stowed away on the Going Merry and demanded Luffy take responsibility of saving her by letting her join his crew. Without much hesitation, Luffy agreed much to everyone's surprise.
The following events are Non-Canon and therefore not considered part of the Canon story.
Goat Island Arc
While being chased by the Marines, led by Moore and Minchey, Luffy and his crew get lost in the fog and discover an uncharted island. They find that the island is inhabited only by an old man named Zenny and a multitude of goats. They also find a partially constructed ship on the top of the island.
Because of his bad heart, Zenny probably only has three days to live. Hoping to make his last days good ones, the Straw Hat Pirates help him out and they learn about Zenny's past as a money lender and his dream of becoming a pirate. But realizing that Zenny has outlived Chopper's predictions the Straw Hats decide that after helping him finish his pirate ship, they will leave the island. The Straw Hat Pirates help the old man out while hiding from the Marines and working to get his ship into the water.
With Luffy's help, Zenny and his goats were able to attack the Marines. The Straw Hat pirates then went forth to help him. They defeated Minchey and tied him up. Luffy, then, threw Minchey back on Captain Moore's ship, and Captain Moore allowed them to choose their battle location. Zenny decides to follow his dream and become a pirate, despite his age and they part ways. Luffy, then, pointed to the Marines a foggy area for battle location, which caused Captain Moore's ships to land in a shipwreck due to the rocks.
Dead End Adventure
Luffy and the Straw Hats are now chased by a marine ship, commanded by Drake. Due to the stormy weather and Nami's exceptional navigational skills, the ship sails away unscathed, leaving the marine pursuant behind.
Luffy and the crew has reached a town of an inhabited island. Inisde a pirate filled bar, they find out there is a great but very dangerous opportunity through a mysterious door in the bar. As the crew enters the mysterious door they are surprised to see it is the opening to a large tunnel. Inside they find themselves in a large cave filled with pirates, the site of the Dead End Race, a very dangerous anything goes sailing competition which the winner can win up to ![]() 300,000,000.
300,000,000.
The crew is introduced to the favorites to win that year, 2 giants, Bobby and Pogo, a Fishman and former rival of Arlong, Willy and the favorited to win, Gasparde, a former marine general who deserted after killing his crew. While Nami registers the crew for the race, Luffy gets involved in a fight against Gasparde's crew along with an infamous bounty hunter by the name of Shuraiya Bascùd, as well as meets Gasparde himself which of course ends on bad terms.
The next morning, Luffy and the crew set sail along with many other pirate ships for the parade start which involves sailing off a waterfall, fighting off other pirates, and navigating sharp turns. Before even reaching the ocean, several pirate crews are wrecked, luckily the Straw Hats manage. However while checking the ship, they find a stowaway, a kid by the name of Anaguma whose come to kill them for the bounty though find that's impossible after witnessing the crew's strength and power and thus sails along with them for the race.
After a few more encounters one involving the pirate ship of Bigalo the Hangman and sea kings, Luffy and the Straw Hats arrive at Partia, the supposed finish line of the race. However it turns out to be a marine stronghold that quickly sinks any incoming pirate ships. Luffy realizes Gasparde rigged the race and the crew manages to escape the stronghold and track down Gasparde's ship using Chopper's nose.
Meanwhile onboard Gasparde's ship the Salamander, Shuraiya, the bounty hunter from earlier tries to attack Gasparde but barely defeats his right hand man, Needless. Just when Gaparde is about to finish Shuraiya off, the Straw Hats arrive on the scene and Luffy makes his way onboard Gasparde's ship, taking down his crew angered about what the former marine did. Shuraiya tries to intervene but Luffy knocks him out to keep from getting in the way. Luffy and Gasparde proceed to fight.

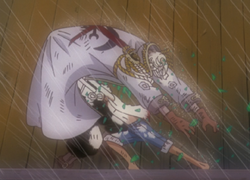
Luffy's Gomu Gomu no Bazooka against Gasparde.
Luffy's fight with Gasparde is not going well but Sanji realizes something and gives Luffy sacks of flour before rejoining the other Straw Hats. When Anaguma realized that his grandpa is still on Gasparde's ship, he begs the Straw Hats to go back but Zoro knocks him out and reveals that Anaguma is actually a girl. Meanwhile back in the ship, Grandpa overloads the boiler causing it to explode and sink the ship. Luffy manages to stay on the sinking remains as does Gasparde who shows Luffy that a cyclone is closing in on their position and that whoever wins can escape the ship and storm via lifeboats. The two strike one another with Luffy actually managing to hit him due to the counter-effects of the flour on Gasparde's syrup powers. Luffy then throws the remaining flour sack at Gasparde, coating him with it, and proceeds to pound on him and sends him flying into the cyclone.
Luffy, then, collapses from exhaustion but is saved by Anaguma's grandpa along with Shuraiya. As they head for the nearby island, grandpa reveals that Anaguma was adopted and her real name is Adelle Bascùd, Shuraiya's little sister whom he thought was dead. Despite the awkward reuniting, the two come to accept each other.
The Straw Hats close in on the real Partia as the winners of the race but the Marine ships suddenly appear and go after them, forcing them to flee from the island and forfeit their prize money. They let Adelle, Shuraiya, and Grandpa off then wish them good-bye individually before sailing off with the marines on their tail. Despite not getting the prize money the Straw Hats continue on for their next big adventure.
Ruluka Island Arc
Luffy and the Straw Hats are being chased by a small fleet of Marine ships led by Major Pasqua and Isoka. Luffy and his crew barely escape when the Marine's Major accidentally sinks one of his own ships. The crew then make their way towards an island named Ruluka.
They soon meet Flip, the son of the mayor and the commander of a troop who collects taxes from the people of Ruluka, The Collection Party and they find out the island is in fact ruled by a former pirate, mayor Wetton, that is over-taxing the people. Luffy, Usopp and Robin meet also Professor Henzo, who's doing research on something called the 'Rainbow Mist', sponsored by the scrupulous Wetton.
Suddenly, a huge galleon, the Tarielishin, appeared in the harbor and Luffy and the others go explore it and turns out to be the pirate ship of Wetton Pirates. When some of the mist shows up, Henzo borrows the Going Merry and Luffy, Usopp, Robin, Henzo and Zoro, who was sleeping on the ship, go inside it.
The inside of the Rainbow Mist is full of wrecked ships and treasure, and is guarded by five kids. The kids are actually friends of Henzo's that got lost in the mist over 50 years ago, along with the Tarielishin and Ian, a member, then, of the Wetton Pirates. Henzo states that the flow of time is different inside the Rainbow mist and the space is disorted, so Luffy and the others try to find a way out of the ship graveyard.
Finally, Flip communicates with Hezno with a Den Den Mushi and the company realizes they are still connected with the outside world. Then, Luffy accidentally propels himself and Rapanui, one of the kids, to the end of the mist. The Mayor, though, uses the Rainbow Tower to make a bridge to the Rainbow Mist and launches an attack inside it, along with Lake, the son of Flip and his grandson.
Luffy, goes back to the Rainbow Mist by trowing himself and Rapanui trough the Rainbow Tower. There he fights Wetton, but the mayor manages to escape and blows the Rainbow Tower away. Luffy and the others, though, escape the Rainbow Mist onboard Going Merry, with the help of Rapanui and the other kids who stayed behind to blow up a marine ship and give the Going Merry a boost to escape with the explosion.
Outside, the Mayor gets arrested by a bunch of powerful Marines that turn out to be older versions of Henzo's friends, who were thrown 50 years into the past by the Rainbow Mist's collapse. The marines let Luffy and the Straw Hats go and the crew departs onward to their next adventure.
Concludes non-canon section.
Sky Island Saga
Jaya Arc
A Sunken Ship and a Lawless Town
Not long after Luffy and the Straw Hats left Alabasta, a massive ship fell from the sky and into the sea. From Nico Robin and a brief search of the sinking ship which wielded a map, Luffy and his crew learned that the ship fell from an island in the sky called Skypiea.[137]
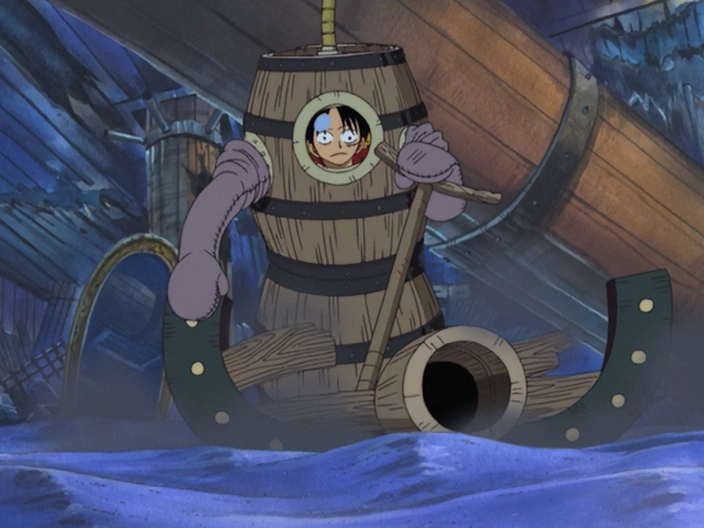

Luffy exploring the sunken St. Briss.
Needing more info on the matter, Luffy and his crew decided to explore more of the ship. Using special diving suits created by Usopp, Luffy, along with Zoro and Sanji, explored the sunken ship. As they explored the ship and found few things, their search was cut short as the ship was suddenly clamped and filled with air, and a bunch of other people appeared. After taking care of the intruders within the newly created air pocket, the three encountered a monkey-like person bursting into the room. Although Luffy and the stranger initially got along, they unfortunately got on bad terms when they found out that they were after the same thing.[138]
Fortunately with thanks from his two crew mates, Luffy escaped from Masira and a giant turtle that ate the ship at the same time. As Luffy and the others were about to deal with this new foe, they suddenly witnessed something that completely scared them, the shadowy silhouettes of creatures several times larger than regular giants. After escaping from the creatures and getting rid of Masira who accidentally tagged along, Luffy and his crew learned of Jaya from an Eternal Pose that Robin stole from the guy. Needing info on how to get to Skypiea, Luffy and his crew sailed for Jaya.[139]


Luffy's arguing with a certain bar customer during their first encounter.
Arriving at Jaya at the port of Mock Town, Luffy and his crew found that the place they landed on was a lawless town filled with pirates. Wanting to explore the town as well as get information, Luffy, along with Zoro and Nami, went offshore into town. With a promise not to fight while in Mock Town to Nami, the three explored the place and encountered several of the inhabitants. They eventually end up in a bar wherein Luffy has a small argument with another customer. Though the incident ended without a hitch, Luffy and his companions encountered a much more serious one.
Luffy and his companions soon encountered in the bar Bellamy and his crew with the intention of seeing if Luffy was worthy of joining his "New Age" of pirates. However upon learning that Luffy and his crew wanted to go to a Sky Island, Bellamy along with the rest of the bar started ridiculing them and the notion of dreams such as a Sky Island. Though the situation got worse with Luffy and Zoro taking hits from Bellamy's crew, they however refused to fight. As the two were dragged out by a frustrated Nami, the three were congratulated and encouraged by the pirate that Luffy had a brief argument earlier. Though the man assured them that dreams would never die, Luffy and Zoro however sense something up with him and the people that are apparently associated with him.[140]
Returning to the Going Merry, Luffy and the others soon learn that while their search was unproductive, Robin's was successful. Learning that a man by the name of Montblanc Cricket might know something, they headed off to the other side of Jaya.
The Saruyama Alliance and Knock Up Stream
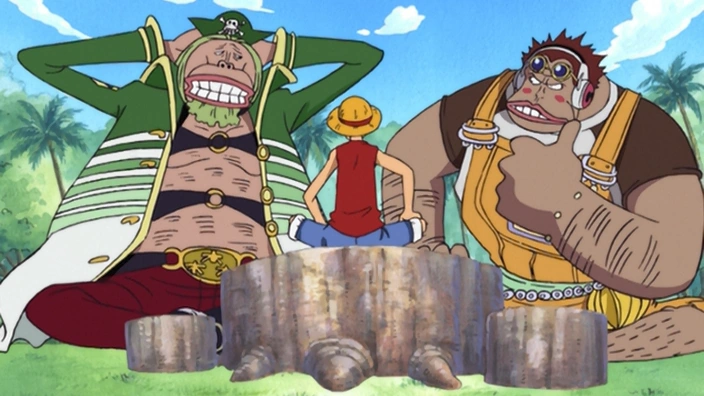

Luffy getting acquainted with Masira and Shoujou while Cricket recovers.
After escaping a brief encounter with Masira's brother, Shoujou, Luffy and his crew reached Cricket's home. There they had a brief misunderstanding with Cricket who they found out apparently suffered from decompression sickness. However upon helping Cricket and clearing things with him, Luffy and his crew were able to get better acquainted with the former pirate. For helping Cricket, they were also able to reconcile with Cricket's proteges, Masira and Shoujou.[141]
As they explained their problem and got acquainted with Cricket and his proteges, Luffy and his crew learned of Cricket's past and his ancestor. Showing interest with Cricket's dream, Luffy and his crew convinced Cricket to help them out in getting to Skypiea. While having acquired help from someone who could aid them in getting to Skypiea, Luffy and his crew however found out that they needed an important thing to aid them, the South Bird. This bird as explained to them by Cricket, was needed to find a Knock Up Stream needed to help them get to Skypiea. Having been told this, Luffy and his crew quickly went in search for the bird.[142]
Splitting into various groups, Luffy and his crew searched the nearby forest for one of these elusive birds. Though they encountered all sorts of obstacles and antics while searching for the bird, they were able to catch one in the end thanks to Nico Robin. With the captured bird, they went back to Cricket's. Upon returning however, they discovered the horrid aftermath of an incident that happened while they were away, Cricket and his proteges were defeated and had been robbed by Bellamy and his crew.[143]
Luffy defeating Bellamy with a single punch for stealing Cricket's gold.
Spurred on by this, Luffy decided to go after Bellamy and get his wounded friends' gold back. At Mock Town, Luffy was engaged by Bellamy who wanted to prove once and for all to those around him that Luffy and Cricket's dreams were nothing. Despite Bellamy's over the top display of his Devil Fruit ability, Luffy however defeated the arrogant pirate with a single normal punch. Having completely obliterated Bellamy in front of his crew and the other pirates, Luffy was able to retrieve Cricket's gold without any further trouble.[144]
As the morning of the next day came, Luffy arrived back to Cricket's house. There he saw the newly modified Going Merry as he gave Cricket's gold back. With the new modifications for the trip up to Skypiea and the South Bird, Luffy and crew set sail with the ships of Masira and Shoujou escorting them. As they were leaving, Luffy and his crew were cheered on by Cricket's final words of encouragement. With that, Luffy and crew sailed off to where they could ride a Knock up Stream.[145]
After a long wait out on sea, the weather and the sea started to show signs of a Knock Up Stream. As Luffy and his crew were preparing themselves for the journey to Skypiea, they suddenly encountered the ship and crew of the pirate that Luffy fought with in the bar. From this encounter, Luffy and his crew learned of his and Zoro's new bounties for which the pirate planned on collecting. The encounter however was brief as the Knock Up Stream started. With the Knock Up Stream shooting the Going Merry into the sky, Luffy and his crew set forth to new adventure as well inadvertently escaping from the pursuing pirate.
Skypiea Arc
Arrival and Many Adventures
Thanks to the Knock Up Stream, Luffy and the Straw Hats arrived at Skypiea. As soon as they arrived, they are attacked by a mysterious masked warrior who Luffy had trouble fighting. But, luckily, they were saved by a knight named Gan Fall. After he rescued them, Gan Fall decided to leave.
Luffy and the Straw Hats pass through Heaven's Gate and arrived at the shore of Angel Island, in which they meet Conis, an inhabitant of this island. While having fun, Luffy discovers, the hard way, that the White Sea has the same effect on him just like the Blue Sea.
After hearing that Nami has ventured into Upper Yard, a forbidden sacred place in which the god Enel and his priests reside, Luffy decided to head out to rescue her, but he makes it obvious that he simply wants to go to Upper Yard to explore and have an adventure. Unfortunately, he was stopped in his tracks by the White Berets, who tried to arrest them for illegally entering Angel Island. However Luffy easily defeated them.
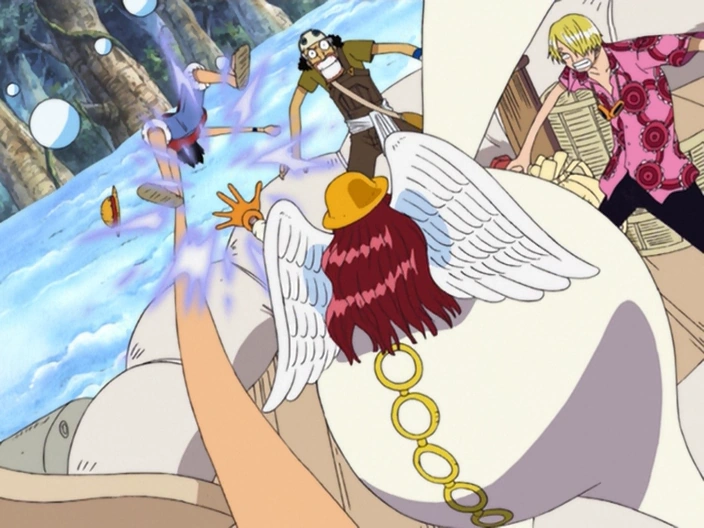

Luffy, Usopp and Sanji vs. Satori.
Luffy, Usopp, and Sanji discover that a giant shrimp has kidnapped the rest of the Straw Hat Pirates, and taken them to Upper Yard. The three pirates decided to rescue them. After finding a ship that can take them to Upper Yard, the Karasumaru, Luffy, Usopp, and Sanji learned that Conis was responsible for calling the White Berets. She was almost killed by Enel's lightning, but was saved by Gan Fall. Despite this show of Enel's power, Luffy, Usopp, and Sanji started their travel to Upper Yard.
Luffy, Usopp, and Sanji travel through the Milky Road in which they avoided several deadly traps. After that, they entered the Ordeal of Balls, in which they encountered Satori, one of Enel's priests. Satori was a strong opponent, especially because he possessed an ability called Mantra. But, despite this, Luffy and his friends managed to defeat him.
After the battle, Luffy, Usopp, and Sanji managed to rejoin their friends at the Sacrificial Altar along with Gan Fall, who arrived to save Chopper from Shura. Later that night, Luffy and his friends had a great party along with the company of a pack of wolves. In the morning, the crew decided to split into two groups; one which would go search for the city of gold in Upper Yard, which was revealed to be part of Jaya 400 years, while the other group will go out of Upper Yard. Luffy searches for the city of gold.
Inside the Stomach of a Giant Snake
Luffy vs. Wiper.
Luffy, Zoro, Chopper, and Robin were searching for the city of gold in Upper Yard, until they are pursued by a gigantic snake, which forced them to split up. After that, Luffy encountered Wiper, the man who attacked him and his friends on their arrival in Skypiea, and the two began to fight. During their fight, the giant snake appears, interrupted their fight, and eats Luffy. In the snake's stomach, Luffy sees mountains of gold and ruins, but cannot seem to find his way out, under the assumption that he's in a cave. Later, Gan Fall, his horse Pierre, Nami, and Aisa joined Luffy inside the snake's stomach. Nami finds out from Luffy that his attacks within the snake are responsible for the its erratic behavior and comically beats him up in anger. After Enel blasts the surface that the snake, Zoro, and Wiper were on, the three fell towards the hidden ruins of Shandora. Gan Fall and Nami managed to escape the snake, but accidentally left Luffy, Aisa, and Pierre behind. With the snake remembering the city from long ago, from which she came and gave a triumphant roar, Enel silences it with a thunderbolt powerful enough to knock it unconscious. Later that day, Luffy, Aisa, and Pierre managed to escape the unconscious snake. But, at the moment they escaped, they noticed the destruction that Enel has caused. After a barely conscious Robin explains the situation, and Enel's intentions to eradicate Skypiea, Aisa explains to Luffy that she can use her mantra to lead him to Enel. Following Aisa's direction, Luffy decided to stop Enel.
Facing Off Against a God
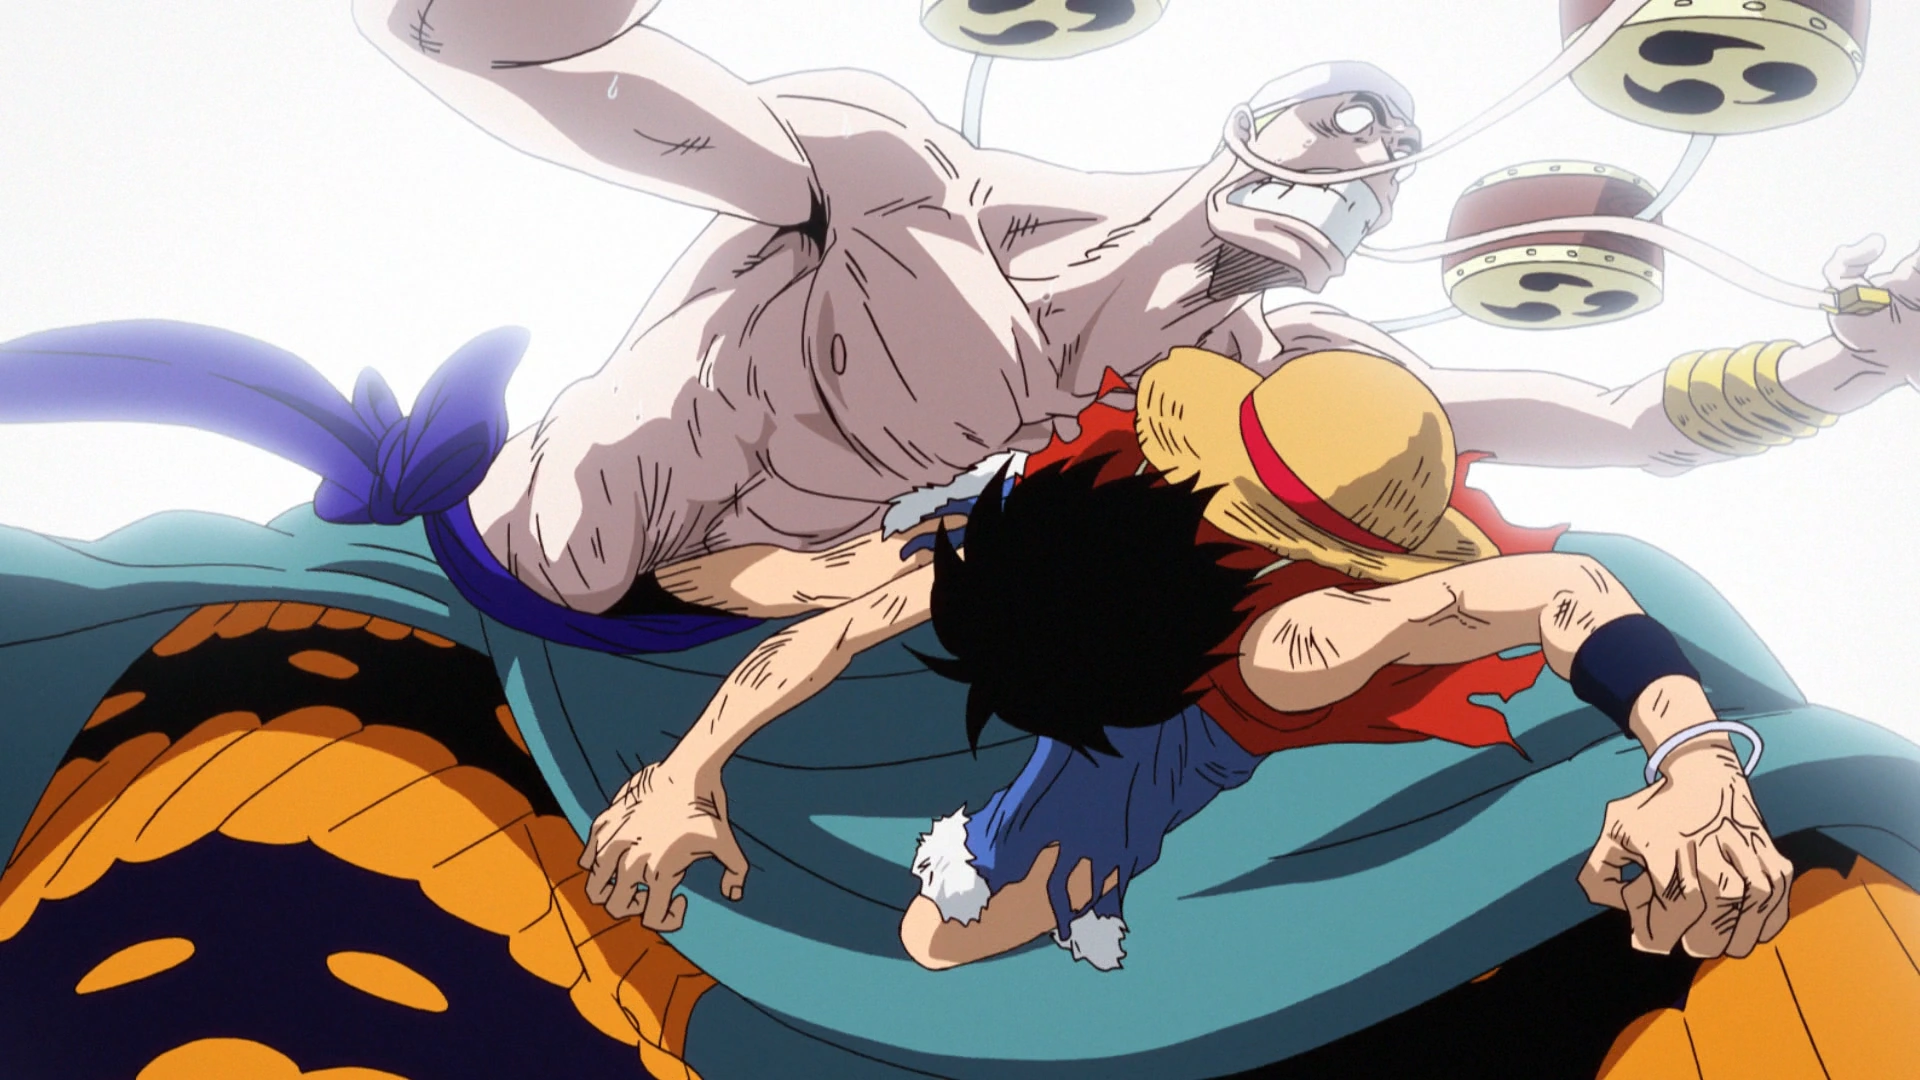

Luffy vs. Enel
Luffy finally reaches Enel and challenges him. As Luffy charges, Enel fires electrical attacks at him only to find that they have no effect on a rubber Luffy. Not only that, but Luffy can neutralize the invulnerability from his Logia fruit power. After this unexpected turn of event, Enel switches to a different mode of attack by reforming his staff into a trident, and using his Mantra to predict Luffy's moves.
Luffy's hand is stuck inside the golden ball Enel created.
While Luffy and Enel duel continues, the Maxim starts to rise and Enel activates Maxim's secret function: Deathpeia to produce thunderclouds into the atmosphere allowing him to attack the island from an island-scale range. Luffy manages to hit Enel a few more times despite his mantra hence Enel decides to incapacitate the rubber boy by attaching a large ball of gold to his arm instead of defeating him. He then can get rid of Luffy by knocking him off the ship back onto Upper Yard. With the help of Aisa, Luffy tries to get the golden ball off him as the two try to give chase to Enel and his rising ship Maxim.
Luffy manages to recover in the ruins of Shandora and, along with Aisa and Pierre, runs towards the beanstalk with the golden ball still attached to his arm. Seeing Robin made it with the others on Giant Jack, Luffy tosses Aisa and Pierre onto them to look after the two as he chases Enel. Luffy makes it to the top of the beanstalk and grabs onto the Maxim, only for Enel to kick him off, and destroy the top of the beanstalk before using the thunderclouds to form a giant sphere with his power called Raigou to annihilate another Sky Island. Luffy is eventually met by Nami, who tried to convince him to leave, but he replies that he has to ring the bell so Montblanc Cricket and everyone else will know that the city of gold is in the sky. Using the Waver's full power, Nami and Luffy blast up the plant and are sent flying towards Enel. However, Luffy pushes Nami onto a cloud and makes a detour into Enel's Raigou.
Luffy defeating Enel and ringing the Golden Bell.
Luffy swings the gold ball around with Gomu Gomu no Hanabi Ougan Botan to draw the electricity from the Raigou into him and eventually destabilizes it clearing the sky. Despite Enel unleashing his full power, Luffy manages to kick him, only falling back when the weight of the golden ball allows Enel to pierce him with the tridents. Luffy jumps back using the cloud Nami was on and fire Gomu Gomu no Ougan Rifle at Enel, with such such speed that he cannot dodge it and sends him crashing into the Shandorian Golden Belfry Bell sending a ring that could be heard everywhere, thus ending the war between Skypieans and Shandia, and informing Cricket that the bell was always in the sky. In Jaya, Luffy's shadow in the sky is seen by Cricket, Masira and Shoujou, which let them conclude that the city of gold is in the sky.
After Enel's defeat, Luffy, his crew and the rest of the inhabitants of Skypiea had an enormous party at night. After the party, Luffy decided to take several bags full of gold, thinking that as pirates they should simply take them not knowing that the natives already allowed them to take them in the first place. Once that was done, Luffy and his crew boarded the Going Merry and go out of Skypiea using the Clouds End door, thanks to Conis and her father Pagaya who thanked them for saving Skypiea from the tyranny of Enel.
Water 7 Saga
Long Ring Long Land Arc
The Three Events
Upon returning from Skypiea to the Blue Sea, Luffy and his crew had no time to rest as they encountered a giant wave created by some Sea Monkeys. After the brief incident, Luffy and his crew rested and assessed the good wealth they obtained from their Sky Island adventure. As Luffy discussed with his crew, they all agreed that they would use the treasure to help fix the travel-worn Going Merry and get a shipwright to help maintain it. After encountering the Sea Monkeys once again and a curious pirate ship with no sails or crew, Luffy and his crew reached the next island in their journey. As Luffy, along with Usopp and Chopper, decided to explore the island, they noticed that the animals and plant life were all very long in appearance.[146]
As Luffy and his two companions explored the island more, they encountered a nomad named Tonjit who had been stuck on his stilts for 10 long years. After getting acquainted with the old man and reuniting him with his horse, Shelly, Luffy and his companions felt that they had done small accomplishment. However, in the midst of their enjoyment, Shelly was suddenly shot. Learning immediately that the shot was fired by the pirate, Foxy, who was nearby, Luffy momentarily get angry at this foe. Before Luffy could fight Foxy however, he was suddenly challenged to an official Davy Back Fight.[147]
From Usopp, Luffy learned that this sudden challenge was a set of three games between pirate crews in which the crew members were at stake. Despite Usopp's warnings however and much to the dismay of the rest of his crew, Luffy accepted the challenge from Foxy and his crew to hold a Davy Back Fight on Long Ring Long Land. What happened next was a festival-like event set up by Foxy's pirates in lieu of the Davy Back games. After the formalities of the beginning of the games, Luffy and his crew decided who would participate in which game. Taking the final and most climatic game, Combat, Luffy awaited for his turn as he watched the rest of his crew participate in the other games.
The first two games of the Davy Back Fight proved to be both surprising and emotional for Luffy and his crew. In the first game, Donut Race, they witnessed Foxy and his crew's cheating tricks, and Foxy's exploit of his Devil Fruit powers of the Noro Noro no Mi. Due to these, Luffy lost Chopper to Foxy. Fortunately, Luffy was able to win Chopper back as his crew won the second game, Groggy Ring, despite the gigantic odds stacked against them. After watching these two grueling games, Luffy was pumped up for his turn in the final game.
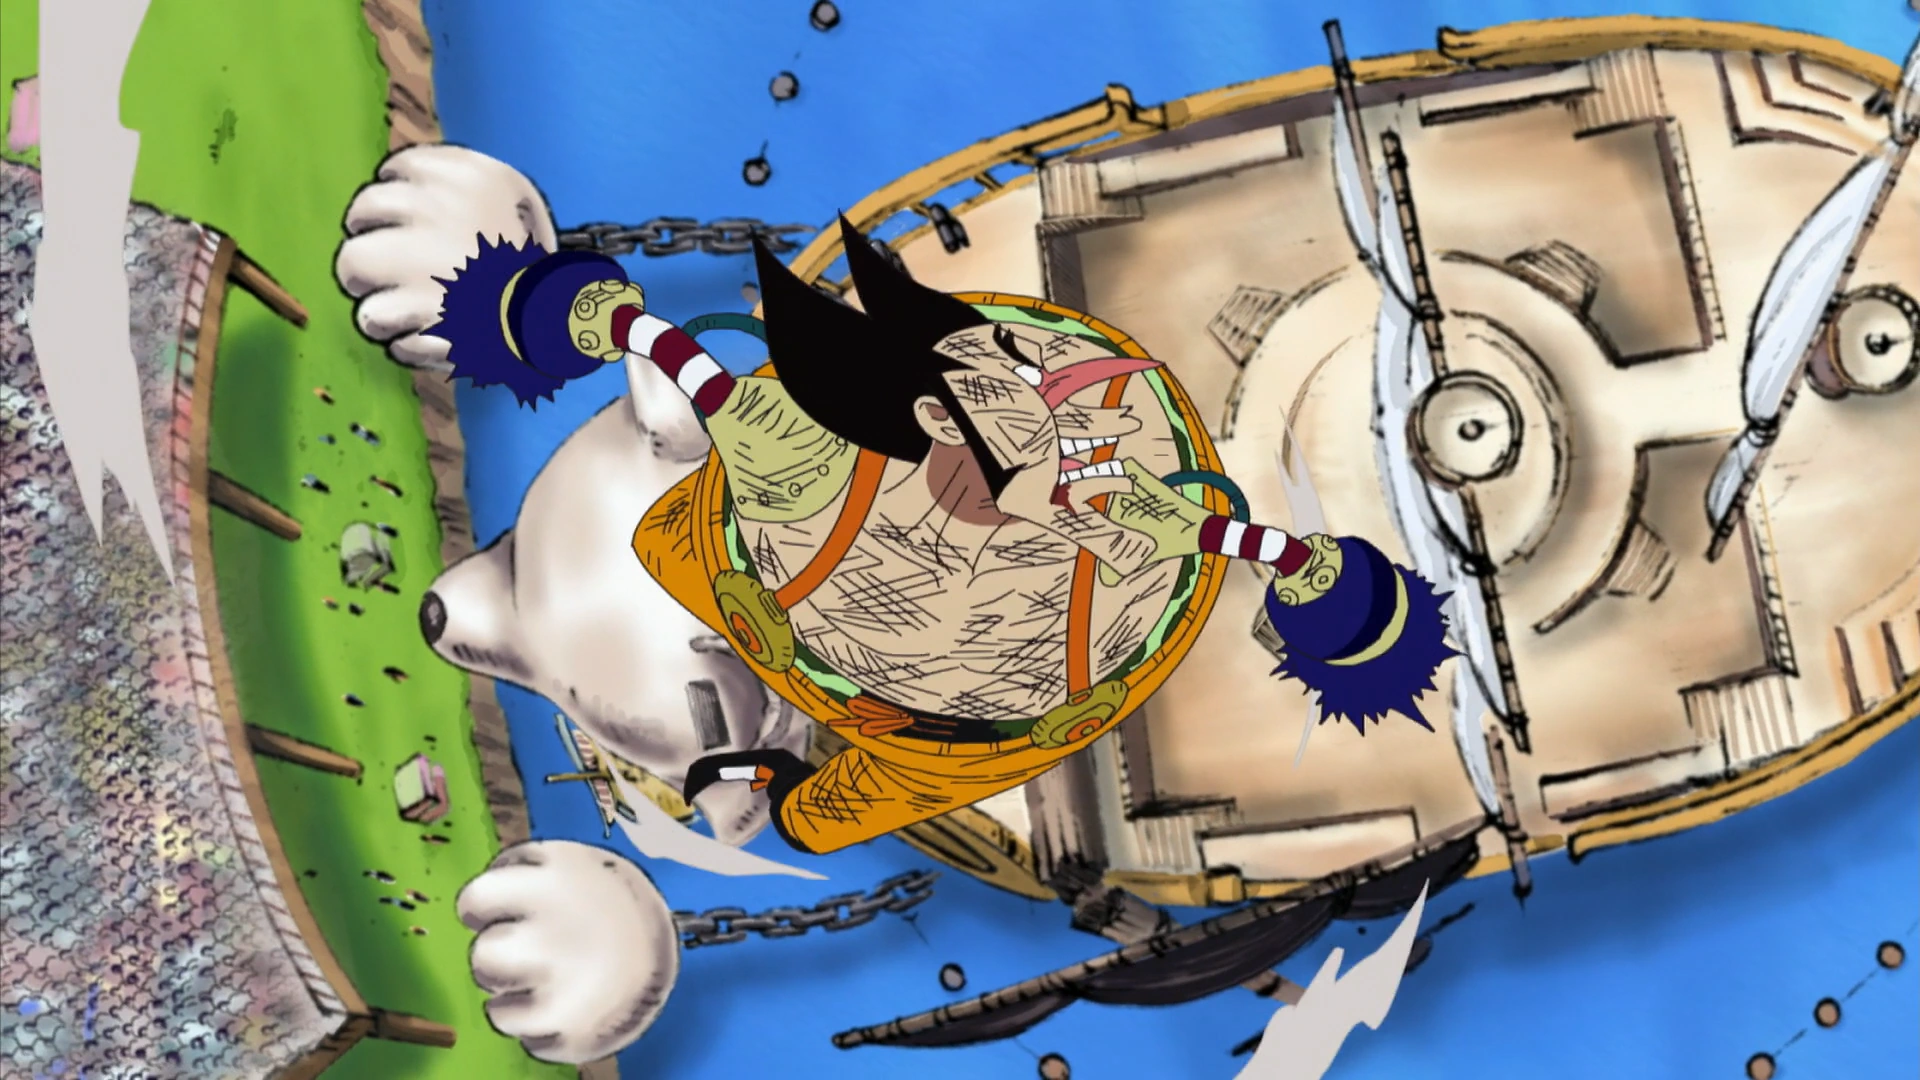

Luffy defeats Foxy.
With the third game approaching, Luffy with the help from Usopp, decided to dress appropriately for the match. Donning an afro and boxing outfit, Luffy was ready to face against the sly Foxy aboard his ship, the Sexy Foxy. Throughout the whole match, Luffy was constantly tricked by his smarter opponent as they battled all around the ship. With Foxy's tricks and Devil Fruit powers, it seemed like Luffy would lose. Despite this, Luffy persevered to not lose one of his crew forever. In the climax of the battle, Luffy was able to thwart Foxy by using a mirror shard obtained from the battle to reflect Foxy's powers back to himself. Having slowed Foxy down, Luffy delivered the final blow and won the game.[148]
After a lot of rest, Luffy wakes up being told he indeed did win the fight. Foxy comes to congratulate Luffy on how he fought in the match, giving a handshake gesture, then attempting to throw him overhead, forgetting his arm is rubber. As Luffy won, he gets to choose a crew member from the Foxy Pirates, but instead choose their flag, but as the sail is their flag, Luffy opts to "redesign" the flag, then give it back. Luffy's poorly drawn Jolly Roger is given to them, officially ending the Davy Back Fight. Although obviously grateful, Foxy vows revenge on Luffy for losing the match. The Straw Hats return to Tonjit giving him the Foxy Pirates' old flag as a sign of their defeat. Chopper uses it as a bandage for Shelly, the horse.
Encounter with Admiral Aokiji
Just as Luffy and his crew were done with the dealing with the matter with Foxy and his pirates, they soon came across another one. Sleeping beside Tonjit's house was the Admiral Aokiji. Initially, Aokiji was non-hostile to Luffy and his crew, despite him being a Marine and causing Luffy some fear when he told him that he knew his grandfather. Aokiji even helped Tonjit in finding a way to get back to the rest of the old man's nomad clan with his Hie Hie no Mi. However, when hostilities began between Aokiji and Nico Robin, Luffy and his crew faced off against this new foe. Despite their best efforts, Luffy and those who fought alongside him against Aokiji were utterly defeated. Fortunately however, the admiral simply left a frozen Luffy in defeat, but with a warning to be wary with Nico Robin.
Water 7 Arc
The Captain's Burden
After sailing for a short while, they witness a frog doing a freestyle swim trying to stall a train moving in the ocean, with an odd girl and even odder elderly woman. The girl introduces herself as Chimney with her pet rabbit, Gonbe and her grandmother Kokoro. They explain that the train is called the Puffing Tom, and is a Sea Train. Kokoro tells them that they are approaching Water 7, where they can easily repair their ship, as it is home to the world's best shipwrights and carpenters, and to look for a man named Iceburg.
The Straw Hats are amazed at the architecture of Water 7. Luffy, with Nami and Usopp go in a group and Luffy carries the gold from their last raid in Skypiea. After entering shipyard, they find out that the gold is worth at least ![]() 300,000,000, and trade it in for cash in a merchant shop. They meet a man with a long rectangular nose named Kaku of the Galley-La Company. They soon visited by Iceburg himself assisted by Kalifa, who both turns out to be the mayor of Water-7 and aware of who they are and agree to help them. In between their meetings, they almost got robbed by a gang of dismantlers known as the Franky Family, were it not for Paulie of Galley-La Company.
300,000,000, and trade it in for cash in a merchant shop. They meet a man with a long rectangular nose named Kaku of the Galley-La Company. They soon visited by Iceburg himself assisted by Kalifa, who both turns out to be the mayor of Water-7 and aware of who they are and agree to help them. In between their meetings, they almost got robbed by a gang of dismantlers known as the Franky Family, were it not for Paulie of Galley-La Company.
Luffy, Usopp and Nami are taken to the Shipyard. Kalifa tells them that Iceburg is not only the mayor of Water-7, but the leader of the Galley-La Company, and its greatest carpenter. Luffy asks Iceburg to join his crew, to which he declines. Kaku returned from his diagnosis to tell Luffy and Nami that the Going Merry is irreparable. Luffy pleads to repair the ship, and they have plenty of money to spend, but Paulie explains that the Merry has suffered a broken keel. As the keel is the most vital part of the ship, they cannot fix it. Luffy refuses to believe that Merry was truly irreparable, but Iceburg coldly states with that sort of stubbornness, he might as well sink with it. He also tell them to return once they've decided on getting a new ship, and with the![]() 300,000,000 they have, they easily buy the best they have to offer. As a scheming Government agent has a private conversation with Iceburg, Luffy and Nami discover they've been robbed and their cases of cash replaced.
300,000,000 they have, they easily buy the best they have to offer. As a scheming Government agent has a private conversation with Iceburg, Luffy and Nami discover they've been robbed and their cases of cash replaced.
Zoro, Sanji and Chopper were searching for Usopp at the time, and Sanji brings him out. They look for the whereabouts of the Franky Family's base, and find a severely beaten up Usopp outside it. So Luffy, Zoro, Sanji and Chopper enter the Franky House. After the four beat them up, severely for attacking Usopp, and destroy the house they contemplate what their next course of action is, as Franky took the money anyway, and the ship cannot be fixed. Luffy makes the difficult decision to abandon the Going Merry and get a new one. As Usopp recovers back at the Going Merry, he is glad to see his friends around him, and laments to Luffy that he could not get the money back to fix the ship. However, Luffy tells him that the ship is irreparable, so they just have to get a new one. Usopp does not take the news too well and a large quarrel ensues between the two. In the end, Usopp explains his feelings of inadequacy to the crew and concludes by announcing he's leaving the crew. Leaving the ship, he also announces he will duel with Luffy for the Going Merry.

Luffy is attacked by Usopp using Impact Dial during their duel.
When Usopp arrives at the appointed time, Luffy orders the crew not to come down, and let the two of them settle it. Usopp, who has fight along Luffy and knows him well, surprisingly manages to give Luffy a hard time. However, all the while, Luffy is thinking about their former friendship. As Luffy lies on the ground, he thinks of the good times he and Usopp had together. Using his new dials, Usopp manage to hit Luffy but it wasn't enough to stun him for too long and the captain finished Usopp off with Gomu Gomu no Bullet, ending the duel.
With Luffy winning, he told Usopp he could not have won anyway, however, out of pity and respect to their former friendship, he tells Usopp that he can have the Going Merry and orders everyone out by the following morning as they take their stuff. While all the others were saddened by the loss of Usopp in their crew, Zoro said to Luffy he did the right thing. As the captain, he has to be decisive and stern. Luffy's tears start to roll down his eyes, with two Straw Hats gone (Robin is missing), and the ship broken.
Encountering CP9
Soon afterward, Nami tells Luffy and Sanji that an attempt on Iceburg's life was made. Luffy and Nami decide to head to Iceburg for him to tell them what happened. However, Luffy is challenged by the boss of the Franky Family, Franky who wants revenge for beating his "brothers and sisters" up in his absence and trashing their house. Franky reveals he is a cyborg and gives Luffy a hard time. Meanwhile, news spreads blaming the Straw Hat Pirates for the attempted assassination of Iceburg, when he reveals that Nico Robin was one of the assailants. The battle continues between Luffy and Franky when the Galley-La foremen interrupt the fight, convinced that the Straw Hats tried to kill Iceburg. Luffy tries to explain that the Straw Hats weren't involved in what happened to Iceburg but the shipwrights do not listen to him. Franky annoyed that intruders sneak into their duel decides to fire his Coup de Vent blast, which ends everything.
Luffy and Nami escape to a building near Galley-La Headquarters, and Nami notes that the atmosphere has dropped, and the typography appears different. Luffy immediately attempts to ask Iceburg what happened and stretches towards the building. After evading those trying to capture him, he makes it to Iceburg's room. The mayor notes he is not here to kill him in the midst of all the chaos, and asks Luffy to see Robin one more time, and the Straw Hat replies it's impossible as they do not know where she is and leaves the room before the pursuers appear. After informing Nami that Iceburg said he definitely saw Robin, he still refuses to believe it. After they meet up with Zoro, they are forced to hide until Chopper tells them that Robin has left them, and was involved with an attempt on Iceburg's life. Zoro decides that by nighttime, they need to find out after all the time they spent whether Robin is their friend or foe. After much thinking, Luffy decides that they should return to the crime scene to find out what the truth about Nico Robin really is.
Luffy, Nami, Zoro and Chopper wait for Robin to arrive sitting on a tree branch while observing what is happening. Galley-La Headquarters is heavily guarded with carpenters. Suddenly, chaos erupts within the building and Luffy escapes into the headquarters. After getting stuck, he smashes into the third floor, getting stuck again, and seeing Paulie on the ground bleeding with two masked assailants in front of him. The two use a powerful kick called Rankyaku and subdue Luffy with metal hoops, and do the same with Paulie before taking off. As the two are trapped, Paulie admits a misunderstanding with Luffy and decides he needs his help to beat the assailants, who are really a team of secret agents known as Cipher Pol No. 9. Luffy uses his rubber ability to free himself and frees Paulie as well. As they enter Iceburg room, Rob Lucci, Kalifa, Blueno, and Kaku all now revealed to be CP9 members notice him, as well as Robin.
Luffy pleads with Robin to tell him what is going on, but she states she cannot as she has darkness in her heart and prepares to escape. Luffy tries to go after her but is held back by Blueno who withstands his attacks while Kaku and Kalifa both attack him using powerful attacks. As Robin declares they will not see her again, and escapes through the window, Luffy gives chase behind her, but Lucci grabs him by the head, preventing him from running after her, and resists his attacks with Tekkai, before throwing him to the side. He informs the Straw Hats that CP9 are secret agents dedicated to serving the World Government, and have trained their bodies from young ages to superhuman levels, and says for this reason they cannot compare to their strength. With the time set to burn the house down, Lucci decides to reveal his Neko Neko no Mi, Model: Leopard fruit, turning into a gigantic half-human, half leopard. With the shipwrights arriving to save Iceburg, Lucci uses his Rankyaku technique to slice the ceiling. Paulie puts Iceburg on his back and prepares to fight Lucci, but Luffy attacks him first, but Lucci defeats Luffy with a single Shigan piercing right through his abdomen, grabs his head and flings him out of the building.[149]
Later, after Nami recovers and finds that Sanji managed to sneak aboard the Sea Train bound for Enies Lobby. She goes in search of Luffy in the old ruins of Water 7, with some help from Chimney, Nami finds Luffy wedged between two buildings.[150] When she tells him the real reason Robin left (which Nami learned from Iceburg); That she left to save them from being targeted by the World Government, and give herself up to them. Upon hear hearing this, Luffy says he's glad to hear that and in a tremendous show of strength, pushes the buildings aside then jumps to Nami just as Aqua Laguna about to hit. The two along with Chopper and Zoro just barely avoid getting caught in the first wave though the second nearly catches them.[151] Luckily, they are rescued by Paulie and pulled to higher ground.
After recovering from nearly being drowned, Luffy asks for a boat to chase after Robin but Kokoro tells him its impossible due to the Aqua Laguna storm. However seeing that he is determined to rescue Robin no matter what, she leads him to a hidden area where a second prototype Sea Train is kept. Iceburg is already there, having anticipated what Luffy was going to do and readied the train for departure. Luffy stocks up on provisions before heading out but is confronted by the Franky Family who beg Luffy to take them along as their leader Franky was captured by the CP9 as well. Luffy agrees to let them come before boarding the Sea Train with the remaining Straw Hats and Kokoro and setting off. As they leave, the Franky Family hook their ship up to the train just as it about to connect to the tracks. Later on it shown that more passengers, Chimney, her rabbit Gonbe, and the remnants of Galley-La (Paulie, Tilestone and Peeply Lulu) managed to stow away on the train as well. Once the latter learn the truth about CP9, Luffy forms an alliance with the Franky Family and Galley-La to defeat their common enemy.
After which, Luffy mostly sits at the front of the train for most of the trip. At one point, they come upon a wave that threatens to derail the train. Luffy and Zoro combine their attacks together to blow a hole through it to allow safe passage for everyone. Later on they come across a detached compartment from Puffing Tom (the first train) which was due to the actions of Franky, Sanji and Usopp (going by his Sogeking persona). Luffy slingshots himself onto it and checks to see if his friends are inside. But finding only Government agents, jumps back on board the Rocketman as Zoro cuts the compartment in half to allow the train to continue.
Soon, the group pick up Sanji and Usopp after their failed attempt to rescue Robin and Franky. Luffy assures Sanji they will rescue her. He gushes after he meets Sogeking not realizing who he really is (everyone save for Chopper realize though). After which, Enies Lobby is in sight and the last ditch rescue of Robin begins.
Enies Lobby Arc
Arrival and Takedown
As they were approaching Enies Lobby, Luffy (before hearing any plans the others can come up with) rushes on ahead straight into Enies Lobby, climbing through with his Gomu Gomu abilities, and begins a rampage across the island, taking out any Marines and Government agents in his path. Indeed, in the 10 minute headstart Luffy gave himself, he was able to defeat up to 500 World Government and Marine personnel before reaching the Courthouse of Justice, causing a crisis on the island all by himself, even without his crew, let alone the alliance forged by them. Luffy was soon confronted by Blueno of CP9 on the Courthouse of Justice, who explained that Luffy's presence on the island has already caused an incident on a global scale, and that the invasion meant he has offended the World Government itself, and the retribution will likely be severe. Blueno continues that their last encounter demonstrated that he was no match for a user of Rokushiki (himself and the rest of CP9).
Luffy fighting Blueno.
However, Luffy rebuffs this statement saying that this time will be different. It seemed from his initial attack that Luffy wasn't just bluffing: Unlike the battle on Water 7 however, Luffy is a completely different fighter. He is able to keep up and avoid most of Blueno's Rankyaku attacks and even manage to break through his Tekkai defense. Luffy states he does not care about the World Government, and simply wants Robin back. After a pause during the battle Luffy reveals he is thankful for meeting the CP9 as he now learnt a few new techniques to keep his crew safe. He then reveals the new technique, which he calls Gear Second, an ability which is noted by the steam coming off Luffy's body, and radically increases his power and his speed. This shows when not only is Luffy fast enough to keep up even with Blueno's Soru, but is more than strong enough to easily break through his Tekkai. Blueno is eventually overwhelmed by Luffy's new power, leaving Luffy free to call out to Robin. These turn of events force the other CP9 members to come out and confront him. The Straw Hat captain is soon joined by his fellow crew and the group prepare to face off against the rest of CP9.

Luffy and Lucci clash.
It is here the dramatic confrontation takes place and they learn of Robin's true situation. Luffy demands that he hear that Robin wishes to live from her own mouth, She declares that she does indeed want to live and with those words set the following events in motion. After declaring war on the world government by means of Luffy issuing the order for Sogeking (Usopp) to set fire to the World Governments flag, Luffy grabbed his crew and jumped together into the waiting Rocketman train below; Franky fell down, pushed by Spandam and fell together with the Straw Hats.
Each of them started to search for the key to Robin's Seastone handcuffs which is in the possession of one of the CP9. After defeating the other members of CP9 and successfully releasing Robin, Luffy was the only one remaining to have yet defeated his opponent, Rob Lucci. Luffy begins his fight with Lucci and seemed to be on equal terms with him, but was still no match for his great strength and his Rokushiki techniques. Later, Franky shows up and helps Luffy fight Lucci, but Luffy urges Franky to forget about him and save Robin. When Franky was about to leave, he gets cornered by Lucci, but Luffy goes into Gear Second and strikes Lucci with a Gomu Gomu no Jet Pistol. Lucci then goes into his leopard form and fights Luffy. Luffy, thanks to his Gear Second techniques, is finally able to catch up with Lucci's inhuman speed and strength and even the odds against him. But, due to being tired, Luffy gets out of Gear Second and he starts to struggle in his fight with Lucci.
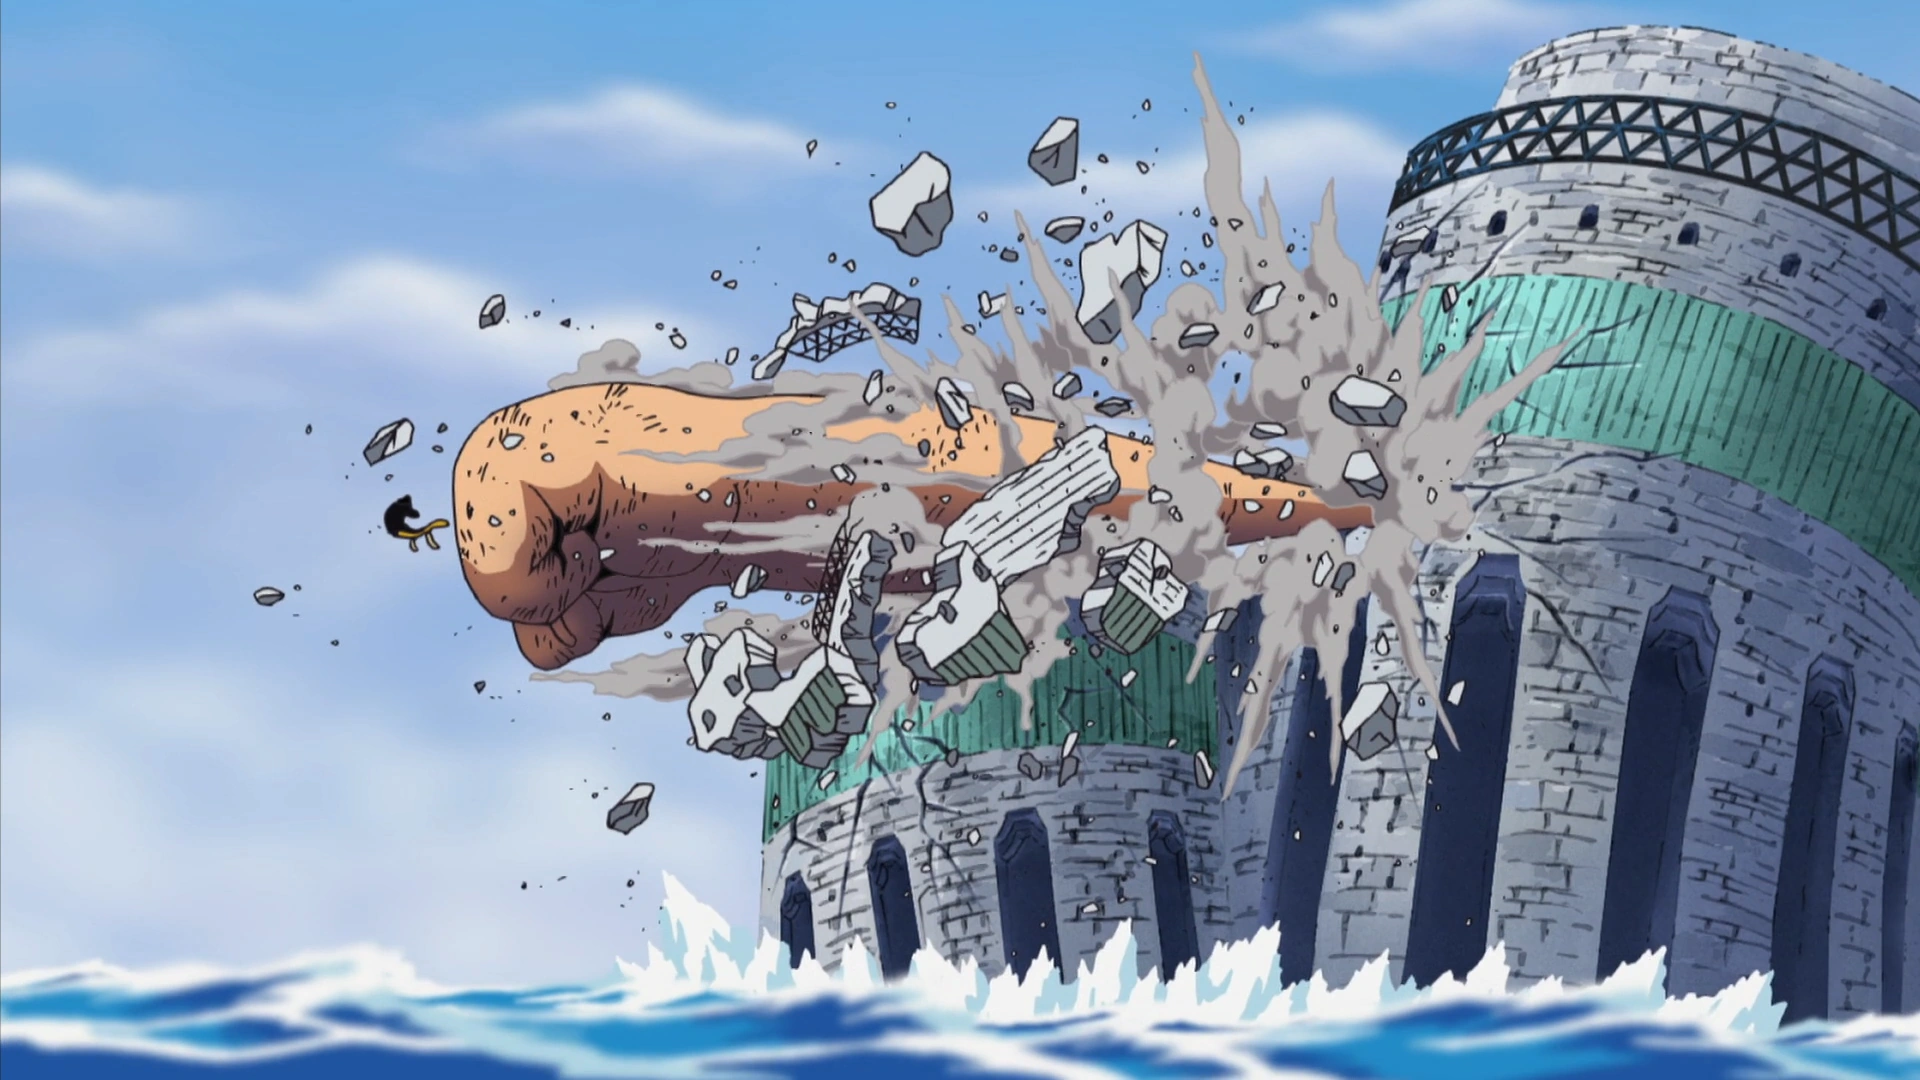

Luffy strikes Lucci with Gomu Gomu no Gigant Pistol.
After being hit by Lucci's Tobu Shigan: Hibachi, Luffy stands up once more and enters in Gear Third. He does an extremely powerful blow to Lucci using Gomu Gomu no Gigant Pistol. Lucci falls into a Marine battleship and Luffy goes him using Gomu Gomu no Rocket. He sees Lucci and uses Gomu Gomu no Gigant Axe. He misses and he instead crushes the ship below him. Lucci lands on the mast and Luffy uses Gomu Gomu no Gigant Whip to hit him. He misses and Lucci then goes into his second leopard form and bites Luffy on the shoulder, but Luffy forces him to get away from him by using Bone Balloon. Lucci hits him with a Tobu Shigan and surprises Luffy by going behind him. He now understands that Luffy's speed has decreased tremendously. Lucci strikes Luffy on the ground and uses Rankyaku: Gaicho to kill Luffy, but Luffy barely dodges and goes in his chibi form due to the side effects of Gear Third. Lucci was about to finish off Luffy, but due to the considerable damage given to him by Luffy's Gigant Pistol, he couldn't do so, allowing Luffy to revert back to his normal form. Luffy, ready to resume his long battle with Lucci, enters Gear Second.
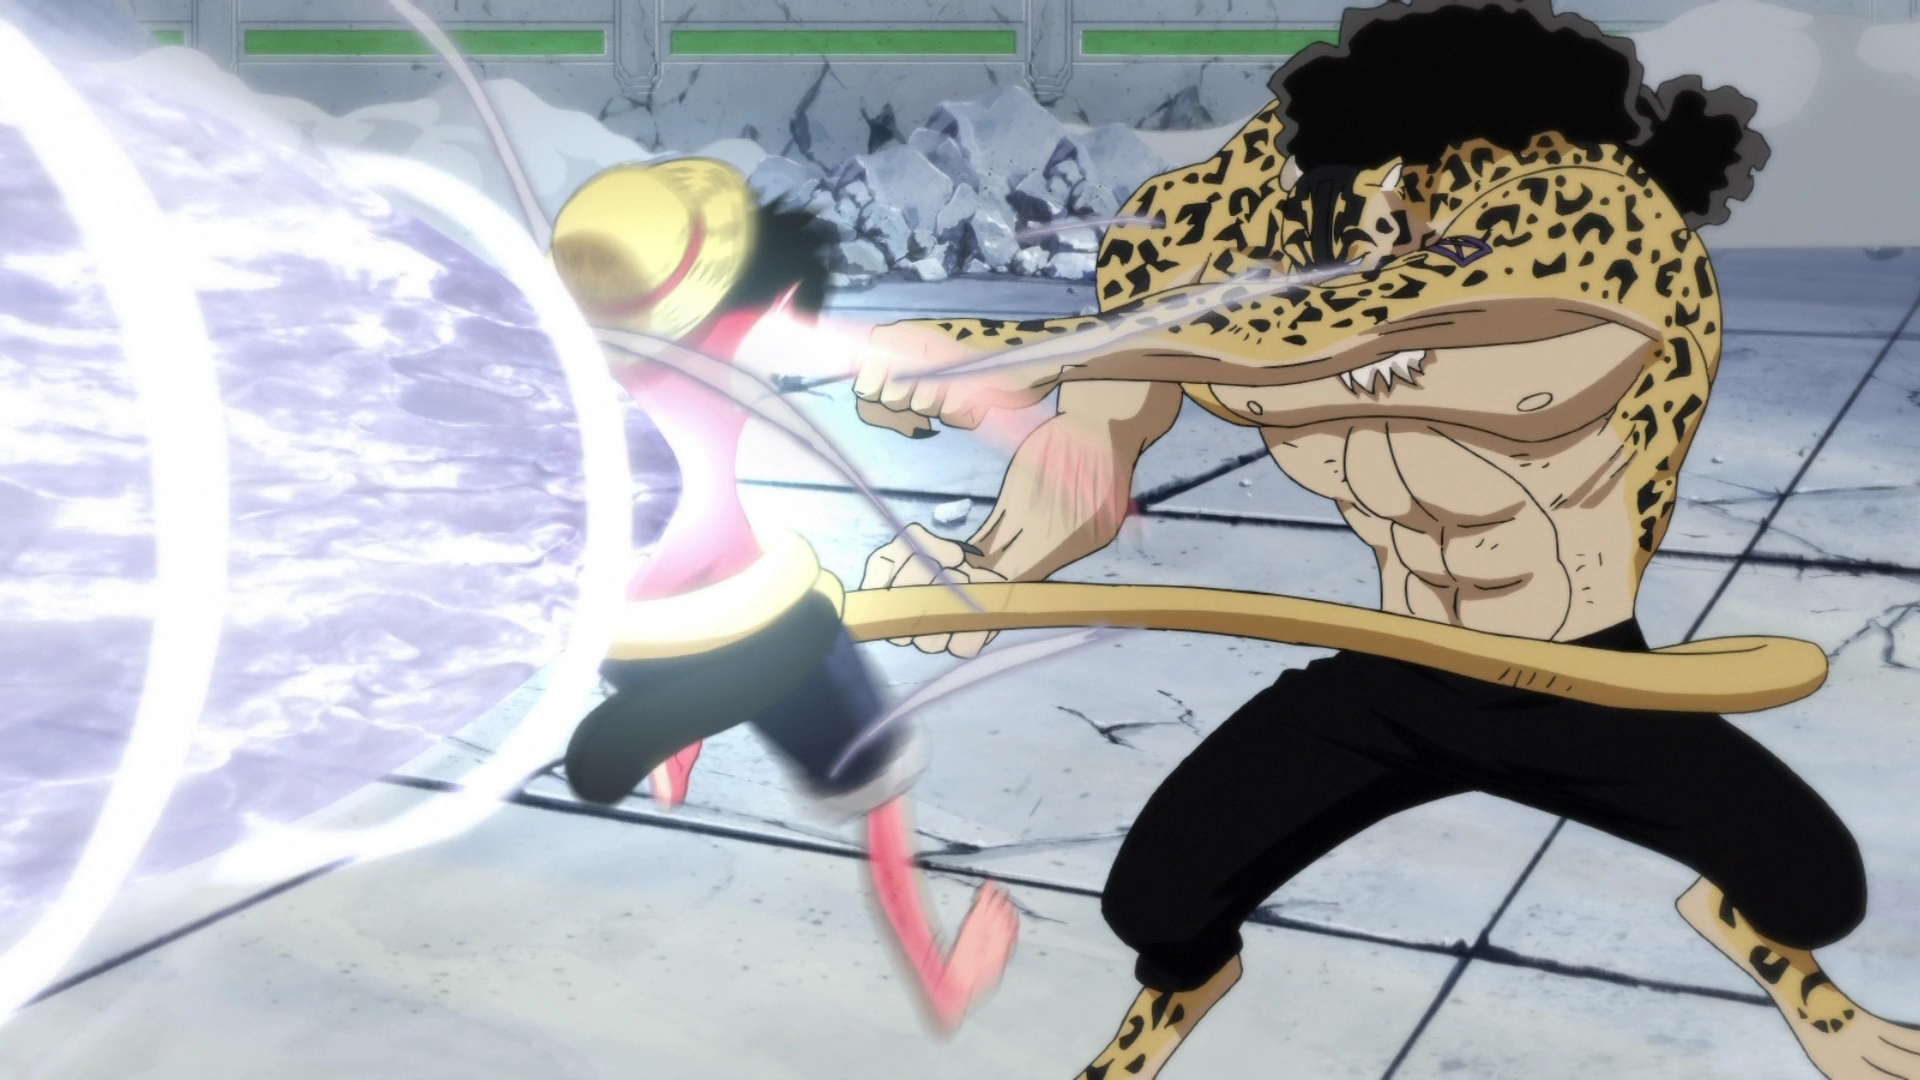

Luffy struck by Sai Dai Rin: Rokuogan.
Luffy and Lucci's battle continues, with Luffy having the advantage over Rob Lucci using the techniques, Gomu Gomu no Jet Pistol, Jet Bullet, and Twin Jet Pistol, and his brute strength. Lucci, now taking Luffy seriously, uses Rokushiki's secret technique, called Rokushiki Ogi: Rokuogan. Luffy is hit hard by the power of its attack, but he still mangages to stand up. Luffy's speed soon starts to decrease and Lucci lands another Rokuogan on Luffy. Luffy falls to the ground, still in Gear Second and conscious, but defeated. Later, Usopp shows up and tells Luffy that he needs to get back on his feet. He also tells him that Enies Lobby isn't hell. Luffy, still in pain by the Rokuogan, stands on his feet and tells Lucci that until he defeats him, he won't drop to the ground ever again. Luffy engages Lucci once again. After he lands a Gomu Gomu no Jet Pistol on him, Luffy is struck by Lucci's Sai Dai Rin: Rokuogan.
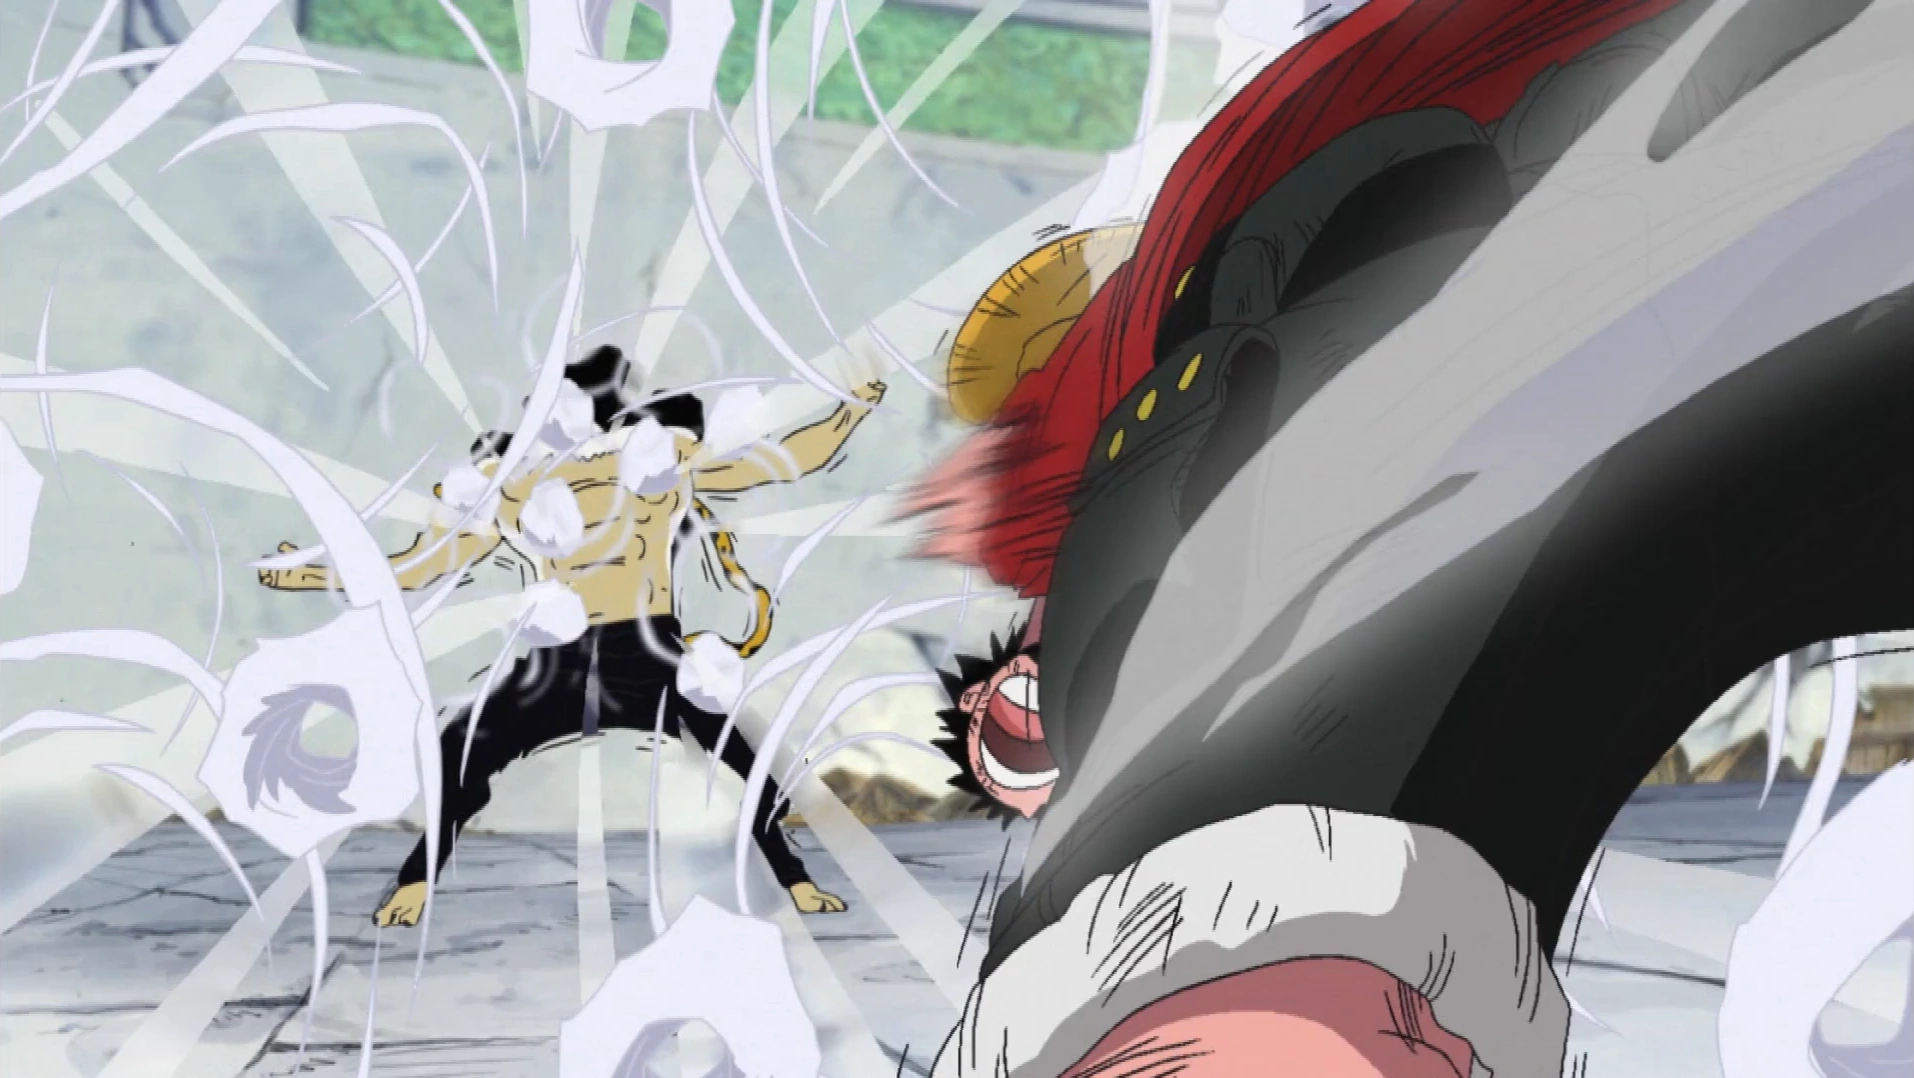

Luffy using Gomu Gomu no Jet Gatling to defeat Rob Lucci
Luffy, about to fall to the ground, gets back up after he remembers what he said eariler. After thinking about all of the things he and his crew went through, Luffy lands a devastating Gomu Gomu no Jet Gatling on Lucci and finally defeats him. Now, their main problem was how to escape the now destroyed island surrounded by battleships. This was solved when the Going Merry appears in the sea below them without a navigator. Luffy was too weak to move after the fight, but Robin drops him into the ship with her powers.
Post-Enies Lobby Arc
The New Ship and the New Shipwright
Luffy tearfully bids farewell the Going Merry in its last moments.
With the Going Merry, everyone has managed to escape Enies Lobby safely. However, after escaping, Iceburg arrives in a Galley-La Company ship just in time to pick up the Straw Hat Pirates as the Merry suddenly breaks apart. Luffy then gives the Going Merry a viking funeral by burning it as the crew tearfully says goodbye. While the ship is burning, however, the Merry appears to speak to everyone present, apologizing for not being able to take them to the end of the world, but it was happy.[152]
As everyone relaxes at Water 7, Franky decides to build a ship for the crew out of the special wood called Adam Wood.[153] However, at that point, Marines led by Garp break into Iceburg's mansion where everyone is staying, and punches the still-asleep Luffy to wake him up. Luffy reveals that Garp is his grandfather, and Garp casually reveals the name of Luffy's father—Dragon the Revolutionary—who is considered by the World Government to be the worst criminal in the world. Afterwards, he says that it's a secret.
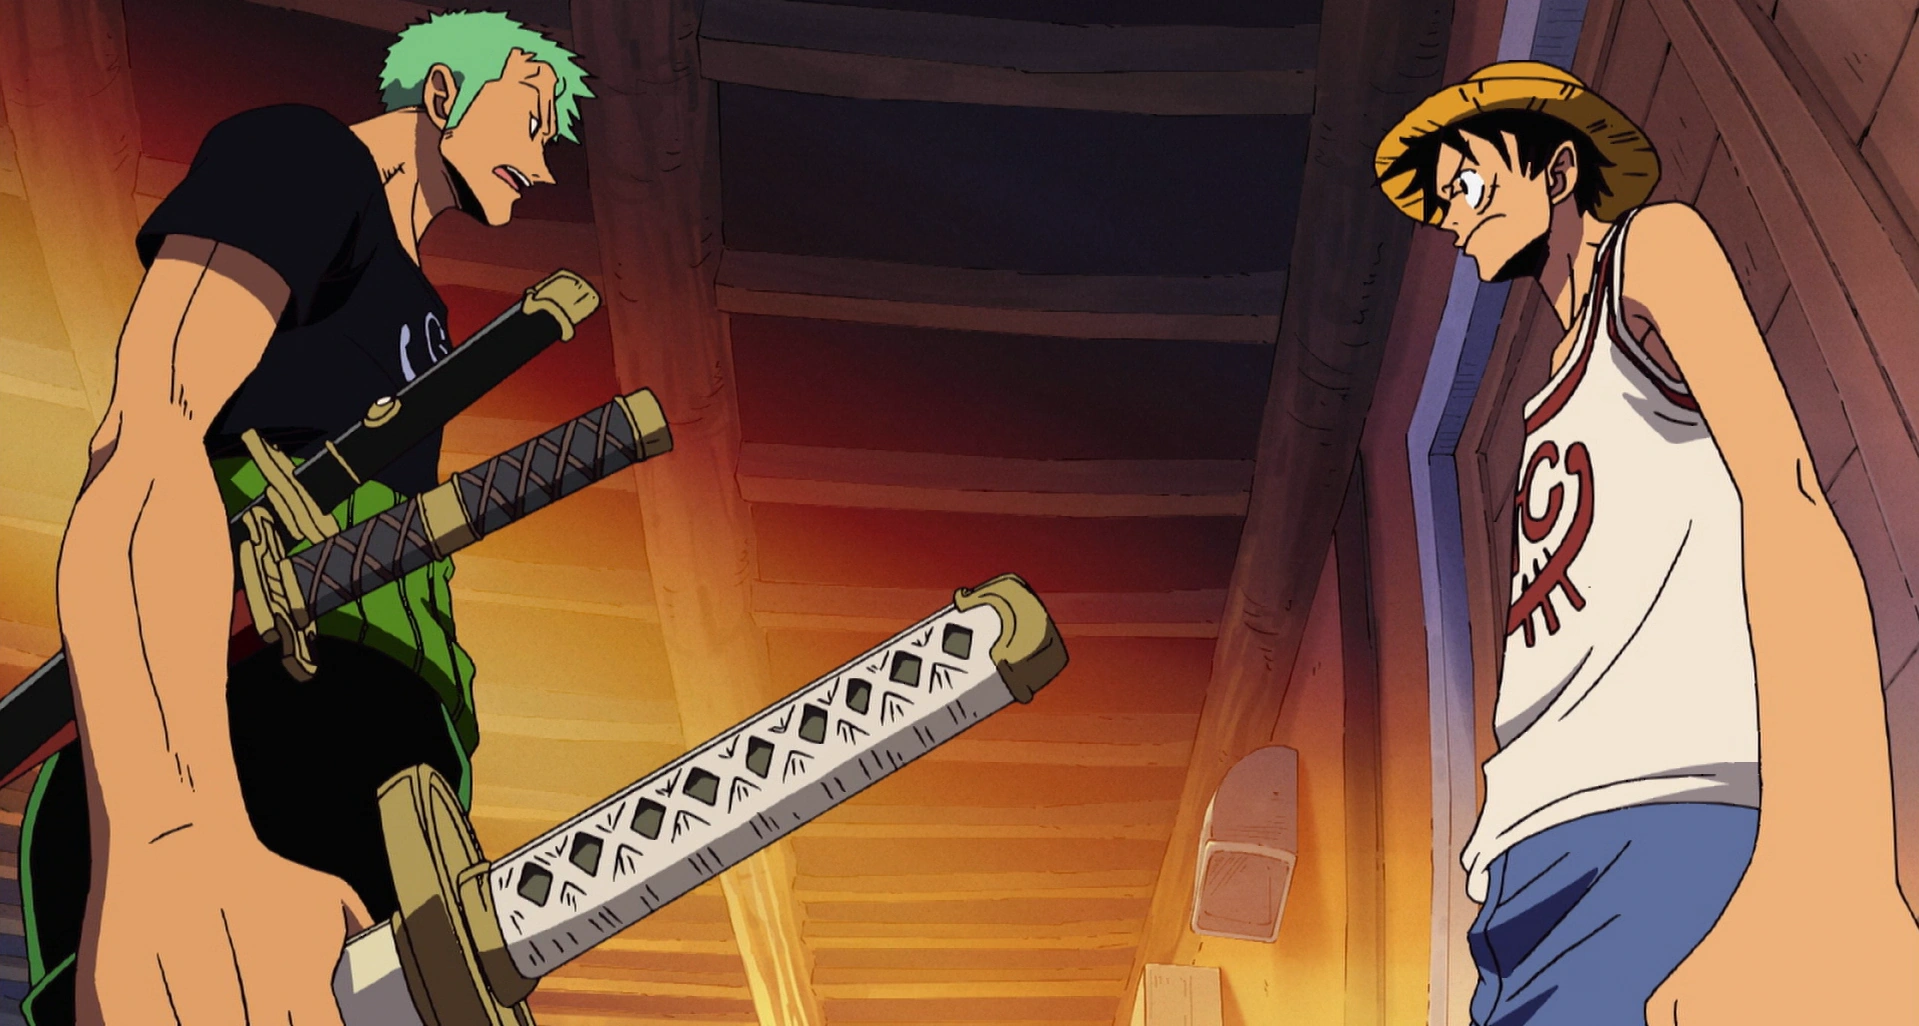

Zoro discusses Usopp's return to the crew with Luffy.
Sometime after, Sanji reveals to the Straw Hats that Usopp is planning to rejoin the crew. While Luffy, Nami, and Chopper want him to join and to invite him back, Zoro insists that Luffy should be a firm captain on his position, Usopp shouldn't return so easily, and should return on their terms, not his. Zoro even threatened to leave the crew if Usopp was allowed to rejoin without asking for forgiveness for his behavior. Luffy understood the message, and agreed with Zoro's view of the situation.
With the help of the rest of the Franky Family, Luffy gets a hold of Franky's underwear as a bargaining chip to get him to join his crew. Franky simply poses naked, unabashed, and says, "I'm still a man, naked." Meanwhile, Sanji comes running with Zoro to tell everyone that Vice Admiral Garp has sailed on the opposite shore into attack position. Luffy then throws Franky's swim briefs back and tells him to sail with them. Franky then states that he does want to see his dream ship reach the end of the world and become the greatest ship ever built. Franky agrees to join after this.
Luffy and the Straw Hats then battle his grandfather with his new ship, the Thousand Sunny. At that moment, Usopp tries to rejoin the crew, but because of Zoro's speech he is ignored until he apologizes. During the struggle between Garp and the Straw Hats, Usopp finally apologizes and admits he wants to rejoin. With that note, Luffy tearfully accepts him back into the crew. After Usopp and Robin's return, the newly formed Straw Hat Crew sails off to find their next advenure.
Thriller Bark Saga
The following events are Non-Canon and therefore not considered part of the Canon story.
Ice Hunter Arc
| This is an empty section. Please help the wiki by adding information to it. |
Concludes non-canon section.
Thriller Bark Arc
Meeting Brook and Exploring Thriller Bark
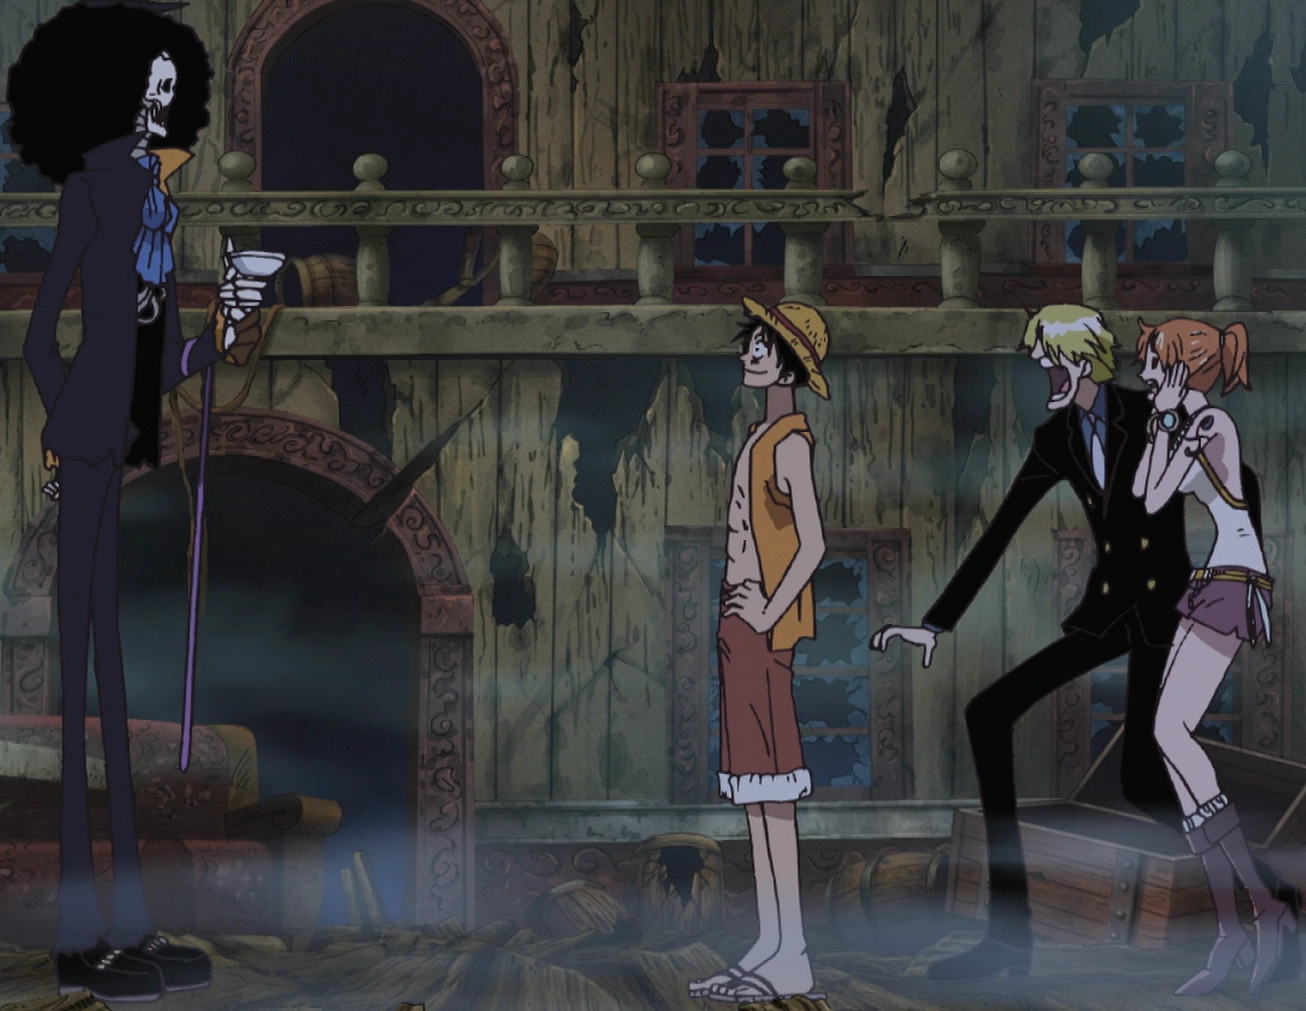
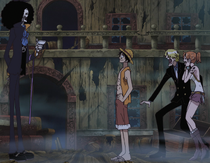
Sanji and Nami panic as Luffy invites the skeleton Brook to join their crew.
After sailing for some time on the Thousand Sunny, Luffy and the rest of the crew found themselves in the presence of a ghost ship. Wanting to explore the ship, Luffy along with Sanji and Nami climbed aboard. There they met a skeleton named Brook. When, Luffy asked him to join his crew, the skeleton eagerly accepted.[154] Luffy then brought Brook back to Thousand Sunny to show to the rest of the crew, much to their dismay. Over dinner, Brook explained his past and later explained that he really cannot join Luffy due to his current condition of having his shadow stolen.[155]
Luffy really wanting to have Brook as a member, promised to get Brook's shadow back no matter what. This pleased Brook so much that the skeleton decided to perform before the crew with his violin, revealing he is a musician. Just as Brook was about to perform, a ghost appeared as well as the gates of a strange island, Thriller Bark. These events prompted Brook to head to the island before Luffy and the rest of the Straw Hats' eyes.
With Luffy's resolve to go to the island to get his long awaited musician (in fact, nearly since the beginning of his journey) and to explore the island, Franky and Robin decided to join him also. After witnessing Franky's present to the Straw Hats, Luffy and the rest of the Straw Hats decided to look for Nami, Usopp, and Chopper who had not returned. However before Luffy and the rest could go to the island, they were stopped by an invisible thing.[156]
After the Thousand Sunny got caught in what was apparently a spider web, Luffy and the rest descended to the island. There they met the Cerberus which Luffy thought of eating,[157] soon followed by even more strange creatures. At one point, they came across some ghosts, one of which Luffy tried to catch. The ghost was unaffected and instead passed through Luffy and temporarily drained his will to go on. After recovering, the group meets with some Zombies. Luffy and the rest defeated the zombies with a combo technique.[158] Luffy then asked the zombies about his three friends that came by earlier. The zombies inadvertently revealed that they attacked them when they showed up. For this, Luffy and the rest shoved the zombies back into their graves head first.
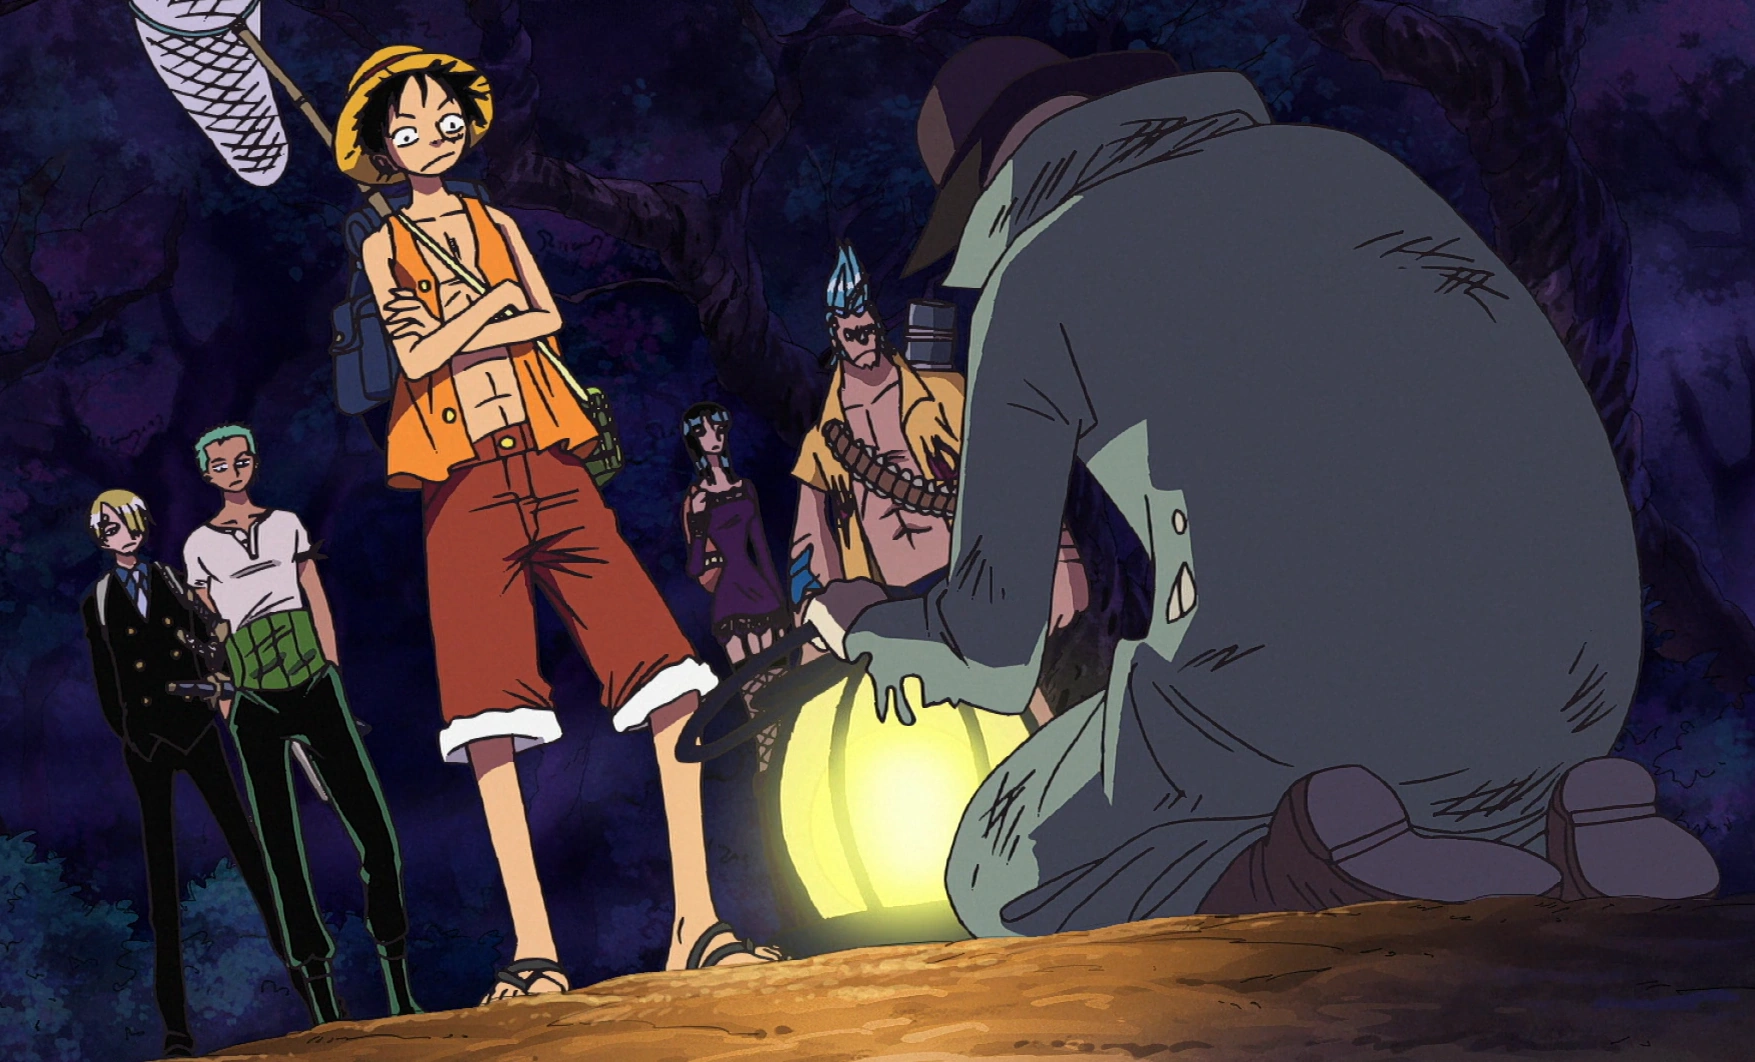
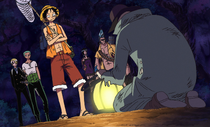
Spoil begs Luffy to get his and the other victims' shadows back from Moriah.
The group then met with Spoil, a zombie looking old man who asked them to defeat Gekko Moriah who had stolen his shadow and the shadows of others like him. Robin then explained that Moriah was a Shichibukai with a former bounty higher than Luffy. With plans to actually beat Moriah, Luffy agreed to help the old man and the others who had their shadows stolen. As it began to rain, Luffy and the others discovered that Thriller Bark was actually a ship. With their goal in mind, they ventured into Moriah's mansion.[159]
Inside the mansion, Luffy and the others fought against the Zombies in the dining hall. [160] After the battle, he and the others noticed that Sanji was missing. With nothing else to do in the room, Luffy and the others decided to take Buhichuck, the leader of the Zombies in the room, along in order to have him guide them to the rest of their friends. As Luffy left the room, the Zombies told him to be scared of Moriah's wrath for what Luffy and his friends did in the dining hall. Luffy in response, merely replied that he will "kick Moriah's ass".
After walking awhile with Buhichuck as their hostage, Luffy, Robin, and Franky suddenly noticed that Zoro was missing too.[161] The situation was beginning to become suspicious. Later, Luffy found a suit of armor and decided to don it. After a while, the three came upon an arena like area. There, Luffy and Robin witnessed a bout between Franky and a General Zombie. After witnessing it for while, Luffy's group were suddenly trapped in the room by Buhichuck. There they were forced to fight a large group of General Zombies.[162] In the middle of the battle, Luffy found himself face to face with a General Zombie with three swords like Zoro. Before Luffy could get a clear answer from Jigoro, he was caught off guard by some Spider Mice Zombies. Luffy was then sealed in a coffin by the Spider Mice with their webbing and was then sent to the main mast of Thriller Bark.
Luffy was brought afterwards before Gekko Moriah.[163] After being stripped of his armor, Luffy had his
Luffy's shadow being cut by Moriah.
shadow stolen by Moriah through the use of the power of the Devil Fruit Moriah ate, the Kage Kage no Mi. Upon being separated from his shadow, Luffy fell into a coma. With Luffy's shadow in Moriah's hands, Moriah decided to put it in the 900th Zombie, Oars.[164] Having his shadow finished being extracted, Luffy was then brought back to the Thousand Sunny by some Spider Mice.
Counter attack against Moriah
After being placed in the Thousand Sunny's kitchen along with Sanji and Zoro, Usopp managed to wake them up. After being briefed on what happened while they were out. With Nami and three of their shadows taken, Luffy and the others planned to take them back. Luffy was then informed by Franky of Brook's relationship with Laboon. Ever more excited by this information, Luffy is even more decided to have the skeleton join their crew. With this, Luffy and his crew decided to take back from Moriah what he stole from them and their friends.[165]
With the determination to get everything back before dawn arrives, Luffy and his crew split into two teams. With part of his team headed to save Nami and himself headed to defeat Moriah, Luffy's team purified several zombies with some salt from Usopp. As they rampaged through and purified Moriah's zombie hoard, Luffy and Sanji unfortunately got subdued by more of Perona's ghosts. Fortunately however, they were saved by the rest of the team before the zombies could get to them. Just as things were getting chaotic enough, Oars, the zombie with Luffy's shadow, came crashing into the part of the building Luffy's team was in and separated part of the building as well as part of Luffy's team. With only Robin and Chopper left with him, Luffy and the two decided to continue towards Moriah, seeing that the others would not be beaten so easily.[166] As the three continued onwards, they were stopped in Moriah's dance hall by Hogback and Cindry. Fortunately, however, Robin and Chopper were able to hold those two off long enough for Luffy to slip pass them.
Luffy meets Gekko Moriah and demands him to return all of the shadows he stole.
Luffy finally reached Moriah,[167] and after a short conversation, started attacking the Shichibukai. However, as soon as Luffy threw a punch, Moriah used his own shadow, Doppelman, to fight in his stead. Undeterred by this seemingly invincible being, Luffy was still able to land a hit on Moriah himself by attacking the Shichibukai from an indirect place.[168] However despite using this tactic for some time, Luffy was still unable to land a direct clean hit on Moriah. This continued until Oars came back to the freezer and started obeying Moriah's orders fully. Once Moriah gave Oars the order to completely annihilate all of the Straw Hats, the zombie began to attack Luffy. Luffy dodged the blow and started to chase after Moriah, who had decided to run away from the chaos that was about to ensue.[169]
As Luffy chased after Moriah, he was led deep within the forest of Thriller Bark. However, as Luffy was chasing Moriah, the Shichibukai tricked Luffy into chasing Doppelman. Upon realizing what happened, Luffy was left stranded in the middle of forest. Seeing that dawn was fast approaching, Luffy immediately tried to find his way back to the Mast Mansion.[170] However while running around lost in forest, Luffy encountered the group that the old man, Spoil, was head of, the Thriller Bark Victim's Association. With some convincing by members of the association, the Risky Bros. of the Rolling Pirates, Luffy was told that they knew a way to beat Moriah.[171]
Through some explanations by the Risky Brothers' captain Lola, Luffy was told of the process of using captured shadows to power oneself up for ten minutes. Luffy was implanted with one hundred shadows that the Thriller Bark Victim's Association had collected over the years and became a vastly larger blue being that was dubbed "Nightmare Luffy". With his newfound strength and skills bestowed by the shadows, Luffy rushed off to Mast Mansion, where Oars and Moriah were battling against his crew and Brook.[172]
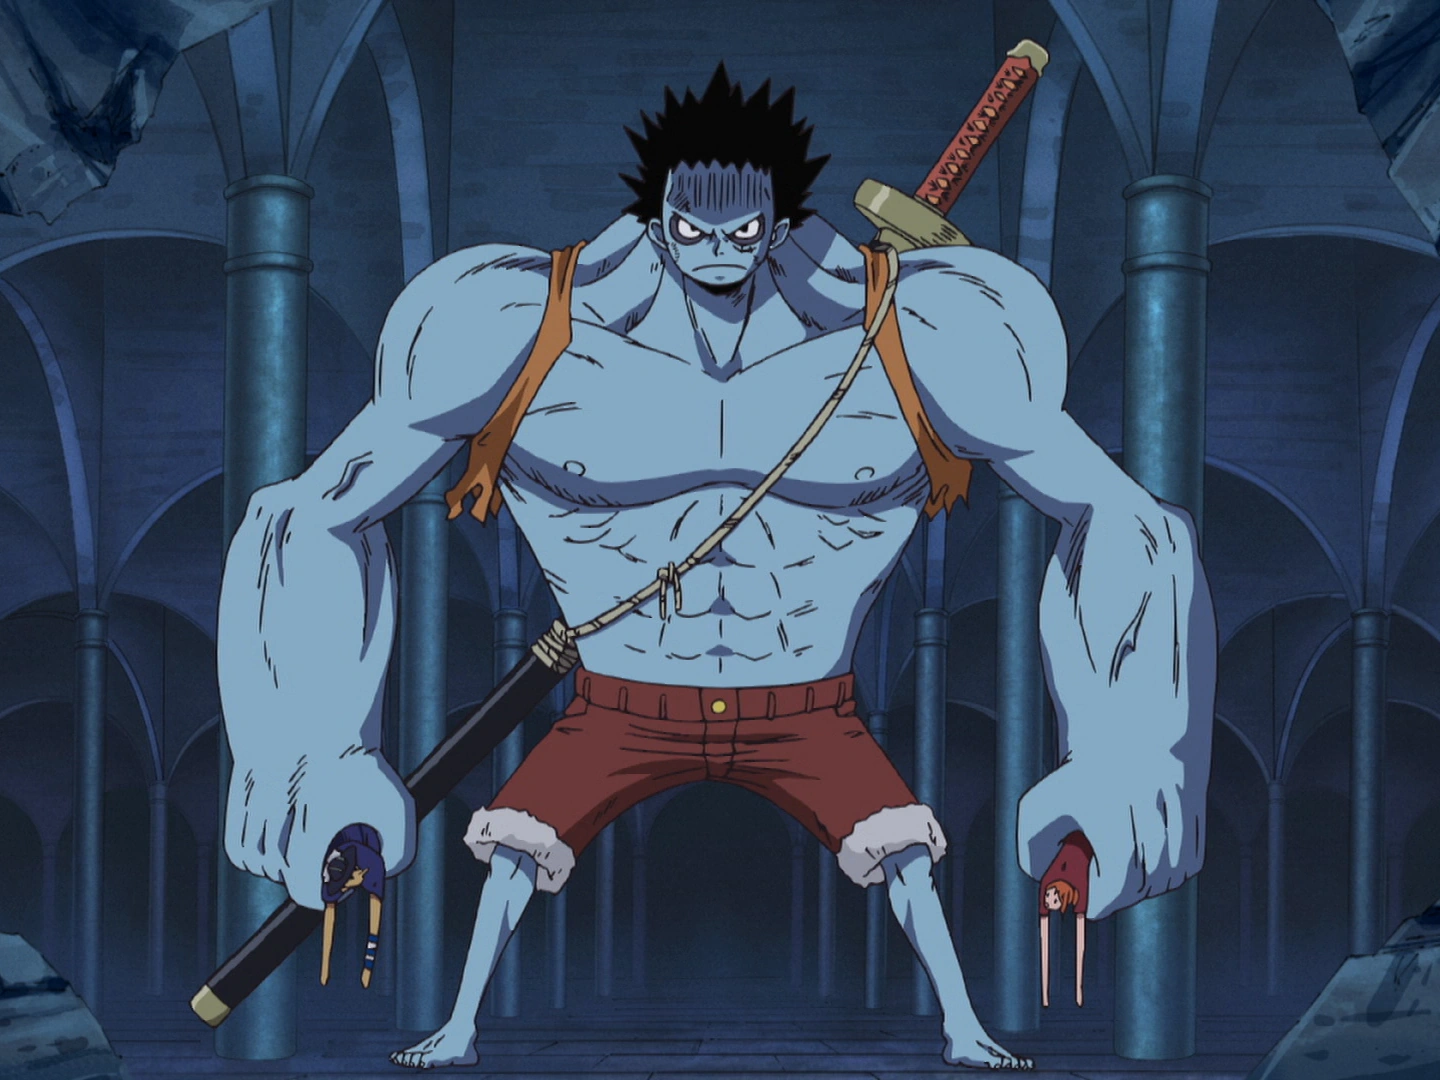
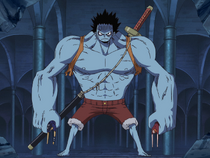
Nightmare Luffy saves Nami and Usopp from Oars and joins the fight.
Arriving just in the nick of time to save both Nami and Usopp from Oars, Luffy immediately started battling against the zombie. He easily overpowered him with his devastating attacks, wounding Moriah as a result as well. With the execution of his final move, Gomu Gomu no Storm, Luffy's ten minute limit was up. However, Luffy had inflicted so much damage onto Oars that the behemoth completely toppled over onto the Mast Mansion.[173]
Though Luffy was exhausted by having so many shadows implanted within him, the battle was still not over, for Oars rose back up to continue battling on. Despite their wounds, Luffy, his crew, and Brook rose back up as well and started one last combined attack against the zombie. While the rest of his crew began to restrict Oars' movements, Luffy was brought to top of Thriller Bark with help from Brook's high jumps and Robin's ability. At the top, Luffy was then thrown down towards a restricted Oars. As Luffy fell, he activated Gear Third and landed a crippling blow to Oars, shattering the zombie's spine and rendering him incapable of moving anymore.[174]
Luffy using Gomu Gomu no Gigant Jet Shell to defeat Moriah.
Despite Luffy's strong will within him, Oars was no longer able to move. However, while Oars was indeed finally defeated, Luffy and the other shadowless victims still had to get Moriah to return all of their shadows before the rising dawn incinerated them. Unfortunately, despite receiving the blunt of Luffy's attack, Gekko Moriah, managed to rise back up again and instead of giving back their shadows, the Shichibukai replied with his horrifying technique, Shadow's Asgard. Despite Moriah's transformation into a giant monstrosity, time getting dangerously over before dawn, and all the fatigue and wounds from earlier, however, Luffy readied himself to fight Moriah one last time. As Luffy battled against Moriah to the limit with Gear Second techniques that made Moriah spew out some shadows, dawn was quickly approaching. Eventually, with time practically almost over, Luffy decided to stack his Gear transformations on top of one another in order to perform a reckless move, Gomu Gomu no Gigant Jet Shell, to use against Moriah. As Luffy attacked Moriah with this move and just as the first signs of dawn started to incinerate both Luffy and the others, Luffy asked his own shadow to come back to him if it wanted to become Pirate King. Then with one last use of Gomu Gomu no Gigant Jet Shell Luffy was able to topple down Moriah unable to hold his stolen shadows any longer. With this, Luffy's shadow and all of the other shadows of those on Thriller Bark returned to their original just in time to save them.[175]
Just Escaping the Tyrant's Clutches and Finally Getting a Musician
Kuma takes Luffy's pain.
With everyone's shadows finally returned and Moriah finally defeated, Luffy collapsed from all the fatigue and pain he experienced from the night beforehand. While things seemed finally over, the celebration was however cut short with the arrival of Bartholomew Kuma in the scene. The second Shichibukai, having seen and reported the whole event to the World Government, was ordered to take out Luffy as well eliminate everyone else on the island who witnessed Luffy's victory over Moriah. A battle for an unconscious Luffy thus then ensued between the second Shichibukai and everyone else left standing willing to protect Luffy. In the end, Zoro asked if he could exchange his life for Luffy's. Impressed by Zoro's loyalty, Kuma pushed all of the pain from the battle from Luffy's body with his ability and implanted it into Zoro, to make him feel Luffy's pain.[176]
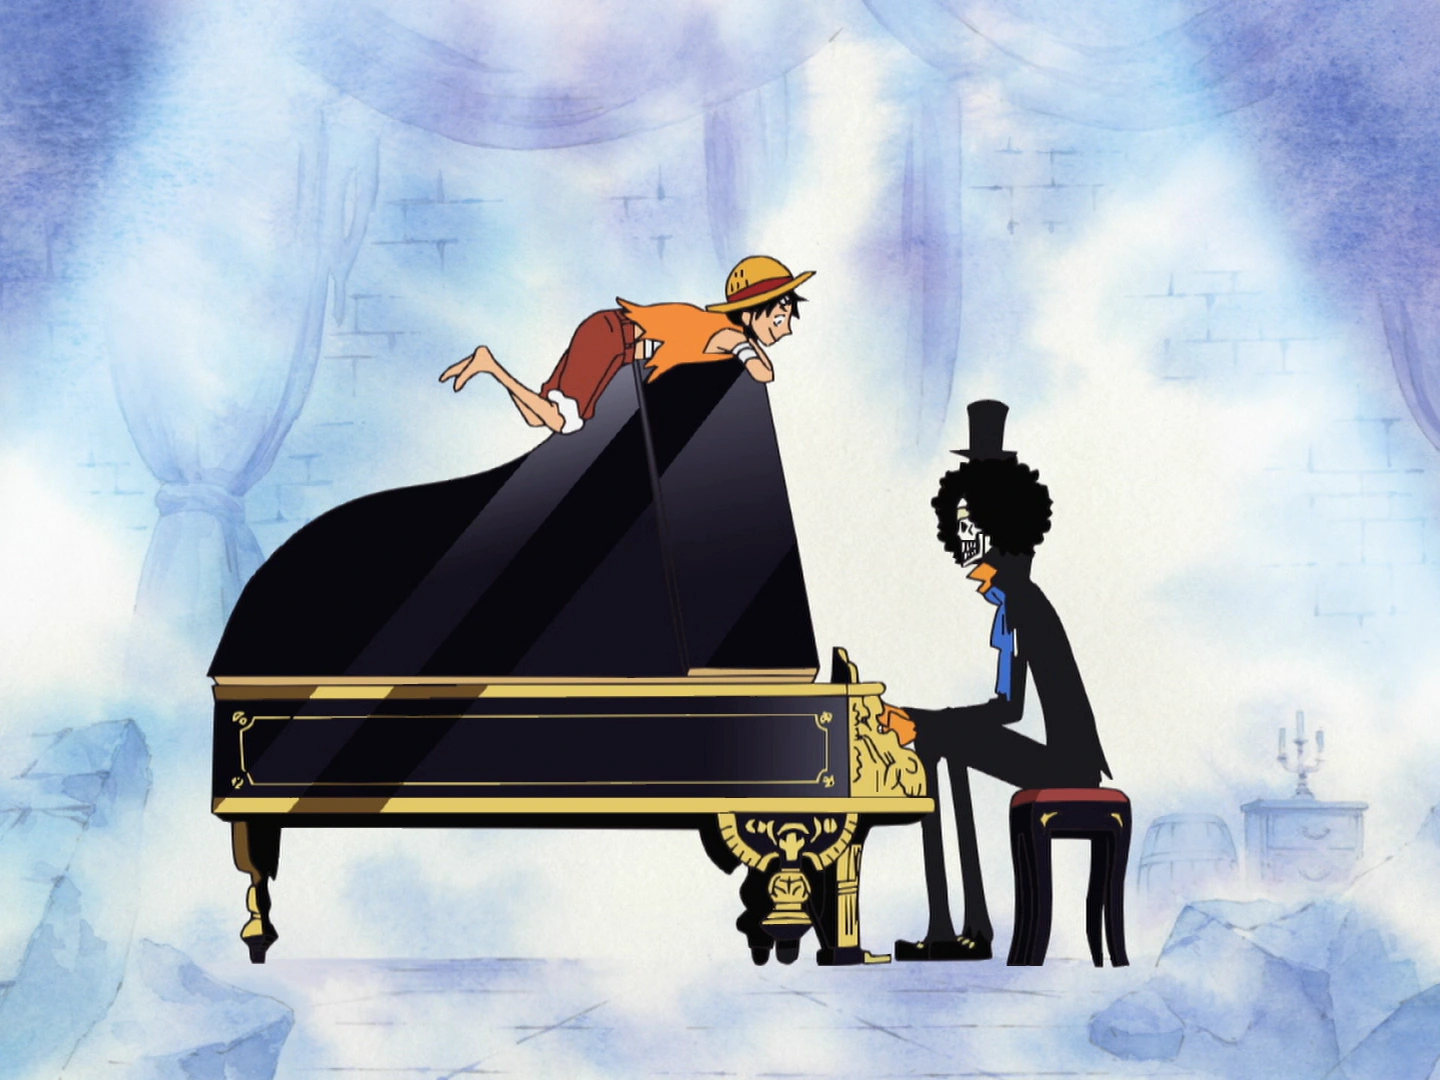

During the victory celebration, Luffy asks Brook once again to join his crew.
After Kuma left and a day of rest went by, an energetic Luffy decided to celebrate their victory with everyone. As party went on, Luffy noticed Brook playing a familiar song on a piano. Remembering that this was a song that Shanks and his crew used to sing all the time, Luffy got into a conversation with Brook. As Brook played and the conversation went on, Luffy once again asked Brook to join his crew. Brook once again, turned down Luffy's offer since the skeleton had still some things to do. Knowing what he was talking about, Luffy revealed to Brook that not only did he learn about the skeleton's relationship with Laboon, but also told him that Laboon was alive and well. Having told Brook this, Luffy touched Brook's heart and made the skeleton burst into tears of joy. As the party got more joyous with Brook bringing out a Tone Dial with the last musical performance of the Rumbar Pirates on it, Luffy was asked by Brook if he could join his crew. For this, Luffy casually agreed, much to the shock to most of his crew.
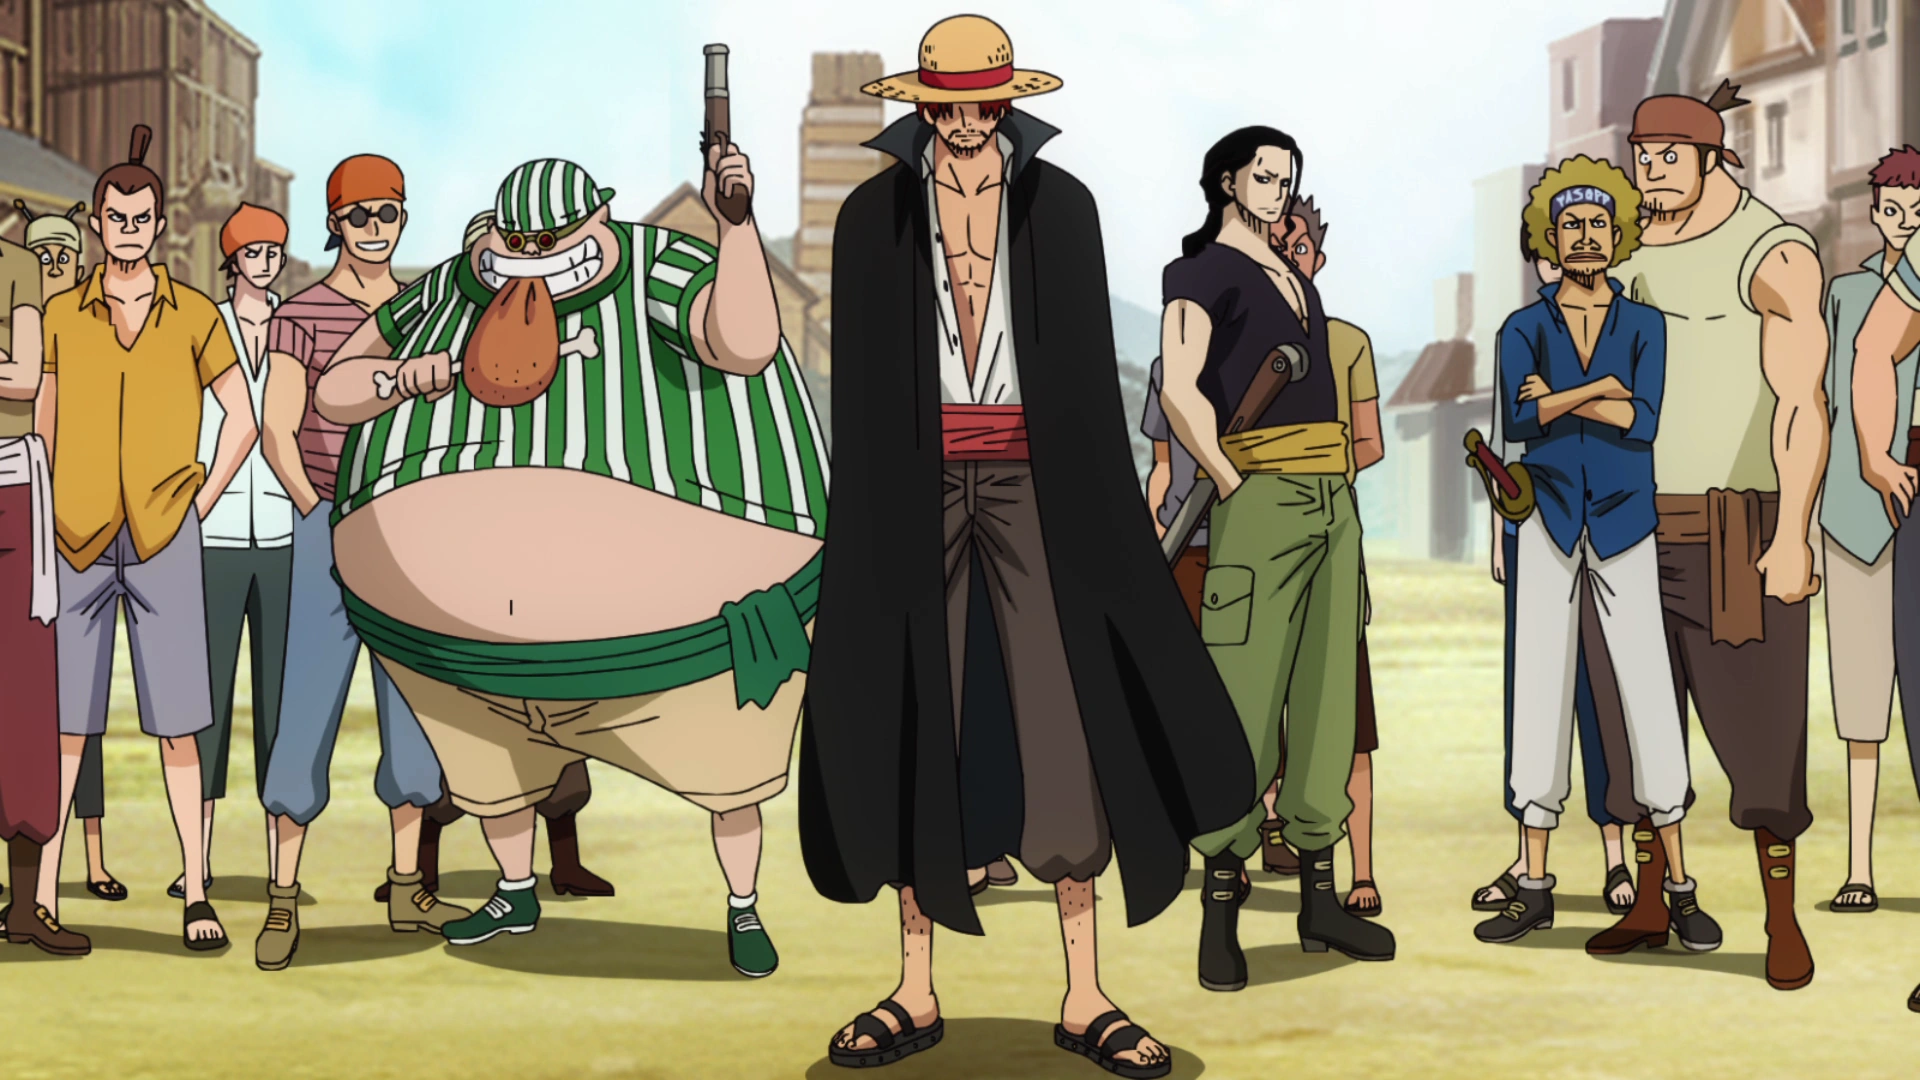

The Straw Hat crew as they cheer on their ship for their new member Brook.
With this very casual acceptance, Luffy finally got the musician he so longed for since his journey as a pirate began. After two days of recuperation, Luffy and his crew decided to leave Thriller Bark for Fishman Island. As they were about to leave, they were introduced to the concept of the Vivre Card by Lola. Remembering the piece of paper that Ace gave to him, Luffy took out the Vivre Card that his brother gave to him. Upon taking it out however, Luffy noticed that Ace's Vivre Card was burning a little and becoming smaller. With this, Luffy was explained that Ace's life was slowly vanishing. Dismissing the Vivre Card's state as Ace having his own adventure, Luffy and his crew sailed away from Thriller Bark and onto Fishman Island.[177]
The following events are Non-Canon and therefore not considered part of the Canon story.
Spa Island Arc
| This is an empty section. Please help the wiki by adding information to it. |
Concludes non-canon section.
Summit War Saga
The following events are Non-Canon and therefore not considered part of the Canon story.
Little East Blue Arc
| This is an empty section. Please help the wiki by adding information to it. |
One Piece Film: Strong World
On board the Thousand Sunny, the Straw Hats read news of attacks on East Blue. Luffy says they will return to East Blue to protect it when Shiki's ship appears overhead. After warning him of the storm ahead, he comes down to meet them. There he reveals he has a Devil Fruit power to make any inanimate object he touches ignore gravity and float. After learning it was Nami that delivered the warning, and that they are headed to East Blue, Shiki offers to take them there and uses his power on Sunny.
Luffy uses Gear Third on the Terror Bear.
Together the two ships travel to the floating island seen before where Shiki suddenly kidnaps Nami. Luffy along with the others try to rescue her, but by controlling the Thousand Sunny using his power, he escapes them, as well as scattering them among the fragments of the island.
Luffy inflates and lands safely on a nearby island. Almost immediately after landing, Luffy is chased through the forest by a Land Gator. Right after, a Forest Octopus pursues and assaults it and begins its chase after Luffy. As Luffy clears the forest into an opening of ruins, the Forest Octopus is attacked by a giant Mantis. A Terror Bear snatches the Mantis in its paws and smashes it. It then begins to charge at Luffy who charges back as the two fight. The bear proves smart in dodging Luffy's moves, as Luffy uses Third Gear to overwhelm and defeat it.
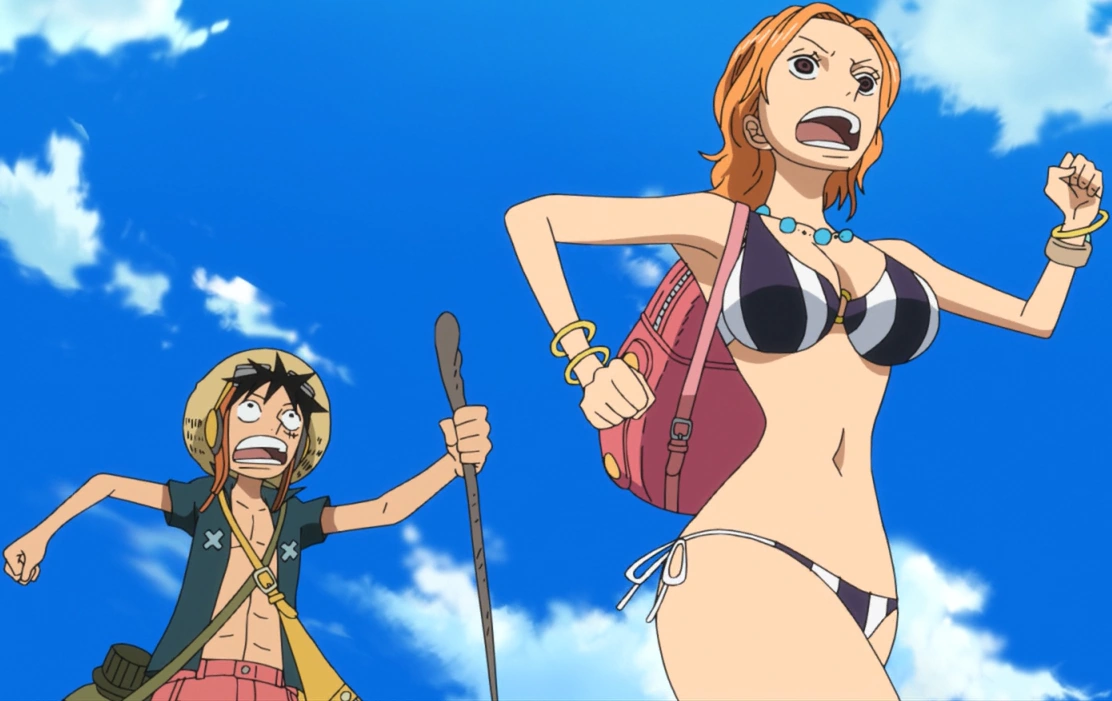
Luffy and Nami running from danger.
Afterwards, Nami manages to escape her captivity with the help of Billy, and finds the Thousand Sunny. Only moments later, Luffy, being chased by several giant scorpions, arrives. Billy defeats the scorpions using electricity, and Nami and Luffy talk about what has happened. They soon decide to search for the others, using Billy to fly. Robin's group, meanwhile, find a large building where many pirates are gathering, similarly protected by poison plants.
They learn there that Shiki is planning to let loose the animals on the island into East Blue in a gambit to force the surrender of the World Government. They also learn that to prove the power of the animals he is planning a demonstration using a village on the floating island.
Luffy and Nami join the others at the village, and they too learn of the plan from the village residents, who, not knowing where the Straw Hats originate, are relieved to be rid of the monsters. Shiki arrives sometime later and confronts the Straw Hats who are there. Luffy tells Shiki he's going to kick his ass and the crew begin to fight. Shiki avoids most of Luffy's attacks but helps free Sanji at one point during the battle. Despite some initial success in fending him off, the Straw Hats are defeated, and Nami is coerced into rejoining Shiki by him agreeing to leave them, and her home town be. Usopp, the only remaining crew member conscious tries to stop her, but Shiki knocks him out.
Nami records a message, using the Tone Dial, which is supposed to be a farewell message. After leaving it, Shiki's men remove the poisonous plants around the village, and cause the animals to destroy it. Xiao and the other villagers took shelter in an underground bunker. Nami watches this from Shiki's palace, apparently uncaring. Robin's group arrives shortly after, revive, and rejoin the rest of the crew. Xiao reappears and gives them the Dial. Her mother, who earlier had expressed relief about the animals being sent to East Blue, apologizes for saying how happy she was for Shiki leaving for East Blue. They then play the message, and after hearing only the first bit of it, Luffy is angered to the point that he will not listen to the rest (the rest of the crew does, however).
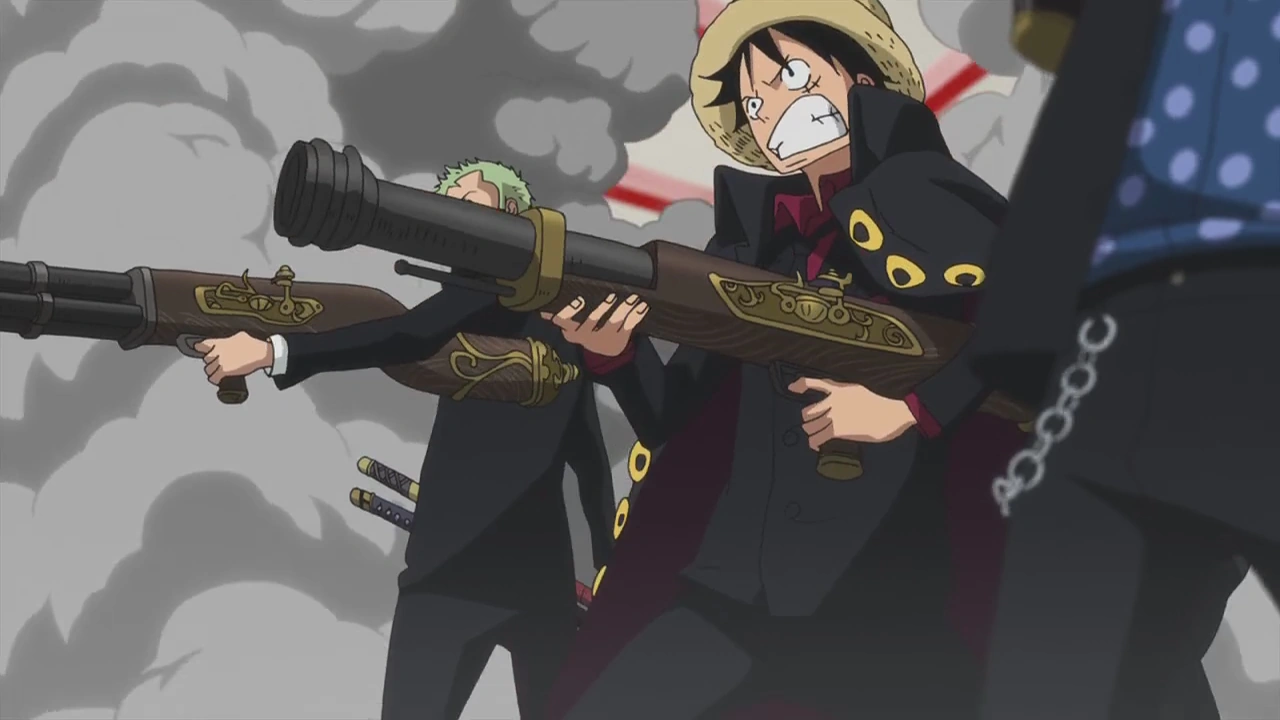

Luffy and the rest of the Straw Hats fight to rescue Nami.
Back at Shiki's place, Nami is found to have in fact been attempting to blow up the plants protecting his palace, but was overcome by the poison. Shiki traps her near the plants and heads off to meet the pirate captains gathering. The Straw Hats arrive at his palace and burst down the gates and make short work of the guards outside. While preparing a toast to the commencement of the operation, the Straw Hats march into the main meeting room brandishing various firearms and a new wardrobe. After a short confrontation, where Shiki calls them simply a suicide squad, and reveals hundreds of men around them.
They unload their firearms in the room, defeating most those gathered much to Shiki's dismay, then split up to defeat the rest. Luffy chases after Shiki, with the others helping fight off his minions and hordes of animals who begin running wild in his fortress. Shiki later tries to attack Usopp and Chopper when they are trying to save Nami, but is stopped by Luffy. Luffy promises Nami he'll send him flying and then they'll all get to go back together. Shiki remarks that they can run but they can't escape from, to which Luffy angrily replies he isn't going to be deciding any of their fates as he goes Second Gear.
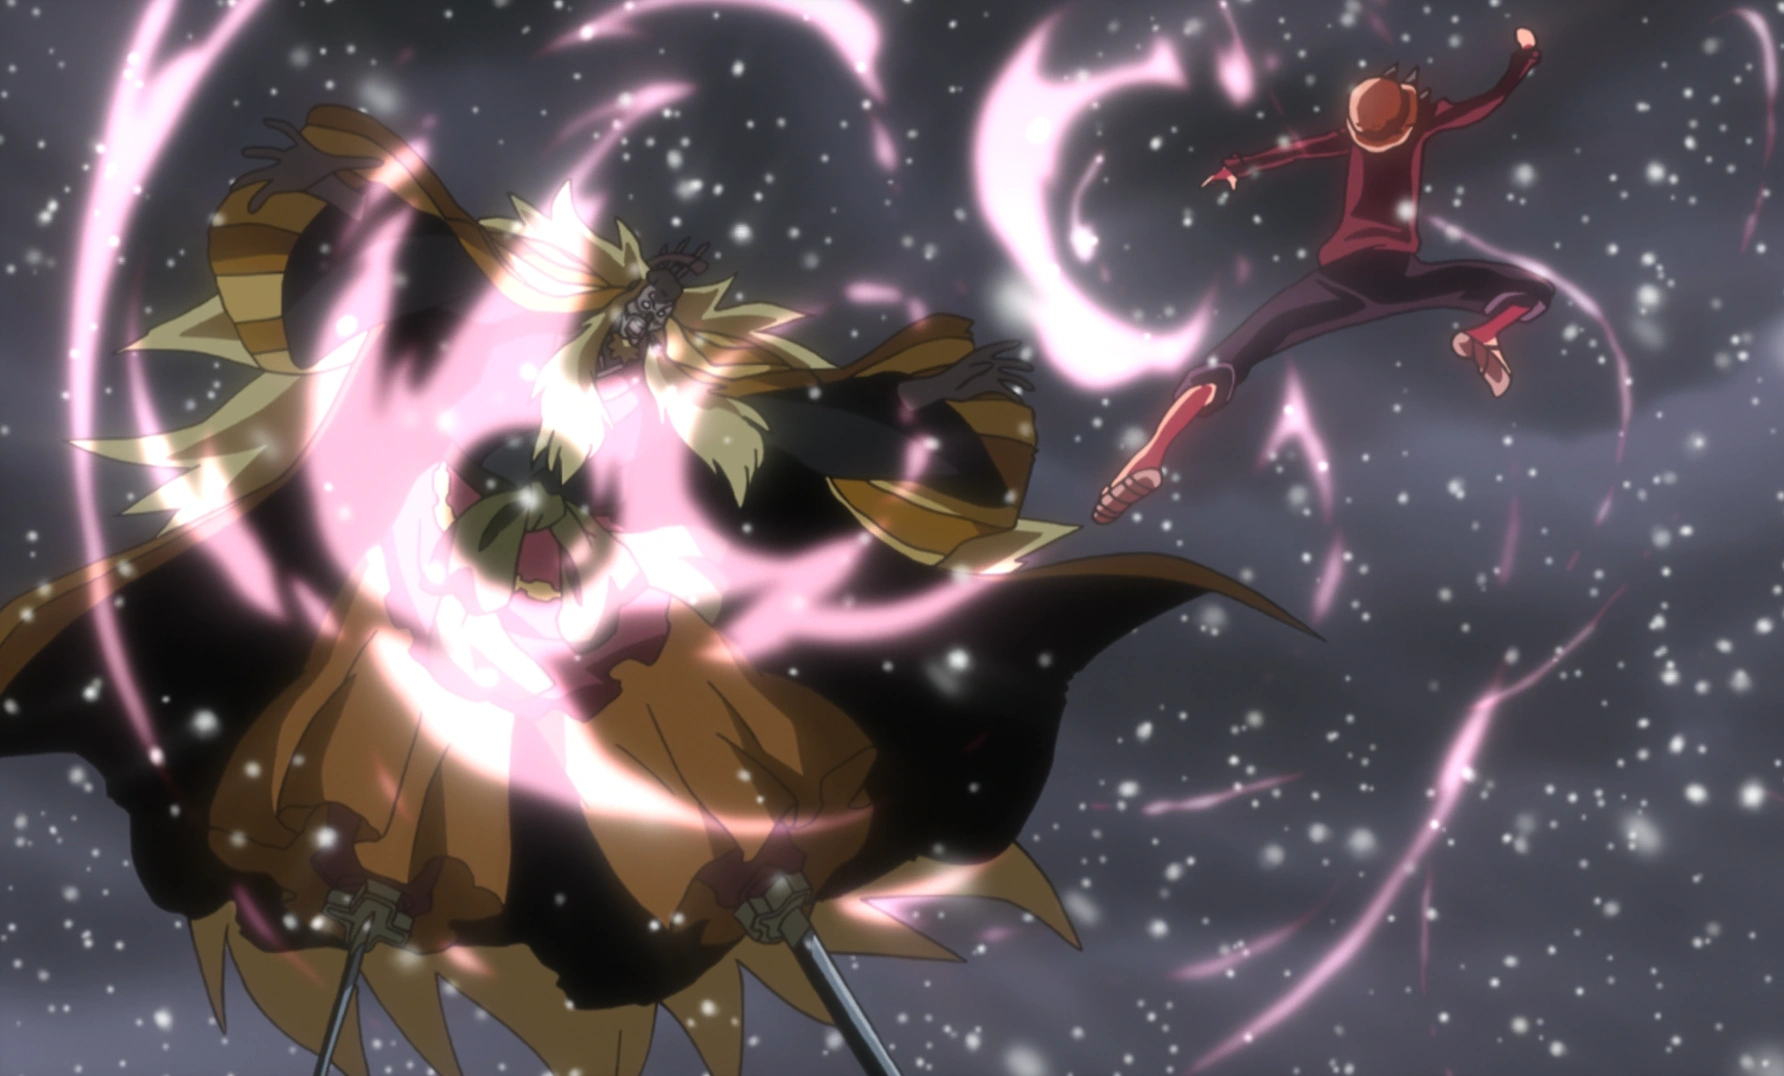
Luffy vs Shiki.
The battle begins with Luffy striking Shiki off gaurd with a Jet Pistol attack knocking him back in the air. Luffy then mounts Billy taking their battle to the sky. They both fly through the different islands destroying floating rocks and chunks of land in their way as they trade blows with one another. Shiki cuts apart a chunk of the floating ocean around an island and reforms a prison around Luffy and Billy, trapping them in the water. He then slashes it apart, sending Luffy and Billy falling to the island below.
Luffy picks himself back up and asks Billy to carry him into the heavens. Luffy asks Billy to save Nami from Shiki as he jumps high into the storm clouds raging above. Luffy goes Third Gear inflating his leg, and letting powerful bolts of lightning charge through it. Shiki laughs, thinking Luffy foolish. Luffy yells that he will not let him get to the East Blue as he unleashes his devastating Gomu Gomu no Gigant Thor Axe attack down on Shiki. Shiki tries to hurl chunks of rocks to stop him but the attack smashed through his defenses and breaks the main island in half underneath him, defeating Shiki.
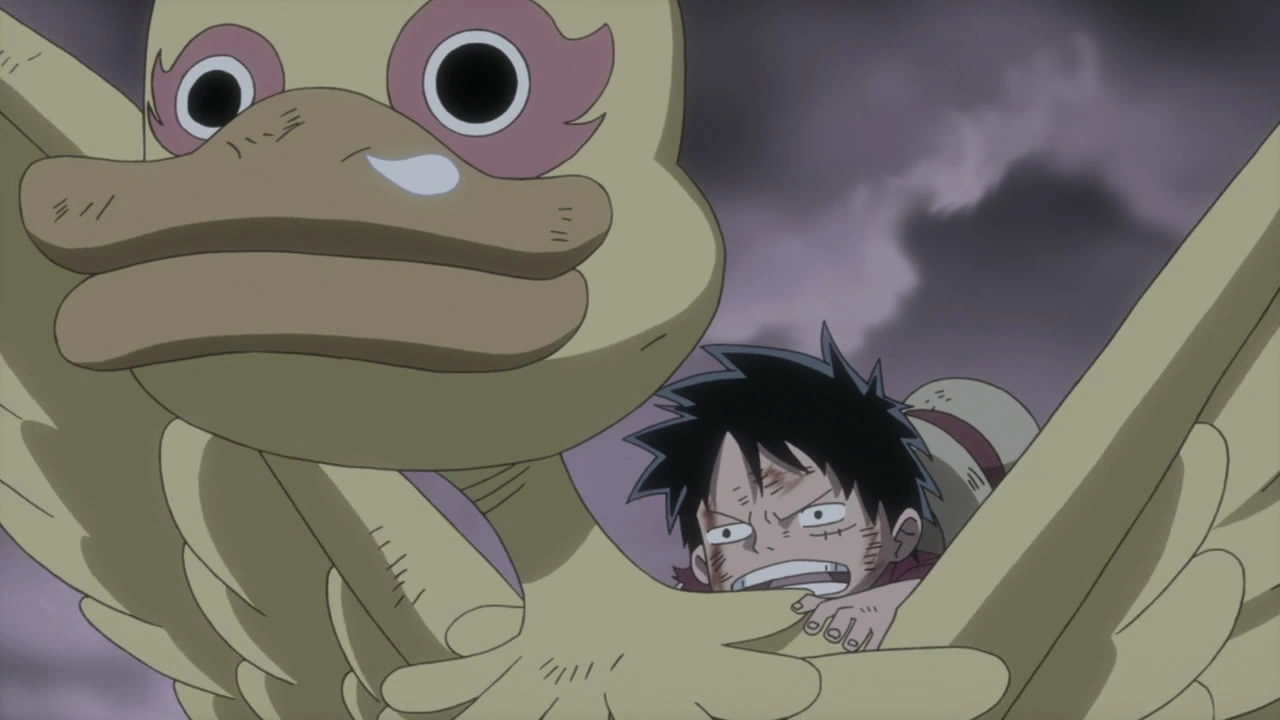

Luffy emerges victorious.
Later, it shown that Luffy and his crew managed to escape and continue on with their adventure. Luffy confronts Nami about the message she left on the Tone Dial, angry that she did not have faith in them. When the others revealed he did not hear the whole message, Nami tries to stop Luffy from playing it, feeling embarrassed of its content. She, Luffy, and Usopp wrestle over the Dial (Luffy wanting to hear the message, Nami trying to prevent him and throw the Dial overboard, and Usopp wanting to keep the dial since it was valuable). As the Tone Dial is knocked off the ship, it is revealed that on the other half of the message Nami indeed asked them to save her.
Concludes non-canon section.
Sabaody Archipelago Arc
An Old Nemesis and the Man in the Iron Mask
After sailing off from Thriller Bark and encountering several more phenomenon of the Grand Line, Luffy and his crew finally reached the Red Line again and the location directly above Fishman Island. Deciding to look for the island, Luffy, along with Robin and Brook, take the Shark Submerge to investigate the depths below. However due to the submarine's limits, they cannot dive deeper than five thousand meters. As they resurface, a giant sea rabbit followed them up to the surface. Luffy makes short work of the beast, but as he punches it, two figures are spit out of it and onto the deck of the Thousand Sunny. To Luffy's and everyone else's amazement, the two figures are a mermaid, Keimi, and a talking starfish, Pappug.[178]
Thankful for having being saved, Keimi decided to reward Luffy and his crew with some takoyaki. However before Luffy and his crew could get their reward, they then suddenly learned that Keimi's friend "Hachin" who provides the Takoyaki had been kidnapped by the Macro Pirates with help from the Flying Fish Riders. Seeing that, in order to get their reward of takoyaki, Keimi's friend has to be rescued, Luffy gladly accepts.[179]
Upon reaching the Flying Fish Riders' base, Luffy and his crew find out that it is a floating town of sorts. As they entered the place, they found the place to be completely empty except for a suspended cage in the middle containing Keimi's friend, "Hachin" whose real identity appears to be Hatchan. Realizing that the one he agreed to save was actually a former member of Arlong's crew, Luffy is slightly torn between not rescuing him due to past crimes, and rescuing him for some takoyaki. Seing that, Keimi and Pappug decide to rescue Hatchan by themselves and in the process get themselves captured by Macro and his crew. Seeing the two captured, Luffy and his crew decide to save them and Hatchan for a way to Fishman Island and some takoyaki. With a leap from the Thousand Sunny to the deck of the floating town, Luffy rescues both Keimi and Pappug with outstretched hands, then tells Zoro to free Hatchan. Upon landing, Luffy and his crew ready themselves for the fight against the incoming Flying Fish Riders whose leader, Duval, has a grudge against one of the Straw Hats. [180]
Upon facing them, Duval reveals the reason of his animosity: his face looks remarkably like Sanji's ugly wanted poster. Duval attempts to sink the Thousand Sunny, but Franky and Usopp activate its latest weapon: the "Gaon Cannon", obliterating the Flying Fish Riders' base. Duval finally tries charging his bison, Motobaro but Luffy's "aura" calms the beast down, like Shanks did to the Sea King ten years earlier.[181] Sanji finally gives a Parrage Shot on Duval's face making him very handsome, and his feeling towards the Straw Hats changes from bitter to joyful. He thanks them and promised to be an aid to them whenever needed by giving his number on the Den Den Mushi before setting off to return to his country life.[182]
Defying the World Nobles
On their further journeys through the Sabaody Archipelago, the Straw Hats meet Shakuyaku (aka Shakky) in her bar. She warns the Straw Hats of nine other pirates that are on the island. Shakuyaku tells the Straw Hats that Luffy, as well as Zoro and the other pirates, are the Worst Generation: rookie pirates worth more than ![]() 100,000,000. [183]
100,000,000. [183]
Keimi is then kidnapped and Sanji calls the Flying Fish Raiders for help. After they arrive and meet up with the rest of the Straw Hat Pirates they start looking for Keimi who has been sent to the slave auction. "Silvers" Rayleigh helps her in a way and is revealed to be Gol D. Roger's first mate.[184]
Not tolerating Hachi's injury, Luffy punches Saint Charloss.
Luffy breaks into the auction house in an attempt to free Keimi. Hatchan is shot by Saint Charloss, causing a furious Luffy to punch him in the face.[185] This causes a huge commotion which is stopped by Silvers Rayleigh, who proceeds to knock out all the guards with a burst of spirit energy and claiming that he has been waiting to meet Luffy.[186] In all the pandemonium, while Eustass Kid does not like the idea of facing an admiral, Luffy and Trafalgar Law insist they move forward to the challenge.
Luffy, Kid, and Law confront the Marines.
Along with the two other captains,[187] they easily defeat the Marines who try to arrest them, demonstrating their abilities. Then, Kid vows to meet Luffy at the New World as a rival, instead of an ally. Luffy accepts saying he's going to be the Pirate King. The Kid and Heart Pirates depart, while Duval's Rosy Life Riders meet up with the Straw Hats to make a getaway.[188]
Duval and his crew take the Straw Hats back to Shakky's Rip Off Bar to rest and find out more about Silvers Rayleigh. As they arrive Shakuyaku is shocked to find Hatchan wounded, and takes him inside to recover. As Silvers Rayleigh explained, Hatchan knows him so well because at one point 20 years ago, he was shipwrecked in the ocean until Hatchan saved his life when he was just a kid, and have been good friends ever since, even up to when he joined Jinbe's crew.
"Destruction" of the Straw Hat Crew
Rayleigh then tells his story of how he was Gold Roger's first mate, and the details leading up to Roger's death. He also states that he learned of Luffy when Shanks reunited with him explaining how he lost his left arm, and told him of Luffy's remarkable personality.[189] Rayleigh congratulates Luffy and his crew for finishing the first half of the Grand Line, and says that Shanks is waiting for him in the New World. Luffy is excited at the idea of meeting Shanks again, as Rayleigh agrees to coat the Thousand Sunny. However, when Usopp asks him the location of One Piece, Luffy admonishes his friend saying he wants to find out the answer for himself and does not want a boring adventure.
Unfortunately, Rayleigh states he will need at least three days to coat the ship, and with an admiral currently on the archipelago, Rayleigh will move the ship as the Straw Hats plan to split up. They agree to rejoin at Rayleigh's location, and with the Vivre Card, they shall; be able to find him. As the Straw Hats say their goodbyes to Shakky, Hatchan, Keimi, and Pappug, they are about to split up but are confronted by what appears to be the Shichibukai Bartholomew Kuma.[190]
As Luffy was unconscious during his Thriller Bark, the other members warned him that he was immensely strong, and of his ability. However, he demonstrated that he wasn't able to shoot "paw prints" out of his hands and shot a laser beam instead. Despite the danger, the Straw Hats were confident about being able to defeat him, as while they were exhausted when they first faced him, they were now at full strength.[191] After a harsh battle, the Straw Hat manage to defeat the cyborg however Zoro points out it may not be the real Kuma as thus far he has not demonstrated any of his Nikyu Nikyu no Mi abilities.[192]
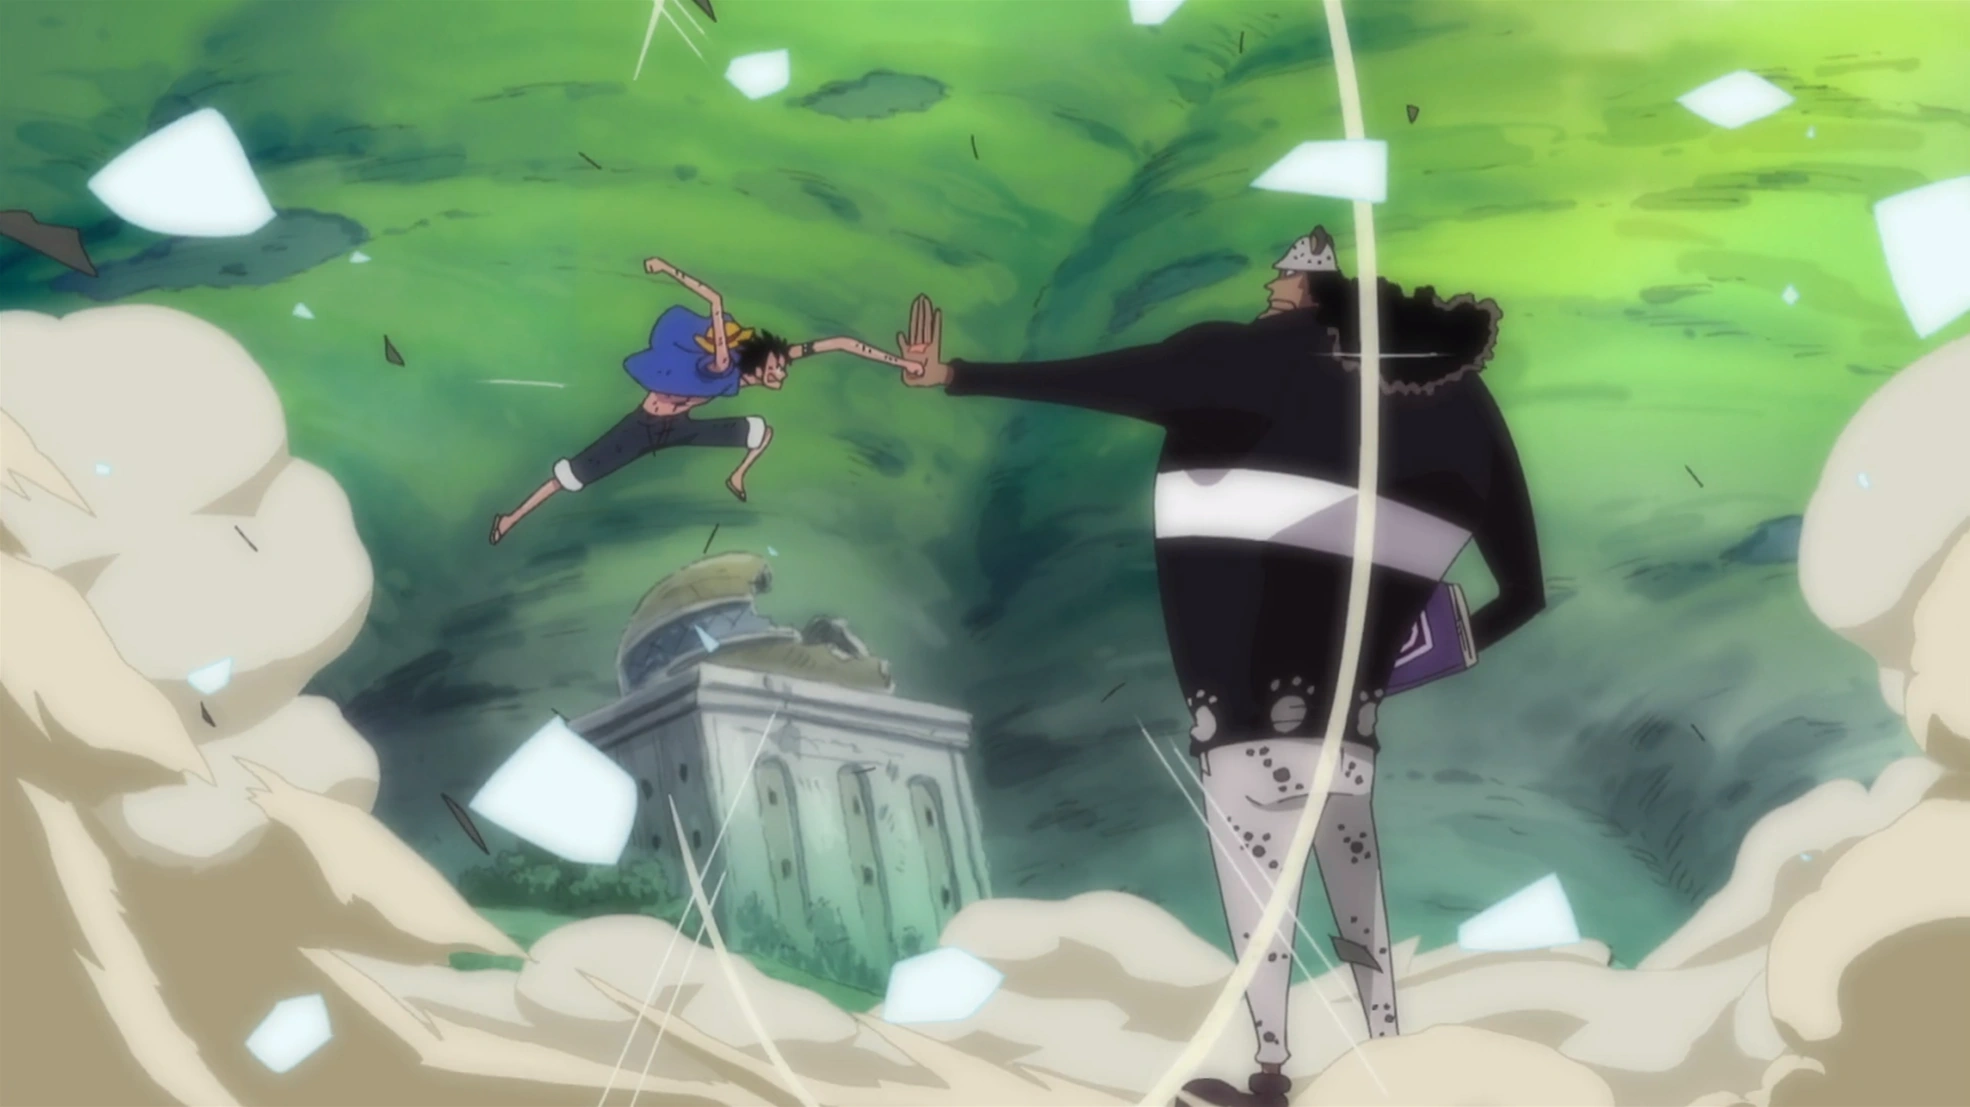
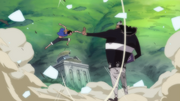
Luffy, in Gear Second, battles Bartholomew Kuma.
With no time to rest, a warrior with a broadaxe named Sentomaru appeared with yet another Pacifista. Worn out, the Straw Hats decide to separate and go in different teams to escape them and Luffy ordered them to meet up at the Thousand Sunny's location in three days. However, Sentōmaru then orders Pacifista "PX-1" to stop the escaping pirates and the cyborg caught up to Robin's group. While Luffy grew worried about his friends from the Pacifista's attack, Sentomaru confronts the captain and successfully counters his Gomu Gomu no Gatling attack despite not being a Devil Fruit user. To make things worse, Sentōmaru's superior, Admiral Kizaru finally appears and attacks Zoro. With no one able to stop him from finishing the already worn-out Zoro off, Silvers Rayleigh finally appears and successfully counters Kizaru's kick, warning him not to interfere with the "new era" of the Straw Hats.[193]
Luffy cries over the loss of his crew.
Luffy thanks Rayleigh and orders everyone to escape, but he is repelled again by Sentomaru and Chopper is forced to transform into his Monster Point form, going on a rampage. Luckily Robin manages to carry him away in time. However, Zoro is not so lucky as the real Bartholomew Kuma makes his appearance and teleports him to another location.[194] After Zoro's disappearance Luffy orders the crew to escape but all of the crew, one by one, are sent to different and unknown locations by Kuma. Luffy, in despair over not being able to help any of his friends, is the last to be sent away by Kuma and with his disappearance the Straw Hats are defeated.[195]
Amazon Lily Arc
Luffy's Encounter with the Pirate Empress Hancock
After being sent flying by Kuma's powers, Luffy lands onto a jungle island. Remembering Rayleigh's Vivre Card, Luffy decides to follow it in hopes of reuniting with his crew. After some unsuccessful trekking through the jungle, Luffy finds some mushrooms. Unfortunately, one of the mushrooms was not edible. As he laid unconscious, three Kuja amazons found him and took him to their village and while treating him, their elder reveals the shocking truth: Luffy is what one would call a man.[196]
After several misunderstandings, Luffy finds himself being chased by the Amazons. As he ran all over the place, he learned that one of the Amazons that saved him, Marguerite, had taken Rayleigh's Vivre Card while fixing his clothes. Due to the situation, Luffy took Marguerite and jumped over the mountain walls surrounding the village into the jungle. There, Luffy was able to talk things out and learned that the island he was on, Amazon Lily, was ruled by the Pirate Empress Boa Hancock and her two sisters.

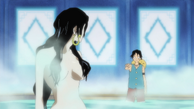
Luffy sees Hancock's back.
Still pursued by the others Amazons, Luffy figures from Marguerite's explanation about the Kuja having no other boats than the one used by Hancock, he would need to ask her help in getting off the island. In his search for Hancock, Luffy accidentally crash lands into the middle of her bath. Upon her back, he saw something that looked familiar.[197]
Having seen Hancock's secret, Luffy is captured and sentenced to be executed in the battle arena before Hancock and the rest of the Kuja. Marguerite and the two other Amazons that originally saved him desperately try to reason with Hancock to spare his life. Instead however, the three are turned to stone by Hancock. Insulting the empress with his impudence and his resistance to her charms, Hancock's sisters, Boa Sandersonia and Boa Marigold, were sent to deal with Luffy.[198]
Luffy faces off against Marigold and Sandersonia in their human-snake forms.
Fighting against these two, Luffy finds that they are more than just simple Devil Fruit users as they displayed techniques that seemingly nullified his own rubber body among other things. As the fight rages on, the two sisters decide to torment Luffy by breaking Marguerite's petrified stone body. Angered by this, Luffy shouts with all his might for them to stop, releasing unconsciously a power that not only stunned both the sisters but also knocked out several of the Amazons in the audience in a manner similar to Rayleigh. The Kuja warriors identify that power as Haōshoku Haki, the ability of the chosen that appears only to one person from a million. Having saved Marguerite's body for the moment, Luffy decided to take it up at notch and enters Gear Second.
Luffy defeats the Gorgon Sisters with Gomu Gomu no Jet Gatling Gun.
Powered up, Luffy is able to best the two sisters. In the midst of the battle however, Luffy sees that Sandersonia caught on fire from one of her sister's technique, exposing her back. Knowing that what was on Hancock's and her sisters' was something that they did not want others to see, Luffy covers Sandersonia's back before the audience in the stands could see it. With Luffy showing his true character to Hancock and her sisters, the amazons in the audience are dismissed and Luffy is approached by Hancock herself.
As a thank for saving her sister, Boa Hancock returns the three petrified Amazons to normal and invites Luffy to re-examine what was on her back. Seeing it more clearly, Luffy realized that despite looking like the mark on Hatchan's forehead, it is something completely different. With that realization, Elder Nyon comes before Luffy and Hancock and reveals to Hancock Luffy's actions against the Celestial Dragon in Sabaody Archipelago. Having been told of his actions, Hancock promptly reveals to Luffy her and her sisters' past, the meaning of the mark on their backs, and why it resembled the mark on Hatchan and other fishman. Moving Hancock with his actions and his hate for the Celestial Dragons, Luffy is promised her ship to use.[199]
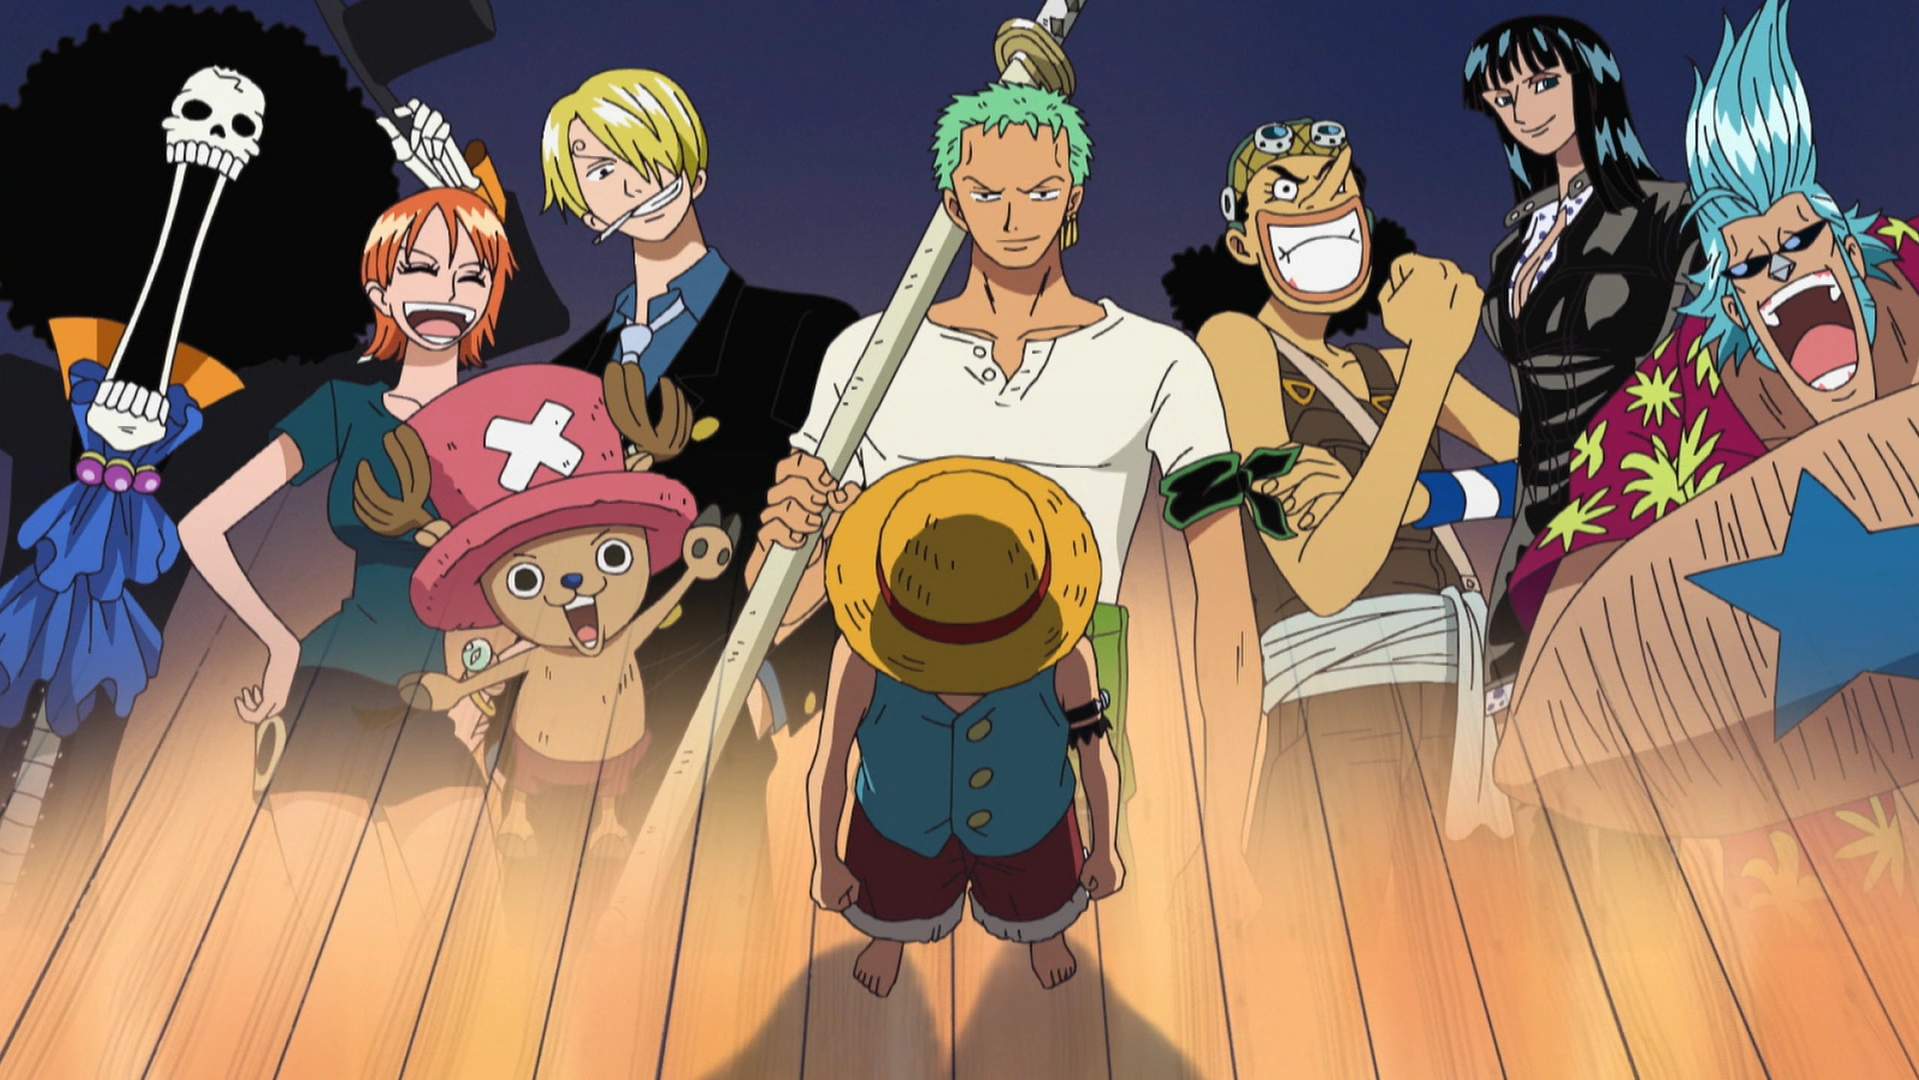

Luffy makes the tough decision of putting his brother's life before reuniting with his crew.
Having been promised with a ship to travel on, Luffy enjoys a party, courtesy of the Amazons. Despite all the festivities, he learns from Elder Nyon that Ace is soon to be publicly executed. Finding this out and seeing the almost burnt out state of Ace's Vivre Card, Luffy decides to put reuniting with his crew on hold to save his brother who was then being held at Impel Down and desperately asked Nyon for a way to get there.[200]
With this he learns that the fastest way to the great prison was to sail there using a Marine battleship through the current beyond the Gates of Justice. Finding out also that his only way to use such a ship was to stow away with Hancock if she answers the Shichibukai summons to protect Marineford, he and Nyon seek her out to ask her of such a favor. Before Luffy could ask Hancock of such a thing, he learns that she had contracted an unknown disease. Despite her condition, Luffy is still approached by Hancock to hear his pleas. Telling her his case, Hancock surprisingly agrees to help Luffy in his endeavor. Though this delights Luffy, unknown to him was that Hancock's disease was something called Love Sickness and Hancock, having been moved by Luffy's selfless, brave, and kind nature, has fallen madly in love with him.
After some fond farewells with his new friends from the island, Luffy secretly boards Vice Admiral Momonga's ship with Hancock and her snake and sails for Impel Down.[201]
Impel Down Arc
On the Loose in the World Government's Greatest Prison
As Boa Hancock and Monkey D. Luffy came on board of the marine ship, Marigold and Sandersonia are left in charge of the island in Hancock's absence. Hancock requests she is taken to Impel Down to the vice admiral, and at his wishes, she reverts the petrification placed on the Marine sailors during their first meeting. Luffy is shown to be stowing away on the Marine ship by hiding under the large robe Hancock is wearing. [202]
On the ship, Hancock makes seemingly outrageous demands to the Marines, such as 100 kg of food a meal, for five meals a day. When the food is taken in to the room she's staying in, it is shown it is simply needed to feed Luffy. Hancock also forbids anyone from peeking into her room (lest they find Luffy). Luffy is later shown looking at what's left of Ace's Vivre Card as he gets ever closer to Impel Down.[203]
When Luffy arrives at Impel Down he hides under Hancock's robe once more. However, Hancock warns him that she will be searched.[204]
Before Hancock receives a full-body check by the Vice Jail Head, Domino, Hancock immediately petrifies her and the vigilant den-den mushi. Luffy comes out, but Hancock explains that she cannot accompany him further into the prison. She begs him to promise not to make a ruckus inside Impel Down. Luffy complies then climbs up to the ceiling and prepares to leave after the room is opened by Impel Down's Vice-Chief Hannyabal. While Hancock leaves with Momonga to Marineford, Luffy navigates his way through Impel Down by following Ace's Vivre Card and going through any open doors. After he enters Level 1 of the prison, Luffy encounters an old pal fighting against the Blugori guardians. Buggy is shocked when he realizes that Luffy entered Impel Down on his own accord. They then decide to team up in order to defeat their common enemies.[205]
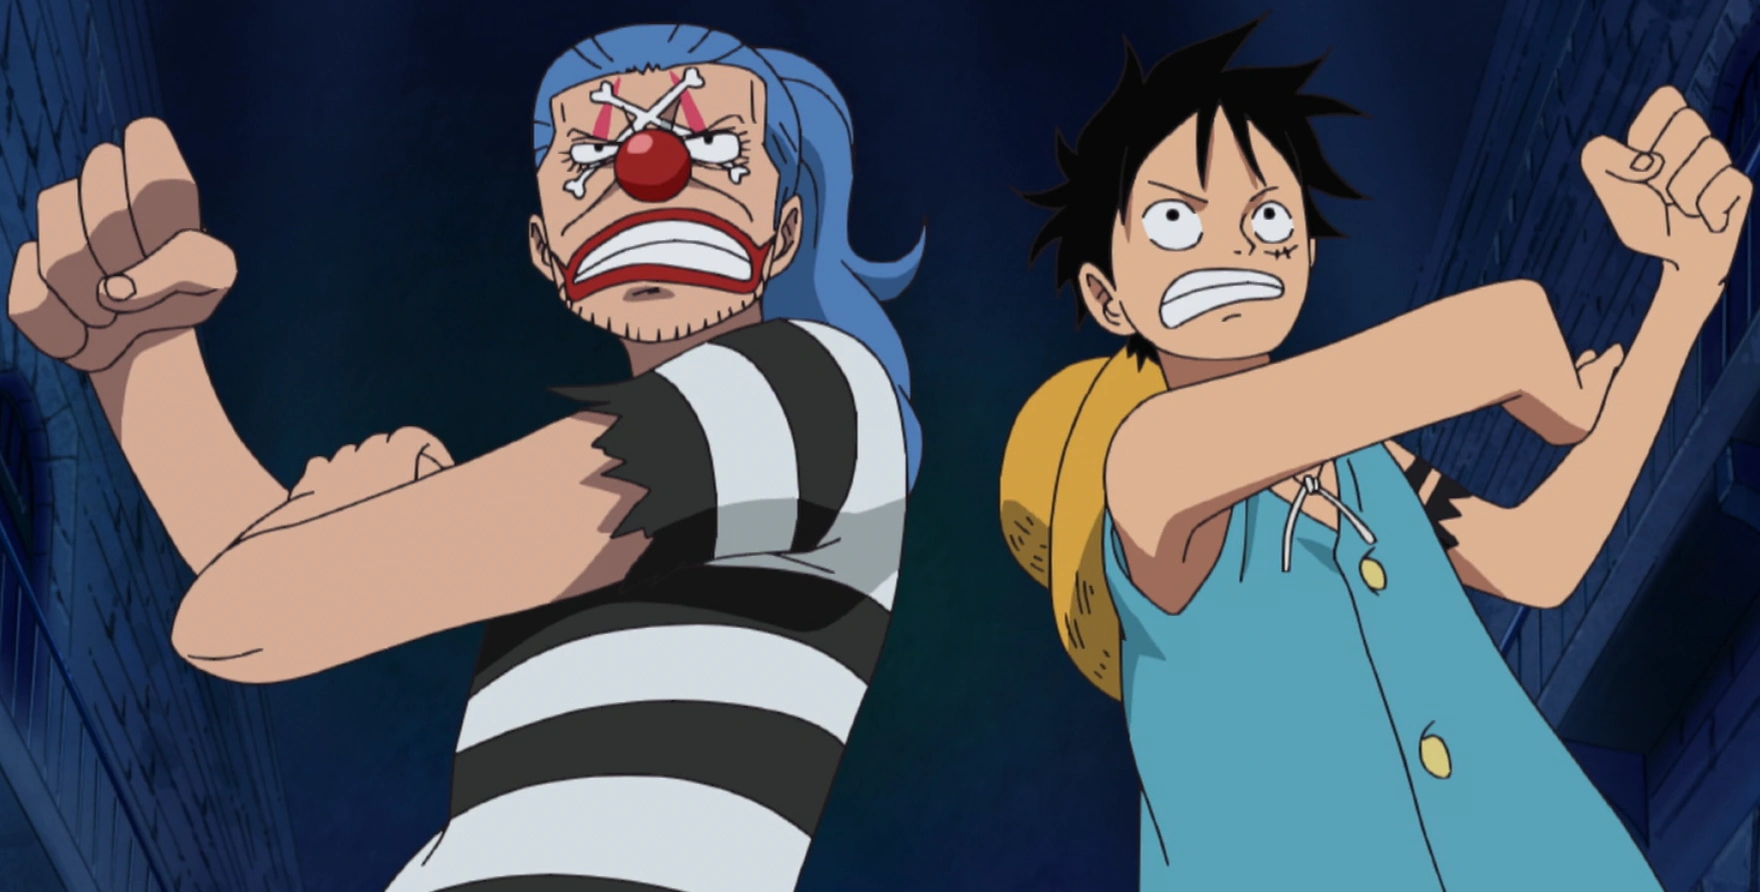

Luffy and Buggy teaming up together.
Luffy manages to defeat all of the guards in an instant, much to Buggy's surprise as his special combo did not even faze them. After hearing Luffy wants to go to Level 5 where Ace is kept, Buggy initially decides to leave him and escape until hearing Luffy tell him about the battleships outside, instead choosing to stay. Buggy suddenly spots the arm band that Luffy is wearing and immediately identified it as the map to Captain John's treasure. Although Luffy insists he goes to Level 5, Buggy states he has to go down each level, which houses more dangerous criminals the lower they go. Buggy explains that he himself has only reached Level 4. He makes a deal with Luffy: he will escort him to Level 4 of Impel Down but in return, Luffy has to give him the treasure. Without hesitation, Luffy agrees and even decides to give him the arm band in advance for helping him. Buggy feels guilty for lying to Luffy but nonetheless, decides to escape from Luffy but crashes into the Prisoner's room and towards the Crimson Hell. Luffy grabs hold onto Buggy as they fall. Luffy throws Buggy's feet into the ground as told and they fly towards a giant hole. Buggy explains that the hole leads to Level 2. Luffy immediately jumps down and heads towards Level 2.[206]
Upon reaching Level 2, Luffy and Buggy (who fell into the hole as well) are chased by a giant monster chicken called a Basilisk. Finally, Luffy gets fed up and activates Gear Third to defeat the Basilisk and the other guards chasing them. Buggy decides to release the prisoners to start a riot inside, and told Luffy that he lied about knowing where the other floors are to make an escape, angering Luffy. Then, Luffy finds out that one of the prisoners released is Mr. 3.[207] Luffy, Buggy, and Mr. 3 are defeating and been chased by the bizarre wild beasts of "Level 2", before confronting the Sphinx. Buggy and Mr. 3, knowing that there's a staircase, plan to ditch Luffy as he goes down "Level 3", while they go up to escape. However, while trying to smash the wax statues made by Mr. 3 in order to escape it, the sphinx makes the floor collapse, sending itself and the trio down to Level 3.[208]
After falling to Level 3 Luffy is told by Buggy that they are in the "Starvation Hell". With the Sphinx knocked out, Luffy wants to head to Level 4, but he and Buggy, who wants to get out of Impel Down, argue about where to go. Before they can separate though, a net made of steel reinforced with Seastone captures Luffy, Buggy, and Mr. 3. The guard and commander of the Blugori: Saldeath walks up and claims there's no escape. However, the Sphinx wakes up and breaks the net. Luffy looks up to see Buggy and Mr 3 climbed to the rafters as they tell him that they are betraying him. Luffy however merely thanks them for taking him so far. Luffy then begins to beat up several Blugori and guards in his way as he heads to Level 4.[209] As Luffy continues to head on, the Sphinx is still chasing him, but a man in a prison outfit looking like Zoro kicks the Sphinx off Luffy. It turns out to be Mr. 2. After a happy reunion, they team up to go further down, as there is someone Bon Kurei would like to see as well.
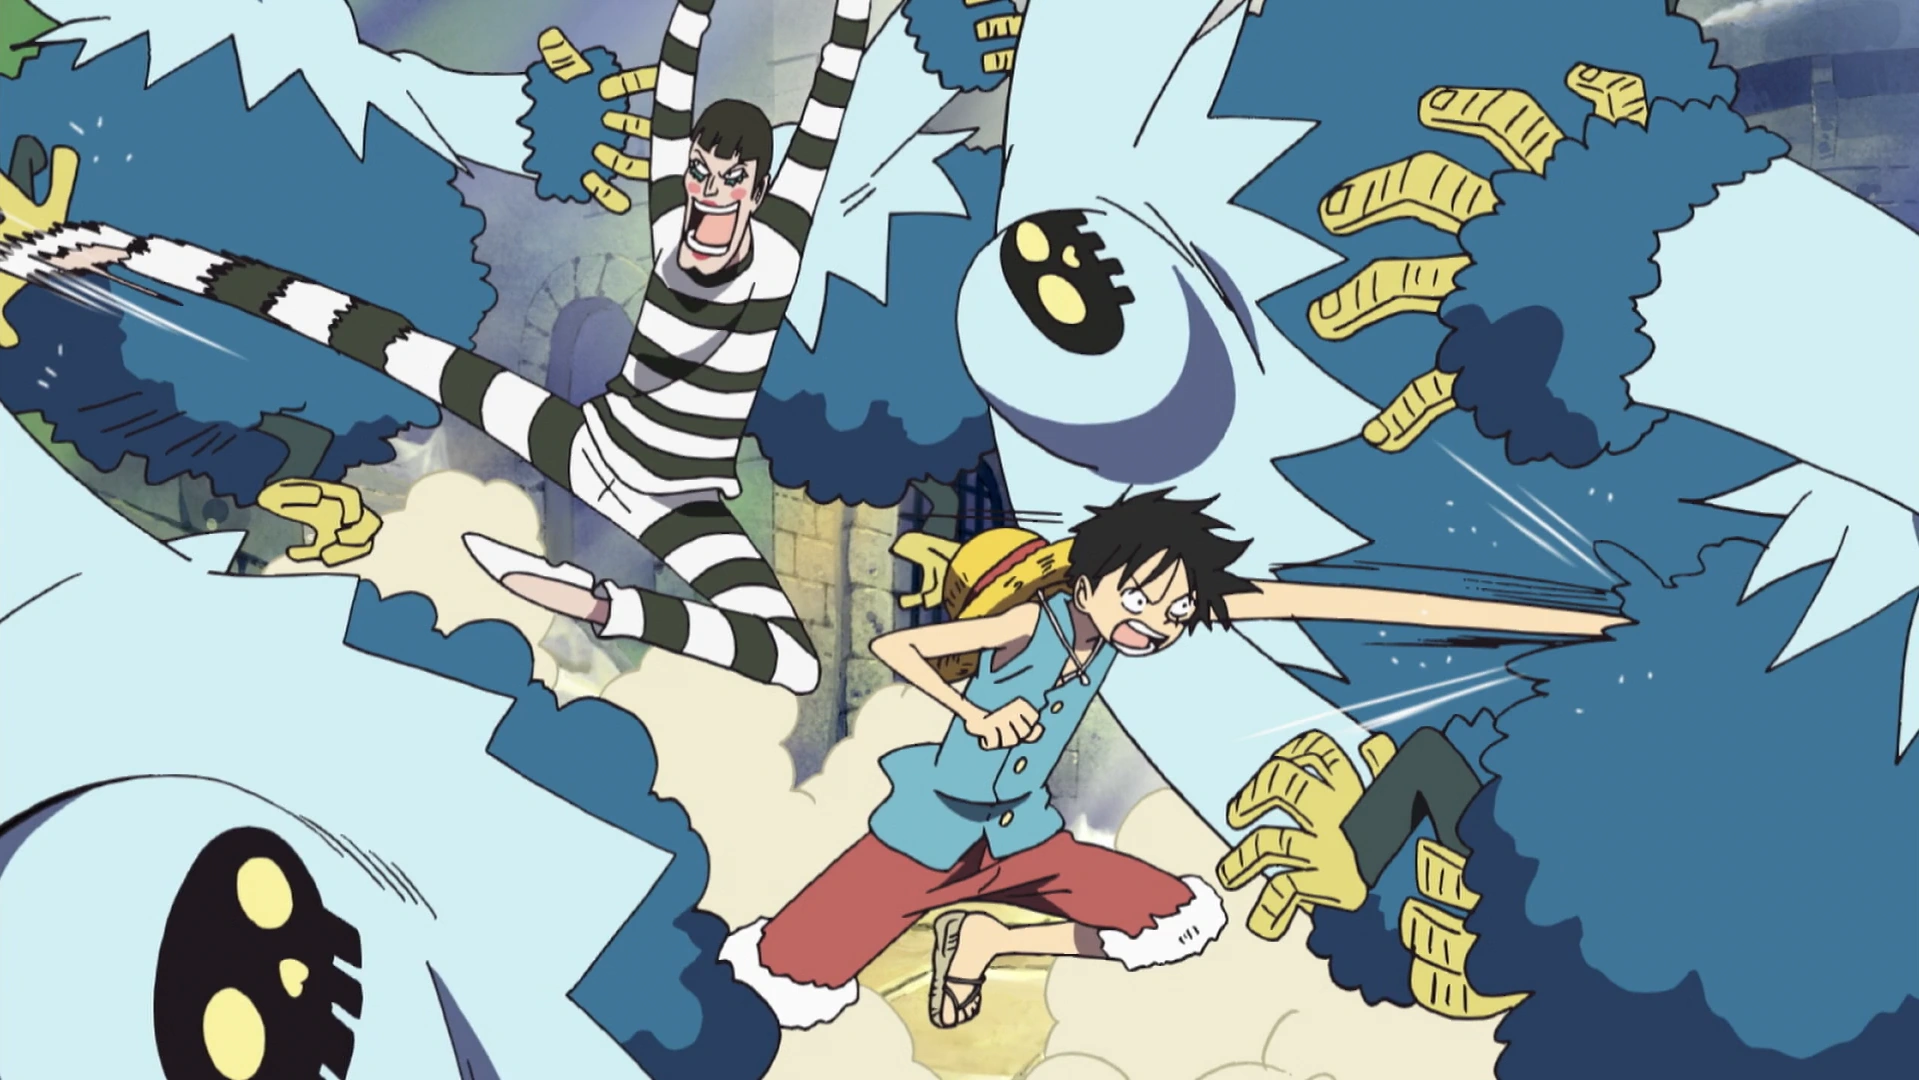
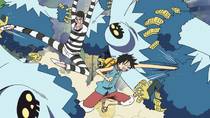
Luffy teams up with Mr. 2 Bon Kurei to rescue someone in the lower levels.
After defeating the army of Blugori, Mr. 2 and Luffy meet a Minotaur, the Jailer Beast Minotaur gives two a good fight, almost killing Mr. 2. They then climb up a wall and are literally standing above Level 4. Bon Kurei warns Luffy that Level 4 is the Blazing Hell, and on the lower parts of the floor, is a vat of boiling blood and blazing fire.
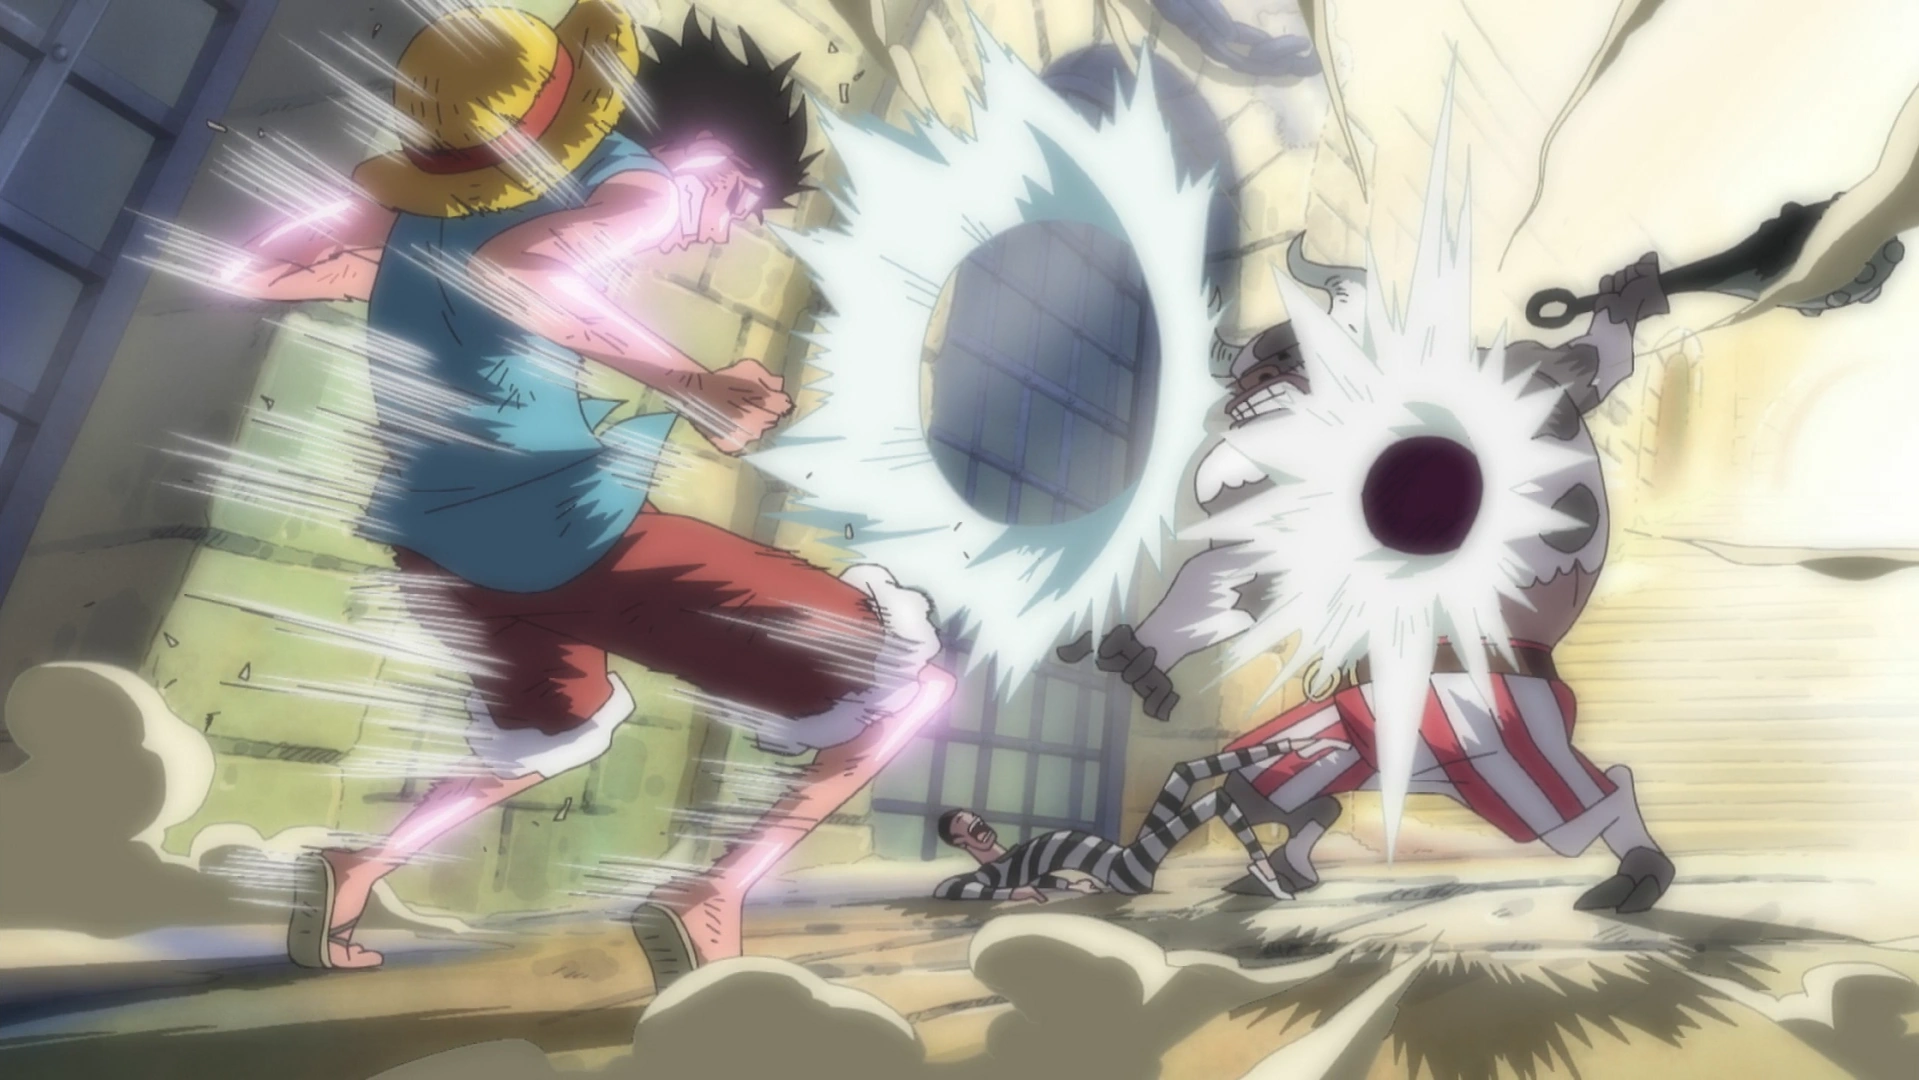

Luffy uses Gomu Gomu no Jet Bazooka to defeat Minotaur.
However they meet up with Mr. 3 and Buggy who are being chased by the same Jailer Beast which was sent flying. The four decide to team up together in order to beat him. Successful, the four celebrate as they make their way to Level 4.[210] The four of them fall through to Level 4 because the floor collapsed beneath them thanks to their fight with the Minotaur.
Luckily, the falling debris allowed them to jump off the boiling pot. As soon as Luffy smells food he runs towards the kitchen on Level 4. While charging the guard on his way, he notices a blob of poison, as Chief Warden Magellan leaps towards the group and confronts them.[211] Mr. 2 Bon Kurei warns him that the man that is in front of them is Chief Warden Magellan, who has eaten the Doku Doku no Mi, and thus his entire body is poison. Magellan tells Luffy he knows he broke into Impel Down to rescue Portgas D. Ace, and demands to know exactly how he did this.
A Near-Death Experience
Luffy sacrificing his arms to poison and attacking Magellan with Jet Bazooka.
Thinking of Hancock, Luffy refuses to tell Magellan anything. Unable to touch the chief warden without being deadly poisoned, Luffy tries to avoid the attacks as much as he can. Desperate and already half poisoned, Luffy sacrifices his hands with a Gomu Gomu no Jet Bazooka to Magellan, saving Ace being more important than his safety.[212] But the multiple poisons start to take effect, weakening Luffy's senses. Ultimately he lies down defeated while Magellan sentences him to death in Level 5: The Freezing Hell. [213]
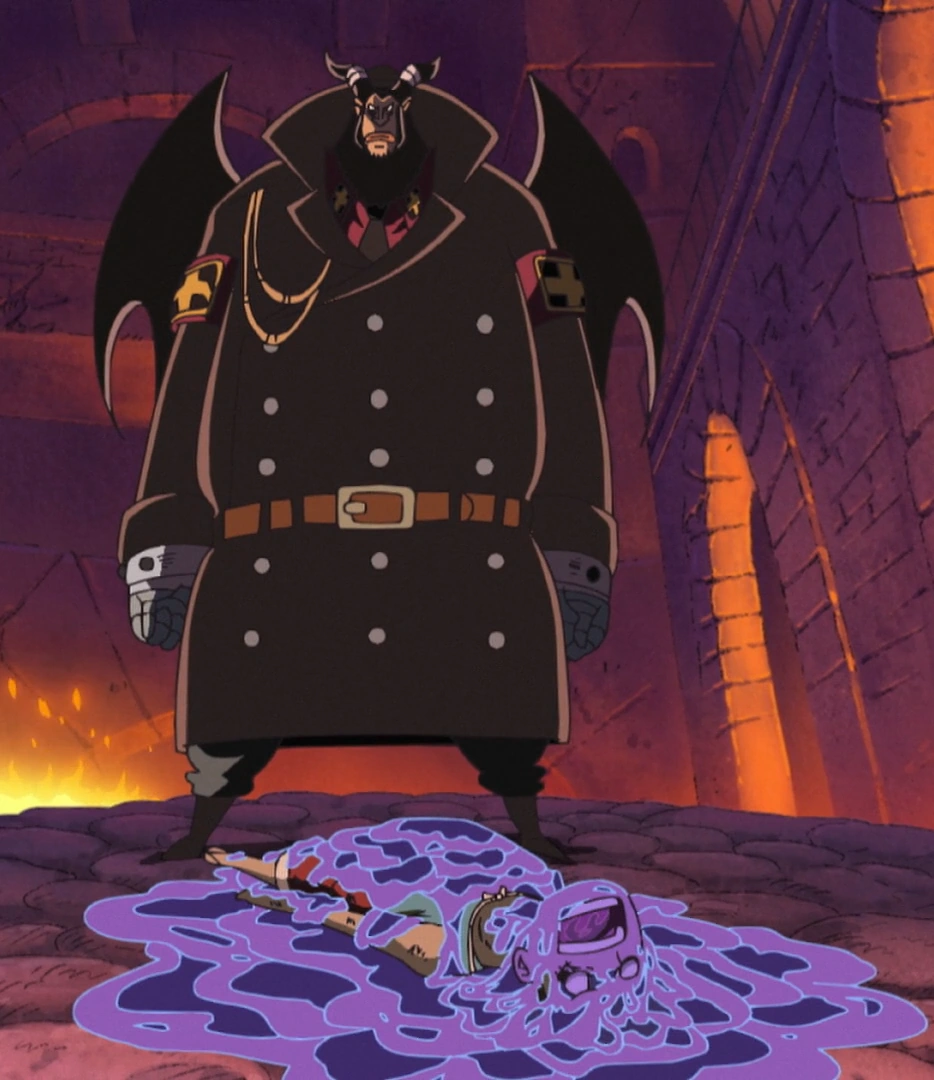

Luffy defeated by Magellan.
He is later seen incarcerated in a Level 5 cell, where despite dying, is still determined to rescue Ace, and is only living on despite the poison through sheer willpower. Fortunately, he was later released by Bon Kurei, who returned to help Luffy and hopes to get rid of the poison slowly killing him by bringing him to Iva, the King/Queen of Kamabakka Kingdom. With his body being dragged by Bon, the two wandered throughout Level 5, but later encountered a pack of wolves intent on eating them; Bon managed to fight off a few but was later overwhelmed by their numbers. To his surprise, Luffy suddenly got up and, after biting off one of the wolves attacking Bon, lets out a surge of Haki that repelled the wolves away. He is shown afterward to have passed out along with Bon Kurei, where they are approached by Inazuma.[214]
Luffy and Bon Kurei are revealed to have been saved by the Okama prisoners who've managed to create a small refuge in between Levels 5 and 6. The former Queen of Kamabakka Kingdom, now King of New Kama Land on Level 5.5, Emporio Ivankov, took Bon Clay and Luffy in after being impressed by Luffy's selflessness in begging him/her to save Bon Clay when he was himself dying. Iva placed him in a locked room and chained him to a slab to help heal him. However, he warned Luffy that the process will cost him ten years of his life, if he does survive. Luffy decided to go through it anyway, and Iva injected some of his Healing Hormones into Luffy to boost his immune system to counteract the poison, giving Luffy intense pain. Iva expected the healing to take two days, in which he will surely miss Ace's execution. Bon Clay decided to cheer Luffy on for the duration of his struggle with the poison.
Bon Clay's support through the hours along with Iva and the natives of "New Kama Land" help Luffy recover in only twenty hours, much to Iva's astonishment, but just two hours before Ace's transport from Impel Down.[215] After eating massive amounts of food, Luffy finally emerges from the room. He thanks Bon Clay and Iva for helping him heal, and immediately tries to set out to save Ace, whose transport is minutes away. However, in an ensuing conversation with Iva, he reveals that Dragon is his father, much to Iva's surprise. Iva, being a former comrade of Dragon's, realizes that both Luffy and Ace are Dragon's "sons". After injecting Luffy with Tension Hormones (acting as a temporary adrenaline rush), Iva sets out with Luffy and Inazuma to Level Six, to save Ace.[216]
Escape from the Great Prison
Luffy, Jinbe and Crocodile rampaging their way through the levels to freedom.
Luffy does not make it in time and is cut off from Level 1 due to the elevator shaft being flooded with sleeping gas. He is then recommended by Iva to let Ace's safety be in the hands of Whitebeard, assuring the boy that the Yonko will not let any harm befall his 2nd Dividsion Commander. But never one to be deterred, Luffy then resolves to go to Marineford to rescue Ace, despite Iva's protests. Crocodile becomes interested and offers to help Luffy escape. After he is convinced by Ivankov to free Crocodile, Jinbe begs Luffy to free him as well. Luffy is convinced, despite Inazuma's objection and allows Jinbe to join as well.[217]
Luffy, along with Jinbe and Crocodile are heading up Impel Down, and realize that they only have five hours before Ace's execution. While passing through Level 4, Crocodile frees his former subordinate Mr. 1. Having caught up with the New Kama natives and Mr. 2,[218] Luffy and the army of prisoners continue to blast through the goalers.
Sadi then appears with her Jailer Beasts. With the three beasts brutalizing the army from New Kama Land, Luffy, Crocodile and Jinbe decide to blast through, all defeating the Jailer Beasts with a single blow.[219]
Sadi-chan uses her Koufun no Geki Akamauchi attack on several prisoners and cuts the bridge in half as well. Luffy charges at her, but is thrown by a now female Ivankov. As Luffy makes his way towards the stairs, he is stopped by a stubborn Hannyabal who, despite being severally injured by Luffy's attacks, cannot, in the name of justice, permit a pirate to go further.
However, Hannyabal's good words are instantly crushed down by an incoming Blackbeard who has entered
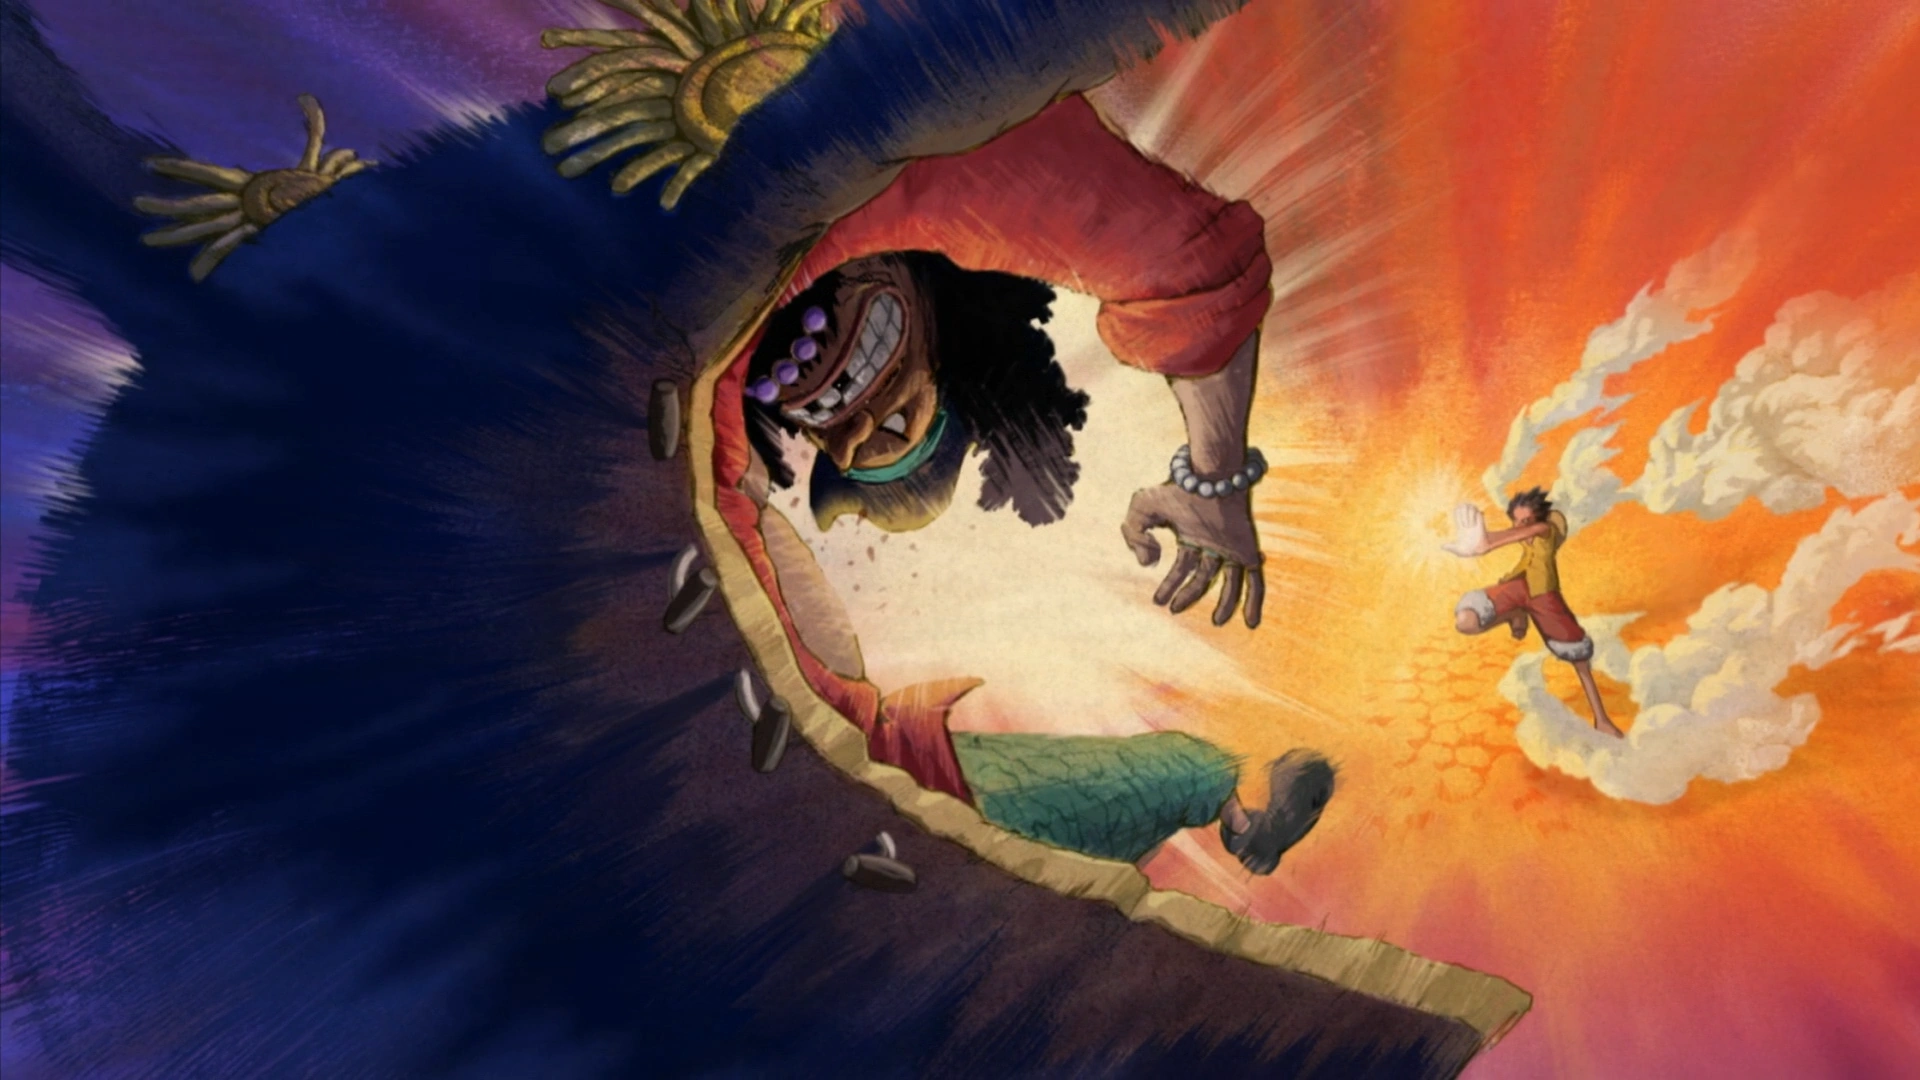

Luffy attacks Blackbeard using Gomu Gomu no Jet Pistol.
Impel Down. When Luffy recognizes Blackbeard from Jaya and discovers he was the one responsible of Ace arrest, he could not hold back anymore and attacks Bleackbeard straight away. The fight was stopped by Jinbe who reminded him about the rescue of Ace which should be his priority. As Luffy then made his way to Level 2, Magellan closes in on the prison escapees.[220][221]
As they realized that Magellan was following them, Luffy became worried about Ivankov and Inazuma who tried to stop Magellan so the rest of them can escape. However as soon as they united with the bunch of prisoners lead by Buggy, Magellan confronted them again. As Magellan used his Hydra on Luffy and the other prisoners, they were saved by Mr. 3's candle wall. While Luffy and Mr. 3 combine to slow down Magellan,[222][223] Jinbe goes on ahead to secure a Marine ship. Unfortunately, Magellan switches to a new poison called Kinjite so corrosive that it even cancels out Mr. 3 wax power. Luffy and the other are forced to flee. Eventually the group make it to the entrance where Bon Clay and the others wait for Jinbe, Crocodile, Mr. 1 and Buggy to procure a ship.
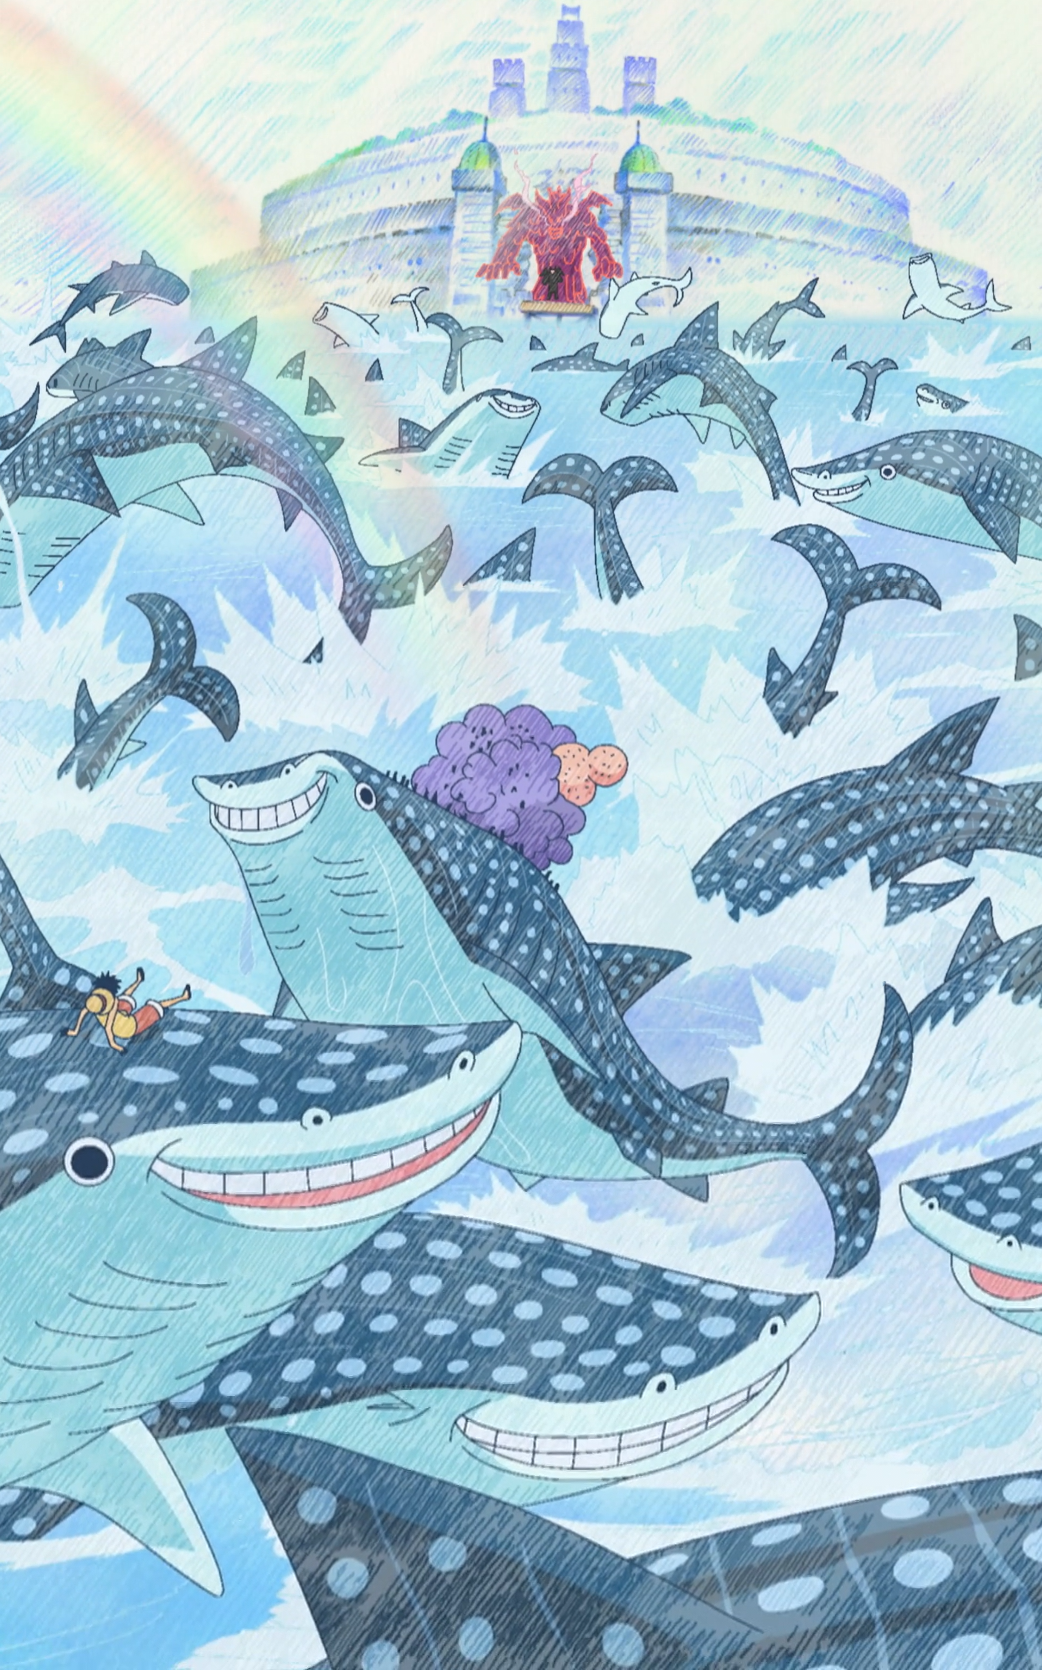

Luffy and the prisoners finally escape on whale sharks that Jinbe summoned.
However, Magellan is closing in fast on the bunch and with nowhere left to run, the escapees are trapped. Iva suddenly comes crashing through the floor, having used his Face Growth Hormones. Jinbe then calls Luffy, informing him that they've captured a ship, but due to the distance will not make it in time before Magellan reaches them. Instead Jinbe tells Luffy and the other to jump into the sea. Using Iva wink and grabbing the gigant head, everyone is propelled just in time away from Magellan out into the sea. Just as they're about to land, Whale Sharks catch them and take the bunch to the captured marine ship.[224]
Luffy escaped Impel Down with the help of the whale sharks Jinbe called out to, and was on his way to Marineford with the 241 other prisoners who had escaped with him when he realized that the Gates of Justice were still closed. Suddenly, they opened for an unknown reason. It turned out that Bon Clay had disguised himself as Magellan using his Devil Fruit power, and ordered the men in the communications room to open the gates by using Magellan's face. Realizing Mr. 2's sacrifice, Luffy and all of the prisoners all said a tearful goodbye.
Marineford Arc
The Fight Rages Without Him
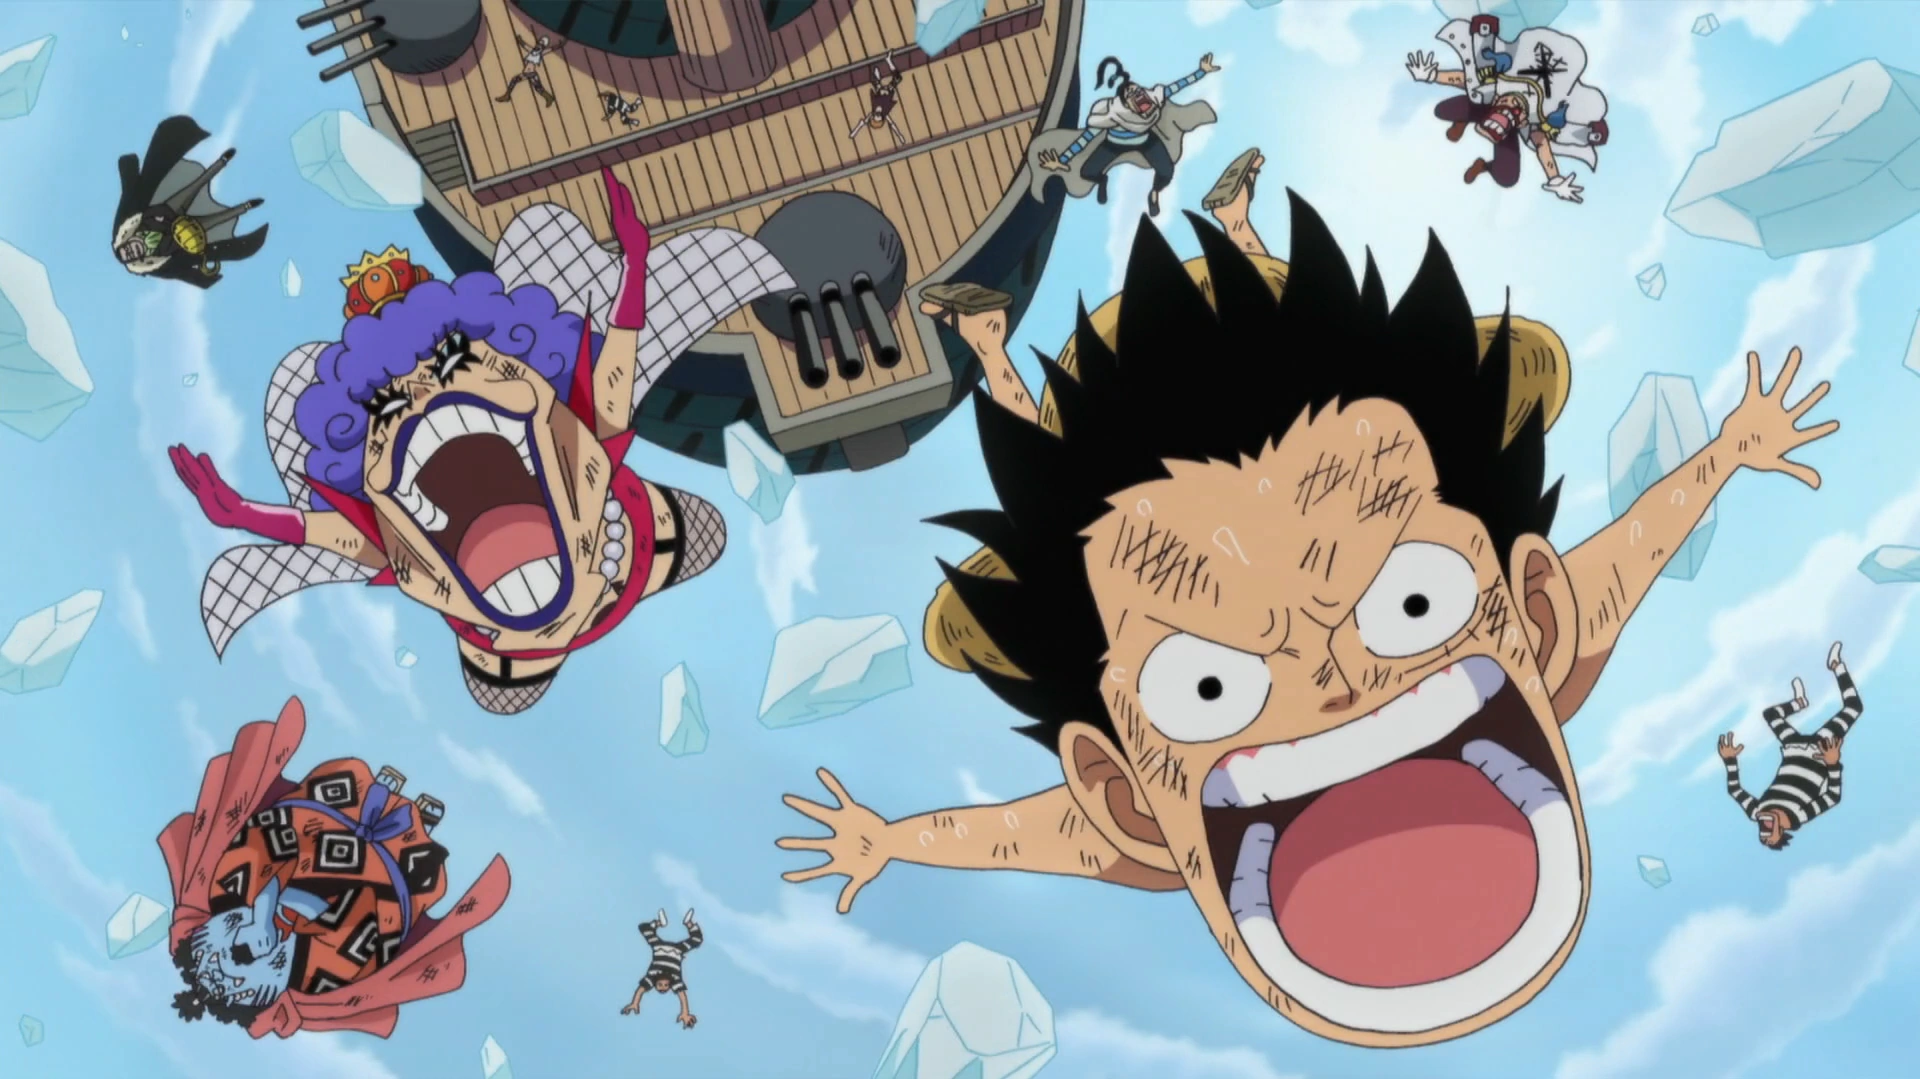

Luffy and the other Impel Down prisoners finally arrive at Marineford.
After their escape, their ship was contacted by a Marine officer from Marineford, who informed them that they were trapped inside the Tarai Current and that Luffy and Buggy were considered the masterminds behind the jailbreak. Luffy defiantly proclaimed that he was going to rescue Ace no matter what before hanging up.[225]
When Luffy arrived before the Gates of Justice, he was excited that they had reached their destination so quickly while Jinbe stated that they were a little late and was more concerned with how to open the doors. Later, when Whitebeard's fleet arrived, the Gates of Justice inexplicably opened on their own.[226]
When Ivankov asked Luffy if Dragon would come to save his other son, Luffy revealed that he knew that Ace's dad was Gol D. Roger.[227] Tsunami waves were created and frozen by Whitebeard and Aokiji's powers. Luffy tried to talk the others into pushing the boat down the frozen wave. As the battle in Marineford began, Luffy and the Impel Down escapees found themselves trapped atop one of the frozenat so that it would slide down the back of the wave. Before they could, though, the Den Den Mushi on board intercepted the order to ignore the schedule and execute Ace prematurely. Panicking, Luffy told the others that they need to hurry. Ivankov performed Hell Wink in hopes of shoving the battleship off of the wave, but instead of sliding down, it was knocked forward, flipping upside down and sending all of the inmates plummeting towards the sea.
Through an act of pure fortune, the battleship landed in one of the few spots of ocean that remained unfrozen. Although the impact split the boat in two, Luffy and the others on board fell into the ocean unharmed. Jinbe dove underwater to rescue Luffy and the other fruit users, tossing him onto the wreckage. As Luffy made his way out of the water, he and Ace spotted each other. Ace called out to Luffy, who happily responded that he was happy to see Ace again.[228]
Before the two could talk any longer, though, Crocodile decided to attack Whitebeard. Luffy instantly activated Gear Second and intercepted the blow, soaking his leg in water and knocking Crocodile away. Crocodile reminded Luffy that they had a deal, to which Luffy responded that because Whitebeard was important to Ace, he would not let Crocodile touch him. Luffy's act caused Marco to remark that he wasn't half bad. As Whitebeard observed Luffy, he recognized the Straw Hat as the one that Shanks used to wear. When he told Luffy that he had seen the hat with "Red Hair", Luffy said that Shanks had let him borrow it.
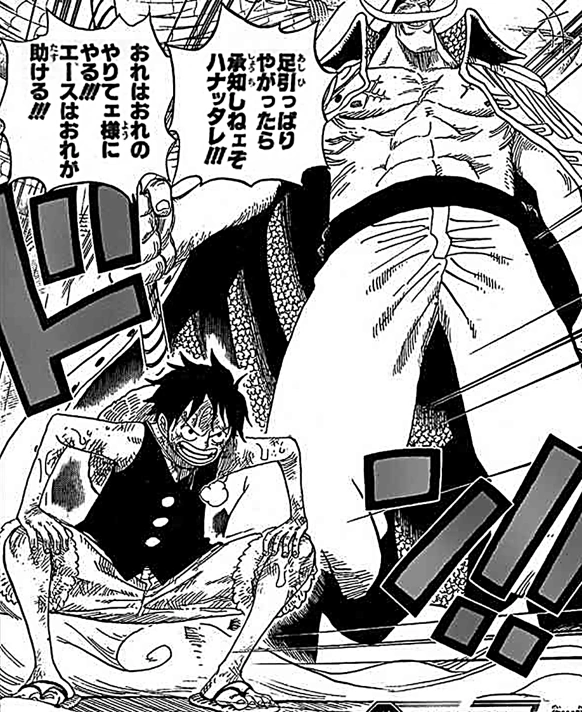
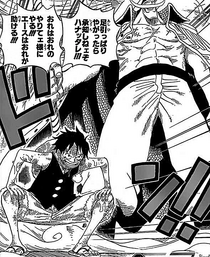
Luffy beside the great pirate Whitebeard.
Whitebeard told Luffy that he had no chance in the battle, apparently to deter him. Luffy snapped back at Whitebeard, saying that he would definitely save Ace. He even went so far as to challenge Whitebeard outright to the title of Pirate King, stunning everyone within earshot. Amused by and in admiration of Luffy's tenacity, Whitebeard cracked a grin before telling Luffy not to get in his way. Luffy snapped back again, saying that he would do as he pleased.[229]
Objective: Save Ace!
Before charging into the battle, Luffy informs Whitebeard that he had heard the Marines' plan to execute Ace early. As Whitebeard thanks Luffy for the information, Luffy bolts towards Ace; however, Kizaru attempts to stop him by launching a kick of light at him. Ivankov used his Death Wink to propel Luffy out of the line of fire. When Luffy thanks him, Ivankov states that it is his duty to make sure Luffy does not go and kill himself. Hina reappears to capture Luffy, transforming her arms into long iron fences. Luffy manages to jump out of the ring using Gear Second before it ensnares around Hina's marine allies.
Ace suddenly cries out to Luffy to stay away, berating his brother for getting involved with his own affairs. He states that he would be too humiliated if a weakling like Luffy were to rescue him, but his true reason for wanting to keep Luffy at bay was so that he would not drag his brother down with him. Luffy replies by shouting out that they are brothers, and that he does not care about any rules about pirates. As Moriah sends zombies that he produced from the earth after Luffy, they are drowned and purified in a burst of seawater fired by Jinbe.

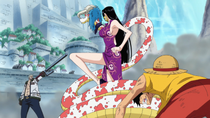
Hancock protecting Luffy from Smoker.
Much to the shock of the Marines as well as Luffy's and Whitebeard's subordinate crews, Sengoku reveals that Luffy's father is none other than the Revolutionary Dragon. Not even fazed by the fact that his lineage was revealed to everyone at Marineford (as well as the whole world, due to the reporters watching), Luffy smashes his way through more of the Marines with Gear Third, including a giant. Claiming that he does not care if Ace objected, and that he would rescue Ace even if it killed him, he presses forward, only to be attacked and subdued by Commodore Smoker. However, Boa Hancock intervenes on his behalf, angrily threatening Smoker for attacking Luffy. She then gives Luffy the key to Ace's handcuffs to which he hugs her in gratitude.
He stops his advance when he sees Ivankov fighting Kuma as Doflamingo explains that Kuma has been fully converted into a cyborg, making him little more than a killing machine. Ivankov keeps Kuma busy and tells Luffy to press forward. Luffy, however, then meets Mihawk who is drawing his sword, contemplating whether or not fate will keep Luffy safe from his blade.
Although Mihawk stands before him, Luffy knows he has no time to fight Mihawk, and bursts past him with his superhuman speed. However, Hawk-Eye, peering through the crowd, manages to point out Luffy, and swings his blade forward, slashing Luffy, as well as all those between the two. After sending Luffy careening into a wall, Mihawk pursues after him, attempting to impale him. However, two Newkama soldiers get in the way of Mihawk, who brushes them aside with little effort. Luffy attempts to attack Mihawk again, but realizing that the Shichibukai would slice his arm off, halts his attack at the last moment, instead choosing to run away. Mihawk comments that Luffy was unusually composed as he slices horizontally at the rubber man. Although Luffy dodges it, the attack slices the remaining frozen wave in two, causing the upper half to come crashing down on Marineford.
Luffy uses Gomu Gomu no Jet Migawari to dodge Mihawk's attack.
As Luffy and Mihawk continue their battle, the latter notes on how Luffy is moving away from the execution platform. In a move of desperation, Luffy grabs onto Buggy and uses him as a shield against Mihawk's attack. Although Buggy is angry at Luffy, Luffy continues to use him as a shield. Seeing as Luffy is in trouble, Marco calls on 5th division commander Vista to help him. Having finally gotten a break, Luffy dashes back towards the platform. Mihawk comments on how Luffy has the strange ability to make anyone around him an ally, an ability that is the most dangerous in the world.[230]
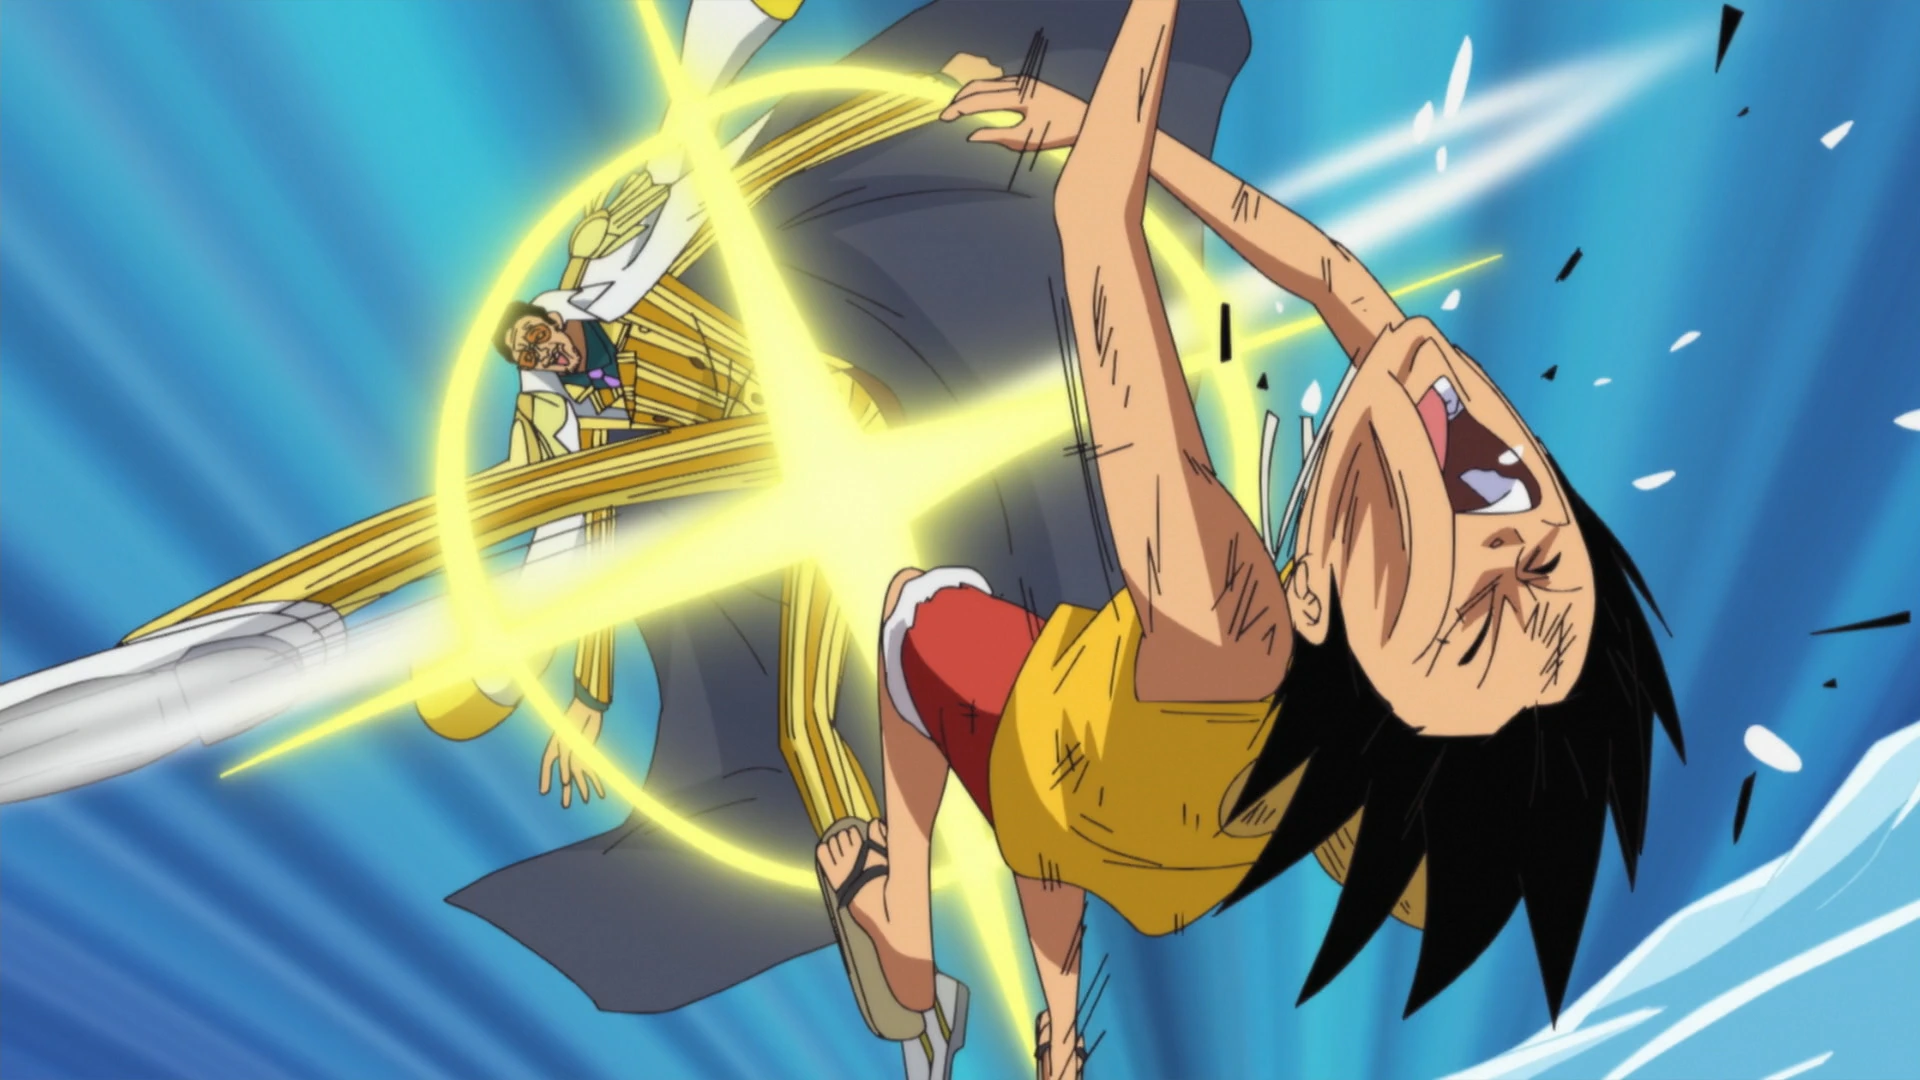

Kizaru kicks Luffy at the speed of light.
As more battleships begin to appear from behind, Luffy recognizes the twenty Pacifista on board, as well as Sentomaru. As Luffy keeps moving toward the platform, Kizaru attacks him and is sent flying. Fortunately Jinbe catches him and Luffy complains how strong Kizaru was to which Jinbe replied that no matter how strong their enemy seemed, they expected that from the beginning. Then the squad captains, who Jinbe said were as strong as 100 men, come to break through Kizaru, asking Luffy if he lost all his strength and Luffy said that they could handle it.[231] Luffy is seen looking in shock as Whitebeard is stabbed.[232]
Luffy is later seen joining the charge to the execution platform after Whitebeard finally entered the battle himself. While he was charging he got hit by one of Whitebeard's attacks, asking if Whitebeard knew his friends from foes, which Jinbe just stated that his crew knew to stay back. He attempted to make his way to the platform, but the wall that formed around the bay interfered and he is currently trapped with the rest of the invading force of pirates as the admirals unleash their powers to destroy them.[233]
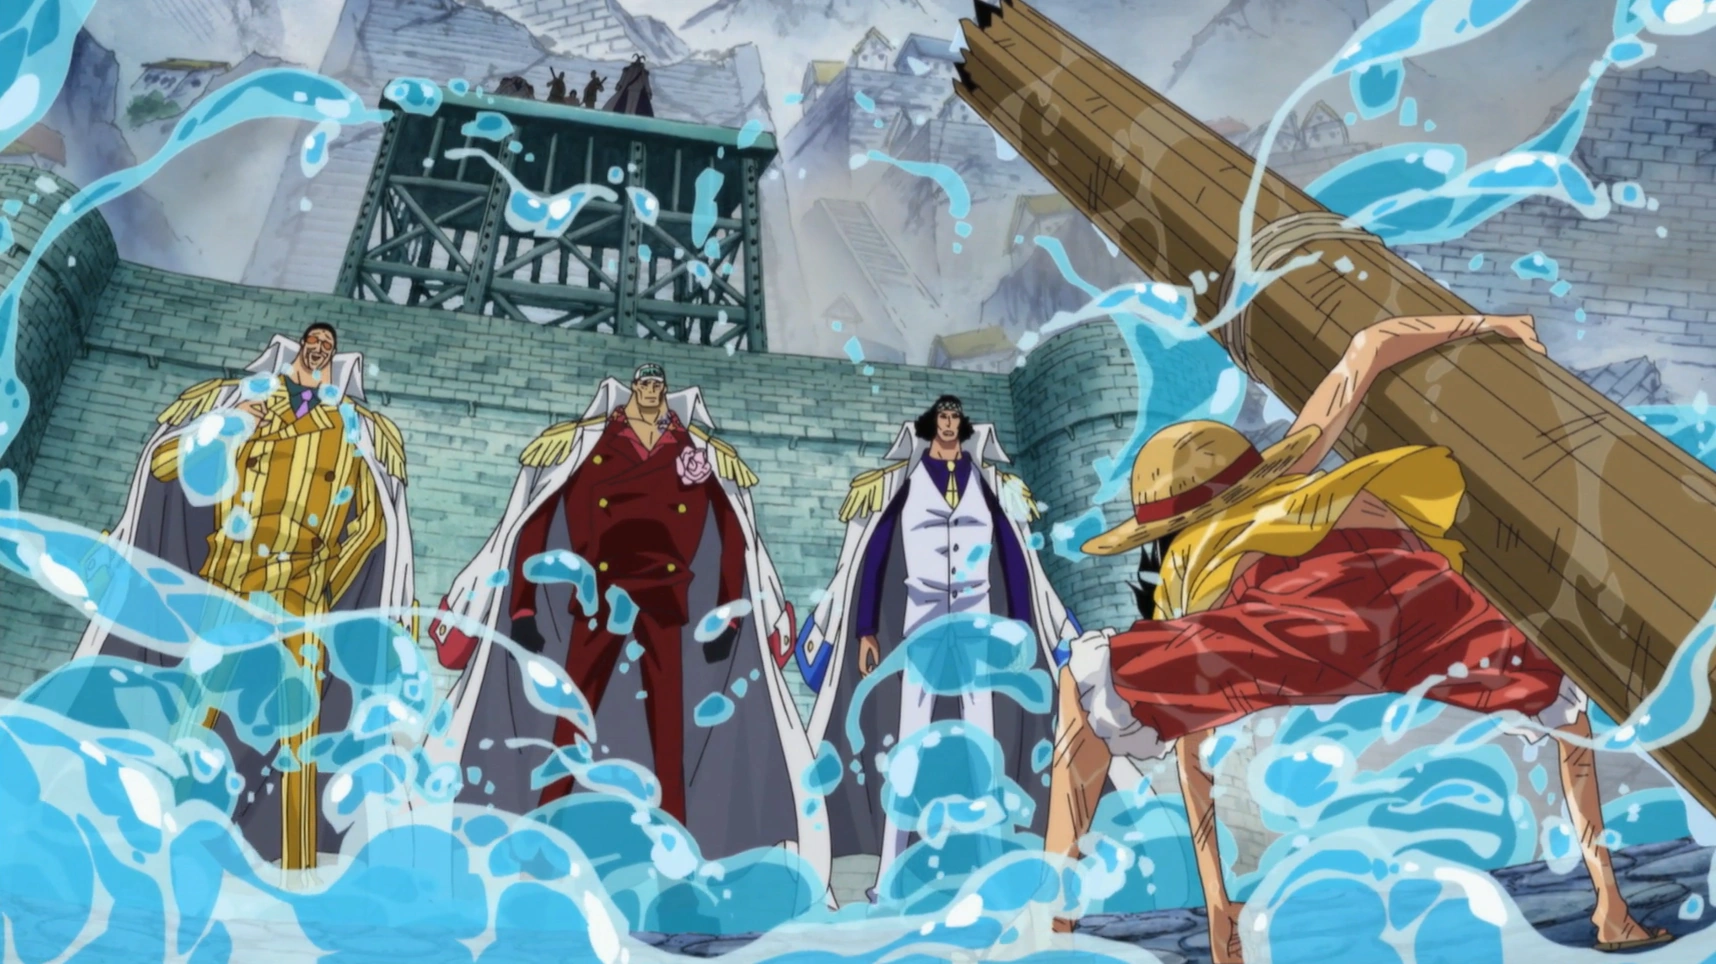
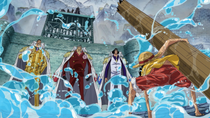
Luffy faces the three admirals.
Luffy attempts to charge in through the gap in the wall made by Little Oars Jr., though is blasted back by cannon fire. He then has Jinbe launch him through a jet of water, where he lands right in front of the execution platform, with the three admirals standing before him, all commenting on his boldness. True to their comment, Luffy shows no sign of fear and yells that he's going to save Ace, and then tries to attack with a mast he had carried with him, but it is frozen by Aokiji; but this was part of his plan, and broke off his hold on the mast a split-second right before he himself gets frozen along. He then uses Gomu Gomu no Stamp Gatling to shatter the frozen mast, and sending the chunks of frozen debris at the three admirals, who only passively used their respective powers to nullify the attack.[234] Luffy then activates Gear Second and attempts to speed past the three admirals, but is quickly intercepted and kicked away by Kizaru. Luffy expresses great shock and horror as Ace is nearly executed, but is then surprised by the fact that Crocodile saved Ace.
Aokiji later appears before him and stabs him with an ice saber, and says that while he owes a favour to Garp, Luffy chose the "path of death" for himself and proceeds to kill him, only to be kicked across the island by Marco of the Whitebeard Pirates.[235] Luffy attempts to charge at the plaza again, but this time, Vice Admiral Momonga intercepts him. As he slashes him with his sword, Luffy tries to counterattack but Momonga's speed allows him to evade his attacks and attack him again. As Luffy activates Gear Second, Vice Admiral Dalmatian, a Zoan user in human-dalmatian hybrid form, attacks him with Shigan with all his fingers, critically injuring him, followed by a light beam from Kizaru, who descends and tells him his willpower alone will not be enough to save him as he delivers a light-speed kick to him, and is caught by Whitebeard leaving him unconscious.
Kizaru derides Whitebeard, saying that it was a poor choice to have "trash" like Luffy to lead the charge. Whitebeard seems to silently agree, while Luffy gains consciousness yells for him to let go of him. Whitebeard merely toss him to the side, and says he has done his part, and asks for a doctor to take care of him. Luffy gets up and says he does not want one and yells at Whitebeard's crew that Ace is his only brother he has and has to save him. However, he succumbs to his injuries and collapses again. Whitebeard says guys like him are stubborn and are "all talk", but has spirit like Luffy as he re-enters battle. A little later, he asked Emporio Ivankov to give him more Tension Hormones by saying he would rather die fighting and that if he did nothing, it would make him want to die anyway and after getting the Tension Hormones, he gets up and screams, as they run Iva tells him that if he were to collapse he will not be returning to this world again.[236]
Luffy defeats Coby with Gomu Gomu no Bullet.
After his second wind, he briefly faces off against Coby, whom he beats with a single punch to the face. When Sengoku orders that Ace be executed, Luffy screams at the executioners to stop, releasing a burst of Haōushoku Haki. This knocks out a number of both the Whitebeard Pirates and the Marines, including Jango. Aokiji, Whitebeard, Ace and especially Sengoku, are visibly stunned to learn that Luffy had such an ability. Ivankov then comments on this recent development, and Luffy then replies to continue where he left off - and that is saving Ace.[237] As Luffy continues running towards the platform to save Ace, everyone is still visibly stunned about the sudden surge of hidden power being released, Haoshoku Haki. Luffy is still unaware of his power as Ivankov notes. Luffy and Ivankov pummel their way through the Marines, with several of the Whitebeard Pirates' subordinate crews assisting in clearing the way. He once again encounters Mihawk, who is stopped by Daz Bones, who is in turn saved by Crocodile from Mihawk's sword. As Luffy closes in on the platform, Inazuma appears and creates a way up to the platform for Luffy to meet Ace. Kizaru makes one ditch effort to stop him, only to be halted by Whitebeard.

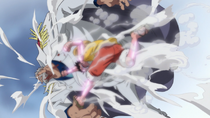
Garp allowing Luffy to strike him in order to rescue Ace.
Luffy then encounters his grandfather, Monkey D. Garp, whom he tells to move aside, but Garp tells Luffy that as a vice admiral, he cannot allow him to pass.[238] As the bridge both of them are on begins to collapse due to Garp's sudden weight, he tells Luffy that he's been fighting pirates all his life and that if he wants to rescue Ace, he will have to kill him. With grandfather and grandson thinking of their past together, Luffy refuses to do so. Garp states that Luffy is now his enemy and prepares to attack. Luffy enters Gear Second and does the same. At the moment of impact, Garp suddenly relents and lets Luffy hit him, falling off the makeshift bridge into the plaza much to the shock of the vice admirals and Sengoku who is showing sympathy, stating that Garp could not shed his fatherly love against Luffy.
With Garp out of the way, Luffy reaches the platform and prepares to use the key Hancock gave him. Sengoku suddenly reveals his Devil Fruit power, transforming into a Buddha-like figure that towers over him and Ace. Luffy quickly goes to insert the key into Ace's cuff, but a shot from Kizaru cuts it in half. Just as all seems lost, one of the guards reveals himself to Mr. 3 in disguise recovering from Luffy's Haki. Sengoku prepares to execute all three of them prompting Luffy to go to Gear Third, while he tells Mr. 3 to protect Ace with a candle wall.
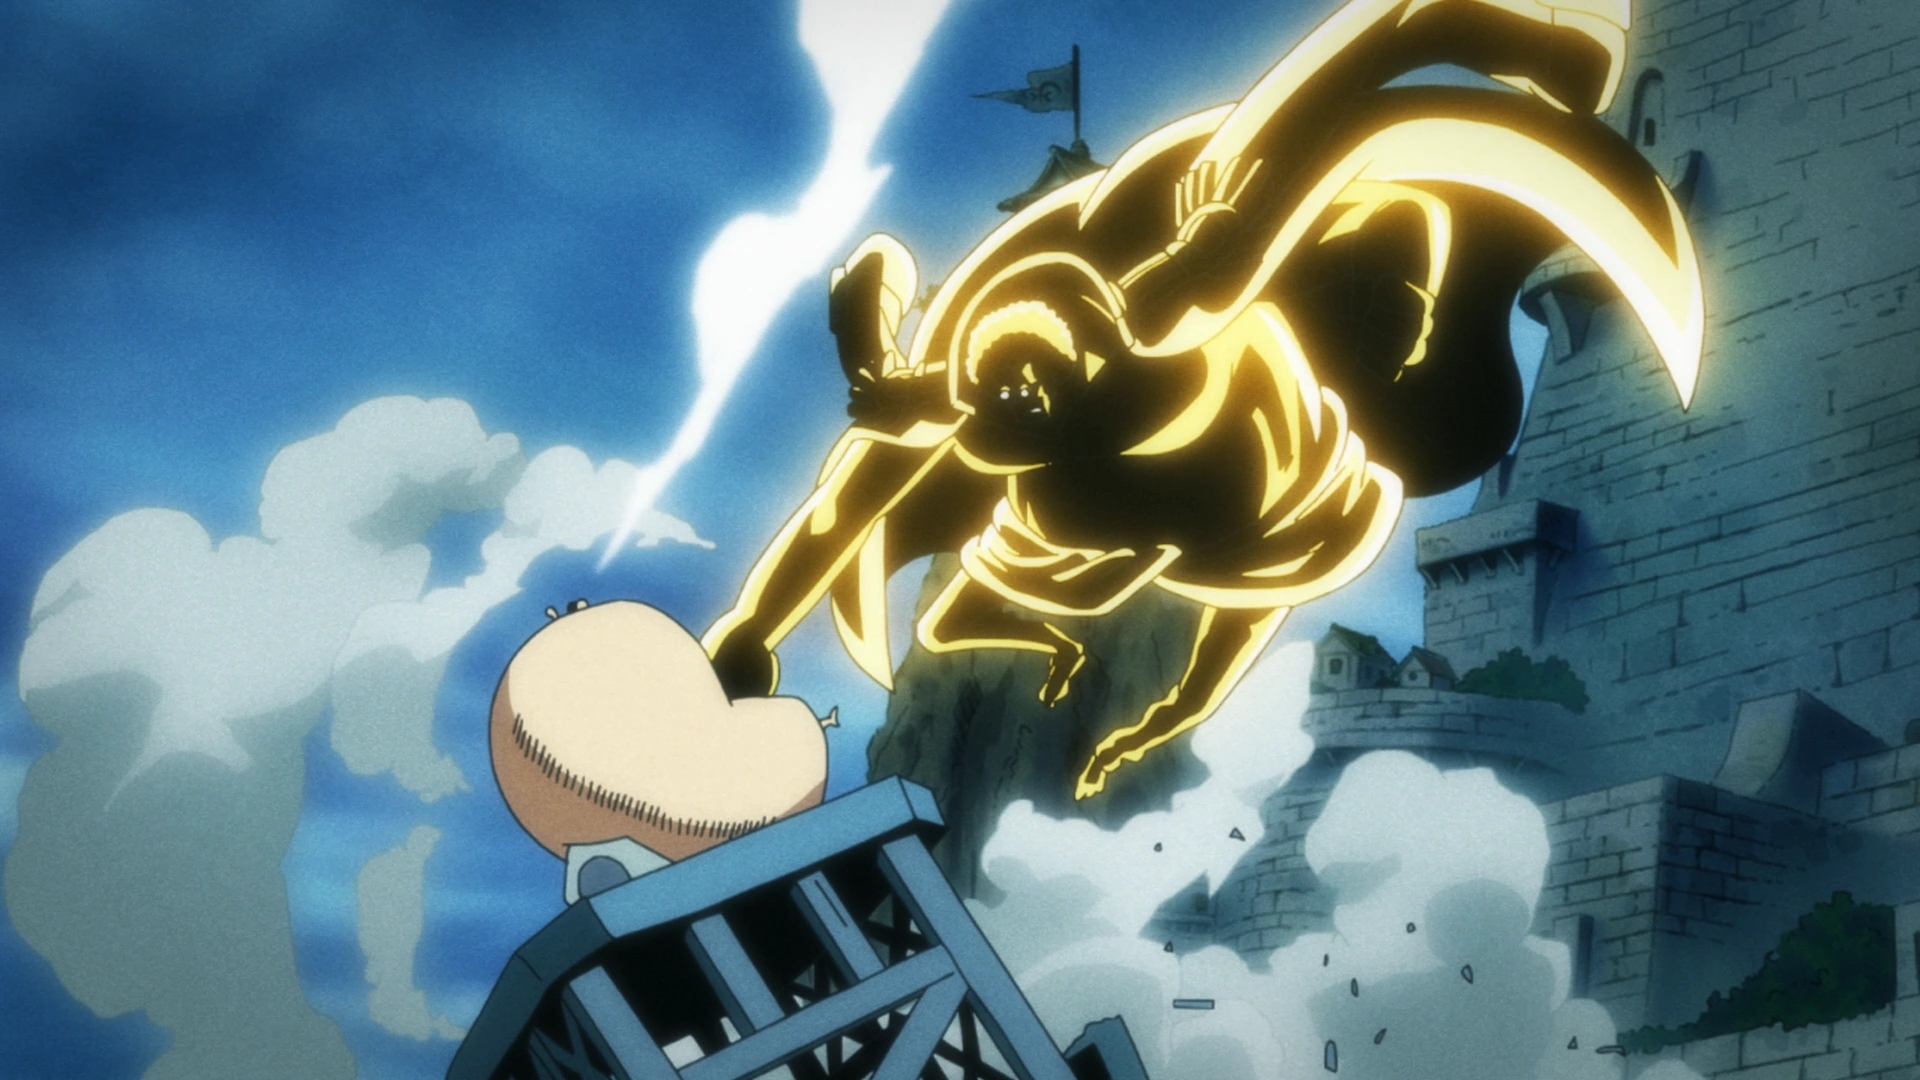

Luffy blocks Sengoku's punch with Gomu Gomu no Gigant Balloon.
Luffy activates Gear Third and uses Gomu Gomu no Gigant Balloon as Sengoku strikes, barely blocking the attack and protecting Ace and Mr. 3. However, the impact still hurts Luffy, spitting up a mouthful of blood. The attack destroys the scaffold they are on, sending everyone plummeting off it. Mr. 3 quickly make a new key, asking Luffy if he will laugh at him for doing it to avenge a fallen comrade (referring to Bon Kurei). Luffy of course shouts he will not as Mr. 3 tosses him the key.
The vice admirals, meanwhile, aim at the falling trio and fire. For a moment, it looks like the shots have hit, until a fire tunnel suddenly appears from the explosion. Ace scolds Luffy for being reckless and overdoing things as he reveals Luffy, Mr. 3 and himself to be unscathed. Ace is now free of the seastone cuffs.
Uncontrollable Anguish: Luffy Collapses
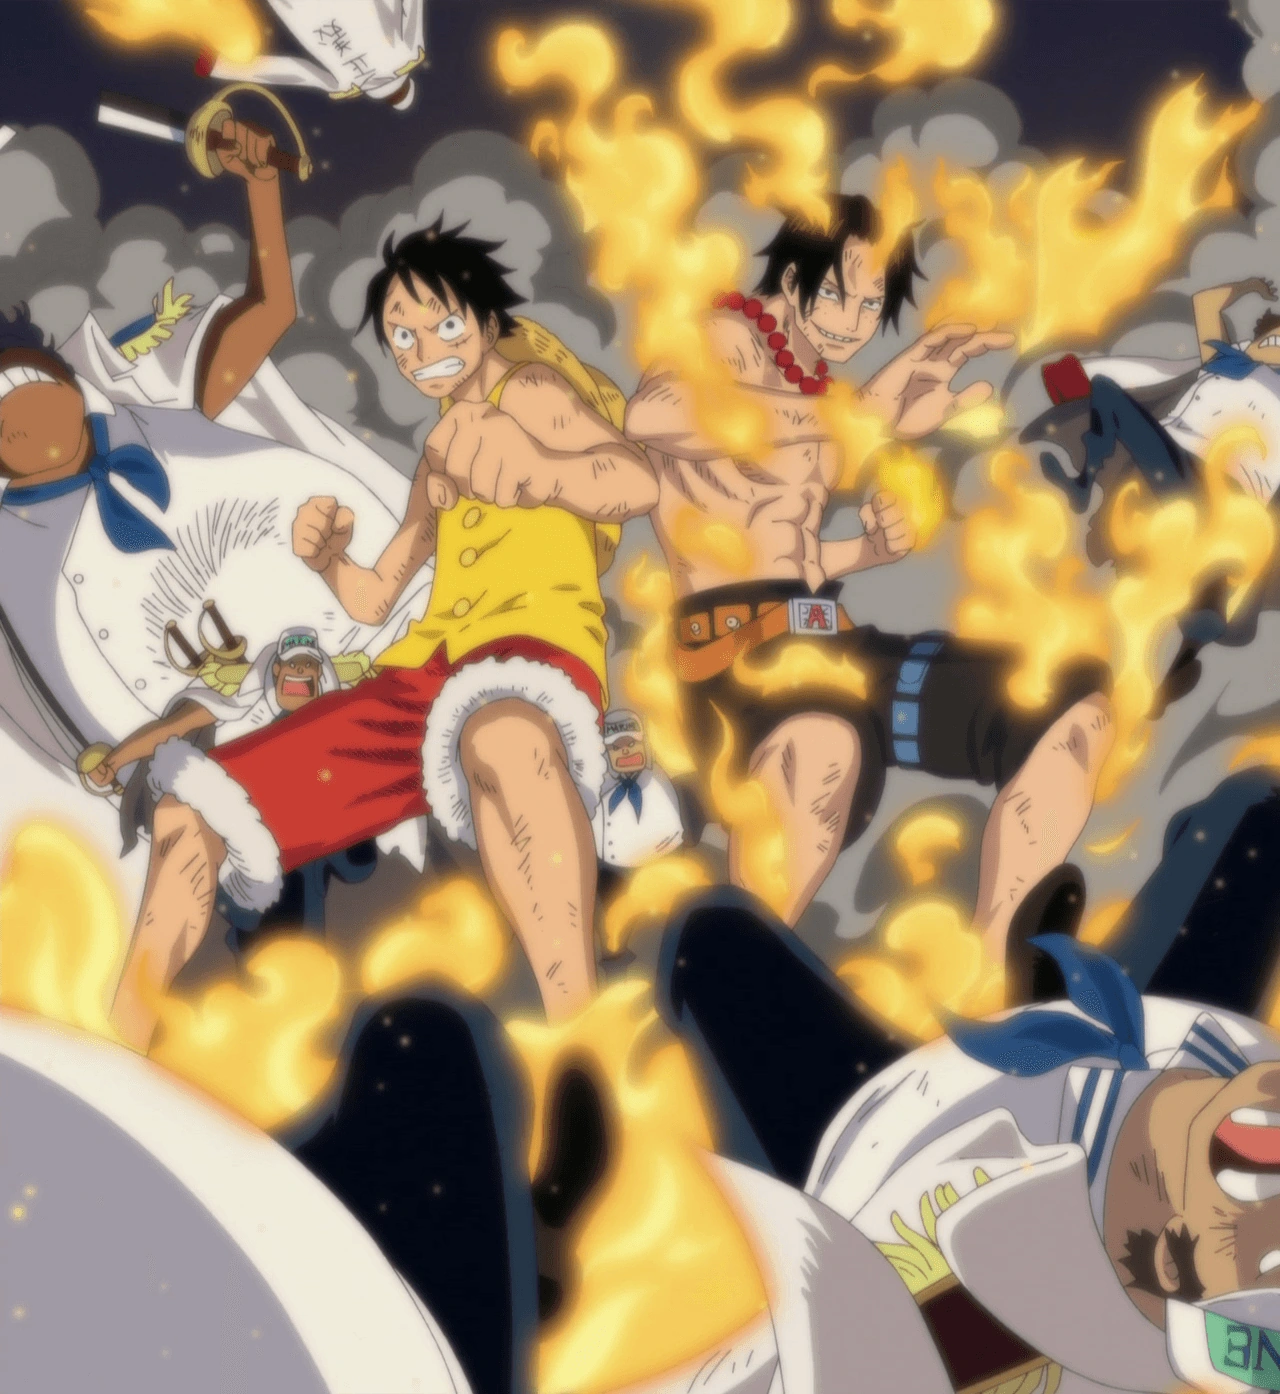

Luffy and Ace battle against the Marines.
Ace and Luffy now fight side by side enjoying being finally together. Luffy and Ace are later seen reacting with stunned horror to Whitebeard's declaration that he is staying behind.[239] Luffy appears to be worn out and tries to get Ace to leave along with the other Whitebeard Pirates, as Ace faces off against Akainu, who had called Whitebeard a failure while chasing them.


Luffy's mind collapses from Ace's death.
Akainu then provokes Ace before attempting to strike Luffy, but he can only stare in shock as Ace takes Akainu's blow through the chest to protect him.[240] Knowing that his end is near, he thanks his family and friends for loving him. Although Ace dies with a smile on his face, Luffy is overcome with tremendous pain and grief for the loss of his brother.[241]
Ivankov notes that Luffy has become mentally broken and that his life is now in danger. Akainu, taking advantage of the situation, charges in and tries to finish Luffy off as well, but Marco intercepts the attack. Marco tells Jinbe to take Luffy with him and swears that they will protect Luffy as if he were Ace.[242] Jinbe rushes to the Whitebeard pirate ship to escape from Marineford, hounded by the admirals which are countered by Whitebeard pirates and Crocodile. Heavily wounded by Akainu, Jinbe and Luffy are somehow caught by Buggy in mid-air when Trafalgar Law suddenly appears in a submarine of the Heart Pirates claiming he wants to save Luffy.[243] Though reluctant at first, Buggy gladly turns over Luffy and Jinbe to Law when Kizaru starts attacking.
Luffy and Jinbe are brought inside, but Kizaru refuses to let Law escape. Coby's speech about the needless death caused by the war, followed by Shanks' unexpected arrival, momentarily distracts him, which Law uses in an attempt to escape. Shanks picks up Luffy's Straw Hat and claims he is here to end the war. He tells Buggy to deliver the hat back to Luffy, not wanting to break their promise by meeting earlier than intended. Kizaru and Aokiji try to stop the leaving submarine, but despite their best efforts it manages to escape. Luffy is shown laying on a table with Law's crew caring for him inside the sub.
Post-War Arc
Law's Aid, Memories, Messages, and a Two Year Training
Luffy was next seen being treated for his injuries on Law's submarine. As he was being treated on Law's submarine, Law, Ivankov, Boa Hancock, and Jinbe commented on how much damage he had accumulated, and Jinbe worried about his reaction to all that had happened when he awakened. [244]
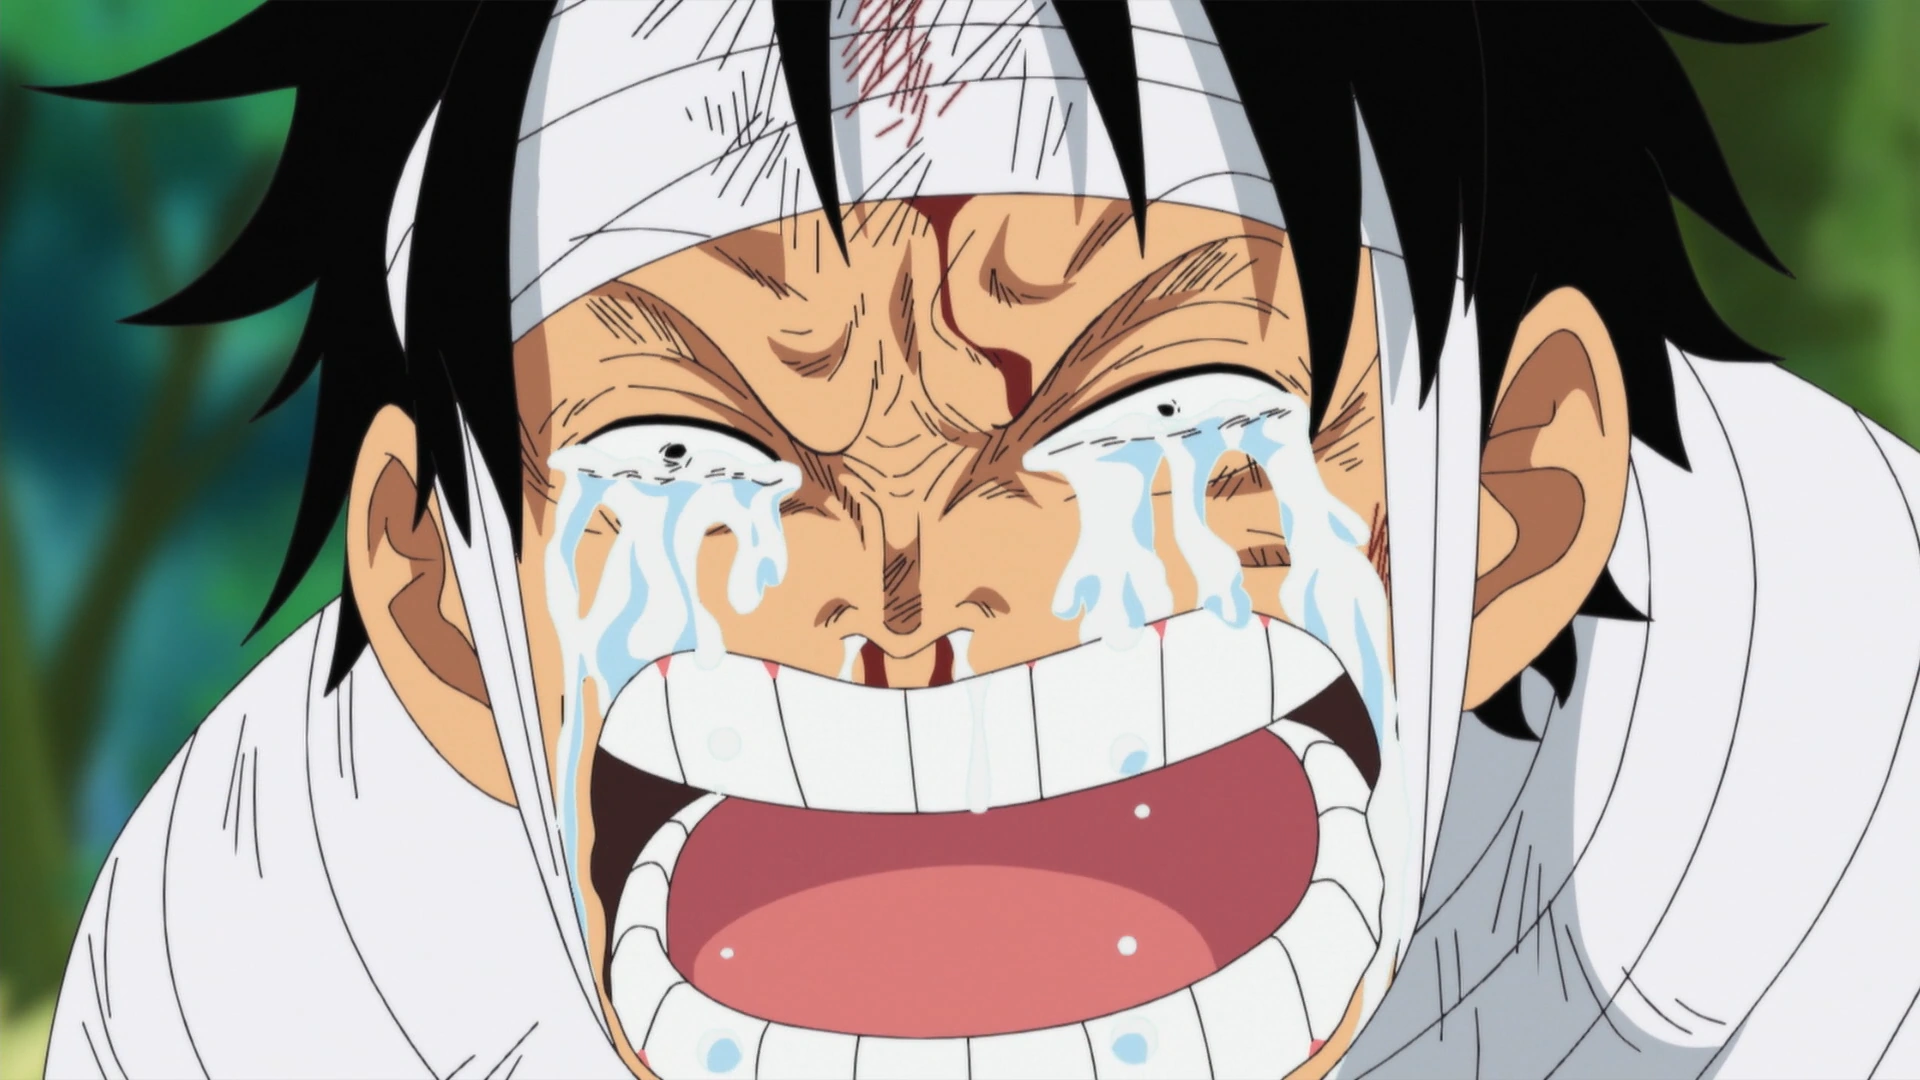

Luffy cries over the death of his brother, Ace.
After two weeks of recovering from his injuries, Luffy awakens in Amazon Lily and goes on a rampage blindly asking where Ace is. After remembering Ace's death little by little, while still destroying the rocks and the trees in the forest, he stops for a moment as Jinbe tries to explain to him that the war is over and Ace is dead. Luffy states he has realized that it wasn't a dream by pinching his cheek very hard and starts to finally cry and mourn over his loss. While weeping, he thinks back to when he first met Ace. After the flashback, he begins to doubt his abilities and starts to think about how he could possibly become the Pirate King if he is too weak.[245] After that, Luffy has a little verbal and physical struggle against Jinbe who told him not to regret his brother's death, and that he has not lost everything yet. Luffy then remembers that he still has something priceless: his crew, and then declares that he wants to go to Sabaody Archipelago to meet his crewmates again.[246]
Soon after that he meets Silvers Rayleigh and learns about his and Shakky's relationship with Nyon, Boa Hancock, and her sisters. Luffy asks if any of his crew had returned to Sabaody Archipelago, to which Rayleigh replied that they probably had not. After Rayleigh explained how he learned Luffy was on Amazon Lily, Rayleigh explains that if Luffy went back to Sabaody, the same tragic events he suffered would occur again. Luffy then starts to listen to a proposition Rayleigh has for him.[247] Although no word left from Luffy and Rayleigh, the word about Luffy being alive is being spread throughout the world. However, there is something lingering within the newspaper regarding actions of Luffy.[248]
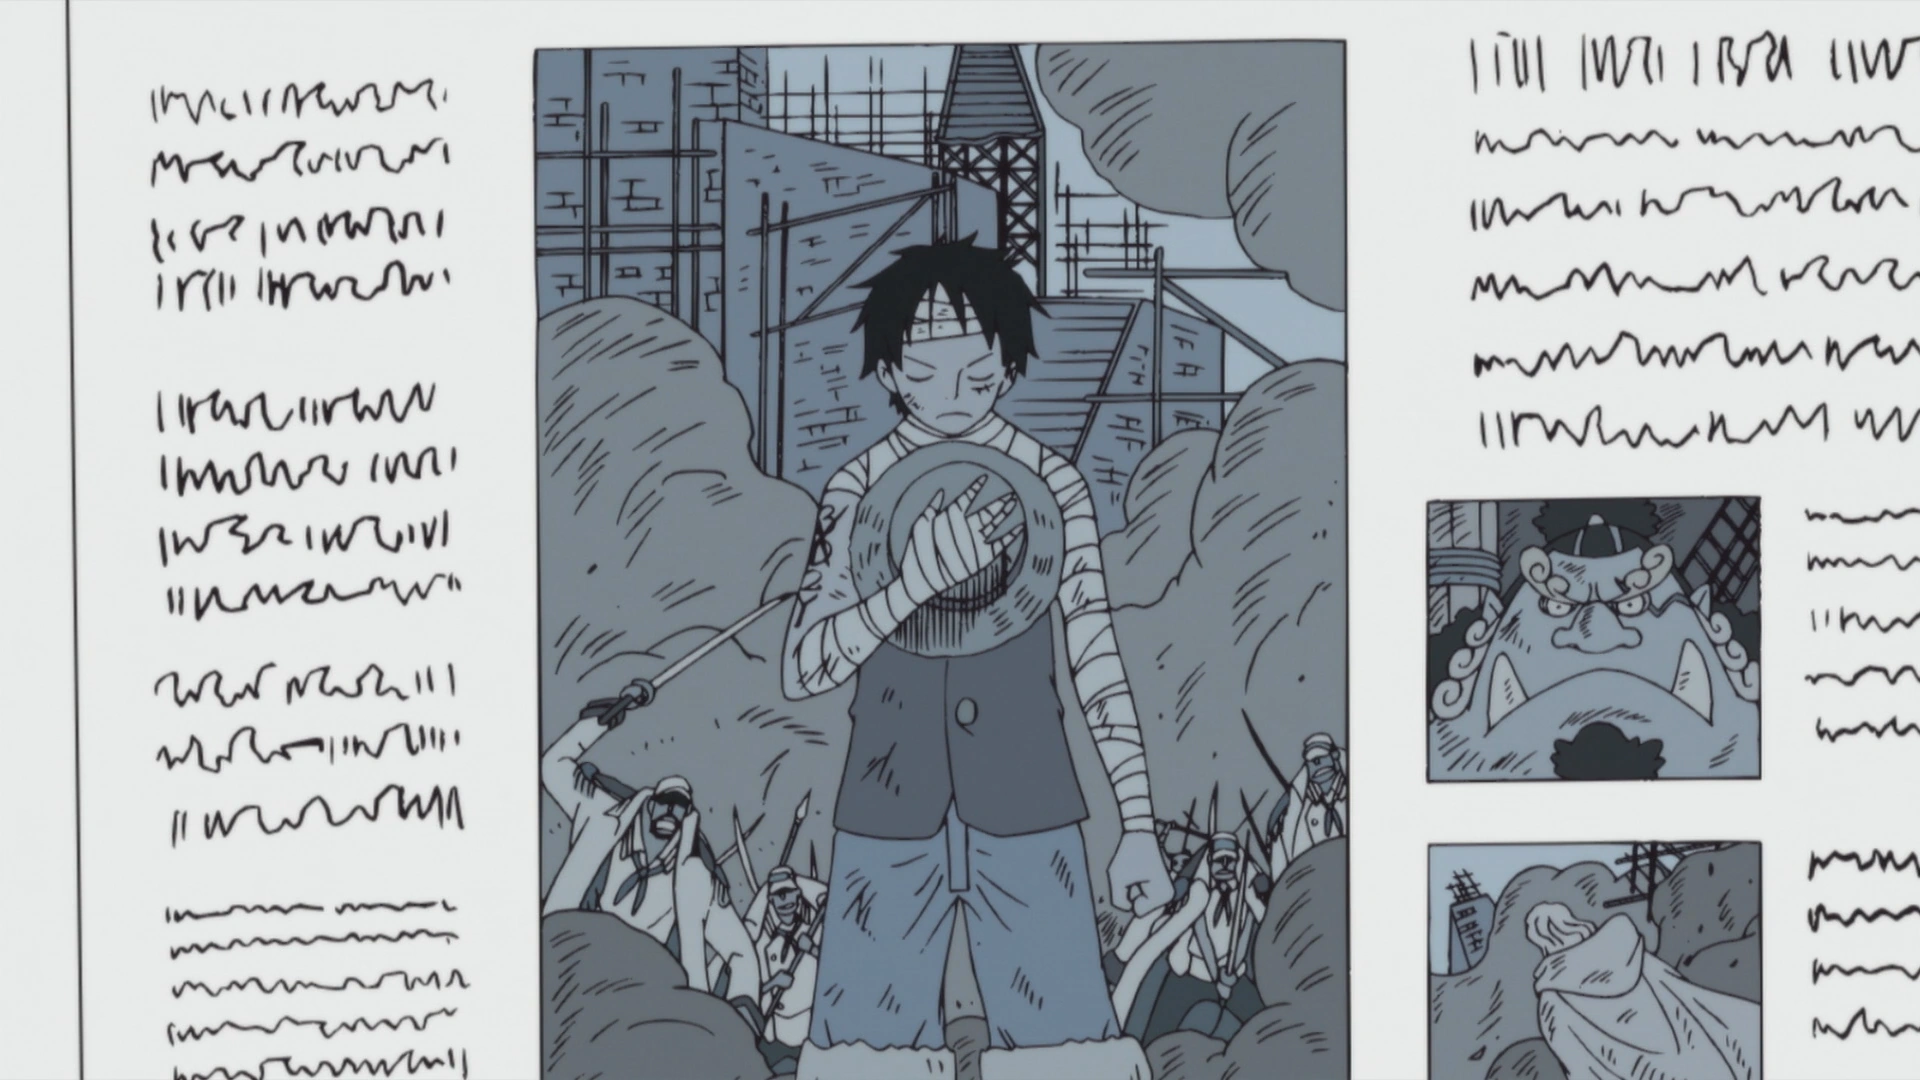
The article about Luffy's return to Marineford with a hidden message for his crew: the "3D2Y" tattoo on his right arm with the "3" and "D" crossed out.
The article revealed that Luffy actually infiltrated Marineford a second time, accompanied by Jinbe and Rayleigh. After they stole a Marine ship, they circled Marineford once, which according to Lieutenant Commander Brannew is a custom for burials at sea. Luffy then went into the plaza alone and rang the Ox Bell sixteen times, threw a bouquet of flowers into the rubble, and then bowed his head in silent prayer, leaving promptly after. His goal from this was to send the message: 3D2Y to the other Straw Hats, meaning that they would, meet in Sabaody Archipelago not in three days, but in two years.
Luffy is later seen on the Kuja Pirates' ship, resting so he can recover from his injuries. The other Kuja pirates are all at his bedside, watching him under Hancock's orders while playing with his stretchy skin. Luffy then says that he hopes that his message reached his crewmates. Rayleigh then assured him that it would, since it was highly unlike him. Jinbe eventually left the Kuja ship while riding a whale shark after Luffy and Jinbe gave their thanks to each other and Jinbe tells him that he will continue to aid Luffy later on in the future and that he looks forward to meeting Luffy and his crew 2 years from now.
Luffy eventually arrives on Rusukaina, a deserted island northwest of Amazon Lily, with the Kuja and Rayleigh where he will train with Rayleigh alone. Rayleigh explains the three forms of Haki while demonstrating them on a rampaging elephant. The demonstration excites Luffy and makes him eager to learn them. Luffy then puts his hat on a stone, which is the only safe spot on the dangerous island, with the vivre card while saying that he will take a vacation from being a pirate for sometime.
The story continues two years later.
References
- ↑ 1.0 1.1 1.2 1.3 1.4 1.5 One Piece Manga and Anime — Vol. 1 Chapter 1 and Episode 4.
- ↑ One Piece Manga and Anime — Vol. 59 Chapter 582 (p. 16-19) and Episode 493.
- ↑ One Piece Manga and Anime — Vol. 60 Chapter 588 and Episode 503.
- ↑ One Piece Manga and Anime — Vol. 1 Chapter 2 and Episode 1.
- ↑ 5.0 5.1 One Piece Manga and Anime — Vol. 1 Chapter 3 and Episode 2.
- ↑ 6.0 6.1 One Piece Manga and Anime — Vol. 1 Chapter 4 and Episode 2.
- ↑ One Piece Manga and Anime — Vol. 1 Chapters 3–7 and Episodes 2–3.
- ↑ One Piece Manga and Anime — Vol. 1 Chapter 8 and Episode 4.
- ↑ One Piece Manga and Anime — Vol. 2–3 Chapters 9–21 and Episodes 5–8.
- ↑ One Piece Manga and Anime — Vol. 3 Chapter 22 and Episode 18.
- ↑ One Piece Manga and Anime — Vol. 3 Chapter 23 and Episode 9.
- ↑ One Piece Manga and Anime — Vol. 3 Chapter 24 and Episode 9.
- ↑ One Piece Manga and Anime — Vol. 3 Chapter 25 and Episode 10.
- ↑ One Piece Manga and Anime — Vol. 3 Chapter 26 and Episode 10.
- ↑ One Piece Manga and Anime — Vol. 4 Chapter 27 and Episode 11.
- ↑ One Piece Manga and Anime — Vol. 4 Chapter 28 and Episode 12.
- ↑ One Piece Manga and Anime — Vol. 4 Chapter 29 and Episode 12.
- ↑ One Piece Manga and Anime — Vol. 4 Chapter 30 and Episode 13.
- ↑ One Piece Manga — Vol. 4 Chapter 34.
- ↑ One Piece Manga — Vol. 4 Chapter 35.
- ↑ One Piece Manga — Vol. 5 Chapter 36.
- ↑ One Piece Manga — Vol. 5 Chapter 38.
- ↑ One Piece Manga — Vol. 5 Chapter 39.
- ↑ One Piece Manga and Anime — Vol. 5 Chapters 40–41 and Episodes 9–17.
- ↑ One Piece Manga — Vol. 5 Chapter 42.
- ↑ One Piece Movie — One Piece: The Movie.
- ↑ One Piece Movie — One Piece: The Movie.
- ↑ One Piece Movie — One Piece: The Movie.
- ↑ One Piece Movie — One Piece: The Movie.
- ↑ One Piece Manga — Vol. 5 Chapter 42.
- ↑ One Piece Manga and Anime — Vol. 5 Chapter 42 and Episodes 18–20, Luffy makes his Jolly Roger and realizes he needs a cook.
- ↑ One Piece Manga — Vol. 5 Chapter 43.
- ↑ One Piece Manga and Anime — Vol. 5 Chapter 44 and Episodes 20–21, Luffy accidentally damages the Baratie and meets Sanji.
- ↑ One Piece Manga — Vol. 6 Chapter 45.
- ↑ One Piece Manga and Anime — Vol. 6 Chapter 46 and Episodes 21–22, Luffy asks Sanji to join his crew and is introduced to Don Krieg.
- ↑ One Piece Manga — Vol. 6 Chapter 47.
- ↑ One Piece Manga — Vol. 6 Chapter 49.
- ↑ One Piece Manga — Vol. 6 Chapter 50.
- ↑ One Piece Manga and Anime — Vol. 6 Chapters 50–51 and Episodes 23–24, Luffy witnesses the fight between Zoro and Mihawk.
- ↑ One Piece Manga and Anime — Vol. 6 Chapter 52 and Episode 24, Luffy asks Zeff if his debt would be repaid by defending the Baratie which Zeff approves.
- ↑ One Piece Manga and Anime — Vol. 7 Chapter 54 and Episode 25, Luffy accidentally hits Pearl.
- ↑ One Piece Manga — Vol. 7 Chapter 55.
- ↑ One Piece Manga — Vol. 7 Chapter 56.
- ↑ One Piece Manga and Anime — Vol. 7 Chapter 59 and Episodes 26–27, Luffy attacks the Baratie to prove a point to Sanji.
- ↑ One Piece Manga and Anime — Vol. 7 Chapter 60 and Episode 27, Don Krieg decides to fight Luffy.
- ↑ One Piece Manga — Vol. 7 Chapter 62.
- ↑ One Piece Manga and Anime — Vol. 7–8 Chapters 62–63 and Episodes 27–28, Luffy steals some gas masks and then charges at Krieg for poisoning Gin.
- ↑ One Piece Manga — Vol. 8 Chapter 63.
- ↑ One Piece Manga and Anime — Vol. 8 Chapters 64–65 and Episodes 28–29, Luffy breaks Krieg's spear and is finally able to break through his armor.
- ↑ One Piece Manga and Anime — Vol. 8 Chapter 66 and Episode 29, Luffy defeats Don Krieg.
- ↑ 51.0 51.1 One Piece Manga — Vol. 8 Chapter 67.
- ↑ One Piece Manga — Vol. 8 Chapter 68.
- ↑ One Piece Manga and Anime — Vol. 8 Chapter 68 and Episode 30, Luffy gets a cook for his crew.
- ↑ One Piece Manga — Vol. 8 Chapter 69.
- ↑ One Piece Manga and Anime — Vol. 8 Chapter 69 and Episode 31, Luffy is explained by Yosaku about Shichibukai, Fishmen, and Arlong.
- ↑ One Piece Manga and Anime — Vol. 9 Chapter 73 and Episode 32, Luffy and present company encounter and defeat Mohmoo.
- ↑ One Piece Manga and Anime — Vol. 9 Chapters 74–75 and Episode 33, Luffy and present company arrive and crashland in Commi Island.
- ↑ One Piece Manga — Vol. 9 Chapter 75.
- ↑ One Piece Manga and Anime — Vol. 9 Chapter 76 and Episode 34, Luffy tries to convince Nami to come back.
- ↑ One Piece Manga and Anime — Vol. 9 Chapter 77 and Episode 34, Luffy refuses to listen to Nami's past and walks away.
- ↑ One Piece Manga and Anime — Vol. 9 Chapter 80 and Episode 37, Luffy tries to offer some help to Nami.
- ↑ One Piece Manga and Anime — Vol. 9 Chapter 81 and Episode 37, Luffy and his crew accept a crying Nami's request for help.
- ↑ One Piece Manga and Anime — Vol. 10 Chapter 82 and Episode 38, Luffy spins Mohmoo around and knocks out the majority of Arlong's Fishmen.
- ↑ One Piece Manga and Anime — Vol. 10 Chapter 83 and Episode 38, Luffy is thrown into the water by Arlong.
- ↑ One Piece Manga — Vol. 10 Chapter 84.
- ↑ One Piece Manga and Anime — Vol. 10 Chapter 85 and Episodes 39–41, Genzo and Nojiko's attempt to rescue Luffy.
- ↑ One Piece Manga — Vol. 10 Chapter 86.
- ↑ One Piece Manga — Vol. 10 Chapter 89.
- ↑ One Piece Manga — Vol. 10 Chapter 90.
- ↑ One Piece Manga and Anime — Vol. 11 Chapter 91 and Episodes 41–42, Luffy and Arlong debate on the differences between their species.
- ↑ 71.0 71.1 One Piece Manga and Anime — Vol. 11 Chapter 92 and Episode 43, Luffy learns a bit more of Nami's past and relationship with Arlong.
- ↑ One Piece Manga and Anime — Vol. 11 Chapter 93 and Episode 43, Luffy finally defeats Arlong and destroys Arlong Park.
- ↑ One Piece Manga and Anime — Vol. 11 Chapter 94 and Episode 43, Luffy is reported in by Nezumi to the Marine higher ups.
- ↑ One Piece Manga — Vol. 11 Chapter 95.
- ↑ One Piece Manga and Anime — Vol. 11 Chapter 95 and Episode 44, Luffy and crew set sail once again with Nami after several days of partying.
- ↑ One Piece Manga and Anime — Vol. 11 Chapter 96 and Episode 45, Luffy's first bounty.
- ↑ One Piece Manga — Vol. 11 Chapter 96.
- ↑ One Piece Manga — Vol. 11 Chapter 98.
- ↑ One Piece Manga — Vol. 11 Chapter 99.
- ↑ One Piece Manga and Anime — Vol. 11–12 Chapters 96–100 and Episodes 48–53, Luffy and his crew's adventures in Loguetown.
- ↑ One Piece Manga — Vol. 12 Chapter 100.
- ↑ One Piece Manga and Anime — Vol. 12 Chapter 101 and Episode 61, Luffy and crew enter the Grand Line through Reverse Mountain.
- ↑ One Piece Manga — Vol. 12 Chapter 101.
- ↑ One Piece Manga — Vol. 12 Chapter 102.
- ↑ One Piece Manga — Vol. 12 Chapter 103.
- ↑ One Piece Manga — Vol. 12 Chapter 104.
- ↑ One Piece Manga and Anime — Vol. 12 Chapter 105 and Episodes 62–63, Luffy's interaction with Laboon and learning how the Grand Line works.
- ↑ One Piece Manga — Vol. 12 Chapter 106.
- ↑ One Piece Manga — Vol. 12 Chapter 107.
- ↑ One Piece Manga and Anime — Vol. 12–13 Chapters 106–113 and Episodes 64–67, Luffy's interactions in Whiskey Peak and Luffy learning about Baroque Works.
- ↑ One Piece Manga — Vol. 13 Chapters 110–113.
- ↑ One Piece Manga — Vol. 13 Chapter 114.
- ↑ One Piece Manga and Anime — Vol. 13 Chapter 115 and Episode 67, Luffy and crew accept to help Vivi, met Miss All Sunday, and sail off to Little Garden.
- ↑ One Piece Manga — Vol. 13 Chapter 115.
- ↑ One Piece Manga and Anime — Vol. 13 Chapters 115–116 and Episodes 70–71, Luffy arrives in Little Garden and learns about the wonders there.
- ↑ One Piece Manga — Vol. 13 Chapter 117.
- ↑ One Piece Manga and Anime — Vol. 13–14 Chapters 117–118 and Episode 72, Luffy has a fight with Dorry over suspicion of sabotaging his drink.
- ↑ One Piece Manga and Anime — Vol. 14 Chapter 119 and Episode 73, Luffy is pinned down by Dorry with the giant's home.
- ↑ One Piece Manga and Anime — Vol. 14 Chapters 120–121 and Episodes 73–74, Luffy, Usopp, and Carue are beaten down as Vivi is taken away.
- ↑ One Piece Manga — Vol. 14 Chapter 121.
- ↑ One Piece Manga — Vol. 14 Chapter 122.
- ↑ One Piece Manga and Anime — Vol. 14 Chapters 122–126 and Episodes 74–76, Luffy, Usopp, and Carue fight against Mr. 3 and the other Baroque Agents, and free their captured friends.
- ↑ One Piece Manga and Anime — Vol. 15 Chapters 127–129 and Episode 77, Luffy and crew rest from their ordeals in Little Garden and sail on.
- ↑ One Piece Manga — Vol. 15 Chapter 130.
- ↑ One Piece Manga — Vol. 15 Chapter 131.
- ↑ One Piece Manga — Vol. 15 Chapter 132.
- ↑ One Piece Manga — Vol. 15 Chapter 133.
- ↑ One Piece Manga — Vol. 15 Chapter 134.
- ↑ One Piece Manga — Vol. 15 Chapters 135–136.
- ↑ One Piece Manga — Vol. 16 Chapter 137.
- ↑ 111.0 111.1 One Piece Manga — Vol. 16 Chapter 138.
- ↑ One Piece Manga — Vol. 16 Chapter 139.
- ↑ One Piece Manga — Vol. 16 Chapter 140.
- ↑ One Piece Manga — Vol. 16 Chapters 141–145.
- ↑ One Piece Manga — Vol. 17 Chapter 147.
- ↑ One Piece Manga — Vol. 17 Chapters 148–149.
- ↑ One Piece Manga — Vol. 17 Chapter 150.
- ↑ One Piece Manga — Vol. 17 Chapter 151.
- ↑ One Piece Manga — Vol. 17 Chapter 152.
- ↑ One Piece Manga — Vol. 17 Chapter 153.
- ↑ One Piece Manga and Anime — Vol. 18 Chapter 156 and Episode 92, Luffy and crew met Mr. 2 Bon Kurei.
- ↑ One Piece Manga and Anime — Vol. 18 Chapters 157–159 and Episode 94, Luffy meets with Ace and Smoker again in Alabasta.
- ↑ One Piece Manga and Anime — Vol. 18 Chapter 161 and Episode 96, Luffy acquires 100 Kung-Fu Dugong apprentices and further told about the problem in Alabasta.
- ↑ One Piece Manga and Anime — Vol. 18 Chapters 162–165 and Episodes 96–104, Luffy and crew's adventure through the desert and discovery in Yuba.
- ↑ One Piece Manga and Anime — Vol. 18 Chapter 166 and Episode 104, Luffy argues with Vivi and has a small fight with her.
- ↑ One Piece Manga and Anime — Vol. 19 Chapters 167–169 and Episodes 105–106, Luffy and crew travel to and arrive at Rainbase.
- ↑ One Piece Manga and Anime — Vol. 19 Chapters 172–173 and Episodes 107–108, Luffy and the others with him are placed in a dangerous challenge by Crocodile for Vivi.
- ↑ One Piece Manga and Anime — Vol. 19 Chapters 174–176 and Episodes 108–109, Luffy and the others with him are saved by "Mr. Prince" in Rain Dinners.
- ↑ One Piece Manga and Anime — Vol. 19–20 Chapters 176–178 and Episode 110, Luffy fights with Crocodile in the desert.
- ↑ One Piece Manga and Anime — Vol. 20 Chapter 180 and Episode 111, Luffy rescued by Miss All Sunday and left with Pell.
- ↑ One Piece Manga and Anime — Vol. 22 Chapters 198–201 and Episodes 121–122, Luffy saves Vivi and fights Crocodile again.
- ↑ One Piece Manga and Anime — Vol. 22 Chapters 202–204 and Episodes 123–124, Luffy searches for Crocodile once again.
- ↑ One Piece Manga and Anime — Vol. 22–23 Chapters 204–210 and Episodes 124–126, Luffy battles Crocodile for the third time and finally defeats him.
- ↑ One Piece Manga and Anime — Vol. 23–24 Chapters 211–218 and Episodes 127–130, Luffy saves Cobra and Nico Robin from the royal tomb before collapsing.
- ↑ One Piece Manga and Anime — Vol. 23 Chapter 213 and Episode 128, Luffy and his crew are treated by the Alabastan royalty in secret.
- ↑ One Piece Manga and Anime — Vol. 23 Chapters 214–216 and Episode 129, Luffy and his crew leave Alabasta and show Vivi their sign of friendship.
- ↑ One Piece Manga and Anime — Vol. 24 Chapters 217–219 and Episodes 130–131, Luffy and crew get Nico Robin in their ranks and learn of Skypiea as well.
- ↑ One Piece Manga and Anime — Vol. 24 Chapters 219–220 and Episode 144, Luffy, Zoro, and Sanji explore the St. Bliss.
- ↑ One Piece Manga and Anime — Vol. 24 Chapter 221 and Episode 145, Luffy and his crew escape from what appeared to be shadowy creatures bigger than giants.
- ↑ One Piece Manga and Anime — Vol. 24 Chapters 222–226 and Episodes 146–147, Luffy, Zoro, and Nami's search in Mock Town.
- ↑ One Piece Manga and Anime — Vol. 24 Chapter 226 and Episode 147, Luffy and crew evade Shoujou.
- ↑ One Piece Manga and Anime — Vol. 25 Chapters 227–230 and Episodes 148–149, Luffy and crew get acquainted with the Saruyama Alliance.
- ↑ One Piece Manga and Anime — Vol. 25 Chapters 230–231 and Episodes 149–150, Luffy and crew find a South Bird and discover the defeated Saruyama Alliance.
- ↑ One Piece Manga and Anime — Vol. 25 Chapters 232–233 and Episode 151, Luffy completely defeats Bellamy.
- ↑ One Piece Manga and Anime — Vol. 25 Chapters 235–236 and Episode 152, Luffy and crew ride the Knock Up Stream.
- ↑ One Piece Manga and Anime — Vol. 32 Chapters 303–304 and Episode 207, Luffy and his crew return to the Blue Sea and reach Long Ring Long Land.
- ↑ One Piece Manga and Anime — Vol. 32–33 Chapters 305–306 and Episode 208, Luffy meets Foxy and accepts his challenge to a Davy Back Fight.
- ↑ One Piece Manga and Anime — Vol. 33–34 Chapters 313–318 and Episodes 217–219, Luffy fights against Foxy in the final game of the Davy Back games.
- ↑ One Piece Manga and Anime — Vol. 37 Chapter 349 (p. 7-13) and Episode 246, Luffy punches Lucci in the cheek but is easily defeated by Lucci's brute force in his leopard form.
- ↑ One Piece Manga and Anime — Vol. 38 Chapter 362 (p. 18) and Episode 253, Luffy is found by Nami.
- ↑ One Piece Manga and Anime — Vol. 38 Chapter 363 (p. 6-11 & 14-15 + 17) and Episode 254, Luffy is told by Nami the reason Robin defected them before he splits the building from the inside.
- ↑ One Piece Manga and Anime — Vol. 44 Chapter 430 and Episode 312, the Going Merry's goodbye.
- ↑ One Piece Manga and Anime — Vol. 45 Chapter 431 and Episode 313, back at Water 7.
- ↑ One Piece Manga and Anime — Vol. 46 Chapter 442 and Episode 337, Brook is introduced.
- ↑ One Piece Manga and Anime — Vol. 46 Chapter 443 and Episode 338, Brook joins the Straw Hats for dinner and explains his past.
- ↑ One Piece Manga and Anime — Vol. 46 Chapter 444 and Episode 399, Luffy, Zoro, Sanji, Robin, and Franky are kept from going ashore by Absalom.
- ↑ One Piece Manga and Anime — Vol. 46 Chapter 446 and Episode 340, Luffy, Zoro, Sanji, Robin, and Franky encounter the Cerberus.
- ↑ One Piece Manga and Anime — Vol. 46 Chapter 448 and Episode 342, Luffy and the Straw Hats with him defeat some Zombies with a combo.
- ↑ One Piece Manga and Anime — Vol. 46 Chapter 449 and Episode 343, Luffy and the others with him agree to defeat Moriah.
- ↑ One Piece Manga and Anime — Vol. 47 Chapter 450 and Episode 344, Luffy and the others fight against the Zombies in the dining hall.
- ↑ One Piece Manga and Anime — Vol. 47 Chapter 451 and Episode 345, Luffy, Robin, and Franky notice that Zoro is now missing.
- ↑ One Piece Manga and Anime — Vol. 47 Chapter 452 and Episode 346, Luffy, Robin, and Franky fight against the General Zombies.
- ↑ One Piece Manga and Anime — Vol. 47 Chapter 455 and Episode 349, Luffy is brought before Moriah.
- ↑ One Piece Manga and Anime — Vol. 47 Chapter 456 and Episode 350, Moriah decides to put Luffy's shadow in Oars.
- ↑ One Piece Manga and Anime — Vol. 47 Chapters 458–459 and Episodes 353–354, Luffy is awakened and decides with the rest of his crew to retaliate against Moriah.
- ↑ One Piece Manga and Anime — Vol. 48 Chapter 460 and Episode 355, Luffy's team is separated by Oars amongst the chaos.
- ↑ One Piece Manga and Anime — Vol. 48 Chapter 461 and Episode 356, Luffy reaches Moriah in the freezer.
- ↑ One Piece Manga and Anime — Vol. 48 Chapter 463 and Episode 357, Luffy begins fighting against Moriah in the freezer.
- ↑ One Piece Manga and Anime — Vol. 48 Chapter 469 and Episode 364, Luffy starts chasing after Moriah as Oars starts looking for the Straw Hats.
- ↑ One Piece Manga and Anime — Vol. 49 Chapters 473–474 and Episodes 368–369, Luffy is led deep into Thriller Bark's forest and left there.
- ↑ One Piece Manga and Anime — Vol. 49 Chapter 475 and Episode 370, Luffy meets the Risky Brothers in the Thriller Bark forest.
- ↑ One Piece Manga and Anime — Vol. 49 Chapter 476 and Episode 370, Luffy becomes Nightmare Luffy.
- ↑ One Piece Manga and Anime — Vol. 49 Chapters 478–479 and Episode 372, Nightmare Luffy devastates both Oars and Moriah in battle.
- ↑ One Piece Manga and Anime — Vol. 49 Chapter 480 and Episode 373, Luffy along with his crew and Brook perform one last move that shatters Oars' spine.
- ↑ One Piece Manga and Anime — Vol. 49–50 Chapters 481–482 and Episodes 373–374, Luffy battles Moriah one last time just as dawn finally arrives.
- ↑ One Piece Manga and Anime — Vol. 50 Chapters 483–485 and Episodes 375–377, Luffy is saved from being capture by Bartholomew Kuma while he is unconscious.
- ↑ One Piece Manga and Anime — Vol. 50 Chapters 489–490 and Episode 381, Luffy sees that Ace's Vivre Card is becoming smaller but dismisses it as him having his own adventure.
- ↑ One Piece Manga and Anime — Vol. 50 Chapter 490 and Episode 385, Luffy and crew meet Keimi and Pappug.
- ↑ One Piece Manga and Anime — Vol. 50 Chapter 491 and Episode 386, Luffy and crew decide to help Keimi for Takoyaki and a way to Fishman Island.
- ↑ One Piece Manga and Anime — Vol. 51 Chapter 492 and Episode 387, Luffy and crew ready themselves against the Flying Fish Riders.
- ↑ One Piece Manga and Anime — Vol. 51 Chapter 495 and Episode 389, Luffy uses his Haki to scare Motobaro.
- ↑ One Piece Manga and Anime — Vol. 51 Chapters 495–496 and Episodes 389–390, Sanji rearranges Duval's face.
- ↑ One Piece Manga and Anime — Vol. 51 Chapter 498 and Episode 392, Luffy is revealed to be one of the Eleven Supernovas.
- ↑ One Piece Manga and Anime — Vol. 51 Chapter 500 and Episode 394, Silvers Rayleigh is revealed to be Gol D. Roger's first mate.
- ↑ One Piece Manga and Anime — Vol. 51 Chapter 502 and Episode 396, Luffy punches Saint Charloss in the face.
- ↑ One Piece Manga and Anime — Vol. 52 Chapter 503 and Episode 397, Silvers Rayleigh meets Luffy.
- ↑ One Piece Manga and Anime — Vol. 52 Chapter 504 and Episode 398.
- ↑ One Piece Manga and Anime — Vol. 52 Chapter 505 and Episode 399.
- ↑ One Piece Manga and Anime — Vol. 52 Chapter 506 and Episode 400.
- ↑ One Piece Manga and Anime — Vol. 52 Chapter 507 and Episode 400.
- ↑ One Piece Manga and Anime — Vol. 52 Chapters 507–508 and Episode 401.
- ↑ One Piece Manga and Anime — Vol. 52 Chapter 509 and Episode 402.
- ↑ One Piece Manga and Anime — Vol. 52 Chapter 511 and Episodes 403–404.
- ↑ One Piece Manga and Anime — Vol. 52 Chapter 512 and Episode 404.
- ↑ One Piece Manga and Anime — Vol. 53 Chapter 513 and Episode 405.
- ↑ One Piece Manga and Anime — Vol. 53 Chapters 514–515 and Episodes 408–409.
- ↑ One Piece Manga and Anime — Vol. 53 Chapters 516–517 and Episodes 410–411.
- ↑ One Piece Manga and Anime — Vol. 53 Chapters 518–520 and Episodes 412–414.
- ↑ One Piece Manga and Anime — Vol. 53 Chapter 521 and Episode 415.
- ↑ One Piece Manga and Anime — Vol. 53 Chapter 522 and Episode 416.
- ↑ One Piece Manga and Anime — Vol. 54 Chapter 523 and Episode 417.
- ↑ One Piece Manga and Anime — Vol. 54 Chapter 523 and Episode 417.
- ↑ One Piece Manga and Anime — Vol. 54 Chapter 524 and Episode 421.
- ↑ One Piece Manga and Anime — Vol. 54 Chapter 525 and Episode 422.
- ↑ One Piece Manga and Anime — Vol. 54 Chapter 526 and Episode 423.
- ↑ One Piece Manga and Anime — Vol. 54 Chapter 527 and Episode 424.
- ↑ One Piece Manga and Anime — Vol. 54 Chapter 528 and Episode 425.
- ↑ One Piece Manga and Anime — Vol. 54 Chapter 529 and Episode 430.
- ↑ One Piece Manga and Anime — Vol. 54 Chapter 530 and Episode 431.
- ↑ One Piece Manga and Anime — Vol. 54 Chapter 532 and Episode 433.
- ↑ One Piece Manga and Anime — Vol. 55 Chapter 533 and Episode 434.
- ↑ One Piece Manga and Anime — Vol. 55 Chapter 534 and Episode 435.
- ↑ One Piece Manga and Anime — Vol. 55 Chapter 535 and Episodes 436–437.
- ↑ One Piece Manga and Anime — Vol. 55 Chapter 536 and Episode 438.
- ↑ One Piece Manga and Anime — Vol. 55 Chapters 537–538 and Episodes 439–440.
- ↑ One Piece Manga and Anime — Vol. 55 Chapter 539 and Episode 441.
- ↑ One Piece Manga and Anime — Vol. 55 Chapter 540 and Episodes 442–443.
- ↑ One Piece Manga and Anime — Vol. 55 Chapter 541 and Episodes 443–444.
- ↑ One Piece Manga and Anime — Vol. 56 Chapter 542 and Episode 445.
- ↑ One Piece Manga and Anime — Vol. 56 Chapter 543 and Episode 446.
- ↑ One Piece Manga and Anime — Vol. 56 Chapter 544 and Episode 447.
- ↑ One Piece Manga and Anime — Vol. 56 Chapter 545 and Episode 449.
- ↑ One Piece Manga and Anime — Vol. 56 Chapter 546 and Episode 449.
- ↑ One Piece Manga and Anime — Vol. 56 Chapter 547 and Episode 450.
- ↑ One Piece Manga and Anime — Vol. 56 Chapter 549 and Episode 452.
- ↑ One Piece Manga and Anime — Vol. 56 Chapter 550 and Episode 460.
- ↑ One Piece Manga and Anime — Vol. 57 Chapter 552 and Episode 461.
- ↑ One Piece Manga and Anime — Vol. 57 Chapter 556 and Episode 465.
- ↑ One Piece Manga and Anime — Vol. 57 Chapter 557 and Episode 466.
- ↑ One Piece Manga and Anime — Vol. 57 Chapter 561 and Episode 470.
- ↑ One Piece Manga and Anime — Vol. 57 Chapter 562 (p. 9-10) and Episode 471.
- ↑ One Piece Manga and Anime — Vol. 57–58 Chapters 562–563 (p. 17 & 2) and Episodes 471–472.
- ↑ One Piece Manga and Anime — Vol. 58 Chapter 564 and Episode 473.
- ↑ One Piece Manga and Anime — Vol. 58 Chapter 565 and Episode 474.
- ↑ One Piece Manga and Anime — Vol. 58 Chapter 566 and Episode 475.
- ↑ One Piece Manga and Anime — Vol. 58 Chapter 567 and Episode 476.
- ↑ One Piece Manga and Anime — Vol. 58 Chapter 569 and Episode 478.
- ↑ One Piece Manga and Anime — Vol. 58 Chapter 570 and Episode 479.
- ↑ One Piece Manga and Anime — Vol. 58 Chapter 571 and Episode 480.
- ↑ One Piece Manga and Anime — Vol. 58 Chapter 573 and Episode 482.
- ↑ One Piece Manga and Anime — Vol. 59 Chapter 574 and Episode 483.
- ↑ One Piece Manga and Anime — Vol. 59 Chapter 575 and Episode 484.
- ↑ One Piece Manga and Anime — Vol. 59 Chapter 578 and Episode 487.
- ↑ One Piece Manga and Anime — Vol. 59 Chapter 581 and Episode 490.
- ↑ One Piece Manga and Anime — Vol. 60 Chapter 589 and Episode 504.
- ↑ One Piece Manga and Anime — Vol. 60 Chapter 590 and Episode 505.
- ↑ One Piece Manga and Anime — Vol. 60 Chapter 591 and Episode 507.
- ↑ One Piece Manga and Anime — Vol. 60 Chapter 593 and Episode 510.
Template:Monkey D. Luffy Infobox