
|
Ahoy! This here is the 139th Featured Article.
"Galdino" has been featured, meaning it was chosen as an article of interest.
|
Galdino,[2] alias Mr. 3,[1] is a former officer agent of Baroque Works, alongside his partner Miss Goldenweek.[4] He was the main antagonist of the Little Garden Arc. After being sent to Impel Down, he escaped with the assistance of Buggy and Monkey D. Luffy. When the war ended he became a member of the Buggy and Alvida Alliance.[3]
Appearance
When he first appeared, Galdino was an average-sized man with a rather frail-looking build. Like other male Baroque Works, Mr. 3 has his number hidden somewhere on his costume. For Mr. 3 he both has 3's visible on his vest design, upper part of his glasses, and one big 3 achieved through his top knot. He also wears glasses and has neatly combed hair. He was also seen wearing a Log Pose on his left wrist. As a small form of comical relief, his hair seems to form various shapes according to the situation (like an "!" when he got scared or a "?" when he heard about Luffy for the first time and asked who Luffy was during the Little Garden arc, and even an arrow pointing to where he was talking about during the Impel Down Arc).
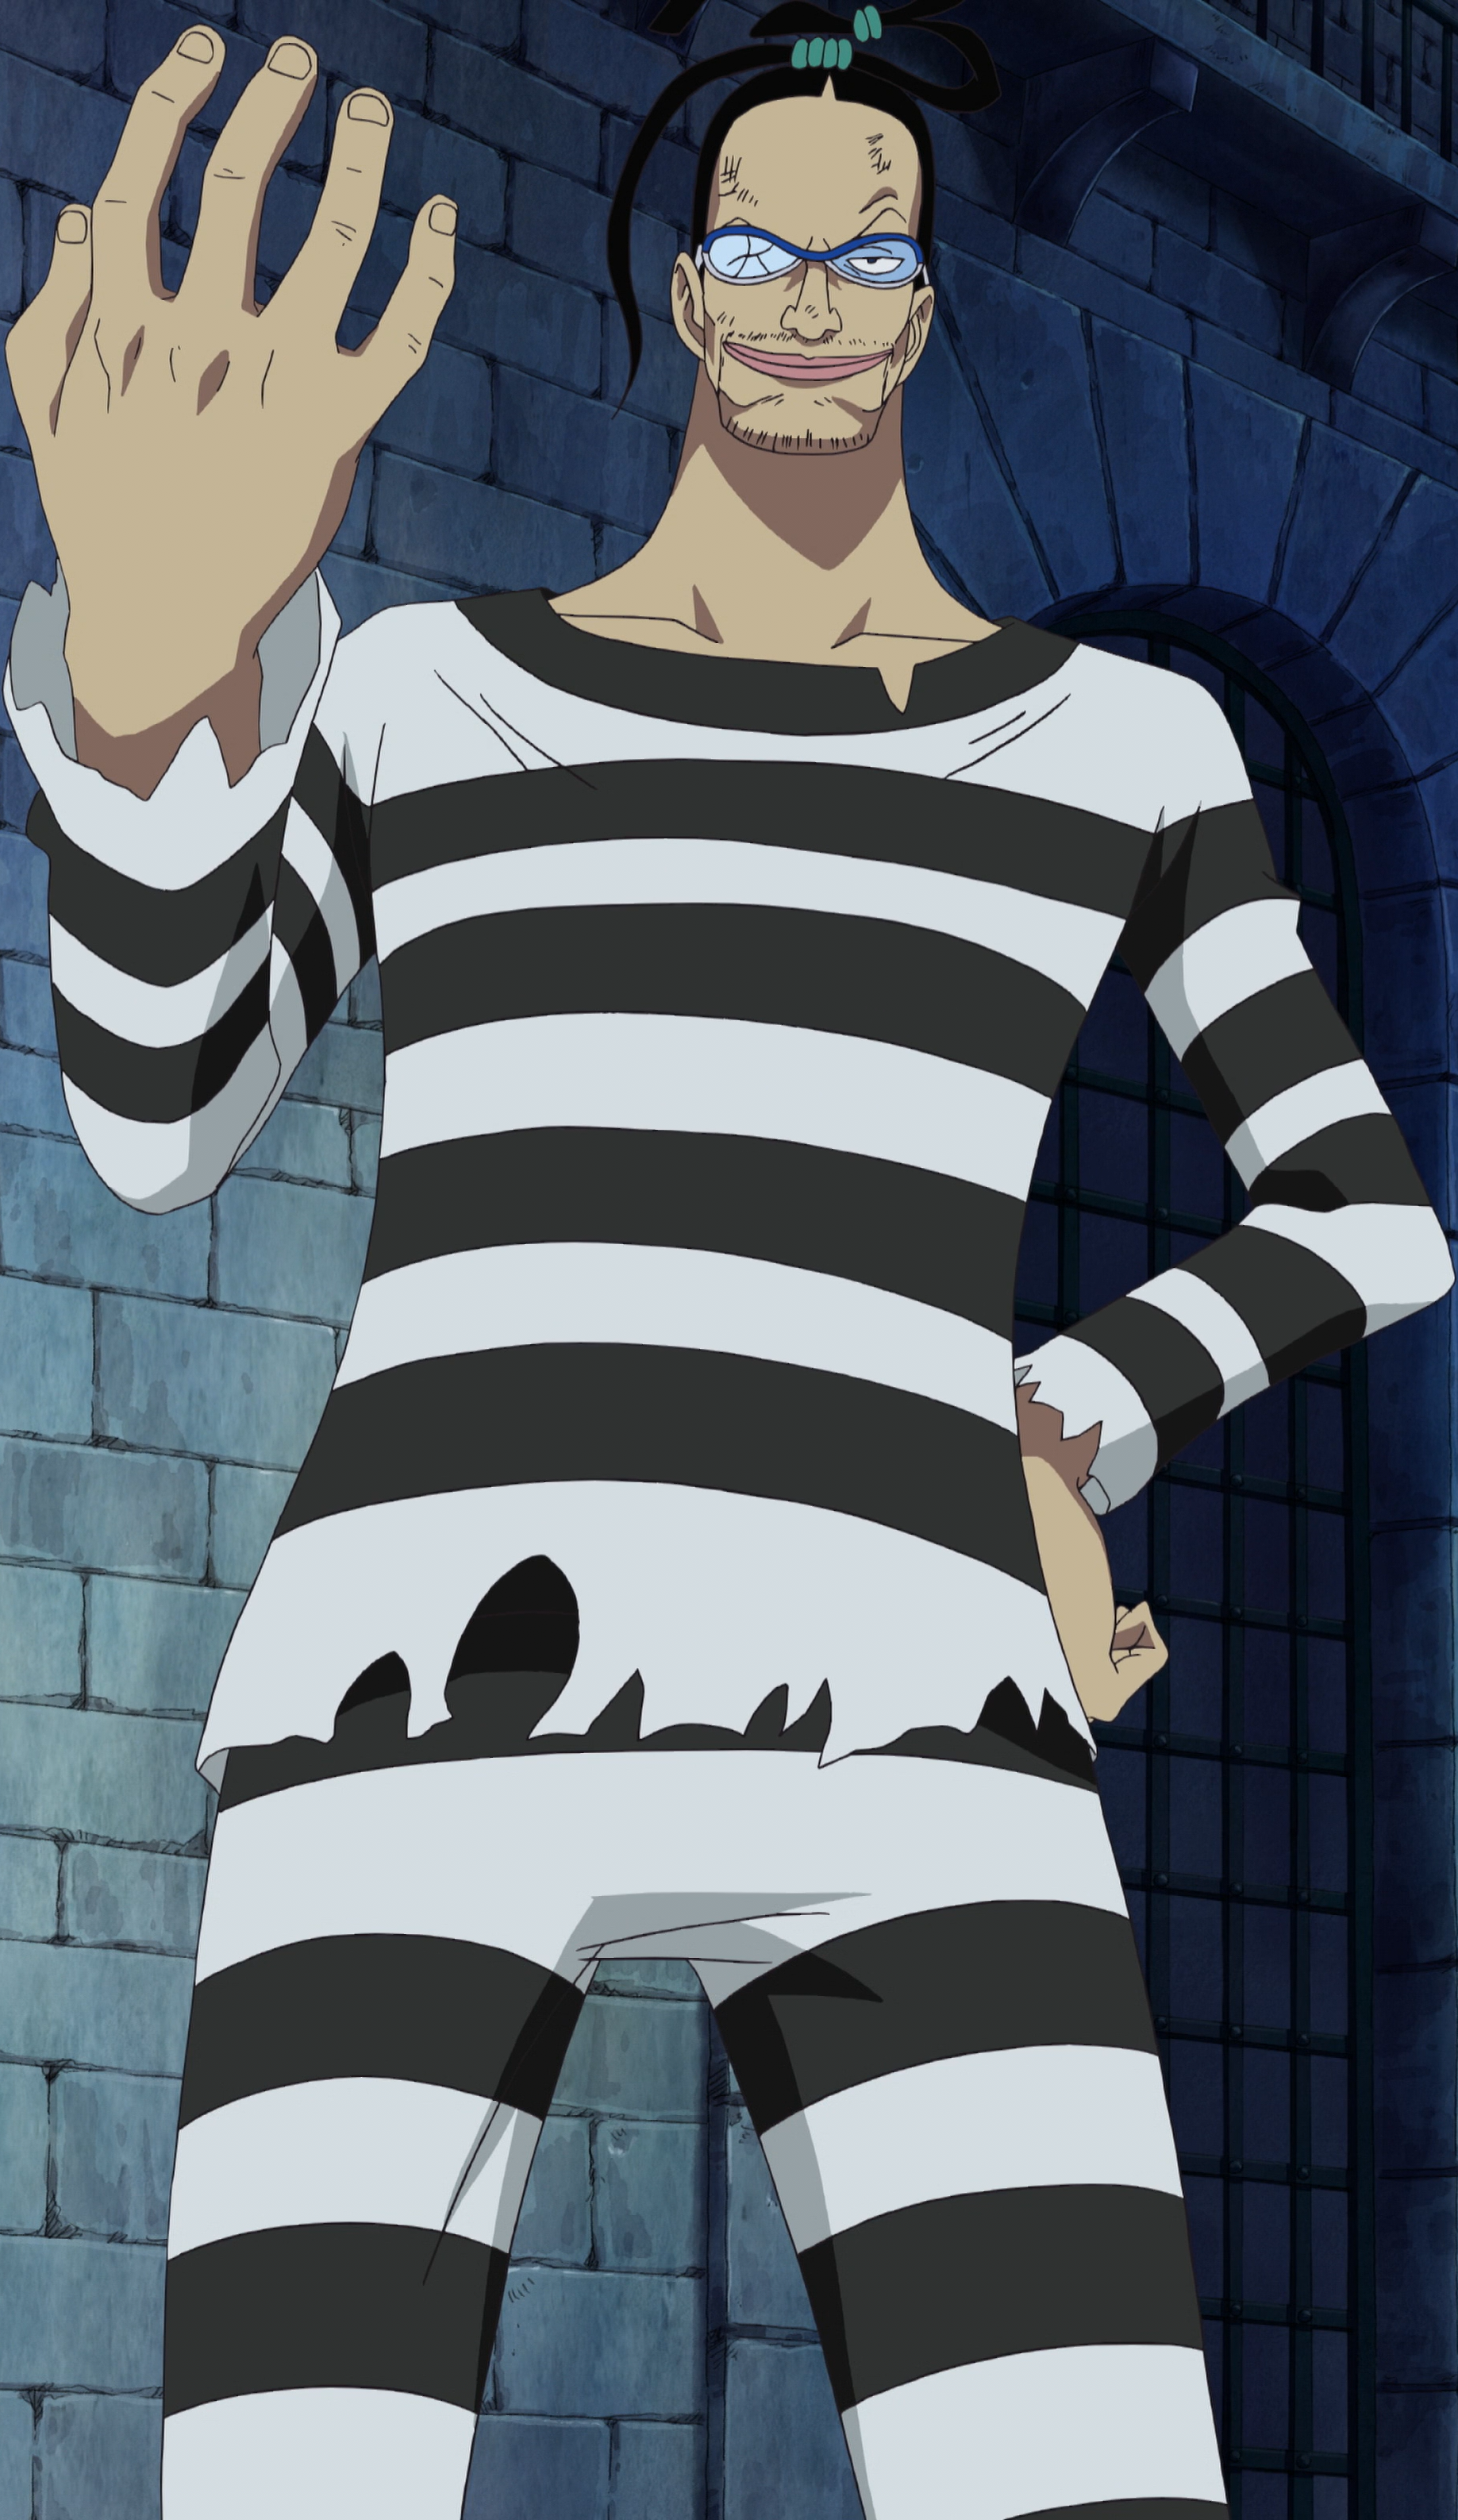
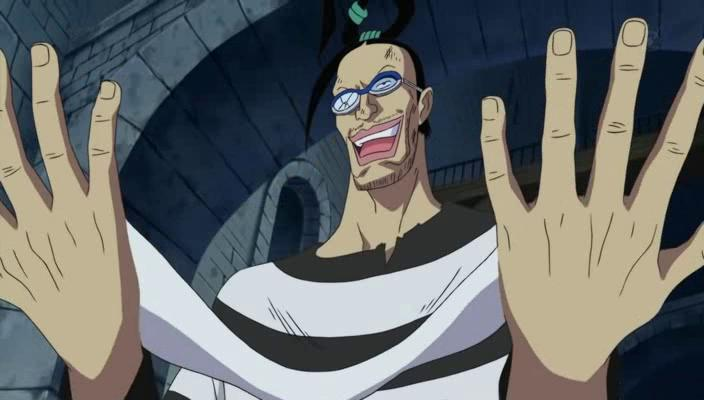
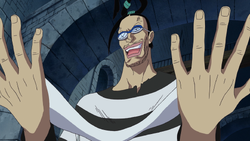
Later, like most Impel Down prisoners, he wears a striped prisoner's outfit, with his top knot sagging and his right lens of his glasses cracked. His hair became untidy and he grew a beard due to the roughness of the Beast Hell he was placed in.[7]
After the escape, he changed to a black pair of pants, and adorned a cloak over his attire. In an attempt to save Ace, Galdino disguised himself as an executioner, and somehow made himself look slightly more muscular.
After the war he trimmed his hair back to its original length, but kept his beard. He also seen wearing a orange button collar shirt and brown pants.
When Galdino uses his Candle Champion technique, he gains a incredible change in size. The suit is white, however with Miss Goldenweek's painting abilities, the suit could be colored, as shown during the Little Garden Arc.
Gallery
| File:Mr 3. Alabasta Arc Manga.png |
 |
 |
 |
 |
 |
 |
 |
 |
Personality
Galdino thinks very highly of himself, and is not afraid to show it. He believes himself to be a master of strategy, using his intellect and total lack of scruples to complete his plans. This statement is partly, since Crocodile himself admitted that although Mr. 4 and Miss Merry Christmas were stronger than him, he had been assigned a higher rank due to his intelligence.
He also thinks of himself as a great artist, using his wax powers to turn his victims into "living statues" for his former partner, Miss Goldenweek, to paint over.
However, when presented with situations in which he has to fight for his life, he reveals himself as little more than a coward who fears fighting (such as when a rage-filled Brogy was close to completely shattering his wax bonds).
He is also somewhat sadistic, as he prefers killing people after making them perfect human sculptures in a long and painful process, rather than killing them directly. During his fights, he is rather rebellious and as coward person prefers not to confront people directly but he'd rather prevent them from attacking him by trapping their body parts with his devil fruit.
Galdino also likes tea and especially the Earl Grey.[8]
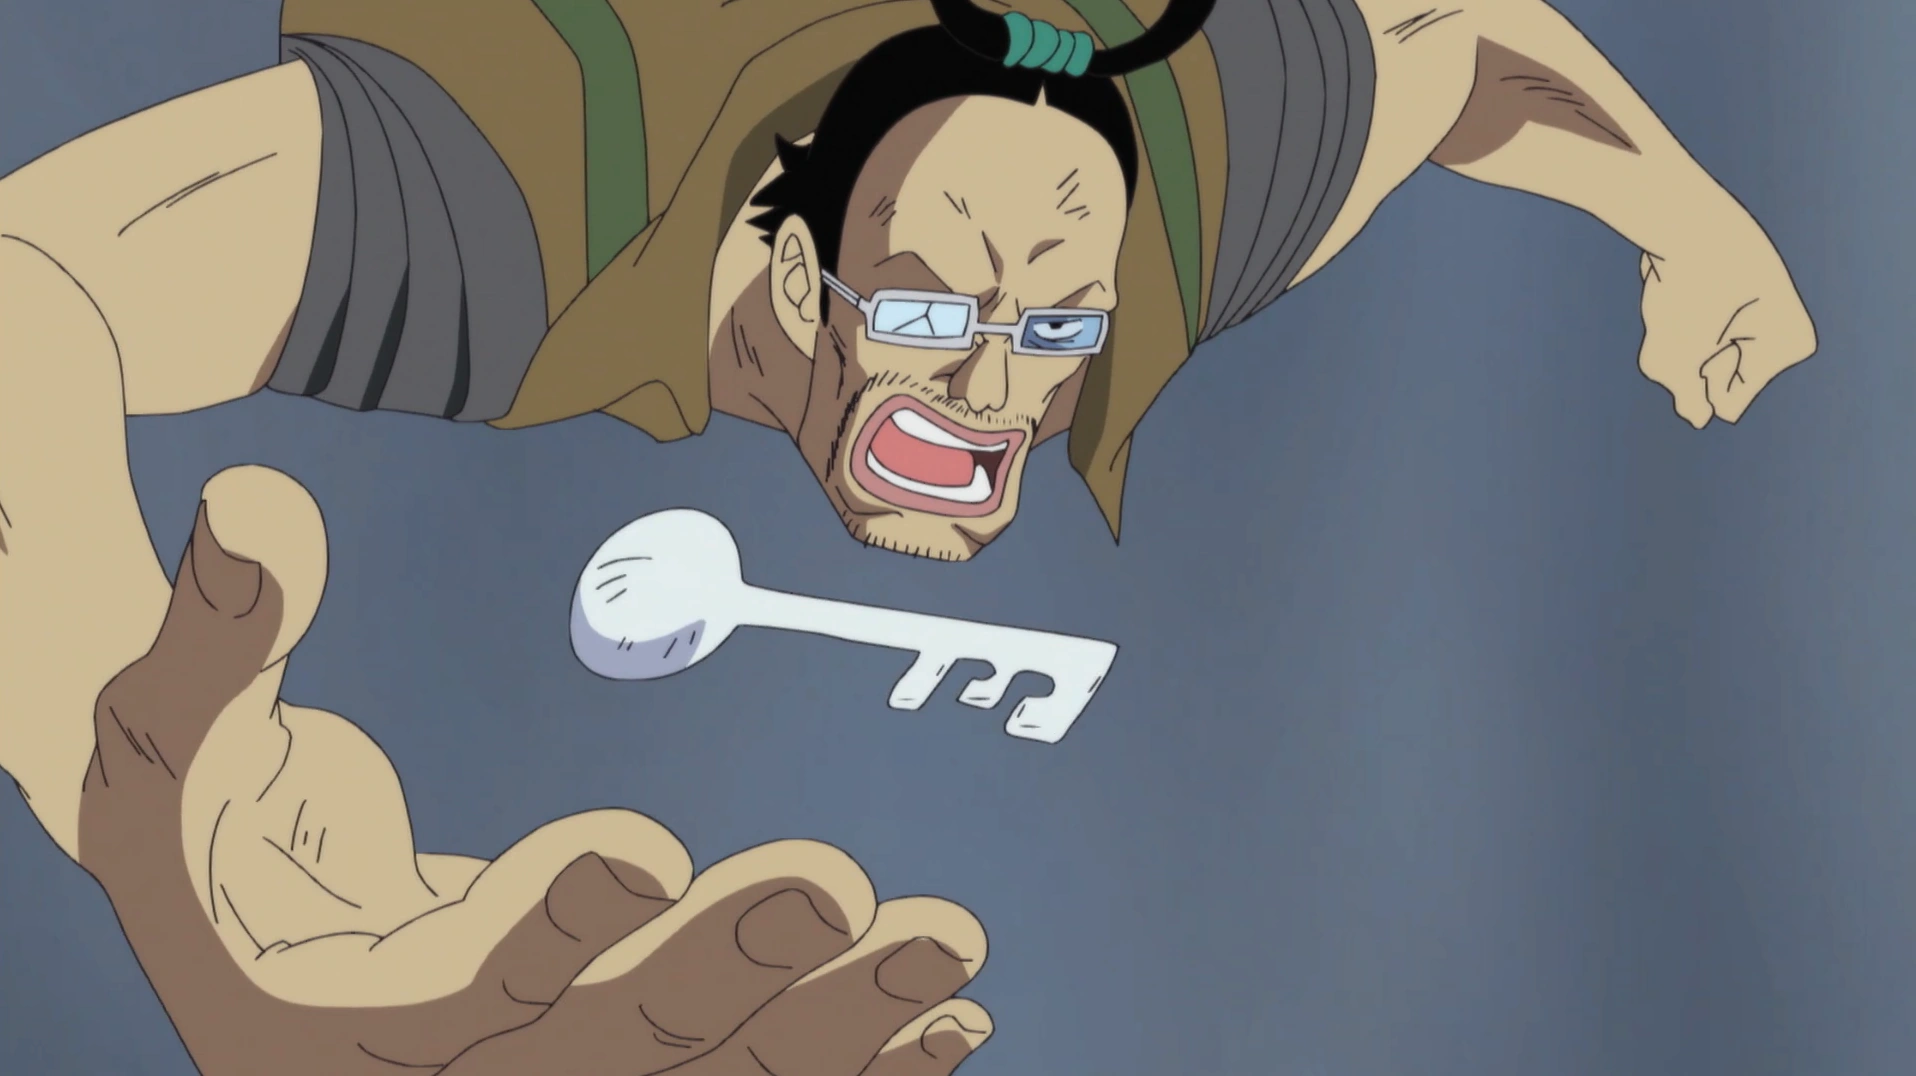
| — Mr. 3 as he crafts the key to set Ace free for Luffy |
However, he apparently had some unexpected changes while in Impel Down. While he was a coward before, Galdino risked his life to repay a debt to Luffy by blocking a torrent of deadly poison. He also admits that if he is not careful, he could end up viewing Luffy as a friend. After Bentham sacrificed himself to save the escapees, he was clearly very upset and admitted that he did not think Bentham was really all that bad. This eventually results in Galdino attempting to free Ace on his own accord, stating that he wants to avenge his fallen comrade and fulfill Bentham's last wish, risking his life for a second time in doing so.
Relationships
Baroque Works
He and his partner, Miss Goldenweek, had a relationship standard of most Baroque Works pairs. While he greatly appreciated her help with her painting skills, he would also grow annoyed from time to time when she would easily give away information. She would also paint his wax sculptures for him.
He thinks lowly of those who are beneath him in rank. He openly showed distaste for Mr. 5, upon learning of his defeat in Whiskey Peak. He saw Mr. 5 as a fool who relied more on the power of his Devil Fruit, and should have been more tactful. He also wished for the downfall of those above him in rank as well so as to benefit him with a promotion, making him antagonistic to the other Officer Agents.
Though formerly a loyal subject to Crocodile, Mr. 3 began to hate and fear him after Crocodile attempted to murder him by feeding him to the Bananawani. Ever since, the mere sight of Crocodile fills him with terror.
While initially viewing Mr. 2 Bon Kurei as an idiotic nuisance, the okama's actions in Impel Down deeply moved Mr. 3; he felt that his actions in Marineford helped avenge, as he put it, his "fallen friend".
Buggy and Alvida Alliance
Buggy
Galdino and Buggy teamed up in Impel Down in order to escape the Great Gaol, and sharing a hatred for Luffy, quickly became friends. However, they usually found that their attempts to escape without the assistance of Luffy and his allies proved fruitless, and it was only through Luffy's help that they managed to break free.
During their time side by side in Impel Down, Galdino acted as the more cautious of the two, frequently warning Buggy of the dangers that the two of them have triggered throughout the course of their escape from the Gaol; in the anime he has, on more than one occasion, had to do things himself to ensure Buggy's safety as well as his own, using his wax to supply themselves with convenient implements to fend for their lives with. After Buggy gains his blindly loyal followers, Galdino remains the only one who can see through Buggy's facade.
Allies
Monkey D. Luffy
Mr. 3 was initially antagonistic to Luffy, after ambushing his new giant friend Dorry and causing him to almost die. Mr. 3 scoffed at Luffy's approach of following blind instinct, but was nonetheless defeated by that very same instinct.
The two met up again in Impel Down, where Galdino seemed to forgive Luffy for his past actions against him. While initially showing cowardice in the walls of Impel Down, it was Luffy's actions that helped motivate Galdino to become more active in freeing all of the escapees from the Great Gaol, a task that would've been impossible without him and his wax. He assisted Luffy in holding off Magellan long enough for Jinbe, Mr. 1, Crocodile, and Buggy to abscond with a ship.
He later helped Luffy by disguising as one of the Marines on the scaffold attempting to execute Ace, as well as being one of the many shocked at the world's most infamous criminal Monkey D. Dragon being Luffy's father. After being knocked out by Luffy's Haki, he awoke to see that Luffy's key had been broken by Kizaru. He helped by crafting a key of wax, and it was that act that finally freed Ace from his bindings.
Abilities and Powers
Prior to the fall of Baroque Works, Mr. 3 was amongst the top-ranked members of the criminal organization, and presumably had a number of Billions (the lower ranked subordinates of Baroque Works Officer Agents) under his command.
He is also highly artistic and detailed, capable of perfectly replicating the physical structure of a human being with just a visual in mind.
Crocodile only allowed Mr. 3 to hold his position in the organization as "Mr. 3" because Mr. 4 was too mentally slow. Otherwise, he would have been ranked lower. In Impel Down, he proves his overall lack of fighting spirit on a number of occasions; this was further proven when he fainted under Luffy's burst of Haki, though he did wake up for some time after that on his own. He acted like a coward and backed up Buggy's escape plan rather than Luffy's much more dangerous advancement to the lower levels. After Magellan showed up on the fleeing group during their escape, Galdino showed a moment of bravery, but he admitted he could only hold it together for a brief moment.
In spite of his cowardice, Galdino seems to have some skill in stealth and infiltration. He is shown to be oppurtunistic by nature, manipulating the everlasting battle between the giants Dorry and Brogy so as to obtain at least one 100,000,000 bounty without performing any physical combat.
While working together, him and Buggy were able to bypass many of Impel Down's surveillance systems after abandoning Bentham in Level 5. This was further elaborated during the Marineford Arc, where he demonstrated the ability to avoid Aokiji's freezing powers by substituting himself with one of his wax statues without the admiral noticing, and then later succeeding at impersonating one of Ace's executioners in his secret attempt to free the 2nd Division Commander.
Devil Fruit
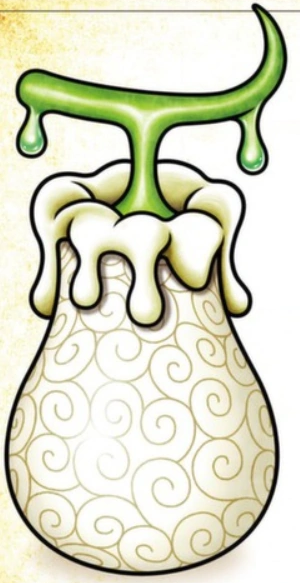
Galdino ate the Doru Doru no Mi, a Paramecia Devil Fruit which allows him to tap infinite amounts of a special candle wax from his body. He can manipulate this wax to form any shape he desires, control its motion in both liquid and hardened states, and harden it to become as strong as steel.
He usually crafts artistic weapons with such wax, which, when used at its maximum peak, was strong enough to take down a pirate with a bounty of ![]() 42,000,000. The hair shaped like a 3 on his head, much like a candle (since he is a literal "Candle-man"), produces a flame whenever he uses his ability, and also seems to grow larger when he exerts himself more to create a large amount of wax, like with his gigantic "Candle Set" move.
42,000,000. The hair shaped like a 3 on his head, much like a candle (since he is a literal "Candle-man"), produces a flame whenever he uses his ability, and also seems to grow larger when he exerts himself more to create a large amount of wax, like with his gigantic "Candle Set" move.
One of the most invaluable abilities granted by his wax is that he can use it to create keys to open prison cell doors and shackles, even if they are made of Kairoseki. His wax's resilience to acid and abilities to form keys proved instrumental in the events at Impel Down, helping Buggy free the prisoners and helping Luffy hold off Magellan, and Marineford, protecting and freeing Ace.
His ability's weakness is fire and extreme heat, which melts his wax and makes it useless. While fire melts the wax instantly, under heat Galdino seems to be able to keep the wax's form steady for a few seconds, which is helpful when Luffy needed to use Galdino's "Candle Lock" ability to beat the Minotaur guard in Impel Down.
 |
 |
Ship
The ship that Mr. 3 used when he was a Baroque Work agent.
Mr. 3 owned a personal ship during his career in Baroque Works. He used this ship to arrive discreetly to Alabasta and to escape Mr. 2 Bon Kurei's vigilance. It's a small boat with 3 as a figurehead. It also has the Baroque Works Jolly Roger as the flag. Nefertari Vivi mentioned that it is powered by his Doru Doru no Mi powers,[9] although the exact method has yet to be explained, it likely functions similarly to Smoker's Billower Bike in that his wax flows around an axle to rotate the paddles.
It first appeared in Chapter 158 and Episode 93,[9] and was later seen in the Baroque Works Mini-Series.[10] What happened to it after Mr. 3 was arrested and sent to Impel Down is unknown, but it is unlikely that he is still using it, as he is now onboard Big Top.
History
Past
Galdino's past remains unkwown. However, at some point he ate the Doru Doru no Mi and he joined the Baroque Works.
He also took down a criminal with a ![]() 42,000,000 bounty.
42,000,000 bounty.
Alabasta Saga
Little Garden Arc
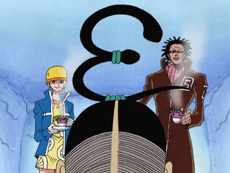
At Holiday island Mr. 3 was seen relaxing, when he asked Miss Goldenweek what she was looking at to which she replied that she was staring at orders they had received from their boss.

Mr. 3 meets up with Mr. 5 and Miss Valentine.
Mr. 5 and Miss Valentine also arrived at Little Garden and they entered a strange house. It was revealed to be Mr. 3's and Miss Goldenweek's hideout, who were waiting for them while drinking some tea. Mr. 3 mocked his subordinates, who were unable to arrest Vivi and put their organization in danger. As a second chance, he offered them to complete a job or to be killed by him. Beside killing the Straw Hats, the job consisted of arresting the two giants Dorry and Brogy. The bounties they had before starting their fight 100 years ago were still valid: arresting them would give the agents a reward 200,000,000. It was revealed that in order to accomplish their plan, Mr. 3 was the one who asked Mr. 5 to put a bomb in the rum, that Dorry and Monkey D. Luffy were drinking. Mr. 3 explained to Mr. 5 and Miss Valentine about his plan to capture the giants and then to take out the Straw Hats. Elsewhere Zoro realized that he was lost, when he spotted what appeared to be Nami, while the real Nami and Usopp were running from a dinosaur, when she spotted what appeared to be Luffy.
After defeating Dorry, Brogy was ecstatic, though Luffy knowing that the duel was rigged he was angry and demanded to know who the real culprit was. Mr. 3 then revealed himself to Brogy and asked why he was crying, to which Brogy demanded to know who he was, which prompted Mr. 3 to introduce himself and exclaimed that he had captured Brogy. And when Brogy moved to take a step forward it was revealed that he had been immobilized by wax, meanwhile back at Dorry's camp Mr. 5 and Miss Valentine showed up and Luffy realized it was them that they had planted the bomb. They also revealed that they had captured Carue and intended to use him to separate Vivi from Luffy. Angered by their lack of morals, Vivi and Usopp attacked the duo, only to be defeated easily. While Mr. 3 had completely defeated Brogy and announced that he would make a masterpiece.
When Brogy was completely immobilized by Mr. 3's wax, Mr. 3 then told Brogy how he had helped him out during his fight with Dorry, which angered Brogy. Vivi was then delivered to Mr. 3 and she insulted him for his lack of morals and sabotaging the fight. He then began to make a giant candle to wax his captives. Brogy then stated that at the beginning of the fight he knew something was wrong and he realized that it was Mr. 3 that hurt his pride for defeating a weakened opponent, which made Brogy try to get up, only to be hit by Mr. 5's bombs.
Mr. 3's art work
While Brogy was trying to get back up, Mr. 3 realized he needed to use more force to keep him down and he stabbed him with wax swords in his hands and his feet, immobilizing him completely. He then increased the speed of his candle technique and he explained that the Straw Hats would be turned into a group of wax statues, preserving the look of horror on their faces forever. Brogy then tried to get up once more but he failed, and Zoro, inspired by his attempt, resolved to cut off his own legs to escape, and his resolve inspired Brogy to try one last time to get up. Fortunately Luffy, Carue and Usopp arrived before they went through with it and vow to defeat the Baroque Works' agents, with Zoro asking Luffy to destroy the candle to which he agreed, but Mr. 3 saying that he would not let him.
Zoro switched his pose to one more awesome, just in case he got turned into wax, and Miss Goldenweek pointed out to Mr. 3 that the prisoners were not showing fear, which annoyed him. Luffy then prepared to fight, to which Mr. 3 accepted his challenge. Luffy then started attacking but he was quickly caught in a candle lock, but he used it to his advantage by making it into a hammer technique which he used to destroy the candle. However, this did not stop the waxing process and Mr. 3 continued his attack, but Usopp interrupted with an explosive bullet, but it was eaten by Mr. 5. Luffy continued his assault but Mr. 3 also continued his attacks as well, though Luffy beat him. But then he became strangely uncooperative as Miss Goldenweek activated her "color trap".
Mr. 5 and Miss Valentine explain that Luffy is under the spell of "color trap". Vivi then tricked Luffy into getting out of the trap which returned Luffy to normal, unfortunately he then got caught in another of Miss Goldenweek's traps, while Nami, Zoro and Vivi looked on in horror of their impeding doom. Meanwhile Mr. 5 and Miss Valentine were still chasing Usopp and Carue, who freed Luffy from his trap but he was once again unable to combat Miss Goldenweeks' abilities. As the fight between the two duos continued, Mr. 5 realized that he was not fast enough to catch Usopp and Carue, while Usopp headed back to the candle and found his friends waxed. Usopp then fired at Luffy destroying his shirt and freeing him from color trap once again, but he was promptly shot by Mr. 5, which angered Luffy declaring that he would defeat them.
Mr. 3 unveiled his candle champion technique to fight against Luffy, which Luffy found cool. He then started attacking Mr. 3, though his candle champion technique proved a formidable match, while Usopp realized a way to free his friends and he tried to free them, but he was stopped by Mr. 5 who bombarded him. He gave Carue a piece of rope and some instructions, but he was overheard by Miss Valentine who then began by testing how much weight he could take. Luffy suddenly grabbed Mr. 3's hair and used his hair to light Carue's rope, which was covered in oil, on fire.
The fire from Mr. 3's hair ignited the oil covered rope and creates a furnace, freeing the waxed Zoro, Vivi, Brogy, and Nami. Mr. 3 began to run away to which Luffy ran after him. Meanwhile, the other agents were defeated. Luffy was angry at Mr. 3 for destroying the pride of the giants' battle, and finally came across a multitude of Mr. 3's, but Luffy used his instincts and picked out the real Mr. 3, beating him once and for all.
At Mr. 3's wax house Sanji had a phone call with Mr. 0 and he pretended to be Mr. 3. He informed Mr. 0 that he had killed Vivi and the Straw Hats much to the pleasure of Mr. 0 who informed Sanji that the Unluckies will be at Little Garden shortly to deliver him an eternal log pose to Alabasta. The Unluckies then arrived and attack Sanji who quickly defeated them, and told Mr. 0 that one of the Straw Hats was still alive but that he finished them. This angered Mr. 0 and he hung up, and he then informed Miss All Sunday to send Mr. 2 to Little Garden to assassinate Mr. 3 for giving him a false report.
Alabasta Arc
He showed up later in Alabasta to apologize to Crocodile for his failure, yet an unamused Crocodile however simply fed him to his pet Bananawani.
However, Mr. 3 showed up yet again when Sanji was attempting to free the rest of the crew from the same Bananawani. He used his powers to encapsulate himself in wax while in the gators stomach, and after being freed Sanji simply made him use his powers to open the jail where the crew was captive and then beat him unconscious.
During Vivi's speech at the end of the Alabasta arc Mr. 3 managed to escape, and he could be seen in the crowd listening to her in Rainbase.[11]
Miss Goldenweek's Mini Story
Afterwards, Mr. 3 is shown on Holliday Island where he is needed to turn himself in to free Miss Valentine. However, Mr. 3 decides to escape on his ship and save himself, but is stopped by Mr. 2. Despite being defeated by Mr. 2, Mr. 3 manages to escape, so Mr. 2 is forced to disguise himself as Mr. 3 to free Miss Valentine. However, Mr. 3 is later caught off-screen and is sentenced to Impel Down with Crocodile, Mr. 1, and Mr. 2.[12]
Summit War Saga
Impel Down Arc
Mr. 3 at Impel Down.
Galdino was revealed to have been residing in Level 2 of Impel Down, appearing more ragged and with facial hair than he had prior to his sentencing, and apparently given up on hope of surviving within his confines.[7]
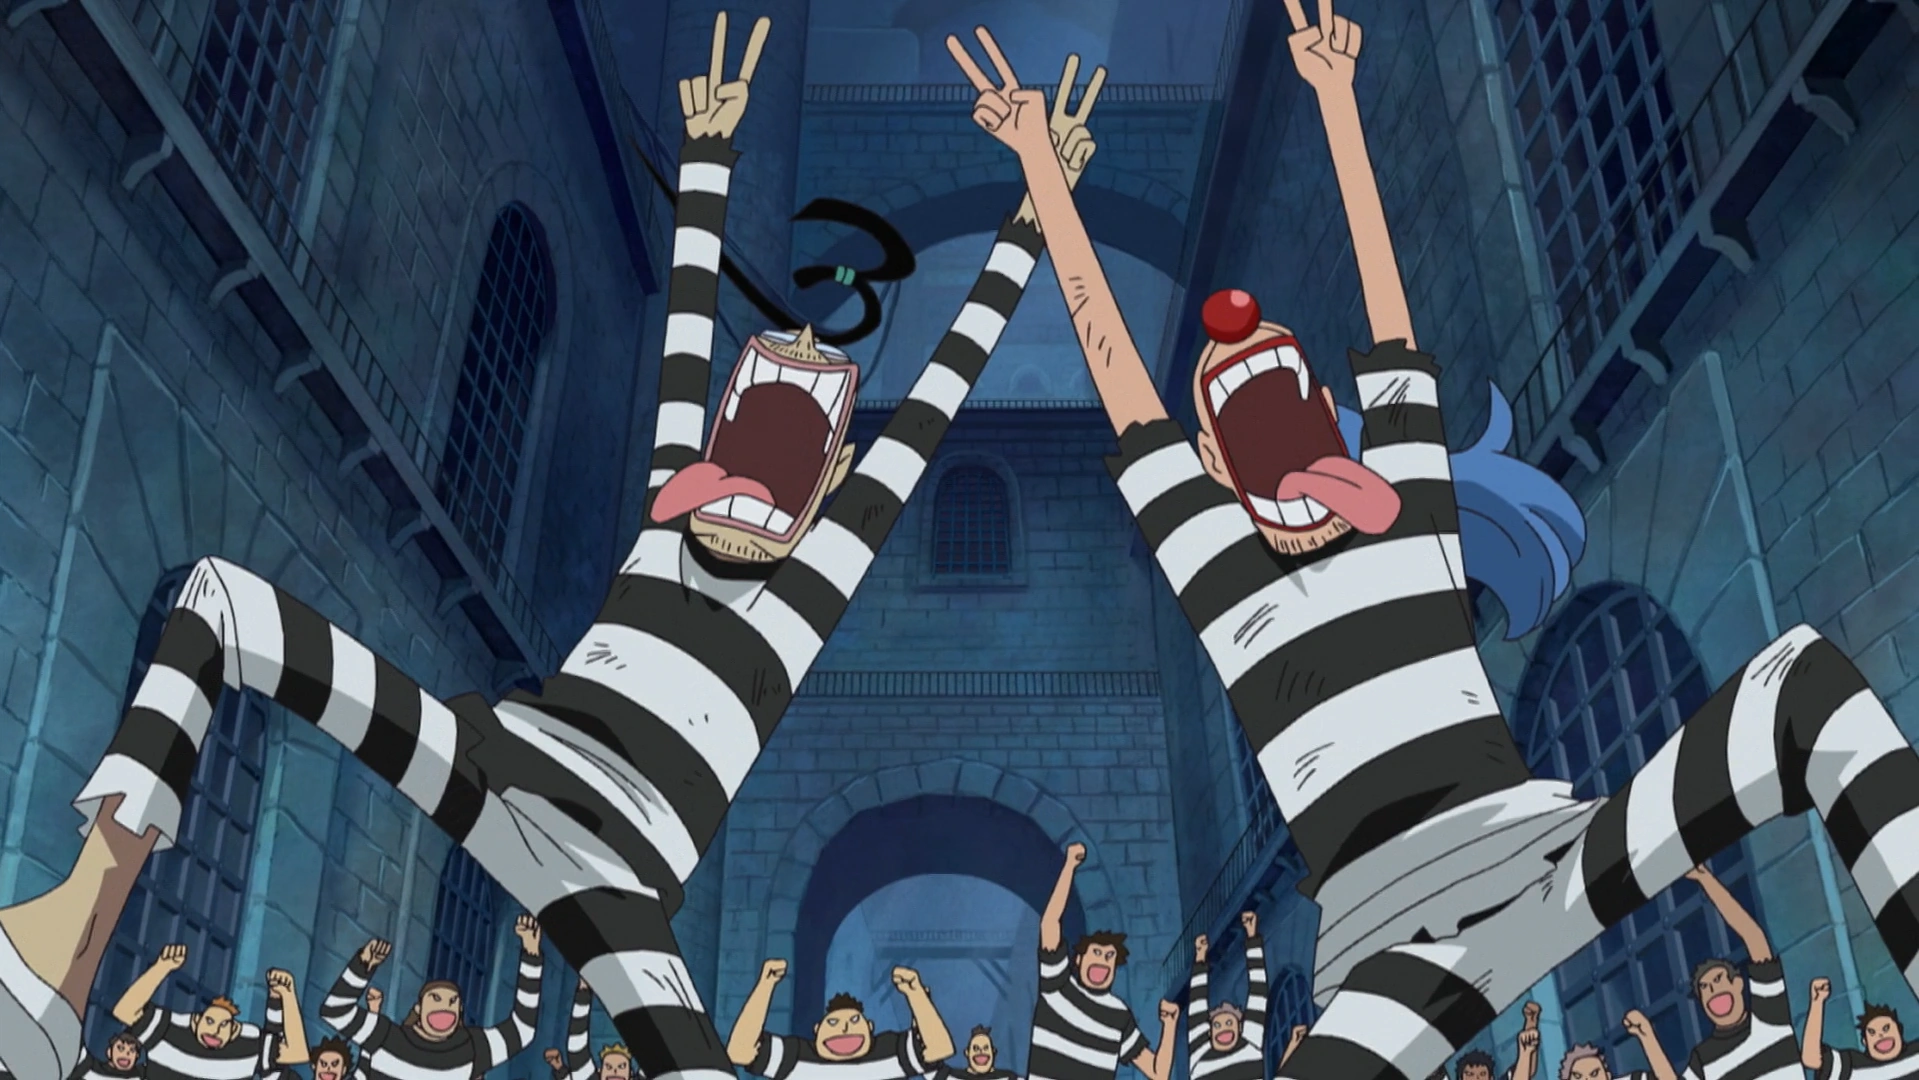
When Luffy and Buggy entered Level 2 and defeated the Basilisk, Buggy decided to release the prisoners in order to cause a riot. Galdino saw his chance and went out, where he addressed them and said that he would repay the debt for letting him out by helping them to Level 3. However, once he heard that Luffy was intending to go down instead of up to Level 1, he attempted to back out of the deal, but reconsidered once he realized that the Level 3 stairwell would also lead back up to Level 1.
He then conspired with Buggy to ditch Luffy so they could escape, but a Sphinx blocked their way to freedom. In order to ensure that he wasn't crushed by the Sphinx, he created lots of wax copies of himself in order to trick the Sphinx, but this only resulted in the Sphinx destroying the floor, sending Galdino, Buggy, Luffy and the Sphinx plummeting straight into Level 3.[13]
With the Sphinx knocked out, Galdino explains that Level 3 is known as the "Starvation Hell", where the heat from Level 4 is so hot that it even reaches the one above, and the prisoners are forced to starve. Before they could go anywhere, they were captured in a Kairoseki-reinforced net. The guard and commander of the Blue Gorillas: Saldeath, says there is no escape, but the Sphinx, who was also captured along with the three, broke out of the net, releasing them. Galdino and Buggy climbed up and told Luffy they are ditching him to break out of prison, but Luffy gives his thanks anyway. Upon trying to find a way out, He and Buggy came across Bentham's cell, who shocked to see Galdino out of his. An embarrassed Galdino suggests that they do not let him out.[14]

Galdino and Buggy start a riot.
Later Galdino and Buggy are mentioned to be in Level 2, but as Minotaurus landed on top of them because Luffy sent it flying, both of them had no other choice than to run. Minotaurus chased Galdino and Buggy down to Level 3 until they meet up with Luffy and Bentham. After all four of them joined up, they attacked the Minotaurus one after the other. Galdino contributed to the defeat of Minotaurus as he used his Devil Fruit powers to wax Luffy's arm so that the final blow by Luffy finished the Demon Guard, Minotaurus, off. Only shortly after that, they realized that they were falling into the boiling point of Level 4. To their fortune, they could jump off the falling debris to land safely.
When Luffy began to run in a random direction, Galdino along with Buggy and Bentham followed him as Bentham told them that there is a kitchen stuffed with food. However as Galdino and Buggy realized that there were many guards running around in order to get Luffy, they changed their mind and made up an idea to escape from Level 4. As Galdino then saw Luffy being attacked by Magellan, he could only think of getting back to Level 3 by taking down Hannyabal. Galdino and Buggy assumed that Hannyabal would be weak as he does not seem to possess a Devil Fruit, and Buggy's Muggy Balls would also be of great advantage for them. They decided to make their way to the entrance to Level 3 from Level 4.

Galdino uses Candle Wall to stop Magellan's Hydra.
Unfortunately, they underestimated Hannyabal severely, who easily defeated them both. They were rescued by Bentham, who was disguised as Hannyabal, and he told them they needed to save Luffy, who was defeated by Magellan and taken to Level 5. Galdino is afterwards seen with Buggy and a disguised Bentham traveling down to Level 5, the Freezing Hell. However, the three of them were shocked to learn that the prisoners and a supposed Hannyabal have to discard their cloaks. As soon as they entered they saw the Wolf Unit intent to eat them. With Bentham prepared to face them, he is shown sprinting away in horror with Buggy.
He is later shown alongside Buggy hiding on Level 2 using his Doru Doru powers and then making wax keys and freeing prisoners in order to cause a distraction for them to leave. Unfortunately, Magellan came to Level 2 and killed many of the rioters. He also sealed off all the entrances and exits to the level, causing Galdino to worry. Luckily, Blackbeard reopened the level and Galdino and the rioters prepared to head to Level 1. However, before they could escape out of Level 1, they were attacked by the revived Demon Guards, but thanks to the arrival of Luffy, Jinbe and Crocodile's group, the Demon Guards were quickly subdued again.

Galdino helps Luffy fight Magellan.
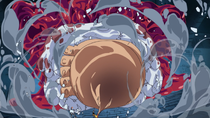
Magellan quickly arrived to try to kill the group, but Galdino in a surprising move, blocked the Chief Warden's Hydra with his own Candle Wall, urging Luffy and company to escape, stating that he'd be damned if he had to keep being in Luffy's debt. As it was clear that Galdino could not actually defeat Magellan, he planned to escape, but Luffy stayed behind to back him up. Noticing his wax's defensive capabilities against Magellan's poison, Luffy asked and received a set of wax boxing gloves and boots, which he promptly used to injure Magellan.
Galdino continued to hold down the fort against Magellan by creating wax barricades around some cannons until they were forced to flee from Magellan's poison golem. Galdino managed to make it out of Impel Down and onto the group's escape ship, upon which he collapsed and gave thanks to above. When Bentham sacrificed himself to enable the others' escape, Galdino was visibly stunned. He is later seen actually crying over Bentham's sacrifice and admits that he no longer actually had hard feelings towards him.
Marineford Arc
Later, the Marines called the escape ship and revealed that Buggy was once part of the Pirate King's crew and is good friends with Shanks. Galdino wondered why Buggy is such a coward, if all that is true. When Luffy and the others reached the Gates of Justice, Galdino was seen to be very excited.
He was later seen alongside with the other Impel Down fugitives, falling from the sky to Marineford, in order to support Luffy in Ace's rescue. He was also seen wearing a cloak and black pants over his original prisoner's striped shirt, understandably hysterical.

Galdino protects Ace using his Candle Wall.
When Buggy showed his shock at Kizaru's laser attack, then tried to hide it (of which most prisoners bought), Galdino cried out that they are so full of hope that they are half deaf. When Sengoku announced that Luffy's father is none other than Dragon the Revolutionary, Galdino was seen standing behind Buggy, both of them greatly shocked. Galdino then followed Buggy and his group as Buggy starts to execute his plan. Galdino is seen screaming when Buggy got caught by a sandstorm created by Crocodile.
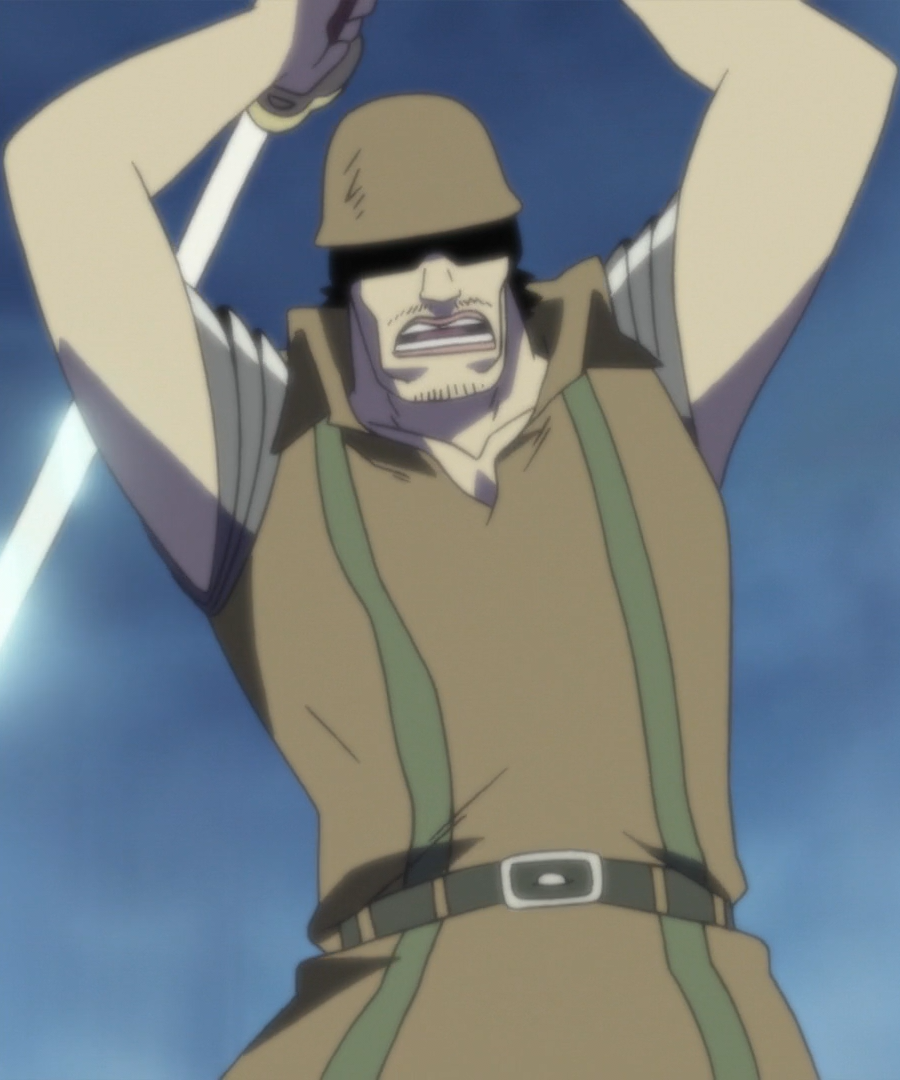
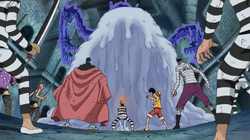
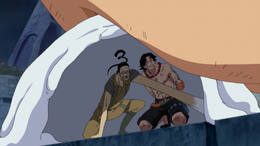
Later in the battle, Galdino disguised himself as an executioner and manages to approach Ace's execution ground. He's ready to free Ace and in doing so avenging Bentham, but had to abide by Sengoku's sudden order to have Ace instantly executed and pretended to do so, no doubt ready to reveal his true intention to liberate Ace at that point, leading to him being knocked out by Luffy's Haki. He regains consciousness when Luffy finally reaches the ground, just in time to protect Ace from Sengoku's attack with a Candle Wall. When Kizaru destroys Luffy's key, Galdino makes one himself with his powers, managing to free Ace from his chains in midair, but not before asking Luffy that if his reasons for helping him free Ace was to respect a comrade's (Bentham) final wishes, would he laugh at him, to which the Straw Hat said no, while the platform is destroyed.
Both him and Luffy are thus saved by Ace, who protects them from the flames of the destroyed execution scaffold. Galdino is soon being dragged away by Pirates while remarking that he thought that he was a goner when the Marines spotted him. Marco who wishes to support the others who are being attacked by Akainu, immediately orders Galdino to unlock his handcuffs with his ability and Marco is later seen engaging in battle with Akainu.
Post-War Arc
Galdino is shown to be joining the Buggy and Alvida Alliance on an island in the Grand Line. He was last seen reading a message for Buggy from the World Government, telling him he would not believe what it said.[3] It was later revealed that it was an invitation to Buggy to join the Shichibukai.
Major Battles
- Mr. 3 and Miss Goldenweek vs. Monkey D. Luffy, Usopp, and Carue
- Mr. 3 vs. Crocodile
- Mr. 3 vs. Sanji
- Galdino, Buggy, and Monkey D. Luffy vs. Sphinx
- Galdino, Buggy, Mr. 2 Bon Kurei, and Monkey D. Luffy vs. Minotaurus
- Galdino and Buggy vs. Hannyabal and Impel Down Guards
- Galdino, Buggy, and prisoners of Impel Down vs. Magellan (Level 2)
- Galdino, Buggy, and prisoners of Impel Down vs. Demon Guards (Level 1)
- Galdino, Monkey D. Luffy, and prisoners of Impel Down vs. Magellan (Level 1)
- Galdino, Portgas D. Ace, and Monkey D. Luffy vs. Fleet Admiral Sengoku
Filler
- Galdino and Buggy vs. Gairam (interrupted by Boa Hancock)
Translation and Dub Issues
Mr. 3 and Miss Goldenweek's involvement in the Little Garden was removed in the 4Kids dub. To explain Mr. 3's presence in Rainbase afterwards, the story was rewritten to say that he had been following the Straw Hat Pirates since Loguetown. However, this created a plot hole since before Whiskey Peak, Baroque Works did not know who the Straw Hats were. Mr. 3 was also rewritten to be a joker, telling flat jokes in almost every sentence he spoke, despite being a genius in the original storyline.
In the FUNimation dub, Mr. 3 speaks with a slight English accent.
Anime and Manga differences
After Aokiji's attack on Buggy and the other Impel Down escapees, Galdino manages to escape using a candle copy of himself. Later, he is seen in an underground passageway below Marineford, trying to hide from the Marines, as he thinks they spotted him. Moments later, he sees the substitute executioners for Ace's execution.[15]
Trivia

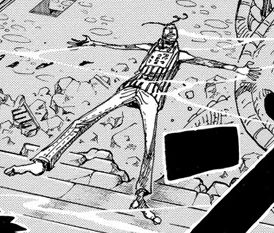
Mr. 3 floating in water in the manga.
- Even though a Devil Fruit user cannot swim or float in the sea, on Page 17 of Chapter 175, Mr. 3 is seen floating on water. Oda explained in a SBS that Mr. 3 landed on a plank of "super-floating wood", which allowed him to stay afloat. In the anime version of this scene, a table is clearly floating beneath him to hold him up. It was revealed in another SBS that the wood was in fact Kuuigosu.
- His ship being powered by a Devil Fruit power is similar to the vehicles used by Logia-class Devil Fruit users. This ship is also the only one that functions from a Paramecia-class Devil Fruit power.
- He speaks with a Nagoya dialect.
- The Mr. 3 pair has an "art" theme, due to sculpting and painting.
- Galdino's Candle Champion helped him take down a criminal with a
 42,000,000 bounty.[16]
 - In the Episode of Luffy, Luffy meets a skillful wax modeler and asks him if he knows about "that three guy", referring to Galdino.
- He is the only known person who has been member of the crews of two Shichibukai: Crocodile and Buggy.
References
- ↑ 1.0 1.1 1.2 1.3 One Piece Manga and Anime — Vol. 13 Chapter 117 (p. 3) and Episode 70, Galdino debuts as Mister 3.
- ↑ 2.0 2.1 One Piece Manga and Anime — Vol. 54 Chapter 532 (p. 3) and Episode 433, Mr. 3's real name is revealed.
- ↑ 3.0 3.1 3.2 3.3 One Piece Manga and Anime — Vol. 60 Chapter 593 (p. 19) and Episode 512, Galdino is seen as a member of the Buggy and Alvida Alliance.
- ↑ 4.0 4.1 4.2 One Piece Manga and Anime — Vol. 13 Chapter 117 (p. 4) and Episode 70, Galdino is introduced.
- ↑ SBS One Piece Manga — Vol. 60, Galdino's birthday is revealed.
- ↑ One Piece Manga and Anime — Vol. 14 Chapter 120 (p. 19) and Episode 73, The Doru Doru no Mi's name is revealed by Vivi and explained by Mister 5.
- ↑ 7.0 7.1 One Piece Manga and Anime — Vol. 54 Chapter 527 (p. 19) and Episode 424, Galdino's location in Impel Down revealed.
- ↑ SBS One Piece Manga — Vol. 21, Oda explains what kind of tea the Baroque Members like.
- ↑ 9.0 9.1 One Piece Manga and Anime — Vol. 18 Chapter 158 (p. 3) and Episode 93, Vivi sees Mr. 3's ship when they arrive at Alabasta, and explains how it moves.
- ↑ One Piece Manga — Vol. 40 Chapters 382–384, cover story: Miss Goldenweek's "Operation: Meet Baroque Works" Vol. 18-19, Mr. 3 tries to escape Kyuka Island on his ship, but is stopped by Mr. 2 Bon Kurei.
- ↑ SBS One Piece Manga — Vol. 24, Oda explains Mr. 3's presence there... Yet does not.
- ↑ One Piece Manga — Vol. 43 Chapters 412 and 413, cover story: Miss Goldenweek's "Operation: Meet Baroque Works" Vol. 41-42, Mr. 3, Mr. 2, Daz and Crocodile are sent to Impel Down.
- ↑ One Piece Manga and Anime — Vol. 54 Chapter 529 and Episode 430, Galdino and company are sent crashing into Level 3 of Impel Down.
- ↑ One Piece Manga and Anime — Vol. 54 Chapter 530 and Episode 431, Galdino and Buggy ditch Luffy.
- ↑ One Piece Anime — Episode 475, Galdino is seen under Marineford.
- ↑ One Piece Manga and Anime — Vol. 14 Chapter 125 and Episode 76, Mr. 5 mentions that Mr. 3 defeated a criminal with Candle Champion.
| |||||||||||||||
| |||||||||||||||
| |||||||||||||||
| |||||||||||||||||
| |||||||||||||||||
| |||||||||||||||||
| |||||||||||||
| |||||||||||||
| |||||||||||||
| |||||||||||||
| |||||||||||||