- Introduction
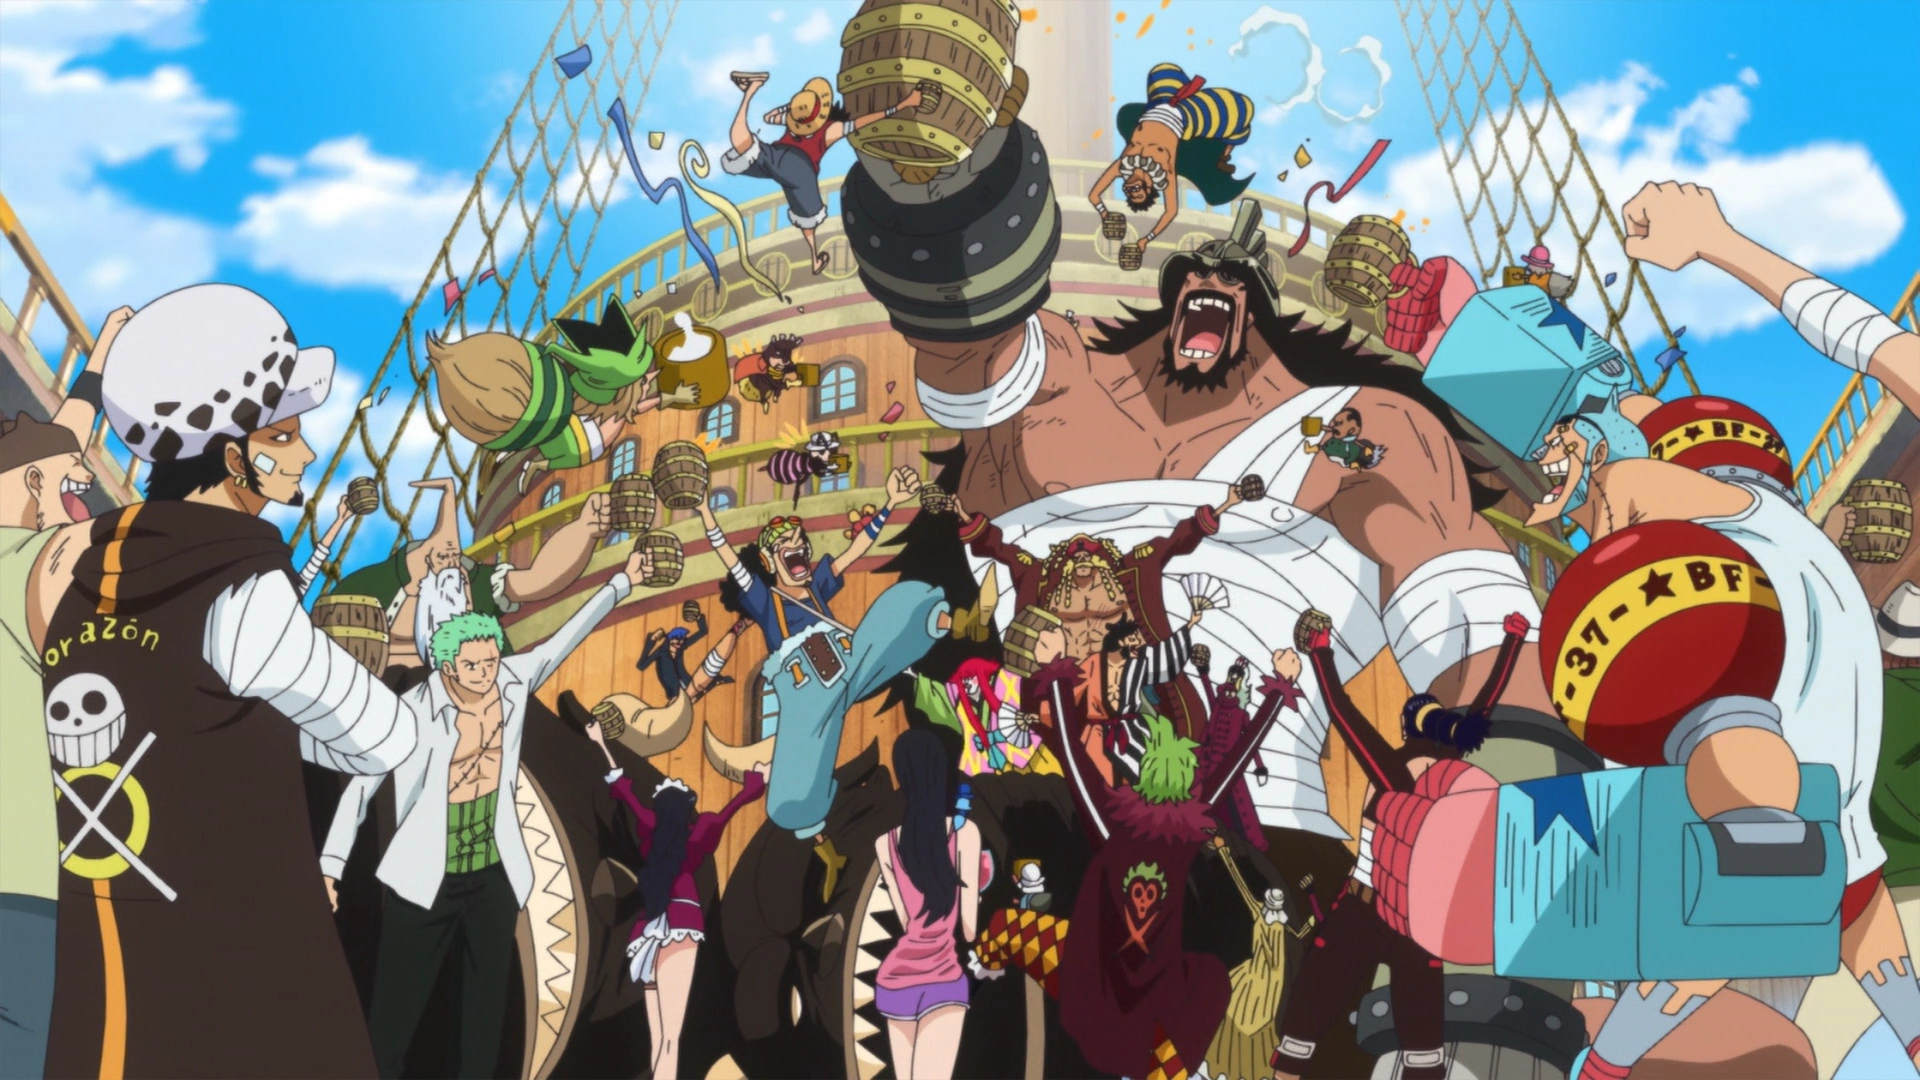
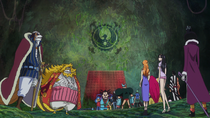
- Gallery
- Personality and Relationships
- Abilities and Powers
- History
- Past and Before the Timeskip
- During and After the Timeskip
- Non-Canon
- Misc.

|
Ahoy! This here is the 88th Featured Article.
"Roronoa Zoro" has been featured, meaning it was chosen as an article of interest.
|
During the Timeskip
During his training, Zoro also learned from Mihawk how to imbue his swords with Busoshoku Haki. To Zoro's chagrin, Mihawk forbade him from having any alcohol until he had mastered doing so.[20]
Fish-Man Island Saga
Return to Sabaody Arc
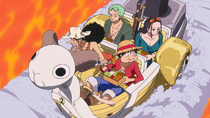
Zoro returns to Sabaody.
After two years of training, Zoro (with Perona's help) returned to Sabaody Archipelago. Shakuyaku told him that he was the first to return. He went to a fisherman, saying that he was bored and wanted to fish, and accidentally went on a coated pirate ship instead of the fisherman's boat (despite the major difference such as the fisherman's boat being a dingy and the pirates being a galleon). Later he fell asleep, and the fisherman was unable to wake him up as the coated ship submerged. He was found by Sanji when the ship resurfaced with him sitting on one of the broken masts after he cut the whole ship in half with his blade (similar to Mihawk) upon waking up. Zoro then tells the unfortunate pirates to blame fate for him being on their ship. He then casually states that he had boarded the wrong ship.
Zoro then gets reacquainted with Sanji. Zoro says that he wants to go to the beach and go fishing. Sanji angrily states that it would be a pain for the crew to search for him if he ends up getting lost and forces him to return to the Thousand Sunny. Zoro then ranks Sanji by the order in which he arrived (#7), much to Sanji's frustration. The two then start their usual bickering with Zoro threatening to cut Sanji in half.

After getting a call by Franky, Sanji informs Zoro of the Straw Hats' meeting place, which is in Grove 42. They also hear a commotion coming from a nearby grove. When they go see what it is, they find Luffy there along with the Marines, the Pacifistas, and the crew of the Fake Straw Hat Crew. After quickly defeating a Pacifista, and briefly arguing about whose blow actually finished it off, Zoro and Sanji then get reacquainted with Luffy as Zoro ranks Luffy the ninth. Luffy, Zoro, and Sanji then make their way back to the ship. On the way, they come across Rayleigh. When Luffy tells Rayleigh that he is going to become the pirate king, Zoro just smiles along with Sanji.
As Luffy, Zoro, and Sanji head back to the Thousand Sunny, they find Marines blocking their path. Perona aids them by fending off the Marines with her Negative Hollow. When Zoro asks Perona why she is still there, Perona gets angry at him, scolding him for talking that way to someone who was nice enough to bring him to Sabaody. Zoro, Luffy and Sanji then return to the ship with the aid of Chopper and a giant bird. With the Marines held back by their new allies, the crew submerges on their coated ship and heads for Fish-Man Island.
Fish-Man Island Arc
Undersea Voyage
As the crew marveled at the surrounding ocean, Zoro simply stated that he had already seen it when he had boarded a coated pirate ship by mistake. Sanji then scolded Zoro for ruining the moment. Zoro then prepared to catch a fish using his sword, but was stopped by Usopp and Chopper. When Luffy again attempted to catch some fish, Zoro proposed that they have a competition, only to be beaten down by his crew again. The crew then started listening to Franky's story about Kuma, while they are the bentos Luffy had brought. Zoro started to wonder what Kuma's real intentions were as he still had his doubts.
With their sea cow, the Caribou Pirates soon caught up with the Straw Hats and prepare for battle, and Caribou jumped onto the Thousand Sunny. Before his crew could follow, his sea cow, Momoo, fled in fear after seeing Nami, Sanji, and Luffy, leaving Caribou behind. Zoro then questioned Caribou if he was the captain of that crew, and Caribou frantically pleaded with them, claiming that he was an unfortunate victim and not a pirate. With that settled, the Straw Hats then sailed through the underwater currents. When they reached the Downward Plume, they encountered a Kraken. When Zoro witnessed the Kraken destroying Caribou's ship, he commented that Caribou's crew looked like jellyfish, much to Caribou's dismay. Zoro, Luffy, and Sanji then equiped themselves with Flutter Kick Coatings and fought the Kraken out in the sea. During the battle, Zoro cut one of the Kraken's tentacles, much to Luffy's disapproval. Luffy, Zoro, and Sanji soon defeated the Kraken, but because they were not wearing life-lines, they were separated from the ship as it went down the Downward Plume.
Zoro cuts one of the Kraken's tentacles.
Luffy successfully tamed the Kraken and named him Surume. Unfortunately, Luffy's and Sanji's coatings had popped, so Zoro had to share his own with them. After some searching, Luffy, Zoro, and Sanji eventually found the Thousand Sunny and the rest of the Straw Hats just in time for Surume to save them from Wadatsumi. After reuniting with the ship, Zoro was then startled when the undersea volcano started to erupt. Surume quickly carried the ship away from the eruption and jumped down a trench.
The Straw Hats were in danger because of the blast from the volcano, rocks were falling down on them. Zoro wanted to leave the ship and the bubble in order to cut them, but Robin stops him with her power and warns him about the water pressure. The Straw Hats are able to escape thanks to Surume and Usopp's Pop Greens, with Zoro seen smiling at Usopp's progress in strength. After going down through the trench, the crew sees Fish-Man Island. They soon encounter a gang of sea monsters led by Hammond, who gives the Straw Hats two options: join the New Fish-Man Pirates or die. The Straw Hats prepare to run using Coup de Burst as Luffy gives Hammond a rejection.
Trouble in the Underwater Paradise
Hammond does not take kindly to Luffy's rejection and prepares to attack the Thousand Sunny. Franky activates Coup de Burst and the ship flies through the bubble surrounding Fish-Man Island. The ship then falls into a current and the crew gets separated. Sometime later, Zoro was found by King Neptune and brought to the Ryugu Palace and began drinking even after King Neptune suggested waiting for the rest of his crew to get there.


Zoro intercepting King Neptune.
After receiving word of the mysterious disappearance of some mermaids from the Mermaid Cove and of Madam Shyarly's ominous prediction, the palace guards and personnel took action against the Straw Hats. They locked up Zoro and attempt to capture Usopp, Nami, and Brook (who were invited to the palace earlier) who easily defeated most of the guards. Zoro then frees himself from his cell and reaches the palace hall just in time to intercept an attack by King Neptune. After subduing and tying up the king, the ministers, and the rest of the royal guards, the crew mates have an argument with Zoro, scolded him for overdoing things, but he insists that they had to fight in order to defend themselves. Zoro then tells everyone that they need to leave Fish-Man Island.
The three princes of the Neptune Family return to the palace only to find it under the control of the Straw Hats. Since the princes are unable to enter, Fukaboshi speaks with Zoro through Den Den Mushi. Zoro demands that in exchange for the freedom of the palace, the Straw Hats would be able to leave Fish-Man Island peacefully. Fukaboshi agrees with Zoro's terms and tells him Jinbe's message. After hearing noises coming from Shirahoshi's room, Neptune begs Zoro and the other Straw Hats to check up on the princess to ensure her safety. When Zoro asks why they should take orders from hostages, Neptune angrily responds by saying if Shirahoshi is harmed while he is incapacitated, he will chase the crew to the ends of the ocean.
Brook instantly dashes off to her location while carrying the Minister of the Right. When they return, the minister informs Neptune of Shirahoshi's disappearance and Brook yells that pirates (pawns of Hody Jones) are invading the palace. Usopp panics asking what to do. Zoro gives a simple answer, "cut them".
Zoro proceeds to defeat the human pirates. The Minister of the Left states that Zoro was enjoying it much to Zoro's annoyance. However, one of the unconscious pirate's arm was laying on top of the Connection Corridor switch, pushing it down and opening the corridor that leads to the palace. Zoro, Usopp, Nami, and Brook then encounter the New Fish-Man Pirates and Vander Decken IX. Once Decken learns that Shirahoshi is no longer in the palace, he quickly goes after her, leaving Jones to take care of things in the palace.
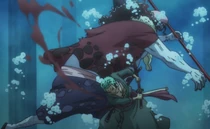
Jones then crushes a palace wall, flooding the palace in the process. Jones launches Yabusame, injuring King Neptune and some of his soldiers. Zoro launches Yakkodori at the fish-man. Jones blocks the attack by using one of his own comrades as a shield. Nami goes off to an unknown location, Usopp and Brook untie the guards, and Zoro cuts Neptune's chains. Zoro regrettably states that the negotiation with the kingdom is void since they are unable to keep the hostages unharmed. Before the room is completely submerged, Zoro tells Neptune to take his crew mates to safety. When completely underwater, Zoro prepares to face off against Hody Jones.

Zoro cuts Hody.
Even though Zoro is at a disadvantage being underwater and without a Flutter Kick Coating, the swordsman manages to deal a striking blow to Hody Jones. While Jones is knocked out, Zoro quickly surfaces and breathes for air. He then grabs onto Neptune as he prepares to make an escape route. Neptune launches Ultramarine and clears a path that allows the ministers and the Ryugu Palace guards to escape. However, Neptune's back gave in, putting him, Zoro, Usopp, and Brook in a dangerous situation. Neptune's whale, Hoe, arrives to save them, but before they can leave the palace, Jones, energized by Energy Steroids, stops Neptune with one hand. Zoro, Usopp, Brook, and Neptune are then captured by the New Fish-Man Pirates. They then lock up Zoro, Usopp, and Brook in a cage in a room with rising water, and plan to drown them after executing Neptune.
Brook then shows a new ability in which he can leave his body in spirit form. Zoro instructs Brook to tell Pappag to bring him his sword so they can escape. They eventually do escape and appear in the Gyoncorde Plaza with the rest of the crew, preparing to fight against the New Fish-Man Pirates.
Battle for Fish-Man Island

Zoro defeats Hyouzou.
Zoro along with Sanji were getting ready to face off against the enemy. However, Luffy used his Haoshoku Haki and took down half of them. Zoro was quite impressed, and he commented that if the captain could not do that much, they would have to search for another one. As the battle with the New Fish-Man Pirates initiate, Zoro defeats the Iron Shell Squad with Kokujo: O Tatsumaki. Later, Dosun tries to attack Luffy as he approaches Hody. Zoro intercepts Dosun and knocks him down.
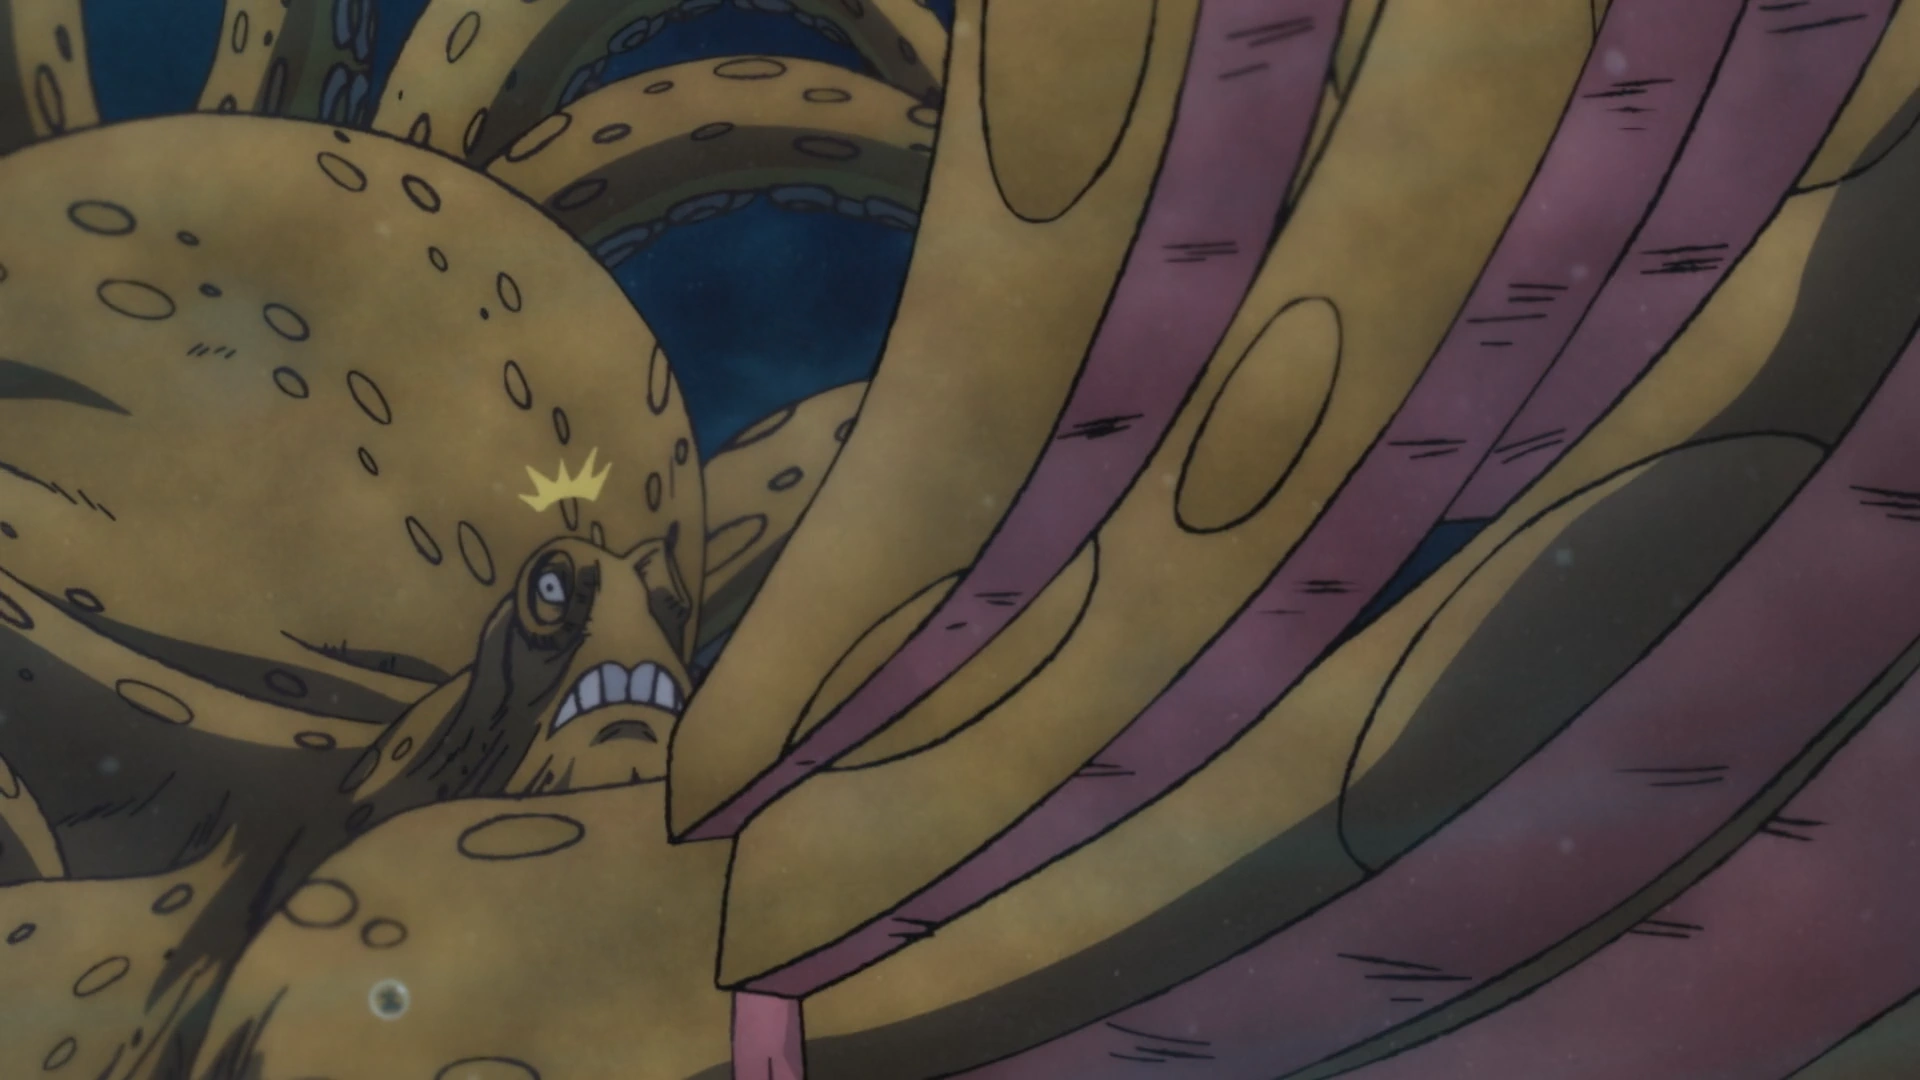
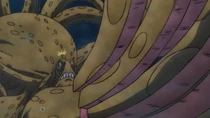
Later, when Hyouzou goes on a rampage and tries to attack Robin, Zoro intercepts the octopus merman before he reaches her. Zoro comments that Hyouzou will be a good warm-up for the New World. Regardless of Hyouzou's strength, Zoro manages to cut his swords. Zoro then comments that Hyouzou's power is not even enough to kill his boredom. Despite being disarmed, a still-drunken Hyouzou merely smiled and complained.
Later, Zoro seemingly lowers his guard and insults his opponent by calling him a frog. An angered Hyouzou then draws new swords, coats them with poison, and attempts a sneak attack. Zoro effortlessly cuts him down and comments that he's just a frog from the bottom of a well. After all the officers of the New Fish-Man Pirates have been defeated, the Straw Hats look up into the sky as Luffy tries to destroy Noah. When the Sea Kings appear and stop Noah from falling, saving the ship and the island at the same time, everyone on Fish-Man Island celebrates.
The After Battle Celebration and Departure
After the battle he is seen with the rest of the crew and their friends by Thousand Sunny, commenting on Chopper's inability to move. He then watches as Chopper performs a blood transfusion between Luffy and Jinbe. Afterward, while floating in the air on the ship, Zoro is appalled at himself for fighting in public the way he did, saying heroes have to share their drinks, and he wants to keep it all for himself. He then goes with the rest of his friends to Ryugu Palace for the celebratory banquet, where he yells at the guards not to call them heroes. He is then seen happily accepting a drink from a mermaid server and later laughing with Franky and Hatchan. Zoro is later seen sleeping next to Nami, Usopp, and Sanji, who drank, ate, and lusted too much, respectively. Luffy wakes him up by asking if he sensed some kind of animal in the palace. The three of them then confront Caribou and Zoro watches with Sanji as Luffy sends him packing. When the Minister of the Right notices that one of the prison towers was cut in half, he suspects Caribou was the culprit, but Pappag tries to tell him it was Zoro. Zoro tells Pappag to let him blame it on the thief. He and Luffy then make the connection that Caribou was also the one who stole the palace's treasure and are surprised when Nami gets mad at them for sending him flying. She then sends Luffy, Zoro, and Sanji to look for him.
They found Caribou, who was knocked out already. The three then collect the treasure and make their way back to the palace. Luffy asks Zoro which direction to go. Zoro points to one direction and Sanji immediately suggests they go the other way to which Zoro takes offense. They soon arrive at the Candy Factory and meet Big Mom's messengers: Pekoms and Baron Tamago. Zoro questions the Emperor's manhood and Tamago points out that Big Mom is not a "man". Zoro is seen smiling when Luffy answers the Den Den Mushi from Charlotte Linlin. He is present when Luffy declares war on her. After returning to the palace and informing the crew about the situation with Big Mom, Nami beats Luffy, Zoro, and Sanji for giving the treasure to the Emperor. Afterwards, Zoro and the crew say their farewells to the citizens of Fish-Man Island and set sail to the New World.
Note:The following takes place during the Punk Hazard Arc and not before.
While heading to the New World, the crew decides to catch some sea fishes to eat. Zoro stated that they should have a party to celebrate entering the New World. Later, Zoro uses Sanbyakurokuju Pound Ho to kill the giant sea monster. As the crew gets caught in the White Strom, a gam of Island Whales (all of which look like Laboon) stop them from getting lost. After Brook plays Binks' Sake, the whales bring the ship up to the surface of the New World and Zoro comments that it looks like entrance to Hell.
Dressrosa Saga
Punk Hazard Arc
Arriving at Punk Hazard
Robin, Zoro, Luffy, and Usopp riding over the sea of flames.
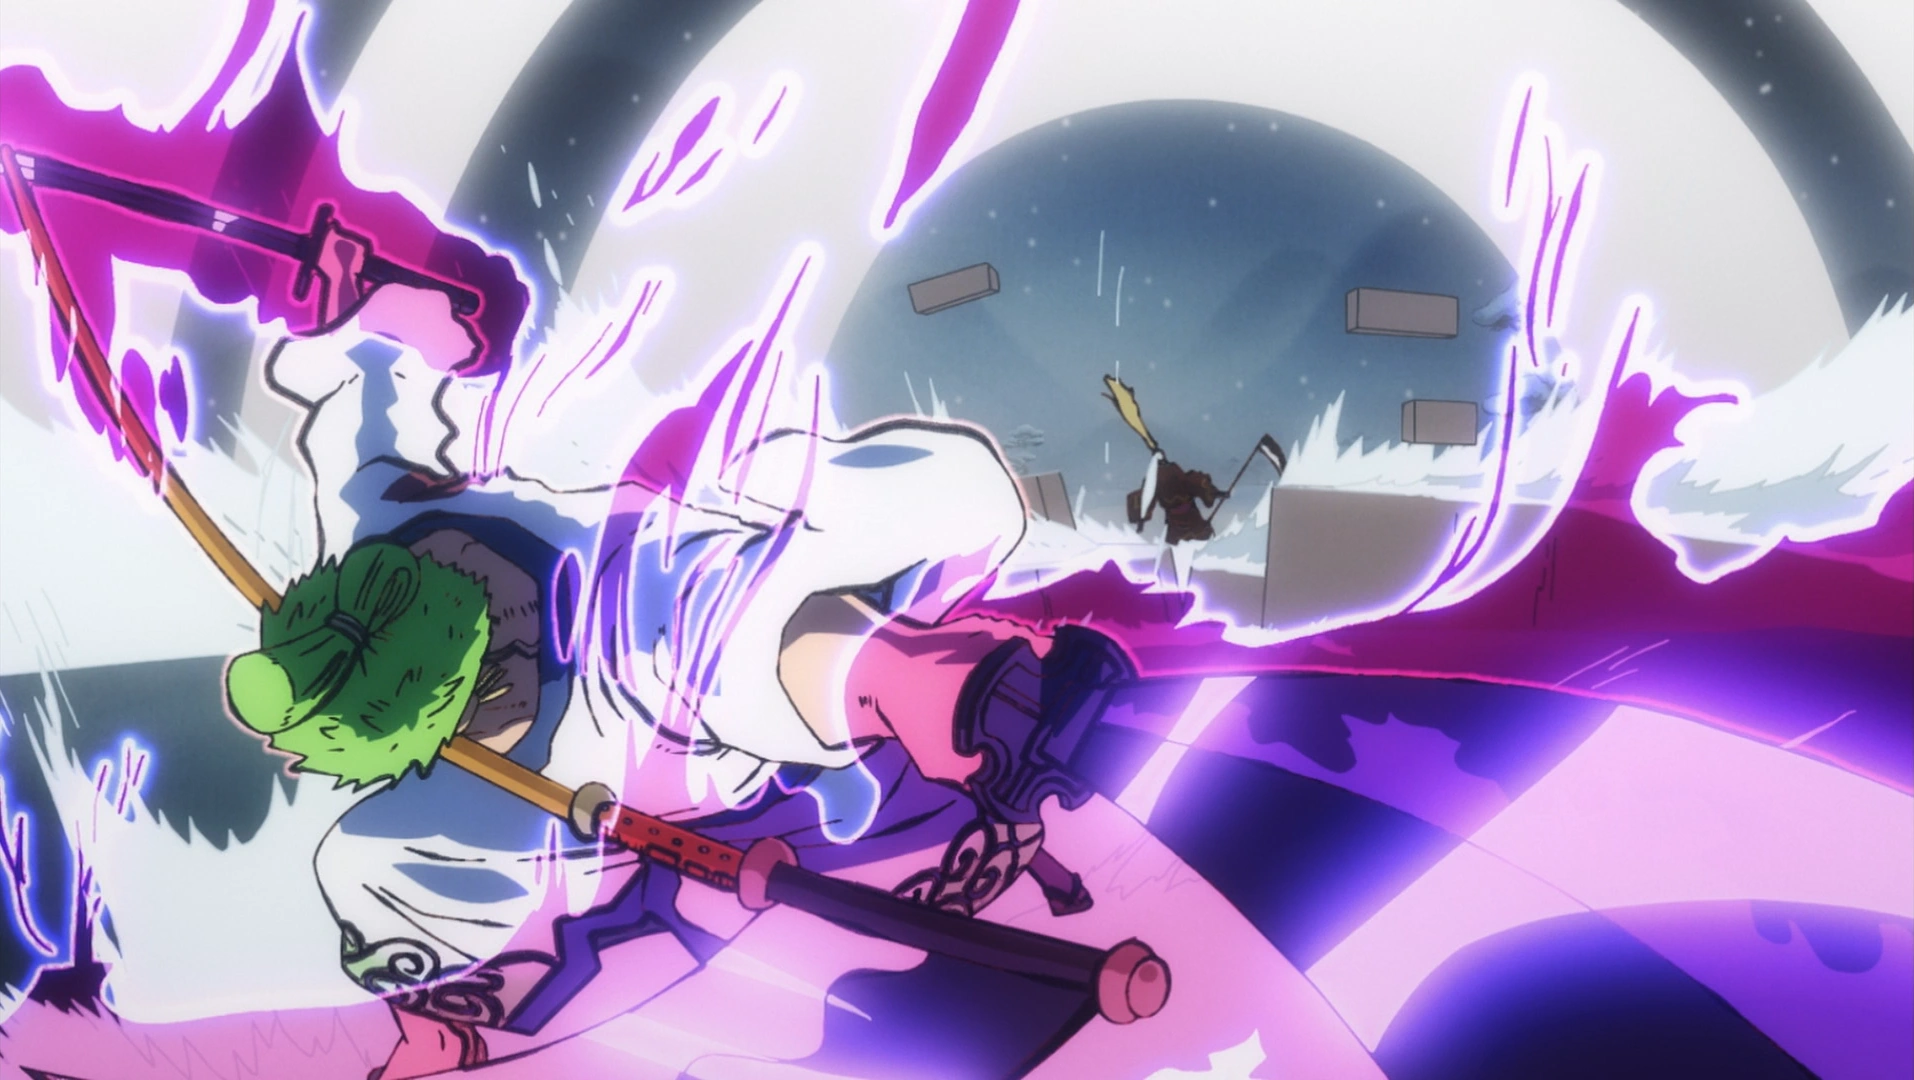
Soon after entering the New World, the crew spots an island surrounded by a sea of flames. The Straw Hats then receive a distress call from someone who seems to be in trouble and mentions a samurai attacking and killing them, before the broadcast cuts out. Zoro asks Brook about the samurai, who answers that samurai are the swordsmen of Wano Country, who have a closed-door policy to outsiders and are not affiliated with the World Government.[21]
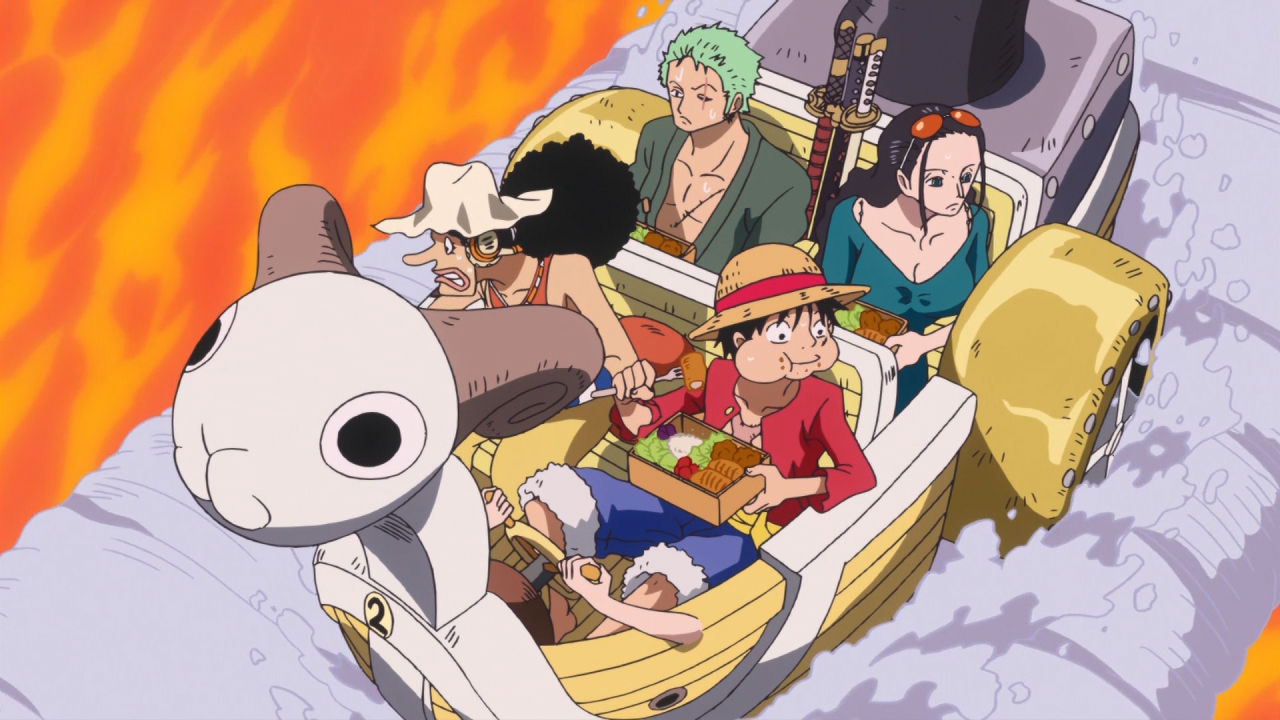
Later, the crew draw straws on who to be the landing party. Zoro, Usopp, and Robin all draw the red straws and then accompany Luffy to Punk Hazard. Nami makes a safe road over the sea of flames for them out of clouds, as Zoro and the rest snack on the bentos Sanji made them. Acting on a threat from an earlier argument, Sanji had slipped razors & poison into his meal but Zoro merely crunched away, as they had no effect on him. Zoro bugs Usopp about returning to his cowardly ways and not eating, himself unaffected by the danger present. As they set foot on land, they come to an iron gate walled up. Zoro slashes the gate down, letting them open. As they explore the island, they are affected by the heat as Zoro and the others strip down from the heat of the flames. They come to a city, finding it blazing-hot with most of the buildings melted. Looking at the structures, Robin deduces the buildings to be a former government base. As they begin to explore, they stumble upon a massive skull bigger than a giant's that had perished during this catastrophe.[22]


Zoro, Luffy, Usopp, and Robin encounter a dragon.
Feeling a presence nearby, they are surprised to encounter a dragon, a monster that Zoro had previously believed to be a myth. The group engages the dragon in battle. Eventually, with a combined effort from Usopp and Luffy, Zoro manages to cleave off the dragon's head. The group then discovers a pair of talking dismembered legs stuck to the dragon's head, which take off in pursuit of a Warlord.[23]
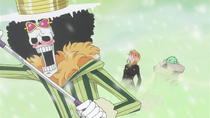
After the group cuts up and eats the dragon meat and takes the rest with them, they continue their expedition. As Luffy plays with the legs, pretending to be a centaur, Zoro draws the group's attention to a remarkable sight: a lake separating the HOT half of the island from a COOL half. Usopp then sights a humanoid figure with wings.[24]


Zoro stands nearby as Usopp reveals his new Pop Green.
Luffy's group then receives a call from Brook, who informs them that the Sunny has been taken to the COOL side of the island and that the other Straw Hats went missing. After Luffy and Robin defeat two centaurs, the group then decide to go to the COOL side of the island. To cross the lake, Usopp forms a boat from Pop Greens. While the group rides on the boat, the centaur that Luffy had just fought jumps after them and informs his boss that the pirates are heading his way. The four Straw Hats then see a group of centaurs waiting for them on the other side. The boss spots Zoro and thinks that he was the samurai who attacked their comrades. The centaurs then fire their bazookas at the water around the boat, capsizing it and leaving Usopp and Zoro to hold up Luffy and Robin. Zoro moves to attack the centaurs, but is instead dragged underwater by sharks. The centaurs prepare to attack the Straw Hats again, but they are stopped by Brook, giving Luffy, Zoro, Robin, and Usopp enough time to escape the lake. After emerging from the freezing water, they plan on stealing coats from the centaurs. After defeating them and stealing their coats, the group uses Brownbeard as transportation to Vegapunk's former research institute. They soon arrive at the scene where Law and Smoker just fought.[25]
After Luffy talks to Law, the group quickly gets away from the Marines and meets up with Sanji, Nami, Chopper, Franky, and some of the children that were held prisoner in the research institute. They then take shelter in the back side of the institute. The Straw Hats then tie up Brownbeard and bring each other up to speed on the current situation. After interrogating Brownbeard, they learn about a man known as Caesar Clown. Kin'emon later leaves the group to find his torso and Sanji (in Nami's body) and Brook volunteer to go search for him while having perverted thoughts. Nami makes Zoro go with them to ensure that they will not do anything indecent.[26]
A Weapon of Mass Destruction

Zoro, Sanji, and Brook are attacked with KYP gas.
Zoro's group later sees the Yeti Cool Brothers' massive footprints and decides to follow them. When they reach the edge of a cliff, they encounter the yetis. The brothers fire KYP bullets at the group, knocking them out and sending them falling off the cliff towards an icicle trap. Fortunately, Zoro destroys the trap before falling unconscious. After Sanji kicked Zoro and Brook to wake them up, they then walked and stumbled on a frozen Kin'emon by accident. After learning that Kin'emon's torso has fallen into the lake, they go to the lake to retrieve it. They then run into Brownbeards' men, but the centaurs choose to run instead of fighting. When they are close to the lake, Zoro then noticed a mountain he did not remember from the previous time he was there. Zoro, Sanji, and Brook then stare at the slime and comment that it is doing something mysterious.[27]
As Smiley continued to shoot itself over the lake, Brook tells the group that he once read a book about the slime, and that it melts away women's clothes. Zoro notices that the fish are surfacing on the lake, realizing that they have been poisoned by the slime's toxins. As Sanji jumps into the lake to find Kin'emon's torso, Zoro and Brook try to fend off the Smilies close to their position.

Smiley chasing the Straw Hats and Kin'emon.
Zoro watches as Brook tries to attack the slimes which releases poisonous gas with each hit. Zoro tells Brook that cutting is no use and should eat it instead. Once Sanji resurfaces, he yells at Zoro and Brook for not doing something about the slime, to which he simply states that attacking it did not work out. Zoro then watches as Kin'emon uses his Foxfire Style to cut the slimes as well as the fire caused by the subsequent explosion. Impressed by Kin'emon's performance, he then claims that the samurai's swordsmanship had sparked his interest.[28]
Zoro is later seen fleeing from Smiley along with Sanji, Brook and Kin'emon. He then watches with the others as the slime begins to change its shape. Resuming its attack again, Zoro and the others begin to run again, deciding to head for the research institute to find Momonosuke. As they run from Smiley, they come across the giant piece of candy left by Caesar for Smiley, and a small dragon made by Vegapunk. They then see a screen appear with Caesar on it but choose to continue running.[29]

Brownbeard and the others crashing into Caesar's lab.
After witnessing Smiley exploding, Zoro, Sanji, Kin'emon, and Brook run quickly away from the poisonous cloud. They see the small dragon flying away from the poison cloud, and Zoro proposes the idea for them to get on its back and fly away. Struggling to catch up to it, Sanji is able to rush ahead after being motivated by his perversion. He then catches the dragon, allowing the group to finally ride it. Eventually meeting up with Nami, Usopp, and Brownbeard, the two groups turn their attention to Caesar's lab where Zoro and Kin'emon are able to cut down the iron shutter, allowing them to enter.[30]
As a result of cutting the iron shutter, the poisonous gas is then able to flow in. The G-5 Marines are able to plug the hole with boards and they blame Zoro and Kin'emon for putting everyone in danger. They prepare to arrest the Straw Hats and Brownbeard and Zoro is getting ready for a fight. Law interrupts them and then tells everyone present about a way off the island but will have two hours to escape. The groups then split into three teams with Zoro going with Kin'emon, Nami, Usopp, and Sanji while the G-5 Marines goes with Tashigi. Usopp tells Zoro of Luffy's earlier defeat at the hands of Caesar. Zoro then mentions about how his group were beaten by the Yeti Cool Brothers and comments on how they cannot let their guards down anymore. While Luffy goes after Caesar, Zoro yells at him, telling him not to be careless and reminds him that they are in the New World.[31]
Zoro, Brook, and Kin'emon fighting the G-5 Marines.
When the G-5 Marines attempt to capture the Straw Hats, they are repelled by Zoro, Kin'emon, and Brook's three-way attack. Tashigi stops them from fighting any further and allows the Straw Hats to continue on their way. One of Caesar's henchmen fires a cannon at the wall of Building A, allowing the gas to enter. As the gate exiting Building A is closing, Zoro and the others then make a dash for it. They manage to escape to the passageway to Building B before the gate seals completely.[32]
Brownbeard, Kin'emon, and Zoro's group go on ahead through Building B, leaving Tashigi and the Marines to mourn the ones who did not make it. After attacking Tashigi's group, the small dragon goes after the group riding on Brownbeard. Zoro, lying on Brownbeard's back, appears unfazed by the fire the dragon is breathing, and merely comments that it is more dangerous than the large dragon due to its agility.[33]
After the dragon's defeat, the group then find Chopper (in Monster Point) trying to prevent the children from getting their candy. Regardless of his efforts, the children beat him down and run pass him when the Rumble Ball wears off. Zoro, Nami, Kin'emon, Robin, Usopp, and Brook quickly come to Chopper's aid and run after the children to the Biscuits Room. Once they reach there, they encounter Monet. Zoro asks who it is, and Usopp says that it is the bird woman he had seen before. As Monet stabs Robin from behind, Zoro shouts her name out and interferes from Monet attacking further stating she is a Logia user and that he will fight her and tells Robin to handle the rest of the kids as he clashes with Monet.[34]
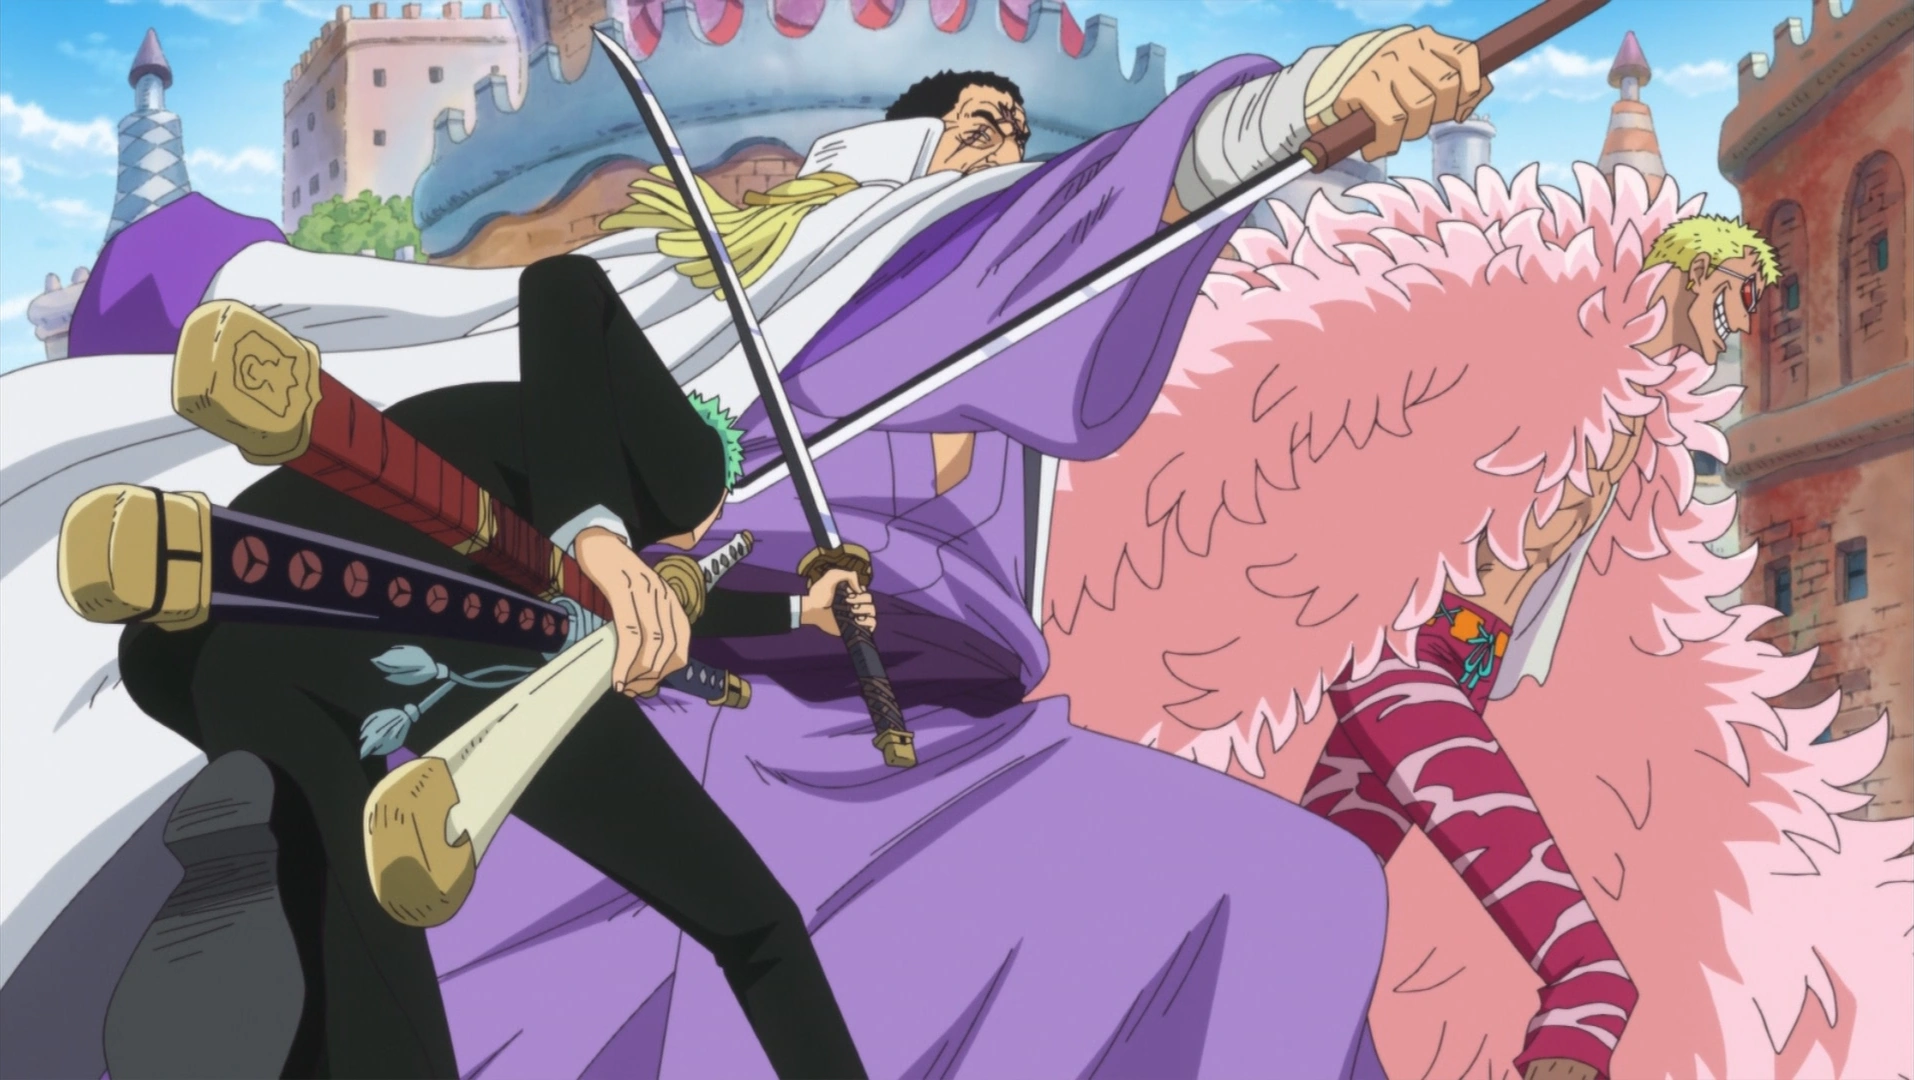
Monet tries to attack Nami, Robin, and Chopper when they attempt to go after the children, but Zoro quickly blocks her. Nami retaliates with a Heat Egg, damaging Monet. She then dives into the snow and stops Nami, Robin, and Chopper from leaving by creating a wall to block their path. After Robin shatters Monet, Zoro slices down the barrier, allowing Chopper, Nami, and Robin to escape the room and go after the berserk children. Monet and Zoro then continue their duel, and Monet comments that oddly enough, Zoro is not on the offensive at all and wonders whether she could defeat Zoro. Sanji, Tashigi, and the G-5 Marines later arrive at the Biscuits Room. Zoro and Sanji then comically yell at each other, despite the serious situation. Tashigi then decides to stay with Zoro and fight against Monet while Sanji and the Marines go find the children.[35]
Zoro slices Monet in half.
Tashigi and Zoro begin to argue over Zoro's dismissive treatment of Monet and his apparent reluctance to cut her, with Tashigi believing this to be another example of Zoro's sexism. Zoro gets mad at Tashigi and then he decides to sit out and let Tashigi handle Monet. After a while, Tashigi starts to lose against Monet. After Monet bites Tashigi in the shoulder, Zoro steps in and cuts Monet on the cheek with Busoshoku Haki. While Monet is shocked, Zoro shows how serious he is and slices her in half with Daishinkan. However, since he did not imbue Haki into his attack, Monet survives. Monet becomes filled with terror knowing that Zoro could have killed her if he chose to. Upon pulling herself together, she tries to attack Zoro in the back only to be struck down by Tashigi. Shortly afterwards, Tashigi berates Zoro for not dealing the finishing blow to Monet when he had the chance, and then she once again gets irritated with him when he tells her that he would have cut Monet if Tashigi did not. After Zoro congratulates her and lets her have the credit, Tashigi gets angry and asks why he talks to her as though he is above her. Zoro simply responds by saying that she is indeed below him, much to her annoyance.[36]
After the battle, Tashigi and Zoro try to get away from the deadly gas. Zoro carries Tashigi over his back while she asks him to put her down as soon as they reach her subordinates. While being carried, she notices his rare sword Shusui, and get excited about it. Zoro tells her to stay still and quiet.[37]
Zoro gets together with the rest of the Straw Hats, the G-5 Marines, the kidnapped children, Law, Momonosuke, Brownbeard, and Kin'emon who has been petrified by the deadly gas. As Zoro tries to help Brook solve Kin'emon's predicament, the group enters a rail cart in an attempt to escape the island. While riding through the escape passage, Zoro defends the cart by slicing the falling rubble.[38] Once they made it outside, they find Franky in his General Franky and two of Doflamingo's subordinates, Buffalo and Baby 5.[39]
Aftermath


Zoro celebrating at the feast.
After the defeat of Buffalo and Baby 5 and the capture of Caesar Clown, Zoro has a feast with everyone else. Later, while Tashigi and her men are taking the children away from Punk Hazard, the Straw Hats leave with Law, Kin'emon, and Momonosuke.[40] While sailing to their next destination, Dressrosa, Luffy tells everyone that he and Law formed an alliance to defeat one of the Four Emperors. Zoro seems eager for the challenge. With everyone gathered around, Law explains to the crew about Doflamingo's connection to the underworld and the plan to decimate Kaidou's forces.[41]
Later that evening, Kin'emon notices that Zoro is holding Ryuma's sword and demands a duel with him, accusing him of defiling the grave of Wano's hero. Zoro denies doing such thing as he fends off Kin'emon's attack. Kin'emon eventually ceases his attack when he learns that his son is bathing together with Robin.[42] On the next morning, everyone reads the news about Doflamingo's resignation from the Seven Warlords. They see that the newspaper also explains about Luffy and Law's alliance as well as the alliance between Kid, Hawkins, and Apoo.[43]
Dressrosa Arc
The Next Objective
After Law contacted Doflamingo to inform him that they will bring Caesar to Green Bit, Zoro had a meal with the rest of the crew while Kin'emon and Momonosuke told them the story about how they were shipwrecked and drifted to Dressrosa, how Momonosuke was separated from his father, and how Kanjuro was captured. The Thousand Sunny later approached Dressrosa.[44]
Zoro and his group incognito.
After arriving at Dressrosa, the group split up into teams. Zoro went along with the team to destroy the SMILE Factory and save Kanjuro. The team saw everything Dressrosa is famous for and stop by at a restaurant to get something to eat after putting on disguises. At the restaurant, they found some thugs taking advantage of a blind man while taking away his money in a roulette. After Luffy called the thugs' bluff, they then witnessed the blind man used some gravity-like ability on the thugs.[45]
After the man left without saying who he was, a commotion started with various people having their possessions mysteriously stolen. A bystander claimed that it was the work of fairies. Zoro got instantly worked up when he noticed that Shusui was missing. Zoro managed to spot the thief holding his sword and immediately gave chase alongside Sanji and Kin'emon. Kin'emon declared that when they capture the thief, he will duel Zoro for the sword.[46]
Zoro eventually lost sight of the thief. When Sanji was distracted by a woman named Violet, Zoro ran off, leaving Sanji behind.[47] Zoro later caught up with the thief and retrieved his sword.[48] Right after that, Zoro saw the thief, a dwarf named Wicca. Zoro then grabbed her as she berated herself for getting caught. Since she sprained her leg, she begged Zoro to take her to the flower field so she can report to her commander. She informed Zoro that the Donquixote Family was on their way to attack the Thousand Sunny. Zoro was about to rush to the shore, but Wicca urged him to carry her to the flower fields first. As she guided him, she berated Zoro for his terrible sense of direction.[49]
Zoro and Wicca later arrived at the Riku Royal Army Headquarters hidden beneath the flower field where Franky and the Thunder Soldier are also present. While Wicca tried to remind Zoro about the Thousand Sunny, he watched Luffy competing in a tournament at the Corrida Colosseum via a video broadcast and was grumpy that he did not get to participate along with Luffy. After learning that Usopp and Robin also have an encounter with the dwarves, Zoro suddenly remembered that he needed to get back to the Thousand Sunny.[50]
Zoro was then seen running back to the Sunny with Wicca beside him. On the way, Wicca told him about Giolla as well as Doflamingo's three strongest subordinates. They then ran into Sanji and Kin'emon.[51]
After learning that Nami's group back at the Thousand Sunny was in trouble, Sanji went to save them. Zoro and Kin'emon stayed behind at the Corrida Colosseum, wondering how to get in.[52] Bartolomeo then spoke to them and offered to help them find Luffy while asking for Zoro's autograph.[53] With Bartolomeo's guidance, Luffy came to them.[54]
Zoro stated his frustration of not being invited to compete in the colosseum. He then informed Luffy that the colosseum was surrounded by Marines, who quickly dismissed the fact despite Kin'emon's shock. They then engage in a conference call with Sanji and Franky's group. After everyone is brought up to speed and learned the true situation on Dressrosa, they gained Luffy's approval to join the revolution. Zoro, Kin'emon, and Luffy then witness the dramatic conclusion of a battle between Doflamingo and Law which raged across Dressrosa and stopped right outside the colosseum. They are shocked to see Doflamingo standing above his opponent and then shoot Law three times at close range.[55]
The Decisive Conflict Against the Donquixote Family

Zoro clashes with Fujitora.
Zoro and Kin'emon then rushed Doflamingo to save Law. Zoro was intercepted by Issho, the blind gambler they had helped earlier. As Kin'emon informed everyone of what was happening, Issho used his ability to push Zoro underground, but the swordsman was able to propel himself and send a flying slash towards the Admiral, which he repelled commenting on it being merciless. After Kin'emon was kicked away by Doflamingo, the samurai informed everyone that the blind gambler is actually a Marine Admiral.
Both Doflamingo and Issho float above their opponents using their abilities, taking Law with them and head towards the palace. After the Marines started pursuing Zoro and Kin'emon, Zoro told Luffy to find the exit. They then heard that the Sunny was under attack by the Big Mom Pirates, who are after Caesar Clown. While Sanji's group continued on to Zou and Franky's group was left in charge of destroying the SMILE Factory, Luffy decided to go to the palace with Zoro and Kin'emon to rescue Law and fight Doflamingo.[56]
After Luffy finally escaped the colosseum, the trio wore disguises to elude the Marines, provided by Kin'emon's ability. Zoro was annoyed that Luffy had been crying nonstop. Luffy then revealed to Zoro and Kin'emon that someone dear to him is still alive.[57]
Zoro, Luffy, and Kin'emon later arrived at the lift that leads to the royal palace alongside the dwarf, Wicca. There, they encountered Viola, who offered to guide them to the palace.[58] After getting acquainted with her and learning about her ties with the Riku Family, Zoro's group was then led to a secret passage. Once inside the passage, Zoro suggested that they use a basket used for lifting supplies and that Luffy should climb up carrying a rock and hang from the chain to act as a counterweight for the basket to move up. He and Kin'emon then sit in the basket before Luffy reached the top.[59]
They were later seen at the palace rampart tower. Viola was about to sneak them in, but Luffy went ahead and smashed his way through the gate. Having alerted the guards, they decided to charge in. Once Zoro, Luffy, and Viola reached the Rampart Tower B-1, they were intercepted by Pica.[60]
Zoro confronts Pica.
After Viola explained about Pica's Devil Fruit power, Pica attempted to crush Zoro's group with the palace walls.[61] Luffy and Viola went ahead while Zoro stayed to battle Pica. While fighting the executive officer, Zoro wondered how he should attack him.[62]
During the time the toys transformed back into their original forms, Pica left the battle and Zoro wondered where he went.[63] He later went outside of the outer wall tower and noticed the commotion happening in the country and continued wondering where Pica was.[64]
The Birdcage
After Doflamingo trapped Dressrosa in his Torikago and Pica relocated the royal palace to the top of the Flower Hill, Doflamingo forced everyone into a survival game and put a price on the heads of a certain group of people. Zoro was included in Doflamingo's hit list, with his two stars giving him a ![]() 200 million bounty. Zoro reunited with Luffy's group and contacted Robin through Den Den Mushi. After Luffy declared that he will defeat Doflamingo and end his game, he grabbed Zoro and Law and pursued Doflamingo.[65]
200 million bounty. Zoro reunited with Luffy's group and contacted Robin through Den Den Mushi. After Luffy declared that he will defeat Doflamingo and end his game, he grabbed Zoro and Law and pursued Doflamingo.[65]
Luffy jumped down from the King's Plateau and they landed in the middle of a crowd of enemies. After a brief scuffle with Senor Pink, Machvise, and Dellinger, the Dressrosa citizens started attacking Zoro and his group. Issho soon arrived to confront them as well. While Zoro clashed swords with Issho again, Pica joined the fray while appearing as a massive stone giant.[66]
When Luffy made Pica angry by laughing at his high-pitch voice, the elite officer threw a colossal punch. Luffy and Zoro ran from it, with Zoro chastising Luffy for laughing at his voice, but simultaneously failing to suppress his own laughter, much to Law's annoyance. The impact of the punch sends Luffy, Zoro, and Law flying to the square in front of the colosseum. They are soon joined by those who also wished to fight Doflamingo: Cavendish, the Chinjao Family, Hajrudin, Elizabello II, Dagama, Abdullah, Jeet, Orlumbus, Ideo, Suleiman, and Blue Gilly. Zoro commented that Luffy made strange friends and also commented on their big ego when each of them said that they will defeat Doflamingo themselves. After Ucy joined the group, Zoro and his allies then marched towards the royal palace and began to fight against Pica.[67]
When Pica attacked, Chinjao and Elizabello II shattered his stone arm, enabling Zoro and his allies to move forward. Pica prepared to attack with his other arm and Zoro informed Chinjao and Elizabello II that attacking Pica's stone body is useless. Pica attacked with his other arm, causing Luffy's allies to fall back. As this happened Zoro, Luffy, Law, Abdullah, Jeet, and Ucy managed to jump on his arm and started climbing on it. Pica soon noticed them after regenerating his shattered arm, he prepared to attack Luffy again. Luffy then responded by shattering Pica's stone head with Gomu Gomu no Grizzly Magnum. After Luffy shattered Pica's stone head, Zoro discovered Pica's real body, which appeared in front of the group. Pica took out his sword and tried to attack Ucy carrying Luffy's group but Luffy carried the bull and evaded the sword. Pica tried to strike again, but Zoro intercepted him and initiated another battle with the executive.[68]
As the battle went on, Zoro was able to fight Pica without much difficulty.[69] Zoro and Pica later noticed Robin, Rebecca, and Bartolomeo approaching from the sky with the assistance of Yellow Great Rhinoceros Beetles. Pica prepared to attack the trio with the stone statue, but Zoro used Senhachiju Pound Ho to strike him, halting Pica's attack and injuring him in the process. Zoro then explained to Pica that he is the man who will become the greatest swordsman in the world.[70]
Enraged that Zoro's interference allowed Rebecca's group to pass him, Pica charged at Zoro again, declaring that he would not be allowed to leave alive.[71]
Pica eventually sent Zoro crashing into the second level of the New King's Plateau though Zoro did not sustain any serious injuries. Some of Doflamingo's grunts were about to attack Zoro, but Orlumbus arrived and repelled them. After thanking Orlumbus, Zoro ran through the second level and was quickly confronted by Pica again. The swordsman then angered Pica by making fun of his laugh. Machvise then noticed Zoro and prepared to crush him with Hakai no Senton Vise. Before Machvise landed, Hajrudin delivered Gungnir to the officer and send him flying to the ceiling of the Torikago. When the giant collapsed from his injuries, Zoro promised him that the Torikago would be gone by the time he woke up.[72]
Elizabello II later offered some assistance. Zoro appreciated the offer but told him to save his King Punch for later.[73] Zoro then witnessed Lao G's defeat and took note of Sai's destructive power.[74]
After Pica went to Flower Hill to speak to Kyros and Rebecca following Diamante's defeat, he returned to the second level to fight Zoro and attack the wounded. Zoro reminded him that he was his opponent and while fighting with him, Pica asked who it was standing on the Old King's Plateau. Zoro told him it was the rightful king of Dressrosa, enraging Pica. Pica inhabited the statue and made his way towards the Old King's Plateau. Zoro quickly went over the options he had to stop Pica and eventually made the decision to leap into the sky and cut him in half.[75]

Zoro defeats Pica.
Zoro prevented Elizabello from using his King Punch just yet and asked him to wait for two minutes while he dealt with Pica. Running up to Orlumbus, Zoro had him use his Teitoku Killer Bowling to propel him toward Pica, who was preparing to crush Riku Doldo III. Imbuing his swords with Busoshoku Haki and preparing Santoryu Ogi: Ichidai Sanzen Daisen Sekai, Zoro proclaimed that there was nothing in this world that he could not cut before bifurcating Pica's stone form with Ichidai Sanzen Daisen Sekai. He proceeded to cut the top half of the stone in half to determine where Pica was, only for Pica to emerge on his own and armor his entire body with Busoshoku Haki before claiming that Zoro has not won just because he has destroyed the stone body. However, Zoro notes that the end result of this battle depends on whose Haki is stronger before cutting down Pica in midair with Ichidai Sanzen Daisen Sekai. After Elizabello used his King Punch to blast away the rest of Pica's stone body, Zoro noted that he was just in time.[76]
Hanging on to a wall, Zoro examined his sword for any nicks and was satisfied to find no marks on his sword. He was then pulled up by Usopp, at which point the latter and Kin'emon praised him for his display of strength. Zoro told them to save their praise for when the Torikago was taken down, as it was proof that Doflamingo still had not been defeated.[20] As Doldo, Tank, and the citizens were leaving the Old King's Plateau, Zoro heard about Law's defeat from Viola.[77]

Zoro, Kin'emon, and Kanjuro push back Torikago.
Zoro then watched nervously as Torikago started to shrink.[78] As he left the Old King's Plateau, Zoro informed Kin'emon and Kanjuro about his intention to stop Torikago.[79] While running past Franky, Zoro informed him of his plan to buy time.[80] Once he and the samurais reached Torikago, Zoro hardened his swords with Haki and attempted to push Torikago back despite the samurais' objection. Zoro then angrily asked them to help him instead of doing nothing.[81] Zoro continued pushing back Torikago with his swords as many others joined in. Once Gatz announced Luffy's promise to defeat Doflamingo with one punch continued pressing, Zoro hoped that Luffy could fulfill his promise, knowing that they could not keep Torikago back forever.[82] When Luffy regained his strength after being worn out for ten minutes, Zoro smiled.[83]
Once Luffy finally defeated Doflamingo, Zoro and the samurais witnessed the collapse of Torikago. Zoro continued smiling as everyone on Dressrosa celebrated Doflamingo's downfall.[84]
After Doflamingo's Defeat

The Straw Hats and their allies rest at Kyros's house.
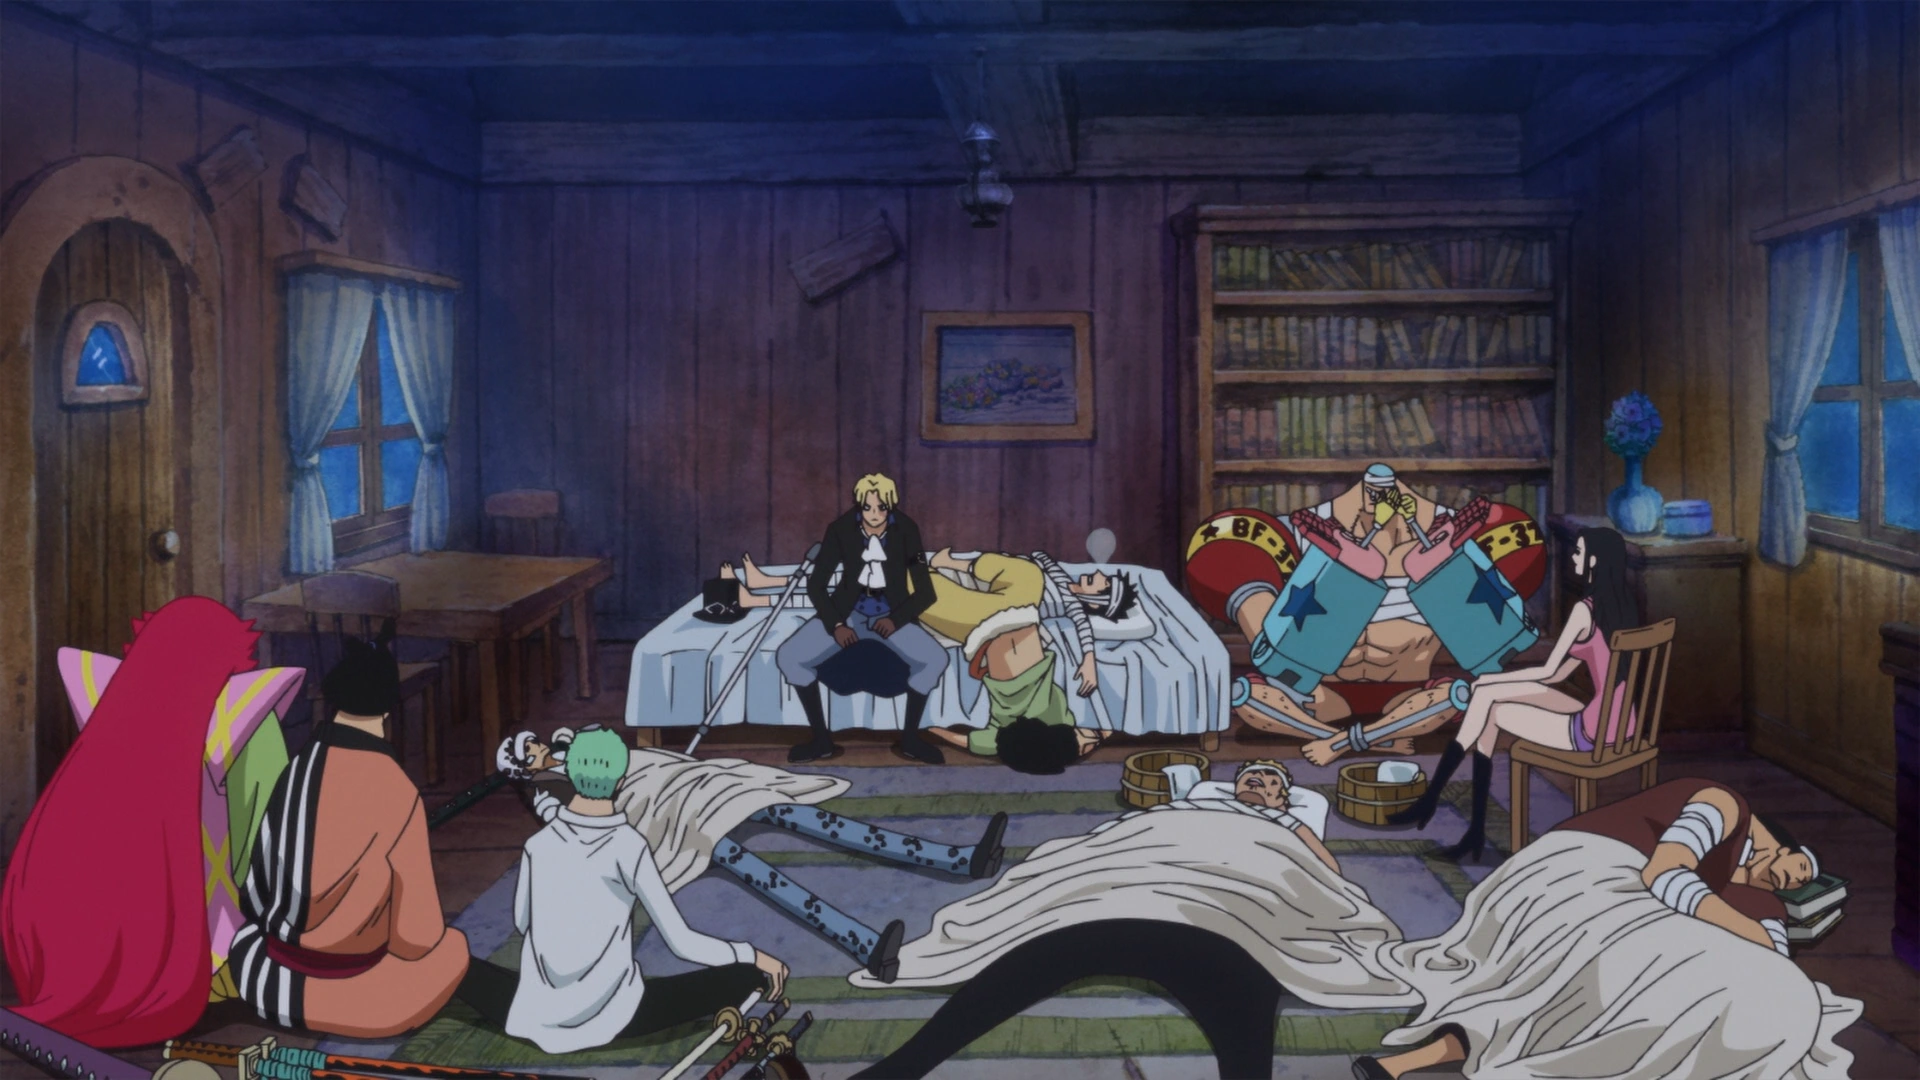
Zoro and his group were later seen resting and recovering in Kyros' old house. Zoro then listened to Sabo's story. Before Sabo departed, he gave Zoro a vivre card for Luffy.[85]
Three days after Doflamingo's defeat, Zoro and the other Straw Hats continued with their recovery. They were eating a meal as they heard the rumor about Rebecca's father. Bartolomeo then entered the house and informed them that the Marines were mobilized to pursue the Straw Hats. He also explained that there is an escape route planned for them. When the Marines were about to storm Kyros' house, Zoro and the others fled.[86]
Zoro's group then went to the eastern port. While waiting for Luffy, they saw Issho approaching.[87] When Issho prepared to strike all of Luffy's allies with all the rubble from Dressrosa, they quickly fled to the escape ship. At that moment, Luffy arrived and attacked Issho.[88]
As Zoro watched the battle between Luffy and Issho, Zoro wondered why Luffy was announcing each of his attacks. After Luffy was blown away and caught by Hajrudin, Zoro prepared to fight the admiral, but Bartolomeo stopped him, saying that it was not the right time or place. The Straw Hats and their allies quickly fled across a bridge leading to a gigantic ship in the distance. Issho prepared to drop the rubble on them but was obstructed by the Dressrosa citizens who were pretending to chase after the pirates.
The Straw Hats and their allies eventually reached Orlumbus' flagship, the Yonta Maria. After boarding the ship, the following pledged their allegiance to the Straw Hats: Cavendish of the Beautiful Pirates (including Suleiman), Bartolomeo of the Barto Club, Sai of the Happo Navy, Ideo of the XXX Gym Martial Arts Alliance (including Blue Gilly, Abdullah, and Jeet), Leo of the Tontatta Tribe, Hajrudin of the New Giant Warrior Pirates, and Orlumbus of the Yonta Maria Grand Fleet.[89]

The Straw Hat Grand Fleet celebrates their formation.
When Luffy was asked to drink a sake cup to complete the agreement for an alliance, Luffy declined, much to the others' shock. While Luffy was explaining that they can do whatever they want, Zoro drank from Luffy's cup. Thanks to him, Luffy found his cup empty when Sai, Bartolomeo, Leo, Cavendish, Ideo, Orlumbus, and Hajrudin sat down and drank their sake cups. Once the Straw Hat Grand Fleet was formed, they held a feast to celebrate their victory over Doflamingo.[90]
After the feast, each of the leading allies received Luffy's vivre card and parted ways. Bartolomeo then brought the Straw Hats, the samurais, and Law to his ship, the Going Luffy-senpai. After Zoro noticed the Straw Hats' increase in bounty from a newspaper, Bartolomeo proudly showed Luffy's group their new wanted posters. Upon seeing his, Zoro gleefully asked if there was any alcohol around so that he could celebrate.[91]
Whole Cake Island Saga
Zou Arc
Encounter with the Mink Tribe
During a hailstorm, Zoro was shocked to learn that the Barto Club does not have a navigator, lack experience in sailing, and they usually called a granny who gives them useless advice. Therefore, Zoro, the other Straw Hats, the samurais, and Law needed to protect the ship. After one week of traversing through the dangers of the New World, the ship finally arrived at Zou.[92]
After finding the Thousand Sunny, the Barto Club bid Luffy's group farewell. Proceeding to search for Sanji's group, they climbed the giant elephant's left hind leg with a dragon that Kanjuro conjured. After the samurais explained that they were also searching for their ninja comrade, Raizo, the group saw something dropping towards them.[93]
The thing that was falling towards them happened to be a monkey. The monkey hit Kin'emon and Kanjuro, causing them to fall off the dragon. Despite being separated from the group, the samurais assured the Straw Hats that they were alright and will catch up to them eventually. The rest of the group considered turning back for them, but after they saw the dragon struggling to climb, they decided to continue towards the top. Once they reached the top, the dragon turned back into a drawing while Zoro and Law remained unconcerned about it. They later entered a village and Luffy ran ahead of the group. While exploring the village, they saw signs of a recent attack. Zoro was then attacked by a rabbit mink named Carrot and they clashed until a dog mink, Wanda, appeared and stopped her.[94]

Zoro clashes with Carrot, a mink.
Right after Wanda interrupted the fight, Zoro wondered what kind of weapon Carrot uses. Wanda and Carrot proceeded to leave in a hurry to deal with an intruder at Whale Forest. Before leaving, Wanda explained to Zoro's group about where to find a "corpse" of their comrade. Zoro and the others thought that Wanda was saying the other Straw Hat members died, but they did not believe that to be true and they continued exploring the island. As they explored the Mink Tribe's civilization, they found more signs of a recent battle.[95]
During their exploration at Kurau City, the group experienced an eruption rain and they fled to higher ground. Once the rain passed, they surmised that it is a daily occurrence based on how the city is built. Right after Usopp spotted Luffy with Carrot and Wanda, Law teleported the group close to their location. Wanda then led them into Rightflank Fortress, where they reunited with Nami and Chopper.[96]
While having a feast with the Mink Tribe, Zoro was annoyed with how the minks wanted to play with him. The group was then reunited with Brook, who explained that Momonosuke was safe but refused to leave his room. He also warned the group not to mention samurai or the Wano Country. Before he could explain the reason, he was interrupted by canine minks. Nami then asked them what to do about Sanji. Since Sanji left a letter, Zoro and Luffy were not too worried, much to Nami's chagrin. Zoro then listened to Nami and Chopper's story about how they escaped the Big Mom Pirates before listening to Wanda's story about how Nami's group saved the Mink Tribe. After hearing that Duke Inuarashi awakened from his coma and wanted to meet Zou's benefactors, Zoro and his group went to meet him. On the way, Wanda began to explain to them about Jack's attack on Zou in more detail.[97]

The Straw Hats visit Inuarashi.
During her explanation, Wanda revealed that Jack was searching for a Wano ninja known as Raizo. After Wanda finished with her recollection, Brook explained to his crew the reason why they should not mention samurai or the Wano Country. They then arrived at the duke's home where they were introduced to Shishilian, who expressed his gratitude to the crew. After entering the duke's home, they heard about a weapon Jack used against the Mink Tribe.[98]
After Wanda recalled the devastation caused by Jack and the Mink Tribe's salvation, the Straw Hats decided to visit Nekomamushi and the Guardians. They then traveled to Whale Forest with Wanda and Carrot.[99]
After hearing about the circumstances concerning Sanji's departure from Zou, Zoro appeared indifferent about it, much to Chopper's annoyance. Zoro then reminded his crew that as much as destroying the SAD factory on Punk Hazard angered Doflamingo, destroying the SMILE Factory at Dressrosa angered Kaidou. He went on explaining that Kaidou was also targeting the samurai for some unknown reason, and they should be expecting a confrontation with the Beasts Pirates sometime in the future. Zoro and Nami then argued about whether or not Sanji was at fault for leaving. After Luffy decided to find Sanji, they arrived at the Whale Forest.[100]

The Straw Hats go off to see Nekomamushi.
Zoro listened in on the conversation between Luffy and Pekoms as Pekoms explained in detail about Sanji's predicament. Luffy then ran out to look for Chopper and found Zoro sitting on a bench. Luffy assumed that Zoro was also worried about Sanji, much to his annoyance. Nekomamushi arrived and greeted Luffy and Zoro. Zoro, his crew (except Franky, Robin, and Brook), and the Heart Pirates then partied with Nekomamushi and his subjects.[101]
Revelations and a New Alliance
On the next morning, Zoro and his group heard a bell ringing and realized that Kin'emon and Kanjuro had arrived. They quickly rushed to find them, fearing what would happen if the Mink Tribe meets the samurais. The Straw Hats managed to intercept Kin'emon, Kanjuro, and Momonosuke just as they arrived at Kurau City and tried desperately to keep them hidden. However, as Nekomamushi and Inuarashi were fighting, Kin'emon and Kanjuro revealed themselves. Contrary to what the Straw Hats expected, the Mink Tribe welcomed the samurai and revealed that Raizo is safe. The Straw Hats were stunned to learn that the minks knew about Raizo all along and went to great lengths to keep him hidden despite the abuse they suffered.[102]

The Straw Hats meet Raizo for the first time.
The Straw Hats were further shocked when they learned that Momonosuke was not Kin'emon's son, but rather was the heir to the daimyo of Kuri. However, Zoro and Usopp became enraged when Momonosuke hugged Nami, and she was fine with it due to deducing that his father was wealthy. Inuarashi and Nekomamushi then led the Straw Hats, Law, and the samurai to Raizo's location, a secret cave inside the whale-shaped tree.[103]
When Robin deciphered the red poneglyph hidden inside the Whale Tree, Inuarashi then explained to the Straw Hats about the four Road Poneglyphs and they listened in anticipation as he revealed how they can lead to Laugh Tale and Nekomamushi revealed that Kaidou and Big Mom each possessed a Road Poneglyph. The Straw Hats were surprised when Nekomamushi revealed that Momonosuke's ancestors created the poneglyphs. However, the samurais explained that Momonosuke never inherited the knowledge of the poneglyphs due to the execution of Oden at the hands of Kaidou and the shogun of Wano. When Zoro asked why Oden was executed, Kin'emon revealed that Oden was part of Roger's crew and had been on Laugh Tale with him as well as the Beasts Pirates' objective in obtaining the secret that Oden knew.[104]
Zoro then realized the reason why Doflamingo and Kaidou were after the samurais. However, they explained that Oden never revealed the secret of the world to them before he died. He then watched Luffy formed an alliance with the samurais and the Mink Tribe in order to defeat Kaidou and the shogun of Wano.[105]
Zou begins shaking due to Jack's attack.
Right after they left the secret room, Zoro and the others learned that Inuarashi and Nekomamuhi traveled with Oden and had been on the ships of both Whitebeard and Roger. The alliance decided to split up to accomplish different tasks and meet up again at Wano. However, before they could start their operation, they felt Zou shaking and heard Zunesha crying.[106] As everything shook around them, they witnessed Luffy and Momonosuke's ability to hear Zunesha's voice. They then heard from Momonosuke that Jack returned to Zou and started attacking Zunesha. On Momonosuke's command, Zunesha sank Jack's fleet with one blow. With the threat of Jack ended, everyone became calm again.[107]
While the Ninja-Pirate-Mink-Samurai Alliance prepared to get on with their missions, Zoro decided to accompany Kin'emon's team. As the Sanji Retrieval Team departed from Zou, everyone, except for the Straw Hat members left behind, were shocked when Luffy jumped off Zunesha with his party.[108]
Wano Country Saga
Wano Country Arc
Zorojuro the Ronin
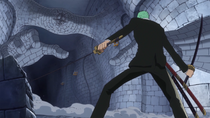
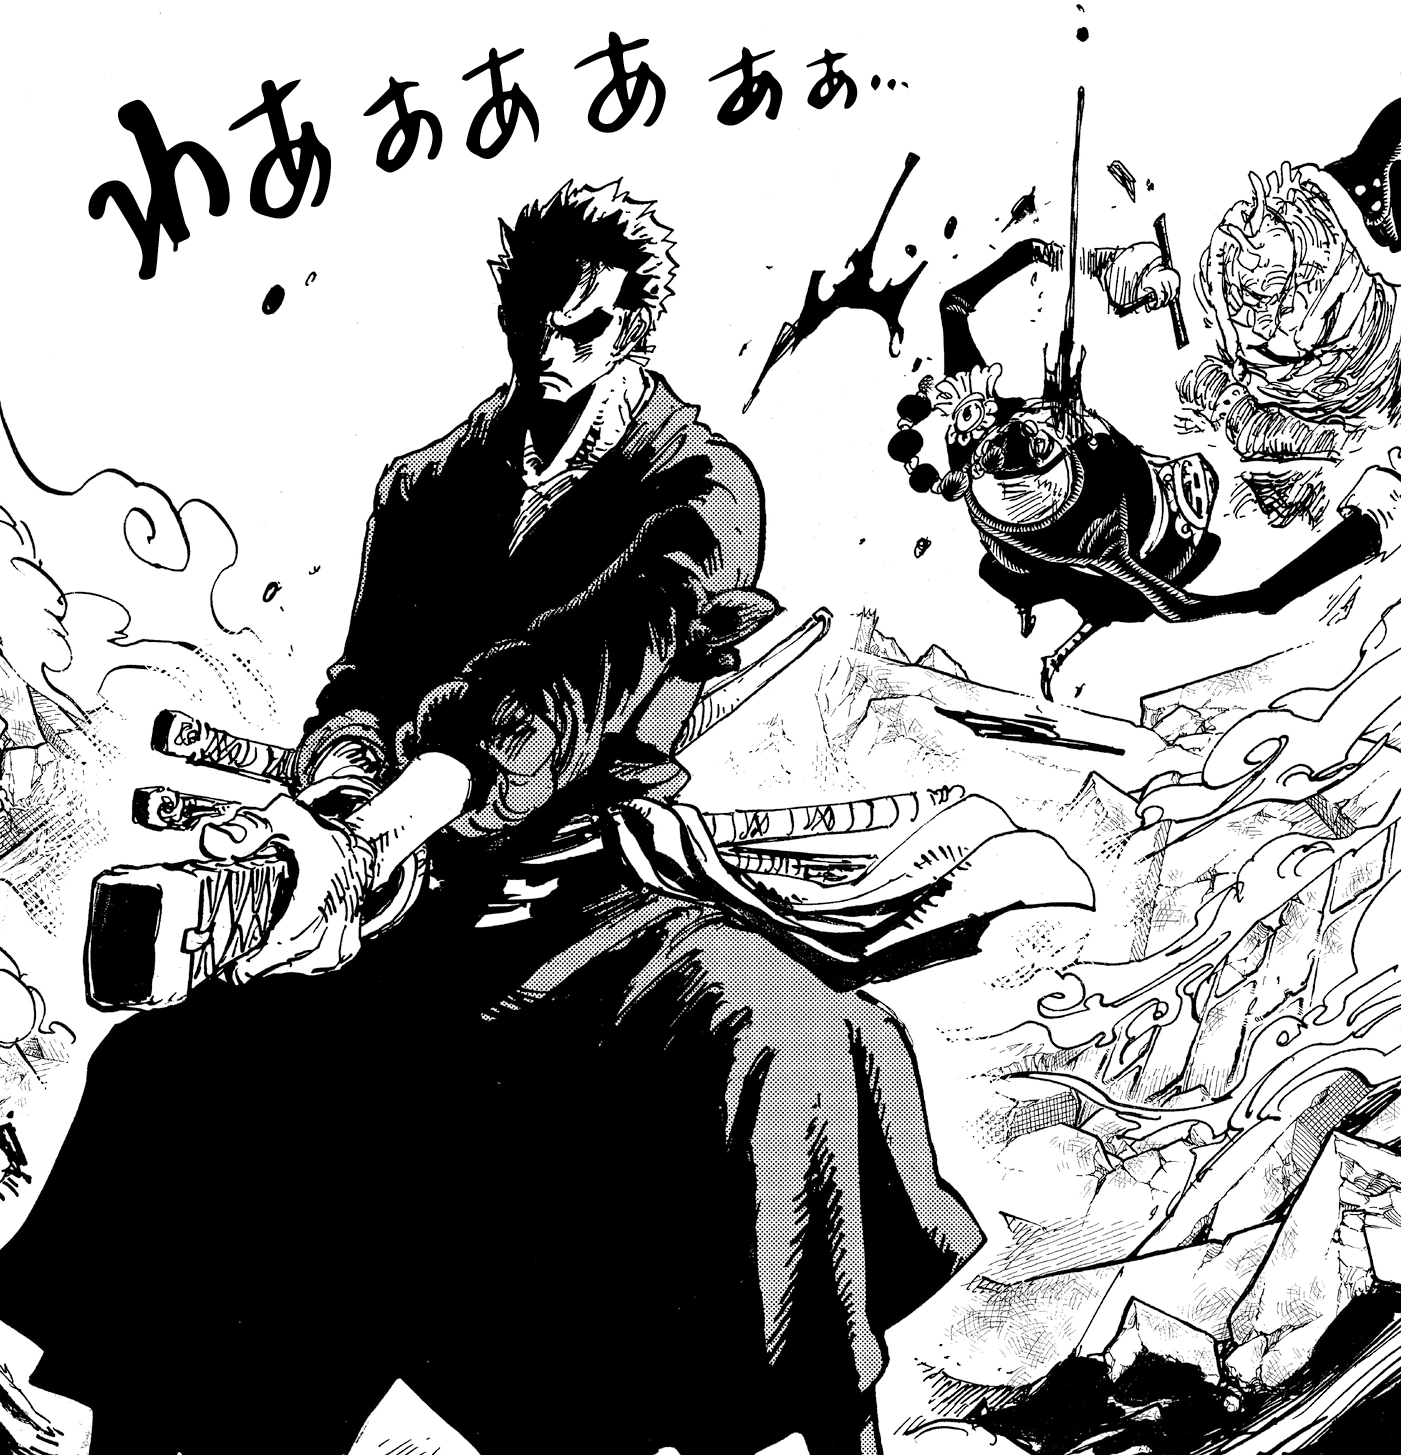
Upon arriving at Wano, Kin'emon instructed the Straw Hats and Heart Pirates to blend in with the populace as they readied their plot to recruit allies for the raid on Onigashima on the day of the Fire Festival. Zoro adopted the alias "Zorojuro" and wandered the streets of the Flower Capital as a ronin. However, he was then arrested under the accusation of committing murders on the streets at night. He was brought before the magistrate Toyama Tsujigiro, who sentenced him to death by seppuku and confiscated Shusui. However, Zoro then noted the smell of blood on Tsujigiro and realized he was the murderer. Zoro then unleashed a flying slash that cut down Tsujigiro, as well as sliced through much of the structure he stood on.[109]

Zoro fends off Hawkins' assault.
Now a wanted man, Zoro escaped from the Flower Capital and lived as a vagabond, eating the animals that roamed the vast wastelands. One day, he encountered a platoon of Beasts Pirates chasing a villager named Tsurujo, and took down the pirates. A nearby Luffy then called out to Zoro, and the two crewmates reunited. However, their reunion was quickly interrupted by the arrival of another Beasts Pirates platoon led by Basil Hawkins.[110] The two groups began fighting and Zoro slashed at Hawkins, but the damage was transferred to one of the Super Rookie's subordinates due to his Devil Fruit power. Luffy and Zoro were then pulled away by the komainu Komachiyo in order to get treatment for Luffy's sick companion Tama. Hawkins covered himself in straw and fired large nails, some of which struck Zoro and injured him; however, Zoro kept him at bay with a sword slash. Tsurujo then introduced herself to Luffy and Zoro, and said they could go to her house where she would brew a treatment for Tama.[111]
The group went to Okobore Town, where a woman named O-Kiku bandaged Zoro's wounds.[112] A sumo wrestler named Urashima was courting Kiku, but ran off after encountering Zoro.[113] After treating Tama, Tsurujo told Zoro and Luffy about the destruction inflicted on Wano by Kurozumi Orochi's shogunate. Zoro then intercepted an arrow fired by the Beasts Pirates Gifter Batman at Tsurujo, and as he was fending off more arrows, Tama was then kidnapped by the Gifter Gazelleman. Kiku immediately took a sword and mounted Komachiyo to pursue them, and Luffy pulled himself and Zoro up on the animal as well. As they got moving, Kiku revealed that she was a samurai.[114] The trio rode Komachiyo to Bakura Town, a place populated with pirates and government officials. They came to a sumo ring where Urashima was competing, and Kiku hid behind Zoro. However, Urashima's subordinates were able to get to her and carry her off, though Kiku responded by cutting off Urashima's topknot.[115] Luffy entered the ring and defeated Urashima, and some Beasts Pirates then arrived to confront the trio. As Zoro, Luffy, and Kiku fended them off, the Shinuchi Holed'em then arrived with Tama as his hostage.[116] Luffy proceeded to knock out Holed'em and rescue Tama, while Zoro seized a cart full of fresh food and had Komachiyo pull it out of the town.[117] They were joined by Law, who berated Zoro for getting into trouble once again. They successfully made it back to Okobore Town with Tama and the food in tow, and the impoverished citizens were delighted to be able to consume fresh food and water.[118]
Meeting Tonoyasu and Hiyori
Law told Zoro and Luffy to go with him to the ruins of Oden Castle on a nearby mountain, and they were joined by Kiku. However, as they rode Komachiyo up the mountain, Zoro inexplicably got lost[119] and ended up wandering to a wharf, where he took a ride on a boat.[120] While sailing, he received a newspaper with the news that Luffy had been beaten by Kaidou, which caused him to recoil in shock.[121]
Zoro ate a lot of sushi and wasabi on his ride, but a man named Tonoyasu paid for it. The two of them then went to an inn, where Zoro won a considerable amount of gambling matches and beat up yakuza thugs who tried to stop him. This caused Tonoyasu to tag along with Zoro for protection, and the two of them walked through Kibi together.[122] Yasu took Zoro to his homeland of Ebisu Town by the Flower Capital, where the residents all smiled and laughed constantly.[123]

Zoro defeats Kamazo.
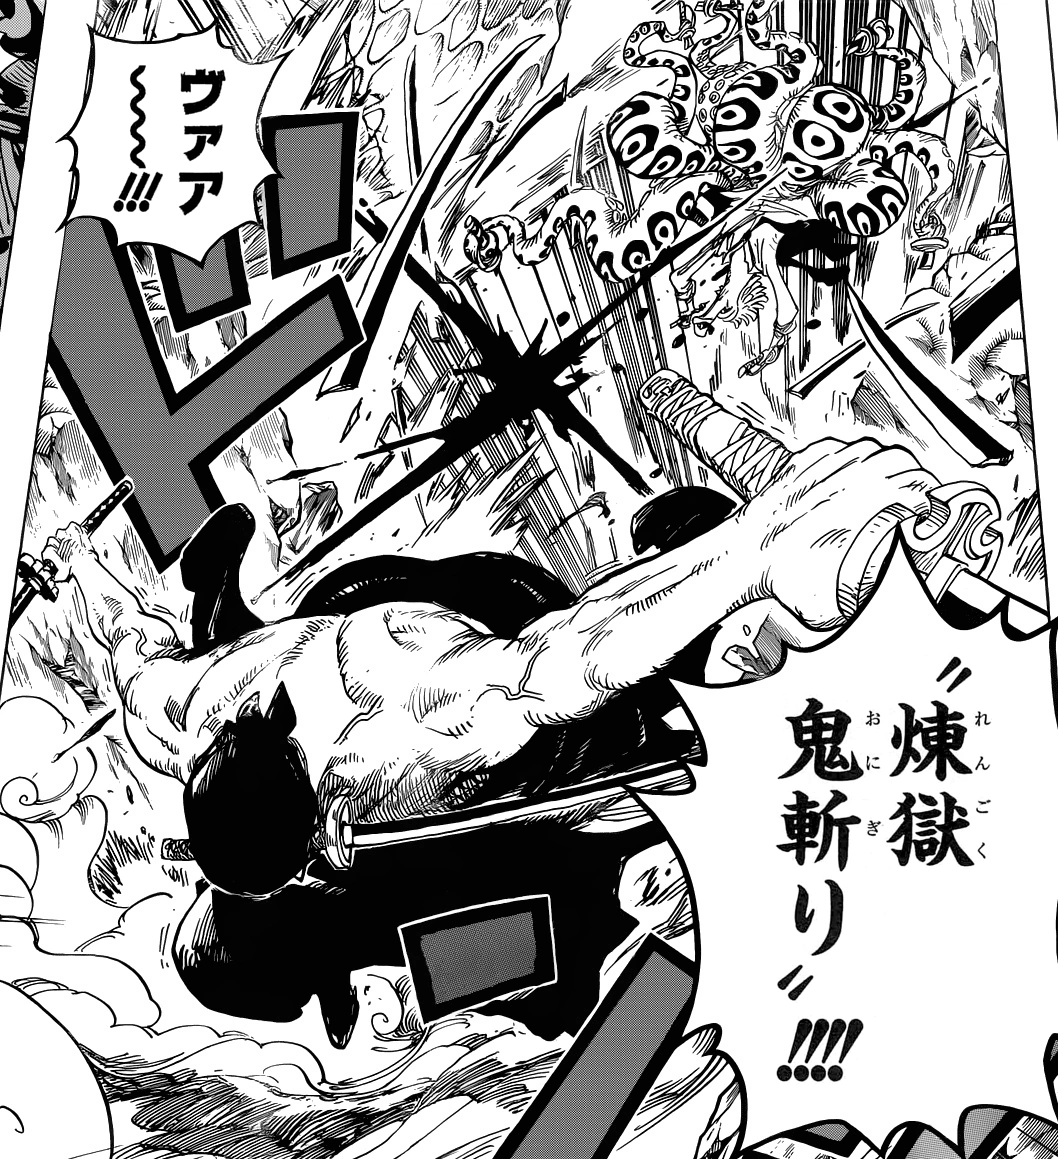
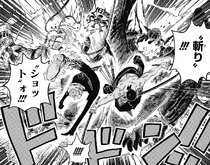
The next day, Shusui was stolen by a man named Gyukimaru, and Zoro chased him all the way to Ringo. They dueled on Oihagi Bridge after Gyukimaru had already returned Shusui to Ryuma's grave, with the bandit not believing that Zoro had obtained the legendary sword rightfully. However, the duel was interrupted when a young woman and Toko came rushing in while pursued by the assassin Kamazo. The woman begged Zoro to help her, and Zoro agreed on the condition of receiving food and alcohol in return. Zoro and Kamazo then engaged in a fierce duel, but Gyukimaru would occasionally jab at Zoro with his naginata while the swordsman was distracted, forcing him to make even more effort to dodge. Eventually, an attack from Gyukimaru distracted Zoro enough to allow Kamazo to impale the side of his chest with a scythe. However, Zoro was then able to rip out the scythe and put it in his mouth in place of Shusui, and he performed Rengoku Oni Giri which cut down Kamazo.[124] He then collapsed and fell unconscious from his bleeding.[125]

Zoro and Sanji save Toko.
Zoro woke up in a house in the Northern Cemetery and found the woman had tended to his wounds. She gave him the food and alcohol that he requested and revealed her relationship to Momonosuke as his sister Hiyori.[126] Zoro then fell asleep, and was woken up the next morning by the arrival of Brook; to his shock, Hiyori had been laying on his chest. Brook revealed that Tonoyasu was going to be executed in the Flower Capital shortly, and Toko, revealing that Yasu was her father, ran off to find him.[127] Zoro, Brook, and Hiyori chased after her, but they arrived at the city right as Tonoyasu, who was actually the former daimyo Shimotsuki Yasuie, was shot to death by Orochi and his forces.[128] Zoro was appalled upon seeing Toko and the Ebisu Town citizens laugh in response to Yasuie's death, but Hiyori then revealed to him that they had no choice as Orochi put defective SMILEs in their food supply that forced them to smile and laugh all the time. Orochi then attempted to shoot Toko as she stood over her father's body, and both Zoro and Sanji moved to save her.[129] Enraged at the shogun, Zoro launched Nanahyakuniju Pound Ho toward him, but this attack was countered by the samurai Kyoshiro. The two of them dueled as Kyoshiro prevented Zoro from going after Orochi, allowing the shogun to escape.[130] Hiyori then came under attack by the Orochi Oniwabanshu ninja Fujin and Raijin, and Zoro went and cut down Raijin as he took Hiyori to safety.[131]
Zoro and Hiyori escaped to the Enma Shrine outside the capital, and Zoro was forced to cut down many Oniwabanshu members pursuing them. After taking care of their threat, he decided to go to Ryuma's grave and get Shusui back, expressing his desire to avenge Yasu.[132] Zoro and Hiyori returned to Oihagi Bridge the next day, and Zoro overwhelmed Gyukimaru in their rematch. However, their duel was interrupted by the Kozuki Family retainer Kawamatsu, who reunited with Hiyori.[133] A group of Beasts Pirates then arrived to attack Gyukimaru, but Zoro and Kawamatsu proceeded to quickly take them out.[134] Gyukimaru then ran off, and Zoro pursued him. Zoro chased Gyukimaru to an abandoned village, where the bandit opened up a secret entrance before disappearing. Zoro, Kawamatsu, and Hiyori discovered a room filled with weapons, which Kawamatsu and Gyukimaru (who was actually a shapeshifting komagitsune named Onimaru) had stockpiled many years back in preparation for the impending battle.[135]

Zoro obtains Enma.
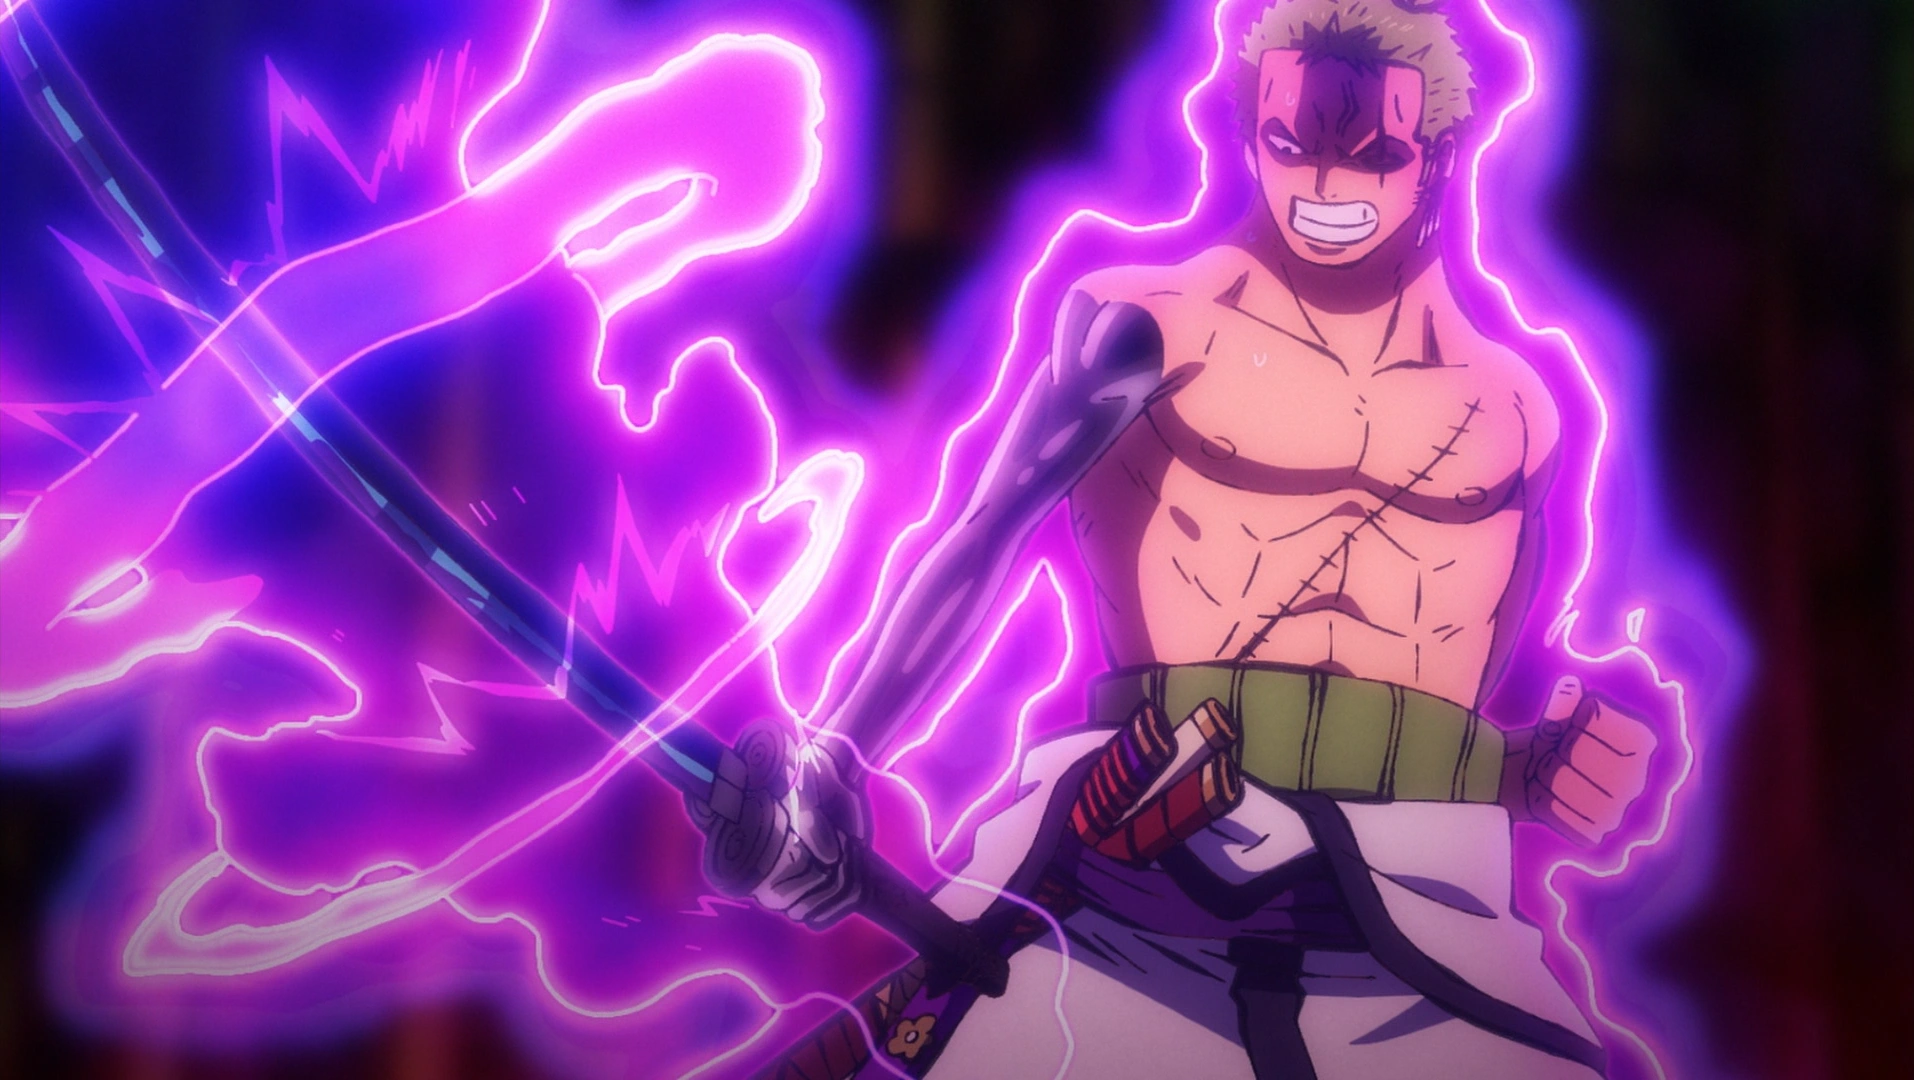
Hiyori then requested that Zoro leave Shusui in the possession of Wano. Zoro initially objected, but she offered to give him Enma, a Meito of the same quality that once belonged to her father, as a replacement.[136] Zoro agreed to this in exchange for being allowed to visit Ryuma's grave,[137] and two days later he went back to Kuri with Kawamatsu to meet with the alliance and discuss the strategy for their invasion, with Hiyori remaining in Ringo until the war ended. Tenguyama Hitetsu presented Enma to Zoro, and as Zoro took the blade, a considerable amount of Busoshoku Haki was drawn out from his arm. However, Zoro managed to take control over Enma and regulate the amount of Haki it drew before it could sap him of all his strength. He then tried to cut a tree with the blade, but to his shock accidentally unleashed a cut powerful enough to slice off the entire cliff face. For the next five days, Zoro trained with Enma to improve his control over the Meito.[138]
Raid on Onigashima
On the day of the Fire Festival, Zoro and the Straw Hats sailed out from Kuri on the Thousand Sunny and went to the alliance's promised meeting place of Tokage Port. They arrived there at the same time as the Heart Pirates and Kid Pirates, and the three crews came just in time to stop a Beasts Pirates fleet from attacking Kin'emon's group.[139] The rest of the samurai in the alliance arrived soon afterwards,[140] and the battle against the Beasts Pirates fleet concluded when Jinbe suddenly arrived to take out their last ship.[141] The Straw Hats had a happy reunion with Jinbe, who officially became part of their crew. The alliance fleet drew close to Onigashima, and the Straw Hats proceeded to disembark and take out the Torii Guards at the island's entrance.[142]
The rest of the alliance then disembarked, and although the plan was for them to sneak around to the back entrance of Kaidou's castle, the Kid Pirates had already entered it through the front. Luffy decided to go after them and stop them, and Zoro went in afterwards to stop Luffy in turn.[143] After hearing chaos erupt, Zoro cut a tower on the Live Floor to see what was going on and found Luffy. With their identities now exposed, the two pirates were forced to battle the massive hordes of Beasts Pirates in the castle, and the Super Rookie and Beasts Pirates informant Scratchmen Apoo joined in their assault by using music-based attacks which dealt significant injuries to both pirates.[144] Realizing they were in danger of taking excessive damage before even meeting Kaidou, Zoro grabbed Luffy and tried moving to a safer area. They ran into Kid and Killer in the process, and the latter told them to cover their ears to gain immunity to Apoo's attacks.[145] Zoro became split up from the others as they advanced further into the castle, and stayed busy fending off hordes of Gifters;[146] however, he was eventually joined by the alliance forces as they commenced their all-out assault.[147]

The Straw Hats stand together against the Beasts Pirates.
Zoro ended up on the Live Stage right as Luffy was about to pull himself up to the roof where Kaidou was through a hole in the Skull Dome's ceiling, and he grabbed onto Luffy to go with him. However, the two of them were stopped in midair by the Beasts Pirates All-Star Queen, who transformed into a brachiosaurus and caught them in his mouth; to make matters more difficult, an aerial platoon led by the All-Star King flew in to further cut off air passage. Queen spat Zoro and Luffy down to the Live Floor far below, where they regrouped with the rest of their crew and geared up for another push to get Luffy and Zoro up to the roof.[148] The Straw Hats and other alliance forces charged into battle against the Beasts Pirates, and Zoro bisected the metal club of Goki of the Numbers before the immensely large fighter could attack a horde of samurai. As the battle raged on, X Drake, who had been one of the Beasts Pirates' Tobiroppo, very suddenly attacked Juki and asked the Straw Hats to let him fight on their side.[149] Zoro was immediately suspicious of Drake and the two clashed, with Drake assuring he was now an enemy to the Beasts Pirates but not divulging his true allegiance. However, when Apoo returned to the battlefield, the two of them decided to form a temporary truce to take him down.[150]
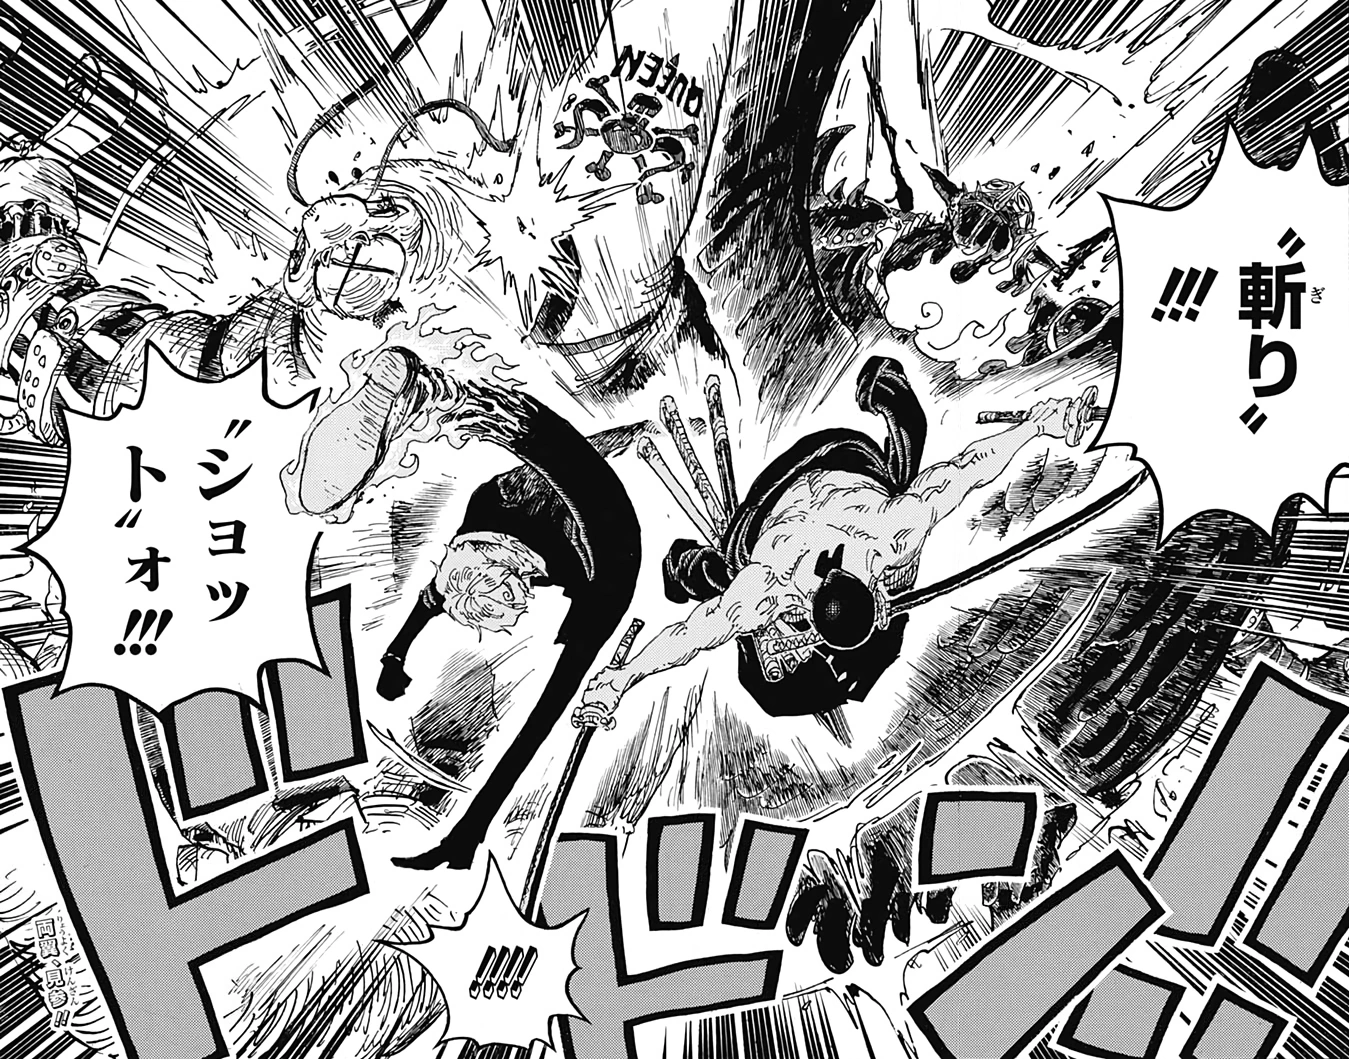
Zoro cuts down Apoo.
Queen then shot at the fighters on the Live Floor with Excite Bullets carrying a virus he had created called Ice Oni, which turned those infected mindlessly violent before killing them within an hour. To make things into a game, he gave Apoo the antibodies for it, and Zoro immediately began chasing Apoo to seize them.[151] Drake joined him again in assaulting Apoo; however, as the chase persisted, Zoro saw Big Mom heading up toward the Dome roof while more and more of the alliance's forces falling victim to the Ice Oni. Tired of Queen's game, Zoro proceeded to charge toward Apoo and cut him down in the blink of an eye. He seized the antibodies vial and immediately gave it to Chopper, and when Queen tried to shoot him, Zoro bisected his gatling gun with a long-range flying slash.
Zoro then turned his attention back to getting up to the roof, and Marco of the Whitebeard Pirates arrived to help.[152] When Marco used his flames on Chopper to halt the spread of the Ice Oni virus, Brook and Zoro misunderstood Marco's intention and attacked him. After spreading the flames to the other infected, Marco offered to fly Zoro to the roof, so Zoro put his trust in Drake who offered to help protect Chopper.[153] Marco turned into his Beast Form and carried Zoro toward the hole in the roof.[154] After grabbing hold of King and Queen, Marco threw Zoro up through the hole, and Zoro landed on the roof to confront Kaidou and Big Mom at the exact same time that Luffy, Law, Kid, and Killer arrived.[155]

Zoro, Luffy and the other Supernova confronting Kaidou and Big Mom.
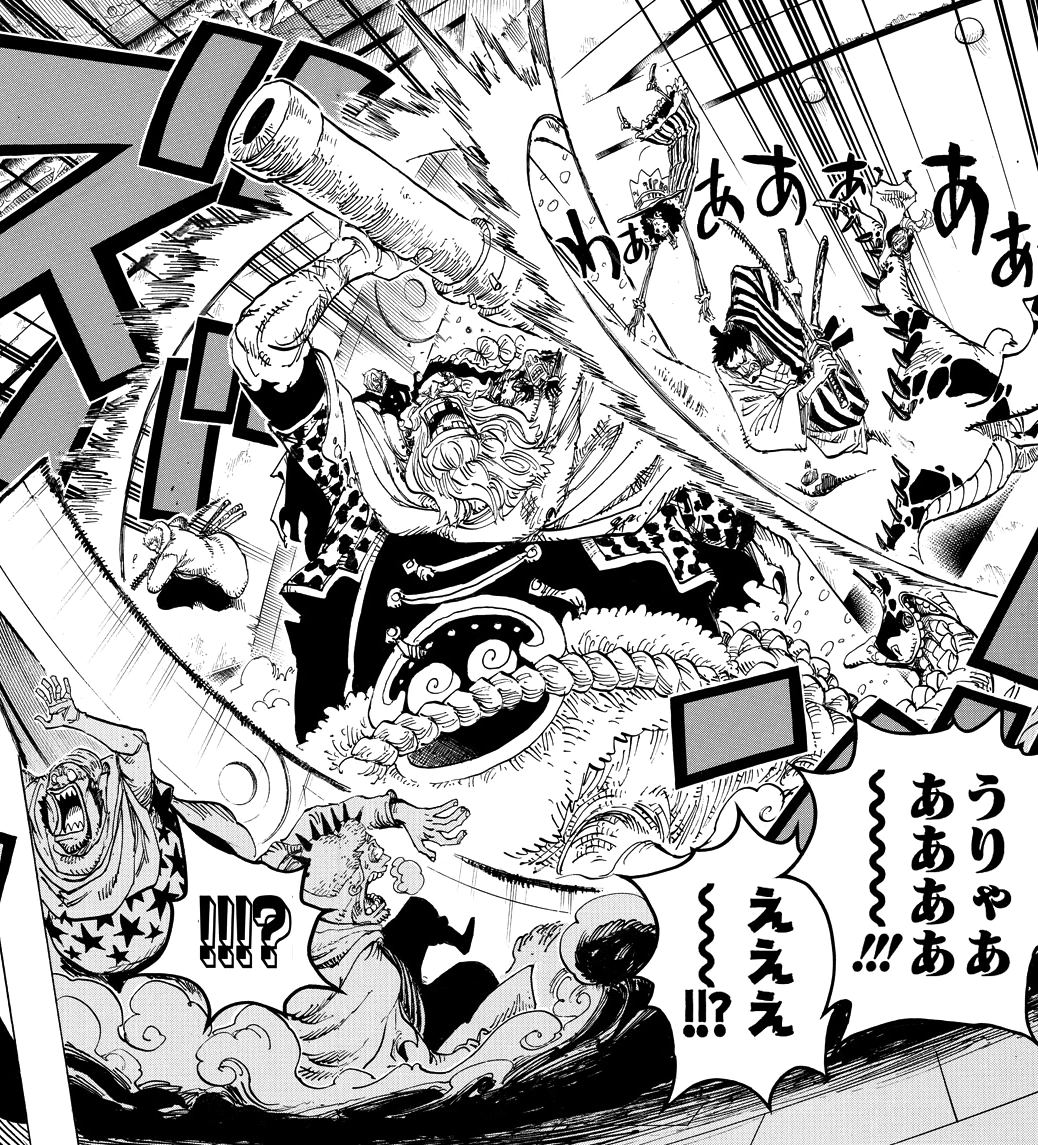
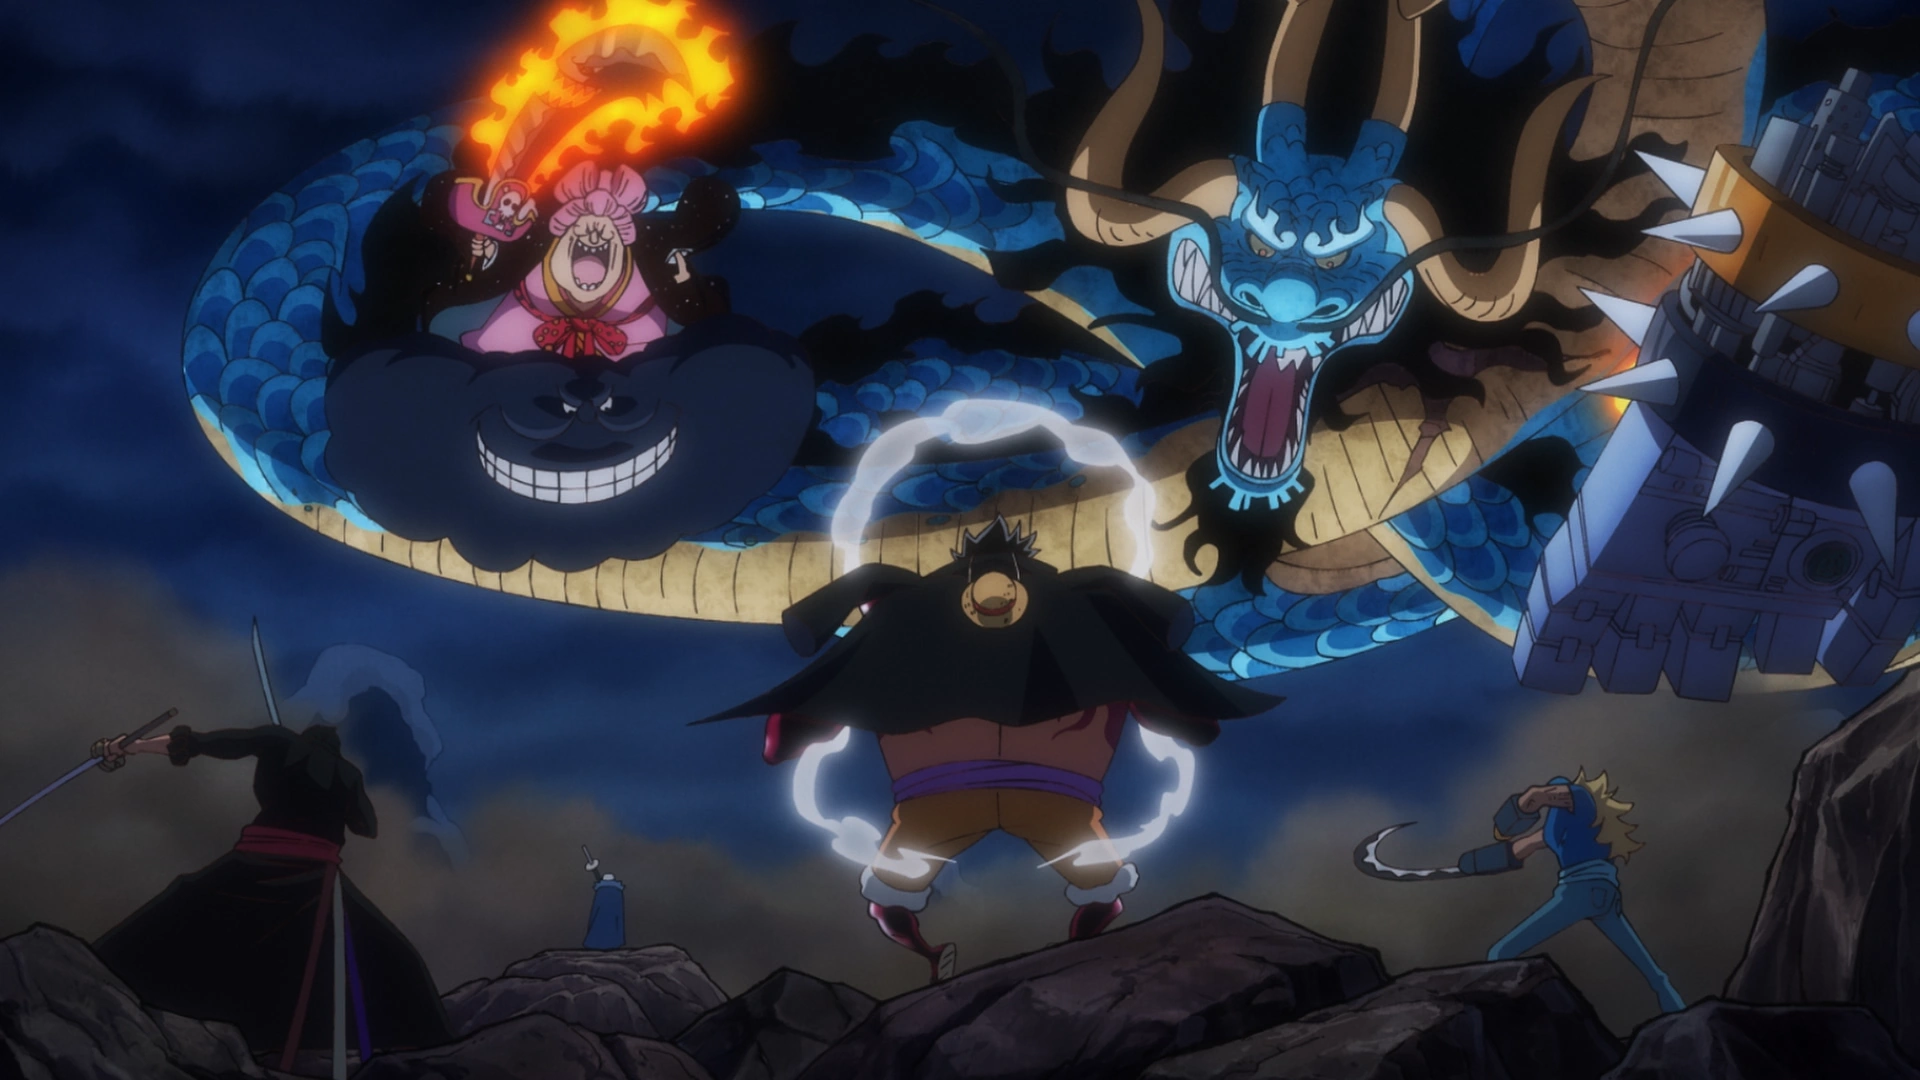
After Luffy punched Kaidou to the ground and hurt him with advanced Busoshoku Haki, Big Mom tried attacking the Super Rookies with her sun homie Prometheus. However, Zoro was able to bisect Prometheus using Foxfire Style, which he had successfully learned from observing Kin'emon. Zoro and Killer then charged at Kaidou and struck him, but Zoro was unable to utilize enough power out of Enma to truly damage the Emperor.[156] Kaidou then transformed into his Beast Form, and Zoro had Law teleport him into the air so he could bisect the Emperor's fire breath and prevent it from striking Luffy. Zoro then unleashed Hiryu: Kaen from Enma toward Kaidou, but the strike missed and he proceeded to be struck by Tenman Daijizai Tenjin from Big Mom and her thundercloud homie Zeus.[157] Luffy's Gear 4 then expired after he used it to pummel Kaidou, forcing Zoro to carry him out of danger from Big Mom's Haha no Hi. Kaidou generated Tatsumaki that blew Luffy away from Zoro, and the Emperor trapped Luffy inside his mouth; however, Zoro then unleashed Kokujo: O Tatsumaki that successfully cut through Kaidou's scales and forced him to release Luffy.[158]
Kaidou then transformed into his Human-Beast Form, and the Super Rookies formed a strategy to split up the two Emperors after failing to gain any sort of advantage.[159] Kaidou and Big Mom proceeded to unleash a combined attack called Hakai that inflicted a devastating explosion-like force over a wide area; however, Zoro was able to resist the attack with all his might for just long enough to allow the Super Rookies to escape its impact. Despite taking considerable damage, Zoro then proceeded to go after Prometheus and cut it into pieces while Law and Kid successfully trapped Zeus, which allowed the latter two to then send Big Mom flying off Onigashima without either of her homies to save her from falling into the ocean.[160] However, Kaidou moved to attack Zoro after knocking Luffy unconscious, and Law was forced to teleport the swordsman away to save his life even though this allowed Prometheus to go and save Big Mom.
As Kid and Killer went after Big Mom, Zoro decided to put his remaining strength into a last-ditch attack against Kaidou. Activating Kiki Kyutoryu: Ashura for the first time in ages, Zoro unleashed Ashura Bakkei: Moja no Tawamure on Kaidou that successfully inflicted a large cut on the Emperor's chest. Kaidou noted in shock that Zoro had used Haoshoku Haki in the attack as well, which confused Zoro as he was unaware, he possessed it. Zoro was disappointed that he had not knocked down the Emperor, but Kaidou still commended him, saying the cut would leave a scar. Kaidou then defeated Zoro and Law with Raimei Hakke, but as they collapsed to the ground, Luffy got back up and began equally clashing with Kaidou with his Haki; he told Law and Zoro that they could retreat and leave Kaidou to him.[161]
Law teleported himself and Zoro inside the castle,[162] and the duo ended up in midair, but were fortunately caught by Sanji. With Zoro having sustained numerous broken bones, Law told Sanji to put him in a splint, and Sanji reluctantly did so before carrying a bandaged Zoro with him back out onto the battlefield. Zoro fell asleep, but when Sanji ran into Kawamatsu and Izou, he briefly woke and told the trio to go to the Live Floor.[163] There, Sanji unceremoniously threw him to Chopper, to have the swordsman attended to.[164] As the battle continued, he learned the Minks possessed an instant recovery medicine, which possessed powerful side effects after it wore off. Initially he was adamant to take it in order to rejoin the battle, but became worried due to how Miyagi was treating him.[165][166]
Zoro and Sanji attack King and Queen.
Sanji found Chopper with Zoro and told him to flee with him if the medicine is not working, but Chopper responded that Zoro had already been administered it, and that it was just taking longer due to his condition. Sanji then resumed fighting Queen as King ordered the Beasts Pirates to find Zoro and stop him from recovering. Zoro is eventually found by the remaining loyal members of the Beasts Pirates and the samurai attempt to keep him safe, but they are stopped by King. As King attempted to attack Zoro, his punch was blocked by Marco. Queen then met up with King, and when the pair begin to attack Marco, Marco does nothing to stop them. He instead says that from this point on, the stars will be taking the stage. Just as he says this, Zoro, who has recovered, strikes King with Rengoku Oni Giri while Sanji strikes Queen with Diable Mouton Shot. Both Zoro and Sanji then say that when they conquer this battle it will give them a glimpse of Luffy as the Pirate King.[167]
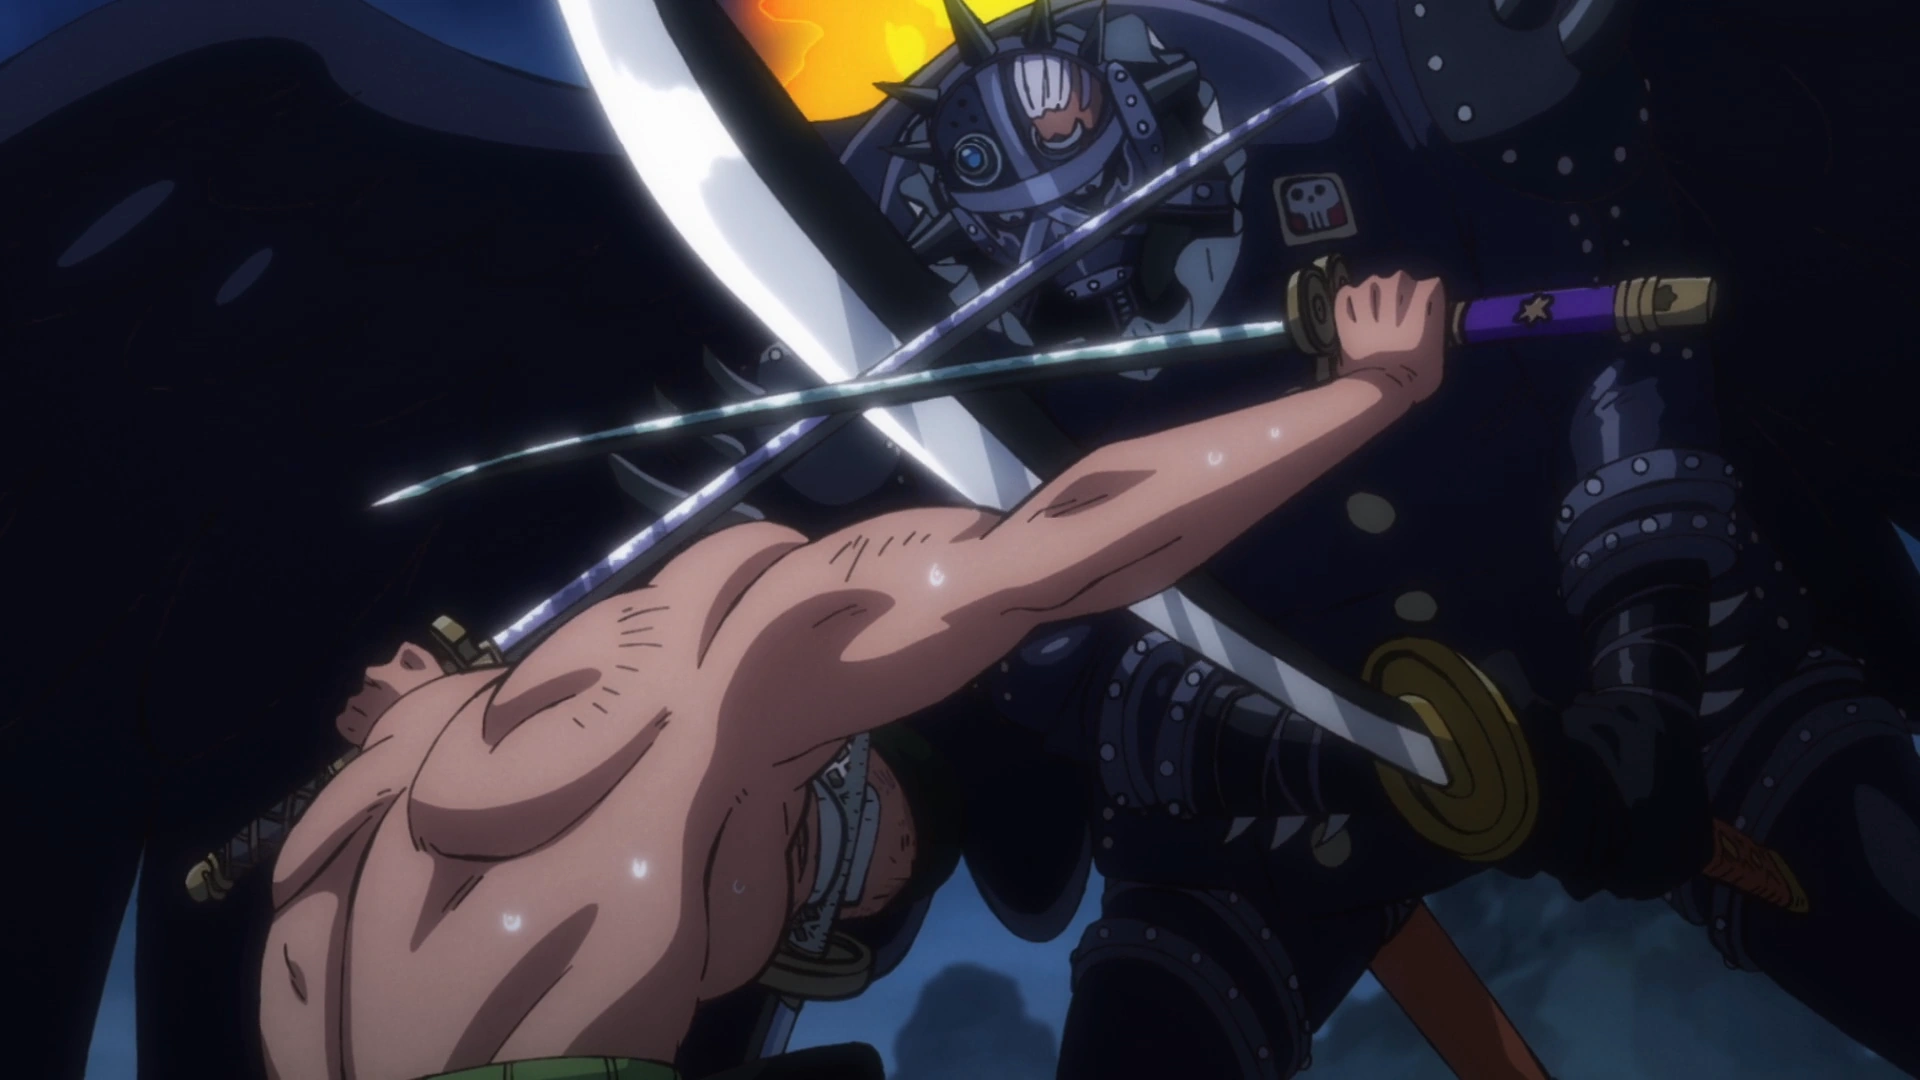
King and Queen quickly recovered from the attack, and Queen began to attack Zoro and Sanji with beams in retaliation, which they both dodged. Zoro questioned why Sanji was acting strangely, and Sanji uncomfortably pointed out that his body has felt off since he first used his Raid Suit. Zoro warned Sanji not to hold him back, causing the two to start bickering. The pair then blocked an attack from both King and Queen for each other, although with great resentment, and split up to face the All-Stars one-on-one, with Zoro preparing to fight King. As he was attacking King, Zoro was stunned when King's sword was able to catch and pull away his own swords, sending them flying while King attempted to punch Zoro with his gloves which had spikes. However, Zoro was still able to stop King's punch with his third sword in his mouth. He quickly regained his swords back and then commented on their different view of combat, stating that King is no traditional swordsman and after King replied that one ought not limit to a single way of fighting, Zoro assured him that he will win this battle, even if it requires him to bite King's throat out. Both then resumed their fight.[168]
Later, Zoro was caught off-guard when a dragon crashed into the Live Floor, with Luffy attached to its horns,[169] and was later surprised alongside Sanji to hear that this dragon was actually Momonosuke, although altered.[170] He would later be sent out of the Live Floor by King, and was caught by Franky, who happened to be nearby. He then advised Franky to leave King to him and head to the Live Floor and then prepared for King's next strike, blocking King's Tankyudon with Ul-Tora Gari.

Zoro defending against King.
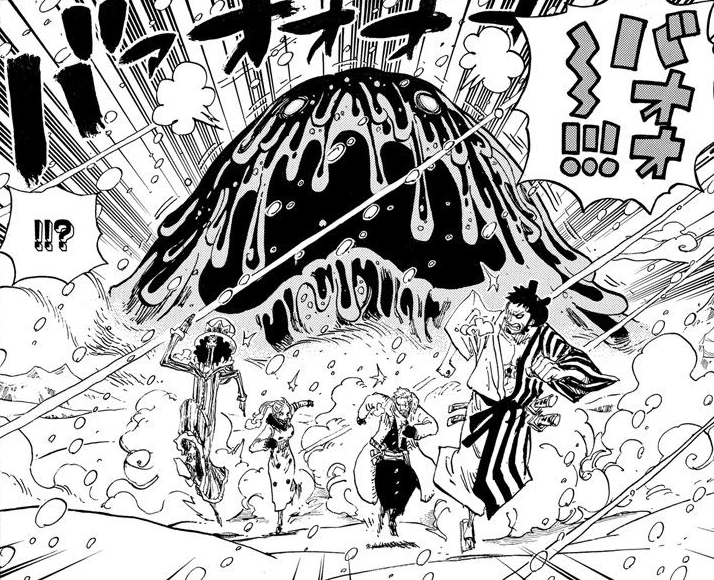
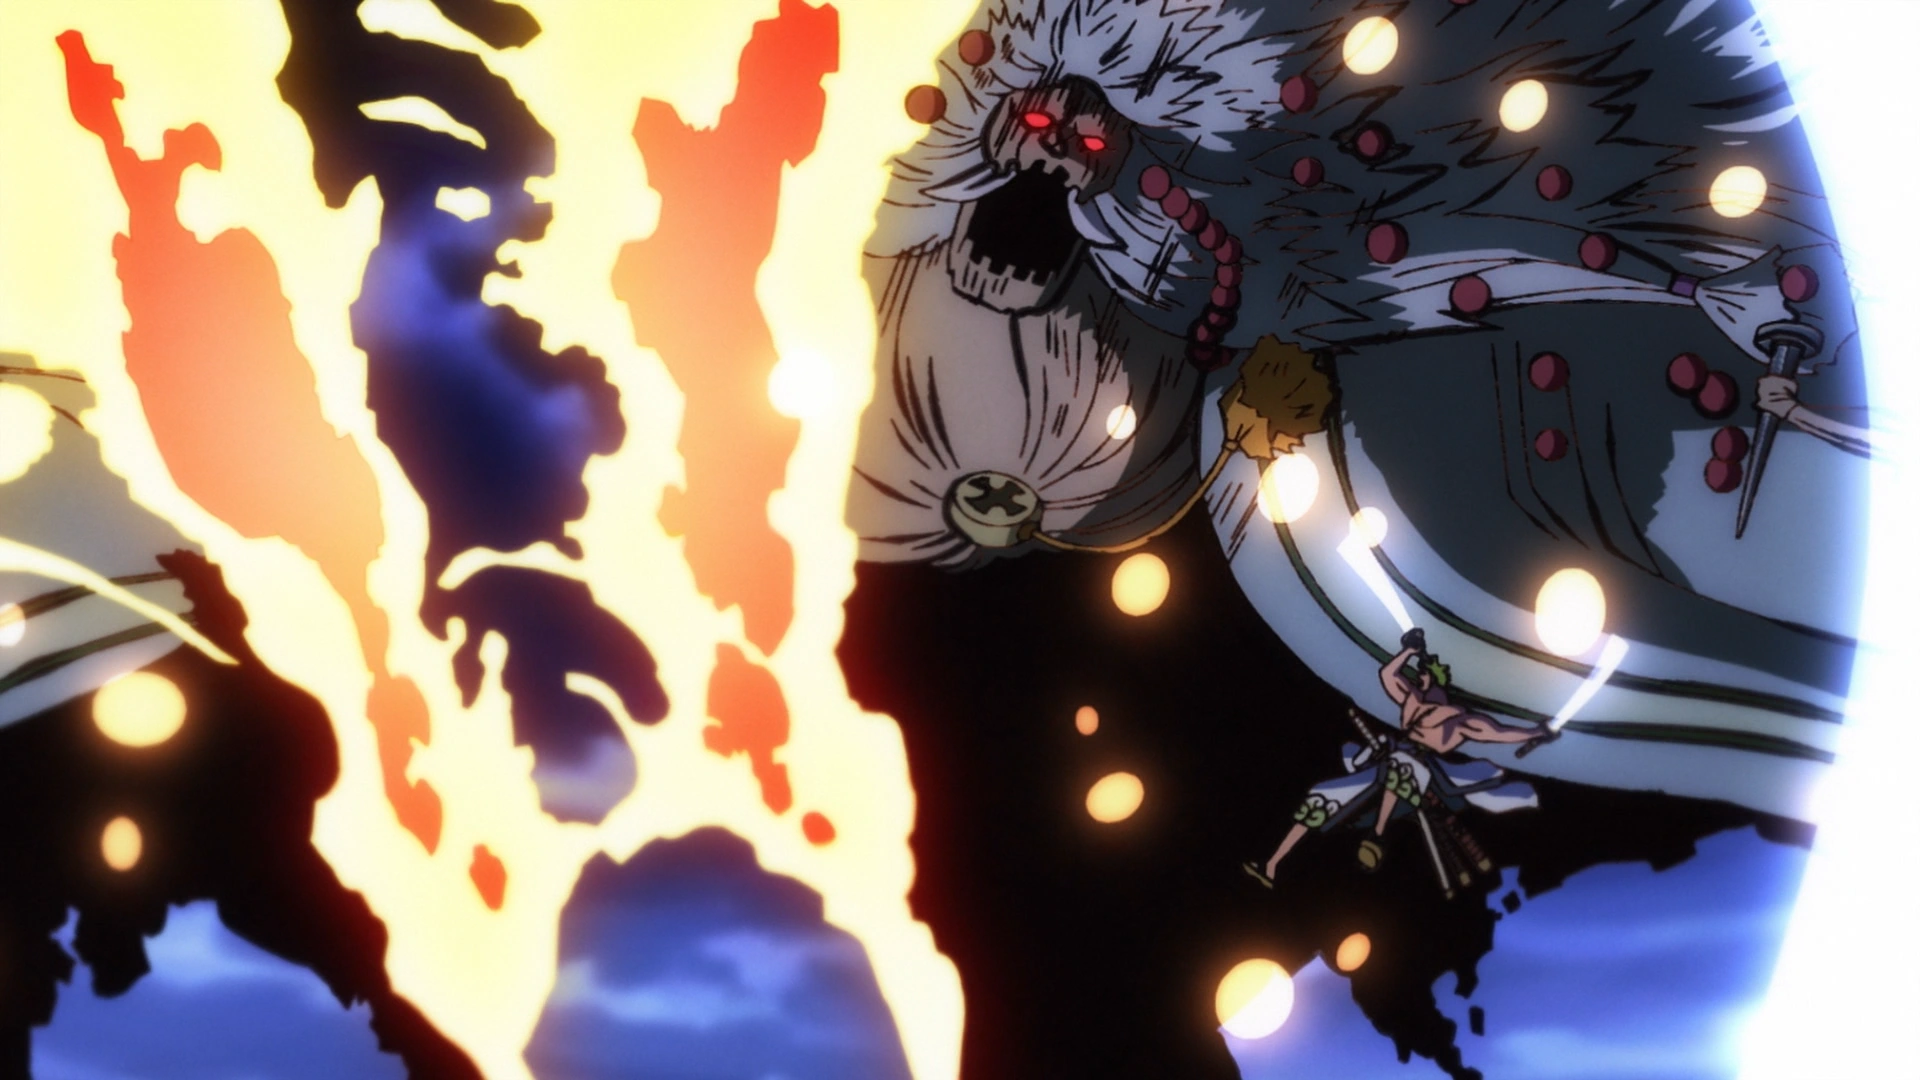
While Zoro was able to effectively block the strike, he was not able to block the impact, being sent flying entirely out of the castle. King even attempted to send Zoro off of the island after pushing him out of the castle, but Zoro prevented his move by using Clear Lance to push himself back onto the island. Zoro then berated King for fighting dishonorably by not attempting to kill Zoro with a blade, and King returned the sentiment due to Zoro having damaged his mask during their fight.[171] They then resumed to cross blades with each other.[172] Deep in the middle of his fight with King, Zoro was contacted by Sanji with a Den Den Mushi and was wondering how ended up with one. After Sanji explained he snuck it into his clothes should he get lost, he agreed on Sanji being confident in their win. He was then tasked with killing Sanji should he lose his humanity. Although confused about this request, Zoro nonetheless agreed to these terms, adding he was looking forward to it and told Sanji to not die until then before resuming his fight with King.[173] However, Zoro was soon struggling against King's Devil Fruit powers, narrowly blocking King's Tempuraudon and retaliating at him with Sanbyakurokuju Pound Ho, although without any result. As Zoro was then trying to figure out a way to defeat King, wondering if the flames on King's back were natural, he launched Kokujo: O Tatsumaki. This attack again had no effect on King, who blocked the attack with his wings, leaving Zoro remarking on the toughness of Ancient Zoan users, before they both continued clashing with their swords once more, with Zoro wondering if King's strength lies in his body's uniqueness or if it might be his origin. After Zoro was send into a wall by King and still looking for a way to defeat him, he heard a shamisen playing, which then led to Enma painfully draining Haki from Zoro.[174]


Zoro fails to cut King.
As Zoro demands Enma to stop, King moves in and stops in front of Zoro, confusing Zoro as to what King is trying to do. Zoro decides to stab King in the chest with his sword, only for King to not only be unharmed, but to explode seconds later. Zoro manages to survive using Busoshouku Haki, but is in disbelief as to how and why King is unscathed after an attack like that. He attacks King again with Ittoryu Iai: Shi Shishi Sonson, but once again King is unscathed. As Zoro prepares to block another of King's attacks with his swords, Enma once again starts draining Haki from Zoro, causing Zoro to get grazed by King's attack, and for a chunk of the area to be destroyed with both of them falling. While falling, Zoro drops Sandai Kitetsu, but quickly goes to reclaim it, while thinking back to all his moments with the sword. King then kicks him back towards the island afterwards, expressing how crazy he thought he was for risking his life for a sword.As his battle with King raged on Zoro had a difficult time dealing with the All-Star and the renowned immense toughness and vitality of his species is known for, while the Straw Hat became grievously wounded and exhausted.[175]
Zoro then gets up to see that Wado Ichimonji didn't fall and was safe, gratefully thinking back to when he first got that sword, and began to look back at everything he learned in Wano and his childhood in Shimotsuki Village, immediately realizing all the connections and realizing that Enma was testing him the whole time. After realizing this, several Beast Pirates arrive and try to interfere with his and King's fight, only for them to all pass out after Zoro decides to let Enma take all the Haki it wants. Realizing that Zoro has Haoshoku Haki, King asks if he had "kingly ambitions" as well, to which Zoro answers yes to, saying that he must since he promised his captain and best friend.[176]
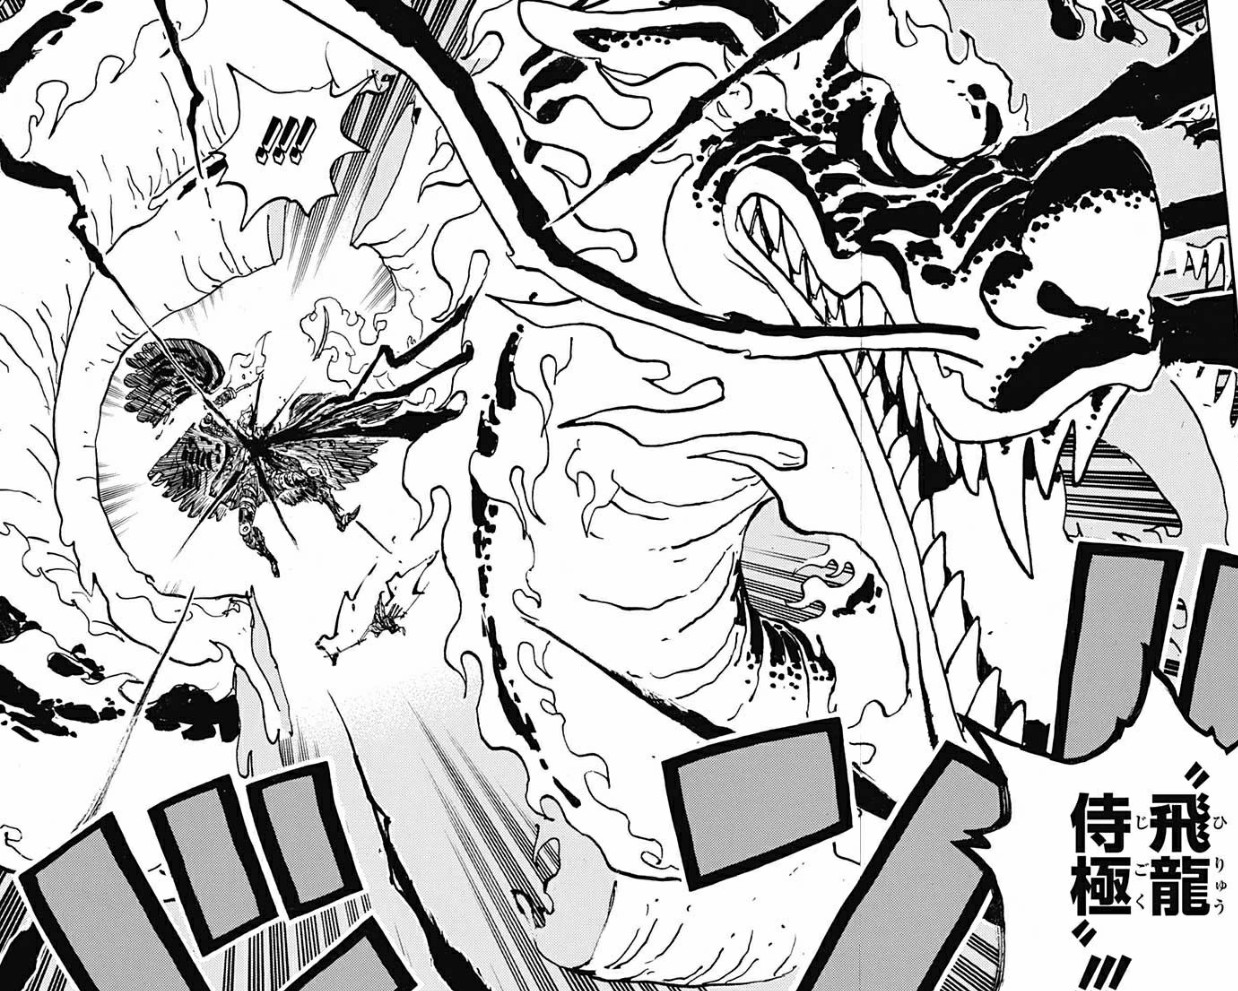
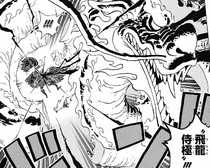
Zoro defeats King.
Zoro figured out that when King puts out the flames on the back of his head to increase his speed his defenses get weaker so waited for the right moment and serially wounded King. When King's face was exposed the Beasts Pirates who were watching their fight commentated that the World Government was offering ![]() 100,000,000 to anyone who had information on lunarians which caused King to scorch them with his flame attacks. Zoro was appalled that his opponent would attack his comrades like that but was interested in King's species, but the All-Star refused to answer and attacked him again. Zoro now dealing serious damage to King declared that the Beast Pirates had reigned long enough and ignored King's claim that Kaidou would be the next Pirate King. After Zoro correctly assumed that King was afraid of his attacks now, King tried finishing him off with Omori Karyudon, but Zoro was unfazed by this and used En-Ō Santōryū: Ippyakusanjo Hiryu Jigoku and landed a destructive onslaught onto King defeating him while simultaneously slicing off half of the lunarian's right wing.[177] Still being mid-air, Zoro remembered the promise he made Luffy when he was defeated by Mihawk to never lose again. Remembering this, he declared that he shall become "King of Hell" if this is what it takes to keep him from losing. He then used his swords to push himself back onto Onigashima. After reaching the top Zoro finally succumbed to his fatigue and injuries from all the intense battling and passed out.[178]
100,000,000 to anyone who had information on lunarians which caused King to scorch them with his flame attacks. Zoro was appalled that his opponent would attack his comrades like that but was interested in King's species, but the All-Star refused to answer and attacked him again. Zoro now dealing serious damage to King declared that the Beast Pirates had reigned long enough and ignored King's claim that Kaidou would be the next Pirate King. After Zoro correctly assumed that King was afraid of his attacks now, King tried finishing him off with Omori Karyudon, but Zoro was unfazed by this and used En-Ō Santōryū: Ippyakusanjo Hiryu Jigoku and landed a destructive onslaught onto King defeating him while simultaneously slicing off half of the lunarian's right wing.[177] Still being mid-air, Zoro remembered the promise he made Luffy when he was defeated by Mihawk to never lose again. Remembering this, he declared that he shall become "King of Hell" if this is what it takes to keep him from losing. He then used his swords to push himself back onto Onigashima. After reaching the top Zoro finally succumbed to his fatigue and injuries from all the intense battling and passed out.[178]
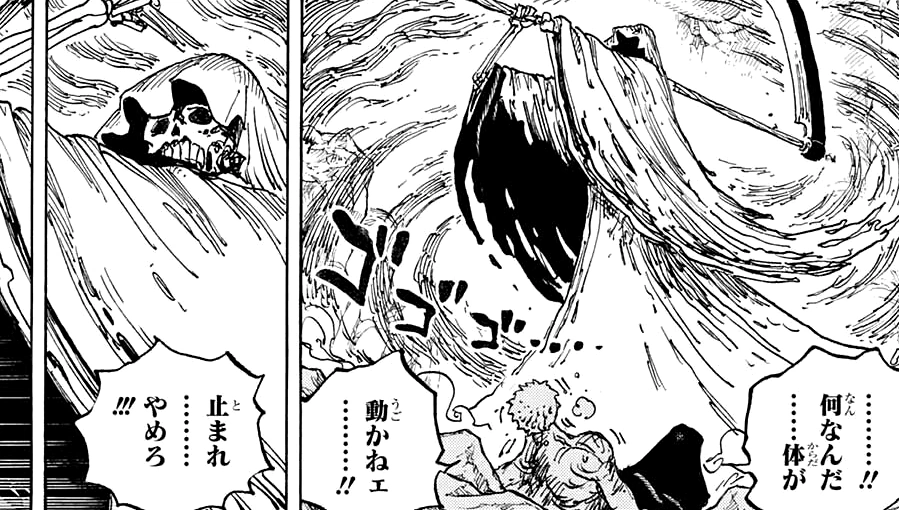

Zoro confronted by a Grim Reaper figure.
As Zoro awakened sometime after the fight, he was confronted by a hooded, Grim Reaper-like figure, who was about to strike at him with a scythe.[179] As a result of this encounter, Zoro was rendered unconscious, laying on his stomach while bleeding profusely. When Big Mom caused one of the bombs in the armory to detonate, large sections of Onigashima crumbled, including the ground beneath Zoro. As Zoro began to fall off the island,[180] Franky appeared and grabbed him with his extendible arm,[181] and later carried Zoro to Chopper for treatment,[182][183] He and Luffy later laid unconscious outside the crash site of Onigashima with the others, as the broadcast of the alliance' victory is announced, as well as the announcement of Kozuki Momonosuke officially becoming the Shogun of Wano.
A New Dawn in Wano Country
A week later, both Luffy and Zoro woke up and immediately demanded meat and booze respectively. As the crew celebrated their recovery, Zoro and Luffy both were shocked to see Momonosuke in his adult form for the first time, after initially not recognizing him.When Hiyori revealed that she had personally bathed Zoro while he was asleep Sanji grew angry.The outburst reminded Zoro of the promise he had made Sanji, and the two began fighting, with Sanji insisting that the issue had been resolved already. After the crew learned that there was going to be a massive festival to celebrate Wano's liberation, Zoro decided to go to the baths first with his friends before partying.[184]
Zoro later enjoys the festival with the others and the rest of the Ninja-Pirate-Mink-Samurai Alliance, along with Law and Kid's crews as well.[185] A couple days later, Zoro, along with Luffy, Sanji, and Jinbe, secretly watched Momonosuke, his retainers, and Yamato work to prevent Admiral Ryokugyu from entering the Flower Capital and reaching the Straw Hats. After Shanks made Admiral Ryokugyu retreat from Wano, Zoro acknowledged Momonosuke's growth, and Luffy pointed out that the Haki was familiar to him.[186] Afterwards, Yamato talked with Luffy and the others about staying in Wano instead of joining the crew. Zoro advised Yamato to be cautious of Momonosuke's pride. Marco then flew over their heads and told them that he was leaving with Shanks' ship.[187]
The next day, the Straw Hats met to discuss Pluton. Days later, they went to Tokage Port in preparation to depart from the country.[188] As thanks for helping Luffy, the crew agreed to take Caribou with them and drop him off at the first island[189] but forced him to travel in a barrel.[190] Momonosuke, Yamato, and Kin'emon caught up to the crew before they could leave. Zoro was amused by Momonosuke's emotional breakdown over the crew's departure. After Luffy gave Momonosuke a flag with the crew's jolly roger, they set sail and bid farewell to Momonosuke and Yamato. Kid then goaded Luffy and Law into taking their ships over the Climbing-Koi Waterfall.[191]
Final Saga
Egghead Arc
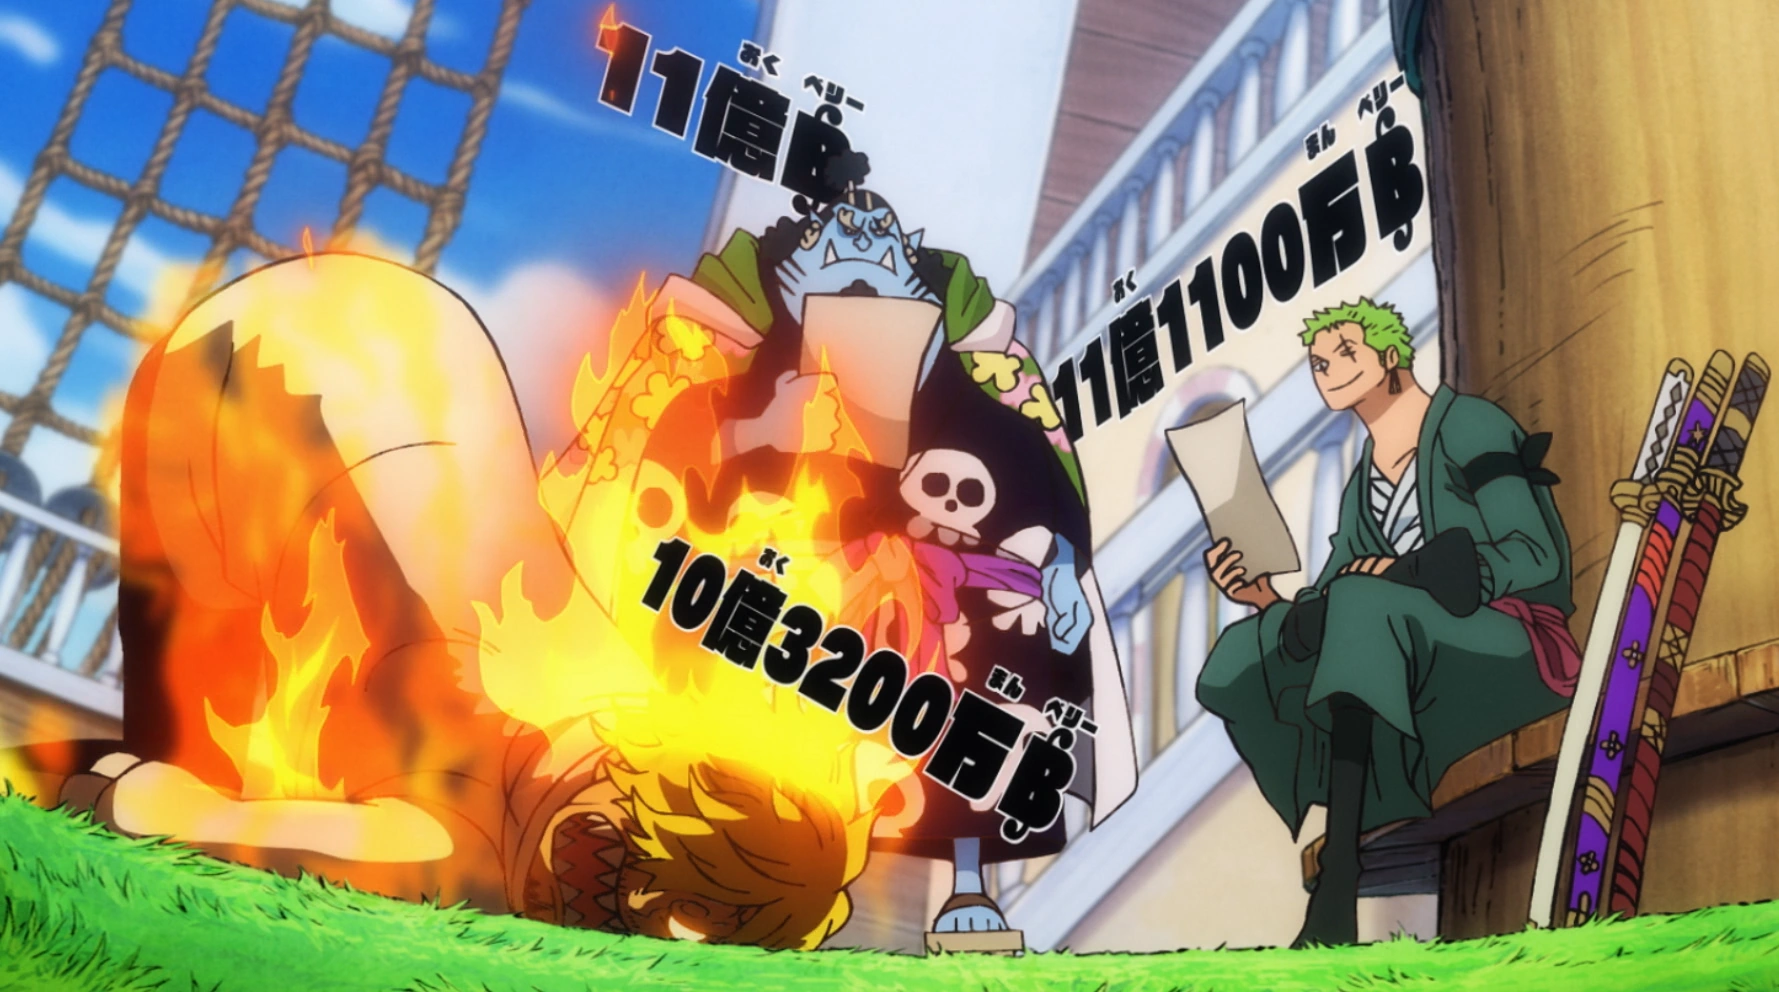

Zoro learns of his new bounty.
Zoro was asleep on the deck until Robin announced that the newspaper had arrived with their new bounties. Zoro teased Sanji who was upset at having a bounty below Zoro and Jinbe, which led to a fight between Zoro and Sanji.[192] After reading that Sabo had assassinated Cobra and that Vivi had disappeared, Luffy demanded that they go immediately to Arabasta, but Zoro pointed out that Vivi had disappeared from Mary Geoise, which led to them bickering about whether or not they should go there. Zoro then reminded Luffy of how he had left Ace to do his own thing until his life had been in clear danger, and suggested that they do the same for Vivi, which drew ire from Luffy, Nami, Chopper, and Sanji. As Zoro and Sanji restarted their fight, Robin read aloud the other events reported in the newspaper. Luffy then told his crew about his oath to Sabo and Ace, as well as about his dream for once he becomes the Pirate King, which surprised Zoro.
Days later, the Thousand Sunny entered a turbulent and cold region of the sea and came across a giant warm eddy. Zoro cut it open when they spotted and heard Bonney trapped inside it. After the wind carried Chopper and Luffy off the ship,[193] the Mecha-Shark attacked the ship and ended up capsizing it. While Jinbe swam off to save Luffy, Chopper, and Bonney, the ship and rest of the crew were saved by Lilith and Vegaforce-01. As the robot lifted them out of the water, Lilith explained the shark's purpose and malfunction and introduced herself.[194] Lilith then demanded the pirates' valuables as the other Sea Beast Weapons surfaced. Zoro watched quietly and prepared to attack them, but Shaka called Lilith and warned her about the danger that Zoro and the crew posed. Zoro had questions for Vegapunk, so Shaka ordered Lilith to bring the ship to Egghead.[195]


Zoro facing Kaku.
Once they reached the island's Labophase, Zoro and Brook remained behind to guard the ship, while the others followed Lilith into the lab.[196] Zoro and Brook released Caribou and then sat down for tea. Caribou protested at being dropped off at a government island, but Zoro insisted that Caribou get off the ship.[189] Zoro was napping when CP0 infiltrated the island and gained access to the Labophase. Upon seeing the Thousand Sunny docked in the Labophase, Kaku attacked the ship, but Zoro grumpily awoke, blocked the Rankyaku, and engaged in battle with Kaku.[197] Zoro had Brook protect their ship while he fought Kaku in his awakened giraffe form. After Kaku was distracted by the Seraphim's display, fellow CP0 agent Stussy bit Kaku, putting him to sleep.[198] After she similarly subdued Lucci, Zoro was puzzled by the agents fighting each other. Stussy then contacted Shaka, revealing herself to have been Vegapunk's secret ally. Zoro and Brook rushed off to stop the Seraphim, who were still attacking the lab where the rest of their crew was. Zoro clashed with S-Hawk until Edison ordered the Seraphim to stop attacking.[199] After receiving new clothes, Zoro, Brook, and Stussy joined the rest of the crew and the Satellites in the control room. After Shaka reported that the main Vegapunk body had gone missing and that they had lost control of the security system, everybody decided to split and search for Stella. Zoro suggested he should join them, but Sanji and Chopper shut his idea down, replying he would only get lost if he went searching, so Zoro stayed behind with Luffy to watch over the captive Lucci and Kaku.[200] When Luffy went to check with Shaka, S-Bear and S-Hawk arrived and attacked Lucci and Kaku, but Zoro held them off and called for Luffy. After the Seraphim failed to respond to Shaka's orders, Lucci and Kaku suggested that they all team up to take out the Seraphim, the idea of which disgusted Zoro and Luffy.[201]

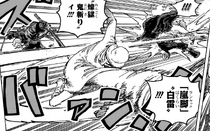
Zoro & Kaku team up to fight S-Hawk.
Zoro doubted that they would let themselves be cuffed up again once they were freed. However, Luffy had already been convinced to set them free though Zoro told him Kaku was lying to them. Their dispute was then interrupted by S-Hawk, who used a powerful flying slash attack against them, making Zoro realize that S-Hawk is using an artificial version of the Supa Supa no Mi, which is the Devil Fruit used by Daz Bonez. When Zoro heard Nami screaming, he realized that all the Seraphim were let loose on everybody inside the Laboratory and was extremely surprised when Lucci fell for an obvious taunt by Luffy. After evading an Ursus Shock, both Luffy and Lucci attack S-Bear with Gomu Gomu no Kong Gun and Rokushiki Ogi: Rokuogan" while Zoro teamed up with Kaku, both attacking S-Hawk with Rengoku Oni Giri and Rankyaku: "Hakurai".[202]
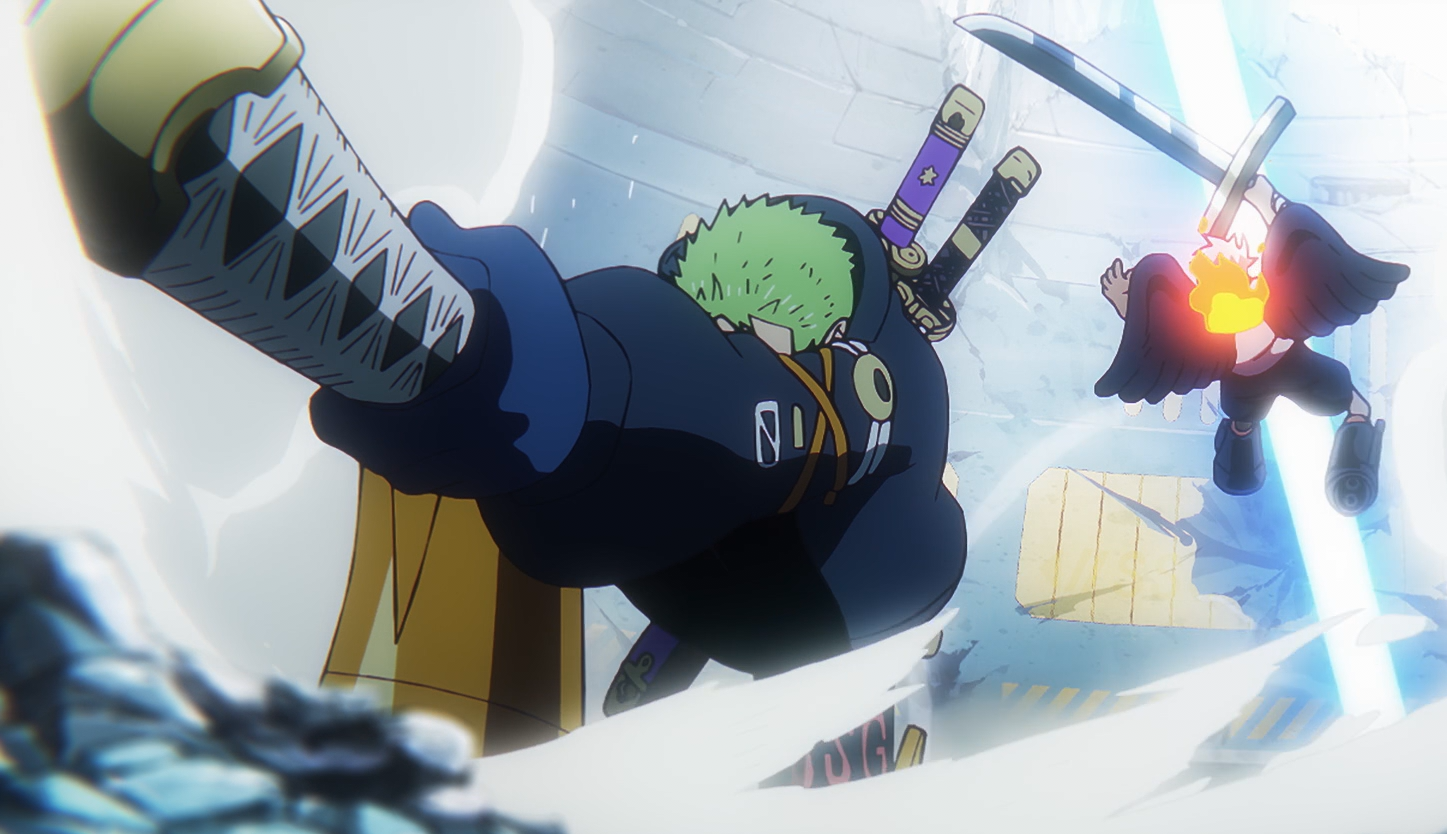

Zoro slashes S-Hawk, although with no lasting damage.
However, all their best attacks were not very effective against the Seraphim, and they struggled to do any lasting damage against the Seraphim. It then, out of the sudden, occured to Zoro that the Seraphim highly resembled King the Conflagration from the Beasts Pirates. To Shaka's surprise over Kaidou having a Lunarian in his crew Zoro only replied he did not know what King really was. When Shaka told everybody King's background and that the Seraphim were created using King's Lineage Factor, Zoro told Luffy, Lucci and Kaku to keep a close eye on the flames on the back of the Seraphim, because as soon as they would go out, they would get faster but also lose their defense. Zoro then apologized to everyone for not realizing that the similarities between King and the Seraphim, namely dark skin, black wings, white hair and fire, were so obvious only to receive their annoyance over him realizing that important connection so late.[203] While they continued to fight, Shaka went on to find Vegapunk, realizing that he might possibly knew where he was. Zoro then realized that S-Bear and S-Hawk's flames were not going out, but Luffy noticed that S-Hawk had left the room. Lucci said that S-Hawk was choosing to prioritize killing the weaker members of the crew and save the more troublesome members for later, thinking they would be too rattled to fight effectively. Zoro then immediately ran after S-Hawk, prompting Luffy to tell Kaku to go with him to make sure he didn't get lost.[204]

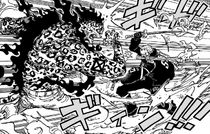
Zoro fighting Lucci.
The following day, York was found to be the culprit and was outmatched by the reunited Straw Hat Pirates and their allies, who subdued and chained her to the ground. Zoro held his sword to her neck and listened in as she was forced to contact the Five Elders for help.[205] Just after Kizaru arrived in the Labophase, Rob Lucci went on the offensive, aiming to kill Vegapunk in the midst of the confusion. Stussy managed to block his attempt, and Zoro promptly attacked Lucci, calling him spineless for his tactics. The two then engaged in a fight, with both breaking out of the lab, [206] with Zoro refusing to have additional help from Luffy in his fight against Lucci, telling him to focus on Kizaru alone. He then proceeded to mock Lucci for not being strong enough to face Luffy with his skills, to which Lucci menacingly replied, though it could be true, it would be enough to kill Zoro instead.[207] During his fight with Lucci the two, along with Luffy and Kizaru, suddenly felt the presence of Jaygarcia Saturn, who then ordered the pacifistas to stop.[208] As Zoro continued fighting Lucci telling the agent he was in a hurry, Lucci mocked him by pointing out how their fight was holding up Zoro's crewmates. He continued to say they were fools for not cutting loose a member to save the rest of them and that as long as they kept fighting they would all be be trapped here, Zoro retorted that he controlled how long the fight lasts and not Lucci.[209]
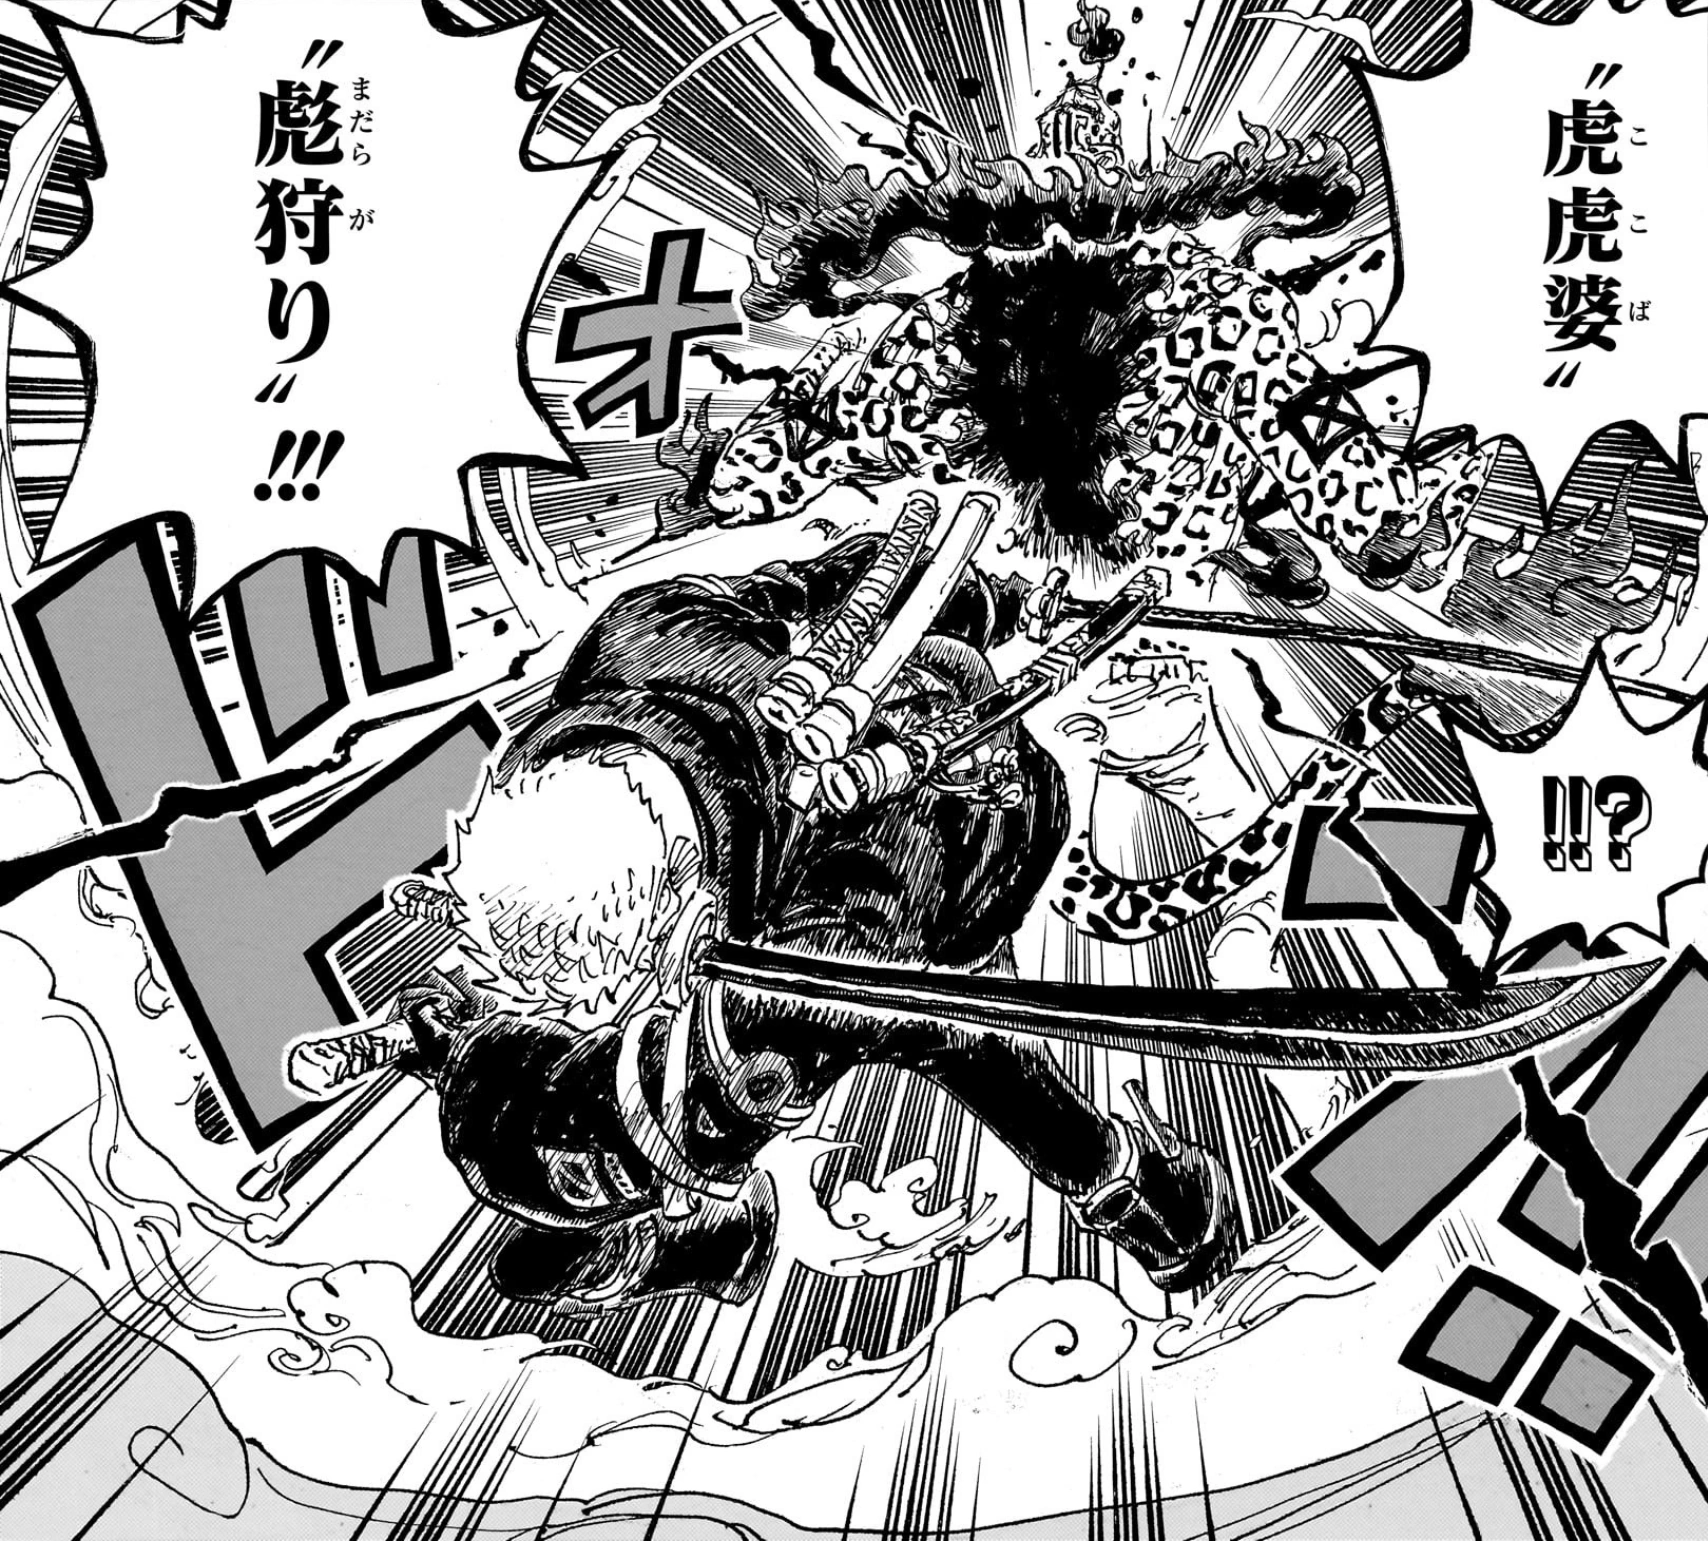

Zoro wounds Lucci.
As the fight continued on, all five of the Five Elder's touched down on Egghead. Lucci knocked away one of Zoro's swords, before questioning him about the strong Haki popping up all over the island. As Zoro agreed with the strangeness of it, he suddenly overheard a communication from Sanji (through Jinbe's contact) about him apparently being a burden to the crew for taking his time with fighting Lucci. Zoro was silently enraged by the notion, and caught his sword again as Lucci prepared an attack. Before Lucci could land his attack, Zoro slashed him using Spotted Leopard Hahava Hunt, leading to the Zoan user becoming gravely wounded.[210] When Jinbe arrived at the scene, Zoro noted Lucci was still standing but the fight came to an end when Jinbe grabbed Zoro to escape off the island, Jinbe then used Gosenmaigawara Shuto to distract Lucci with a dust cloud. While Zoro and Jinbei escaped he spotted a Itsumade.[211]
References
- ↑ One Piece Manga and Anime — Vol. 1 Chapter 3 (p. 8) and Episode 1, Zoro makes his debut.
- ↑ 2.0 2.1 One Piece Manga and Anime — Vol. 1 Chapter 5 (p. 19) and Episode 3, Zoro decides to join Luffy's crew to survive against the Marines' 153rd Branch.
- ↑ SBS One Piece Manga — Vol. 105 (p. 132), Zoro's parents and lineage are revealed.
- ↑ 4.0 4.1 One Piece Manga and Anime — Vol. 105 Chapter 1058 (p. 3-5) and Episode 1086, The Straw Hat Pirates' bounties post-Wano Country.
- ↑ 5.0 5.1 One Piece Manga and Anime — Vol. 90 Chapter 909 (p. 13-17) and Episode 892, Zoro's alias in Wano is revealed.
- ↑ One Piece Manga and Anime — Vol. 5 Chapter 42 (p. 16) and Episode 20, Zoro is revealed to have been a bounty hunter by Yosaku.
- ↑ One Piece Manga and Anime — Vol. 1 Chapter 5 and Episode 19.
- ↑ Vivre Card - One Piece Visual Dictionary (Card #0002), Zoro-juurou is romanized.
- ↑ One Piece Manga and Anime — Vol. 1 Chapter 3 (p. 1) and Episode 2, Both Zoro's epithet is seen in the title of the chapter and he is mentioned and recognized by Koby as the Pirate Hunter.
- ↑ SBS One Piece Manga — Vol. 4 (p. 28), Zoro's age is revealed.
- ↑ 11.0 11.1 One Piece Blue Deep: Characters World (p. 205), Zoro's profile after timeskip is revealed.
- ↑ 12.0 12.1 SBS One Piece Manga — Vol. 69 (p. 66), Zoro's age and height after timeskip are revealed.
- ↑ SBS One Piece Manga — Vol. 15 (p. 90), Zoro's birthday is revealed.
- ↑ SBS One Piece Manga — Vol. 10 (p. 46), Zoro's height is revealed.
- ↑ SBS One Piece Manga — Vol. 66 (p. 162), Oda explains the blood types of the world and reveals Zoro's blood type.
- ↑ Correction to Zoro's bounty. One Piece Staff (@Eiichiro_Staff) on Twitter.
- ↑ One Piece Manga and Anime — Vol. 80 Chapter 801 (p. 15-17) and Episode 746, The Straw Hat Pirates are given new bounties after Dressrosa.
- ↑ One Piece Manga and Anime — Vol. 45 Chapter 435 (p. 16-17) and Episode 320, The crew members' bounties for attacking Enies Lobby are revealed.
- ↑ One Piece Manga and Anime — Vol. 23 Chapter 213 (p. 22) and Episode 128, Luffy's and Zoro's bounties after Arabasta.
- ↑ 20.0 20.1 One Piece Manga and Anime — Vol. 78 Chapter 779 (p. 2, 9-10) and Episode 720, Zoro reunites with Usopp and Kin'emon.
- ↑ One Piece Manga and Anime — Vol. 66 Chapter 655 and Episode 579, Zoro learns about the Samurai swordsmen of Wano.
- ↑ One Piece Manga and Anime — Vol. 66 Chapter 655 and Episode 579, Zoro and the other group of Straw Hats explore Punk Hazard
- ↑ One Piece Manga and Anime — Vol. 66 Chapter 656 and Episode 580, The Straw Hats encounter Kin'emon's lower half.
- ↑ One Piece Manga and Anime — Vol. 67 Chapter 657 and Episode 581, The Straw Hats arrive at the lake.
- ↑ One Piece Manga and Anime — Vol. 67 Chapter 662 and Episode 587, Zoro and the Straw Hats use Brownbeard for transportation and run into Law
- ↑ One Piece Manga and Anime — Vol. 67 Chapter 665 and Episode 591, Zoro departs with Sanji and Brook in search for Brook's body
- ↑ One Piece Manga and Anime — Vol. 68 Chapter 669 and Episode 595, Zoro and his group find Kin'emon and see Smiley at the lake.
- ↑ One Piece Manga and Anime — Vol. 68 Chapter 672 and Episode 598.
- ↑ One Piece Manga and Anime — Vol. 68 Chapter 675 and Episode 601, Zoro and his group run from Smiley
- ↑ One Piece Manga and Anime — Vol. 68 Chapter 677 and Episode 603, Zoro and Nami's group meet up and run into Caesar's lab.
- ↑ One Piece Manga and Anime — Vol. 68 Chapter 678 and Episode 604, Zoro and his group commence a counterattack.
- ↑ One Piece Manga and Anime — Vol. 69 Chapter 679 and Episode 605, Zoro's group escape from the gas.
- ↑ One Piece Manga and Anime — Vol. 69 Chapter 682 and Episode 608, The group is attacked by the dragon
- ↑ One Piece Manga and Anime — Vol. 69 Chapter 685 and Episode 611, Zoro clashes with Monet.
- ↑ One Piece Manga and Anime — Vol. 69 Chapter 686 and Episode 612, Tashigi interferes with Zoro and Monet's fight.
- ↑ One Piece Manga and Anime — Vol. 69 Chapter 687 and Episode 613, Zoro cuts down Monet.
- ↑ One Piece Manga — Vol. 68 Chapter 668, Zoro and Tashigi run from the gas.
- ↑ One Piece Manga and Anime — Vol. 70 Chapter 694 and Episode 620, Riding through the escape passage in a rail cart.
- ↑ One Piece Manga and Anime — Vol. 70 Chapter 695 and Episode 621, Once outside, they see Franky fighting Baby 5 and Buffalo.
- ↑ One Piece Manga and Anime — Vol. 70 Chapter 697 and Episode 623, The Straw Hats leave Punk Hazard with Law, Kin'emon and Momonosuke.
- ↑ One Piece Manga and Anime — Vol. 70 Chapter 698 and Episodes 624–625, Law explains their alliance and his plan.
- ↑ One Piece Manga and Anime — Vol. 70 Chapter 699 (p. 11-12) and Episode 625.
- ↑ One Piece Manga and Anime — Vol. 70 Chapter 699 (p. 15-19) and Episode 628.
- ↑ One Piece Manga and Anime — Vol. 70 Chapter 700 and Episode 629, The Straw Hats, Law, Kin'emon and his son approach Dressrosa.
- ↑ One Piece Manga and Anime — Vol. 71 Chapter 701 and Episodes 630–631.
- ↑ One Piece Manga and Anime — Vol. 71 Chapter 702 and Episode 631.
- ↑ One Piece Manga and Anime — Vol. 71 Chapter 703 and Episode 632.
- ↑ One Piece Manga and Anime — Vol. 71 Chapter 705 and Episode 635.
- ↑ One Piece Manga and Anime — Vol. 71 Chapter 711 and Episode 640.
- ↑ One Piece Manga and Anime — Vol. 72 Chapter 718 and Episode 648.
- ↑ One Piece Manga and Anime — Vol. 73 Chapter 722 and Episode 652.
- ↑ One Piece Manga and Anime — Vol. 73 Chapter 723 and Episode 653.
- ↑ One Piece Manga and Anime — Vol. 73 Chapter 725 and Episode 656.
- ↑ One Piece Manga and Anime — Vol. 73 Chapter 728 and Episode 660.
- ↑ One Piece Manga and Anime — Vol. 73 Chapter 729 and Episode 661.
- ↑ One Piece Manga and Anime — Vol. 73 Chapter 730 and Episode 662.
- ↑ One Piece Manga and Anime — Vol. 73 Chapter 731 and Episode 663.
- ↑ One Piece Manga and Anime — Vol. 74 Chapter 734 and Episode 666.
- ↑ One Piece Manga and Anime — Vol. 74 Chapter 735 and Episode 667.
- ↑ One Piece Manga and Anime — Vol. 74 Chapter 736 (p. 11-15, 18-19) and Episodes 668–669.
- ↑ One Piece Manga and Anime — Vol. 74 Chapter 737 (p. 2-3) and Episode 669.
- ↑ One Piece Manga and Anime — Vol. 74 Chapter 740 and Episode 673.
- ↑ One Piece Manga and Anime — Vol. 75 Chapter 743 (p. 8) and Episode 677.
- ↑ One Piece Manga and Anime — Vol. 75 Chapter 745 (p. 4) and Episode 679.
- ↑ One Piece Manga and Anime — Vol. 75 Chapter 746 and Episodes 681–682.
- ↑ One Piece Manga and Anime — Vol. 75 Chapter 747 (p. 11-17) and Episode 683, Zoro clashes with Issho as Pica becomes a massive stone giant.
- ↑ One Piece Manga and Anime — Vol. 75 Chapter 748 (p. 4-16) and Episode 684, The Colosseum fighters join up with Zoro and Luffy.
- ↑ One Piece Manga and Anime — Vol. 75 Chapter 749 (p. 3-15) and Episode 685, Zoro engages in a fight with Pica after riding on the statue on Ucy.
- ↑ One Piece Manga and Anime — Vol. 75 Chapter 752 (p. 15) and Episode 688.
- ↑ One Piece Manga and Anime — Vol. 76 Chapter 754 and Episode 692.
- ↑ One Piece Manga and Anime — Vol. 76 Chapter 755 and Episode 693.
- ↑ One Piece Manga and Anime — Vol. 77 Chapter 770 and Episodes 708–709.
- ↑ One Piece Manga and Anime — Vol. 77 Chapter 771 and Episode 711.
- ↑ One Piece Manga and Anime — Vol. 77 Chapter 772 and Episode 711.
- ↑ One Piece Manga and Anime — Vol. 78 Chapter 777 and Episode 718.
- ↑ One Piece Manga and Anime — Vol. 78 Chapter 778 (p. 3-19) and Episodes 718–719.
- ↑ One Piece Manga and Anime — Vol. 78 Chapter 780 (p. 8) and Episode 721, Zoro learns about Law's defeat from Viola.
- ↑ One Piece Manga and Anime — Vol. 78 Chapter 781 (p. 5) and Episode 722, Torikago starts to shrink.
- ↑ One Piece Manga and Anime — Vol. 78 Chapter 784 (p. 3) and Episode 726, Kin'emon and Kanjuro are informed about Zoro's intention to stop Torikago.
- ↑ One Piece Manga and Anime — Vol. 78 Chapter 785 (p. 6) and Episode 727, Zoro passes Franky en route to Torikago.
- ↑ One Piece Manga and Anime — Vol. 79 Chapter 787 and Episode 730.
- ↑ One Piece Manga and Anime — Vol. 79 Chapter 789 and Episode 732.
- ↑ One Piece Manga and Anime — Vol. 79 Chapter 790 and Episode 733.
- ↑ One Piece Manga and Anime — Vol. 79 Chapter 791 and Episode 734.
- ↑ One Piece Manga and Anime — Vol. 79 Chapter 794 and Episodes 737–738.
- ↑ One Piece Manga and Anime — Vol. 80 Chapter 796 and Episodes 740–741.
- ↑ One Piece Manga and Anime — Vol. 80 Chapter 797 and Episodes 741–742.
- ↑ One Piece Manga and Anime — Vol. 80 Chapter 798 and Episode 743.
- ↑ One Piece Manga and Anime — Vol. 80 Chapter 799 and Episodes 743–744.
- ↑ One Piece Manga and Anime — Vol. 80 Chapter 800 and Episode 745.
- ↑ One Piece Manga and Anime — Vol. 80 Chapter 801 and Episode 746.
- ↑ One Piece Manga — Vol. 80 Chapter 802 (p. 5, 12-15), Zoro, his crew, and his allies make their way to Zou.
- ↑ One Piece Manga and Anime — Vol. 80 Chapter 803 (p. 3-5, 12-13) and Episode 752, Zoro, his crew, and his allies begin ascending the elephant's leg.
- ↑ One Piece Manga and Anime — Vol. 80 Chapter 804 and Episode 753.
- ↑ One Piece Manga and Anime — Vol. 80 Chapter 805 and Episode 754.
- ↑ One Piece Manga and Anime — Vol. 80 Chapter 806 and Episode 755.
- ↑ One Piece Manga and Anime — Vol. 81 Chapter 807 and Episode 756.
- ↑ One Piece Manga and Anime — Vol. 81 Chapter 808 and Episodes 757–758.
- ↑ One Piece Manga and Anime — Vol. 81 Chapter 811 and Episodes 761–762.
- ↑ One Piece Manga and Anime — Vol. 81 Chapter 814 and Episodes 764–765.
- ↑ One Piece Manga and Anime — Vol. 81 Chapter 815 and Episode 766.
- ↑ One Piece Manga and Anime — Vol. 81 Chapter 816 and Episode 767.
- ↑ One Piece Manga and Anime — Vol. 82 Chapter 817 and Episodes 768–769.
- ↑ One Piece Manga and Anime — Vol. 82 Chapter 818 and Episodes 769–770.
- ↑ One Piece Manga and Anime — Vol. 82 Chapter 819 and Episodes 770–772.
- ↑ One Piece Manga and Anime — Vol. 82 Chapter 820 and Episodes 772–773.
- ↑ One Piece Manga and Anime — Vol. 82 Chapter 821 and Episodes 773–774.
- ↑ One Piece Manga and Anime — Vol. 82 Chapter 822 and Episode 776.
- ↑ One Piece Manga and Anime — Vol. 90 Chapter 909 (p. 13-17) and Episode 892.
- ↑ One Piece Manga and Anime — Vol. 91 Chapter 912 (p. 15-19) and Episode 897.
- ↑ One Piece Manga and Anime — Vol. 91 Chapter 913 and Episodes 898–899.
- ↑ One Piece Manga and Anime — Vol. 91 Chapter 914 (p. 3) and Episode 900.
- ↑ One Piece Manga and Anime — Vol. 91 Chapter 915 (p. 2) and Episode 901.
- ↑ One Piece Manga and Anime — Vol. 91 Chapter 914 (p. 7-17) and Episodes 900–901.
- ↑ One Piece Manga and Anime — Vol. 91 Chapter 915 (p. 8-17) and Episode 902.
- ↑ One Piece Manga and Anime — Vol. 91 Chapter 916 and Episodes 903–904.
- ↑ One Piece Manga and Anime — Vol. 91 Chapter 917 (p. 6-17) and Episode 905.
- ↑ One Piece Manga and Anime — Vol. 91 Chapter 918 (p. 11-16) and Episode 908.
- ↑ One Piece Manga and Anime — Vol. 91 Chapter 919 (p. 10-11) and Episode 909.
- ↑ One Piece Manga and Anime — Vol. 91 Chapter 920 (p. 4) and Episode 910.
- ↑ One Piece Manga and Anime — Vol. 92 Chapter 924 (p. 11) and Episode 916.
- ↑ One Piece Manga and Anime — Vol. 92 Chapter 929 (p. 9-10) and Episode 922.
- ↑ One Piece Manga and Anime — Vol. 92 Chapter 930 (p. 2-5) and Episode 923.
- ↑ One Piece Manga and Anime — Vol. 93 Chapter 937 (p. 6-17) and Episodes 933–934.
- ↑ One Piece Manga and Anime — Vol. 93 Chapter 938 (p. 2-3) and Episode 934.
- ↑ One Piece Manga and Anime — Vol. 93 Chapter 938 (p. 10-13) and Episode 935.
- ↑ One Piece Manga and Anime — Vol. 93 Chapter 941 (p. 10-13) and Episode 938.
- ↑ One Piece Manga and Anime — Vol. 93 Chapter 942 (p. 16-17) and Episode 940.
- ↑ One Piece Manga and Anime — Vol. 94 Chapter 943 (p. 9-17) and Episode 941.
- ↑ One Piece Manga and Anime — Vol. 94 Chapter 944 (p. 2-9) and Episode 942.
- ↑ One Piece Manga and Anime — Vol. 94 Chapter 945 (p. 4-11) and Episode 943.
- ↑ One Piece Manga and Anime — Vol. 94 Chapter 950 (p. 14-16) and Episode 951.
- ↑ One Piece Manga and Anime — Vol. 94 Chapter 952 (p. 2-4) and Episode 952.
- ↑ One Piece Manga and Anime — Vol. 94 Chapter 952 (p. 15-17) and Episode 953.
- ↑ One Piece Manga and Anime — Vol. 94 Chapter 953 (p. 3, 15-16) and Episode 954.
- ↑ One Piece Manga and Anime — Vol. 94 Chapter 953 (p. 17) and Episode 954.
- ↑ One Piece Manga and Anime — Vol. 95 Chapter 954 (p. 3) and Episode 955.
- ↑ One Piece Manga and Anime — Vol. 95 Chapter 955 (p. 2-7) and Episode 956.
- ↑ One Piece Manga and Anime — Vol. 96 Chapter 974 (p. 12-17) and Episode 977.
- ↑ One Piece Manga and Anime — Vol. 97 Chapter 975 and Episodes 978–979.
- ↑ One Piece Manga and Anime — Vol. 97 Chapter 976 (p. 17-19) and Episode 980.
- ↑ One Piece Manga and Anime — Vol. 97 Chapter 977 (p. 2-14) and Episodes 981–983.
- ↑ One Piece Manga and Anime — Vol. 97 Chapter 979 (p. 7) and Episode 984.
- ↑ One Piece Manga and Anime — Vol. 97 Chapter 980 (p. 5-17) and Episodes 985–986.
- ↑ One Piece Manga and Anime — Vol. 97 Chapter 981 (p. 8-9) and Episode 987.
- ↑ One Piece Manga and Anime — Vol. 97 Chapter 983 (p. 6) and Episode 991.
- ↑ One Piece Manga and Anime — Vol. 98 Chapter 987 (p. 15) and Episode 997.
- ↑ One Piece Manga and Anime — Vol. 98 Chapter 989 (p. 12-17) and Episode 1000.
- ↑ One Piece Manga and Anime — Vol. 98 Chapter 990 (p. 11-17) and Episode 1001.
- ↑ One Piece Manga and Anime — Vol. 98 Chapter 991 (p. 3-4, 10-11) and Episode 1002.
- ↑ One Piece Manga and Anime — Vol. 98 Chapter 994 (p. 10-13) and Episode 1007.
- ↑ One Piece Manga and Anime — Vol. 99 Chapter 997 (p. 7-13) and Episodes 1010–1011.
- ↑ One Piece Manga and Anime — Vol. 99 Chapter 998 (p. 2-7) and Episode 1012.
- ↑ One Piece Manga and Anime — Vol. 99 Chapter 999 (p. 11) and Episode 1014.
- ↑ One Piece Manga and Anime — Vol. 99 Chapter 1000 (p. 4, 10-17) and Episodes 1014–1015.
- ↑ One Piece Manga and Anime — Vol. 99 Chapter 1001 and Episodes 1016–1017.
- ↑ One Piece Manga and Anime — Vol. 99 Chapter 1002 (p. 11-13) and Episode 1017.
- ↑ One Piece Manga and Anime — Vol. 99 Chapter 1003 (p. 6-12) and Episode 1018.
- ↑ One Piece Manga and Anime — Vol. 100 Chapter 1008 (p. 15-17) and Episode 1024.
- ↑ One Piece Manga and Anime — Vol. 100 Chapter 1009 (p. 7-19) and Episodes 1025–1026.
- ↑ One Piece Manga and Anime — Vol. 100 Chapter 1010 and Episodes 1027–1028.
- ↑ One Piece Manga and Anime — Vol. 100 Chapter 1011 (p. 5) and Episode 1031.
- ↑ One Piece Manga and Anime — Vol. 100 Chapter 1012 (p. 7-10) and Episodes 1032–1033.
- ↑ One Piece Manga and Anime — Vol. 100 Chapter 1015 (p. 8) and Episode 1036.
- ↑ One Piece Manga and Anime — Vol. 101 Chapter 1017 (p. 12) and Episode 1039.
- ↑ One Piece Manga and Anime — Vol. 101 Chapter 1019 (p. 3) and Episode 1041.
- ↑ One Piece Manga and Anime — Vol. 101 Chapter 1022 (p. 10-17) and Episodes 1045–1046.
- ↑ One Piece Manga and Anime — Vol. 101 Chapter 1023 (p. 2-10) and Episode 1046.
- ↑ One Piece Manga and Anime — Vol. 101 Chapter 1025 (p. 8-9) and Episode 1049.
- ↑ One Piece Manga and Anime — Vol. 102 Chapter 1026 (p. 11) and Episode 1051.
- ↑ One Piece Manga and Anime — Vol. 102 Chapter 1027 (p. 12-17) and Episode 1052.
- ↑ One Piece Manga and Anime — Vol. 102 Chapter 1030 (p. 11) and Episode 1055.
- ↑ One Piece Manga and Anime — Vol. 102 Chapter 1031 and Episode 1057.
- ↑ One Piece Manga and Anime — Vol. 102 Chapter 1032 and Episode 1058.
- ↑ One Piece Manga and Anime — Vol. 102 Chapter 1033 (p. 4) and Episode 1059, Queen talks to Sanji about a lunarian’s ability to survive in any environment.
- ↑ One Piece Manga and Anime — Vol. 102 Chapter 1033 and Episodes 1059–1060.
- ↑ One Piece Manga and Anime — Vol. 102 Chapter 1035 and Episode 1062.
- ↑ One Piece Manga and Anime — Vol. 103 Chapter 1036 (p. 4-6, 17) and Episodes 1062–1063.
- ↑ One Piece Manga and Anime — Vol. 103 Chapter 1038 (p. 5) and Episode 1065.
- ↑ One Piece Manga and Anime — Vol. 103 Chapter 1040 (p. 10-11) and Episode 1067.
- ↑ One Piece Manga and Anime — Vol. 103 Chapter 1041 (p. 10) and Episode 1068.
- ↑ One Piece Manga and Anime — Vol. 103 Chapter 1046 and Episode 1073.
- ↑ One Piece Manga and Anime — Vol. 104 Chapters 1049–1050 and Episodes 1076–1077.
- ↑ One Piece Manga and Anime — Vol. 104 Chapter 1052 and Episode 1079.
- ↑ One Piece Manga and Anime — Vol. 104 Chapter 1053 and Episode 1080.
- ↑ One Piece Manga and Anime — Vol. 104 Chapter 1055 and Episode 1082.
- ↑ One Piece Manga and Anime — Vol. 105 Chapter 1059 (p. 2-5) and Episode 1087.
- ↑ One Piece Manga — Vol. 105 Chapter 1056.
- ↑ 189.0 189.1 One Piece Manga — Vol. 105 Chapter 1065 (p. 3).
- ↑ One Piece Manga and Anime — Vol. 105 Chapter 1060 (p. 4) and Episode 1088.
- ↑ One Piece Manga and Anime — Vol. 105 Chapter 1057 and Episode 1085.
- ↑ One Piece Manga and Anime — Vol. 105 Chapter 1058 (p. 2-5) and Episode 1086.
- ↑ One Piece Manga and Anime — Vol. 105 Chapter 1060 and Episodes 1088–1089.
- ↑ One Piece Manga and Anime — Vol. 105 Chapter 1061 and Episodes 1089–1090.
- ↑ One Piece Manga and Anime — Vol. 105 Chapter 1062 and Episode 1091.
- ↑ One Piece Manga — Vol. 105 Chapter 1064.
- ↑ One Piece Manga — Vol. 106 Chapter 1071 (p. 11-13).
- ↑ One Piece Manga — Vol. 106 Chapter 1072.
- ↑ One Piece Manga — Vol. 106 Chapter 1073.
- ↑ One Piece Manga — Vol. 106 Chapter 1074.
- ↑ One Piece Manga — Vol. 106 Chapter 1075.
- ↑ One Piece Manga — Vol. 106 Chapter 1076.
- ↑ One Piece Manga — Vol. 107 Chapter 1077.
- ↑ One Piece Manga — Vol. 107 Chapter 1078.
- ↑ One Piece Manga — Vol. 108 Chapter 1089.
- ↑ One Piece Manga — Vol. 108 Chapter 1091, Zoro faces Rob Lucci
- ↑ One Piece Manga — Vol. 108 Chapter 1093.
- ↑ One Piece Manga — Vol. 108 Chapter 1094.
- ↑ One Piece Manga — Chapter 1107 (p. 7), Zoro and Lucci continue to fight
- ↑ One Piece Manga — Chapter 1110 (p. 14-15).
- ↑ One Piece Manga — Chapter 1111 (p. 4-6,18).
| |||||||||||||
| |||||||||||||
| |||||||||||||
| |||||||||||
| |||||||||||
| |||||||||||
| |||||||||
| |||||||||
| |||||||||||
| |||||||||||
| |||||||||||
| |||||||||
| |||||||||
| |||||||||
| |||||||||
| |||||||||
| |||||||||
| |||||||||
| |||||||||||||
| |||||||||||||
| |||||||||||||
| |||||||||||||
| |||||||||||||
| |||||||||||||
| |||||||
| |||||||
| |||||||
| |||||||
| |||||||||||||||||||||||||||||||||||||||||||
| |||||||||||||||||||||||||||||||||||||||||||
East Blue Inhabitants | |||||||||||||||||||||||||||||
|---|---|---|---|---|---|---|---|---|---|---|---|---|---|---|---|---|---|---|---|---|---|---|---|---|---|---|---|---|---|
| |||||||||||||||||||||||||||||
| |||||||||||||||||||||||||||||
| |||||||||||||||||||||||||||||
Individuals with Bounties | |||||||||||||||||
|---|---|---|---|---|---|---|---|---|---|---|---|---|---|---|---|---|---|
| |||||||||||||||||
| |||||||||||||||||
| |||||||||||||||||
| |||||||||||||||||
| |||||||||||||||||
| |||||||||||||||||||||||
| |||||||||||
| |||||||||||
| |||||||||||
| |||||||
| |||||||
| |||||||
| |||||||||||||
| |||||||||||
| |||||||||||
| |||||||||||
| |||||||||||||||||
| |||||||||||||||||
| |||||||||||||||||
| |||||||