
|
Ahoy! This here is the 88th Featured Article.
"Roronoa Zoro" has been featured, meaning it was chosen as an article of interest.
|
Past[]
Zoro and Saga were trainees together at the same dojo when they were children and became friends even as they became young men, with the two making a promise with one another; with one aspiring to become the world's best swordsman and the other wanting to join the Marines and become the master of the sword of justice respectively. Years later, during Zoro's time as a bounty hunter, he was fighting with a group of pirates, Zoro was cornered by a pirate wielding two pistols. The pirate, however, was quickly dispatched by Saga, who appeared much to the pirate hunter's surprise. He pulled a small knife out from his waistband, telling Zoro that it represented their promise and reminding him of their childhood together. The two began fighting together for a time, and when they came across another pirate crew at sea that was burning down, Saga ended up trapped on the burning boat by an iron chain, forcing Zoro to leave him as he could not cut steel at that time. Zoro believed that Saga died that day, but Saga had managed to survive with his right arm paralyzed, and made had it to a nearby island.[20]
East Blue Saga[]
One Piece - Defeat Him! The Pirate Ganzack[]
Adrift in a small dinghy on a sunny, windless day, Luffy, Nami, and Zoro sit paralyzed with hunger. As Nami berates the two men for squandering the month's provisions, a Plesiosaur suddenly attacks, snapping their dinghy in half. Overjoyed at this new source of meat, Luffy and Zoro prepare to counterattack, but are quickly overpowered and swept away in the tide; while a panicking Luffy drags Zoro deeper and deeper down, the monster carries Nami off.
Some time later, a half-drowned Luffy washes up on an island. Here two pirates, Alto and Chico, prepare to loot his body, only to be challenged by Medaka, a small, heavily armored girl who demands they return her father. Though unimpressed, the pirates are annoyed enough to give chase, and inadvertently trample Luffy enough times to force all the water from his lungs. Awakening in a rage, Luffy beats up the two pirates senseless, and promptly collapses from hunger. An awed Medaka brings Luffy and a hastily found Zoro into the local village, where an elder named Skid offers them food. While Luffy and Zoro eat (and speculate on Nami's fate), Skid warns them of Ganzack, a vicious pirate whose crew has enslaved the whole island. While the women, children, and elders have been left in the village as hostages, all the able-bodied men - including Medaka's father Herring - have been put to work in the Devil's Tower, a massive structure on the far side of the island.
When the tower starts shaking, it spills Luffy's meal. When he asks for more, Medaka sadly explains that the village has given the last of its food to Luffy and Zoro; only the tower, she adds, might contain more. On hearing this, Luffy immediately rushes off to the tower with Medaka, an exasperated Zoro following in their wake. As they reach the tower, the three of them discover that the Ganzack Pirates are forcing the villagers to make weapons, and that the shaking was coming from artillery fire. As Medaka cries out to her father as soon as she finds him, alerting dozens of hostile pirates, and unfazed Luffy and Zoro eagerly meet the challenge, until a masked figure suddenly swoops in and kidnaps Medaka. As the two prepare two give chase, Ganzack's men begin to attack, leaving Zoro to fend them all off while Luffy gets Medaka back. Luffy chases Medaka's kidnapper out of the tower and down to the shore, only for the kidnapper to reveal herself as Nami. At first puzzled, Luffy is shocked when the Plesiosaur reemerges with none other than Ganzack himself riding it.
Upset about everything that is happening, Luffy attacks the pair and proves an even match for both Ganzack and the Plesiosaur, but eventually falls when Ganzack's armor sprays a powerful foam that binds his entire body. Shortly after, Ganzack's men force Zoro's surrender by threatening to fire on the slaves; as Zoro is taken away in chains, Herring quietly reassures his fellow slaves, and shows that he has smuggled some dynamite out of the pirates' munitions.
Soon, Luffy, Zoro, and Medaka find themselves shackled to a wall, forced to watch the Ganzack Pirates - and a disinterested Nami - feast and party. When Luffy continues to defy him, an annoyed Ganzack seizes Luffy's hat and stomps on it. Enraged, Luffy shouts that the hat is a treasure entrusted to him by Shanks, and - to Medaka's shock - proudly proclaims himself a pirate. Moments later, an explosion rocks the tower, as Herring leads the other villagers out in open rebellion. While the Ganzack Pirates rush outside to quell the villagers, Nami cheerfully approaches the shackled trio, returns Luffy's hat, and flashes the keys to their shackles; all along, she had meant to double-cross Ganzack. As soon as Medaka is freed, however, she runs off by herself, now considering Luffy and his friends no better than the Ganzack Pirates.
Despite this, however, when Ganzack unsheathes the bladed pincers on his armor and gets ready to kill both Medaka and Herring; Luffy, Zoro, and Nami join the fray. Their arrival inspires the villagers to challenge the Ganzack Pirates anew, spurring Ganzack to reveal his ultimate weapon, which turns out to be the Devil's Tower itself. At his signal, the Plesiosaur tows the tower, along with him and his crew apart from the rest of the island, revealing it to be the main cannon on a massive warship. To the villagers' horror, a single shot from this cannon sinks a good part of the island - and Ganzack means to keep shooting until he sinks it all.
As Luffy and Zoro prepare to engage, Herring desperately tries to hold Medaka back; though touched by her father's concern, Medaka refuses to stay behind, and grabs on as Luffy rockets himself and Zoro onto the ship. Onboard, Zoro engages Ganzack's men, while Luffy confronts Ganzck himself atop the mainmast. Now prepared for the projectiles in Ganzack's armor, Luffy presses his advantage, until Ganzack binds him in a long, powerful chain.
Gloating, Ganzack swings his pincers in for a killing blow, only for Medaka to once again block him - and fall, her armor unable to withstand the razor-sharp blades. Shocked by her sacrifice, an enraged Luffy shatters his chains and forces Ganzack into melee, quickly overpowering him and his armor with a Gomu Gomu no Tsuchi. Moments later, Luffy finds himself being applauded by Medaka, who cheerfully reveals that Ganzack had only sliced off the top half of her helmet.
As Zoro, Nami, Herring and the villagers deal with the rest of Ganzack's crew and the Plesiosaur, Luffy prepares to escape with Medaka and the others as they send off a boat filled with dynamite to finish the Plesiosaur and sink the Warship for good. Refusing to admit defeat, Ganzack clambers to his cannon and fires one last shot at the island, all the while proclaiming himself to be the future Pirate King. In response, Luffy scornfully punches him into the sky, on a collision course with his own shell. As Ganzack is swallowed by a huge explosion, Medaka helps Luffy off the sinking warship, and back to the island.
Sometime later, the crew prepare to depart, the grateful villagers having supplied them a new boat and plenty of food. To Luffy's surprise, Medaka runs up with a gift of her own: a life preserver. As she gently teases Luffy about his inability to swim, Nami and Zoro quietly smile at the "thank you" scrawled on the gift's underside.
With Medaka's encouragement, the crew sail off into the sunset, with their hopes aimed high as they head for the Grand Line.[21]
One Piece: The Movie[]
On the Going Merry, Zoro finds himself starving alongside Nami, Luffy, and Usopp, specifically because Luffy ate all of their food and provisions. As they’re starving, a group of thieves come to steal their treasure and supplies. Luffy stops them and wrecks their getaway boat, which had a kid on it as a hostage. Suddenly, a large pirate ship led by a man named Eldoraggo, appeared. Since the thieves worked for his pirate crew, an angry Eldoraggo, using his Devil Fruit ability, while aiming at Luffy, destroyed what was left of the getaway boat. Luffy and the kid both fell in the sea, and Zoro jumped in to save them. As a result, Luffy and Zoro were separated from Nami and Usopp.
After reaching a floating Oden stand owned by his grandfather, Ganzo, the kid; whose name is Tobio, told Luffy and Zoro about Woonan, the Great Gold Pirate, who, according to the legend, obtained almost one-third of the world's gold and disappeared with it to a remote island. As Luffy and Zoro hastily eat while listening, they learned from Tobio that Eldoraggo was determined to find Woonan's loot, too, and that he had the treasure map, which had the coordinates of the location of Woonan's treasure in possession. After hearing this, Luffy wanted to meet Woonan and find his treasure too, but he and Zoro were both stopped by Ganzo, who told to pay for the food they just ate. When he heard that they had no money at all, Ganzo tied them both up in chains.
After arguing with his grandfather about Woonan and the gold, Tobio and the others see Eldroraggo using his devil fruit in the distance, and Tobio decides to go for the treasure. As they reach the island, and Tobio runs off alone to the forest, a concerned Luffy, still chained to Zoro goes off after him, forcing Zoro to go along with him as result. After the three run into Eldoraggo, the pirate easily wards off Tobio, while Luffy and Zoro have better luck despite being chained together, with Zoro stuck with only his mouth to use one of his swords. As Luffy continues to try to fight back, he makes a mistake that leads to him, Zoro, and Tobio being launched into a distant hill, with Nami and Usopp carefully escaping Eldoraggo to follow them.
After Nami and Usopp reach the hill, Nami undoes the chains binding Luffy and Zoro, and she reveals that took the map from Eldoraggo. After both destroying and deciphering the map, the group meet up with Ganzo, who reveals that he knew Woonan and tells them how Woonan became a pirate and how he became an Oden shop owner. After hearing the story, the Straw Hats take Tobio and Ganzo to the plateau where the treasure is located, unfortunately Eldroraggo and his crew figured out the location as well.
As the Straw Hats begin their counterattack, Zoro is pitted against the mercenary hired by Eldroraggo, Golass. As the two duel, Zoro notices Golass' strength as a swordsman, but is disappointed by his apparent greed. As the duel continues, Golass seems to have the upper hand, till Zoro shows him that he is stronger, and then soundly defeats him. Although Golass lost, Zoro allowed him to live, as he realized that Golass never wanted to fight for money, and that during their duel, he wasn't. Zoro then leaves him there, and tells him to come back to challenge him if he ever regained his pride as a swordsman. After Luffy manages to defeat Eldroraggo, the Straw hats, along with Tobio and Ganzo go inside the house, hoping to find Woonan and the treasure in a hidden chamber. It turns out it was the resting place of Woonan himself and that he returned all the gold he stole to its rightful owners. As the Straw hats try to settle the earlier payment for the food, Ganzo refuses and states that they don't have to pay anymore, stating that they can pay it back after they reach their dreams, which Zoro and the others happily agree to. The Straw Hats then bid farewell to Tobio and Ganzo and sail away to their next adventure.[22]
[]
It's a random day aboard the Going Merry, and Luffy is being yelled at by Nami for urinating in the ocean. While on fishing duty, Luffy catches something big and tries to reel it in, only for it to drag the ship backwards instead of forward. As the ship crashes, the fishing line, as well as the ship ends up caught at a rocky crater with a chest chained to it.
While Luffy is disappointed that he catch anything to eat, the others are more interested in the chest, namely Nami. She opens the chest, only to find a skull inside. Usopp picks up the skull and reads the back of it, and finds an engraving about a treasure that can make anyone's dream come true. It also says that it can be located at a place called the Ocean's Navel. While the others explore the Ocean's Navel, the Going Merry begins to fall down into the crater, causing Luffy to almost drown, and for Zoro to have to save him. As they are doing this, they meet the one who sent the message in the bottle, Hamu as well as his guardian, Meroie. After being welcomed to their hidden village, they are immediately attacked by a monster, but Zoro manages to stop them with a polearm. Hamu and Meroie give them food, and asked them why the two of them are there, and Luffy explains they fell looking for treasure and that they are pirates. After hearing this, Hamu gets upset and leaves, when Luffy and Zoro ask what was wrong, Meroie explains the village's past and how it was destroyed by the pirate captain Joke.
She asks them if, even though they are pirates, they will help Hamu avenge his mother and protect his village. They reply that they will and decide to go to the mountain. As soon as they reach the end of the village, the monster they encountered before attacks them again. Zoro immediately starts fighting the monster and tells Luffy to go find Nami and Usopp. Meroie stays with Zoro while Hamu runs towards Luffy. Zoro keeps fighting the monsters with rusty swords that were provided by Meroie until Sanji shows up and delivers the finishing blow. Zoro is glad that Sanji is there, but then gets immediately annoyed at Sanji's behavior towards Meroie. After Joke is defeated, the monsters and treasure disappear, and Zoro, Sanji, and Meroie reunite with the others. When the Straw Hats leave the island, Hamu tells Meroie that he hadn't asked their names, but she states that it doesn't matter since they are just a bunch of pirates, to which Hamu agrees. He looks at the Straw Hats' ship sail away and smiles.[23]
Clockwork Island Adventure[]
Having found a sunny, peaceful island in the midst of their voyage, the Straw Hat Pirates disembark and relax on the beach together. Their relaxing day is ruined when Luffy not only go on about a toy windmill that he finds on the beach, but later when Luffy sees The Going Merry sailing away, as the ship has been stolen to everyone’s shock.
With no possessions and forced to rent a small paddleboat and clothes from a nearby wedding shop, the crew chases their ship, only to run into a boy floating in the water. After stopping to help, they are caught in a net, realizing that the boy, Akisu lured them into a trap alongside his brother, another thief named Borodo. After seeing that they had nothing to steal, the pair let the straw hats go and introduced themselves. Then they explained that they were planning to steal the legendary Diamond Clock, which is located on Clockwork Island, which is where the Going Merry is currently headed. When asked why, the brothers explained that the Island was taken over by the Trump Pirates which is led by a pirate named Bear King, and that they are the ones who took their ship. As they began explaining who the Trump Pirates were and how big of fleet they had, the group soon became surrounded by a part of the fleet.

The Straw Hats and Thief Brothers are confronted by Honey Queen.
The fleet was commanded by two members of the Trump Pirates, Boo Jack and Honey Queen, who soon corners the brothers' boat. Despite Luffy, Zoro, and Sanji happily fighting back, Usopp frantically rows the boat away when the pirates almost capsize them all, accidentally causing Akisu to drop a music box in the sea, and causing Akisu to force Usopp to stop so Borodo can retrieve it. Borodo manages to get the box, but the Trump Pirates catch up as a result, destroying the boat, and even kidnapping Nami to be their captain's new bride.
After salvaging enough of the boat to make a raft, the remaining Straw Hats, along with Akizu and Borodo, make their way to Clockwork Island, and listen to Akisu's past. As they arrive, they see a small, barren rock in the sea, which Borodo explains is the entrance to the Island. Atop this rock stands a huge spiral staircase, stretching far beyond the clouds. This staircase leads to the "true" Clockwork Island, a hill town full of scientists and engineers. The hill is topped by a great castle, which houses the delicate engine keeping the island stable; for seven years, Bear King has commandeered it as his base, Trump Castle, using the people of the island to build a weapon powerful enough to help him become the king of the pirates, the King Cannon. As they go up the staircase, they storm through trap after trap, with Zoro stopping one trap by uprooting a part of the floor with his bare hands. Eventually, they reach the top of the staircase, though extremely exhausted and begin to head to Trump Castle.
As Borodo spots both the Diamond Clock and the Going Merry at the top of the castle, the group decides to go into town first for food and clothes. After finding both, they soon meet the town's chief engineers, who explain the town's current situation and tells the group to leave while they still can. Despite them telling the group to leave, they head straight to the castle by parasail, but are attacked by the Trump Pirates again, this time being separated from Sanji, who falls into a hill filled with landmines and is quickly captured after. Borodo brings the parasail to a crash landing at the gates of Trump Castle, where everyone continues inside through the gates.
As the group is met with hundred's of the Trump Pirates' foot-soldiers, Luffy and Zoro quickly make short work of them. When the group is attacked by another member of the Trump Pirates, Skunk One, Usopp decides to hurl himself towards him so the others can continue moving forward inside the castle, being captured in the process. As they make their way through the upper floor of the castle, Akisu is stopped by a foot-soldier and is knocked out. Seconds later, the floor springs a pressure-trap that threatens to crush them against the ceiling. Luffy and Zoro desperately try to hold the trap back, only for Borodo to slip away, taking himself and Akisu to safety. As the Straw Hats look on in shock, Borodo coldly deems them unfit to fight the Trump Pirates and reveals he had stolen their ship and planned to sail it to Clockwork Island so they would fight the Trump Pirates and hopefully save Akisu's hometown, but now he has decided to defeat them on his own, leaving Zoro and Luffy stuck on the floor.
As Borodo moves on, the trapped Luffy and Zoro are accosted by the last Trump member, the vengeful Pin Joker. As Pin Joker recalls his past with Zoro and the scar he received from him, Zoro dismisses him entirely, claiming not to even remember ever fighting him in the past. Enraged, Pin Joker began unleashing a flurry of feather darts with poison gas held within at them. However, to Luffy's horror, Zoro throws himself into these darts head-on, shielding Luffy's body at the cost of his own, and is then stabbed by Pin Joker and taken to the Bear King, where he is crucified along with the other captured Straw Hats.

Zoro defeats Pin Joker.
While Borodo and later Akisu is being beaten by Bear King for their actions, the toy windmill from before fails down to the floor Luffy is on and breaks in front of his feet. Reminded of the Thief Brothers' integrity, Luffy finds the resolve to shove straight through the ceiling and every floor above, and after reaching the top, he randomly grabs a stick of dynamite and "plays" with it, causing everyone to freak out and make Luffy toss it away, causing an explosion, which accidentally frees the rest of the Straw Hats. After being freed, the Straw Hats, despite being upset by Luffy's antics, rally for another fight with the Trump Pirates, with Zoro quickly confronting Pin Joker. After Usopp manages to retrieve Zoro's swords and the other's stuff, The Straw Hats were finally ready for a proper fight. With his swords returned to him, Zoro begins a fight with Pin Joker, who tries to sneak attack Nami, only for Zoro to block his attempt. The two continued fighting until they reached the edge of the balcony. An angry Pin Joker then launched another wave of poison darts at Zoro for correcting his speech, but Zoro managed to not only block the attack, but send them right back at Pin Joker. Zoro then tells Pin Joker that he won't be defeated by him and finishes him off with an Onigiri attack.
As the Straw Hats defeat the members of the Trump Pirates, Luffy gets into an intense fight with the Bear King, who ends up using the King Cannon on Luffy. This backfired as Luffy caught the bullet and shot it back at the Bear King, sending him crashing into the King Cannon and through the floors of the castle. As the Bear King was defeated and the impact from Luffy's attack using the King Cannon's bullet caused the island to collapse, the townspeople watched as the castle and hill collapsed. Zoro and the others got onboard the Going Merry and made a dangerous escape attempt using a large piece of canvas as an emergency parachute, which did lead to them landing back into the water safely. With the island destroyed, the islanders pledge to seize the future that the Thief Brothers and the Straw Hats staked their lives for, and build a new homeland elsewhere on the sea. Hearing this, and the crew sees an alive Akisu, who is quickly reunited with his mother, who was one of the chief engineers, after seeing this, Borodo decides to leave Akisu with his real family.
As they leave the ruins of Clockwork Island, the Straw Hats and Borodo quietly sail their separate ways. Despite the Straw Hats' questions, Borodo tearfully insists that he and Akisu can't stay together anymore now that he's found his real family. Despite this, Akisu boards Borodo's boat and shocks everyone by stating that not even his blood family can erase what he truly is: a man of the sea, and Borodo's brother. As the two tearfully reunite, the Straw Hats happily sail away, ready for their next adventure.[24]
Loguetown Arc[]
| This is an empty section. Please help the wiki by adding information to it. |
Warship Island Arc[]
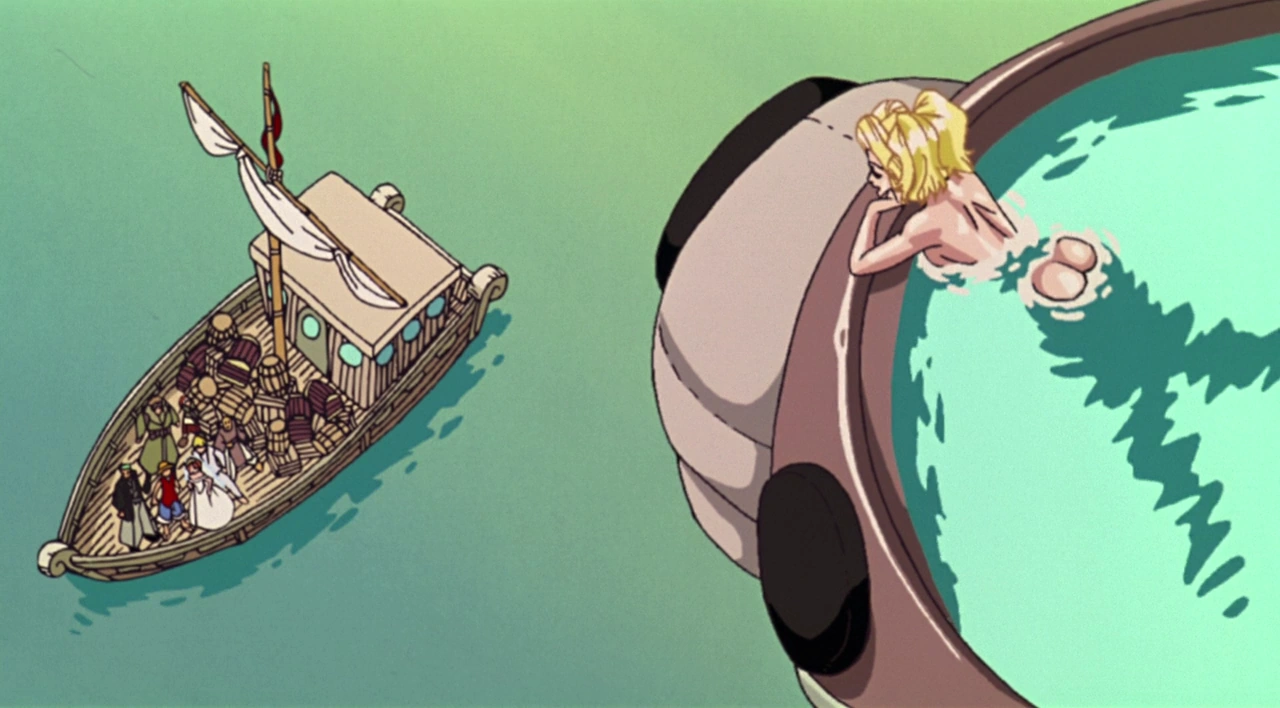
Back on the Going Merry, Luffy asks Nami if they reached the Grand Line yet, and she tells him no. Usopp then spots a flock of birds off their starboard side and Luffy sees something in the water and stretches his hand out to grab what he thinks will be a fish. The crew are all surprised when he pulls in a girl instead and accidentally knocks Zoro off the edge of the boat. The girl is unconscious but wakes up when she smells Sanji's cooking. After learning that she is on a pirate ship, she freaks out and refuses to eat any food given to her.[25]
Later in the night, Zoro and the rest of the crew are awoken to both Luffy and the girl in the kitchen, after being reassured that they were not evil and would let her take what she wants to eat, the girl introduced herself as Apis the next morning after making everyone breakfast. She tells them that she is from Warship Island, but refuses to tell them why she is being chased by the Marines. After a Marine ship begins attacking the Going Merry, the crew manage to avoid and escape the Marines, but only to end up stranded in the Calm Belt.
The Merry ends up atop the head of a Sea King as the crew are surrounded entirely by them. After Apis manages to pull out the Sea King's nostril hair, it sneezes, causing the Going Merry to be blown back out of the calm belt into the regular seas. After this, the group start sailing to Warship Island to take Apis home. As they reach the port, Apis had to persuade the locals not to attack the Straw Hats, telling them that they were the ones who rescued her. After doing so, Apis' grandfather, Bokuden shows up, and tells Apis to come home, and invites the Straw Hats for dinner. While waiting, the group asks Bokuden why the Marines are after Apis, to which he asks Apis the same question, only for her to refuse to answer. Bokuden then tells them about the island's old legend about the Lost Island, the millennial dragons, a substance called Dragonite, and the Elixir of Immortality.[26]
A day later, Luffy and Nami come back with Apis and tells the others the truth about why the Marines are after her, and they tell them about her pendant and about the millennial dragon Ryu. With Luffy wanting to help Apis and Ryu, the crew prepare to get the two of them off the island before the Marines show up. Unfortunately, the Marines of the 8th Branch, led by Nelson Royale already have the island surrounded, and they even have a mercenary by the name of Eric hunting the two. Everyone splits into groups, Usopp and Zoro move the ship into position, Nami and Apis get Ryu onto a cart, and Luffy and Sanji fight off the Marines. Despite all this, the group still have trouble shaking off Eric, as he hunts them with his Kama Kama no Mi, but manage to lose him in a mirage.[27]
After going into the mirage, the crew spot an island hidden in the mirage and go towards it. After reaching the island, Ryu is still unsure if the island they are on is the Lost Island, so they go to the top of the mountain to find the Dragon's nest. Instead, they find a building with a dragon emblem. While trying to find the entrance, they end up falling down into an underground temple. After examining the temple ceiling and its paintings, Nami comes to the conclusion that the Lost Island is actually hidden beneath Warship Island, and a sleeping Ryu wakes up and confirms her theory. As Eric shows up, the others flee with Apis and Ryu, while Zoro holds him off. After battling Zoro for a while, Eric flees the building to chase Ryu, Zoro chases after Eric, stopping him by throwing a stick at his legs. Despite Eric finally agreeing to fight Zoro for real, the others had finished getting Ryu's cart back to the Merry, and Luffy stretches his arm and pulls Zoro back onto the ship, much to his frustration. The crew then escape Eric and sail out of the mirage.[28]
Even after the crew escape and make it to the Lost Islands' coordinates, Nelson's fleet manage to blockade them, with Eric and lieutenant Hardy's ship closing in.[29] As the ship becomes blockaded with giant chains, the crew starts to board the Marines ships to kick the Marines out. As Eric comes and takes Ryu and Apis, an angry Ryu knocks Eric into the water after knocking Apis back. As Ryu starts to finally fly, Nelson has his ship fire several cannonballs at Ryu, to everyone horror. As Ryu falls to the water, he asks Luffy to keep Apis safe. As this happens, Ryu lets out one final roar, leading to the Lost Island rising from the ocean, and multiple dragons flying from it. After this happens, the straw hats begin their counterattack once again, with Luffy and Sanji fighting off the Marines and Zoro cutting the chains connecting their ship to the Marines.[30]
While Luffy decides to finish off the Marines, the other reach the Lost Island with Apis, upon doing so they learn that the so-called substance called dragonite meant for creating the Elixir of Immortality was in fact the fossils of ancient sennenryus. After Luffy destroys Nelson's Ship, he gets on land and makes it to the others, after which he tells Apis Ryu's final message to her; that when the dragons die, they are reborn in the nest. Seconds later, a baby dragon hatches from an egg, with the baby supposedly being a reborn Ryu. The baby screeches at Apis, and she cries happily agreeing with what it's telling her.
Unfortunately, both Nelson and Eric show up, however an angry Eric slashes Nelson and proposes a deal with the straw hats. He states that he wants to split the dragonite and the immortality with them, but a critical Nami points out that the fossilized sennenryus that make up the dragonite couldn't possibly be used to make the Elixir. That's when Eric states that the alive sennenryus could, which upsets Apis, who runs towards him out of anger. As Eric tries to attack her, Usopp and Zoro protect her, and Luffy tells them all to stop, and that he’ll be the one to beat him, because he promised Ryu he would. Eventually Luffy does succeed in taking Eric down.[31]
As the Straw Hats get ready to leave Warship Island again, they are met by Apis and Bokuden. Luffy asks Apis if she wants to come with them, to which she replies that she would like to but she will stay in the village to protect the Dragon's Nest. The Straw Hats set sail and say goodbye. Then Usopp asks the rest of the crew if Apis will be fine and Sanji, Luffy and Zoro all say that she will be okay. As the Straw Hats finally reach the entrance to the Grand Line, they have a rough time going through Reverse Mountain, which is made even worse by Eric showing back up and telling them that if any of them move and he will tear the ship apart. Nami warns him that there is Dragonite besides him, and he falls for it and she kicks his leg, throwing him to the current. With Eric officially gone, the crew celebrate as they enter the Grand Line.[32]
Arabasta Saga[]
Chopper's Kingdom on the Island of Strange Animals[]
Following a lead from an old treasure map, the Straw Hats set sail for Crown Island, with everyone ready for a new adventure; except Chopper, who worries over every possible danger. While the others tease Chopper, the Going Merry suddenly begins shaking. Rushing above-deck, the Straw Hats find the sea erupting with dozens of massive geysers, one of which directly strikes the Merry and launches it high into the air. In midair, the crew can see the entirety of the island, and the crown-like ring of steam its surrounding geysers produce, but then the ship starts to fall and crash land on the island, accidentally Knocking Chopper off the ship in the process.
As Chopper vanishes in the forest, the others land in the far-off shore, with several bizarre animals surrounding them, including a Bald Parrot. The crew was taken aback when the Parrot started speaking english, but then listened as he explained that he was the elder of the island, and the island was filled with animals as intelligent as him. He then explains that for years, the creatures of the island lived peacefully under the rule of the Kirin Lion, but their ruler passed away and now the kingdom needs a new ruler, one that falls in line of an ancient prophecy.
After listening to the story, the crew hears a celebration happening in the mountains, and they go to investigate, with Usopp giving everyone animal themed disguises to blend in. On the way though, the celebrating is cut short by the arrival of the islands natural predators, the Horn Eaters, a herd of armored beasts. As everyone runs away, Luffy gets targeted by the beasts due to his costume having fake horns. Panicked, Luffy snaps them off, but throws them straight ahead, leading the Horn-Eaters to trample him anyways, with the others watching annoyed.
Later, the Straw Hats stumble across a cliff-side camp where the Horn-Eaters have been trapping and trampling scores of horned animals. They soon come to learn that the beasts are being controlled by a man named Battler, who's collecting horns in an attempt to find a treasure on the island said to have power that could shake worlds. Realizing that he told the Straw Hats too much, he controls the Horn Eaters with a special hypnotic violin and orders them to attack, unfortunately Luffy was also effected by the hypnotic music and goes on a rampage knocking himself and the crew over a cliff and into a crocodile filled river. Once Luffy is out of range, he grabs everyone and breaks their fall with his rubber body.
The straw hats then see dozens of dehorned animals along the riverbanks. Realizing how much damage Battler has already done, the crew start to worry more about Chopper, while doing that they notice the Bald Parrot from earlier flying above. They ask for his help, and he agrees to take them to the mountain to meet the new king of the beasts, unaware that they are being followed by Battler and his men, Heaby and Hotdog. Once they reach the top of the mountain, however, they are surprised to learn that the new king is Chopper, and while Chopper is happy to see them, Mobambi; the only human resident of the island, and a talking bird named Karasuke, who thinks they are invaders, and asks Chopper to fight them. Chopper tells the animals that the Straw Hats are safe, and so he leads the Straw Hats over to a great feast so they can eat together. Mobambi demands what's so great about the Straw Hats, and when the animals hear that they are pirates and when Luffy asked for meat, the animals flee in terror thinking Luffy is going to eat them. Nami asks Karasuke about the treasure of Crown Island, but Usopp says that they should just grab Chopper and leave.
Then, a large blast is heard from the distance so the straw hats and the animals go to see what is going on. They see Battler and his men down below, and he states that the power he is looking for is in the horns of the King of the Beasts. Battler demands that they tell him where the king is and starts playing his violin, so the Horn Eaters start charging. An angry Chopper leaps down and lands in front of Battler declaring himself as the King. Battler stops playing the violin, unconvinced by Chopper's words. Chopper tells him to stop attacking the animals and to call off the Horn Eaters, but Battler says he will only if Chopper beats him. Luffy tries to help, butt is unable to leave the entrance, due to eating to much and becoming fat, which ended up blocking Zoro and Sanji as well.
As Chopper and the others try to divert the Horn Eaters away, Sanji, Zoro, and Luffy arrive, and Zoro and Sanji run off to go help Chopper. Luffy says that Mobambi should go help too, but Mobambi says that he is not strong enough, remembering that he was helpless when his father was killed by pirates. As the others console Mobambi, Zoro begins fighting off one of Battler's henchmen, Hotdog. As the fight went on Zoro became restrained with a metal ball and chain, and began taking an onslaught of powerful kicks from Hotdog. This goes on for awhile, until Hotdog becomes overconfident and ends up kicking the chains holding Zoro loose, till Zoro eventually breaks free from them. As Hotdog brags about having the world's strongest kicks, Zoro simply notes how careless the man is, before finishing him off with his Tatsu Maki Technique, finally defeating him. After this, Zoro openly states that Sanji's kicks are more powerful, then goes off to find the others.
As Luffy finally defeats Battler once and for all, a day later as Mobambi and Chopper say their tearful goodbyes, the Straw Hats talk about the great party they had after the defeat of Battler. As they head toward their next adventure, Usopp jokes with Chopper about possibly seeing some monsters next, and Luffy happily yells that they will just keep moving, full steam ahead.[33]
Arabasta Arc[]
| This is an empty section. Please help the wiki by adding information to it. |
Post-Arabasta Arc[]
| This is an empty section. Please help the wiki by adding information to it. |
Episode of Arabasta: The Desert Princess and the Pirates[]
The majority of the events of Whisky Peak Arc plays out the same, but Zoro's fight with the bounty hunters of Baroque Works has changed. In this version, when the bounty hunters try to shoot Zoro, he cuts them, instead of dodging their attack to make them shoot each other. When Zoro runs up a ladder, an unknown man shoots him, and when fighting against the Officer Agents, another unknown man throws a barrel at Zoro, instead of Miss Monday. His fight with Miss Monday remain the same, but his fight with Mr. 9 happens while Zoro is on the roof, also Zoro doesn't fight against Igaram or Vivi and defeats all bounty hunters that are left with Tatsu Maki. Just like in the original version, Vivi ends up traveling with the Straw Hats all the way to the Arabasta Kingdom.
A sleeping Vivi wakes up on the Going Merry to find Luffy and Usopp fishing with Karoo as bait, and she punishes them by bashing their heads together. They pull up a mysterious okama, who appears extremely grateful to be saved by pirates he does not know. The man reveals that he cannot swim because he ate the Mane Mane no Mi, which allows him to change himself into anyone he has touched the face of. He adds that he can also remember these faces, which allows him to take on the faces of those he touched before, showing several faces to the crew, one of which is Vivi's father Cobra, the king of Arabasta. The man then leaves as his crew arrives to pick him up, declaring the Straw Hats his friends despite not knowing them for long. As he leaves, he is called Mr. 2 Bon Kurei by his crew.
When Vivi realizes that the man was a member of Baroque Works and that he could turn into her father, she reveals that Arabasta is in a drought, and her father, King Nefertari Cobra had been framed for using Dance Powder, which forces rain onto the region it is used on at the expense of places downwind, for the capital. She states that the leader of Baroque Works is Crocodile, one of the Seven Warlords of the Sea, who is considered a hero in Arabasta for protecting the nation from pirates. In order to prove their identity should Mr. 2 transform into any of them, the crew each draw an X on their wrists and covers it with a bandage, which they will take off to prove their identity.
The crew reach Yuba, a ghost town that had once been a prosperous oasis before sandstorms ravaged it, causing many of the people to join the rebellion. They encounter an old man named Toto, who is the father of the rebellion's leader, Koza, a childhood friend of Vivi's. As the sun rises, Toto gives Luffy some of the water he dug up. During their travel, Luffy declares that he quits, saying that even if the rebels stop, the threat will continue as long as Crocodile is alive. He adds that Vivi is naïve to think that they can prevent everyone from dying in the battle, and he urges her to, rather than risk only her life, let them help her, which she agrees to. After this, the crew befriend a camel named Matsuge, and they begin to ride his Crab friend, Hasami. Vivi then thanks Luffy for helping her see the truth, and promises him a feast after they save the kingdom.
Crocodile then ambushes them almost immediately, using his devil fruit abilities to reach and capture Vivi. Pell shows up and attacks Crocodile and while he fails to injure him, manages to make him let go of Vivi. Crocodile's assistant, Miss All-Sunday uses her powers to ground Pell, then uses Clutch to severely wound him. Luffy intervenes, stretching out and throwing Vivi atop Hasami, staying behind to fight Crocodile.
As the rest of the crew go on to Alubarna without Luffy, Baroque Works' Officer Agents lie in wait, but the crew splits up as decoys for Vivi, allowing her to escape and try to stop the rebellion. Zoro ends up fighting Mr. 1. The majority of his fight with Mr. 1 remains the same but is a lot shorter, as Zoro is initially unable to hurt Mr. 1, but suddenly realizes how to cut through steel, and defeats him.
After Luffy and Pell save Vivi, Zoro reunites up with the rest of the crew, and they attempt to retrace Crocodile's steps to find a bomb he placed in the city that will take everyone out, while Pell searches from the air. They discover its location in the clock tower and is guarded by Mr. 7 and Miss Father's Day, who shoot Pell from the sky. The crew are left with less than one minute, and they work together to launch Vivi into the clock tower, where she easily defeats Mr. 7 and Miss Father's Day and cuts the fuse, only to discover that it's a time bomb and cannot be disarmed. Pell, however, shows at the last minute and carries the bomb high above Alubarna, sacrificing himself in the process. As the crew watch Vivi try to stop the fighting, the then see Crocodile fly through the sky and lands in the main square, defeated, knowing that their captain has won. As the fighting finally stops, Cobra then brings Luffy to his crew, meeting them for the first time. The crew then collapse from their injuries and rest in the palace as Vivi stays up, watching the rain.
Three days later, Luffy awakens from his coma, and the crew enjoys a feast for helping save the kingdom. As they eat, Chaka then arrives, informing them that Marine ships have come for the Straw Hats. Nami tells Vivi that she can come with them if she wants, and if she does, she must come to the shore at noon the next day. That night, Vivi wonders if she can truly continue her journey with the Straw Hats. The next day, Vivi, who is supposed to be giving a speech at the palace, instead proceeds to the shore, where the Straw Hats are waiting, initially believe that she would not come. She tells the Straw Hats that she can no longer travel with them, but asks if they will consider her a friend if they meet again. Luffy is about to say yes, but Nami tells him that her being associated with them will make her a criminal, and as they sail away on the Going Merry, the crew says goodbye by showing her the marks on their arms, while Vivi and Karoo does the same, happily saying their goodbyes.[34]
Sky Island Saga[]
Goat Island Arc[]
While being chased by the Marines, led by Moore and Minchey, Luffy and his crew get lost in the fog and discover an uncharted island. They find that the island is inhabited only by an old man named Zenny and a multitude of goats. They also find a partially constructed ship on the top of the island.[35]
Because of his bad heart, Zenny probably only has three days to live. Hoping to make his last days good ones, the Straw Hat Pirates help him out and they learn about Zenny's past as a money lender and his dream of becoming a pirate. But realizing that Zenny has outlived Chopper's predictions the Straw Hats decide that after helping him finish his pirate ship, they will leave the island. The Straw Hat Pirates help the old man out while hiding from the Marines and working to get his ship into the water.[36]
With help from Luffy, Zenny and his goats were able to attack the Marines. The Straw Hat pirates then went forth to help him. They defeated Minchey and tied him up. Luffy, then, threw Minchey back on Captain Moore's ship, and Captain Moore allowed them to choose their battle location. Zenny decides to follow his dream and become a pirate, despite his age and they part ways, leaving the island and officially forming the Zenny Pirates. Luffy, then, pointed to the Marines a foggy area for battle location, which caused Captain Moore's ships to land in a shipwreck due to the rocks. With the Marines out of their way, the crew sails off on towards their next adventure.[37]
Ruluka Island Arc[]
The Straw Hats are being chased by a small fleet of Marine ships led by Major Pasqua and Isoka. The crew barely escape when the Major accidentally sinks one of his own ships. The crew then make their way towards an island named Ruluka.
After making landfall, they soon meet Flip, the leader of the Collection Party, a group who collect taxes from the people of Ruluka. He is also the son of the island's mayor, Wetton, who used to be a pirate, and is currently over taxing the people to build the Rainbow Tower. Wetton hires a professor named Henzo to build the tower, and to research a phenomenon called the Rainbow Mist. As the straw hats eventually meet Henzo, he explains the Rainbow Mist to them, they then hear two townspeople rushing to the harbor to see a galleon and they rush there as well.
Some of the mist begins to arrive as Henzo rushes to the galleon, that he recognizes as the Tarielishin on his small boat. When the mist begins to reach the island, Henzo borrows the Going Merry, with Luffy, Usopp, Robin, and a sleeping Zoro on the ship, into the mist.[38] The inside of the Mist is full of wrecked ships and treasure, and is guarded by a group of kids calling themselves the Pumpkin Pirates.
Henzo explains that the flow of time is different inside the mist, and that those children were once his friends. He tells them that Ruluka was attacked in the past by the Wetton Pirates and that the children stole the pirates ship but were chased by Wetton and his crewmate Ian. As the children fight off Wetton and Ian, Wetton and Henzo fall overboard and the children sail directly into the Rainbow Mist never again returning. Understanding now how the Rainbow Mist kept the children from aging, the crew attempts to find a way out.[39]
Finally, Flip communicates with Henzo with a Den Den Mushi and the group realizes they are still connected with the outside world. Knowing this, they try to reach the end of the mist, alongside the Pumpkin Pirates. As they do that, Sanji, Nami, and Chopper are trying to get to the harbor to find the others, as they are hindered by Lake, Wetton's grandson. He tells them that the mayor has announced all the shipwrecks there have untouched cargo just laying around with jewels and coins, and that the Rainbow Tower will be used as a bridge between the island and the Shipwrecks in the mist, just as Luffy propels himself and one of the kids outside of the mist.[40]
After the Rainbow Tower is connected, Nami manages to get into the mist and reach the Merry. After asking where Luffy was, Zoro and Usopp told her that he was gone, and then continue trying to make it out of the mist, despite Wetton and his invading forces.[41] As Luffy returns, he fight Wetton off, but Wetton manages to escape and blows the Tower away. Despite this, Luffy and the others manage to escape the mist onboard the Going Merry, when the Pumpkin Pirates stay behind and help the Merry escape with an explosive.
Outside the collapsing Mist, Wetton finally gets arrested by a group of powerful Marines, who turn out to be the older versions of the kids who stayed behind in the Rainbow Mist. They reveal that after the mist collapsed, they were thrown 50 years into the past and became Marines. They decide to let the Straw Hats leave as a thanks, and the crew departs the island of Ruluka, going onwards to their next adventure.[42]
Dead End Adventure[]
The Straw Hats are now chased by a Marine ship, commanded by Drake. Due to the stormy weather and Nami's exceptional navigational skills, the ship sails away unscathed, leaving the Marine pursuant behind.
The crew reach a town on Hannabal Island. Inside a pirate filled bar, they find out there is a great but very dangerous opportunity through a mysterious door in the bar. As the crew enters the mysterious door they are surprised to see it is the opening to a large tunnel. Inside they find themselves in a large cave filled with pirates, who are all there to compete in the Dead End Race, a very dangerous anything goes sailing competition, which the winner can win up to ![]() 300,000,000.
300,000,000.
The crew is introduced to the favorites to win that year, 2 giants, Bobby and Pogo, a Fish-Man and former rival of Arlong, Willy and the favorited to win, Gasparde, a former Marine general who deserted after killing his crew. While Nami registers the crew for the race, Luffy gets involved in a fight against Gasparde's crew along with an infamous bounty hunter by the name of Shuraiya Bascùd, as well as meets Gasparde himself which of course ends on bad terms.
The next morning, The crew set sail along with many other pirate ships for the parade start which involves sailing off a waterfall, fighting off other pirates, and navigating sharp turns. Before even reaching the ocean, several pirate crews are wrecked, luckily the Straw Hats manage to pull through with each challenge. However while checking the ship, they find a stowaway, a kid by the name of Anaguma whose come to kill them for their bounties, though find that's impossible after witnessing the crew's strength and power and thus sails along with them for the race.
After a few more encounters one involving the pirate ship of Bigalo the Hangman and sea kings, the Straw Hats arrive at Partia, the supposed finish line of the race. However it turns out to be a Marine stronghold that quickly sinks any incoming pirate ships. Luffy realizes Gasparde rigged the race and the crew manages to escape the stronghold and track down Gasparde's ship using Chopper's nose.
The Straw Hats manage to get to Gasparde's ship, the Salamander, just in time to stop Gasparde from killing Shuraiya. After Luffy knocks out Shuraiya, and starts to fight Gasparde, the rest of the crew board the ship and Anaguma reunites with his grandpa and tries to get him to leave the ship. Instead he sends Anaguma on ahead while he claim he has one last thing to do. As Luffy's fight continues, When Anaguma realized that his grandpa is still on Gasparde's ship, he begs the Straw Hats to go back but Zoro knocks him out and reveals that Anaguma is actually a girl, while this is happening, her grandpa causes the boiler to explode and make the ship sink.
As Luffy manages to stay on the sinked wreckage and finish his fight with Gasparde right as a cyclone is coming, Luffy manages to defeat Gasparde and send him flying into the cyclone. After this, he is saved by Anaguma's grandpa along with Shuraiya. As they head for the nearby island, the grandpa reveals that Anaguma was adopted and her real name is Adelle Bascùd, Shuraiya's little sister whom he thought was dead. Despite the awkward reunion, the two come to accept each other.
The Straw Hats close in on the real Partia as the winners of the race but the Marine ships suddenly appear and go after them, forcing them to flee from the island and forfeit their prize money. They let Adelle, Shuraiya, and Grandpa off then wish them good-bye individually before sailing off with the Marines on their tail. Despite not getting the prize money, and Nami strangling Zoro for his wisecrack about her leaving without the money, the Straw Hats continue on for their next big adventure.[43]
The Cursed Holy Sword[]
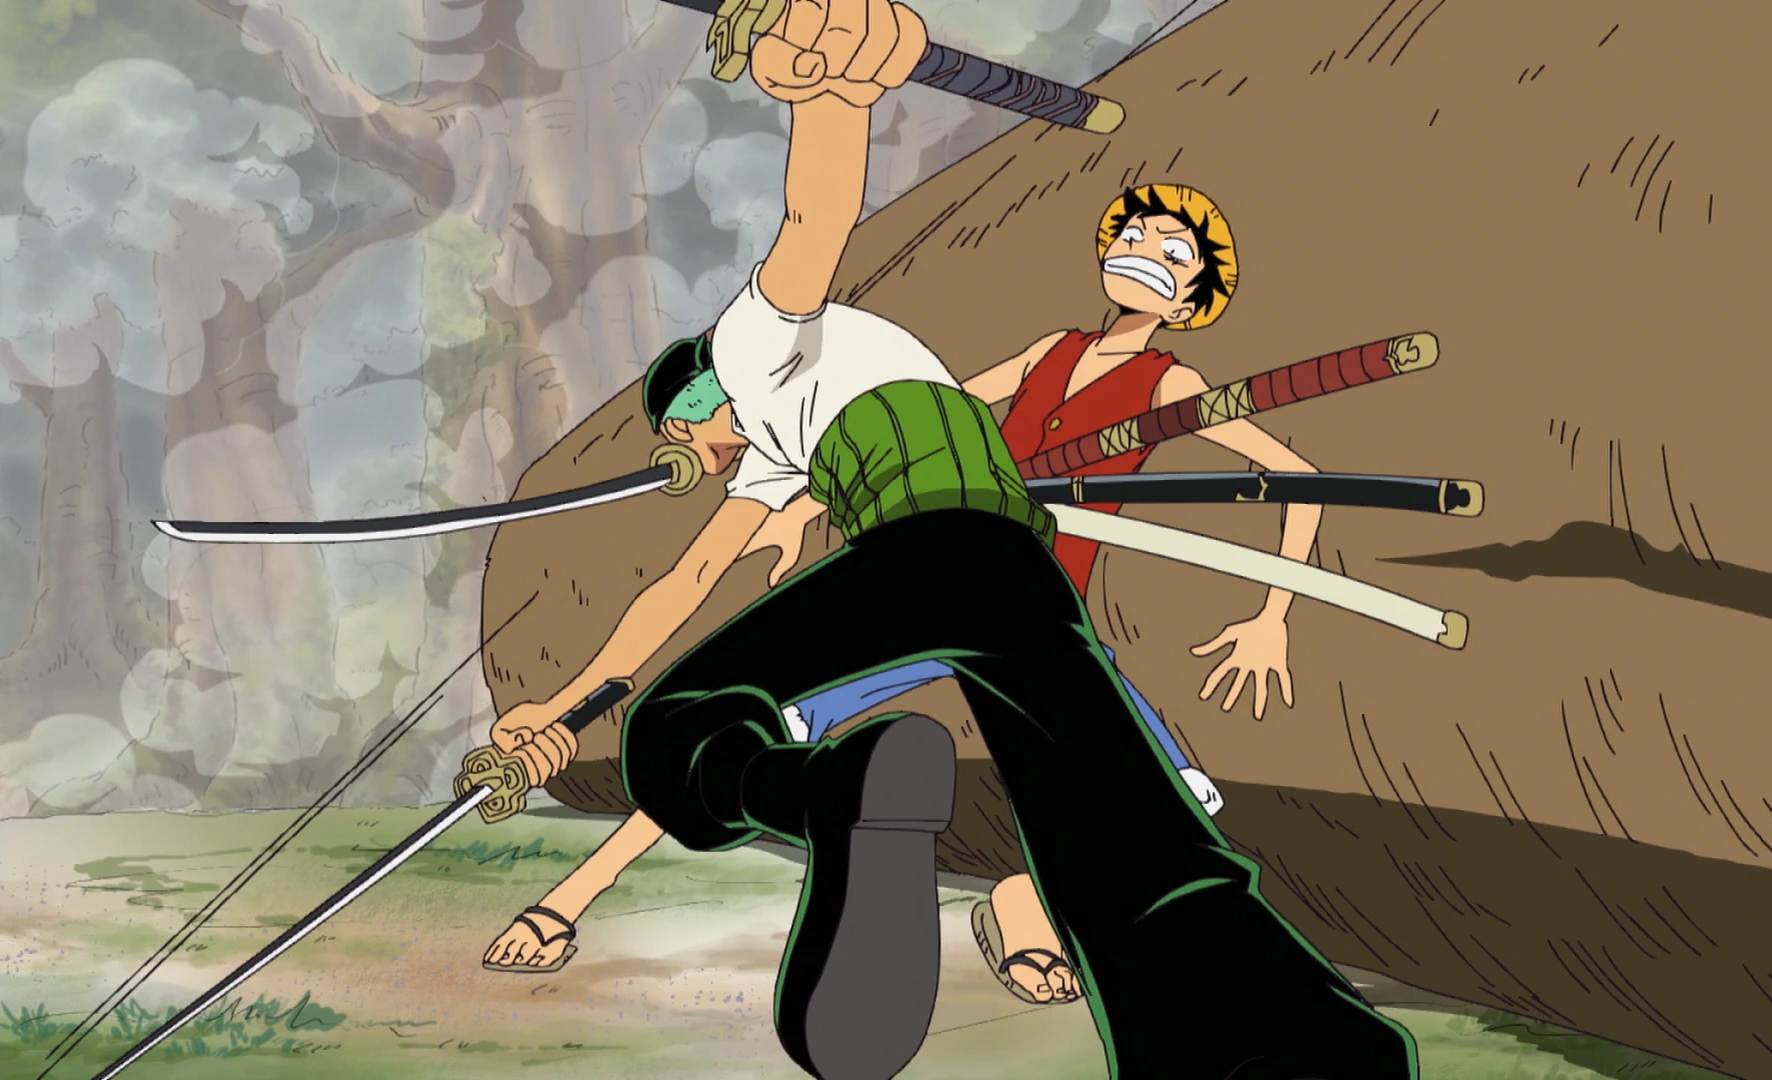
When the Straw Hat Pirates dock at Asuka Island, Zoro and Usopp stay behind on the Going Merry to guard it, while the others head into town to restock their supplies. As everyone on the island learns about the legend of the Shichiseiken, Zoro is fast asleep, while Usopp is issuing repairs on the Merry. After Usopp asks a still sleeping Zoro to kick down some wooden boards for repairs, a knife is thrown through the wood, nearly hitting Zoro squarely in the face, if he had not moved his head. However, Zoro is shocked to see his name carved into the knife. As Usopp climbs above deck to get the wood himself, he notices Zoro is suddenly missing.
Zoro is later seen walking through the woods, with the knife thrown earlier in his hand, when he eventually comes across three people: Bismarck, Boo Kong and Toma. The three identify him as Roronoa Zoro, tell him that they've been expecting him, and asks him to follow them. As the Straw Hats notice Zoro's absence and are forced to make an attempt to leave the island without him due to the Marines chasing them, Zoro follows the trio deeper into the jungle, where they reach a Marine dojo. It is revealed that Zoro has been taken by Toma's group to meet their leader, who turns out to be Saga, his old friend. Zoro hands Saga the knife, who hands it to Toma. Zoro presumes, since Saga is a Marine and Zoro is a pirate, he wants to fight him, but Saga asks him instead to give up on being a pirate, before collapsing on his knees, clutching his chest in pain. As Zoro asks his friend what's wrong, Saga simply asks Zoro for a favor; to lend him his strength. Zoro then decides to listen to what he has to say.
Later the Straw Hats end up back on the island, due to them barely escaping the Marines chasing them, as well as a Hippo Rhino that fell in love with the Merry. As they go back to looking for Zoro, they end up meeting a woman named Maya and eventually most of the crew follow her back to her village, with Luffy and Usopp getting lost on the way. Just then, a band of Marine swordsmen assaults the village, led by Bismarck, Boo Kong, and much to the Straw Hats' surprise, Zoro. Zoro chases after Maya and another villager; Izaya, in an attempt to steal a set of orbs in her possession, while Sanji pursues the rogue swordsman. After Sanji asks Zoro what the hell he thinks he is doing, Zoro simply refuses to answer his questions, and the two engage in combat. As the two are fighting, Sanji leaves himself wide open in the middle of another conversation with Zoro, which lets Zoro cut his arm in the process. After that, as Sanji lies on the ground, Zoro steals the orbs, and leaves with the retreating Marines.
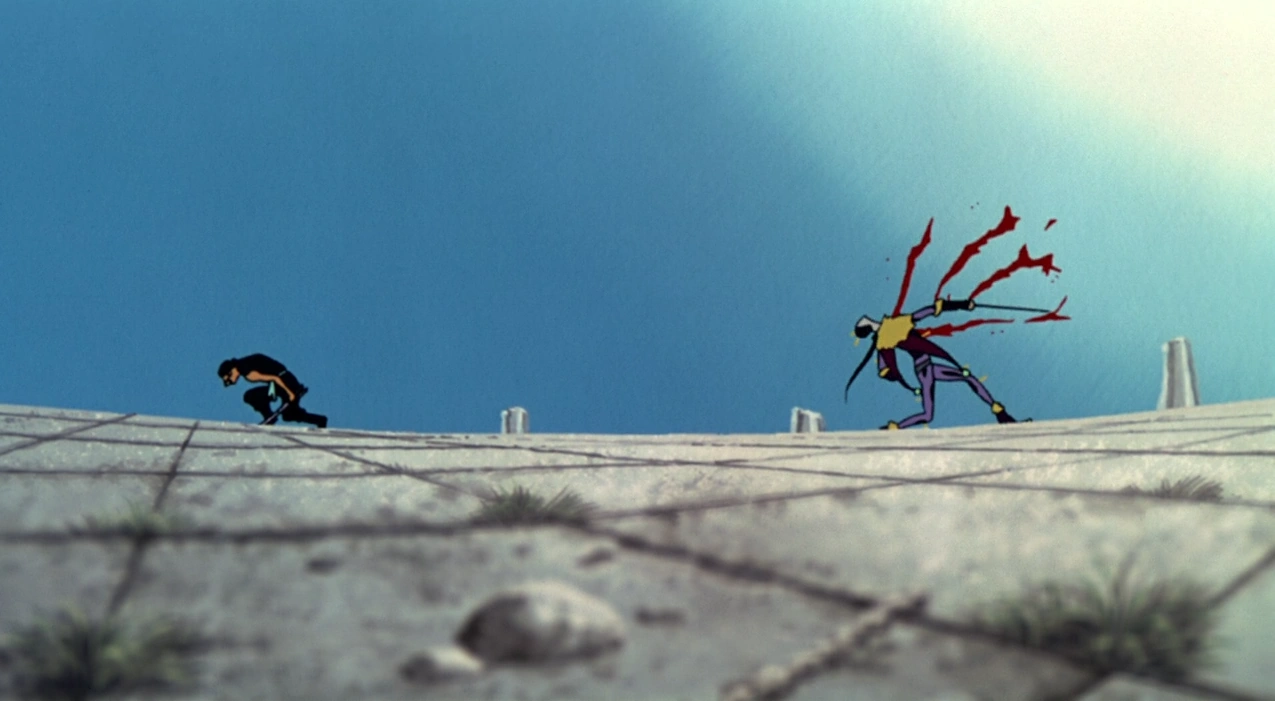
Zoro grants Toma's wish and duels him.
Back at the dojo, Luffy and Usopp managed to get there, and Toma simply tells them that Zoro will be there soon, but are later driven out by Toma and Saga, who start to fight them saying that Zoro will no longer be a part of their crew. Later that night, Zoro brings the orbs Maya was protecting to Saga, who throws them down a well. Despite this, Saga once again collapses, even though it seemed that the orbs were causing him pain, but Saga tells him that he will be alright. In morning, Saga, Zoro, Toma, Bismarck, and Boo Kong are standing in front of many Marine soldiers, all trained under Saga's tutelage in swordsmanship. Saga promises the Marines an insurmountable power when "the awaited time arrives". At that moment, he lifts his sword, which he identifies as the Shichiseiken, and proclaims that with their power, they will cut a path to true justice. Everyone in the vicinity roars in agreement, except for Toma, Saga, and Zoro. Saga then tells Zoro that on the night of the red moon, his dream will be realized, with Zoro simply staring at him, realizing that everyone, including Saga was under the sword's influence. As they left, Toma expressed interest in sparring with Zoro and informed the pirate of his captain’s defeat by Saga’s sword. Toma asked Zoro to have a proper duel with him before he completely succumbs to the sword's influence like the others. Zoro agrees and he and Toma fight, reminding Zoro of his past with Saga, and of the promise they made, that Zoro would become the greatest swordsman of all time, and Saga would join the Marines and master the sword of justice. However, Saga interrupted their duel and took complete control over Toma, crushing his spirit and ordering him to protect one of the towers needed to perform a ritual with the orbs from earlier to seal away the swords' power.
Zoro, angered by this, called out Saga and stated that Toma was stronger through his ability to resist the sword, angering Saga. Despite the disagreement, Saga proclaimed that Zoro would still make his dream come true, prompting Zoro to attack Saga. The two began to fight, with Saga launching flames at his angered friend. Zoro’s attacks had no effect, and Saga sent a blue, dragon-shaped flame to bite Zoro, picking him up and throwing him into the ground. Struggling on the ground, Zoro tried to reach for Yubashiri, but Saga kicked the sword away before stabbing Zoro in the hand. He stood over Zoro, telling him about how the Shichiseiken gave him the power he lost when his dominant arm was crippled and how he would take over the world with darkness. Zoro stood up, remarking about their past dreams, and charged Saga, who knocked the pirate back and shot him with Youkazan: Dark Fire Slash. This action thrusted Zoro into the outer wall of the dojo, and he fell to the ground injured.

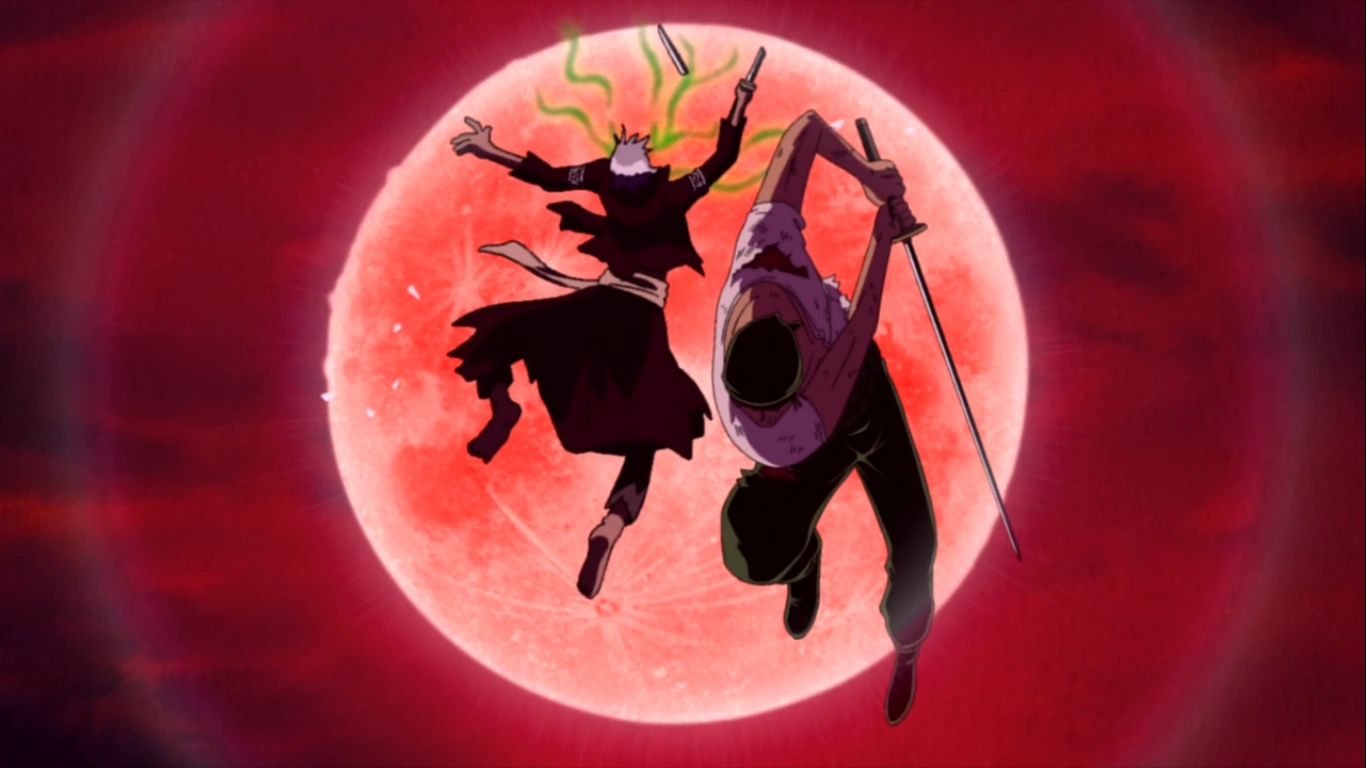
Zoro destroys the Shichiseiken and frees Saga from the sword's curse.
Saga was ready to finish Zoro off when, to his surprise, Maya was able to activate the barrier between their island and the Red Moon and prepare to start the ritual to seal the Shichiseiken. Infuriated by this interruption, Saga ran toward Maya's location, with an injured Zoro following to the site. As Zoro tries to get to the site, Luffy and Saga fight their second fight. While Luffy had the upper hand for a while, Saga eventually loses full control of himself to the cursed sword, which merges with Saga's body, making him strong enough to get the upper hand on Luffy. As Luffy is about to challenge Saga again, he is stopped when Zoro arrived to fight Saga himself. Wanting a proper final duel, Zoro threw Saga a katana. As the two prepared to clash, Maya, praying again, caused the orbs in the towers to glow, activating the ritual. The ritual aggravated the mark on Saga’s chest where the sword merged with him, and the swordsman stabbed the ground in front of him in anger to force Zoro into the air. He lunged at Zoro, but Zoro was able to strike Saga down, defeating the Shichiseiken, and destroying it once and for all. Lying injured on the ground, Saga regained his consciousness and smiled up at his victorious friend before passing out.
Zoro himself passes out along with Luffy who passes out from hunger as their friends come for them while Maya holds Saga in her arms. With the ritual complete, the cursed sword destroyed, and everyone under it's influence freed, and his old friend saved, Zoro apologizes to the crew for his earlier actions, including Sanji, who simply shrugs off his apology and states that after everything that's happened, he'll let what he did slide. As the crew happily reunite, Saga wakes up and swears to everyone that he will master the sword of justice for everyone's sake, as it is the only atonement he can make. Zoro then gives Saga his old knife back, as Saga makes Zoro the same promise, he walks away with his crew ready to leave the island. As the Straw Hat Pirates leave the island, Saga sits on a cliff with Maya, Izaya, Lacos, and Toma to see their departure. As the crew ready themselves for their next adventure, the Going Merry sails out with a Hippo Rhino continuously hitting it in a strange sort of mating ritual, with the crew trying to sail away from the smitten creature.[20]
Open Upon the Great Sea! A Father's Huge, HUGE Dream![]
The Straw Hats arrive onto Shellfish Island where they run into a mysterious group of people looking for treasure. The same group is then ambushed by the Bayan Pirates' second in command, Zap, who captures the oldest child, Amanda, along with a sleepy Luffy, who apparently had sleeping medicine put into his food by Sanji earlier to make him quiet.
Straw Hats visit Amanda's father's hut to try to find out where the great treasure is. They learn that the treasure island is between Mamanato Island and Samua Island, which is the island that they are on now. They also learn Amanda holds the key to finding the treasure. After this, the Straw Hats, Maccus, Bonney, and Amanda's younger siblings follow the Bayan crew to their main ship in order to save Luffy and Amanda.
As the Straw Hats arrive to save their captain, Bayan decides to force Luffy to fight his own crew. This tactic was successful until Usopp manages to shoot sleeping pellets into the singers' mouths, stopping them from singing. As Bonney and Maccus board the ship and fail to defeat Zap, The Straw Hats then board Bayan's ship, easily defeating Zap and, using a combined attack against Bayan, send him off into the ocean, and rescuing Amanda in the process.
The Straw Hats then sail back to the island where the treasure is supposed to be. Afterwards, the island starts to "open" and reveals itself to be a giant clam. Inside is a gigantic pearl, which makes Amanda acknowledge her father's drive for adventure, as they all realize that the island itself was the treasure that the map leads to. Afterwards Bonney and Maccus offer to adopt the children, as the Straw Hats say farewell to the newly formed family.[44]
Protect! The Last Great Performance[]
One day on a random island, the Straw Hats decide to buy tickets to go see the farewell performance from a long time actor named Randolph. 30 minutes before the play is set to start, 3 actors decide to quit the play, leaving Randolph's play shorthanded. Nami makes a deal with the manager of the play to participate as the princess for ![]() 100,000, and the other Straw Hats decide to help as well.
100,000, and the other Straw Hats decide to help as well.
As the first act ended up being disastrous, due to the straw hats' individual performances, their hectic performances causes a crash on the set and Zoro, thinking that was the cue, turns the stage so that it crashes on all the actors. Randolph, playing a marine officer, however performs a valiant speech which inspires the audience and keeps the show going. Before Act 2, Randolph finds out Luffy is a pirate and attacks him, due to his own past as a ex marine and the loss of his family to pirates. Knowing that Luffy was a pirate made Randolph angry and he attempted to fight him. Seeing as Act 2 was soon to come, Randolph decided to postpone the fight until after the play.
Just as everyone was about to start the 2nd act, a marine commander showed up and arrested Randolph for selling weapons to pirates. This turned out to be a lie however as this marine commander Governor had planted those weapons on Randolph's ship for revenge, as the commander was a former subordinate of Randolph who once tried to sell weapons to pirates to speed up his own promotion within the marines and to make money, but Randolph caught on and tried to get him kicked out by court martial. Although he failed to prove his guilt, Governor's plans to rise the ranks were greatly halted as a result of Randolph's actions for years, with the commander now back to get his revenge and arrested Randolph.
After falling into a cell, Randolph is freed by Luffy who tells him to go back to his ship and finish the act. Randolph refuses to accept help from a pirate but once they are discovered, Luffy grabs Randolph and fights through many marines until he escapes the marine ship and places Randolph back on his own ship and stage. Commander Governor tells the marines to fire and sink both the Going Merry and Randolph's ship but Luffy stops the cannonballs from reaching Randolph's ship. Luffy vows to protect Randolph's performance and yells to Randolph to hurry and finish the act.
While Randolph is performing the act, the marines send two ships around the Going Merry to try and sink Randolph's ships. Zoro and Sanji head out to stop these ships and defend against cannonballs. Eventually, the marines focus all fire on the Straw Hat Pirates and sink both Zoro's and Sanji's rowboats. As the rest of the crew deals with marines, Luffy and Chopper board the main marine ship during the confusion and knock out all of the marines on board. Two other marine ships try to help the main marine flagship but each one is destroyed by Zoro and Sanji respectively. Commander Governor wonders why the pirates are so strong and finally realizes that they are facing the Straw Hat Pirates. He accuses an underling of making the mistake and threatens him with court martial, but the marine says go ahead and threatens to reveal the truth about Commander Governor.
Meanwhile, Randolph is just about to finish his play when he decides to change the last line. Instead of "I will fight until every pirate is dead at my feet", he tells the audience that the pirates in the play actually disposed of the cruel and greedy princess of the village. He says that he will fight against all who are despicable instead. He will fight against those with rotten souls and that even if your loved ones are slain by these evil people, you must forge ahead and live on.
The Straw Hat Pirates defeat all the marines that fight, while some decide to ditch the cowardly Commander Governor. With no men left, Governor states he will not give up and will just lie on his reports to his superiors about what happened. Luffy then drops down into the commanders room however, and punches him through the sky.
Randolph's new speech brings tears and cheers to the audience as his farewell performance comes to an end. As Luffy and the rest leave the island, Luffy yells to Randolph that he will be back to settle things and to not to forget about it and Randolph remarks that Luffy better not forget their postponed fight either as the Straw Hats sail off into the sunset.[45]
G-8 Arc[]
When the Straw Hats drop from the sky after their adventure in Skypiea, they land in the middle of the marine base known as G-8, they are forced to abandon their ship, as many marines immediately spring upon it. Separated, the crewmates are forced to disguise themselves and try to find a way out of the base, which is comprised of a huge mountain surrounded by water, and then a ring of sheer rock cliffs that form a wall of sorts.
As the crew separates, Zoro surfaces in the water and dodges an oncoming ship.[46] As Zoro wanders the base with no real destination and without doing anything to hide, Nami notices him and takes his swords and throws them on a bush difficult to reach, just to make him busy and to stop him from getting caught. However, Zoro eventually reaches his swords, but he falls into the sea. When he comes out, he finds himself surrounded by marines that capture him.[47]
As Zoro is taken prisoner, Vice Admiral Jonathan gives Lieutenant Commander Drake a direct order to interrogate Zoro. In the cells, Zoro was about to take a nap when Drake shows up and demands for Zoro's guards to open the cell. Drake begins asking questions as to how many of the crew there are, how did they infiltrate the stronghold and such. Zoro truthfully replies that they came from heaven via an octopus balloon. Drake does not believe him and warns him not to underestimate the marines.[48] While imprisoned, Zoro is eventually joined by Usopp who is also captured, Robin is with Vice Admiral learning more about the island.[49] Major Shepherd is captured by the marines and held in the same cell as the Straw Hat Crew, as Robin stole his uniform previously and the Marine mistook him for an intruder. Usopp takes the chance to pretend he is their comrade, assuring the marines won't let him out, with Zoro knocking Shephard out so he can continue his nap.
Meanwhile, Luffy and Sanji attempt to infiltrate the prison, concerned about how deserted the path was. They race down, despite the obvious trap. Luffy discovers the bars are made out of Seastone, whist Sanji attempts to kick down the bars, also discovering that they are practically unbreakable. However, Sanji takes Usopp's impact dial, only to find out it's the voice dial instead. He tries Usopp's other pocket, only for it to be the flavor dial. The gas sets off an explosion, and the Straw Hat's escape only to get lost while following Zoro.[50]
Luffy's group begins running around the base, being chased by Marines. In trying to escape, they end up in what seems like a dead-end at the side of the mountain and meet Jonathan again, who happened to be at the balcony of his office. Luffy tells Jonathan that he has freed his crewmates and declares that they were going to escape the base. This makes Jonathan laugh, asking him if he really thinks he can escape Navarone Island with their treasure, to which Luffy replies that they are pirates and that the Marines can't catch them. Suddenly a huge cannon fires at Luffy's group, and they run back inside the base.
Instead of going in pursuit of the Straw Hats, Jonathan decides to set a trap for them in Dock 88, where the Going Merry is moored, as he knows this is where they will surely go. He tasks Lieutenant Commander Drake to set up the ambush in Dock 88 and since it will take Drake some time to arrive at said dock, he orders Unit 55 to slow the Straw Hats down to stall for time. He stations them at the bridge which is the only way to get to the ship.
As Luffy's group arrives at the bridge leading to Dock 88, they see that the bridge is unguarded, they gather that it must be a trap. They decide that they don't care and go ahead and cross it. Unit 55 block their path and have them surrounded from all sides. Luffy's group easily defeats them but, in the process, Luffy destroys the bridge, and they all fall into the bay. Even with the damage caused, Jonathan in pleased with the result since it bought them the time they needed to set up the ambush in Dock 88. Luffy's group heads to the dock, straight into the trap, seemingly cornered. Luffy is shot with a Seastone net and is incapacitated. Just then, Nami and Dr. Kobato also arrive pushing a hospital bed, with Chopper hidden in the sheets pretending to be a patient.[51]
As Nami's group arrive in Dock 88 to help, Drake's men bombard Luffy's group with gun fire but he easily repels the bullets using his Devil Fruit powers. The Marines resort to using what seem like bazookas seeing that their guns are ineffective. They have fired instead, flash bombs to subdue the pirates which stings their eyes. Drake then has his Sword Unit attack the Straw Hats as they are still trying to recover from the effects of the flash bomb. The Crew are able to fight off the attacks. Luffy is then shot with a Seastone net and is instantly incapacitated. Drake demands that they surrender and tells them that while their Marine base policy is to take prisoners alive, he will not hesitate to change this policy if he is met with any resistance.
With Luffy in a weakened state, Sanji, Zoro and Usopp seem to be unable to resist the overwhelming number of the Marines in the dock and consider surrendering. Just as the Marines are about to capture them, Nami and Dr. Kobato, with Chopper still hidden under the sheets of the hospital bed, get up, and as the marines notice the doctor, Kobato then pretends to be a hostage and screams in feigned terror. She hints at Nami of her plan and in turn, Nami also pretends to be a nurse held hostage by Chopper, now in his Heavy Point form. Chopper acts like a tough and ruthless pirate and demands that the Marines stand down and let them board their ship. As Drake gives in and orders his men to stand down in return for the release of the hostages, Zoro releases Luffy from the Seastone net but Luffy remains weak.
Drake "accommodates" the Straw Hats and lets them board their ship, but Zoro senses another trap. He silently tells Luffy to sling them to their ship on his signal. A Marine covertly rescues Dr. Kobato and another also tries to rescue Nami, but she punches the Marine. This was their signal to rush towards the ship. Luffy slings the Crew onto the Merry. Mekao, with the safety of his daughter in mind, aides the pirates in their escape by releasing the Going Merry from the dock into the bay. Thinking that the Straw Hats are holding the "nurse" Nami as hostage, Drake orders them not to shoot at them, but instead to just give them warning shots. As the ship sails away, the Marines scope out the ship and notice Nami giving the crew orders and realize that she is not being held hostage. They realize that she is actually part of the Straw Hats. As Robin later arrives and rejoins the crew, She gives Nami a map of Navarone Island which she obtained in the library.
The Marines start shooting cannons at the Merry and start giving chase using warships. Nami refers to the map and sees the only way out of the base is the Sea Gate, to which they head. She notices that the water is too shallow and that the map doesn't make sense. They head to the Sea Gate anyway and try to think of a plan to open the gate. The Marines continue their barrage on the Merry while the Straw Hats don't have a way to retaliate since the Marines have confiscated all their cannon balls. Luffy devises a plan and catches all the cannon balls shot at them with his Gomu Gomu no Fusen ability and redirects them towards the gate. Just as the gate explodes, Nami realizes that if the Marines took all their cannon balls, they must have also taken the treasure they found on Skypiea.[52]
The Straw Hats decide to go back for the gold, as well as Nami's waver. They hide the Going Merry in an abandoned dock, since there are so many. Usopp uses the junk in the dock to disguise Merry as a Naval ship, and then splits the crew into two teams: one team to recover the treasure gained at Skypiea, and the other team to retrieve Nami's Waver. Chopper is left behind to guard the Merry.[53] Jonathan tricks the crew into another ambush, this one in a huge room that is locked from the outside. Drake is once again leading the attack, with countless marines backing him up, and things look bleak until Agent Shepherd foolishly opens the doors and allows Luffy, Robin, Zoro, and Usopp to escape.[54]
As Nami's group retrieves the Waver and return to the ship, she goes looking for Luffy and finds him, only to discover that they still do not have the gold. Nami suspects that it's in the Commander's office, so she and Luffy go alone while everyone else goes back to the boat. Using the Waver, she and Luffy scale the main mountain and break into Jonathan's office. Marines fill the room but Nami uses her Thunder Tempo attack to electrocute them all. She and Luffy grab the treasure and head back to the boat. However, Jonathan is not worried, because at 9 PM the "fangs of G-8" will appear. What he means is the inner lake becomes so shallow that the Going Merry is stranded on a reef. With no water, the Merry is stuck in the mud while the marines mobilize.[55]
When Luffy commands the ship to go full speed ahead, a hole was torn in the hull by the rocks on the harbor floor, so they stop. The harbor eventually reaches a very low tide, rendering the ship unable to move. Jonathan gloats via megaphone how he had captured the Straw Hat Pirates. However, the Straw Hat Pirates decide to launch a plan of their own; they use Usopp's Impact Dial to launch the ship into the air, then uses an Octopus Balloon inflated with Breath and Flame Dials to float in the air. Jonathan orders his men to fire a "warning shot" at the balloon. However, Shepherd also aims for the balloon with his bazooka, only to instead miss and shoot down the Marines' cannon, with the Straw Hats escaping, once and for all.
As the Straw Hats are seen flying towards the sunset. Usopp begins working on fixing the hole in the hull, as they continue to sail away from the base and onto the open sea.[56]
Water 7 Saga[]
Long Ring Long Land Arc[]
| This is an empty section. Please help the wiki by adding information to it. |
Ocean's Dream Arc[]
One night aboard the Going Merry, Robin is reading late at night while the others are sleeping. Suddenly, a mysterious figure appears in the ocean and plays an instrument resembling a seahorse.
Nami wakes up in the morning, but cannot recognize Robin. Chopper, Usopp, Sanji, and Luffy also wake up soon after, all of which are confused as to why they woke up on the ship; their memories were erased. Usopp lies and says that he was a famous pirate, but his lie is seen through.
The Straw Hats all meet at the deck and notice Chopper, wondering who he is. Robin explains that they were on the Grand Line, and that they were on a pirate ship led by Luffy. Nami then goes to her room and finds her logbook, finding that the notes were written in her handwriting.
Nami decides that she must return to Cocoyasi Village. She escapes the ship using a Waver. Zoro also decides to leave, and jumps in the water and swims. Meanwhile, the mysterious figure watches from a hill.[57]
After Zoro swims to the nearby island, he starts to have a flashback of his time in Shimotsuki Village, with Zoro telling Kuina that either one of them will become the world's strongest swordsman. Kuina's father tells Zoro that Kuina's dream has been passed to him, giving him the Wado Ichimonji. Back in present day, the boy approaches Zoro, but is noticed, so he leaves.[58]

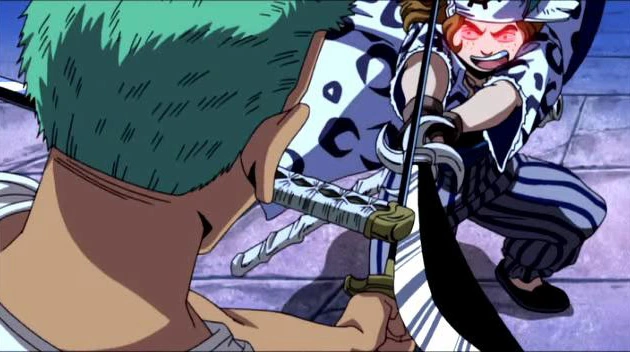
Zoro attacking Luffy
The next day, after the other Straw Hats reach the island, the boy approaches Zoro again, but this time hypnotizes Zoro into joining his side.[59] As Usopp and Chopper find Zoro and they bring him back to everyone else, he suddenly starts to attack Luffy. As the Straw Hats believe that Zoro was hypnotized, Luffy tells the others to go ahead to the temple, while he stayed behind to battle Zoro. As Luffy tries to avoid fighting Zoro, Zoro seemingly defeating Luffy with an Oni Giri move. However, Luffy gets up and they continue to their fight in the forest.
After the others reach the palace, they are approached by the mysterious boy. As Sanji kicks the boy to get everyone's memories back, which caused the seahorse horn to release the Straw Hats' memories and also play a sound. Because the boy was briefly unconscious from the kick, he lost his memories. The boy, confused as to where he was, flees.
Robin explains that the real thief was the seahorse horn. It tries to flee, but is caught by Sanji. Sanji beats the seahorse until it coughed up the Straw Hats' memories. Having regained their memories, they wonder if Zoro has regained his memories. Zoro approaches them, and Sanji is prepared to fight him. The seahorse communicates via Chopper that it still had its last resort.[60]
As Zoro approaches the Straw Hats, prepared to fight them, Sanji battles Zoro, but Luffy launches himself forward, hitting Zoro and Sanji both. When they wake up, Zoro reveals that he regained his memory when the seahorse coughed up his memory, with Luffy right behind him. Sanji was mad that Zoro still looked scary after regaining his memory. Zoro then jumps into the lake to chase the seahorse. After Zoro catches it, the seahorse uses his last resort: he sprays a gas into the air that makes the Straw Hats hallucinate people from their past memories (Bell-mere, Hiriluk, Kaya, Kuina, Zeff, Ace, and Shanks), then their past enemies (Arlong, Wapol, Kuro, Krieg, Crocodile, and Enel). The seahorse then steals the Straw Hats' memories, causing it to inflate and be able to float; claiming that it became a Sennenryu.
Despite having lost all of his memories, Luffy decides that he wants to ride the seahorse and unintentionally uses his Devil Fruit powers to fly into it and wrap his arms around it. This causes the seahorse to return Luffy's memories, so he beats up the seahorse until everyone's memory returns and sends it flying off the island.
As the crew comes down to the village thinking they will be rewarded for getting everyone's memories back, they are instead attacked. Drim, the boy who carried the seahorse around, misinterpreted the situation and thought the Straw Hat Pirates were the ones who took everyone's memories and warned the entire village, so the crew is forced to rush back to the ship and leave.[61]
Baron Omatsuri and the Secret Island[]
On a calm day, the Straw Hats receive a message in a bottle advertising Omatsuri Island as a resort, promising spas and salons, good food, and many beautiful women, with Grand Line Pirates being especially welcome, the stronger the better. The crew are delighted at their luck, and Luffy decides that this is an opportunity they could not ignore. They set a course for the island.
When they reach the island, they see an uninhabited jungle but the crew follow strange sounds throughout the jungle, which leads them directly to the resort, and they are in awe by its dazzling rides and attractions. Soon, the owner of the island, Baron Omatsuri comes out on an elephant with a small talking flower sprouting from his shoulder to greet his guests. The crew notices the flower, and also notice that the dancers and performers, all have a small plants sprouting out of their heads as well. As the Baron welcomes the crew to his island and says they are welcome to enjoy all the delights he is offering, Luffy and the others are happy to hear this, but first he suggests that they prove their worth by taking part in a competition called the 'Trial of Hell, which he explains is similar to the Davy Back Fight.
Despite the crew being unsure whether or not to consider the trial, Luffy is filled with excitement by this challenge, saying that it might be fun, and that his friends are capable of handling any trial, officially excepting the proposal. As he accepts the proposal, the plaza they are in mechanically converts into an enormous round pool with a platform in the middle, as the first competition is goldfish catching, with the rules being that the winning team will be the one who catches the most goldfish in three minutes using only the net they are given, which is about three inches long and made of water-soluble tissue paper.
When Usopp volunteers to take on the challenge, he immediately changes his mind when he sees his opponent, Muchigoro and the massive goldfish that they have to catch, Rosario. As Nami, Sanji, Zoro and Luffy all try to catch the giant fish using their normal attacks, but only succeed in breaking the tiny net. Just as they decide that it's an impossible task, Muchigoro takes his turn. He reveals that he was hiding a net big enough to catch Rosario all along, much to the crew's fury. He calls Rosario into his net and flings him toward his prize bucket, with Robin intervening with her powers to bounce the fish back into the platform, where Chopper knocks him into own bucket using his Guard Point, just as the time limit ends.
The Baron is furious at the Straw Hats for beating him, as well as insulting him and Muchigoro. He demands that they compete in another challenge. Nami had been hoping for a chance to relax at this island, and refuses on behalf of the rest. Luffy, however, overrules as before, having enjoyed the first trial and is looking forward to more. Nami, furious, tries to lead the crew back to the ship, but the forest seems to move around them and they become lost. Luffy, following them, continues to try to convince them to go back to the Trials. When they finally manage to leave the forest, they find themselves before the Baron again as he announces that they have arrived at the second trial - a complex game of ring toss, taking place between two teams of four people, each in two gondola-like waver boats. To win, a team must throw rings over every member of the other team. Due to Luffy, Robin, and Chopper all being Devil Fruit eaters, the teams for the next trial ended up with Zoro and Sanji being partnered together, and Usopp and Nami teaming up as well, and their opponents, were the so-called; Four Wise Men, a group of four tiny, frog-like people.
With the trial starting at a canal, the participants have to throw rings at their opponents while speeding through what appears to be a city. As Zoro and Sanji complain about being partnered together, they avoid machine gun fire from Keroshot and Kerodeek's tooled-up boat. As the race continues Zoro and Sanji do not seem to make much progress together as they continually bicker, but both of them finally catch up to Keroshot and Kerodeek's ship. Before Zoro makes his move with the ring, though, the two wise men use their boat's mechanically operated arms to try and catch him with a ring. Zoro finally slices them up and orders Sanji to pull in closer. Before Zoro makes a second attempt, Keroshot pulls out another piece of artillery and starts to shoot at him. He dodges again and again and blames Sanji for his reckless driving. For that, Sanji goes a bit faster and eventually makes Zoro an easy target for Keroshot again. Zoro eventually leaps out of the boat into the sides and runs to keep up with the boat. He finally leaps high into the air, and after seconds in flight, falls back into his own boat. Both Zoro and Sanji continue to fight, while Keroshot and Kerodeek smile at their success in getting them riled up. Zoro becomes determined to get them this time, but fails as their opponent's boat backs off. Trying to maintain his balance, he then realizes that they are out of sight when the path splits up between them. He cannot help but attack Sanji another time. As they both argue, the paths merge. Without them noticing, Keroshot's boat appears ahead of them, ready to ensnare them with a ring.


Zoro and Sanji defeat Kerodeek and Keroshot.
As Zoro and Sanji are ready to duke it out on the boat, Keroshot and Kerodeek tries to get their attention. They shoot at them, but every single shot misses. Then they provoke Zoro so much he slices up their boat. Kerodeek, within mere seconds patches up the boat, and presents a larger, more intimidating version of their shark-like boat. They pull up near Sanji and continue to make some noise. Sanji finishes them off with his kicks, and Kerodeek is forced to patch up once more. A massive version of their boat pulls from behind. Its power is so great the boat even begins to float. Its golden drill is able to plow through the bridges extending across the water. Zoro and Sanji had enough of their interruptions, so they break the massive boat apart together, sending Keroshot and Kerodeek into the air. Finally they were at peace and they could properly fight. Nami catches their attention and orders them to throw the rings since she's tied up herself, being hung up at the strings which held the city's lanterns. Sanji stops the boat and throws the two rings to ensnare the two wise men.
As the duo try to help Nami, Kerojii appears and gets in their way, with all of them just barely missing each other with their attacks. Annoyed by this, Zoro and Sanji try to stop the frog with Nami's help, only for Kerojii to dodge and for Zoro's katana to cut Nami's string instead, sending her to the water below. They try a second time, but end up hitting each other and landing in their boat. As they fight, Kerojii falls from above with a ring in each hand. Zoro pushes Sanji to save himself, causing Sanji to be ensnared by the strange self-wrapping ring. This gave Zoro the chance to take Kerojii out himself and thought that he'd insult Sanji before doing so. Even without the use of his arms, Sanji attempts to attack Zoro on the boat.
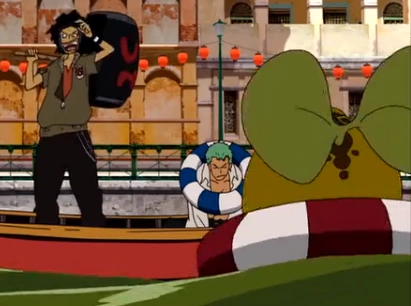

Zoro captured as Usopp defeats Kerojii.
Zoro continues to swing his katana but misses with each thrust. Before performing Oni Giri, Kerojii kicks a sandal to his head and gets ready to catch Zoro. Thinking that he ensured his victory, a voice comes from above. There was one person left of the Straw Hats team, which was Usopp. Usopp lets go of his glider and comes down with his 5 ton hammer, pounding Kerojii down into the water. Usopp throws a ring on Kerojii, ending the game, even though Zoro was caught in the process, the score was 4 to 3. Usopp smiles and laughs about his aid to their victory, until Nami stands up and slaps him and accuses him of betrayal. She slaps him again when Usopp abruptly replies that Nami is the one who specializes in betraying people. Zoro and Sanji aren't happy with each other either. As the victory fireworks appear in the sky, it seems as if the crew is starting to crumble apart.
Despite their victory, everyone was on edge and angry at one another back at the hotel, confusing Robin and Luffy. As Robin questions Usopp if he saw anything that resembled a flower while he was gliding in the air, Zoro interrupts him and asks the crew where Chopper is. Usopp answers, but the question gets asked again by Sanji. Usopp answers again, but Nami asks the question again a third time, then snaps at Usopp and said that she wasn't asking him. Usopp is stunned at the length of Nami's anger towards him for his spiteful words earlier, but they are interrupted by the introductory drumming of the Baron as he presents them with a dinner party for a gift. The water pool near them changes and one of Baron's men Kotetsu emerges from below, equipped with two giant grilling spatulas strapped on his back. The flooring underneath him becomes a giant iron grill as the grill itself is surrounded by walls of flames.
As the performance soon turns into a cooking challenge between Kotetsu and Sanji, an unimpressed Zoro simply takes a nap through the event. As the event ends and Luffy wakes Zoro up to eat, he gets up but Sanji does not give him permission to eat, stating his usually his wanting nobody to go hungry belief was overridden by his rivalry and anger with Zoro, coupled with the fact that he slept through his performance. With Zoro now annoyed, Sanji spends no more time with Zoro and runs through the tables searching for Robin but she's no where to be found. With Sanji not being able to find Robin, Zoro tells him that she was off to investigate a flower on the island. The four Straw Hats then gather and realize that Usopp was gone too, and that they didn't know where Chopper was. Sanji begins to put all the blame on Zoro for not watching them properly, but Zoro counters back telling him that they weren't children. It was outrageous to Sanji that none of them noticed the disappearance of three of their crewmates, leading him to angrily ask Luffy for his response since it was his idea to come to this island, leaving Luffy surprised and feeling guilty.


Zoro attacks DJ Gappa.
With the Baron calling forth the final Trial of Hell and DJ Gappa showing up wearing Usopp's hat, Zoro and Sanji immediately demanded to know where their three missing crewmates are. As the Baron demands that they accept another Trial of Hell, Sanji backs away and decides to look for the three himself, and Zoro decides to do the same and runs off to the opposite direction, as the final trial is revealed to be the trial of shooting, where the island residents ruthlessly hunt down the opposing pirate crew. With the trial officially started, everyone began hunting the remaining Straw Hats down, with Zoro being hunted down specially by DJ Gappa, after already dealing with Sanji and Nami. DJ Gappa walks up towards Zoro, but discovers that he was still alive. Zoro strangles him, throws him, and uses his Oni Giri. It was clear that the technique connected, but DJ stood there with a frightful, smiling face. He realize that he was just cut, but he did not die. There wasn't any blood, and he was still okay. He does not understand what was happening. Zoro attempts to get him a second time, thinking that DJ used some sort of technique to shield himself. The same thing happens. While baffled, Zoro is caught by surprise and is hit with an arrow by the Baron, which causes Zoro to collapse. After which, Zoro is later taken prisoner by the Lily Carnation, and is eventually absorbed into the monstrous plant in front of Luffy, becoming apart of it.
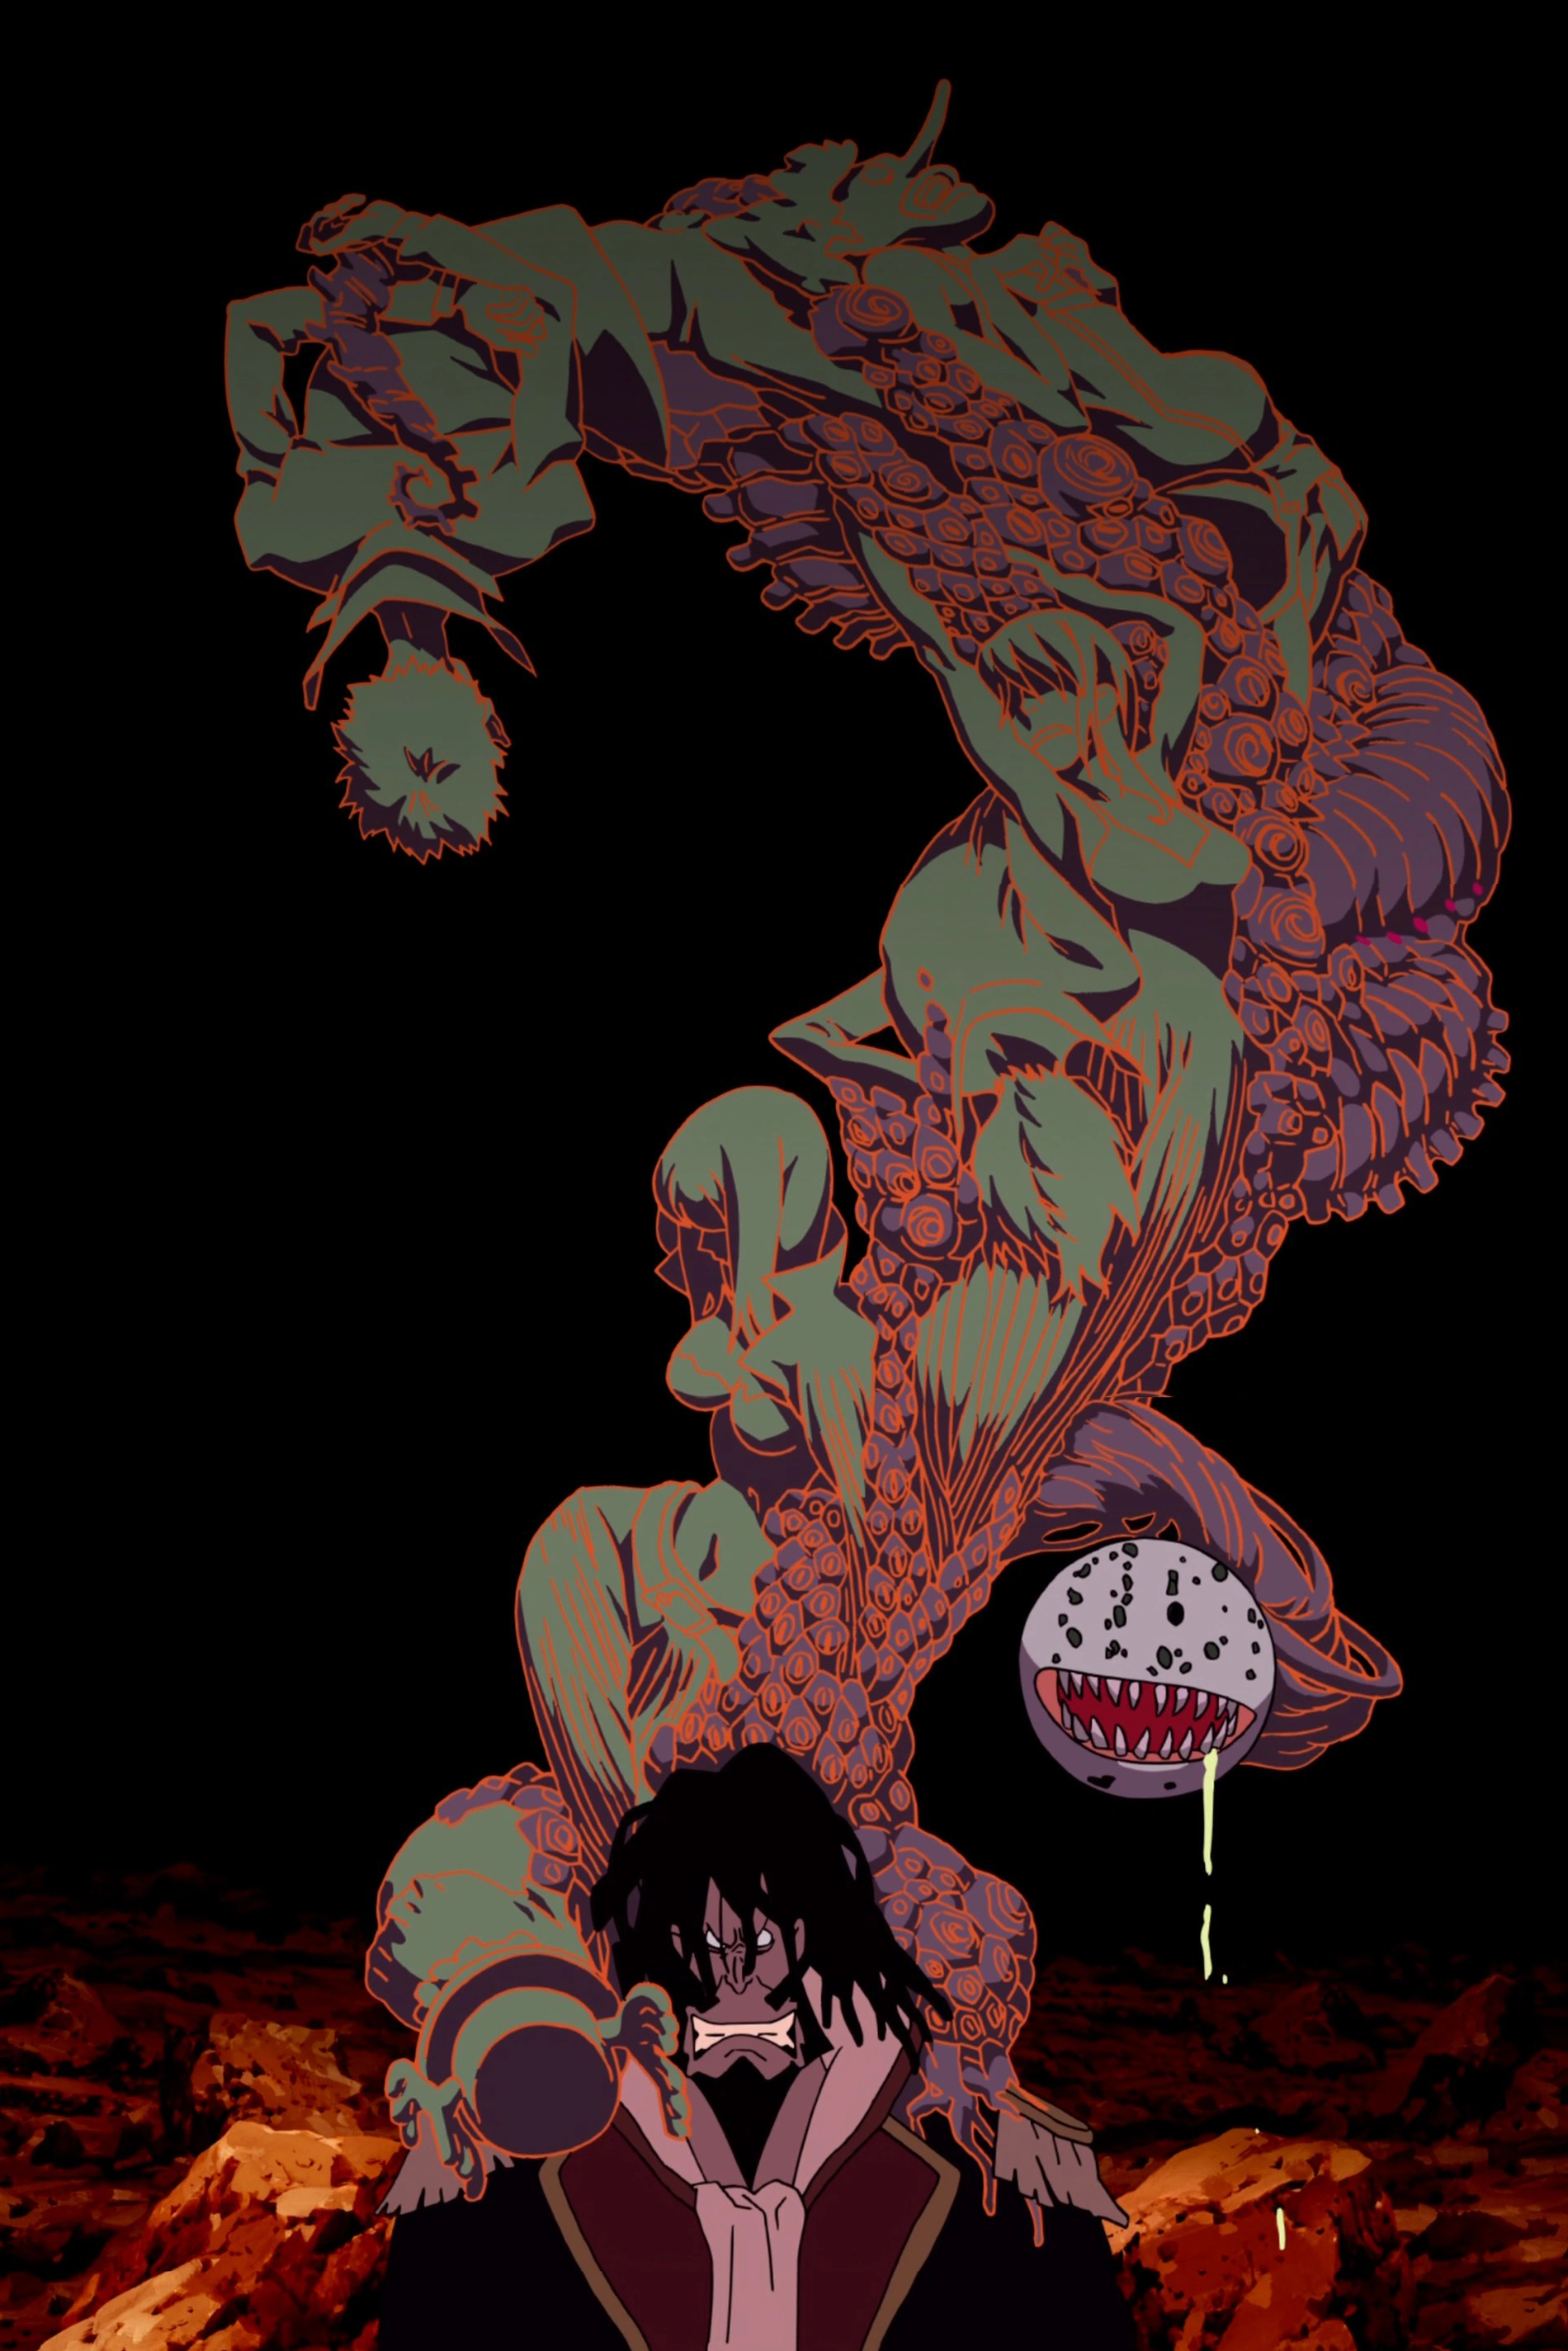

The Lily Carnation reveals its true form.
With Luffy and the other pirates trapped on the island banding together to stop Baron Omatsuri, the Lily Carnation takes it true form, with the entirety of the Straw Hats now assimilated into it and the Baron. Despite an uphill battle now ensuing, one of the pirates manages to fire an arrow into the Lily, critically injuring it in the process, causing all the inhabitants on the island to become lifeless again, and a shocked Baron to lose his connection with the Lily. With a now enraged Baron trying to finish everyone off, before he takes a step further, Luffy steps into the puddle of the Lily's innards and strikes him with a death-rendering punch, sending the Baron into oblivion, and ending the struggle.
With the Lily Carnation's destruction, everyone that was absorbed earlier returned, completely confused about what had happened to them in the first place. As the five of them emerge safe and sound, Luffy smiles in relief and closes his eyes. The Straw Hats spot him and quickly go to see him. With Nami calling out to him wondering what happened and how he could lay there and sleep in a place like this, Luffy couldn’t help but laugh, as the struggle on Omatsuri Island was finally over.[62]
The Giant Mechanical Soldier of Karakuri Castle[]
During a raging storm, the crew searches a wrecked pirate ship for any treasure only to find a single chest. On the Going Merry, they open it only to find an old woman who hid there to escape the storm. As they contemplate what to do with her, even suggesting to put her back in the box, the woman tells them about a legendary Golden Crown on her island that she will let them have if they return her there. Though the rest of the crew thinks this sounds suspicious, Luffy agrees. As it turns out, it is impossible to reach using a Log Pose, requiring the use of a "Turtle Pose", which uses a small turtle that always points to the island.
As they come up to the island, the crew hears a fisherman singing an old folk song about the Golden Crown known as the Yurari Uta. The woman explains that the island is known as Mecha Island and as the pirates get closer, they set off a defense system involving arrow-firing robots. When the island's leader, Ratchet, sees the old lady, his mother, on the ship, he launches a hand glider and retrieves her from the ship. Then, one of Ratchet's subordinates, General Maji, activates the robots, sending hundreds of arrows flying towards the ship, but Zoro deflects all of them. Maji then activates a giant fan to blow the ship away, but the arrow robots end up getting sucked into it. Though the metal parts being blown out of the fan wreck the Going Merry's main sail, the fan is destroyed while Maji gets his back broken by Robin's Clutch.
Due to this, the crew cannot leave the island, so they decide to stay and search for the Golden Crown. They realize that there may be hints in the song they heard earlier, which Robin had thankfully written down. The two possible clues they find in the song refer to "the white snake's eyes" and "the two moons". They manage to figure out that the white snake is referring to a rock shaped like a snake head, but cannot understand what the two moons refer to. Usopp suggests that maybe it is the moon and its reflection, but that is wrong too. As it turns out, Ratchet is also trying to figure out the same thing, but he decides to leave the Straw Hats alone for now, believing that it is impossible for them to solve the mystery. During a contest between him and Usopp, Luffy breaks off one of the snake rock's eyes, and Robin realizes that they may have misinterpreted the lyrics of the song. Luffy breaks off the other eye, revealing an entrance into the island. When Ratchet hears about this from Maji, who was watching the crew, he freaks out for a bit but eventually calms down and decides to use them to get the treasure for himself. Maji then invites the crew to a party at Ratchet's castle, which they begrudgingly accept.
As the Straw Hats reach the castle, Luffy happily begins eating as the crew look around the venue as the party starts. As they look around they notice that the entire staff are all robots dressed like maids, except for the Butler. At the party, Ratchet asks for the Straw Hats to help him find the treasure. Though the rest of the crew finds this suspicious, Luffy agrees to help. The next day, the crew along with Ratchet and his friends enter the cave. They pass through a narrow passage and fall down a waterfall before crashing their ship on land. Luffy comes across a beautiful lake surrounded by animal statues with light shining through the top, and Robin finds a pillar with the final part of the song written on it. At first, they think it means to say that it is time to drink up the lake, but they soon realize that it actually means that the Ibis statue can drink up the lake. Luffy unintentionally knocks down a giant statue of this bird into the lake, and all of the water drains away. At the bottom of the lake is a passage, which Robin, Chopper, and Sanji go through while the others stay to investigate the newly exposed surroundings.
As Robin's group manage to reach the top of the mountain and investigate the temple located there, they make a discovery that literally causes the entire island to shake and fall apart, as the island itself was actually a Giant sleeping turtle. As it turns out, the song actually serves as instructions to awaken the island-sized turtle, with the island itself onto of its shell, which Ratchet reveals he knew this entire time, though he also points out that he still has not figured out what the Golden Crown is referring to, so there may still be a treasure.
At this point, Ratchet reveals his true intentions: he will use the turtle to take over the world, which everyone immediately thinks is stupid. As his group manages to escape from the pirates, he activates his giant mechanical castle which takes the turtle and manipulates it using giant cables in order to force it to move, to advance his world domination plot. The Straw Hats gather together and break into the castle in order to stop him, but Chopper goes off on his own when the turtle starts speaking to him. The remaining six are caught in a trap, where they have to deal with Ratchet and one his inventions, a mechanized battle suit, which empresses Luffy, up until he easily destroys it and Ratchet escapes, leaving them trapped. The Straw Hats remain trapped, only to be released by Gonzo. He and Ratchet's mother arrive and beg the crew to stop Ratchet, as he uses the castle to take control of the turtle. At this point, Chopper learns that the turtle is to be awakened every 1000 years to lay its eggs. The island turtle starts moving, and when Usopp notices this, he starts to run back outside to make sure the Going Merry is alright.
As Luffy runs on ahead, Zoro and Nami get separated from Sanji and Robin, landing in a roller coaster cart. As they travel along the track, getting farther away from the castle, they are attacked by Maji in a robotic cart. Zoro gets off the roller coaster cart and easily defeats Maji and destroys his cart, as Nami goes on ahead. Eventually Zoro catches up with Sanji and Luffy. Nami's group, who had retrieved the ship, meet up with everyone and tell them that the turtle is going to crash into a nearby island. Using a combination of attacks from Usopp, Sanji, and Zoro, Luffy executes an attack called Gomu Gomu no Kaiten Ono on the castle. Luffy breaks the castle apart, releasing the turtle, yet Zoro and Sanji had to stop Luffy before he accidentally hurt the turtle. The turtle stops and successfully lays its eggs. As the crew start to leave, one of the eggs hatched. Luffy sees this and realizes that the Golden Crown is referring to the broken turtle egg shells, which are literally made of gold. They take one of the shells with them as they leave what's left of Mecha Island, but it ends up sinking into the water as they sail off towards their next adventure.[63]
Foxy's Return Arc[]
| This is an empty section. Please help the wiki by adding information to it. |
Post-Enies Lobby Arc[]
| This is an empty section. Please help the wiki by adding information to it. |
Thriller Bark Saga[]
Ice Hunter Arc[]
The Straw Hats, onboard their new ship, the Thousand Sunny encounter a damaged ship, whose members led by a man named Stansen they decide to help, but who then try to trick them. They are then revealed to be working for the bounty hunter group named Accino Family, led by a man named Don Accino.[64]
At the same time, Salchow of the Accino family receives Stansen's report and tricks the Straw Hats into moving into a field of icebergs near Hyokaido, an area that is sometimes known as the frozen highway. Once trapped in the Hyokaido, the two boats have nowhere to go as the icebergs seem to move according to the Sunny's movements and lock them in.[65]
Meanwhile, the Straw Hats learn that the former Phoenix Pirates reportedly sailed into the New World but were heavily beaten there, losing the life of Vigaro, a crew member and vice-captain. Thereafter, they lost their flag to the Accino Family and became their soldiers-though only Stansen shows any "loyalty" to them. When their heavily injured captain, Puzzle recovers, he says that Stansen's decision "wasn't bad", that they will no longer be pirates or sail to the New World and that they will stay the bounty hunters' underlings. No one in the crew agrees with this, especially the very young and passionate member named Jiro, but the captain is not moved at all. Luffy, who was with Chopper on the Phoenix's ship to look on the injured Puzzle, head back, but the rope that was used to hold the ship close to the Sunny breaks in a rampage of several mysterious underwater "eruptions", separating the two ships.
The group trapped on the Sunny are encountered by Lil, Salchow, Arbell, and Hockera. They claim that it's impossible for them to escape and that all the crew will die. Zoro, however, decides to jump off the ship and begin cutting through the icebergs as Franky gets the ship out by using a "Coup de Burst". However after this happens, one of Lil's flying fish manages to steal the Straw Hats flag, and Zoro still focused on cutting the icebergs, gets left behind by the others as a result.[66]
As the others begin their goal to reclaim their flag and battle the Accino Family, Zoro wanders the snow, coming to a huge, strange mansion in the ice, which turns out to be Lovely Land, the Accino Family's headquarters.[67] Eventually Zoro reaches Lovely Land, and begins wandering around the area.[68] Eventually Zoro unknowingly comes across the Boss of the Accino Family, Don Accino himself, and as Zoro confronts Don Accino and two end up drinking together. Accino boasts at his pirate flag collection, just as one of Lil's birds brings in the Straw Hats' Jolly Roger, much to Zoro's chagrin. Don Accino then reveals he knew all along who Zoro was and seemingly prepares for battle. With this, Zoro finally understands who he is and demands to know where he got their flag. Don Accino simply explains that it doesn't matter and that he is out for his 120,000,000 bounty.[69]
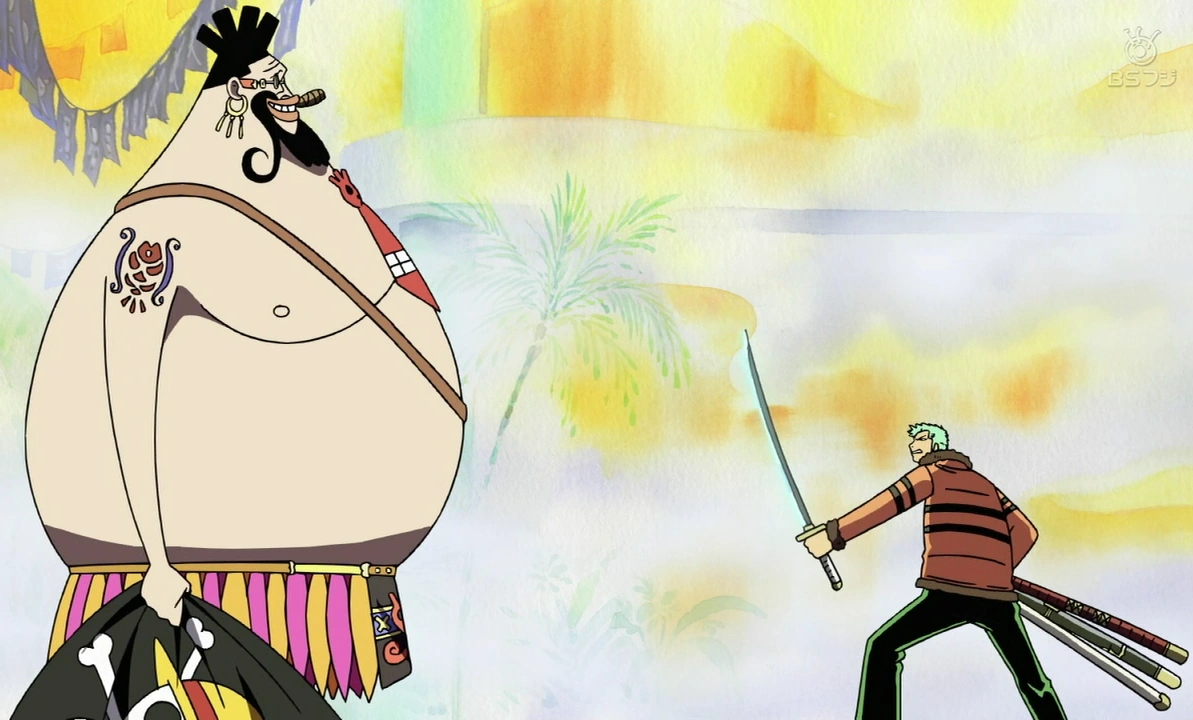
Zoro confronts Don Accino.
As the two prepare to battle, The Don reveals the power of the Atsu Atsu no Mi: the power to heat himself up and melt any substance with his intense heat. As Zoro confronts the Don, his slash flies right through him, as his heat protects him. He almost hits one of Accino's flags, which gets Accino boiling, so much that his children decide to end the fight before it starts and their father melts everything around them. They then manage to get Zoro to fall down a trap door to make sure he will not get the Don angrier. With this, Zoro falls down into an underground ice chamber, trapped with the other captured Straw Hats, unaware of what's going on. As the others bring Zoro up to speed, the crew try to think of a way out, when they are then sent food on the request of Robin. Amongst the food are 3 bottles of cola, which allows Franky to regain his strength. As Franky's Coup de Vent blows away the cap of their prison, and his Coup de Boo brings everyone back to the top, this allows the group to escape before freezing. After escaping, they all go and search for the flag.[70]
The newly freed Straw Hats search for the room with Don Accino's "collection", but they make the mistake of letting Zoro lead them, which ends in them getting hopelessly lost. While wandering around the Accino Family's castle, they encounter Robin and know she is safe. She departs, intending to let Lil show her to her father's room. Just as she leaves, the Straw Hats hear Luffy's screaming and notice he has arrived after following Campacino and his twin brother Brindo. In order to get the flag back before Luffy, they then split, with most of them getting out to help him fight the whole Accino Family (excluding Lil and Don Accino). With all of them doing this, Zoro continues to look for the Don's room, and eventually Zoro finally manages to find Don Accino's room.[71]
With Luffy preparing to fight against Accino, the others took the opportunity to go back into the mansion, with Nami staying with Luffy to monitor him and the others go to retrieve the flag. As the others manage to get to the room, Luffy and the Don fight on, and Lovely Land starts melting away before their eyes due to the Don's devil fruit ability, as the Chopper and Jiro struggle to find the flags and are nearly crushed by the rubble until Zoro and Puzzle appear just in time to save them. Sanji, Usopp and Robin enter the room, the Straw Hats and the Phoenix Pirates manage to recover their flags.[72] After this, Luffy and Accino's intense battle reaches its end, with Luffy withstanding Accino's heat and managing to deliver the finishing blow.
After the intense battle between Accino and Luffy ends, wherein the Don is defeated and Hyokaido was completely melted, The Straw Hats then depart as Hyokaido begins to fall apart, while ensuring to put the flag back on the ship before Luffy notices its actually gone. As they sail away from the area, with the defeated Accino Family sail away with the Don in tow, Campacino and the remaining grunts follow them and try to get revenge. Then suddenly, the Phoenix Pirates arrive and Puzzle challenges Campacino instead. While they sail off, Chopper is worried about them, but Luffy says to see how determined they are and that nothing will happen to them. As Puzzle promises to meet the Straw Hats again in the New World, the crew sail away from the once frozen area, and continue onward toward their next adventure.[73]
Romance Dawn Story[]
| This is an empty section. Please help the wiki by adding information to it. |
Spa Island Arc[]
As the Straw Hats relax on Spa Island, they met Lina, her sister Sayo, and her pet sea raccoon, Nukky, who can shape-shift. While most of the crew are helping the two sisters out, and dealing with the unexpected return of Foxy, Zoro is off mediating under a waterfall. While the commotion of dealing with Foxy and the island's owner Doran is underway, Zoro is seen trying to find his way back to the others, while also noticing that people on the island are starting to leave and the island itself is starting to shake from the commotion.[74]
After finding the others and learning about the sisters' situation, Zoro helps begin destroying the island, an angry Doran decides to stop the bunch by showing them Sayo tied to a stake and a gigantic cannon aimed at her. To show he was serious, he fires a warning shot that barely misses Sayo. Doran then demands the notebook for Sayo's life. Lina tempted to do it was stopped by Sayo, telling her not to give up on their father or his goal, and managed to convince Lina to refuse giving up the notebook. The Straw Hats then proceed to stop Doran and rescue Sayo, with Zoro cutting the cannon apart. After Luffy saves the sisters and stops Doran, Lina notices an x-shaped crack under the island. After telling the crew this, they all realized that the clue was under the island the whole time. The heat from the lava soon makes steam form around the group and the reflection from the sun causes a circular rainbow effect. The sisters then realize that the steam is the final clue to make the gem.
A few days later, the Straw Hats' continue their journey when Nukky flies in and delivers a letter to the crew from his owners. Sayo and Lina succeeded in making the rainbow gem and are living happily with their father who returned, alive and well, just in time to see the creation of the gem. They even sent the gem to the Straw Hats as a thank you, and while the crew gather around to look at the gem, it starts to rain candy out of nowhere, and the candy knocks the gem out of Luffy's hand, causing Nami to panic and demand that everyone search for it on the deck.[75]
Summit War Saga[]
Little East Blue Arc[]
| This is an empty section. Please help the wiki by adding information to it. |
One Piece Film: Strong World[]
On board the Thousand Sunny, the Straw Hats read news of attacks on East Blue. Luffy said they would return to East Blue to protect it when Shiki's ship appeared overhead. After warning him of the storm ahead, he came down to meet them. There, he revealed he has a Devil Fruit power to make any inanimate object he touches ignore gravity and float. After learning it was Nami that delivered the warning, and that they were heading to East Blue, Shiki offered to take them there and used his power on the Sunny. Together, the two ships traveled to the floating island seen before, where Shiki suddenly kidnapped Nami. Zoro and the others tried to rescue her, but by controlling the Thousand Sunny using his power, Shiki escaped them and scattered them among the fragments of the island.

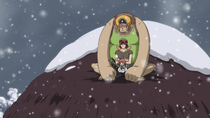
Chopper and Zoro rescue Xiao.
Zoro and Chopper ended up on a snow mountainscape. Upon riding around on a Mammoth Dense, they found and rescued a young girl named Xiao and were lead to her village. Along the way, they learned that the large poisonous plants, called Daft Green, located around the village emit a stink so powerful that the animals stay away. However, long term exposure to the plants is poisonous to humans and Xiao's grandmother had become ill from it.
When the rest of the crew showed up at the village, Robin informed them of Shiki's plan. They learned that Shiki was planning to let loose the animals on the island into the East Blue in a gambit to force the World Government to surrender. They also learned that to prove the power of the animals, Shiki was planning a demonstration by targeting a village on the floating island.
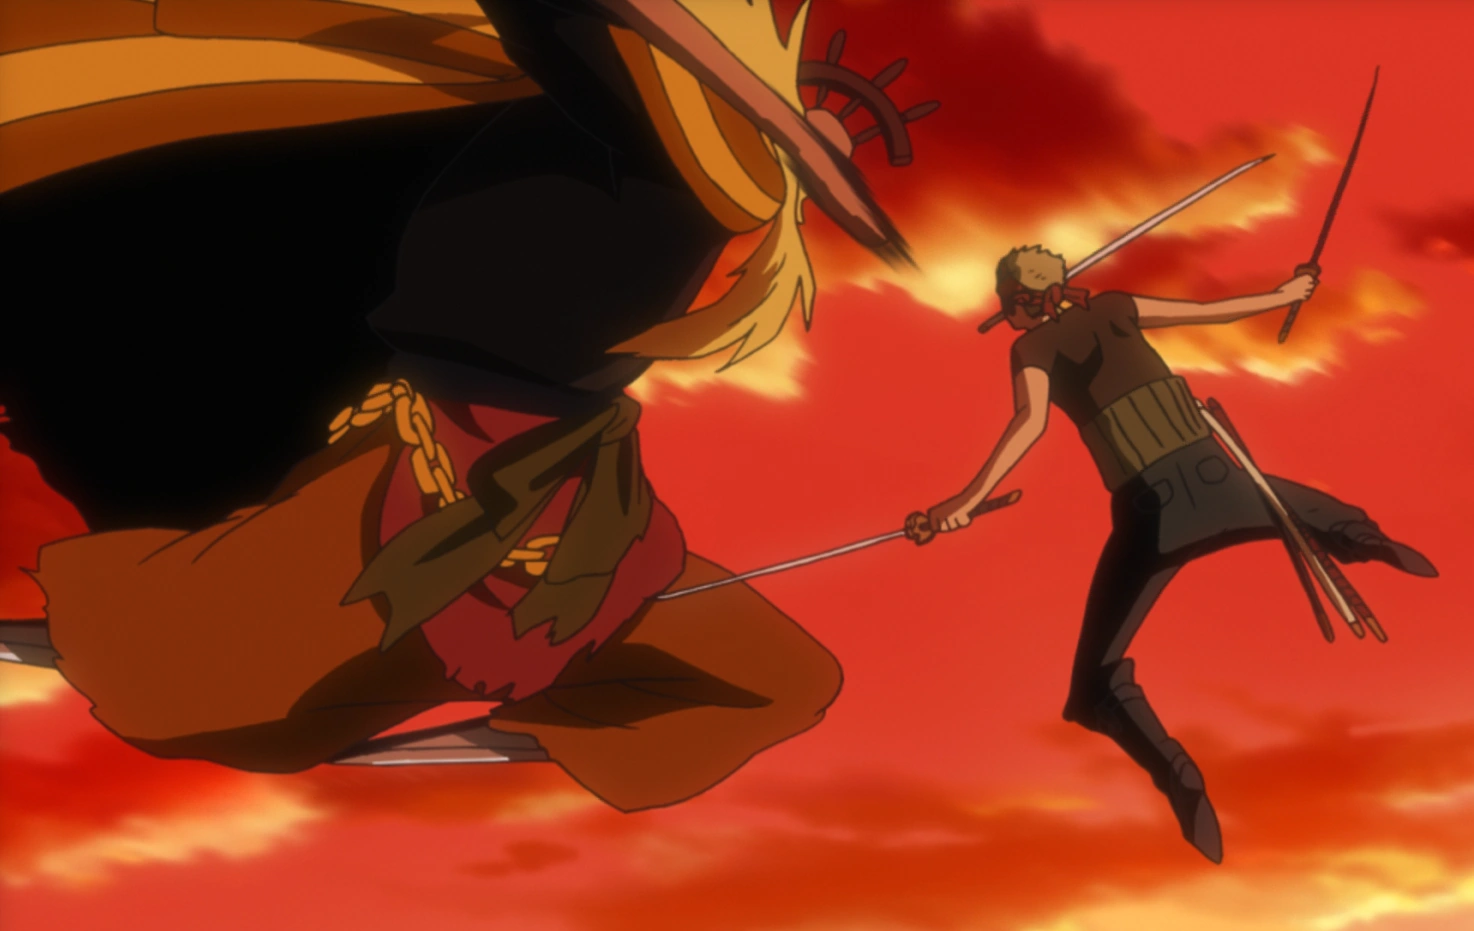
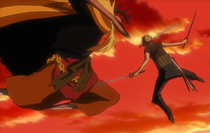
Zoro fighting Shiki.
Shiki then arrived sometime later and confronted the Straw Hats. Zoro attacked with Nanajuni Pound Ho slashes, which Shiki easily deflected. Sanji then launched Zoro into the air as he tried again to fight Shiki, who sent him back down to the ground with one blow. Despite some initial success in the others fending him off, Zoro and the Straw Hats were defeated, and Nami was coerced into rejoining Shiki by him agreeing to spare them and her hometown.
Xiao reappeared and gave them the Dial Nami left for them. Her mother, who earlier had expressed relief about the animals being sent to East Blue, apologized for saying how happy she was for Shiki leaving for East Blue. They then played the message, and the crew, except Luffy, listened to the whole thing.
The Straw Hats later arrived at Shiki's palace, broke down the gates, and made short work of the guards outside. They then marched into the main meeting room brandishing various firearms and a new wardrobe.
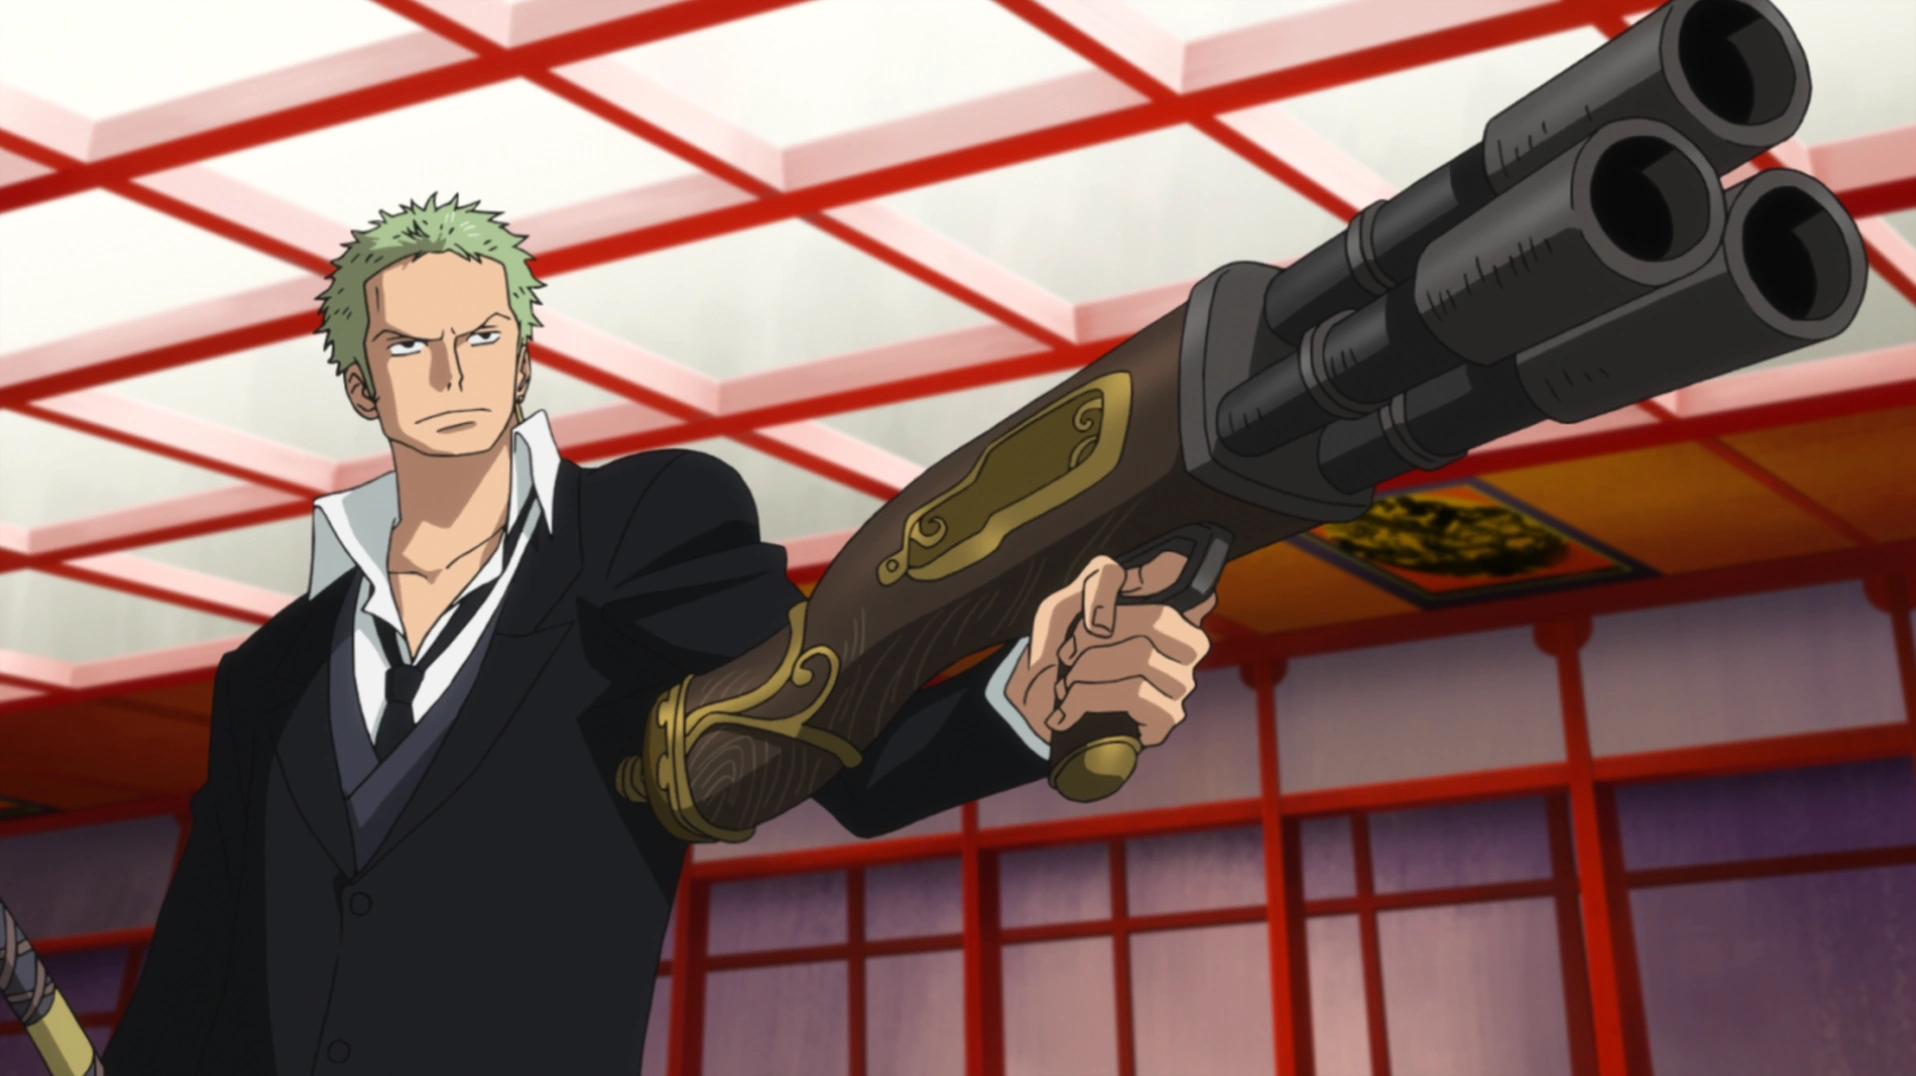

Zoro and the rest of the Straw Hats fight to rescue Nami.
After a short confrontation, where Shiki called them simply a suicide squad, he revealed hundreds of men around them. They unloaded their firearms in the room, defeating most of those gathered, before splitting up to defeat the rest. Luffy chased after Shiki, as Zoro clashed swords with Dr. Indigo.
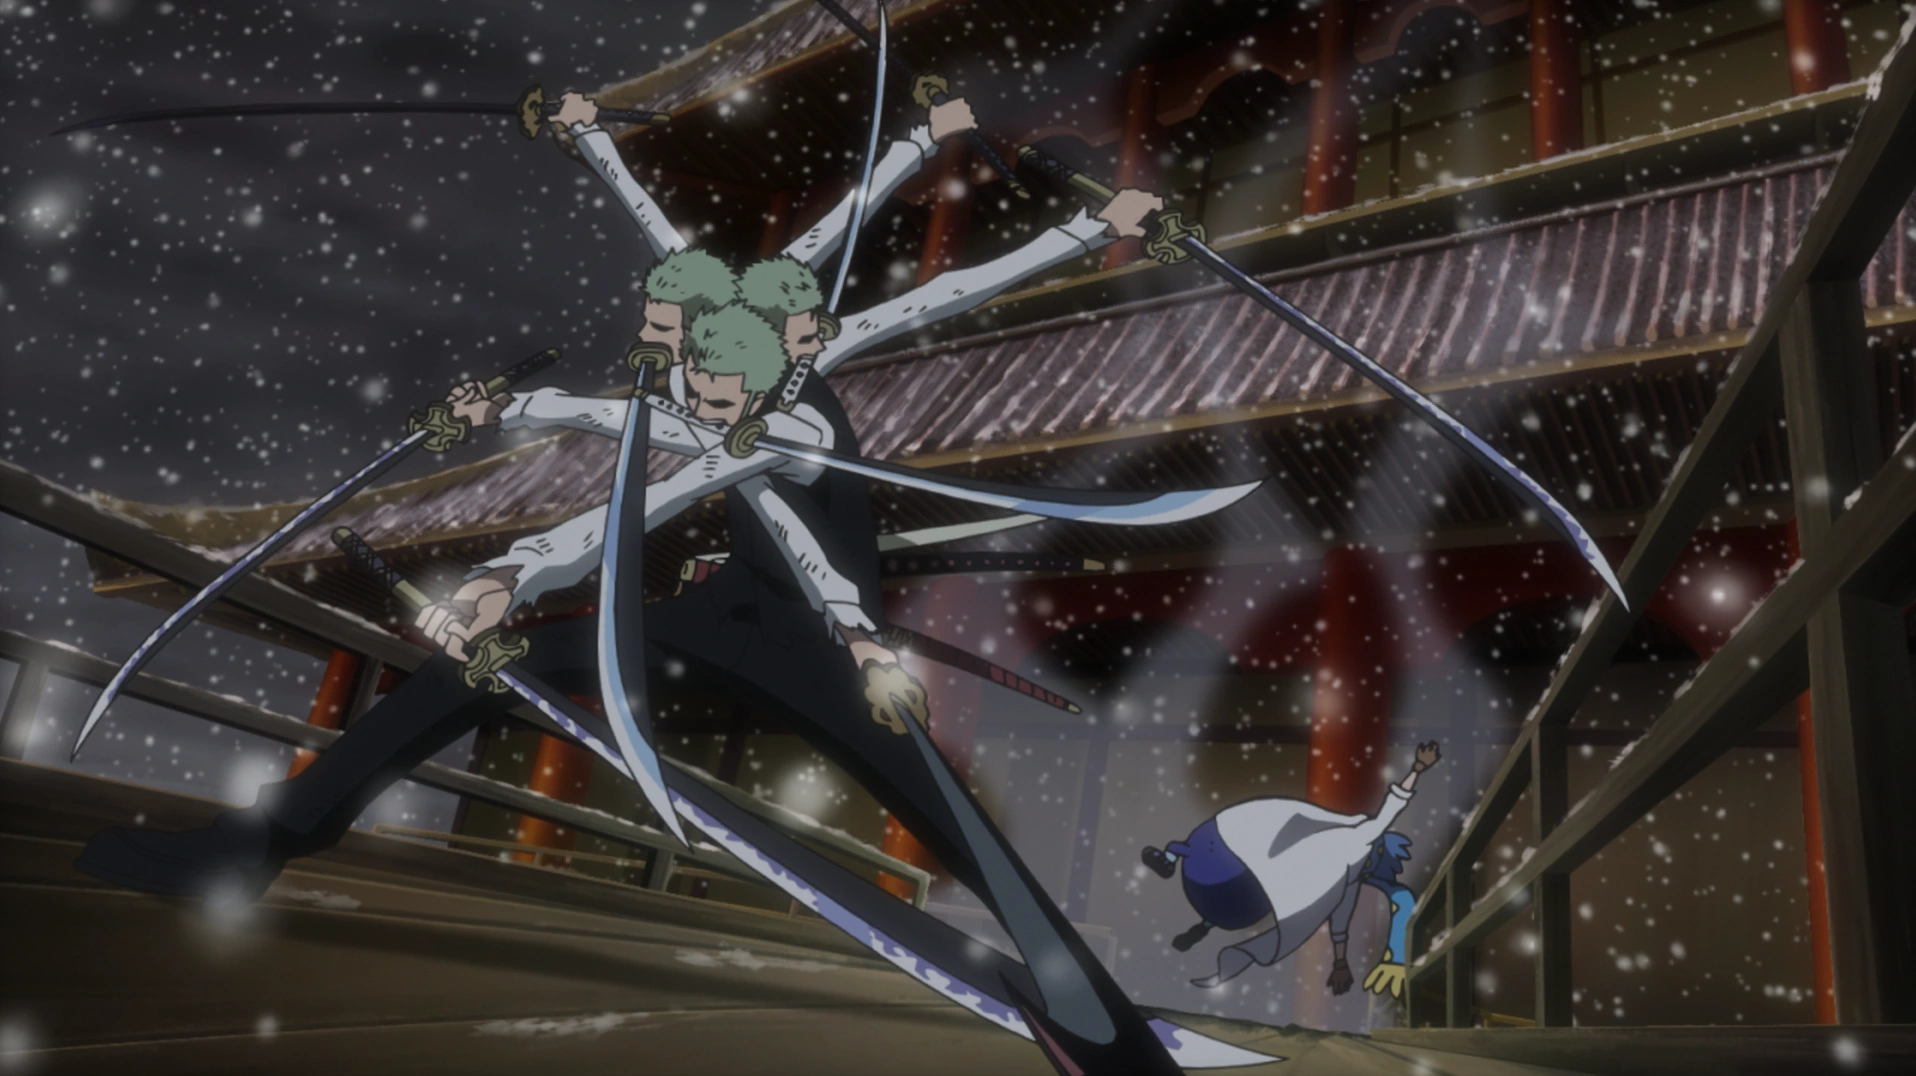
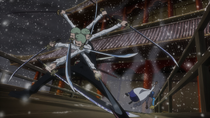
Zoro defeats Dr. Indigo.
Zoro later showed up at Indigo's lab and challenged Indigo for the antidote. Indigo mocked him and stated that the world would not care if East Blue was annihilated. This comment enraged Zoro, due to his origins and most of his crew being born and raised in that area of the world.
He knocked Indigo through the wall and the two began to fight on a bridge. Indigo showed off his Chemical Juggling ability, attacking the swordsman with his chemical orbs. Zoro was unable to keep up and was hit by them. This merely annoyed Zoro, who stated that he did not have time for his acrobatics. Indigo then used the Mass Juggling ability, creating one giant ball of energy and threw it at him. Zoro survived the attack with little damage and defeated Indigo in one strike using his Ashura: Ugui technique. He handed Chopper the antidote and headed back to the ship.
After Shiki was defeated by Luffy, the other Straw Hats escaped on board the Thousand Sunny, using Shiki's pirate sail as a parachute. Zoro was seen much later on the ship as Nami recovered.[76]
One Piece 3D: Straw Hat Chase[]
| This is an empty section. Please help the wiki by adding information to it. |
Toriko x One Piece Collaboration Special[]
| This is an empty section. Please help the wiki by adding information to it. |
ONE PIECE 3D! Trap Coaster[]
| This is an empty section. Please help the wiki by adding information to it. |
Post-War Arc[]
| This is an empty section. Please help the wiki by adding information to it. |
Fish-Man Island Saga[]
Episode of Nami[]
With Nami having stolen the Going Merry and headed back to Arlong Park. Zoro, Usopp and Johnny had already went after her earlier, and Luffy, Sanji, and Yosaku follow suit. In the meantime, it is revealed that Nami is a member of the Arlong Pirates as she reports back to Arlong, who soon celebrates her return with a rowdy party. At the same time, Zoro's group arrives on the island at the destroyed Gosa Village. Zoro roams off by himself, and Usopp and Johnny are quickly spotted by a Fish-Man patrol. Later as Usopp runs from an enraged Arlong, at the same time, Zoro roams into Arlong Park, making quick work of the Fish-Men there, and then leaves. Arlong returns with a captured Usopp, devastated at the loss.
Luffy, Sanji, and Yosaku eventually crash recklessly on the island and run into Zoro (literally). Johnny runs up to them shortly afterwards and tells of Nami's betrayal; Luffy doesn't believe him and angrily threatens to beat him up. Nami arrives, however, and tells Luffy coldly to leave the island; her words don't register with him, and he simply lays down to take a nap, claiming he refuses to listen to her. She runs away infuriated at his stubbornness, and when the crew refuse to budge, Johnny and Yosaku leave, wary of the situation.
Usopp then shows up at Luffy and the crew's location, alive, and tells them how Nami actually saved his life. Initially puzzled by her behavior, the crew then realizes that there must be some deeper motive and goal than just money going on in Nami's head, and just then, Nami's sister Nojiko comes up to them. Wishing to make them understand why they have to leave, she solemnly offers to tell her and Nami's backstory; Luffy opts not to listen and goes on a walk, and the rest of them stay behind to listen (although Zoro almost immediately falls asleep). Johnny and Yosaku also listen, hiding in the bushes.
After listening to the story, the others meet up with Luffy after Nami finally asks him for help. Angry and pumped up, the crew head to Arlong Park. Upon arrival, Luffy slips past the Fish-Men thugs and decks Arlong, who goes flying into the wall. While Luffy deals with Arlong, Zoro is fighting with Hatchan. Although wounded from fighting Mihawk a few days earlier, he easily defeats Hatchan, breaking Hatchan's swords and sending him flying into the air with a Tatsu-maki. As Arlong's crew is taken down one by one, Arlong becomes enraged at their defeat, and he and Luffy viciously trade blows, eventually ending up Nami's cartography room. Luffy notices Nami's blood-stained pen while Arlong talks on his intent to use Nami; both of which get Luffy very, very angry. Luffy then begins to destroy the room while Nami watches from below. Arlong attempts to stop him by biting him. But then, Luffy uses a single Gomu Gomu no Axe to defeat Arlong and completely destroys Arlong Park in the process, and he emerges from the rubble and screams to Nami that they are friends. The village celebrates Arlong's defeat, and the crew promptly beats up Nezumi and the Marines (which contributed to Luffy's first bounty).
Everybody celebrates at a village wide festival, and later that day, Genzo makes Luffy promise to always keep Nami happy, which he complies with. Nami then gets her Arlong tattoo replaced with her own symbol, and the crew sets sail from Cocoyasi Village, to which an older Nami finishes reminiscing about her past two years ago, as everyone is on the coated Thousand Sunny at the Sabaody Archipelago, as she and the crew, Zoro included, prepare to sail to Fish-Man Island.[77]
Toriko x One Piece Collaboration Special[]
| This is an empty section. Please help the wiki by adding information to it. |
Dressrosa Saga[]
Episode of Luffy[]
During some spare time on the Thousand Sunny, the Straw Hats have a mock introductory show with Usopp hosting. Once Luffy's turn was done, they are interrupted by an attack from several Marine battleships. During the battle, the Straw Hats are forced to make an emergency Coup de Burst in order to escape a sudden attack from above, in the form of an immensely large cannonball. Crash landing on a nearby island, they decide to explore while Franky repairs and moves the ship. While Franky works on a way to move the ship back into the water, the rest of the Straw Hats explore the local town to re-supply what was broken or lost in the landing. However they all notice that the town is in short supply of everything and that only women, children or the elderly run the shops.
Later, Luffy comes across what appears to be a fruit stall on the outskirts of the town. Trying to eat several pieces, he quickly discovers that they are actually fake fruits made of wax. From behind, an old man approaches and quickly bursts into laughter over Luffy's mistake, then introduces himself as Diego, the man who had sculpted the fruits. Going inside, Diego is suddenly left dumbstruck as the entirety of his home had been blown away except the front wall and, upon looking over the hill discovers that it was the Thousand Sunny which had caused the damage in its crash landing. Apologizing for the destruction they had caused, Luffy is then led underground where he discovers the pride of Diego's collection, a multitude of life-like wax sculptures of famous pirates.
Luffy recognizes many of the sculptures in the collection room, but after seeing Shanks' sculpture, he is reminded of his childhood and the days when Shanks and his crew had visited Foosha Village, which culminated with his consumption of the Gomu Gomu no Mi and a near lethal encounter with the mountain bandit Higuma where Shanks had sacrificed his arm to save Luffy, earning the boy's eternal respect and admiration. Later, Usopp and Chopper discover the underground section and marvel at the wax figures, leading Diego to show them how his particular wax was created. Noting a poorly crafted figure of Whitebeard on a nearby shelf, Diego mentions that the wax itself is of a much higher quality then the one he can create and demonstrates this by easily destroying his own wax by knocking the sculpture against it though notes that it is weak against fire. Asking who had created it, Diego admits that the man was no longer around and had left him to join the Marines, which was his son, Regis.
Diego then explains the island's situation. Hand Island is an island of artisans that was once under the protection of Whitebeard. However, after he died in the Summit War of Marineford, rival pirates quickly set their sights on his territory. Marines quickly stepped in and built a base nearby which restored peace. Eventually, during mid-construction, Commodore Bilić was put in command. He called for a meeting of the townspeople and asked that they help build a cannon to help ward off pirate attacks which the people happily agreed to. Among them was Regis, who had joined the Marines to help the island, much to the dismay of Diego, who had hoped he would follow in his footsteps. However, once the cannon was completed, Bilic fired on the town as "practice", destroying several buildings and killing a few innocents as well. It soon became obvious that he just wanted the cannon for his own ends and used the families of the builders as his own hostages lest he fire the cannon on the rest of the town.
After telling this tale, Diego starts to head off to the Marine base to give Regis the Whitebeard figurine. But Luffy offers to go instead. Luffy later regroups with the entire crew and tells them his intention. After hearing this the others draw lots to see who'll go with him with Sanji and Usopp chosen. The next day the three head for the Marine base on the Mini Merry. Once they reach the base, the marines open fire once they notice Luffy forcing Sanji and him to invade the base which quickly leads into a chase. Eventually, the two find Regis and give him the figurine but Luffy is captured in a seastone cage once he steps on the platform where Regis's cell is. The wheel turns towards the water submerging the two. Sanji manages to jump in and free the pair and they escape into ocean via a sewer fan where they regroup with Usopp. The four rest on a reef where Regis explains he made the doll when he was six. When he went to join the Marines, Diego tried to at least have him take the figurine with him but he declined. Regis feels that he disappointed his father for not following the path he wanted. But after seeing the figure and being told that Diego always treasured it, he realizes that his father still believes in him. Likewise Diego, after being told why Regis was thrown in jail, is happy of his conviction to protect the island.
After hearing this, the four then notice that Bilic has started firing on the town, thinking the villagers are hiding the Straw Hats and demands they turn them over or he will destroy the town. Luffy's group head back to the base and make their way inside with Usopp and Sanji distracting the Marines while Luffy and Regis sneak in. Bilic, thinking the townspeople sent the Straw Hats after him, fires another cannon at the town but it's sliced in half by Zoro. As Zoro continues to defend the town from Bilic's cannon, Luffy and Regis make their way into the base and gather as much wax as they can. The Straw Hats fight against the Marines while Regis makes his way up to the cannon's barrel and activates the wax, causing it to backfire and destroy itself.
Bilic emerges from the rubble of the cannon, obviously angered. He burns Regis's Whitebeard figure to mock Luffy as well as him then reveals he has a mobile cannon as a back up. Luffy faces off against him, but suffers trouble due to the cannon's speed, the constant bombardment Bilic fires into his rubber body and the spinning tops fitted with blades sent after him. His crew (along with some help from Koby) help take out the tops and Luffy finally manages to beat Bilic by getting in close enough to grab his snake puppet and pummel him with an Elephant Gatling, destroying his cannon in the process.
Kizaru suddenly shows up much to the shock of everyone. The Marines believe he was the one who stopped Bilic and cheer for him as the Straw Hats make a hasty exit. However it turns out the Kizaru is really another wax sculpture created by Diego who made it on the request of Koby. Using the charade (as well as Diego throwing his voice to imitate the Admiral), Koby places Bilic under arrest and states he is likely to be court martialed while declaring that it was never the Marines' intention to enslave the island. He orders the Marines to help rebuild the island while Diego and Regis reconcile. Koby watches the Straw Hats go, promising he'll catch up to Luffy soon to which Luffy, seemingly hearing this, laughs in agreement. However as the crew flees, they realize they accidentally left Zoro on Hand Island.[78]
Z's Ambition Arc[]
| This is an empty section. Please help the wiki by adding information to it. |
Episode of Merry[]
| This is an empty section. Please help the wiki by adding information to it. |
Glorious Island[]
As the crew leisurely mess around on the Thousand Sunny, Luffy, Nami and Brook are seen relaxing in the inflatable pool outside the Sunny, with Zoro taking his usual nap. As Luffy enjoys the pool, he soon notices the presence of a Sea Monster with the appearance of a horse towering the Sunny. As everyone notices the monster, Zoro wakes up when Sanji mentions to Luffy that he should catch it and turn the sea monster into dinner. After Luffy defeats the monster, he accidentally knocks his away, forcing everyone to chase after it with the Sunny.
As the chase begins, they eventually reach where the monster landed, with Luffy excited to eat it. As Zoro reminds Sanji not to forget the booze as well, Sanji comments on how that's all he thinks about, leading to the two of them arguing. Franky gets involved and tries to calm Zoro down, which only makes him annoyed at Franky, until Franky suggests that they should have a party. As Franky starts to talk about having a cherry blossom party, everyone is confused but interested.
Later, Franky explains to the other guys that their party should be a buffet. With everyone originally against the idea, Franky goes on to list the different number of foods that they can have thanks to the sea monster meat, which gets the others dreaming and imagining the food as well. After getting everyone excited about the idea, Luffy starts imagining an whole island filled with meat, with Zoro imagining a waterfall made of booze to go with it. Franky adds the idea of gigantic hamburgers with fries and cola, and Chopper wants clouds of cotton candy and cow milk bath. Brook gets so excited about this glorious dream island that he boldly asks Nami if he could see her panties, making her mad enough to kick him and tell him to come back to reality. As Brook lays on the ground, Sanji shows up telling everyone that the real meat is ready.
As he hands out the food, he also throws a barrel of booze towards Zoro, telling him that everyone is equal when it comes to food and drink, with Zoro stating that he's not complaining. As the cherry blossoms start to rain down and the party starts, Zoro asks Brook to bring the mugs, Brook starts singing as they watch Franky make cherry blossoms rain down across the Sunny.[79]
One Piece Film: Z[]
Luffy and the Straw Hat Pirates are having a cherry blossom party. Luffy is goofing off, stuffing himself with meat while Brook is singing. Chopper becomes distressed when inhaling poison drifting in the air, while Brook is inspired to write a song about it. The smell is shown coming from Usopp spraying poison over his Pop Greens, as Robin happily waters some of the plants. Usopp reassures Luffy that the poison is merely meant for killing worms with Zoro showing a liking to the tainted flavor of his alcohol.
Volcanic ash suddenly begins to rain from the sky much to their confusion. Nami studies her Log Pose and finds the needle spinning where the volcano had erupted from. She realizes that the needle must be spinning around because the volcano must have destroyed the island and the needle no longer has a magnetic field to lock on. Franky says it is impossible, but she points out that they are in the New World, anything is possible. Usopp whispers to her that they have to hide this from Luffy and choose a safer route. Despite it, Luffy notices the spinning needle, deciding to head in that direction. Usopp whines, but Nami tells him to trust in her navigational skills. He warns her that the paths they choose could cost them their lives, but she tells him the matter is out of their hands now.
As Usopp continues to whine, Luffy spots the battered body of Z clinging to life on a piece of driftwood out at sea, and attempts to rescue him. When he grabs ahold of his mechanical arm, he becomes weak and Sanji and Usopp having to help pull Z aboard. Chopper examines Z, but finds that he should be fine. Nami shows signs of suspicion, worrying that they picked up someone problematic. Robin notices his arm is built out of Seastone, the reason why Luffy became weak when he touched him. Sanji reminds them all that Seastone is used against Devil Fruit users with him and Zoro debating whether to throw him overboard. Chopper defends him, with Luffy ordering him to save his life and that he would deal with him if he was an enemy.
Z awakens later in Chopper's infirmary, with Zoro and Sanji standing guard outside. He thanks Chopper for his care, calling him a great medic and meets Luffy who remained in the room during Z's treatment. Z immediately tags him as the ship's captain. Luffy asks him what he plans to do next, as Z tells him he is carrying a Vivre Card and his comrades should find him soon. Luffy begins asking questions about Z, his arm, and what he is doing. Things seem to go fine at first. At least until Luffy reveals he is a pirate.
Z instantly attacks and throws Luffy through the wall. He asks Luffy why he is a pirate to which Luffy proudly responds he will be the Pirate King. This comment infuriates Z, as he madly swings his Battle Smasher around. Luffy, Zoro, and Sanji all begin fighting him with Z able to hold them all off with relative ease. Ain and Binz then arrive with a fleet of ships and board the Sunny, announcing they will be confiscating it. Franky attacks, with Binz summoning vines that are able to subdue him. Robin tries attacking, but he proves too quick for her to grab him with her arms.
Z overpowers the Monster Trio and throws them out into the deck of the ship. He grabs Luffy with his Battle Smasher, sapping away his powers and chastises Luffy's dream, telling him he will never be Pirate King with his strength. Curiosity piqued, he asks Luffy his name. When he tells him, Z connects him as Garp's grandson before throwing him onto the deck with the other Straw Hats.
He announces to the Straw Hats he will destroy all pirates and orders the Neo Marines to attack the Sunny, bombarding her with cannons. While Luffy wishes to continues his battle with Z, the pleas of his crewmates force him to retreat. He frees Franky from his bonds who quickly heads for the steering and he uses a Coup de Burst to escape much to the surprise of the Neo Marines.
Luffy and the Straw Hats are recovering on a nearby island, where Franky goes to work on fixing the Sunny. He tells Luffy to go after Z while he repairs the damage done. Chopper regrets saving Z's life, but Sanji tells him a pirate should live without regrets of what he believes in. Nami tells him that they must track them down, or else she will never get her original body back. She would not be as helpful a Navigator to them without her full grown body. Nami proposes gathering intel on their enemy as the first place to start.
Mobston, an old man approaches them and asks if they had a run in with Z. He tells them many pirate ships that have come to the island have been attacked by him. He tells that many who had been attacked by him, lost their will to continue and left the New World. He is pleasantly surprised Luffy still wishes to fight him, after losing so badly to him and offers up his finest equipment to use in their quest. Nami tells the crew to not arouse suspicion, they need a new change of clothes first. They are told their best place to start is to take the Sea Train to Secon Island.
As they head to their next destination, they split up their search. Luffy, Brook, Sanji, and Zoro, all relax in a local hot spring to rest, recover, and prepare for the upcoming fight. Sanji comments Devil Fruit users are a pain, seeing Luffy and Brook become quite weak. Sanji tells Luffy to keep a low profile since the island is crawling with Marine soldiers.
As Luffy and the others relax in the hot springs, Luffy vows to not let his guard down around Z again. Sanji tells him as long as he is a Devil Fruit user and lets himself get caught by his arm he will lose, offering to let him and Zoro to fight him instead. Luffy turns him down, knowing to avoid his arm for their next fight. However, a familiar voice calls out to them, claiming he was getting tired waiting for them. The group finds it belongs to Kuzan who is resting in a nearby bath. The group instantly go on guard. Save for Brook who does not recognize him, but panics when they fill him in that he is an Admiral.
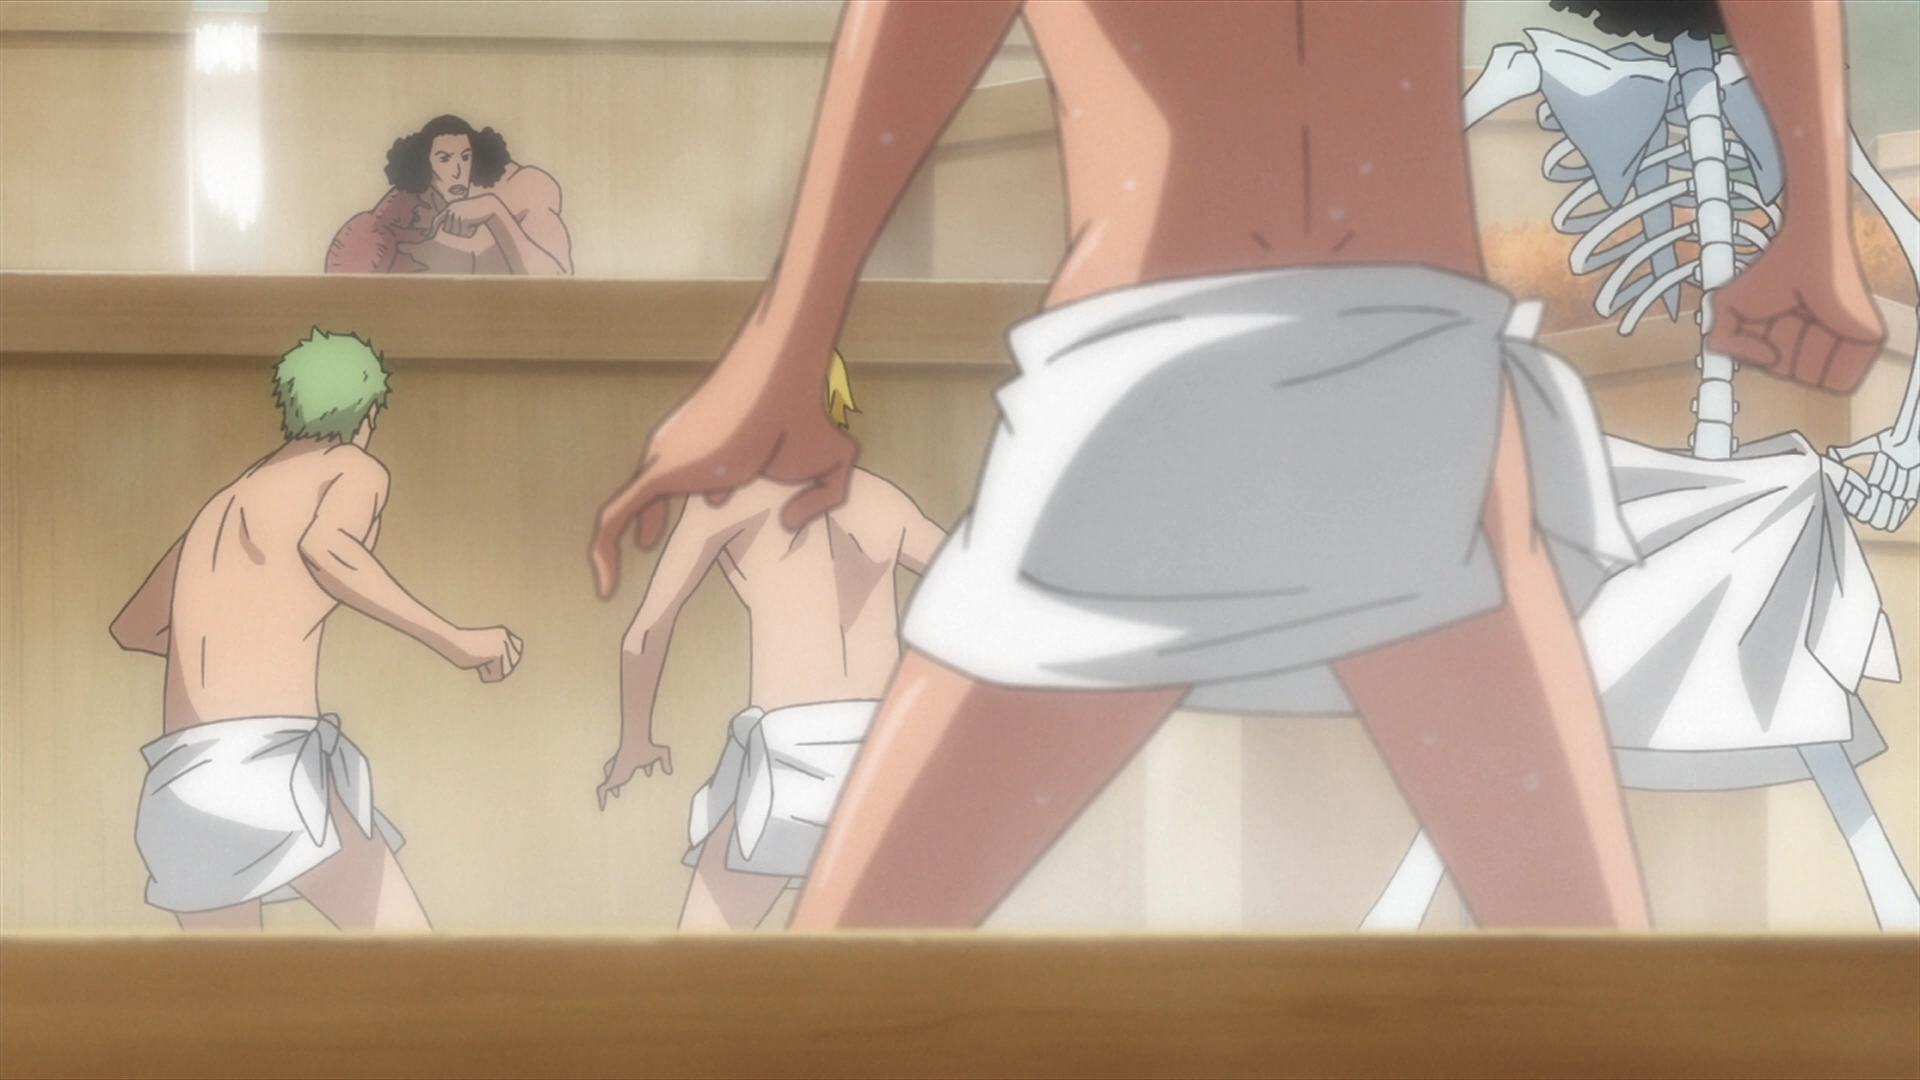
Kuzan with the Straw Hats.
Kuzan reassures them he is not there to capture them, and had given up being an Admiral. Brook asks what he is then, with Kuzan finding being questioned bothersome. He thinks on the question, and is unable to think of a proper answer confusing them further. However, he tells them again he is not their enemy anymore and reminds them if he was he would not be in a hot spring where he cannot use his powers. As Kuzan gets out of the water, the Straw Hats see his battle scarred body, and his missing leg that he regrows with his ice powers. Noticing their shocked expressions, he merely notes he "got into a bit of mischief".
Kuzan and the Straw Hats talk some more, with Luffy asking him what happened to his leg. Kuzan takes offense and tells him there are some things that should not be asked. Luffy tries to change the subject and asks about Akainu on why the two of them fought, believing they were friends. Kuzan refuses to comment on that. He does go on say that he wishes his only reason for coming was to enjoy the hot springs, but is chasing Z. He guessed that they had gone against him, remarking how strong he is.
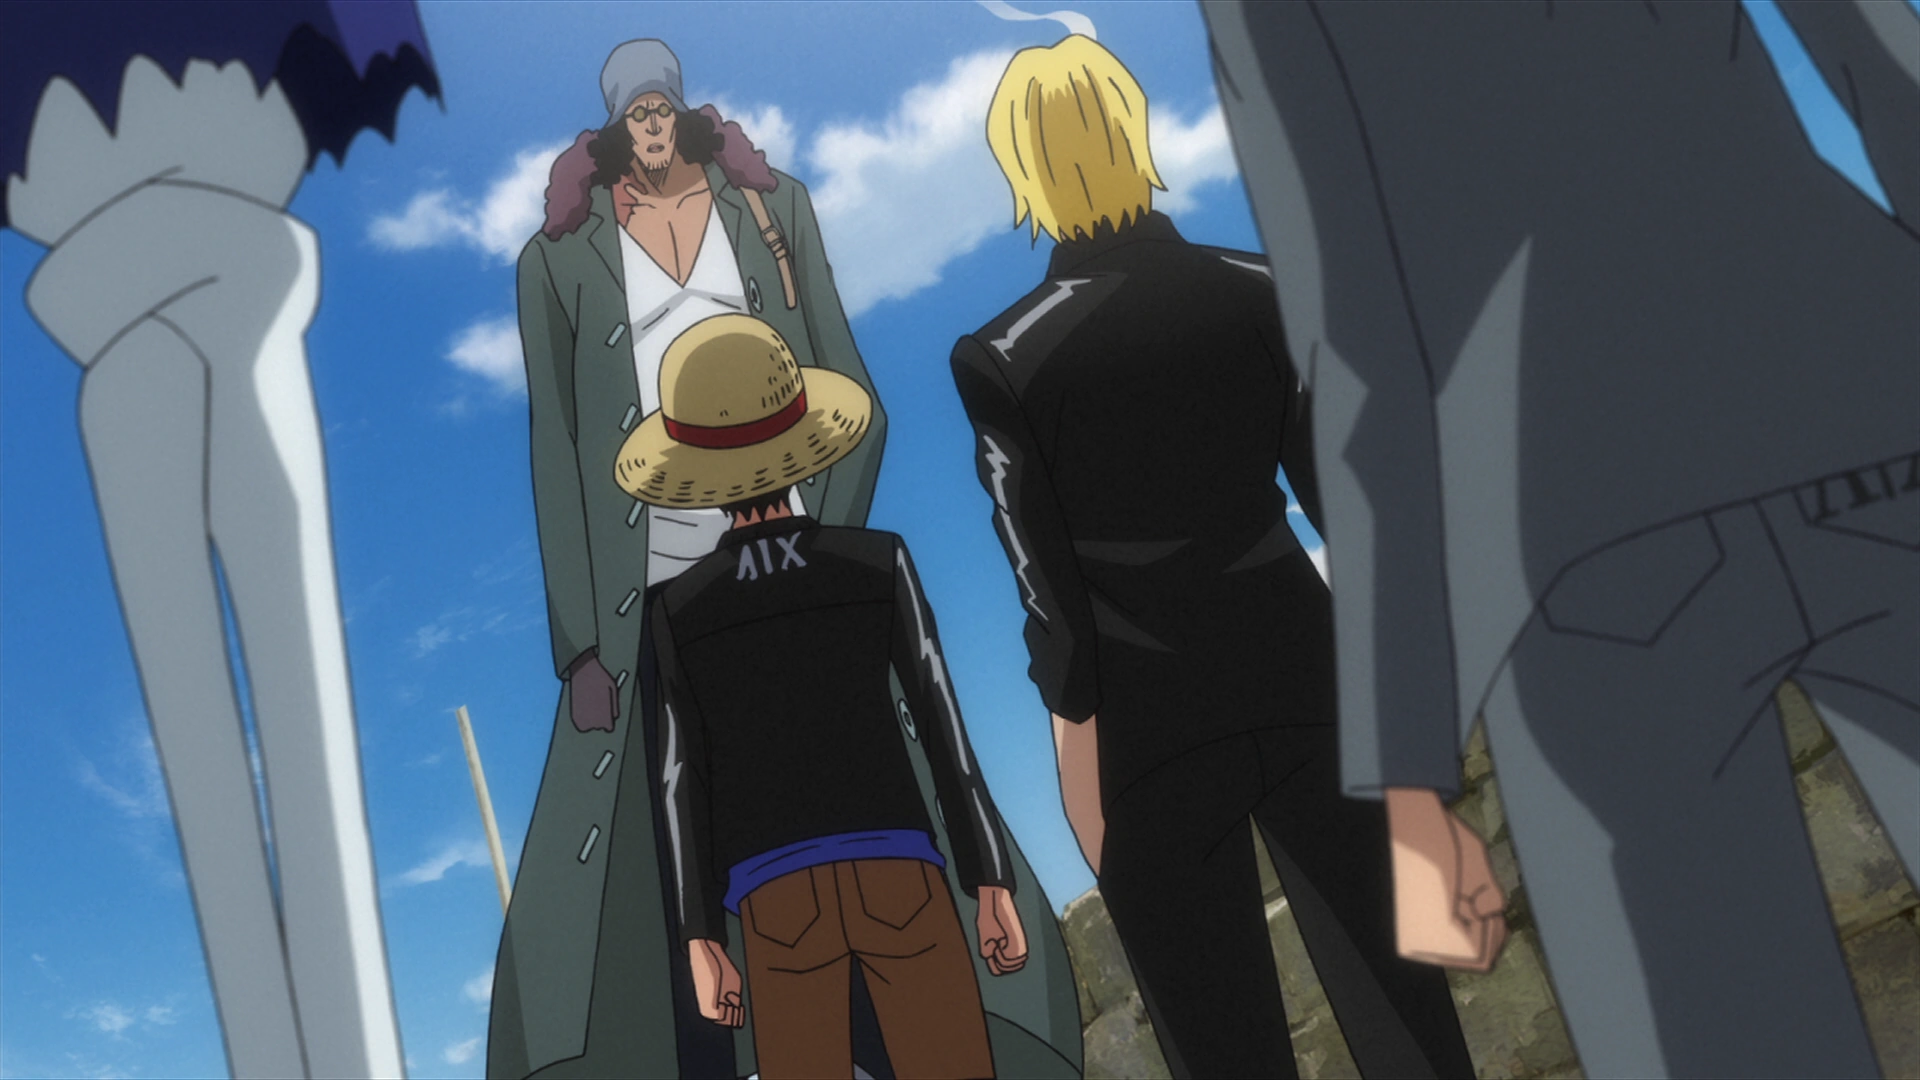

Kuzan warning the Straw Hats about Z.
Kuzan and Luffy's group soon leave the spa as he talks about the great age of pirates. He ponders to himself if pirates are made from the One Piece existing, or if the One Piece exists because of the pirates. Telling them how when some follow their dreams, it can lead to pain and sadness of others. He tells them that Z plans to destroy piracy by destroying the One Piece. He has chosen to follow Z's journey, but is unsure what actions he himself must take. He then departs, telling Luffy he will find Z on the island.
Luffy thinks back to his encounter of Z pondering over him, until the rest of the Straw Hats catch up with them with a group of Marines chasing them. Luffy dispatches them all with his Haoshoku Haki. Reluctantly, the Marine Captain tells him the location of Z. The Dyna Stones on the island explode, causing the volcano to erupt. Z informs his men the destruction the Second Point has been a success and they need only destroy one more island.
With Z in front of them once more, Luffy charges forth and attacks with his Gomu Gomu no Rifle technique. Z blocks it, showing mild surprise to see Luffy. Luffy demands Z change his friends back to normal, as Ain and Binz attack. Sanji and Zoro intercept them, fiercely battling them both. Z tells Luffy if he wants something, he has to take it like a pirate. Luffy and Z both strike, the shock setting off the volcano to explode forth with magma. Kuzan saves the lives of some civilians by knocking away a volcanic rock and tells them to get to the Sea Train. Kuzan looks on at the devastation, wondering if Z has finally lost his mind.
As Luffy and Z's fight grows more intense, Z mocking Luffy telling him if he keeps being afraid of his Battle Smasher, he'll never land any hits on him. He strikes the ground, sending Luffy flying away. He catches up and fires more bullets at Luffy that he deflects back at him. Luffy tells him his bullets will never harm him, until Z pulls out a small pistol and fires a bullet into his shoulder made from Seastone. Mocking Luffy further, he tells him the strongest people in the New World would have never have let themselves be hit with it and he relies too much on is Devil Fruit power. He takes Luffy's hat, promising to bury it himself once he has finished destroying the age of pirates.
Luffy tries to grab it from him, telling Z the hat was given to him by Shanks. He grabs Luffy in his powerful grips and tells him Shanks, along with the rest of the Four Emperors will all die before they know what is happening. Luffy is enraged, screaming at him to not mock Shanks as Z blasts Luffy away. Zoro and the others find Luffy, and help carry him to safety as the deadly ash cloud rolls down the mountain. Usopp uses one of his Pop Greens to make a banana shaped boat they ride against the wind with. They are unable to escape and just as their deaths seemed imminent, Kuzan encases the magma and ash in a gigantic layer of ice giving them time to escape. Luffy and the Straw Hats board the sea train and flee, just before the island blows.
The Straw Hats return to Dock Island, as Luffy is patched up and has the Seastone bullet removed. Kuzan appears before the crew again, telling Luffy to stop moping. Nami, Usopp, Chopper and Robin are shown terrified, but Luffy assures them it is alright. Kuzan explains Z's plan to the crew of destroying the three Endpoints with the Dyna Stones to release the Grande Imbuto, a fissure line underneath the Grand Line. If Z destroys the last one, this will allow the magma flow to be release and flood the sea with fire. Though doing so will not only kill pirates, but innocents as well.
Now that two of the Endpoints have been destroyed, Z is about to go to the last one, Piriodo, and unless the Straw Hats stop him, the Pirate Era will end. The Endpoints had been considered a legend, with most thinking it was nonsense. The government covered up the truth about them, to dissuade pirates from using it. That only the World Government and highest ranking officers of the Marines know about it. He laments that it is an Admiral abusing this knowledge above all else. He reminds them that he is not doing this out of power, but to punish pirates.
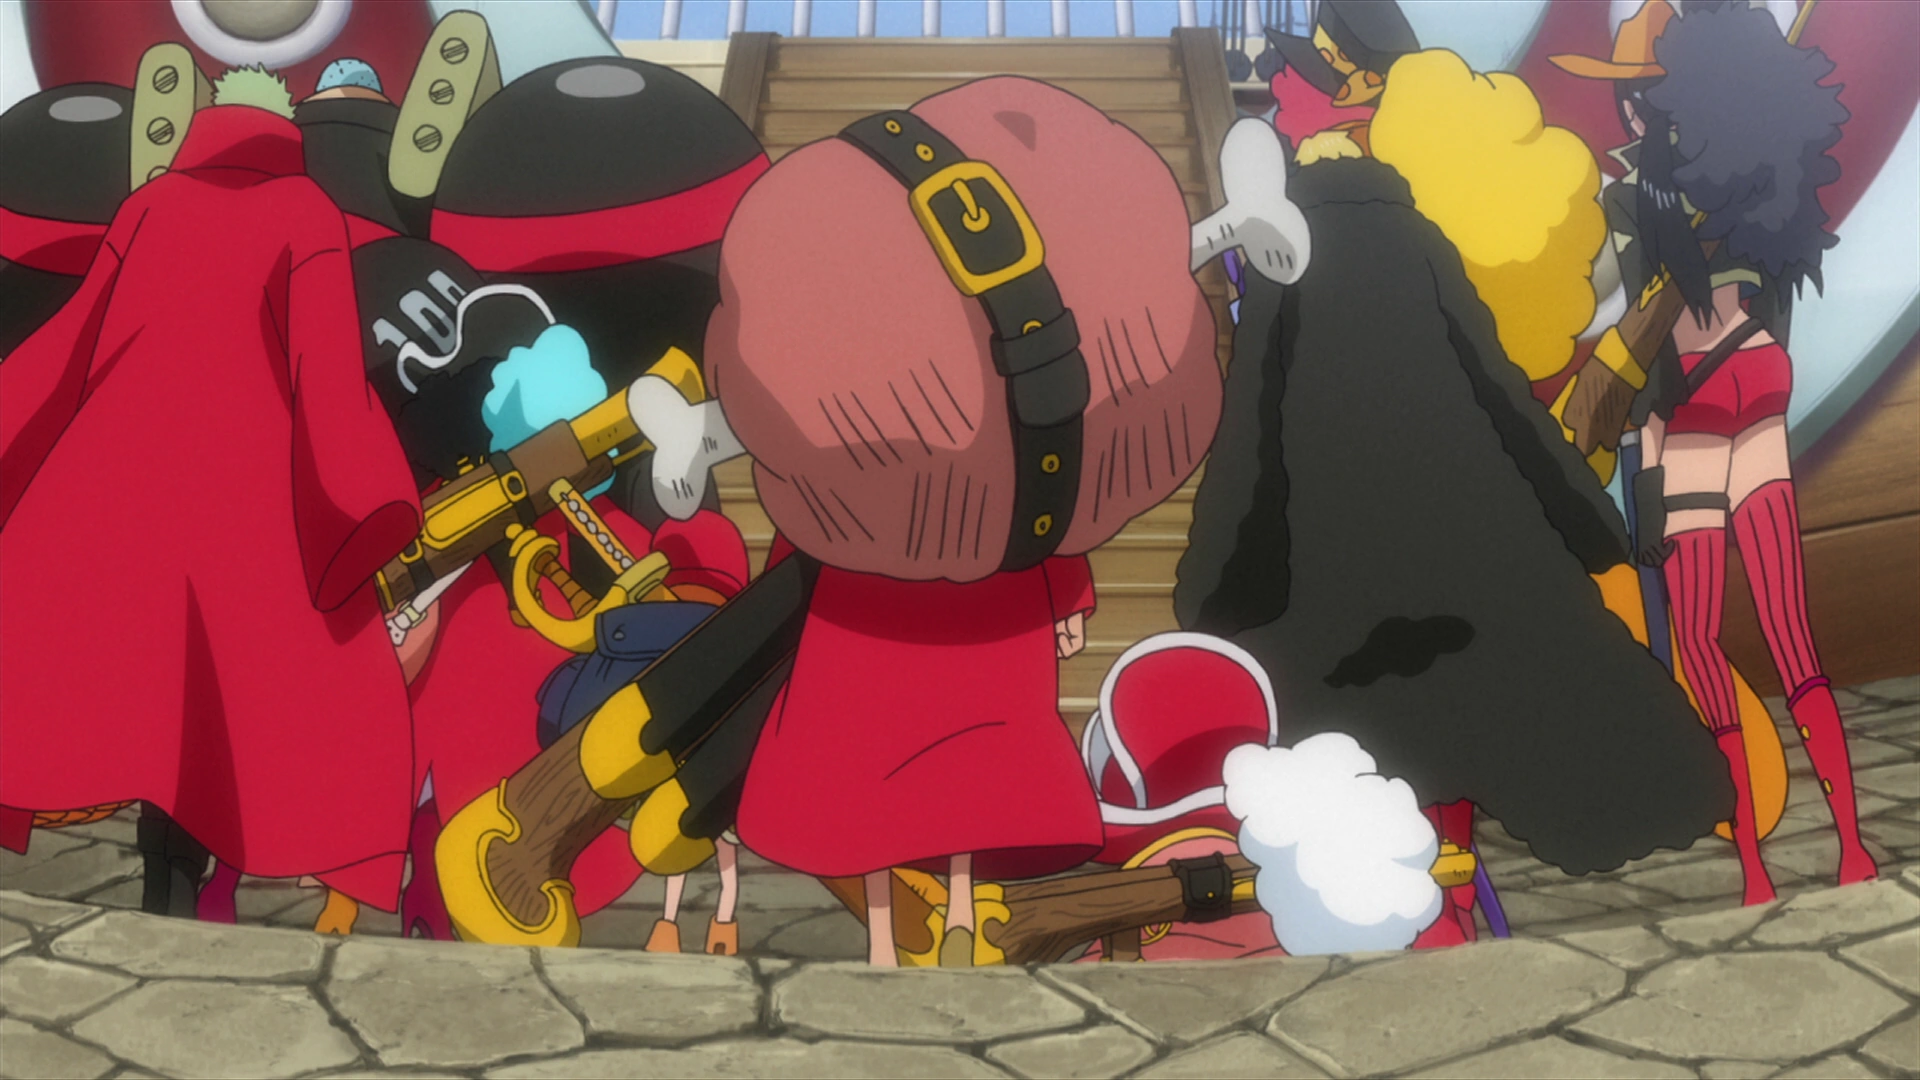

Luffy and the Straw Hats head out to battle.
Luffy remains undeterred despite being defeated twice by Z, vowing to chase him down and get his hat back. If he lets Z keep his hat, he could never face Shanks or be worthy of the Pirate King title. Kuzan then gives the crew an Eternal Pose leading to Piriodo. If they lose to Z, they will be destroyed along with the New World. Or, if they win they will be attacked by the Marines. With that said he leaves them to their own fates. Franky then reminds the crew about the equipment they were promised earlier, showing a large stash of armor and weapons Mobston had saved up from the previous crews that suffered from Z's wrath. hey suit up in their new gear and head out. As they are leaving, Gari approaches Luffy telling him he wants to grow up to be a hero but cant decide whether he wants to be an Admiral or a pirate. Sanji flatly states pirates are not heroes. But Luffy chimes in saying if both feel the same, then it is okay and just do whatever he pleases. Gari watches the Straw Hat Pirates leave, filled with admiration for them.
The Straw Hats intercept a blockade of Neo Marine warships guarding Piriodo. They blast through their defenses with the Gaon Cannon before landing on the beaches with an army waiting for them. The Straw Hats begin fighting, using their new weapons to help. Zoro finds himself separated from the group, and is met once again by Ain. She announces she will not let Zoro reach her master. Zoro tells her he has nothing against her, but will fight with everything he has. Ain admits she probably will not win, but will buy Z as much time as she can and will gladly die for him. Zoro remarks he felt hesitation in her sword, angering her. Zoro and Ain battle as she uses her powers to turn the hardened volcanic rock around them back into flowing magma. Zoro slashes the magma aside easily.

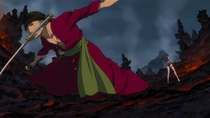
Ain is defeated by Zoro.
Zoro chases Ain through the volcanic lands, both of them clashing their swords against one another. Zoro is shown to be physically dominating the match, as she desperately tries using two pistols against him. Zoro cleaves through the bullets easily and then cuts the guns out of her hands. He finishes the match by performing his Santoryu Seiryu In: Ryusui slash. Ain collapses to the ground, as Zoro stands victorious. After Ain's defeat, her effects begin to wear off. Nami grows back to her adult size, with the armor she is sporting now barely fitting her body. Chopper reverts back growing slightly, along with Robin and Brook (though it does not seem to show any signs of change on him). The group head on to catch up with Luffy.
The Straw Hats catch up to the battle, seeing Luffy had fought hard against Z and had managed to leave an imprint of his fist inside Z's giant metal fist. Z asks him why he wants to fight him so much. That even if he defeats him, nobody will thank him for his efforts for the stigma of being a pirate. Luffy responds if he cannot defeat him, he will never be able to become the Pirate King. The Battle Smasher breaks then and there and falls from Z's arm, revealing a smaller mechanical arm he can still use. Z tells Luffy he is going to dedicate his life to ending his ambition, challenging him for a final bout.
Z and Luffy activate their Armament Haki, their arms turning a hardened black. The two engage in a brutal fist fight, both striking each other with imbued Haki. Kuzan is seen watching their match from a distance, stating "Black Arm" Zephyr has returned. Z and Luffy both give each other hard punches to the chest and stomach, giving Luffy a moment to recoil and puke. Luffy strikes back a punch that knocks Z's glasses right off.
A brief flashback is seen in his mind of his early childhood, rattling his early memories. Z becomes elated, that he is being given such a good fight. Both Luffy and him are worn out, still pushing each other with punches back and forth. He corners Luffy and begins pounding on him, with Luffy showing little sign he can defend himself anymore. As Z begins to gain the upper hand, Luffy pushes him back with a kick.
Fighting on their last reserves, Luffy shouts he is going to be the Pirate King with Z shouting his name in absolute confidence. After exchanging a few more blows to one another, Luffy finally collapses from exhaustion. Z falls to the ground after, unable to fight anymore too. Z bitterly says he's gotten old, and his body cannot keep up with him anymore. He finds it disappointing, telling Luffy he was enjoying fighting him.
As the battle ends, the Straw Hats rush over to Luffy's aid, with Ain and Binz doing the same for Z. Z tells Luffy to finish him, but Luffy merely tells him he is already satisfied as he regains his straw hat, giving him a smile. He offers to continue fighting him, if he wants but Z turns him down, also being satisfied.
Kizaru then arrives with his army, telling them he is going to kill them all. Z says he's done everything he's wanted to do, and now will face the price for it as he marches towards the Marine army. He dismisses Luffy, and tells him to leave the rest to him. Ain tries to rush to his side, but Kuzan summons a giant wall of ice dividing everyone from him. Luffy silently looks on, honoring his sacrifice.
The Straw Hats depart the island, watching the battle unfold in grim silence as Z gives up his life to save them. During the credits, it is revealed that after Z's defeat, the Straw Hats returned to Dock Island one last time, to return the gear and weapons Mobston had given them. They bid them farewell, and Gari decided to become a pirate, wearing Luffy's borrowed attired.[80]
Toriko x One Piece x Dragon Ball Z Collaboration Special[]
| This is an empty section. Please help the wiki by adding information to it. |
Caesar Retrieval Arc[]
| This is an empty section. Please help the wiki by adding information to it. |
Episode of Chopper Plus: Bloom in Winter, Miracle Sakura[]
While sailing the ocean, Nami notices a storm coming in, and alerts the rest of the crew, allowing them to quickly take action and launch the Thousand Sunny away with a Coup De Burst. Almost immediately afterward, Nami collapses from a high fever, and as none of the crew know enough about medicine, they decide to find a doctor to save her, leading them to sail to Drum Island.
Upon arrival, the residents give them a cold reception, as they demand that the crew leave because they are pirates. Luffy begs them to save Nami, and they allow the crew to take her to the shore, with Luffy, Sanji, Robin and Usopp taking Nami ashore while Franky and Zoro stay behind. While the others learn about the the island's king, Wapol and how he took all of the doctors on the island away with him during a pirate invasion, with only one doctor, Dr. Kureha being left on the island, living on top of the mountain. Meanwhile, back at the ship, Franky notices a strange ship, the Bliking, and he and Zoro investigate with the Shark Submerge. Soon after they reach the ship, Wapol's men attack them, and Zoro and Franky defeat them.
As Luffy and the others reaches the top of the mountain thanks to Chopper, and Sanji and Nami also get brought in for treatment, Zoro and Franky find a snowmobile and use it to head toward the mountain.
As Luffy and the others are being treated at Drum Castle, they learn more about Chopper's past, and about Dr. Hiriluk, and thank Chopper and Kureha for saving them and Nami. Unfortunately, they soon come under attack from Wapol and his men, who have come to take back the island. While Chopper and Sanji fight off Wapol's men, Wapol attempts to shoot down Hiriluk's flag with his Baku Baku no Mi powers. As he does this, Luffy gets to the top of the castle and protects the flag, but soon ends up in a fight with Wapol's brother, Musshuru. Musshuru initially has the advantage in speed and easily defeats Luffy with his Noko Noko no Mi powers, poisoning him with his spores. Chopper tries to fight back, but he is defeated, too. Before Musshuru can give the final blow he stopped by the arrival of the rest of the Straw Hats, who stop him and manage to give Luffy an antidote to the poison.
As he finishes recovering, Luffy then uses Gear Second allowing him to keep up with Musshuru and ultimately dominates Musshuru in battle. Wapol escapes into the castle and eats Musshuru, fusing with him and the Bliking Cannon, in an attempt to gain his power and combine it with his own to make a poison bomb to annihilate everyone in Drum so he can replace them with his soldiers. As he tries to fire the bomb, Chopper uses Arm Point and manages to launch Wapol into the roof. Despite managing to fire the bomb, it is destroyed by the Straw Hats before it can explode, then Luffy manages to defeat him and send him flying with Gear Third's Gum Gum Gigant Pistol. Some of Musshuru's poisonous spores drift down, but Franky incinerates them before they can do any damage.
After the battle, Luffy asks Chopper to join his crew, and despite initially not trusting humans before, Chopper decides to go with Luffy. Chopper tells Kureha, who berates him, claiming that he is not ready to leave home, and chases him out of the castle. As he leaves with the Straw Hats off the mountain, Kureha then orders the Drum guards to fire off Hiriluk's Sakura mixture, which mixes with the snow, resulting in a pink snowfall and causing the mountain on which the castle stands to resemble a Sakura tree. As Chopper sees this, he realizes that Hiriluk's dream has been accomplished, and starts to cry. With the Cherry Blossoms in the distance, the Straw Hats sail away from Drum Island, with Chopper now a member, as they go toward their next adventure.[81]
Adventure of Nebulandia[]
The Straw Hats were lured onto Kinoko Island by the Foxy Pirates, who posed as a marooned crew. Luffy agreed to a Davy Back Fight rematch, and Zoro, Luffy, and Sanji took part in the first round, where they had to eat as many mushrooms as possible. However, the mushrooms caused the three of them to become lethargic, and they were captured along with Porche and Hamburg as the Foxy Pirate Komei revealed that this was part of his plan to take down the Straw Hats. Komei then captured Zoro, Sanji, Porche, and Hamburg and took them to Nebulandia, where he imprisoned them.
Zoro and Sanji were later taken outside and chained to a rock formation along with the other captured Straw Hats in order to lure Luffy to Komei. However, Chopper and Brook came with an antidote and reinforcements, and Zoro and Sanji were freed and restored to their old selves. They then helped beat back the Marines, and the Straw Hats and Foxy Pirates returned to Kinoko Island afterwards, where they parted ways. The Straw Hats then held a banquet to celebrate their victory.[82]
Whole Cake Island Saga[]
Silver Mine Arc[]
As the Straw Hats and Barto Club slept for the night, Luffy and Bartolomeo were suddenly kidnapped by the Silver Pirate Alliance. The two crews woke up to confront the kidnappers, but Peseta and his men fired Adhesive Shells at the Going Luffy-senpai. Zoro sliced them up, but became covered in a sticky substance which rendered him and everyone else immobile.[83]


Zoro defeats Peseta.
The next day, the Straw Hats and Barto Club reached Silver Mine, where Luffy and Bartolomeo were being held. As Peseta was forcing Luffy, Bartolomeo, and their allies to surrender by taking hostages, Zoro freed the hostages and confronted Peseta. Peseta mocked Zoro about his predicament the previous night and fired more Adhesive Shells at him. However, Zoro sliced them up without getting any adhesive on him and sent Peseta and his men flying far away with Kokujo: O Tatsumaki. Zoro and Kin'emon prepared to take Luffy and Bartolomeo back to the Going Luffy-senpai, but the Silver Pirate Alliance leader Bill cut the two groups off, and Luffy told Zoro to go on ahead while he dealt with Bill.[84]
Zoro and Kin'emon returned to the Going Luffy-senpai, attacking some of the Battle Boats besieging it. Luffy and Bartolomeo later returned, and the Straw Hats and Barto Club set sail for Zou.[85]
Heart of Gold[]
While at sea, the Straw Hats encountered a girl named Myskina Olga, who fruitlessly tried to threaten them. Olga revealed the existence of the great treasure Pure Gold to the Straw Hats, and they wished to go after it with her. Suddenly, they were attacked by Mad Treasure and his crew, who were also after the Pure Gold. The Straw Hats easily repelled Treasure's crew, but Treasure pulled Olga to him with a chain, starting a tug of war between him and the Straw Hats. Eventually, Zoro cut Olga free and returned her to the Sunny, but her ring fell into the ocean into the process. This caused a giant fish named Bonbori to emerge and consume the ring, and the Straw Hats sailed into Bonbori after hearing that the Pure Gold was inside it. Treasure followed the Straw Hats into Bonbori, and rammed his ship into the Sunny, nearly causing it to hit Bonbori's uvula. However, Luffy prevented a collision, but was blown far away after being shot by Treasure's subordinate Naomi Drunk. Olga went to rescue Luffy as the Sunny fell into Bonbori's throat. Zoro, Sanji, and Franky later ended up in Bonbori's second stomach along with the Sunny.
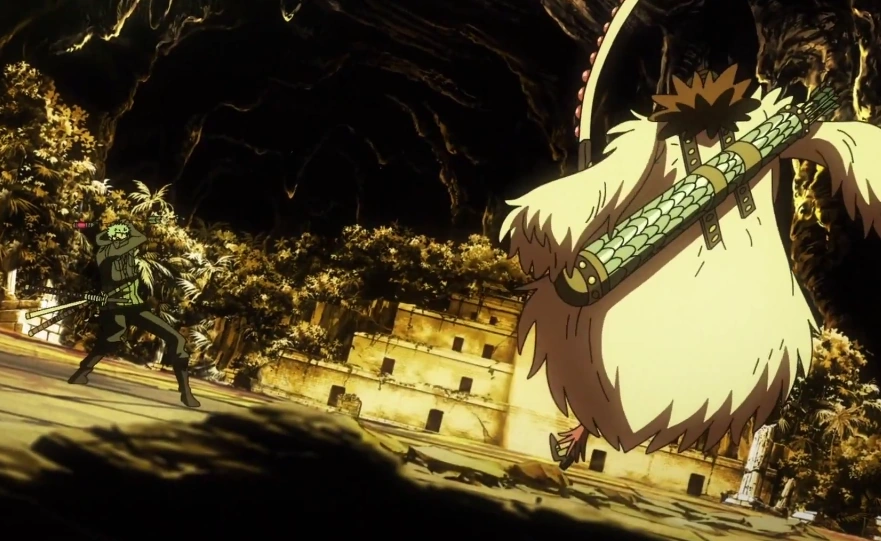

Zoro battles Naomi Drunk.
Zoro, Sanji, and Franky later reunited with Luffy when he and his companion Myskina Acier came into Bonbori's second stomach. Upon hearing that the rest of their crewmates were captured by Treasure, Zoro and Sanji accompanied Luffy and Acier to the island of Alchemi, where the Pure Gold lay. They were attacked by Treasure's crew at the coast of Alchemi, but Zoro and Sanji stayed behind to deal with them as Luffy and Acier continued on. While easily dispatching Treasure's masses, Zoro confronted Naomi Drunk, who repeatedly and unsuccessfully shot arrows at him. Zoro dodged and cut apart all the arrows as he approached Naomi, and hit her with an air slash. He then knocked Naomi out by driving a sword into her cap.
Zoro and Sanji returned to the rest of the crew right after Luffy defeated Mad Treasure, and they prepared to escape on the Sunny. The Straw Hats and Myskina family exited Bonbori as it vomited, and they watched as the Pure Gold was absorbed into Bonbori's lamp. The next day, the Straw Hats parted ways with Olga and Acier, but they were disappointed at their failure to get the Pure Gold. However, Nami revealed that she had acquired a Vivre Card leading to the entertainment city Gran Tesoro, and the Straw Hats excitedly set sail for it.[86]
One Piece Film: Gold Episode 0[]
On the Thousand Sunny, the Straw Hats were having a barbecue. After the volleyball game between Nami and Chopper versus Robin and Franky, the Straw Hats discussed what they will do when they reach Gran Tesoro. Usopp then demonstrated a show for Gran Tesoro in case betting in the casino failed. Zoro spectated the sumo wrestling matches between Luffy versus Usopp and Luffy versus Franky. After a long match between Luffy and Franky, they both decided to use their signature attacks, but Nami punched the two because they could have destroyed the ship. Moments later, the Straw Hats approached the City of Dreams.[87]
One Piece Film: Gold[]
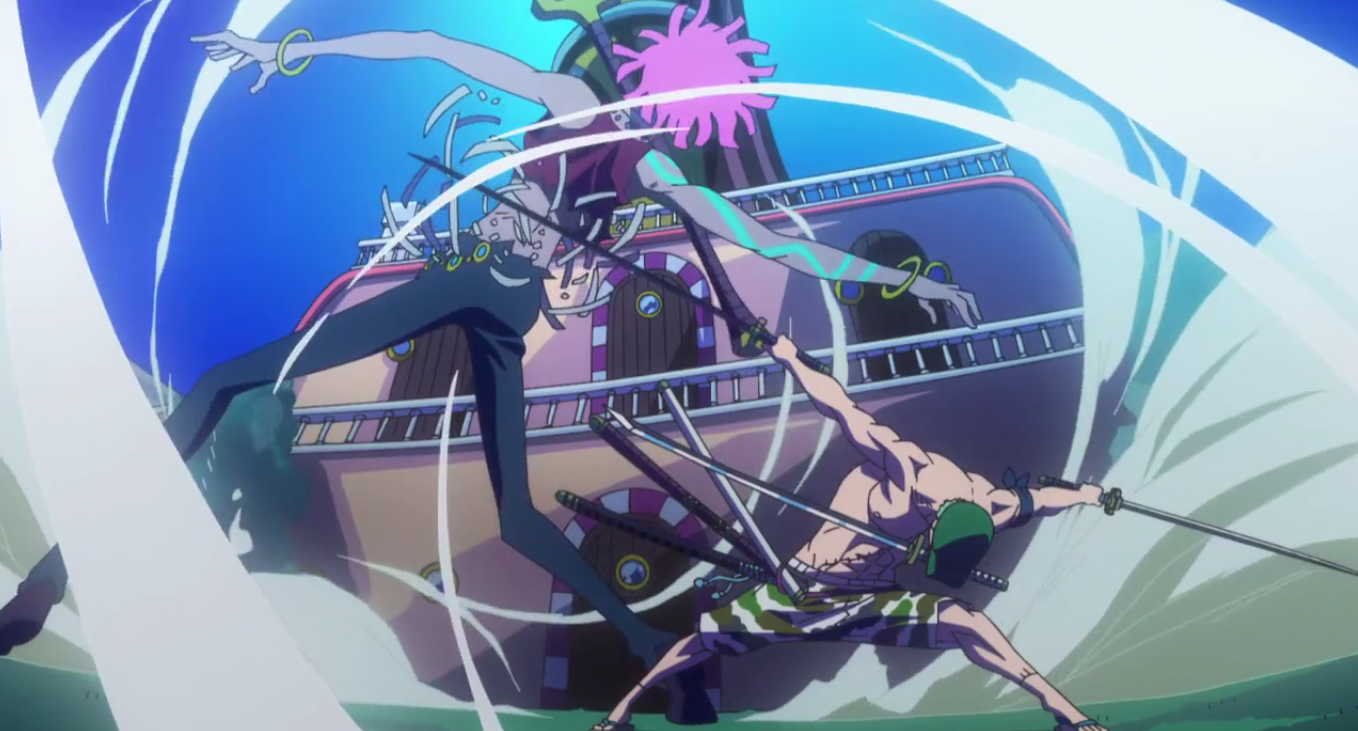

Zoro defeats Narcie with Oni Giri.
The Straw Hats entered Gran Tesoro, and were showered with gold dust at the entrance. They emerged in a pool of liquid gold that had a concert venue around it, but quickly found themselves under attack by the Long Long Pirates, who intended to rob the Straw Hats to pay off their debts. Narcie rushed toward the napping Zoro, but Zoro countered his sword strike. When Narcie attacked again, Zoro ran on top of his sword and used Oni Giri on Narcie, defeating him. The Straw Hats managed to defeat the Long Long Pirates, and watched as Gild Tesoro, the proprietor of Gran Tesoro, encased the remaining enemy pirates in gold.
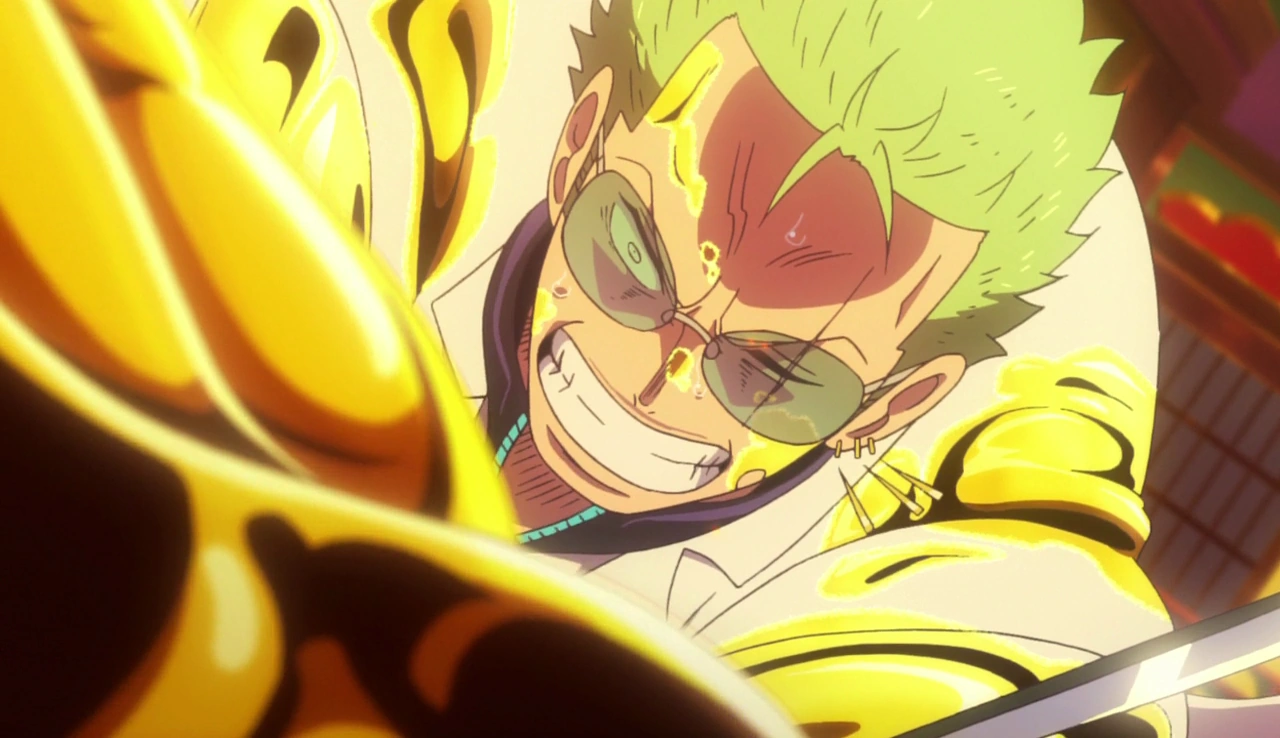

Tesoro starts covering Zoro in gold.
The Straw Hats docked, and were approached by Baccarat, who offered them a VIP experience due to their fame. Baccarat drove them through Gran Tesoro in a turtle car, and took them to a VIP hotel at the heart of Gran Tesoro. The Straw Hats donned new outfits as they prepared to enjoy their vacation, although several kids tried to sell them flowers to pay off their families' debts. They went to the casino, and were given ![]() 20,000,000 worth in tokens. The Straw Hats managed to get very lucky and drastically increase their earnings, and Baccarat took them to the VIP lounge, where they had the chance to become millionaires. They played a dice game hosted by Dice and won, when Gild Tesoro arrived and challenged the Straw Hats to a game. However, Baccarat used her Devil Fruit powers to take away Luffy's luck, causing him to lose. When the Straw Hats found out about her deception, they refused to give Tesoro their money, and Tesoro and his subordinates retaliated with force. Zoro confronted Tesoro, but as he raced toward him, Tesoro encased his legs in gold using the gold dust that had been showered on him at the entrance before blocking his sword strike with a gold tendril. Tesoro covered more of Zoro's body in gold, rendering him helpless, and held Zoro as a hostage. Tesoro allowed the Straw Hats to try and repay their debt by 12:00 the next night, but if they failed, then Zoro would be executed.
20,000,000 worth in tokens. The Straw Hats managed to get very lucky and drastically increase their earnings, and Baccarat took them to the VIP lounge, where they had the chance to become millionaires. They played a dice game hosted by Dice and won, when Gild Tesoro arrived and challenged the Straw Hats to a game. However, Baccarat used her Devil Fruit powers to take away Luffy's luck, causing him to lose. When the Straw Hats found out about her deception, they refused to give Tesoro their money, and Tesoro and his subordinates retaliated with force. Zoro confronted Tesoro, but as he raced toward him, Tesoro encased his legs in gold using the gold dust that had been showered on him at the entrance before blocking his sword strike with a gold tendril. Tesoro covered more of Zoro's body in gold, rendering him helpless, and held Zoro as a hostage. Tesoro allowed the Straw Hats to try and repay their debt by 12:00 the next night, but if they failed, then Zoro would be executed.
Zoro was held in a dark room afterwards in a gold structure, with most of his body encased in gold. The next night, Tesoro came to him and mocked the Straw Hats' hopes of beating him, and Zoro had no reaction.
Later, Zoro was taken to an entertainment venue where he was to be executed and where his crewmates were to be trapped. However, thanks to a plan developed by Carina, seawater sprayed from all of Gran Tesoro's fountains, freeing Zoro and his crewmates from their gold encasement. Zoro rejoined his crewmates, and Tesoro blew up the hotel, causing a deluge of gold to fall on them. However, Sanji, Robin, and Franky carried their crewmates to safety, and Tesoro confronted the Straw Hats inside a giant gold golem. As Luffy battled Tesoro, the Straw Hats were confronted by Dice, Baccarat, and Tanaka, who had been given golden armor and weapons by Tesoro.
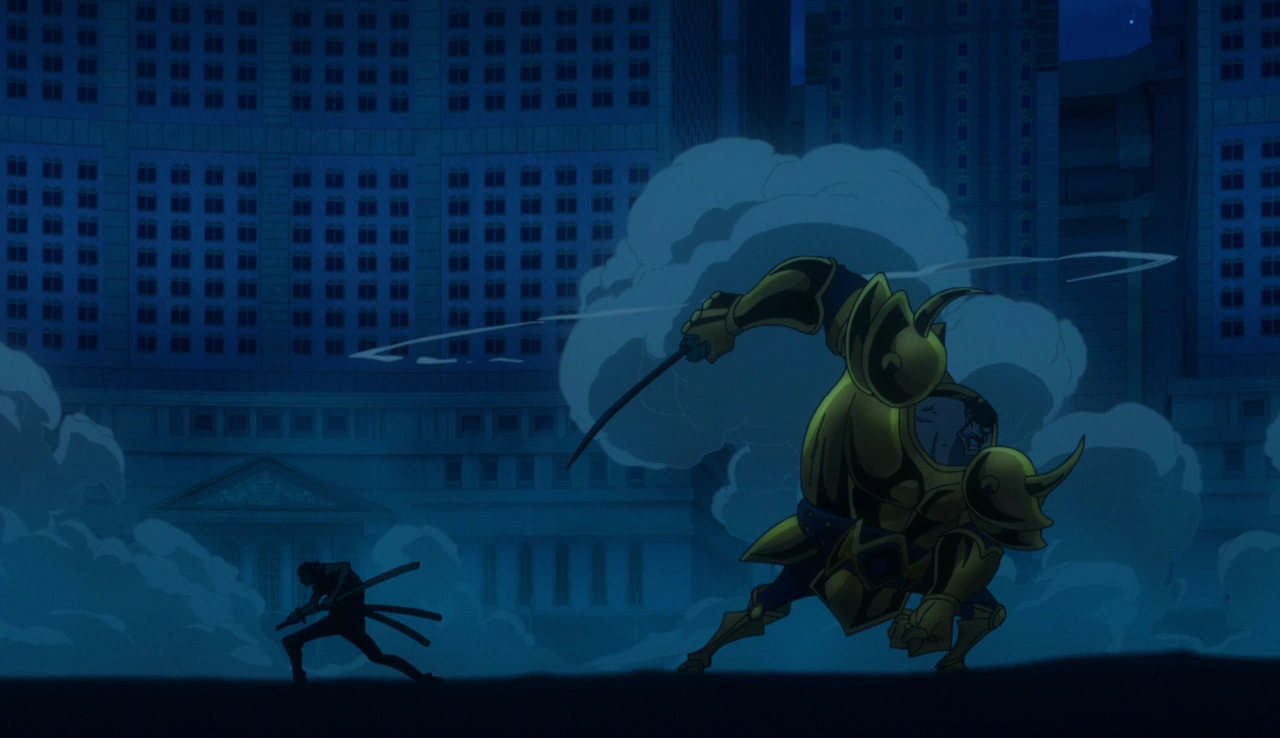
Zoro defeats Dice.
Dice attacked Zoro with a giant golden axe, but Zoro managed to counter his strikes. Dice managed to block Zoro's attacked with Busoshoku Haki, but Zoro eventually managed to disarm Dice and send him flying back in a whirlwind. However, Tesoro summoned gold tendrils to grab Zoro's swords, and Dice curled into a ball and rolled toward Zoro with great force, sending Zoro flying and causing him to lose grip on his swords. Dice took two of Zoro's swords and attacked him with them, but Zoro managed to counter them with only his Busoshoku Haki-imbued arms. He then used Tatsu Maki to send Dice flying back, and after Dice recovered, he rolled toward Zoro again. However, Zoro reclaimed one of his swords and used Shishi Sonson, cutting through Dice's armor and defeating him.
However, after Luffy managed to get the upper hand on Tesoro, Tesoro turned his golem into liquid gold, swamping everyone in it and preventing them from moving, except for the aerial Luffy. Luffy managed to defeat Tesoro, freeing everyone on Gran Tesoro, and they all rejoiced. However, a timer suddenly appeared, and Carina stated that the ship would sink once it reached zero. The Straw Hats then returned to the Thousand Sunny, but then found out that the timer was a ruse in order for Carina to take command of Gran Tesoro. However, they had no hard feelings, and were forced to depart once the Marine fleet nearby began chasing them.[88]
Zou Arc[]
| This is an empty section. Please help the wiki by adding information to it. |
Wano Country Saga[]
Cidre Guild Arc[]
Out at sea, the Straw Hats were under attack by a group of bounty hunters known as the Cidre Guild and their guns that shot powerful blasts of carbonated water. They managed to escape by blasting off with Coup de Burst, but upon stopping at an island afterward they found that the Sunny's cola supply had run out. Luffy volunteered to go to the island to buy some cola, and found that it was dotted with pools of carbonated water. A ramune saleswoman named Caramel told Luffy that he could get cola from the factory, but warned him that it was controlled by the Cidre Guild. Luffy raced toward the factory, but was confronted by a Cidre Guild platoon led by Ginger. Ginger overwhelmed Luffy with a powerful carbonation blast, causing him to fall into a sinkhole and get swept away by an underground river.
The river took Luffy to a pool where Boa Hancock was bathing, and the two reunited and started a battle against Cidre himself. Meanwhile, the other Straw Hats were fighting the rest of the Cidre Guild on the coast, but the fight soon ended as the Guild members revealed they had been enslaved by Cidre and so had no loyalty to him.[89]
As the crew dealt with the enslaved, Luffy continued his battle with Cidre. After a brief clash, Luffy eventually overpowers Cidre and defeats him. He then sees an invitation to the Pirates Festival land on the ground and Luffy picks it up.
The liberated Cidre Guild slaves gave the Straw Hats barrels of cola in repayment for their freedom. Luffy reveals to Hancock that he received an invitation to the Pirates Festival, and bids her a temporary farewell. As the Straw Hats sail back out to sea, Luffy reveals the invitation to his crew, and to their shock, Robin reads that this year's Expo will include a hunt for Gol D. Roger's treasure. Luffy is excited to go there, and the crew sets sail to Delta Island where the Expo will be taking place, along with the other crews of the Worst Generation.[90]
One Piece: Stampede[]
After receiving an invitation for the Pirates Festival, the Straw Hats headed to Delta Island. After exploring and playing around a bit, they decided to take part in the main event, a Treasure Race for Gol D. Roger's treasure. After the Straw Hats started to ascend the Knock Up Stream, they then noticed that Law has boarded their ship, who reveals he's been chased due to coming close to a secret behind the Festival. The crew then decided to split up, with Robin, Brook and Sanji accompanying Law to further investigate his suspicions. The rest continued to the Treasure Island atop the Stream, where an all out brawl occurred as they raced towards the treasure, with Zoro engaging Killer briefly. However, the race ended when the island was destroyed by Douglas Bullet. After also receiving news that the island was being surrounded by a Marine fleet, Zoro was assigned to take care of the crew on the Sunny. When they made it to the coast, the Pirate Hunter soon found himself facing Issho, who he held of until Bullet started to make his move. Issho left, but not before leaving a parting gift in the form of a meteor, which Zoro managed in two, though it was only blown away thanks to Dracule Mihawk, who was present to fulfill his duties as a Warlord. Bullet then altered the island's terrain with his ability, creating walls on the edge of the island and trapping both pirates and Marines within. When Zoro noticed that Crocodile was aiming for Bullet after Luffy destroyed his colossus and ship, Zoro briefly intercepted the former Warlord. After Luffy defeated Bullet, the Straw Hat's reunited on their ship, where they set sail and attempted to penetrate the Marine's encirclement of the island, together with the other members of the Worst Generation, as well as several other pirate crew. In the end they were able to escape thanks to Sabo and Ann creating blazing path for them to go through.[91]
Episode of East Blue[]
| This is an empty section. Please help the wiki by adding information to it. |
Episode of Sky Island[]
| This is an empty section. Please help the wiki by adding information to it. |
Wano Country Arc[]
| This is an empty section. Please help the wiki by adding information to it. |
Uta's Past Arc[]
The Straw Hat's spent a lazy day out at sea on the Sunny, while listening to a Tone Dial playing Uta's new song, New Genesis.[92] Later, after everyone on the crew showed interest in the singer, the crew begged Luffy to attend Uta's concert, and the captain agreed, and the Sunny set course to Elegia.[93]
One Piece Film: Red[]
Uta organized a concert on Elegia in order to realize her dream of performing for the whole world. Zoro was present during the concert.[94]
References[]
- ↑ One Piece Manga and Anime — Vol. 1 Chapter 3 (p. 8) and Episode 1, Zoro makes his debut.
- ↑ 2.0 2.1 One Piece Manga and Anime — Vol. 1 Chapter 5 (p. 19) and Episode 3, Zoro decides to join Luffy's crew to survive against the Marines' 153rd Branch.
- ↑ SBS One Piece Manga — Vol. 105 (p. 132), Zoro's parents and lineage are revealed.
- ↑ 4.0 4.1 One Piece Manga and Anime — Vol. 105 Chapter 1058 (p. 3-5) and Episode 1086, The Straw Hat Pirates' bounties post-Wano Country.
- ↑ 5.0 5.1 One Piece Manga and Anime — Vol. 90 Chapter 909 (p. 13-17) and Episode 892, Zoro's alias in Wano is revealed.
- ↑ One Piece Manga and Anime — Vol. 5 Chapter 42 (p. 16) and Episode 20, Zoro is revealed to have been a bounty hunter by Yosaku.
- ↑ One Piece Manga and Anime — Vol. 1 Chapter 5 and Episode 19.
- ↑ Vivre Card - One Piece Visual Dictionary (Card #0002), Zoro-juurou is romanized.
- ↑ One Piece Manga and Anime — Vol. 1 Chapter 3 (p. 1) and Episode 2, Both Zoro's epithet is seen in the title of the chapter and he is mentioned and recognized by Koby as the Pirate Hunter.
- ↑ SBS One Piece Manga — Vol. 4 (p. 28), Zoro's age is revealed.
- ↑ 11.0 11.1 One Piece Blue Deep: Characters World (p. 205), Zoro's profile after timeskip is revealed.
- ↑ 12.0 12.1 SBS One Piece Manga — Vol. 69 (p. 66), Zoro's age and height after timeskip are revealed.
- ↑ SBS One Piece Manga — Vol. 15 (p. 90), Zoro's birthday is revealed.
- ↑ SBS One Piece Manga — Vol. 10 (p. 46), Zoro's height is revealed.
- ↑ SBS One Piece Manga — Vol. 66 (p. 162), Oda explains the blood types of the world and reveals Zoro's blood type.
- ↑ Correction to Zoro's bounty. One Piece Staff (@Eiichiro_Staff) on Twitter.
- ↑ One Piece Manga and Anime — Vol. 80 Chapter 801 (p. 15-17) and Episode 746, The Straw Hat Pirates are given new bounties after Dressrosa.
- ↑ One Piece Manga and Anime — Vol. 45 Chapter 435 (p. 16-17) and Episode 320, The crew members' bounties for attacking Enies Lobby are revealed.
- ↑ One Piece Manga and Anime — Vol. 23 Chapter 213 (p. 22) and Episode 128, Luffy's and Zoro's bounties after Arabasta.
- ↑ 20.0 20.1 One Piece Movie — The Cursed Holy Sword.
- ↑ One Piece OVA — Defeat Him! The Pirate Ganzack.
- ↑ One Piece Movie — One Piece: The Movie.
- ↑ One Piece Special — Luffy Falls! Adventure in the Uncharted Ocean's Navel.
- ↑ One Piece Movie — Clockwork Island Adventure.
- ↑ One Piece Anime — Episode 54.
- ↑ One Piece Anime — Episode 55.
- ↑ One Piece Anime — Episode 56.
- ↑ One Piece Anime — Episode 57.
- ↑ One Piece Anime — Episode 58.
- ↑ One Piece Anime — Episode 59.
- ↑ One Piece Anime — Episode 60.
- ↑ One Piece Anime — Episode 61.
- ↑ One Piece Movie — Chopper's Kingdom on the Island of Strange Animals.
- ↑ One Piece Movie — Episode of Arabasta: The Desert Princess and the Pirates.
- ↑ One Piece Anime — Episode 136.
- ↑ One Piece Anime — Episode 137.
- ↑ One Piece Anime — Episode 138.
- ↑ One Piece Anime — Episode 139.
- ↑ One Piece Anime — Episode 140.
- ↑ One Piece Anime — Episode 141.
- ↑ One Piece Anime — Episode 142.
- ↑ One Piece Anime — Episode 143.
- ↑ One Piece Movie — Dead End Adventure.
- ↑ One Piece Special — Once Upon the Great Sea! A Father's Huge, HUGE Dream!.
- ↑ One Piece Special — Protect! The Last Great Performance.
- ↑ One Piece Anime — Episode 196.
- ↑ One Piece Anime — Episode 197.
- ↑ One Piece Anime — Episode 197.
- ↑ One Piece Anime — Episode 198.
- ↑ One Piece Anime — Episode 200.
- ↑ One Piece Anime — Episode 201.
- ↑ One Piece Anime — Episode 202.
- ↑ One Piece Anime — Episode 203.
- ↑ One Piece Anime — Episode 204.
- ↑ One Piece Anime — Episode 205.
- ↑ One Piece Anime — Episode 206.
- ↑ One Piece Anime — Episode 220.
- ↑ One Piece Anime — Episode 221.
- ↑ One Piece Anime — Episode 222.
- ↑ One Piece Anime — Episode 223.
- ↑ One Piece Anime — Episode 224.
- ↑ One Piece Movie — Baron Omatsuri and the Secret Island.
- ↑ One Piece Movie — The Giant Mechanical Soldier of Karakuri Castle.
- ↑ One Piece Anime — Episode 326.
- ↑ One Piece Anime — Episode 327.
- ↑ One Piece Anime — Episode 328.
- ↑ One Piece Anime — Episode 329.
- ↑ One Piece Anime — Episode 330.
- ↑ One Piece Anime — Episode 331.
- ↑ One Piece Anime — Episode 332.
- ↑ One Piece Anime — Episode 333.
- ↑ One Piece Anime — Episode 334.
- ↑ One Piece Anime — Episode 335.
- ↑ One Piece Anime — Episode 382.
- ↑ One Piece Anime — Episode 383.
- ↑ One Piece Movie — One Piece Film: Strong World.
- ↑ One Piece Special — Episode of Nami: Tears of a Navigator and the Bonds of Friends.
- ↑ One Piece Special — Episode of Luffy: Adventure on Hand Island.
- ↑ One Piece Special — Glorious Island.
- ↑ One Piece Movie — One Piece Film: Z.
- ↑ One Piece Movie — Episode of Chopper Plus: Bloom in Winter, Miracle Sakura.
- ↑ One Piece Special — Adventure of Nebulandia.
- ↑ One Piece Anime — Episode 747.
- ↑ One Piece Anime — Episode 749.
- ↑ One Piece Anime — Episode 750.
- ↑ One Piece Special — Heart of Gold.
- ↑ One Piece Special — One Piece Film: Gold Episode 0.
- ↑ One Piece Movie — One Piece Film: Gold.
- ↑ One Piece Anime — Episode 895.
- ↑ One Piece Anime — Episode 896.
- ↑ One Piece Movie — One Piece: Stampede.
- ↑ One Piece Anime — Episode 1029.
- ↑ One Piece Anime — Episode 1030.
- ↑ One Piece Movie — One Piece Film: Red.
[]
| |||||||||||||
| |||||||||||||
| |||||||||||||
| |||||||||||
| |||||||||||
| |||||||||||
| |||||||||
| |||||||||
| |||||||||||
| |||||||||||
| |||||||||||
| |||||||||
| |||||||||
| |||||||||
| |||||||||
| |||||||||
| |||||||||
| |||||||||
| |||||||||||||
| |||||||||||||
| |||||||||||||
| |||||||||||||
| |||||||||||||
| |||||||||||||
| |||||||
| |||||||
| |||||||
| |||||||
| |||||||||||||||||||||||||||||||||||||||||||
| |||||||||||||||||||||||||||||||||||||||||||
East Blue Inhabitants | |||||||||||||||||||||||||||||
|---|---|---|---|---|---|---|---|---|---|---|---|---|---|---|---|---|---|---|---|---|---|---|---|---|---|---|---|---|---|
| |||||||||||||||||||||||||||||
| |||||||||||||||||||||||||||||
| |||||||||||||||||||||||||||||
Individuals with Bounties | |||||||||||||||||
|---|---|---|---|---|---|---|---|---|---|---|---|---|---|---|---|---|---|
| |||||||||||||||||
| |||||||||||||||||
| |||||||||||||||||
| |||||||||||||||||
| |||||||||||||||||
| |||||||||||||||||||||||
| |||||||||||
| |||||||||||
| |||||||||||
| |||||||
| |||||||
| |||||||
| |||||||||||||
| |||||||||||
| |||||||||||
| |||||||||||
| |||||||||||||||||
| |||||||||||||||||
| |||||||||||||||||
| |||||||