- Introduction
- Gallery
- Personality and Relationships
- Abilities and Powers
- History
- Past and Before the Timeskip
- During and After the Timeskip
- Non-Canon
- Misc.

|
Ahoy! This here is the 88th Featured Article.
"Roronoa Zoro" has been featured, meaning it was chosen as an article of interest.
|
Past
Zoro was born 21 years ago in the East Blue to Tera and Roronoa Arashi, a descendant of the Shimotsuki Family.[3][11] By the time Zoro was 8 years old, his father had already been killed in a battle against pirates threatening Shimotsuki Village, and his mother had died of illness, leaving Zoro orphaned. At the village's dojo, he trained to be a swordsman.[20]

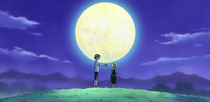
Zoro and Kuina making their promise to become the world's greatest swordsmen.
Even as a child, Zoro was strong enough to defeat most adults, but could not defeat Kuina, the daughter of the dojo's master, Koushirou. During a training session, Zoro met and talked with Kuina's grandfather, Shimotsuki Kozaburo, who gifted him a pair of swords to aid in his practice.[20] The following year while both Zoro and Kuina were training, the Revolutionary Army stopped by their dojo.[21] At some point Zoro came to Koushirou asking if it was true if swordsmen could cut through anything and even steel to which Koushiro confirmed. He then demonstrated to Zoro a piece of paper that he cut without it splitting confusing Zoro, Koushiro then explained to Zoro that part of swordsmanship lies within a sword understanding the will of what the swordsman wishes to protect and what and when he wishes to cut. Further telling Zoro that a sword that cuts and injures anything it touches isn't a real sword, Zoro then told his sensei he would strive to become a swordsman that could cut through anything making Koushirou question if he was listening at all.[22]
After Zoro and Kuina's 2000th fight (and Kuina's 2000th victory), Zoro, now 10 years old, questioned why he still could not win against her to which Koushirou suggested it could be due to their age difference to which Zoro denies as he was able to defeat adults. At night he challenged her in private for one more match—with real swords. Although he had improved tremendously since their first match, he still lost and cried with frustration, telling Kuina about his dream of becoming the world's greatest swordsman. Hearing this, Kuina confided in Zoro, telling him that she shared the same dream but knew she could never attain it. Her father had told her that girls could never be true sword masters, and that her fighting potential would decrease as her body matured. Zoro, annoyed by her defeatist attitude in spite of repeatedly winning against him, told her that one day he would beat her because he was more skilled, not because she was a girl. The two made a promise—that either of them had to become the world's best swordsman.[23]
The next day, Kuina suffered a fatal fall down the stairs of her dojo, much to Zoro's anger and disappointment. Realizing that she would never have a chance to fulfill her dream, Zoro took it upon himself, asking Koushirou for her sword, Wado Ichimonji, and began working to develop his signature Three Sword Style, holding his own two swords in each hand, and Kuina's clenched between his teeth.[24]
Eventually, Zoro learned of Dracule "Hawk-Eye" Mihawk, who held the title of the greatest swordsman in the world. He set off to sea, searching for Mihawk in order to challenge him to a duel. However, he lost his way and could not find his way back home.[25][26] In order to survive on his own, he took on bounties to pay for living expenses. He quickly built a famous reputation for himself as a "Pirate Hunter" in the East Blue[27] and even in the Grand Line as Baroque Works had heard about him.[28] He was even considered the greatest swordsman of East Blue. During that time, he met two bounty hunters, Johnny and Yosaku.
Because of his reputation as a bounty hunter, Zoro was offered a position as a numbered agent within Baroque Works.[28] He replied that he would accept only if he became the leader of the organization, which they refused. He then killed Mr. 7, the agent who offered him the position, in self-defense.[27]
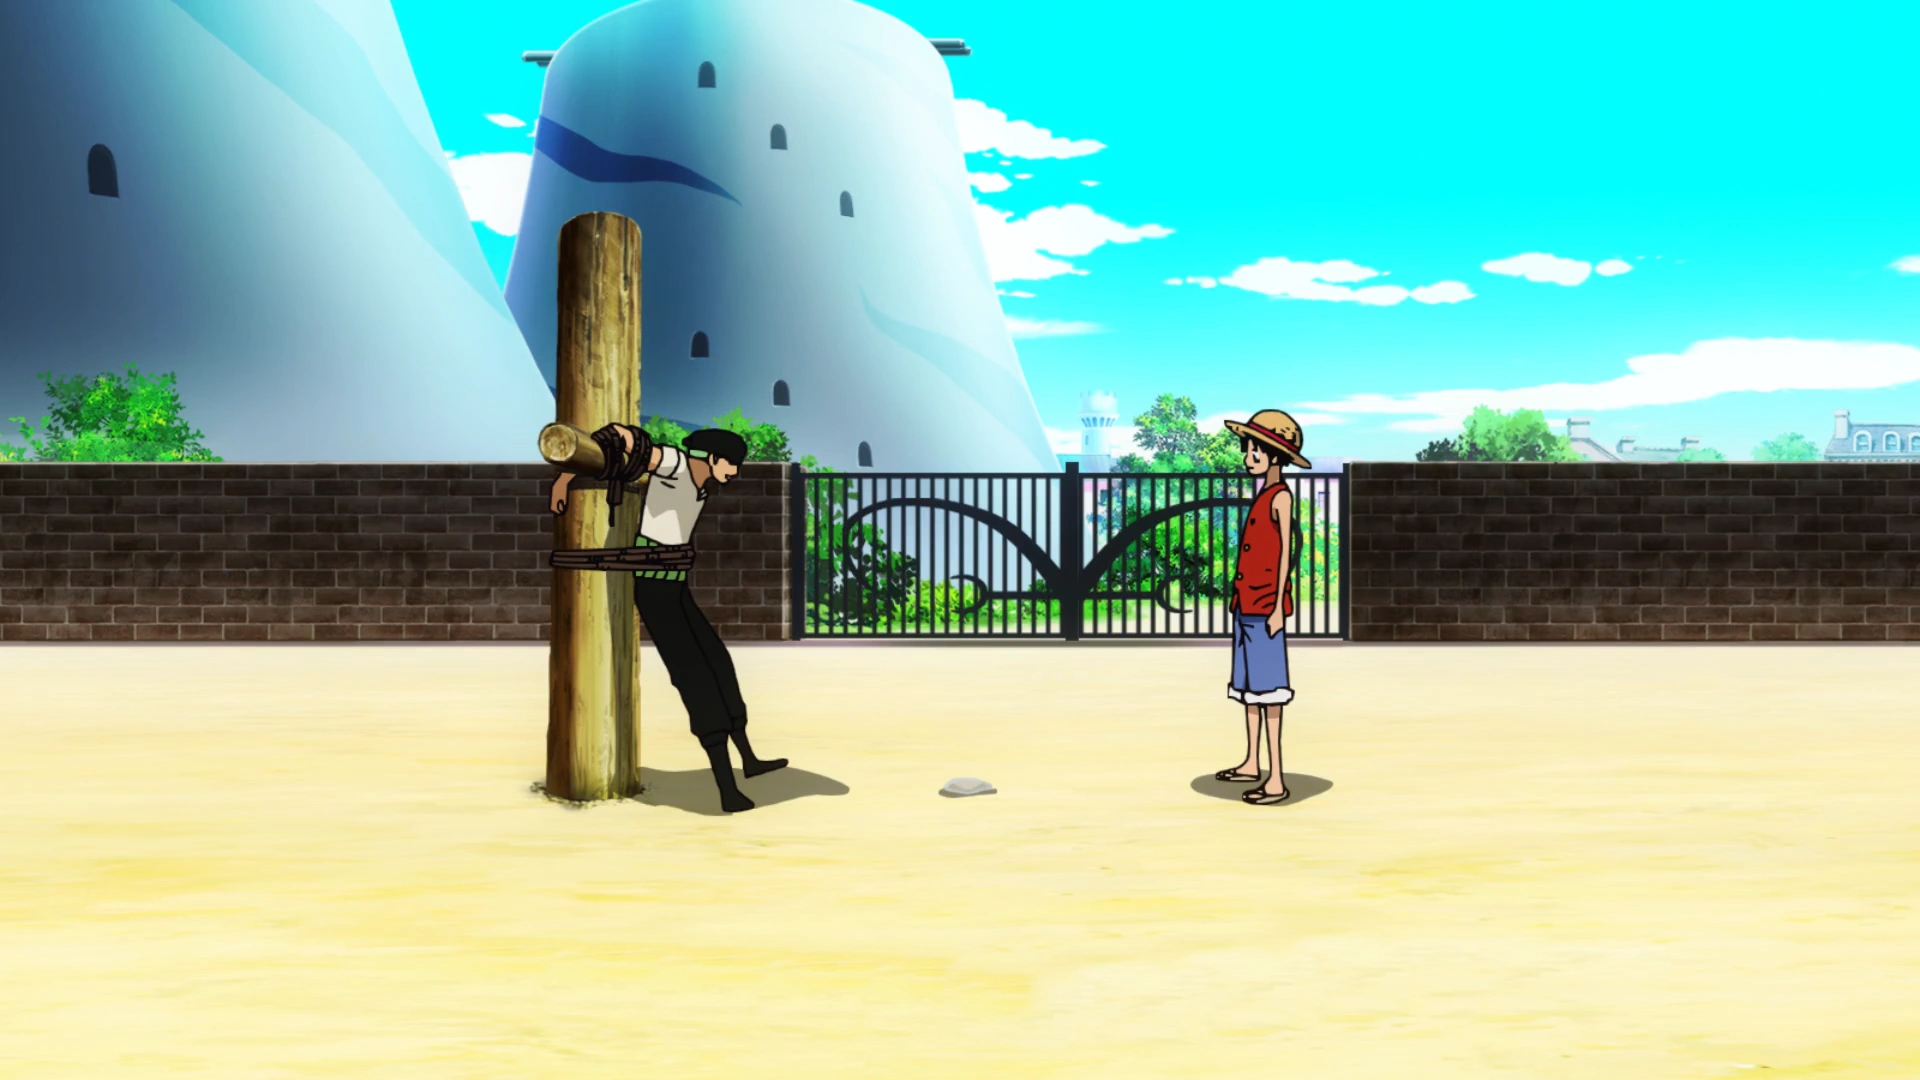
During his journey, Zoro arrived in Shells Town where Helmeppo, the spoiled son of the corrupted Marine captain, Axe-Hand Morgan, released his pet wolf in town. It attempted to attack a girl named Rika, but Zoro saved her by killing it. Based on Rika's story, it is presumed that Helmeppo told Zoro to agree to be tied to a pole for a month to gain amnesty which would preserve his reputation in the Marines' eyes.[29][30]
East Blue Saga
Romance Dawn Arc

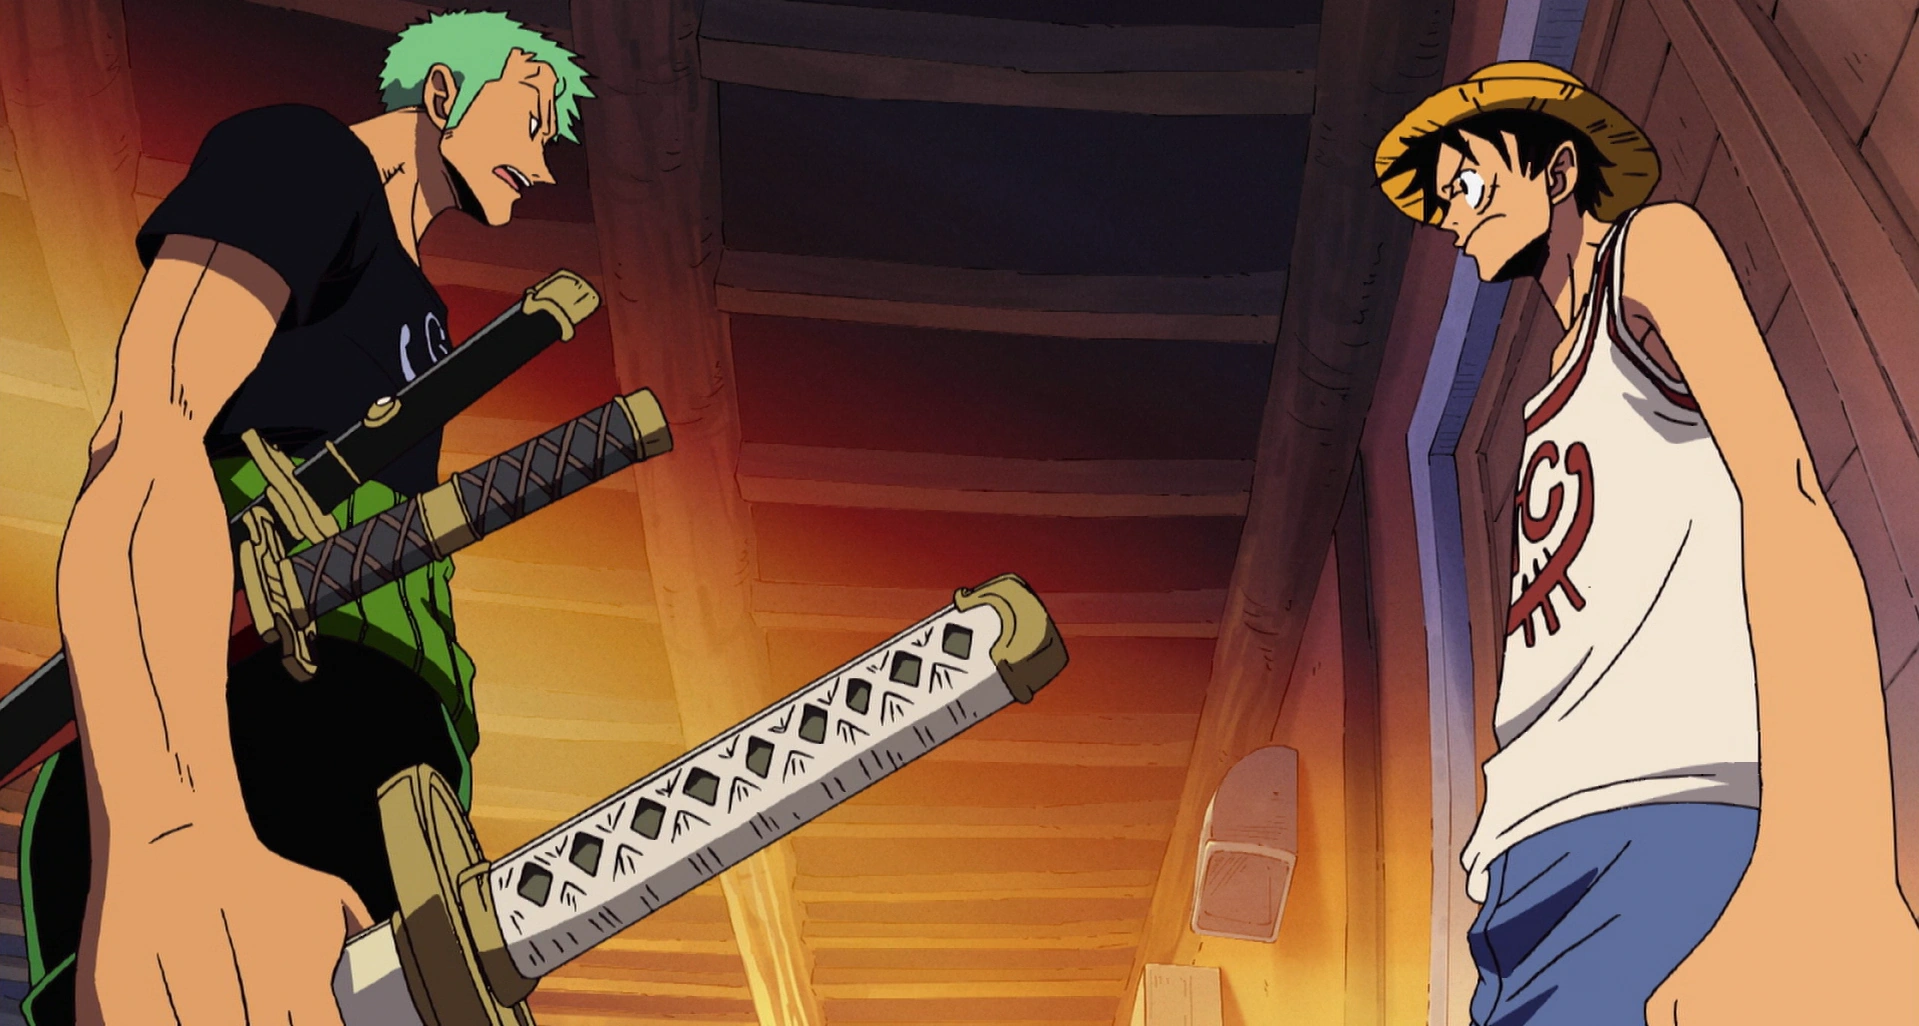
On the ninth day of Zoro's restraint, Koby and Monkey D. Luffy arrived in Shells Town with the intentions of Koby joining the Marines and Luffy inviting Zoro to be his first crewmember. They eventually arrived where Zoro was being held, in time to witness Rika trying to feed him some onigiri which Zoro refused, most likely to avoid the girl being caught as there was a sign forbidding anyone to aid Zoro. The food ended up being stomped badly by Helmeppo because it was sweet while onigiri is supposed to be salty. After they left, Luffy asked Zoro to join him but he flatly refused to become a pirate. He asked Luffy to feed him the dirtied onigiri, and then told Rika that the food was delicious, revealing his kindness. Later in town, Rika explained to Luffy and Koby the reason for Zoro's capture, which only reinforced Luffy's decision to have him as his crewman. When Helmeppo stated that he would execute Zoro in three days time, Luffy angrily punched him for breaking his promise,[31] which sent Helmeppo scurrying to his father, seeking revenge.
With the assumption that Zoro would join his crew if he got Zoro his swords back, Luffy went to the Marine base. Luffy caught Morgan's wrath by crushing his new-built statue and forced Helmeppo to show him where Zoro's swords were. Meanwhile, Koby explained the situation to Zoro while trying to untie him.[32] Luffy came back just in time to save them from a firing squad. Refusing to die, Zoro accepted Luffy's invitation and revealed his unique fighting style. He also revealed his dream of becoming the best swordsman in the world, which Luffy supported, believing that the Pirate King should have the best in his crew.[33] Luffy then proceeded a fight with Morgan. However, when Helmeppo threatened to kill Koby, Luffy knocked him out while Zoro defeated the Marine captain.[34]
The Marines, seeing their tyrant leader finally defeated, rejoiced and allowed Luffy and Zoro to go free. However, since they were pirates, the Marines asked them to leave the island but promised not to report them to headquarters. As they were leaving, Commander Ripper asked about Koby's past. To help Koby hide it, Luffy provoked him into starting a brief fight between them. Zoro stopped the fight before it could get too serious, but it was enough for Koby to muster up the courage to ask Ripper if he could join the Marines, for which Ripper granted permission. Upon leaving, Luffy and Zoro were saluted by Koby and the Marines for their efforts. Luffy and Zoro then sailed onto their next destination.[35]
Orange Town Arc
After leaving Shells Town, Zoro and Luffy realized that they had no knowledge on navigation, and began searching for a navigator. Luffy then managed to get his head stuck in the beak of a giant bird, leaving Zoro to paddle after him. Zoro came across three pirates adrift at sea, and told them to get on quickly because he was not stopping. The three were revealed to be pirates working for Buggy the Clown and planned to rob or kill Zoro.[36]

Zoro is stabbed by Buggy.
Once they discovered Zoro's identity, they began rowing for him, though the commotion caused Zoro to lose track of Luffy's location.[37] In Orange Town, Luffy managed to get tricked by Nami, tied up, and put into a cage with a cannon aimed at him. Zoro showed up just in time to save Luffy and Nami from Buggy's crew. Zoro appeared to slice Buggy into several pieces.[38] However, Buggy is revealed to be immune to blades due to his Devil Fruit powers. Buggy then stabbed Zoro from behind, heavily injuring him. Despite this, Zoro managed to flip the cannon aimed at Luffy to point it at Buggy and his crew instead.[39] Once the cannon was fired at them, Zoro picked up the iron cage Luffy was stuck in and dragged him for a few blocks.
After being taken in by Boodle, the mayor of the town, Zoro was taken care of and slept at his house.[40] However, the house was soon demolished by Buggy and the Buggy Balls that were unleashed upon the town. Zoro rose from the debris with no injuries.[41]
The crew soon decided to make a stand against Buggy. Zoro was pitted against Cabaji, Buggy's Chief of Staff.[42] Zoro fought Cabaji, who fought dirty by striking Zoro's wounds whenever he had the chance. He also created flames through his breath and breathed it directly into Zoro's face. However, once Cabaji was knocked off his unicycle, he became angered and attacked with a slew of spinning tops and more deadly acrobatic maneuvers. Buggy tried to help him by sending his arm to help hold Zoro in place for Cabaji's strike, but Luffy did not allow Buggy to interfere in Zoro's duel.

Zoro defeats Cabaji.
Zoro then took his own sword and slit his own side to ensure that he could battle Cabaji evenly when he was greatly injured. Cabaji recognized Zoro's honor and thought of this as the perfect opportunity to take him down. Zoro declared that if he could not topple all men who called themselves swordsmen, such as Cabaji, then he should give up his own dream to become the greatest swordsman. Cabaji was then defeated by Zoro's "Oni Giri", which cut open his chest. After Cabaji fell to the ground, Zoro also collapsed, claiming that he needed a rest after the grueling struggle. As he fell to the ground, Cabaji was stunned that he, along with Buggy's deadly crew, were all defeated by "common thieves". Zoro responded by saying they were not common thieves, and they were pirates. Zoro fell back asleep while Luffy battled against Buggy.[43]
As the trio started to relax, the townspeople came back into the town, and seeing their mayor knocked out, demanded answers. Luffy replied that the three were pirates, and the townspeople chased them out of town, though the three managed to lose them thanks to Shushu's intervention. Nami agreed to temporarily team up with Zoro and Luffy, and the three sailed off in the two small boats they obtained.[44]
Syrup Village Arc
The crew then came upon the Island of Rare Animals. Zoro slept in the boat, while Luffy and Nami explored the island and met Gaimon.[45]
The crew later arrived at the Gecko Islands. Upon landing, they met Usopp, the local troublemaker of Syrup Village and leader of the Usopp Pirates. After some misunderstanding about coming to the island, they discovered that Usopp's wealthy friend Kaya was bedridden, but was well-provided for by her two butlers, Merry and Klahadore. Luffy believed Kaya would be able to give them a boat, so they moved forward to visit her.[46] The group was sent flying into the backyard (by Luffy) only to intrude on an argument between Usopp and Klahadore, who insulted Usopp's father and forced the group away from the house.[47] While Usopp and Luffy bonded, Nami, Zoro, and the Usopp Pirates came across the backwards-walking hypnotist, Jango.[48]
After Usopp ran past them hysterically screaming that Klahadore was a pirate, they went in search for Luffy.[49] Luffy confirmed that Klahadore was actually Captain Kuro, who planned on killing Kaya and getting all her money. Usopp returned but told the boys that it was just a lie, making them disappointed at Usopp for lying to hurt people and not to entertain. The Straw Hats gained a great deal of respect towards Usopp for tricking the boys to protect their well being and planning to take on an entire pirate crew. Thus, he agreed to help him.[50] Usopp planned to have an oil slip to stop the pirates, to which he could snipe them with ease. However, the four were shown to be on the wrong side of the island. Nami fell into the oil slick but managed to switch spots with Zoro and ran off to fight. Luffy became lost on his dash causing Usopp and Nami to initially fight the pirates alone.[51]
Just before the two could be killed, Zoro and Luffy arrived to fight the Black Cat Pirates.[52] Jango hypnotized the crew to increase their strength but accidentally hypnotized Luffy, and Jango was forced to hypnotize Luffy to sleep again, but accidentally caused the crew to be knocked out by the ship's stempost, which Luffy was holding onto when he fell asleep. Meanwhile, Jango summoned the Nyaban brothers, Buchi and Sham, who started a fight against Zoro.[53] Disarmed of all but one sword, Zoro must fight an uphill battle against the team-work of Buchi and Sham. Zoro exclaimed it was difficult to defeat them without all three of his swords.[54] Zoro prevented Usopp from helping him by taking a hit from his Lead Star to keep him from getting dragged into the fight. Kuro then appeared disgusted by how the Black Cat Pirates were getting beaten by children and gave the Nyaban brothers five minutes before he kills everyone.[55]
Zoro was helped by Nami, who was able to recover Zoro's swords and kicked them back to him, allowing Zoro to defeat the Nyaban brothers, but Buchi got back up and was in turn hypnotized by Jango, which injured Zoro faster. Nami then ran to wake Luffy up, and Jango tried to stop her with his chakram, but at the last second, Nami stepped on Luffy's face.[56] Luffy got up in time to stop the chakram with his rubbery body.[57] Usopp ordered his crew to take Kaya and flee. The three then took Kaya into the forest, while Kuro sent Jango after them.[58] Zoro finished off Buchi. He then headed out with Usopp as his guide on his back to rescue Kaya and the boys (since Usopp could not move due to his injuries and Zoro needed him to navigate through the forest), while Luffy dealt with Kuro and his lightning-fast movements and ten deadly finger-blades.[59]
Eventually, Jango caught up with his target and easily overpowered the boys. Kaya then threatened to kill herself with Jango's chakram to stop Jango from hurting Usopp's crew.[60] Jango promised to leave the boys unharmed in exchange for her to sign the will that would allow Kuro to "legally" acquire her wealth. Zoro and Usopp caught up, and Usopp aided Zoro in defeating Jango and rescuing Kaya and the boys with his sniper skills.[61]
Usopp decided during the aftermath that news of a real pirate attack might be too upsetting for the villagers and would affect their peace of mind since pirates do not normally come to an out of the way village. Therefore, he ordered everyone to keep it a secret, which Kaya and his crew agreed with. Kaya was grateful to the Straw Hat Pirates and gave them her ship, the Going Merry. Usopp was grateful to them as well, and now had the confidence to disband his pirate crew and strike out on his own to be a real pirate. Usopp bid the Straw Hat crew farewell, who became confused and told him to stop and get on their boat with them instead as he became a part of their crew.[62]
Baratie Arc
The crew met Johnny and Yosaku, Zoro's former bounty hunter companions, and they set sail for the Baratie restaurant in search for a cook.[63] Luffy began his job as a chore boy to pay for the damage he did to the Baratie for Zeff,[64] and tried to convince Sanji to join his crew.[65] Gin returned to the Baratie with his also-starving captain, Don Krieg, to whom Sanji once more gave food, but Don Krieg betrayed the cook once he regained energy and attacked the Baratie, despite the cooks' best efforts to stop him.[66] It was then revealed that the Head Chef, Zeff, was a great pirate known as Red-Leg Zeff, who traveled the Grand Line for a whole year before heading back into the East Blue.[67]

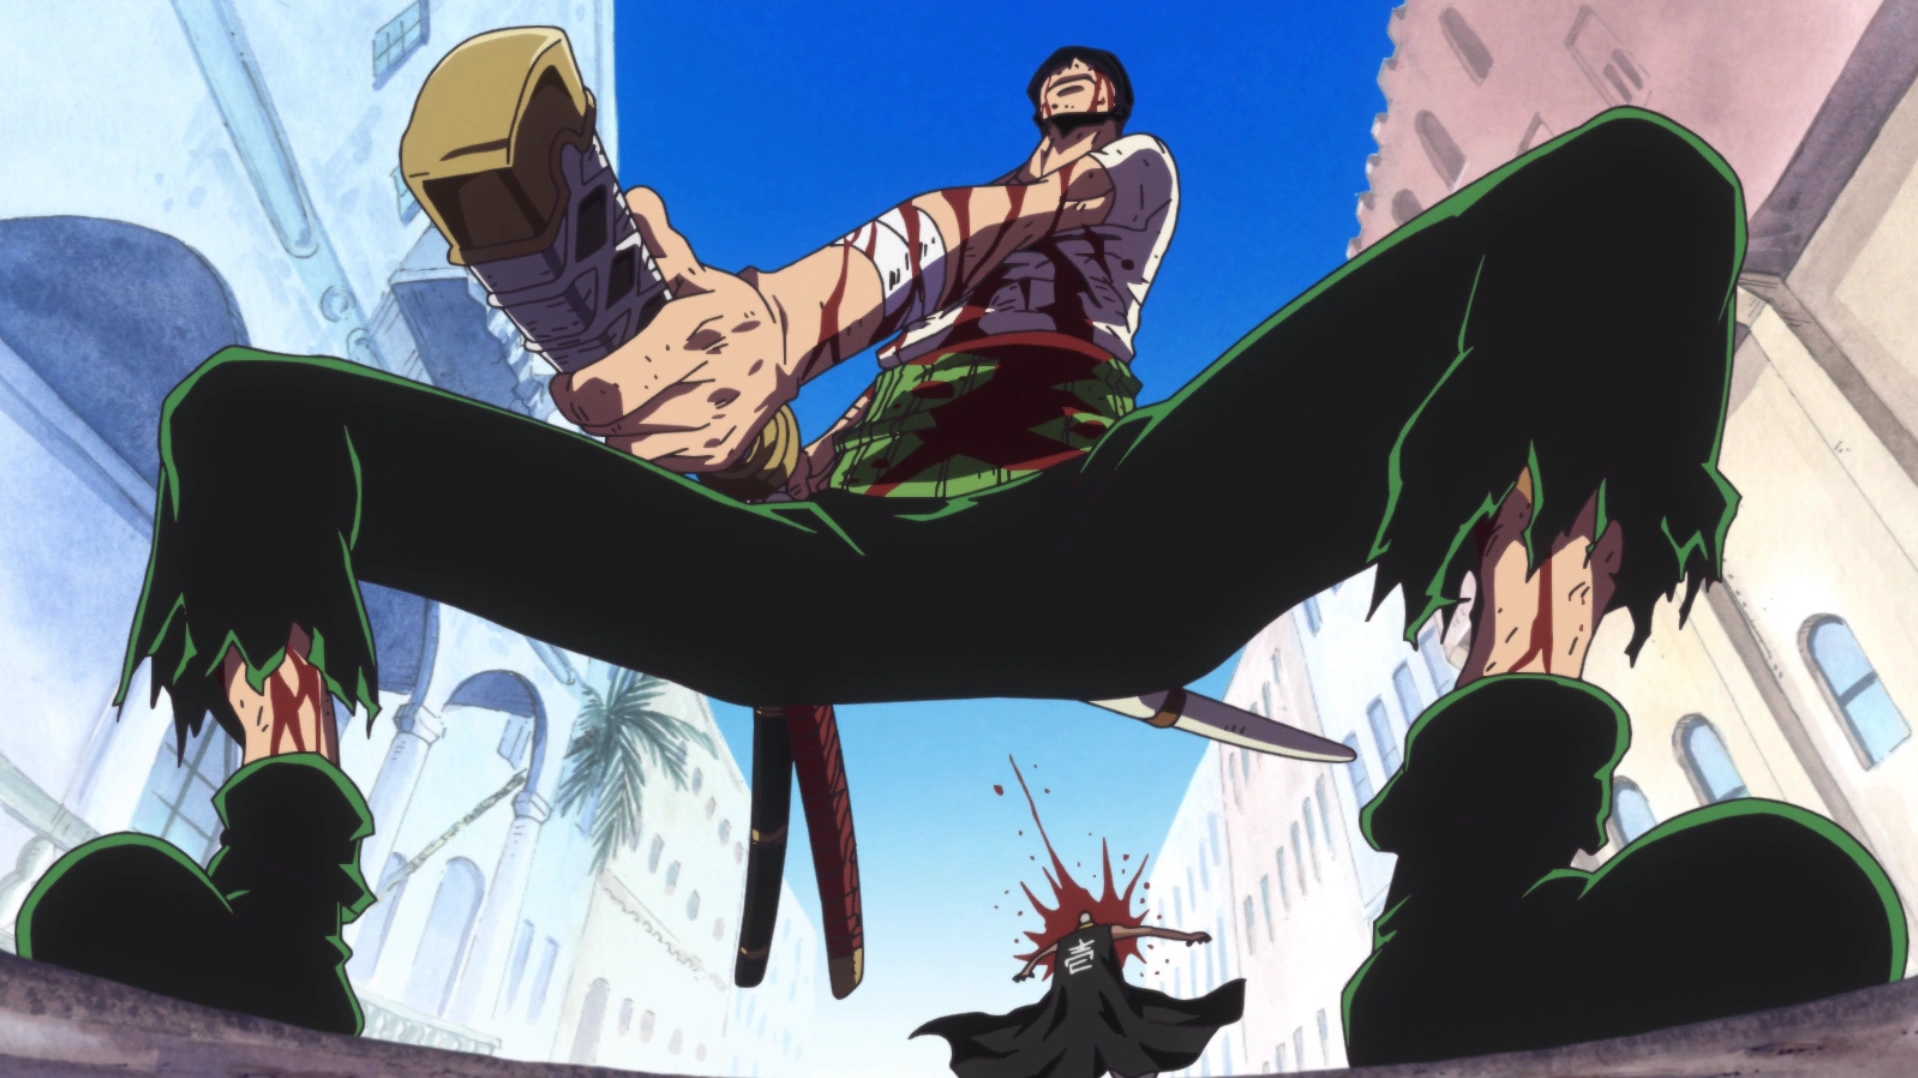
Mihawk strikes down Zoro.
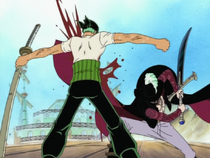
Gin explained the catastrophe Krieg's fleet met in the Grand Line when they encountered Dracule Mihawk, and Don Krieg attempted to take control of the Baratie.[68] Mihawk had returned to finish the job with Don Krieg's Pirate Armada,[69] but Zoro challenged him to a duel in order to achieve his dream.[70] Mihawk easily fended off all three of Zoro's swords with the tiny cross dagger he kept around his neck. Zoro, wanting to finish the fight, unleashed his Oni Giri, but Mihawk easily stopped it as well, stabbing directly towards his heart. Zoro, not wanting to back down because of his pride, piqued Mihawk's curiosity. Mihawk stated that he would remember his name and as a testament to Zoro's willpower, Mihawk unsheathed his black sword. Zoro unleashed a secret technique, Sanzen Sekai, against Mihawk, but Zoro was utterly defeated, and both his unnamed swords were destroyed in the process. Sheathing Wado Ichimonji and turning to face Mihawk, Zoro claimed that a scar on the back of a swordsman is shameful. With that, Mihawk grinned and slashed Zoro down, causing a large scar going from his left shoulder all the way down to his right hip, ending the duel.[71]
Mihawk left after defeating Zoro as Don Krieg continued his invasion on the Baratie. Johnny and Yosaku left with Usopp and the wounded Zoro to go after Nami, who had stolen their ship and left.[72]
Arlong Park Arc
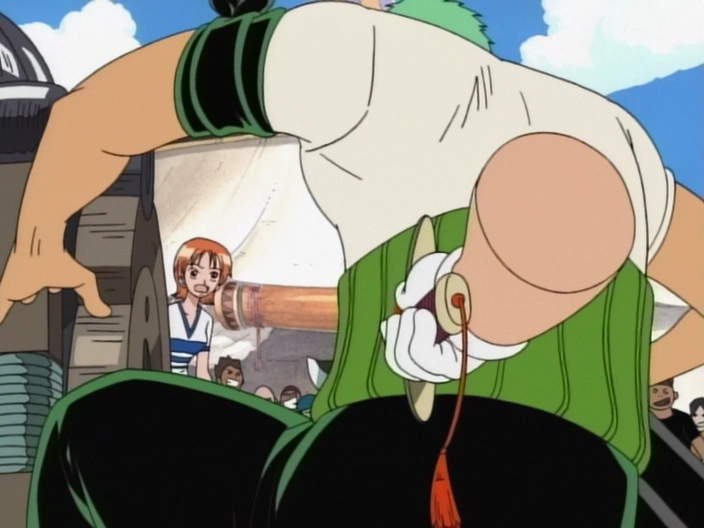
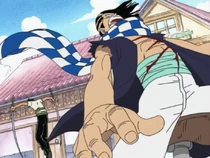
Sometime after Yosaku left to inform Luffy of Nami's destination, Usopp, Zoro, and Johnny arrived at the island. As they approached the island, they tied-up Zoro to keep him from harming himself by foolishly attacking fish-men who were fabled to be 10 times stronger than humans. However, they spotted three fish-men as they pulled close to shore. Usopp and Johnny quickly abandoned the ship, leaving Zoro defenseless.[73]
Zoro was then brought to Arlong Park, where he found out Nami's allegiance to Arlong. After some banter, Arlong proudly stated that Nami was the type of person who would betray even her own family for the sake of riches, which visibly disturbed her. To test Arlong's statement, Zoro threw himself into the water. Nami saved Zoro but beat him to reassure that she was still part of Arlong's crew. While Arlong was away at Nami's village, Zoro broke free from the dungeon he was being held at (with some help from Nami, who cut his ropes)[74] and struck down the fish-men stationed at the park to kill some time.[75] He then met the octopus fish-man, Hatchan, who was outside the park fishing, clearly oblivious of what had just went down on the other side of the wall. Thinking Zoro was a guest, Hatchan towed him to Cocoyasi Village. When he arrived, however, he discovered that Arlong had already returned to Arlong Park.[76]
Luffy, Yosaku, and the newly recruited Sanji were hurled towards the island by their temporary chariot led by the sea cow Momoo. They fell from the sky only to meet up with Zoro.[77] Johnny found them as well and told them that he saw Nami stabbing Usopp.[78] Not long after, they came upon a defiant Nami, who tried to convince the Straw Hats that she was only in it for the treasure. She then told them to take their ship back and get off the island. Luffy refused, causing Nami to angrily walk away. Johnny and Yosaku also split off, not wanting to be killed by the fish-men. Zoro said that he never expected Nami to murder someone, and that she was only a small-time criminal. Sanji became enraged at the comment and the two started to fight, only to have Usopp's face taking the impact of both. Usopp woke up and told them of what really happened. Nami's adoptive older sister, Nojiko, found them and agreed to tell them the reason behind Nami's motives.[79] Luffy then left to take a walk and Zoro fell asleep, while Sanji and Usopp (as well as an eavesdropping Johnny and Yosaku) listened to the story of how Arlong took over the island and killed Nami and Nojiko's adoptive mother, Bell-mère, and how Nami was working for Arlong as a cartographer and stealing from other pirates to buy back their village.[80]
Once Nami broke down after Arlong had his accomplice, the corrupted Marine Captain Nezumi, take all the money she had been saving for her village,[81] she tearfully asked Luffy for help. Zoro, Sanji, and Usopp joined him on the march to Arlong Park, where Johnny and Yosaku were stopping Cocoyasi's villagers from entering as they waited for the Straw Hats.[82] After entering, the Straw Hats managed to beat almost all the fish-men with the exception of the officers.[83] Luffy stuck his feet into the ground to beat Momoo and was later thrown into the water by Arlong.[84]

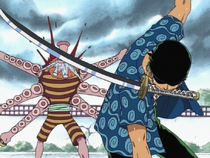
Zoro breaks Hatchan's swords
Zoro warned Sanji that they could not immediately jump in to save Luffy. He reminded them that the fish-men would be faster and more powerful underwater so they must move to defeat them on land quickly. Zoro squared off against Hatchan and found it to be challenging due to his previous injuries against Mihawk. When Sanji attempted to defend Zoro, Sanji was knocked away by Kuroobi and was too distracted with his battle to help Zoro.[85] Despite his wound and fever, Zoro borrowed Johnny and Yosaku's swords and managed to win against Hatchan's Six Sword Style, breaking his swords and defeating him.[86] Sanji defeated Kuroobi[87] and Usopp defeated Chew outside of Arlong Park.[88]
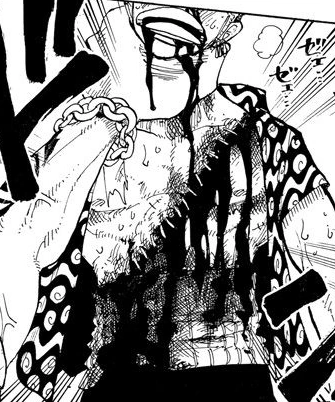

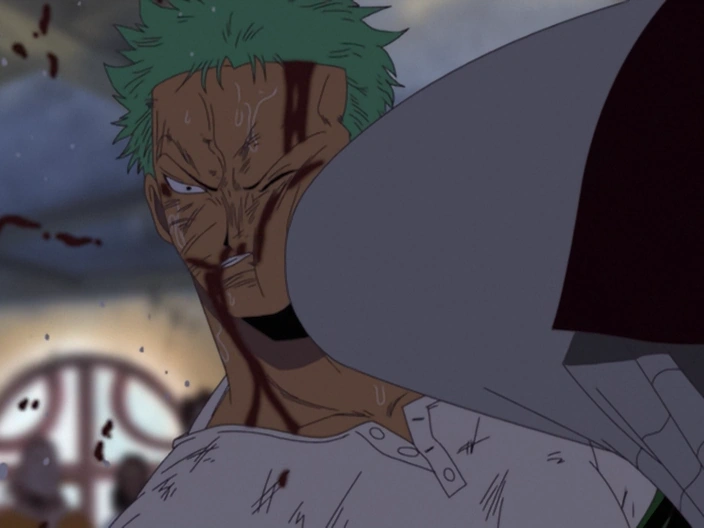
Arlong tears off Zoro's bandages.
After Sanji assured Zoro that Luffy was alive, he and Sanji then fought against Arlong, but were both defeated and agreed that only Luffy could win. While Zoro kept Arlong distracted, and with minor interference by Hatchan,[89] Sanji dove back into the water and freed Luffy's body. On land, Arlong ripped the bandages off of Zoro's chest, injuring him even more and shocking everybody. Luffy then rose from the water (with help from Genzo, Nojiko, and Sanji) and traded places with Zoro by tossing him high into the air. He fell into the sea and fell asleep after pulling himself out of it.[90] When Luffy destroyed Arlong Park and defeated Arlong, Zoro woke up just in time to beat Nezumi, who came to take the credit for defeating Arlong. Nami made Nezumi return all the money and help fix up the island. Humiliated, Nezumi left and reported the incident to Marine Headquarters, ensuring that Luffy would receive a high bounty.[91]
Back in Cocoyasi Village, Dr. Nako tended to the wounds of Zoro, Luffy, Yosaku, and Johnny. To celebrate their freedom, the entire island threw a big party. When the party was finally over, Nami rejoined the crew and the Straw Hats sailed towards their next adventure.[92]
Loguetown Arc
Since Luffy had defeated Buggy, Krieg, and Arlong, the Marines issued Luffy his first bounty. Luffy, Usopp, and Sanji started to discuss Luffy's wanted poster. Meanwhile, Zoro pointed out an island he had spotted. Nami explained about the island's major city, Loguetown, the city of the beginning and the end, where the Pirate King Gold Roger was born and executed.[93]

Zoro holds Sandai Kitetsu.
Arriving at Loguetown, Zoro stated that he wanted to buy something, so he asked Nami for some money. While walking down the street, Zoro witnessed Tashigi, a Marine swordswoman who looks exactly like Kuina, beating some pirates.[94] Upon entering the weapons shop, Zoro looked for two swords. The owner of the shop, Ipponmatsu, tried to trick Zoro into selling the Wado Ichimonji for far less than its value, but Tashigi rushed into the shop and accidentally ruined the owner's ploy. Tashigi pointed out a cursed sword named Sandai Kitetsu to Zoro. Ipponmatsu told them about Kitetsu' curse-line, which interested Zoro, who then decided to buy the sword and test his luck against the sword's curse. He threw the sword up and held out his arm, but the sword circled around Zoro's arm and left him uncut. After witnessing Zoro's caliber, the owner gave Yubashiri to Zoro for free, saying that he passed his dream to him.[95]
After leaving the shop, Zoro reunited with the crew, except Luffy, who was in trouble.[96] Zoro and Sanji rushed to the execution platform and started to fight off Buggy's crew, hoping to save Luffy, but the latter was saved by lightning that struck the platform.[97] Zoro, Luffy, and Sanji fled from the execution site to reach the Going Merry, but Tashigi and Smoker intercepted them. Tashigi engaged Zoro in battle, and Smoker battled Luffy and Sanji. Zoro defeated Tashigi, and Dragon saved Luffy from Smoker. Finally, the Straw Hats reached their ship and left Loguetown. Following this, the Straw Hats made promises about their dreams and set sail to the Grand Line.[98]
Arabasta Saga
Reverse Mountain Arc
Heading to the Grand Line, Nami had to search for more information about it. The Straw Hat Pirates then gathered and Nami explained about the only way to reach Grand Line, which is the Reverse Mountain.
The Straws Hats arrived at Reverse Mountain through the storm, though they were nearly blown off course and into the Calm Belt, but they eventually reached the entrance of Reverse Mountain and managed to climb its uphill rapids despite some tricky close calls.[99] As they came down, they heard a noise and noticed something was blocking their path. They identified the obstacle as a huge whale, which was threatening to crush the Going Merry. Luffy managed to keep the ship from crashing into it, but seeing the bow broken off enraged Luffy and he attacked the whale. The whale swallowed the Going Merry and the crew, except for Luffy, who managed to escape onto the whale's back. Inside, the Straw Hats suddenly found themselves in what looked like an outside setting with a house in the middle of the water where they met an old man named Crocus.[100] Sanji tried to get information from Crocus, who took long periods of time to reply, causing Sanji and Zoro great, comical frustration. Eventually, Luffy reunited with the Straw Hats and it was revealed that the strange setting is in fact the whale's stomach. Crocus revealed that the whale's name is Laboon and that he often cried, trying to run into the mountain in order to break it because of a promise made 50 years ago and that two mysterious people named Mr. 9 and Miss Wednesday were there just to kill the whale to feed the people in their town, but they were later knocked out by Luffy.[101]
Once they exited Laboon, the Straw Hats threw Mr. 9 and Miss Wednesday on the sea. Luffy made a promise to the whale hoping to solve its past problem.[102] The crew was making the preparation for their journey when Nami realized that the compass does not work there, to which Crocus explained that they needed a Log Pose to travel through the Grand Line and gave one to them. Also, Mr. 9 and Miss Wednesday asked the Straw Hats to take them to their town. Since everything was ready, they set sail to the first Grand Line island.[103]
Whisky Peak Arc
As the crew was sailing in the Grand Line, they were forced to deal with rapid weather changes. Usopp attempted to wake Zoro, who was sleeping, but to no avail, and Zoro continued sleeping even as it began to snow on him. Eventually, after the weather calmed down and the rest of the crew was left unable to move from exhaustion, Zoro woke up and, noticing the others lying around the ship, claimed they were being too lazy despite the good weather. Upon noticing Miss Wednesday and Mr. 9 aboard their ship, Zoro confronted them and claimed their names sounded familiar, only to be interrupted when Nami hit him for sleeping while they were hard at work. When the Straw Hats saw Whisky Peak was nearby, Luffy said they should go there even though it might take some time for the Log Pose to record, prompting Zoro to agree with him. Later, Zoro stood by as the crew was greeted by the townspeople.[104]
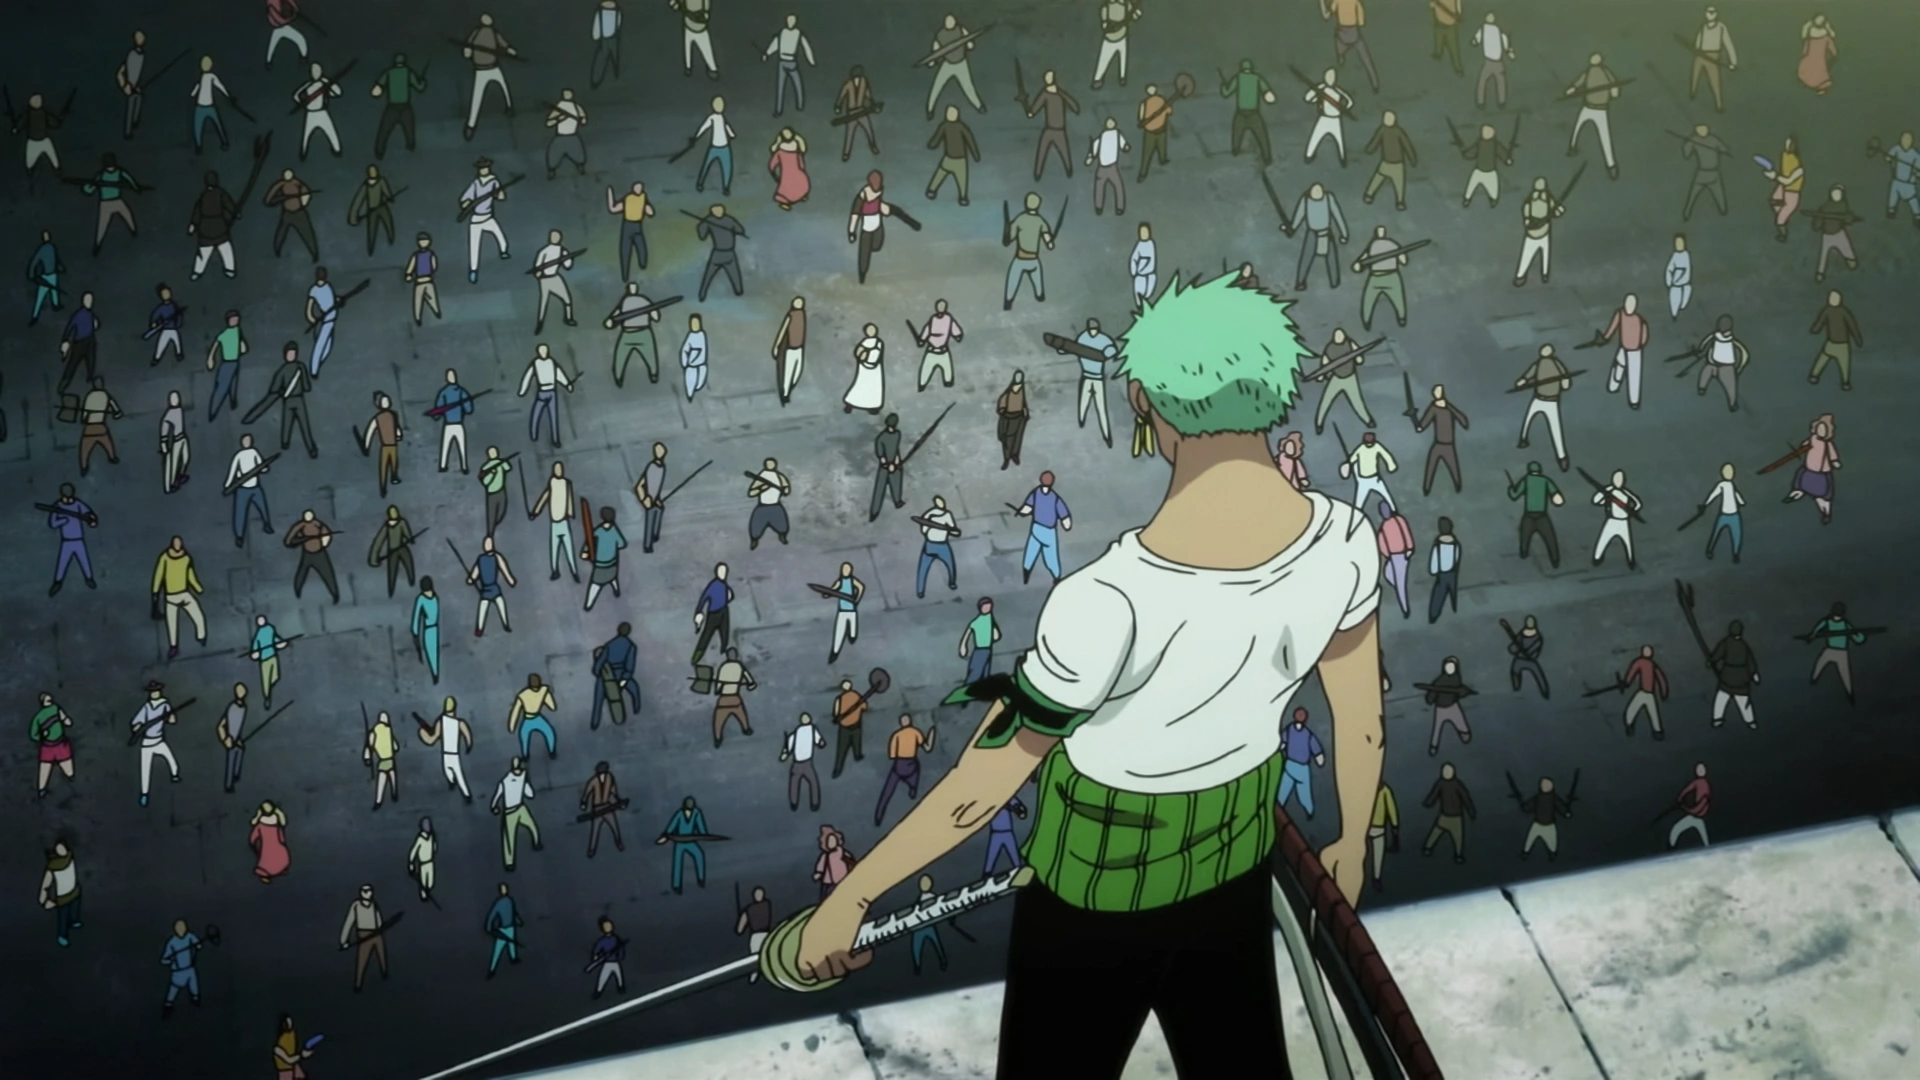
Zoro confronts 100 bounty hunters.
That night, the townspeople threw a party for the Straw Hats, and Zoro managed to out-drink several people before seemingly passing out at the 13th person. However, he later confronted the townspeople planning to capture the Straw Hats, where he claimed that a true swordsman never lets himself be controlled by alcohol. Zoro noted that Whisky Peak was nothing more than a den of bounty hunters who took advantage of inexperienced pirates entering the Grand Line before addressing the 100 bounty hunters assembled before him as Baroque Works. When a shocked Mr. 9 wondered how he knew the name of their organization, Zoro revealed that a member of Baroque Works once tried to recruit him, though he refused, before detailing the secrecy enforced by the members. Deciding that Zoro must be eliminated for knowing this, Mr. 8 ordered the bounty hunters to attack him, but Zoro managed to move into the crowd of bounty hunters before they could notice him. After causing several of the bounty hunters to accidentally shoot each other, Zoro moved to Mr. 8, causing the remaining bounty hunters to focus fire on him. Zoro moved away when Mr. 8 blasted the bounty hunters away with Igarappa and noted he would have to avoid that shotgun attack.[105]
Zoro noted it was a good chance to test out his new swords before rolling inside a house to avoid gunfire from a bounty hunter above him. Defending himself from several more bounty hunters with a table, Zoro decided to test out Yubashiri first before cutting down the bounty hunters in a single rush. Zoro noted Yubashiri was a very light and fine blade before climbing up a ladder to avoid more bounty hunters, only to be confronted by four men on top of the building. After dodging a cannonball, Zoro cut a barrel of alcohol thrown by Miss Monday into fourths, which hit the four bounty hunters behind him, before noticing another bounty hunter attacking him with a stone axe and countering him with Sandai Kitetsu. Upon noticing that his sword cut through the stone axe, Zoro cut down the bounty hunter while noting that Sandai Kitetsu was going to be a problem child if it was going to cut things he did not wish to cut before nearly attacking a young boy armed with a knife. When a nun attempted to trick and blind him, Zoro knocked her and the boy out with the back of his sword while telling them to try a more gullible man next time. Upon being pursued by more bounty hunters up a ladder, Zoro pushed the ladder off the side of the building before using it as a stepping stone to reach the next building, where he cut down the bounty hunters present with Taka Nami. Hearing a cry, Zoro cut a circle in the roof he was standing on before walking away as several female bounty hunters pounced on it and fell through the roof. Though he was seemingly caught off guard and defeated by Miss Monday, Zoro managed to knock her out by clutching her head with his hand before asking the remaining Baroque Works agents if they were ready to continue.[106]
Zoro rolled backward to avoid Mr. 8's Igarappa, prompting the other agents to begin pursuing him as well. As Zoro expressed confusion at Miss Wednesday and Karoo's antics, Mr. 9 began attacking him with his steel bats, but Zoro easily intimidated him by repeatedly jabbing at him with Sandai Kitetsu. After Mr. 9 accidentally fell off the building they were fighting on, Zoro was confronted by Miss Wednesday, who made him dizzy with Miwaku no Memai Dance before attempting to finish him off. However, Karoo went the wrong way and fell off the building as well along with Miss Wednesday, leaving Zoro to state he felt embarrassed fighting these people. When Mr. 8 attacked him once more, Zoro cut a hole in the roof to escape and moved to an alleyway, where he wondered how he was going to get past Mr. 8's shotgun. He was interrupted when Mr. 9 reappeared and bound his arm with the iron wire in one of his bats. As Zoro noticed Miss Wednesday had taken a sleeping Luffy hostage as well, Mr. 8 opened fire on him with Igarappappa, prompting Zoro to pull back in order to avoid the bullets before slamming Mr. 9 into a nearby building and then into Miss Wednesday and Karoo, who were sent flying away. With his left arm freed, Zoro used Luffy's stomach to propel himself toward Mr. 8 before cutting him down as well and noting he was finally done.[107]
After pushing the unconscious Mr. 8 and Miss Monday off the building, Zoro sat down to drink and noted it was a quiet night once more before hearing something in the distance. When Mr. 5 and Miss Valentine confronted the defeated agents, Zoro noticed Luffy was out in the open, and soon dragged him out of the way while telling the agents to continue fighting among themselves. Upon witnessing Mr. 5's Nose Fancy Cannon defeating Mr. 9, a shocked Zoro commented on its power before being interrupted by Igaram, who begged him to protect Nefertari Vivi from Mr. 5 and Miss Valentine in his stead.[108]
After Nami arrived, she successfully negotiated a contract with Igaram to save Vivi and deliver her to the Arabasta Kingdom in exchange for ![]() 1,000,000,000, she ordered Zoro to go rescue Vivi, prompting Zoro to express outrage at her trying to use him for her schemes. Zoro and Nami bickered over why Zoro should or should not fight, but eventually Nami used the fact that Zoro still owed her money from when he bought his swords in Loguetown to force Zoro to fight in order to pay off the debt, prompting Zoro to angrily tell her that she would not have a peaceful death as he walked away. Soon after, when Mr. 5 attacks Vivi with Nose Fancy Cannon, Zoro appeared and cut the booger in half before complaining about how he had to do something so ridiculous. When Vivi, believing he was still after her life, attempted to attack her, Zoro grabbed her arm and revealed he had come to save her. As Zoro prepared to fight Mr. 5 and Miss Valentine, he was confronted by Luffy, who proclaimed he could never forgive Zoro for what he had done.[109]
1,000,000,000, she ordered Zoro to go rescue Vivi, prompting Zoro to express outrage at her trying to use him for her schemes. Zoro and Nami bickered over why Zoro should or should not fight, but eventually Nami used the fact that Zoro still owed her money from when he bought his swords in Loguetown to force Zoro to fight in order to pay off the debt, prompting Zoro to angrily tell her that she would not have a peaceful death as he walked away. Soon after, when Mr. 5 attacks Vivi with Nose Fancy Cannon, Zoro appeared and cut the booger in half before complaining about how he had to do something so ridiculous. When Vivi, believing he was still after her life, attempted to attack her, Zoro grabbed her arm and revealed he had come to save her. As Zoro prepared to fight Mr. 5 and Miss Valentine, he was confronted by Luffy, who proclaimed he could never forgive Zoro for what he had done.[109]
When Luffy accused him of having cut up the friendly townspeople who gave them food to eat, a stunned Zoro acknowledged that he had cut them up before attempting to explain the situation to Luffy, who attacked him before Zoro could finish. After Luffy punched and kicked through several walls, Zoro realized he was serious about killing him and tried to get him to calm down by kicking him, which resulted in Luffy slamming into Mr. 5 and Miss Valentine and crashing into a building. When Miss Valentine began preparing to attack Zoro, Vivi tried to warn him, but Zoro claimed he did not have time to listen to either of them as Luffy emerged from the building with the defeated Mr. 5. Zoro told Luffy that all the townspeople were actually bounty hunters and thus their enemies, but Luffy refused to believe him on the grounds that no enemies would feed them. Casually avoiding Miss Valentine's 10,000 Kilo Press, Zoro realized Luffy was not going to listen to him and resolved to fight him to the death. Zoro used Oni Giri to match Luffy's Gomu Gomu no Bazooka and stated that this was a good chance to see whose fighting style was stronger. As Zoro and Luffy continued to clash, Mr. 5 and Miss Valentine attempted to attack them, but Zoro and Luffy intimidated them with a simple glare before effortlessly defeating both of them with one attack.[110]
After wondering who Mr. 5 and Miss Valentine were, Zoro and Luffy attempted to resume their fight, only to be interrupted by Nami, who beat both of them up while berating them for almost costing her ![]() 1,000,000,000. Eventually, Zoro explained the situation to Luffy, who admitted that he thought Zoro cut them up because they did not prepare his favorite food. When Vivi explained the situation in Arabasta and the reason why she infiltrated Baroque Works, Zoro commended her for being so brave, and when she accidentally revealed Mr. 0's identity, Zoro was the first one to point out that she did this. As Zoro and Luffy expressed interest in meeting and fighting a Warlord of the Sea like Crocodile, Igaram arrived and asked Luffy if he had decided whether or not he would take Vivi to Arabasta, which prompted Zoro to explain to Luffy that he wanted them to take her home. After explaining that he would be acting as a decoy so that Zoro and the others could escape, Igaram left Whisky Peak on a ship with three dummies, only for his ship to explode in a massive fireball, to the shock of Zoro and the others. After confirming that the Log Pose had finished recording, Zoro told Luffy to wake up Sanji and Usopp and bring them back to the ship.[111]
1,000,000,000. Eventually, Zoro explained the situation to Luffy, who admitted that he thought Zoro cut them up because they did not prepare his favorite food. When Vivi explained the situation in Arabasta and the reason why she infiltrated Baroque Works, Zoro commended her for being so brave, and when she accidentally revealed Mr. 0's identity, Zoro was the first one to point out that she did this. As Zoro and Luffy expressed interest in meeting and fighting a Warlord of the Sea like Crocodile, Igaram arrived and asked Luffy if he had decided whether or not he would take Vivi to Arabasta, which prompted Zoro to explain to Luffy that he wanted them to take her home. After explaining that he would be acting as a decoy so that Zoro and the others could escape, Igaram left Whisky Peak on a ship with three dummies, only for his ship to explode in a massive fireball, to the shock of Zoro and the others. After confirming that the Log Pose had finished recording, Zoro told Luffy to wake up Sanji and Usopp and bring them back to the ship.[111]
On board the Going Merry, Zoro pulled up the anchor before informing Luffy, who had just arrived with Sanji and Usopp in tow, that they were ready to leave at any moment. After Zoro revealed that Karoo was already on the ship to Nami and Vivi, the Straw Hats set sail, and upon hearing Sanji and Usopp protesting their departure, Zoro asked Nami to explain the situation to them, prompting Nami to shut them up by hitting them. Soon after, Zoro was shocked when Miss All Sunday suddenly appeared on the Going Merry and drew Wado Ichimonji in an attempt to attack her, only to stop upon seeing Usopp and Sanji pointing a slingshot and a pistol, respectively, at her head. When Miss All Sunday threw Usopp and Sanji onto the deck seemingly without touching them, a surprised Zoro wondered if it was a Devil Fruit. After mocking Vivi and the Straw Hats, Miss All Sunday gave them an Eternal Pose that would allow them to sail to Nanimonai Island so they could avoid detection by Baroque Works, which prompted Zoro to state it was probably a trap. After Luffy destroyed the Eternal Pose and Miss All Sunday departed, Zoro noted that they had someone just as incomprehensible as she was on their crew. Soon after, Zoro was confused when Luffy mentioned it snowing on board the ship in the middle of the ocean.[112]
Little Garden Arc
Zoro, Nami, and Vivi trapped in wax.
Zoro and crew sat ashore on Little Garden, a prehistoric island inhabited by dinosaurs and giants. Zoro, ordered by Sanji to gather some food, has challenged him to a competition on who would be the one to bring the largest piece of meat.[113] Little do the Straw Hats suspect that Officer Agents of Baroque Works were on their tail.[114] Having subdued the giants, Baroque Works made their move. Mr. 3 introduced Zoro, Nami, Vivi, and Brogy to the slow torture of becoming living statues of wax.[115] Agreeing with Brogy that the only way to die was to go all-out honorably, Zoro attempted to cut his feet off, but Luffy arrived to the scene, so Zoro left the rest to him.[116]
Luffy attempted to rescue his friends, but it only accelerated the deadly waxing process, prompting Zoro to strike an honorable pose should he die. To make matters worse, Miss Goldenweek interfered and revealed her own terrifying ability.[117] Usopp freed Luffy from Miss Goldenweek's control by burning Luffy's shirt.[118] With Karoo's help and Mr. 3's unwanted assistance, Usopp and Luffy rescued Zoro, Vivi, and Nami.[119] The newly liberated crew took on Mr. 5 and Miss Valentine. While Luffy and Karoo pursued Mr. 3 and Miss Goldenweek into the forest, Zoro was able to save Usopp from Mr. 5.[120] The crew then left Little Garden while being propelled through the Island Eater and they then set sail for Arabasta.[121]
Drum Island Arc
Nami grew sick while they were out at sea. Zoro took over as a temporary navigator and performed daily training exercises again while looking for a doctor. Nami over-exerted herself to help Zoro steer clear of a cyclone and the crew headed towards a nearby island.[122] The crew soon met the pirate Wapol, who attacked them, but only made Luffy send him flying.[123] They arrived at last to an island only to find out that they were not welcome. The Straw Hat crew managed to gain the trust of the people that attacked them, and were taken to the village. Zoro and Karoo stayed behind to guard the ship.[124] Zoro decided to train in the icy cold waters since his injuries from Little Garden had healed.[125]
A shirtless Zoro was later found buried in snow by Vivi and Usopp after an avalanche. He told them he was training and was unable to escape. They headed back to town together and found they had returned to Bighorn. Zoro helped out the locals by attacking the king's army in order to save Dalton. Zoro obtained one of their warm coats in the process to warm himself back up.[126] The villagers along with Zoro, Vivi, and Usopp started their ascent to the castle.[127] They climbed a ropeway and arrived just after Luffy defeated Wapol.[128]
After finally been convinced to join the Straw Hat crew, Chopper announced his intentions to Dr. Kureha, who did not take it too well. After escaping from the castle, she had decided to give the whole Straw Hat crew a farewell gift and used Hiriluk's dust to create sakura-like snow.[129]
On the way out of the island, the crew discovered Karoo frozen in the water and rescued him. Chopper translated that Karoo jumped in the water to save Zoro when he saw him disappear, causing an angry Nami to hit Zoro on the head because he was at fault for this mishap.[130]
Arabasta Arc
The crew was starving for food and was trying to fish. Vivi saw a shocking sight to which Nami explained it was just steam coming from an underwater volcano. While fishing, they met Mr. 2 Bon Kurei, who showed off his Devil Fruit power. Later, after Mr. 2 left the ship, they saw a Sea Cat. They tried to capture it, but Vivi stopped them because it is sacred. Upon learning Mr. 2's abilities, they planned to make an "X" mark on their right arm to know their true identity. When the crew landed in Nanohana, they encountered Smoker and Tashigi. A powerful pirate named Portgas D. Ace appeared, and was revealed to be Luffy's older brother. Ace fought Smoker while the Straw Hats ran for their ship. Luffy reunited with his brother and together they took down agents of Baroque Works. Ace departed from the crew and left Luffy with a piece of paper. The crew found out that the Rebel Army had moved out of Yuba and headed to Katorea, and that the rebel leader Koza was determined to attack. The crew traveled to the city of Rainbase to take down Crocodile and Baroque Works, but ran afoul of Smoker and Tashigi.[131]
Zoro, Luffy, Nami, Usopp, and Smoker were trapped by Crocodile. Chopper distracted Crocodile while Sanji freed the rest of the crew, but found themselves trapped yet again. After escaping from Rain Dinners by swimming underwater with Zoro carrying Smoker, Zoro admitted to Smoker that while he did save his life, he only did it because Luffy ordered him to due to Smoker's inability to swim because of his Devil Fruit powers. The crew and Vivi then crossed the desert to Alubarna, where the final battle would eventually take place, though Luffy remained behind to fend off Crocodile. The crew excluding Luffy proceeded to Alubarna.[132]

Zoro defeats Mr.1.
As they reached the destination, they split up to distract the Baroque Works agents to engage them in separate battles. While Miss Doublefinger's fight with Nami was challenging, Zoro was having an even more difficult time fighting Mr. 1: a man who can change his entire body into steel—something that Zoro could not cut. As Zoro neared death, he heard "the breath of all things". He then proceeded to defeat Mr. 1, finally learning how to cut steel. After their battle, the other Straw Hats hurried to locate the bomb before it went off. Vivi found the bomb, and called the Straw Hats together. The bomb was inside of the clocktower, but the Mr. 7 pair of Baroque Works agents were there to protect it. Vivi defeated them, but she realized that the bomb could not be stopped so easily. It had a timer, and right before it blew up, Pell showed up and took it into the atmosphere, where he seemingly sacrificed himself to save Alubarna.[133]


The crew, with their left arm in the air, bearing the x sign.
When the battle finally had ended, the outcome was tallied. Igaram appeared with proof of Cobra's innocence, and Koza explained everything. When Luffy awakened from his battle with Crocodile, a magnificent banquet was thrown for the pirates, and the Straw Hats were then invited to enjoy the hot spring steam room inside the palace. It was later revealed that Zoro gained a bounty of ![]() 60,000,000. The day for Vivi's speech had come and so had her decision to not continue traveling with the Straw Hats. Meanwhile, Bon Kurei and his crew attempted to protect the Straw Hats from Hina. When Vivi arrived at their location to say farewell, the entire Straw Hat showed off their "X" marks to symbolize their friendship with Vivi. The Marines failed again to catch the Straw Hats. After escaping from the Marines, Nico Robin (Miss All Sunday) appeared from inside of the Straw Hats' ship and managed to persuade the crew to let her join, although Zoro was the only one to remain suspicious of her intentions.[134]
60,000,000. The day for Vivi's speech had come and so had her decision to not continue traveling with the Straw Hats. Meanwhile, Bon Kurei and his crew attempted to protect the Straw Hats from Hina. When Vivi arrived at their location to say farewell, the entire Straw Hat showed off their "X" marks to symbolize their friendship with Vivi. The Marines failed again to catch the Straw Hats. After escaping from the Marines, Nico Robin (Miss All Sunday) appeared from inside of the Straw Hats' ship and managed to persuade the crew to let her join, although Zoro was the only one to remain suspicious of her intentions.[134]
Sky Island Saga
Jaya Arc
Nami's Log Pose began to point to the sky. After that, a 200-year old galleon fell from the sky, leading the crew to explore it and discover a map of an island named Skypiea. They competed with the monkey-like Masira's salvage crew while they searched for more clues on how to get there. The Straw Hats then decided to go to Jaya to look for information on Skypiea.

Zoro allowing himself to get beaten due to Luffy's orders.
Jaya's main town was full of famous pirates that were constantly brawling with each other. Luffy and Zoro had a run-in with a pirate known as Bellamy the Hyena, who ridiculed their dreams and beat them up. On Luffy's behest, Zoro did not fight back. Luffy, Zoro, and Nami also met the man who was later revealed to be Blackbeard. They left Mock Town and got into a fight with Masira's brother Shoujou, another salvage monkey.
The Straw Hats met up with Mont Blanc Cricket on another part of Jaya. Cricket is a descendant of Mont Blanc Noland, an infamous "liar" who told of a gold city on Jaya and Cricket was exiled for looking for artifacts of the gold city. He was actually the only person who knew how to get to Skypiea. Cricket explained how the Straw Hats could ride a dangerous vertical current called the Knock Up Stream to get to Skypiea. However, they first had to catch a South Bird to point them toward the point where the stream would erupt from the ocean. While the Straw Hats were looking for a South Bird, Bellamy and his crew attacked Cricket's house and stole the gold artifacts he had collected over the years from his salvage work.
When the Straw Hats returned and saw what happened, Luffy decided to take a side trip back to Mock Town to return Cricket's artifacts. Bellamy got his comeuppance in the form of Luffy's fist after speaking badly of Cricket. Upon Luffy's return, the Going Merry had been refitted by Masira and Shoujou to be more flight capable. Before the Straw Hats caught a ride on the Knock Up Stream toward Skypiea, Blackbeard and his crew arrived and Zoro learned of his bounty as well as Luffy's new bounty. Zoro was pleased to hear he became a wanted pirate worth a large amount. Blackbeard came to capture them only to miss them before their ascent. The Straw Hats then arrived in an ocean above the clouds.
Skypiea Arc
As the Straw Hats admired the beautiful cloud ocean, they sailed on and soon came to a gate. The Watcher at first demanded they pay a fee, and then told them they may go even when Nami apologetically stated they had no money. When the crew arrived on a beach in the clouds, they encountered a Skypiean and her father. The Straw Hats started talking to her, particularly about the versatile Skypiean Dials. The Skypiea police, the White Berets, suddenly turned up. They told the Straw Hats that they were illegal trespassers and had to pay ten times the entrance fee immediately. It turned out to be ![]() 70,000,000, far too high to pay. The crew was then sentenced to a form of Death Penalty. Luffy, Zoro, and Sanji swiftly took out the White Berets.
70,000,000, far too high to pay. The crew was then sentenced to a form of Death Penalty. Luffy, Zoro, and Sanji swiftly took out the White Berets.
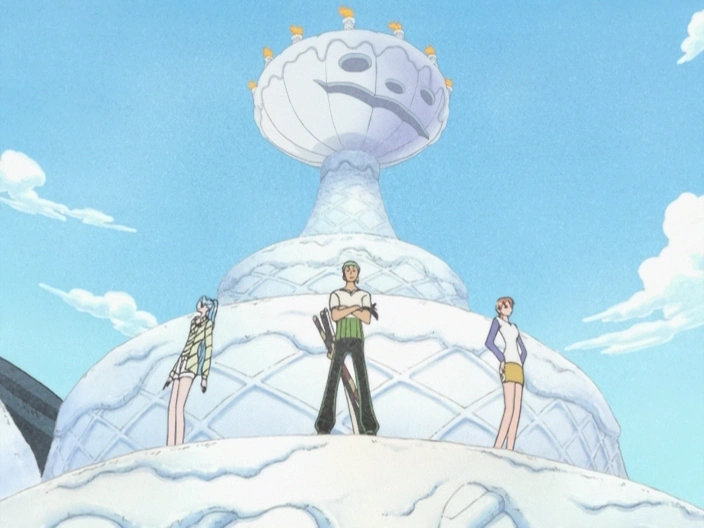
As the crew prepared for their adventure in Skypiea, An enormous shrimp attacked the Going Merry. The Skypiean man explained to Usopp, Sanji, and Luffy that the others on the Going Merry would be taken to the Sacrificial Altar. The three decided to rescue their friends, despite the man warning them about God Enel living in the place they were headed. While Luffy, Sanji, and Usopp looked for the others on the Going Merry, Zoro killed a vicious fish shortly before it could take them to the Altar. Zoro, Nami, and Robin sat off into the forest (Zoro brushed off Chopper's objections by stating he does not even believe in God). After a while, the entire crew was reunited at the Going Merry, and Zoro used his swords to help Sanji prepare food.
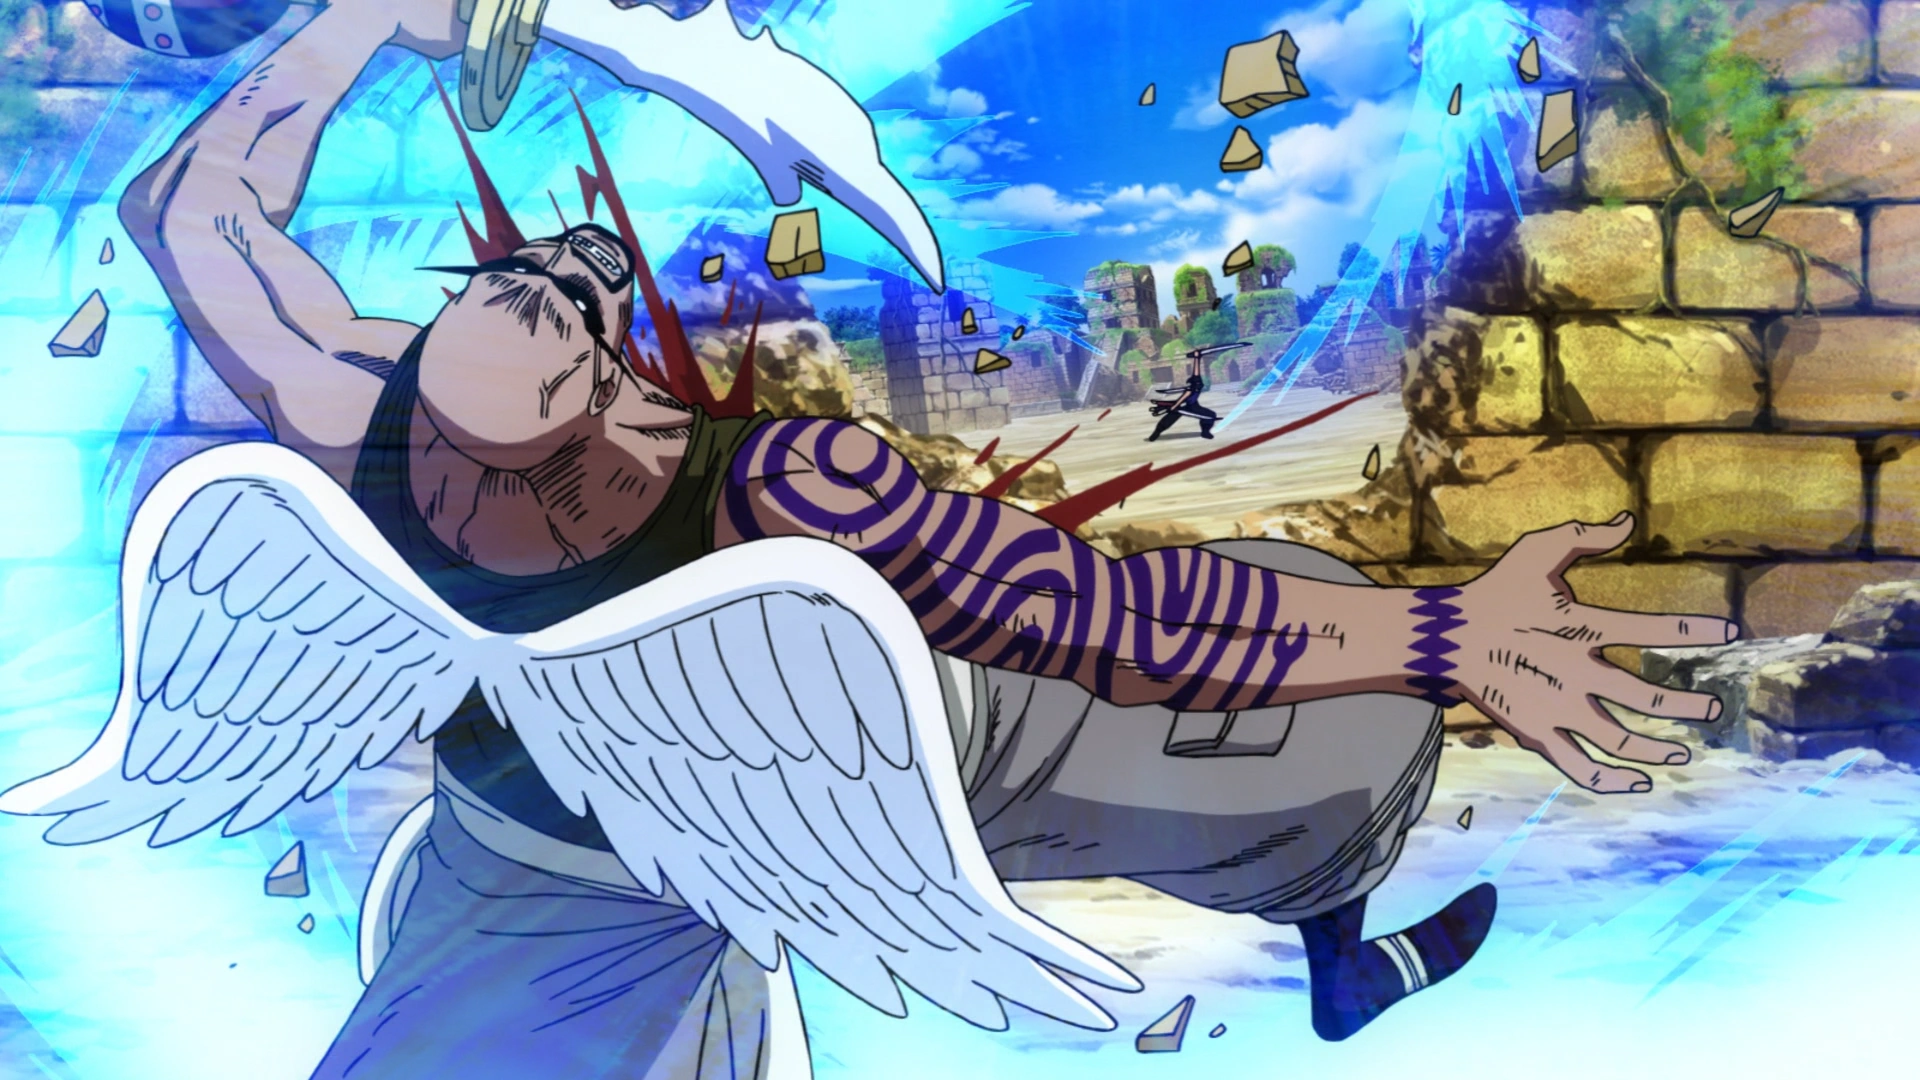
The next day, the Straw Hats decided to split into two teams. The second team, consisting of Zoro, Chopper, Luffy, and Robin, encountered an enormous snake and were all separated after it attacked. Zoro soon encountered a Shandia warrior named Braham, who attacked him. Braham used powerful Dials and pistols to attack. Though Zoro was caught off guard at first, he managed to defeat Braham by using his powerful Sanjuroku Pound Ho.

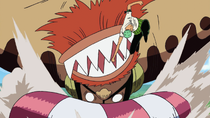
Zoro defeats Ohm.
As Zoro was enjoying his lunch, he winded up being carried away by a South Bird. The bird soon dropped Zoro right in the middle of the confrontation between Ohm, The Knight of the Sky, and Wyper. Zoro fought Ohm, who was revealed to be a great swordsman using a blade with a Dial placed inside the hilt. The blade shape changed to block Zoro's attacks and was strong enough to even stop his Sanjuroku Pound Ho. After a lengthy struggle, Zoro defeated the Priest with an incredibly powerful Hyakuhachi Pound Ho. Enel then struck the ground using his lightning, and caused Zoro to fall to the ruins where Enel, Wyper, Gan Fall, Nami and Robin were.

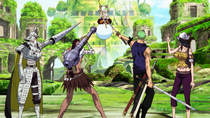
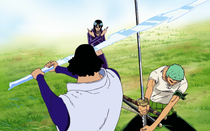
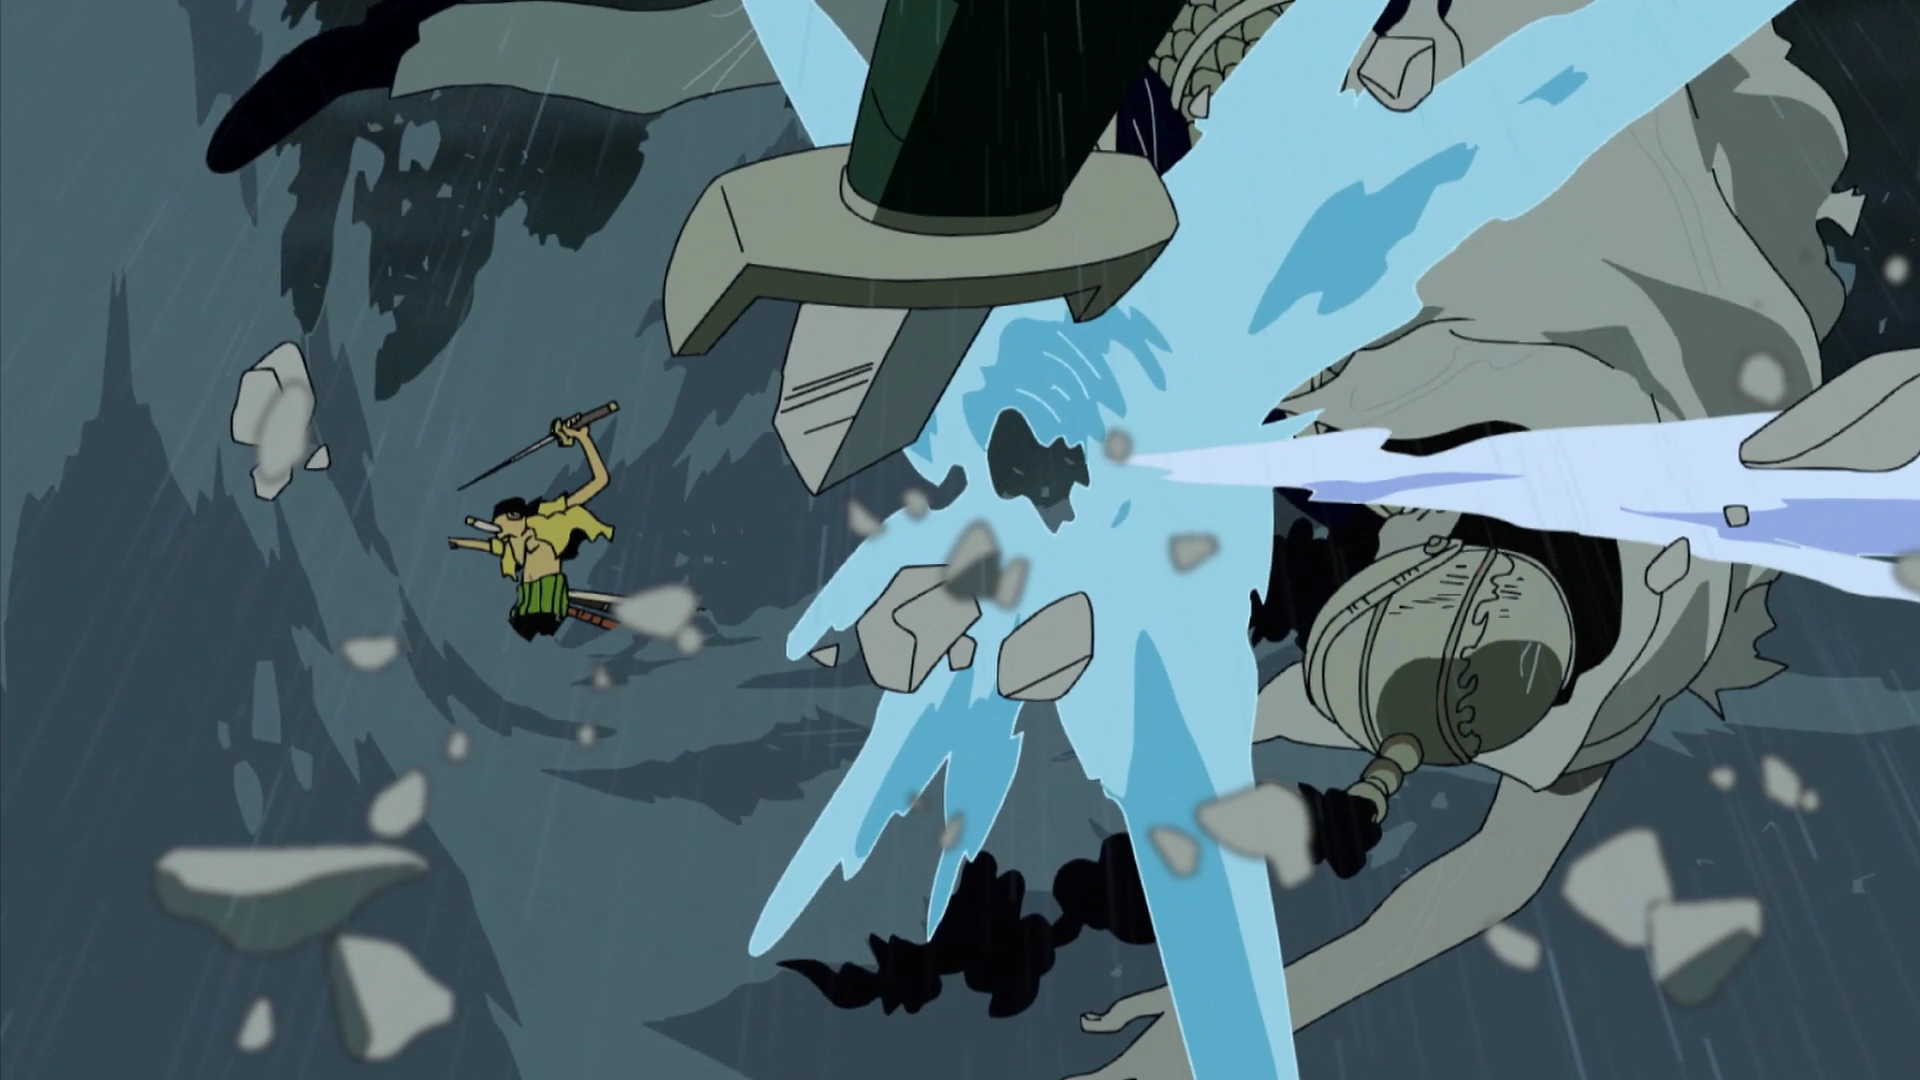
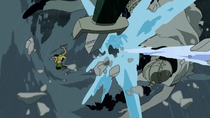
Zoro, Robin, Gan Fall, and Wyper all turning down Enel's invitation.
Upon "almost successfully predicting the five survivors", including himself, Enel offered Zoro, Robin, Gan Fall, and Wyper to join him, provided that Nami was to be eliminated. When all four openly refused his invitation by proclaiming that Enel himself would be eliminated, Enel proceeded to knock Gan Fall down with his powers. Enel then went on to harm Robin. Zoro furiously attacked him in retaliation, but failed in harming him at all. Enel then injured Zoro, who tried to attack Enel once more, but he was shocked into unconsciousness when Enel struck him with Kiten.
Later after regaining consciousness, Zoro attempted to cut down the beanstalk near Luffy and Enel upon Nami's request. He managed to cleave some of it apart, but he was then struck into unconsciousness again by Enel. Wyper then finished the job and was able to cut down the beanstalk.
After Luffy defeated the tyrannical Enel and finally rang the Shandorian Golden Belfry Bell, Zoro joined the other Skypieans in drinking and celebrating.
Water 7 Saga
Long Ring Long Land Arc

Zoro wins the Groggy Ring along with Sanji.
After returning from Skypiea, the Straw Hats came across a mysterious pirate ship with no captain and navigator after they tried to escape from a giant wave. They soon arrived at an island with some strange long animals, the so-called Long Ring Long Land island. As Luffy, Usopp, and Chopper went on board, Zoro, Sanji, Nami, and Robin were challenged by the Foxy Pirates to a Davy Back Fight. Luffy accepted the challenge with a gun shot. When Foxy decided to take Chopper after the first round, the "Donut Race", Chopper cried and said that he only went out to sea because he was asked to be a member of the Straw Hat Pirates. Zoro lectured Chopper and told him that he had to be a man and that he was responsible for becoming a pirate.
In the second game, called the "Groggy Ring", he and Sanji were partnered. They were fighting over who should be the 'ball man' until Sanji took the position at Nami's request. The referee told them that weapons were prohibited in the game, so Zoro was forced to use No Sword Style. They defeated the Groggy Monsters and won after a decisive battle and allowed the Straw Hat Pirates to reclaim Chopper. The last game, "Combat", was a fight between the two captains. Luffy defeated Foxy and chose to take Foxy's pirate flag rather than taking a crew member. Luffy made them a new flag, which ended up being hideous because of his poor artistic ability.

Zoro saves Robin from Aokiji's strike.
After having returned to Tonjit's hut, the Straw Hats met a Marine Admiral named Aokiji (in the anime, they met him on a different island). Aokiji told the crew that he was only there to confirm that Robin was still alive. He then used Ice Saber and proceeded to slice up Robin, but Zoro stopped him. During the fight, Zoro's right shoulder was frozen by Aokiji. After the crew returned to the Merry, Zoro and Sanji immediately jumped into the ocean when Chopper said it would unfreeze them. After treatment, Zoro thought to himself that Luffy needed to get stronger to fight a stronger enemy.
Water 7 Arc
As the Straw Hats continued their journey, they encountered a sea train on their way. They stopped at a train station and asked an old woman named Kokoro where they could repair the ship and recruit a shipwright. Kokoro gave them a picture of a person named Iceburg and told them this was the person for whom they were searching. They set sail and opened the picture only to find it was just a drawing. When they arrived at Water 7, Zoro pulled out the sail and accidentally broke it, not realizing how poor its condition was. Soon Luffy, Nami, and Usopp disembarked to hire a shipwright. Robin and Chopper then went shopping, followed later by Sanji. Zoro remained sleeping and guarded the ship. When he woke up, the ship was surrounded by mysterious strangers called the Franky Family. They attacked but were easily defeated by Zoro. When a man named Kaku, a shipwright from the Galley-La Company, arrived to check the ship, he mistook him for Usopp due to his long nose. Upon completing the inspection, Kaku stated that the ship could not be repaired anymore, a statement Zoro vehemently disagreed with. The carpenter soon returned to the shipyard. In a monologue, Zoro asked the Going Merry if this would really be its last voyage.[135] Zoro later joined Chopper, Sanji, and Luffy to look for Usopp and their stolen money. They found Usopp unconscious outside of the Franky House. The four then attacked the Franky Family and destroyed their base, more so for beating up Usopp than for stealing their money. By then, their money had already been taken by Franky to an unknown location, so they could not get it back.
While Usopp received medical treatment from Chopper, Luffy decided to get a new ship based on the shipwrights' remarks about Merry's fate. When Usopp woke up, Luffy told him this and Usopp angrily disagreed. They started a quarrel as to whether they would leave the ship or not. A few harsh words were exchanged, and Usopp then went outside saying he quit being a Straw Hat Pirate. He then challenged Luffy to a duel, and the winner would claim the ship. Later, Zoro was seen fighting with Sanji over who was responsible for the situation. Robin had disappeared while in the city, and they were also wondering where she had gone. After the duel, the victorious Luffy was still torn up regarding the conflict. Zoro told him that as a captain, he must never hesitate or else the crew could not rely on him. He then stated that they could never come back to the Going Merry again. When the crew later rented a hotel room, he just sat on the rooftop. The Straw Hats then became suspects to the attempted murder of Iceburg after a sudden attempt on his life was made.
When Zoro saw Luffy, Chopper, and Nami, they planned to enter the Galley-La building in order to talk to Iceburg. As Luffy disappeared, they were spotted by the Galley-La guards and started running. When Zoro became annoyed of the carpenters, he decided to use the back of his swords to defeat them. As they entered the building, they saw Luffy with Paulie there and discovered the true identities of Blueno, Kalifa, Kaku, and Lucci as agents of CP9. They saw Robin with them too. Zoro attacked Kaku saying that he was not a true shipwright, but Kaku replied that he did his job correctly when examining the Going Merry. Afterwards, Zoro was quickly sent flying by Lucci in his Human-Beast Form[136] and ended up landing into the chimney of another building.[137]
Zoro remained stuck there for a while, neither able to move nor reach his swords. He was later helped by Chopper, who had been looking frantically for him and Luffy due to the Aqua Laguna about to strike. Chopper gave Zoro Kitetsu and he destroyed the chimney. When he was finally freed, the two ran as quickly as possible to get away from the tidal wave.[138] Zoro and Chopper, along with Nami and Luffy, were helped by Paulie and narrowly escaped drowning. Having heard the truth behind Robin's strange behavior, they planned to sail into the storm to pursue the sea train and save her. Paulie disagreed with their plan and was willing to fight them and stop them. Kokoro then informed them she'd show them another sea train and introduced the Rocketman.
Seeing how determined Luffy was to save Robin, Kokoro and Iceburg lent the Straw Hat crew the use of Rocketman. The Franky Family showed up, pleading with Luffy to let them join them because they would do anything for their leader, who had also been captured along with Robin. The Rocketman finally made it out to sea. As the train connected with the tracks, Luffy had to rescue Chimney before she was thrown off by the wind. With Luffy and Chimney safe in the train, Paulie told his fellow carpenters who the real culprits were. The Straw Hats, Franky Family, and Galley-La Company formed an alliance against CP9. When a large tidal wave loomed ahead of Rocketman, Luffy and Zoro performed Gomu Gomu no Sanbyaku Pound Cannon and blasted a hole through the wall of the wave, opening up a channel for them to pass through. They miraculously passed through unscathed and the passengers rejoiced.
Zoro defeats T Bone.
In the Rocketman, Luffy, Zoro, Nami, and Chopper got an outfit change. Nami showed off the weapon Usopp upgraded for her while he was still with them. Those on the Rocketman then encountered the discarded cars that Sanji had managed to detach from the train ahead, and Zoro sliced them so they could pass. Zoro then clashed with "Ship Cutter" T Bone, who was running on the tracks to catch up to the train ahead. The fight was short and Zoro joined the crew again in the Rocketman, victorious. Yokozuna the frog then jumped onto the front of the train, knocking them from the rails. After Kokoro had a word with him, he joined the group. Luffy and the others finally caught up to Sanji and Sogeking on another set of detached cars as they approached Enies Lobby. Paulie sat down with the group and talked about their plan of entry. Luffy did not bother to follow the plan, and launched himself beyond the gates before the train stopped.
Enies Lobby Arc
As the Straw Hats arrived at the Enies Lobby together with the Franky Family and Galley-La, they planned their move going inside, but unfortunately, Luffy jumped the gun and headed inside on his own. They waited several minutes to open the first gate of Enies Lobby. Zoro had been commanded by Kokoro to slice the fence open, but he commanded Yokozuna to push the fence back instead. Using it as a ramp, the train flew into Enies Lobby. Together, they landed on Oimo's back and started entering the island to their main goal: saving Robin.
As they were waiting for the bridge to be activated, they all lined up at the roof, convincing Robin to accept their request of saving her. When they confirmed that the bridge would not be activated anymore, Kokoro volunteered herself to help them, using the Rocketman. The Rocketman, using the half activated bridge as a ramp and while everyone was being held by Luffy, jumped across to the Tower of Justice.
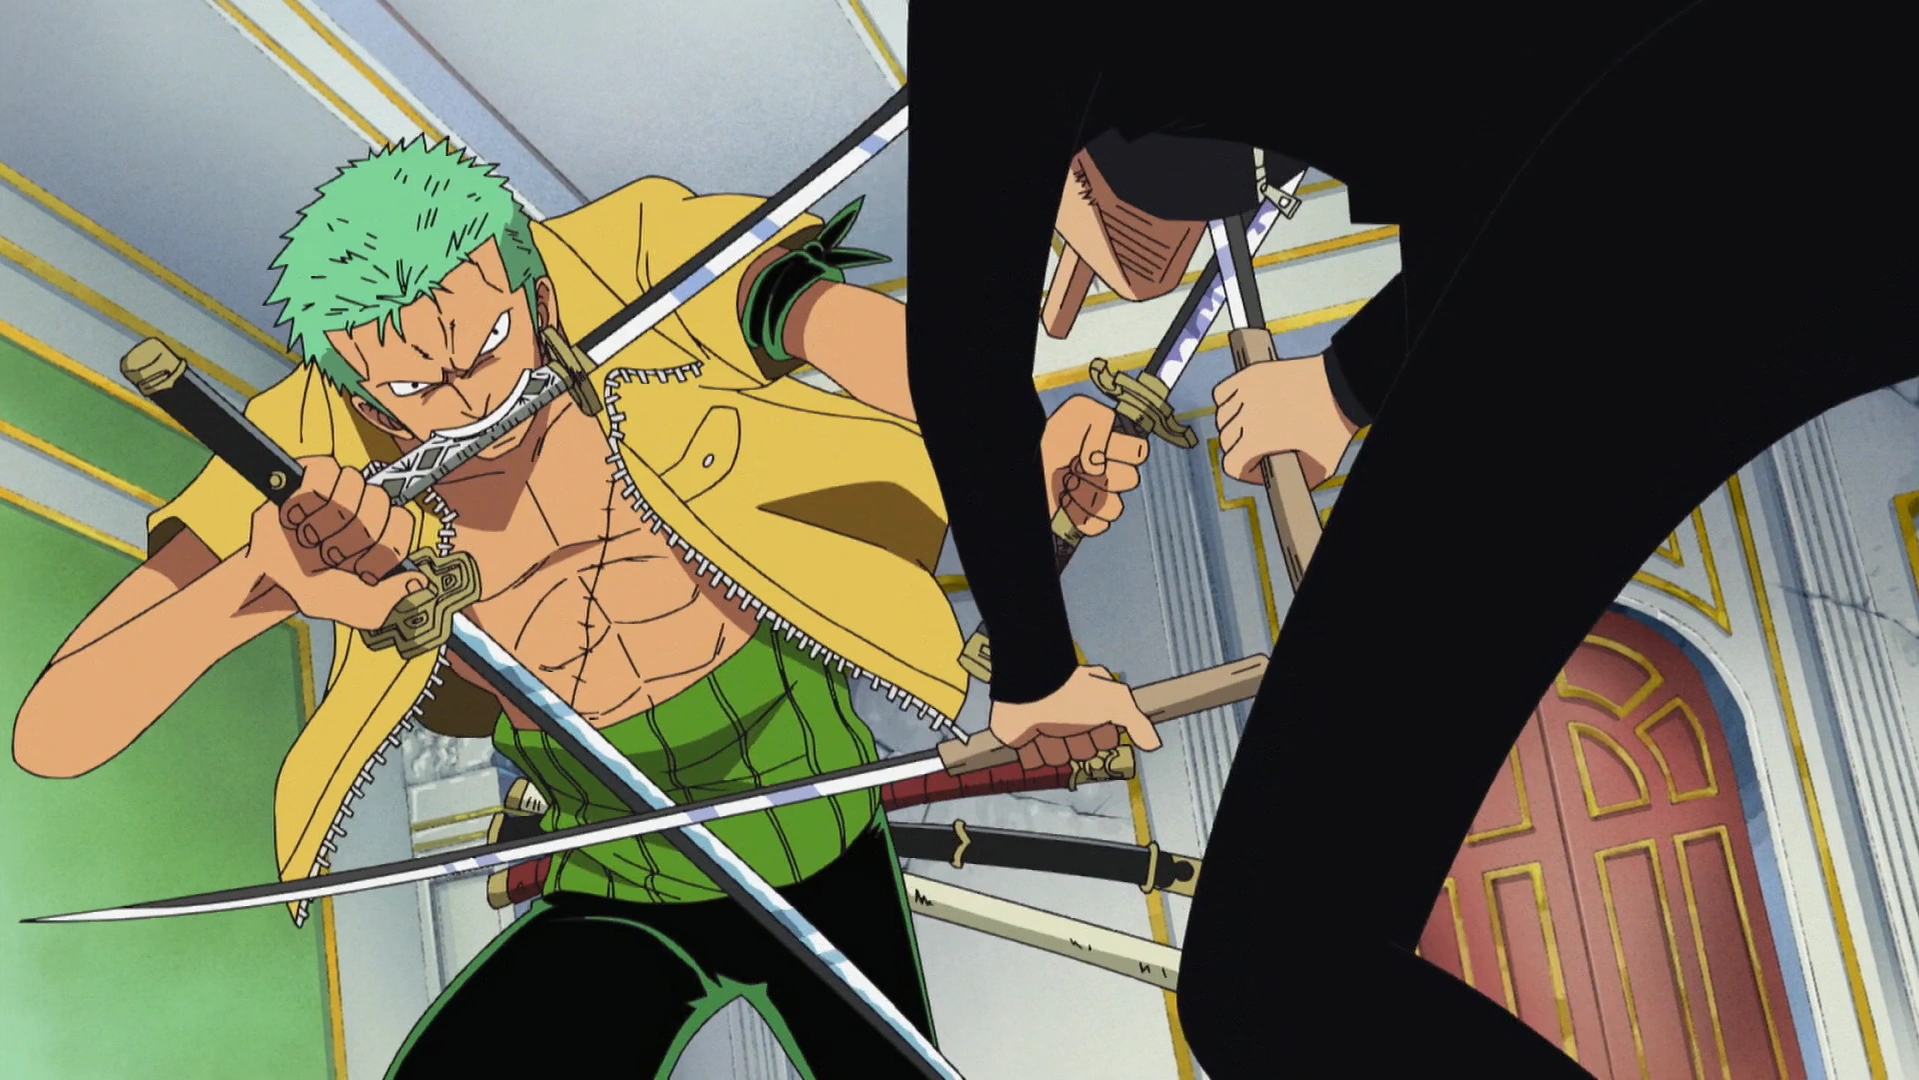
Zoro and Kaku clash.
When they landed on the Tower of Justice, Fukurou showed up and declared that a key was needed to uncuff Robin. They decided to fight individually and started to search an agent. Zoro faced Kaku, who he had already fought at Galley-La. Zoro commented that he had become stronger since then, and in an intense battle, used a new skill to defeat Kaku to finally get his key, which was number 5. After that, he and Sanji carried the injured Sogeking in the tunnel and almost drowned. Luckily, they were saved by Kokoro, who is revealed to be a mermaid.
While awaiting the end of Luffy's fight with Rob Lucci, Zoro and the rest of the crew engaged in battle with numerous Marines, sent there as a result of the Buster Call inadvertently triggered by Spandam. Zoro came across a Marine known as Shuu, who used his Devil Fruit ability, causing his Yubashiri to rust. Their escape ship exploded, leaving them seemingly stranded until they heard the voice of Merry telling them to jump into sea. He complied, and with the rest of his crew, jumped on to the Going Merry. They then evaded the Marine battleships and managed to sail away from the destroyed Enies Lobby.
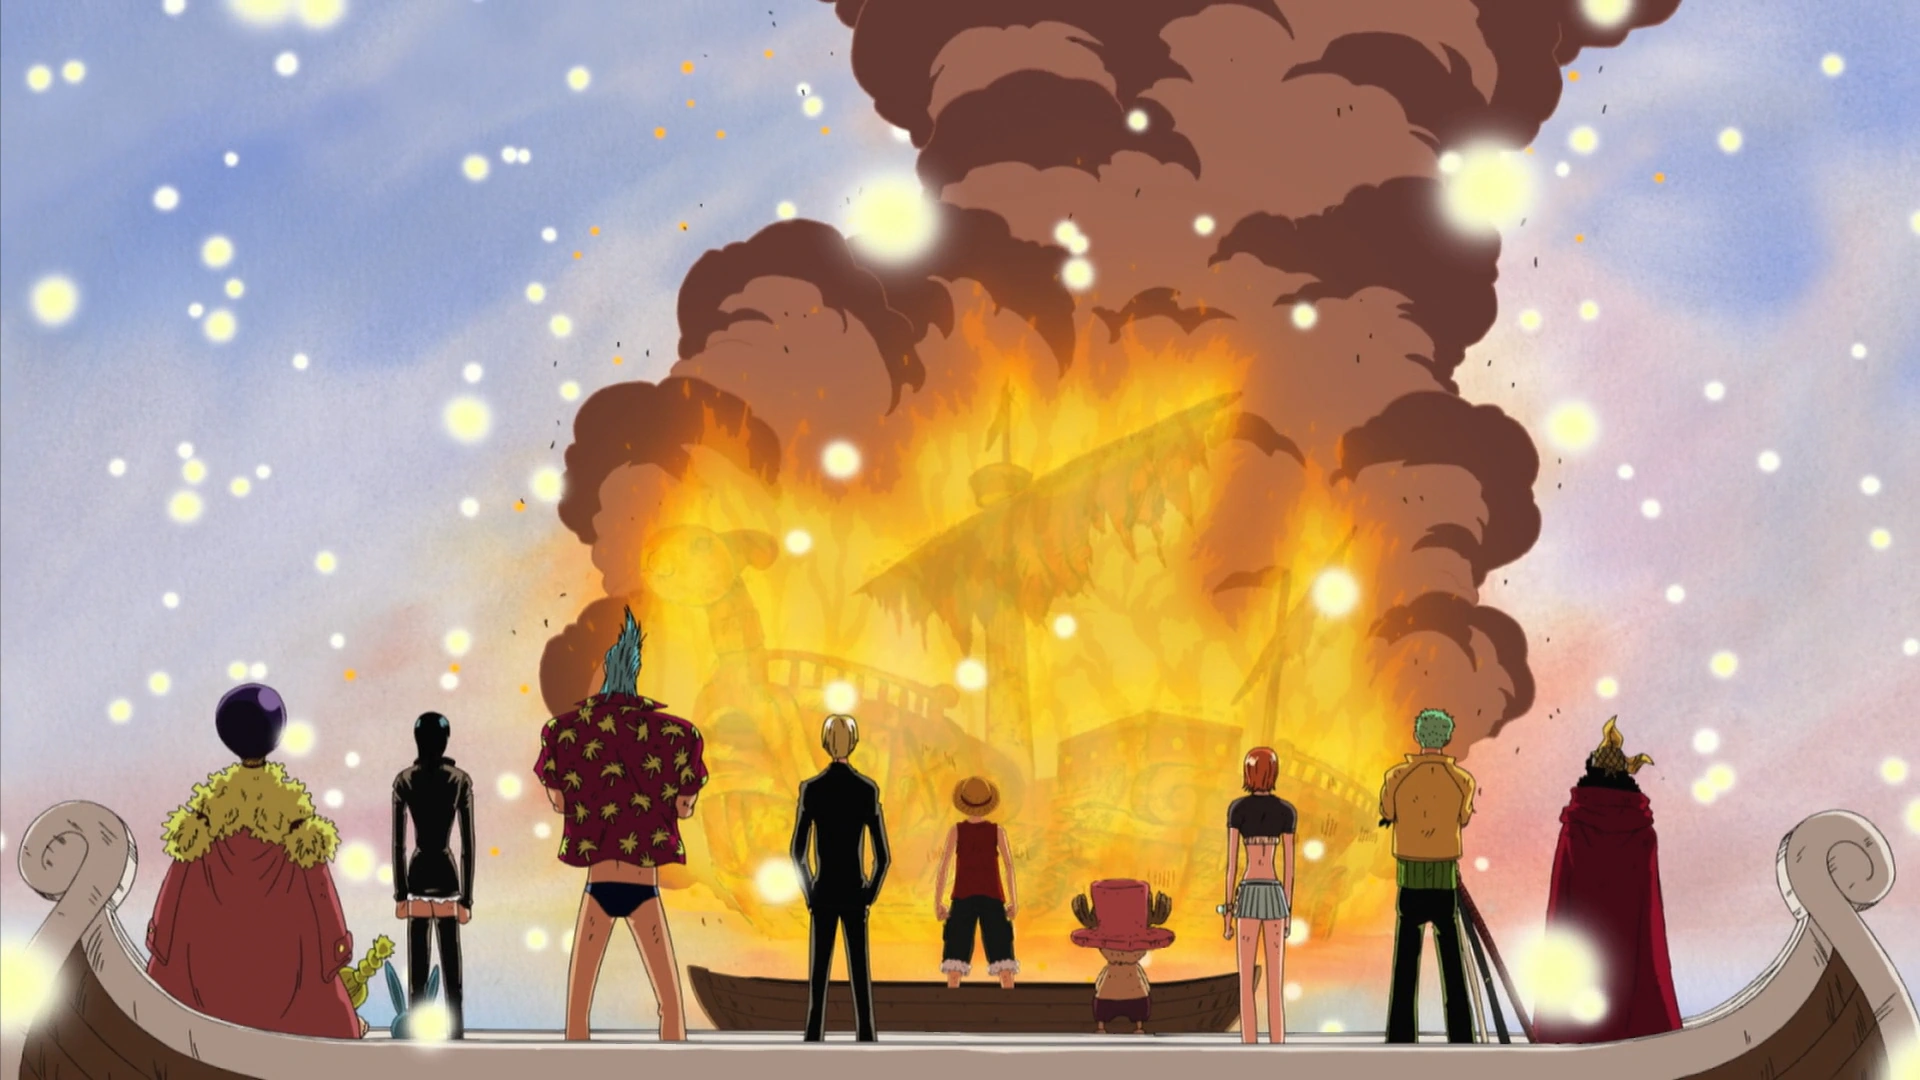
The Going Merry's funeral.
With the Going Merry, everyone managed to escape Enies Lobby safely. After escaping, Iceburg arrived with the Galley-La Company just in time to pick up the Straw Hat Pirates as the Merry suddenly broke apart. Luffy then gave the Going Merry a Viking funeral by burning it as the crew said their goodbyes.
Post-Enies Lobby Arc

Zoro lectures Luffy about his leniency.
Two days later, back in Water 7, he was seen staring at the broken hilt of his sword wondering what he should do. Finally, he was then seen rushing to meet the others to warn them of the Marines' arrival. However, as usual, Zoro ended up getting lost on the way there. When he arrived, he was attacked by Chief Petty Officer Helmeppo with dual kukri knives, but Zoro quickly defeated the young man. Zoro was then updated about the Marines being led by Luffy's grandfather Monkey D. Garp and reunited with Koby.
He was seen trying to buy a sword but had no money and was thrown out.[139] Later on, Zoro's new bounty was revealed; the bounty was set at ![]() 120,000,000. When Luffy was about to invite Usopp back into the crew after hearing he wanted to rejoin, Zoro took a stand on letting Usopp back in, stating that Usopp should not be allowed back into the crew if he returned still full of pride. His reasoning being that Luffy as captain must stand firm as it was Usopp that left them and lost the duel with Luffy over the fate of the Going Merry.[140]
120,000,000. When Luffy was about to invite Usopp back into the crew after hearing he wanted to rejoin, Zoro took a stand on letting Usopp back in, stating that Usopp should not be allowed back into the crew if he returned still full of pride. His reasoning being that Luffy as captain must stand firm as it was Usopp that left them and lost the duel with Luffy over the fate of the Going Merry.[140]
He was later seen when he and Sanji informed the rest of the crew that Garp's battleship was near the island. The Straw Hats then boarded their new ship, the Thousand Sunny, and began sailing away from Water 7.
After Usopp apologized for his stubbornness, he was happily accepted back into the crew with Zoro seen smiling at Usopp's return.
Thriller Bark Saga
Thriller Bark Arc
After sailing for some time on the Thousand Sunny, Zoro and the rest of the crew came across a mysterious barrel floating on the ocean. Upon opening it, a flash shot up from it. After braving a storm that mysteriously came afterwards thanks to Nami and Franky, Zoro and the rest of the crew found themselves in the presence of a ghost ship.
This ship apparently belonged to a skeleton named Brook who, by chance, initially accepted Luffy's offer to join the crew.[141] This apparent new addition to the crew made Zoro scold Nami and Sanji for not keeping Luffy from inviting the skeleton. Zoro then joined for dinner as the skeleton explained his past to the others.[142] Just as Brook was about to perform before Zoro and the rest of the crew, a ghost appeared and some clanking sounds were heard. These sounds were caused by the closing of the gates of Thriller Bark. These events prompted Brook to head to the island before Zoro and the rest of the Straw Hats' eyes.
After witnessing Franky's present to the Straw Hats that the cyborg decided to show them, Zoro and the rest of the Straw Hats decided to look for Nami, Usopp, and Chopper, who had not returned. However, before Zoro and the rest could go to the island, they were stopped by an invisible thing.[143] The thing stole one of Zoro's swords and tried to stab Luffy with it. Luckily, Franky kicked it away before it found its mark. The thing left Zoro and the rest baffled.
After the Thousand Sunny was caught in what was apparently an oversized spider web, Zoro and the rest disembarked onto the island. There, they met the Cerberus, which did not intimidate Zoro.[144] After Luffy tamed the beast, Zoro and the rest met two more of the island's creatures. Luffy caught the talking tree while Franky caught the unicorn. Zoro and Sanji then stopped Luffy before he could ask the talking tree to join the group.
Zoro and the rest then came across some ghosts who affected some of them with their strange abilities. Zoro, seeing his companions in such a pitiful state, merely shook the whole matter off only to be affected by one of the ghosts himself. After Zoro and the rest who were also affected by the ghosts recovered, they pressed forward. Zoro and the rest later met with some zombies and defeated them with 600,000,000 Belly Jackpot.[145] The group then met with an old man who looked like a zombie. The old man asked them to defeat Gecko Moria who had stolen his shadow.

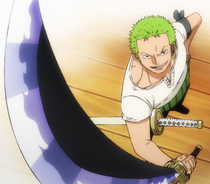
Zoro defeats Ryuma.
While in Hogback's mansion, Zoro disappeared not long after Sanji did. He was later found asleep on the Thousand Sunny with Sanji and Luffy and was woken up by Usopp.
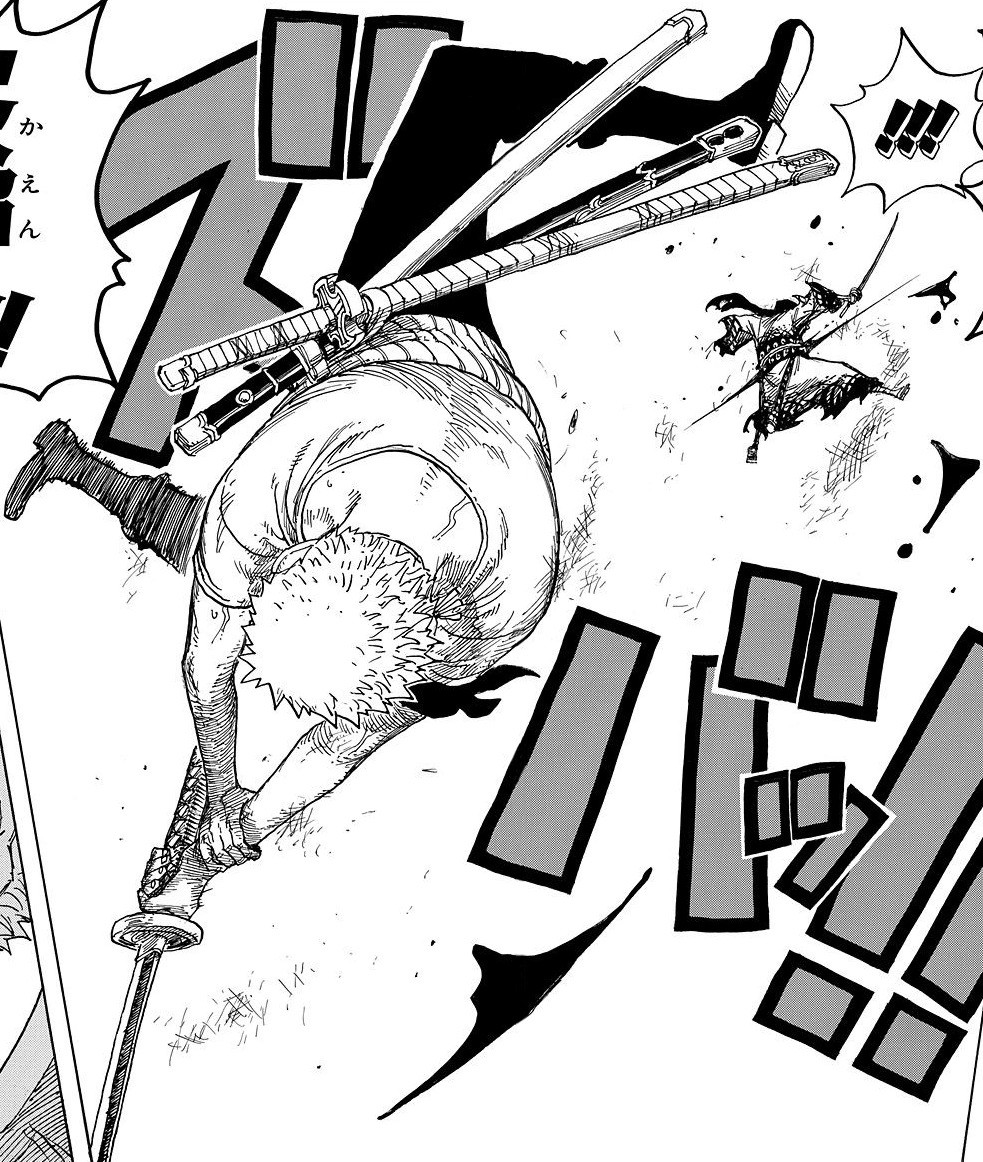
After purifying some zombies, Zoro, Franky, and Sanji were about to cross a bridge leading to Hogback's laboratory when Oars smashed it. With the construction of a new bridge done by Franky, Sanji departed to save Nami. Later on, Zoro and Franky found the defeated Brook and saved him at the last moment from Ryuma. Seeing the samurai's sword, Zoro claimed he intended to fight and take it. After a short but intense battle, he defeated the legendary samurai[146] and gained the sword Shusui from an ashamed Ryuma.

Zoro vs. Oars.
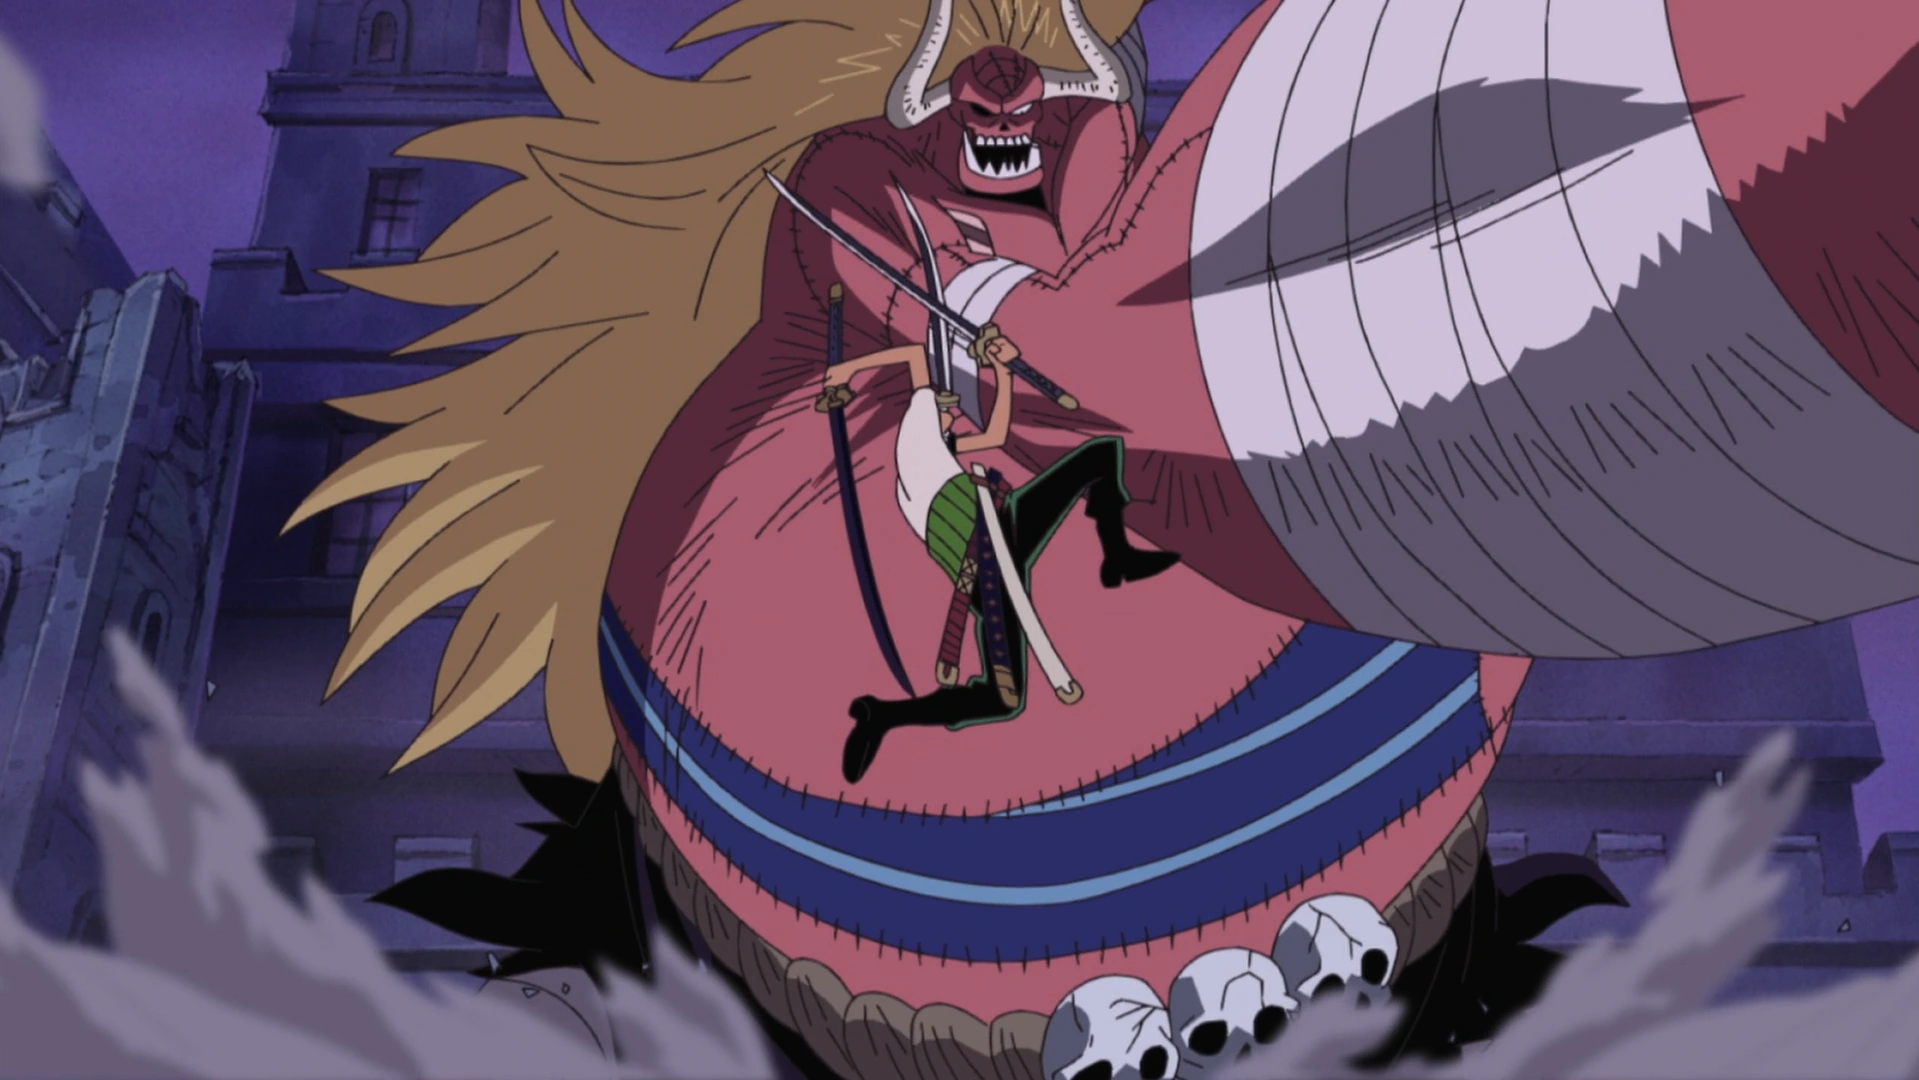
When Moria gained control of Oars, he ordered him to rampage through Thriller Bark and defeat the Straw Hats. Zoro, wanting to fight him, only cut off his left tusk before being defeated by Oars' attack. Later on, he and the other Straw Hats regained consciousness and started a series of combo attacks against Oars. Using a Hyakuhachi Pound Ho at Oars, Zoro noted how his Shusui was heavy and he was still not adept at using it. After Moria manipulated Oars' body to allow it to stretch, the Straw Hats were taken down one by one. Before Zoro was taken down, Chopper formulated a theory that his right arm was his weak point. As his final movement, Zoro tried to damage the arm, but failed since zombies do not feel pain, and was taken out.
After being carried away from the fight between Nightmare Luffy and Oars by the Thriller Bark Victim's Association, he regained consciousness and helped Luffy use Gomu Gomu no Gigant Bazooka to shatter Oars' spine. As Moria used Shadow's Asgard, he stood by watching the fight between Moria and Luffy and was almost burned away by the sun until, with the defeat of Moria, his shadow was finally returned. After launching an attack on the Thriller Bark Victim's Association, Bartholomew Kuma targeted Zoro.
Zoro tried to fight Kuma, but Kuma just pushed his attacks away with his Nikyu Nikyu no Mi, leaving Zoro at a disadvantage. Kuma then came with an ultimatum: give up Luffy and the rest will be allowed to survive. Zoro, the crew, and the Thriller Bark Victim's Association, all in one voice, refused and so Kuma calmly detonated the island with an Ursus Shock, knocking out everybody. However, when Kuma was about to take Luffy, Zoro rose again as one of the only people not knocked unconscious and even launches a successful Shishi Sonson attack on Kuma, revealing that he is a cyborg. Kuma then stated that he is a cyborg but not like "Cyborg" Franky and furthermore explained that he was an incomplete human weapon created by the World Government and Dr. Vegapunk, called a Pacifista. Zoro then proceeded to ask for his head to be taken in exchange for Luffy's. Kuma agreed, but at that point, Sanji woke up and wanted to give his head instead. Zoro calmly hit one of his wounds just above his right hip and knocked Sanji out. Kuma then proceeded to use his powers and drew out all of Luffy's pain and fatigue. Luffy had so much pain and fatigue that it formed a gigantic paw of energy bigger than Kuma himself. Kuma gave Zoro a small sample of it and Zoro could barely tolerate the pain. Kuma then stated that if Zoro were to take in Luffy's injuries, he would definitely die. Zoro then asked to choose a location.
Zoro then took the paw of pain and went to a nearby forest. He took a few breaths before he placed his hands inside of the giant paw. When the Straw Hat crew awakened along with the Rolling Pirates, Sanji went out to look for Zoro and found him in the forest still conscious, surrounded by blood as well as being covered from head to toe in blood. When Sanji asked what happened to him, Zoro replied that nothing happened at all in a trembling voice. Afterwards, all of the Straw Hats tended to Zoro's injuries.
He was seen sleeping in the Thriller Bark Mansion with wounds Chopper said were life threatening, while his crew (minus Chopper, who was taking care of him and Nami, who was watching over him) celebrated their victory. Two days later, Zoro was awake and went to the grave that Franky built for Brook to honor the Rumbar Pirates and asked for Brook's permission to lay his Yubashiri to rest near the grave. He later joked that Brook had bad luck since this crew is varied, to which Brook joked back with him.
Once he and the rest of the crew finally left Thriller Bark, they held a toast to Brook, the newest Straw Hat.
Summit War Saga
Sabaody Archipelago Arc
As the Straw Hats continued their journey, Zoro became embroiled in the battles against the Flying Fish Riders to protect a former enemy, Hatchan, against the slave trader Duval. Assisting Hatchan in his escape, he came to an understanding with the fish-man while defeating those in their way. After the incident, the Straw Hats arrived at the Sabaody Archipelago, where Zoro decided to go off on his own, presumably to get some liquor, as he was later seen chugging on a bottle of one. Though he claimed he knew where the Sunny was docked, a misread sign made the swordsman run off into the unknown, getting himself lost again.


Bonney prevents Zoro's attack on Saint Charlos.
Eventually, he entered an area where a World Noble was messing around with his slaves and the local population. Although other Super Rookies were watching, Zoro unknowingly insulted the noble, who fired his pistol. Zoro dodged the shot and was about to retaliate, but Jewelry Bonney knocked him to the ground and forced him to play along to prevent an incident that would bring a Marine admiral to the island. After the noble left and a brief argument with Bonney, Zoro proceeded to carry a civilian who was injured earlier by the noble to the nearest hospital, ignoring Bonney's protests.
He later jumped onto Luffy's flying fish (after being told by the latter to do so) in an attempt to find his way back to the ship, but was crashed into the Human Auctioning House along with them. After Hatchan was shot, Zoro witnessed Luffy punching Saint Charlos in the face, the same noble he himself almost attacked.[147] Zoro remarked that Luffy should had given him the chance to slice the noble himself. He also witnessed the mechanic they were looking for, Silvers Rayleigh, who used an ability known as "Haki" to knock out the World Nobles' guards as well as Saint Shalria.[148] Zoro assisted Luffy and battled his way out of the massive horde of Marines, before escaping along with Rayleigh with the help of Duval's Rosy Life Riders.[149]
They returned to Shakky's Rip-off Bar to rest. There, Rayleigh revealed that he was Gold Roger's first mate, and revealed the truth about how and what led to Roger's execution. After explaining the story of Roger, Rayleigh mentioned Shanks and Buggy as former members of Roger's crew. The mention of Buggy mildly irritated Zoro.[150]
Rayleigh congratulated the Straw Hats on making it through the first half of the Grand Line, but told them that he was going to need three days to coat the Thousand Sunny. Due to the arrival of an Admiral, he would move the ship to avoid getting noticed. He gave the Straw Hats pieces of a Vivre Card to meet up once he was done. Because of the Admiral threat, Zoro mentioned they too should split up to avoid getting caught and meet up at Rayleigh's location.

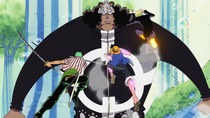
Zoro, Luffy, and Sanji attack PX-4.
As they said their farewells to Shakuyaku, Camie, Pappag, and Hatchan, the Straw Hats departed but were later confronted by what appeared to be the Warlord Bartholomew Kuma. As he attacked, the Straw Hats fought back. Zoro noted that there was something different about him.[151] The Straw Hats continued to fight "Kuma" and Luffy, Sanji, and Zoro finally delivered a successful counter-attack in the form of the Santoryu Gomu Gomu no Diable Mouton Jet Roppyaku Pound Cannon combo, knocking "Kuma" back. Zoro deduced that it may not be the real Kuma as he had not reflected their attacks or teleported with his Nikyu Nikyu no Mi abilities.[152] Zoro suddenly collapsed from the phantom pain he experienced before when he had all of Luffy's pain and fatigue transferred to him, but managed to get up and hit Kuma with Ashura: Makyusen which badly damaged the clone, before Luffy finished it off.[153]
As the Straw Hats rested to catch their breath, they contemplated on how powerful their opponent was and how he came so early, as they planned to hide for the next three days and were worried as to how they were going to deal with more opponents like that.

Bartholomew Kuma confronts Zoro once again.
Just then, a broadaxe-wielding warrior named Sentomaru appeared with yet another Pacifista and ordered it to capture the Straw Hats. As the Straw Hats separated to avoid capture, Zoro, Brook, and Usopp were suddenly confronted by Kizaru, one of the three Admirals, and he proceeded to attack Zoro with a blast from his kick. With Usopp and Brook unable to do anything to Kizaru due to the power of the Pika Pika no Mi, the Admiral attempted to finish Zoro off, but his kick was deflected by Silvers Rayleigh, who intervened to save Zoro.[154] Usopp and Brook again tried to escape with Zoro, but as PX-1 started chasing after them, Zoro told them to put him down so they could get away. Usopp refused, saying Zoro was more useless in his current condition. Even with Sanji's help, they were all beaten down by the Pacifista.
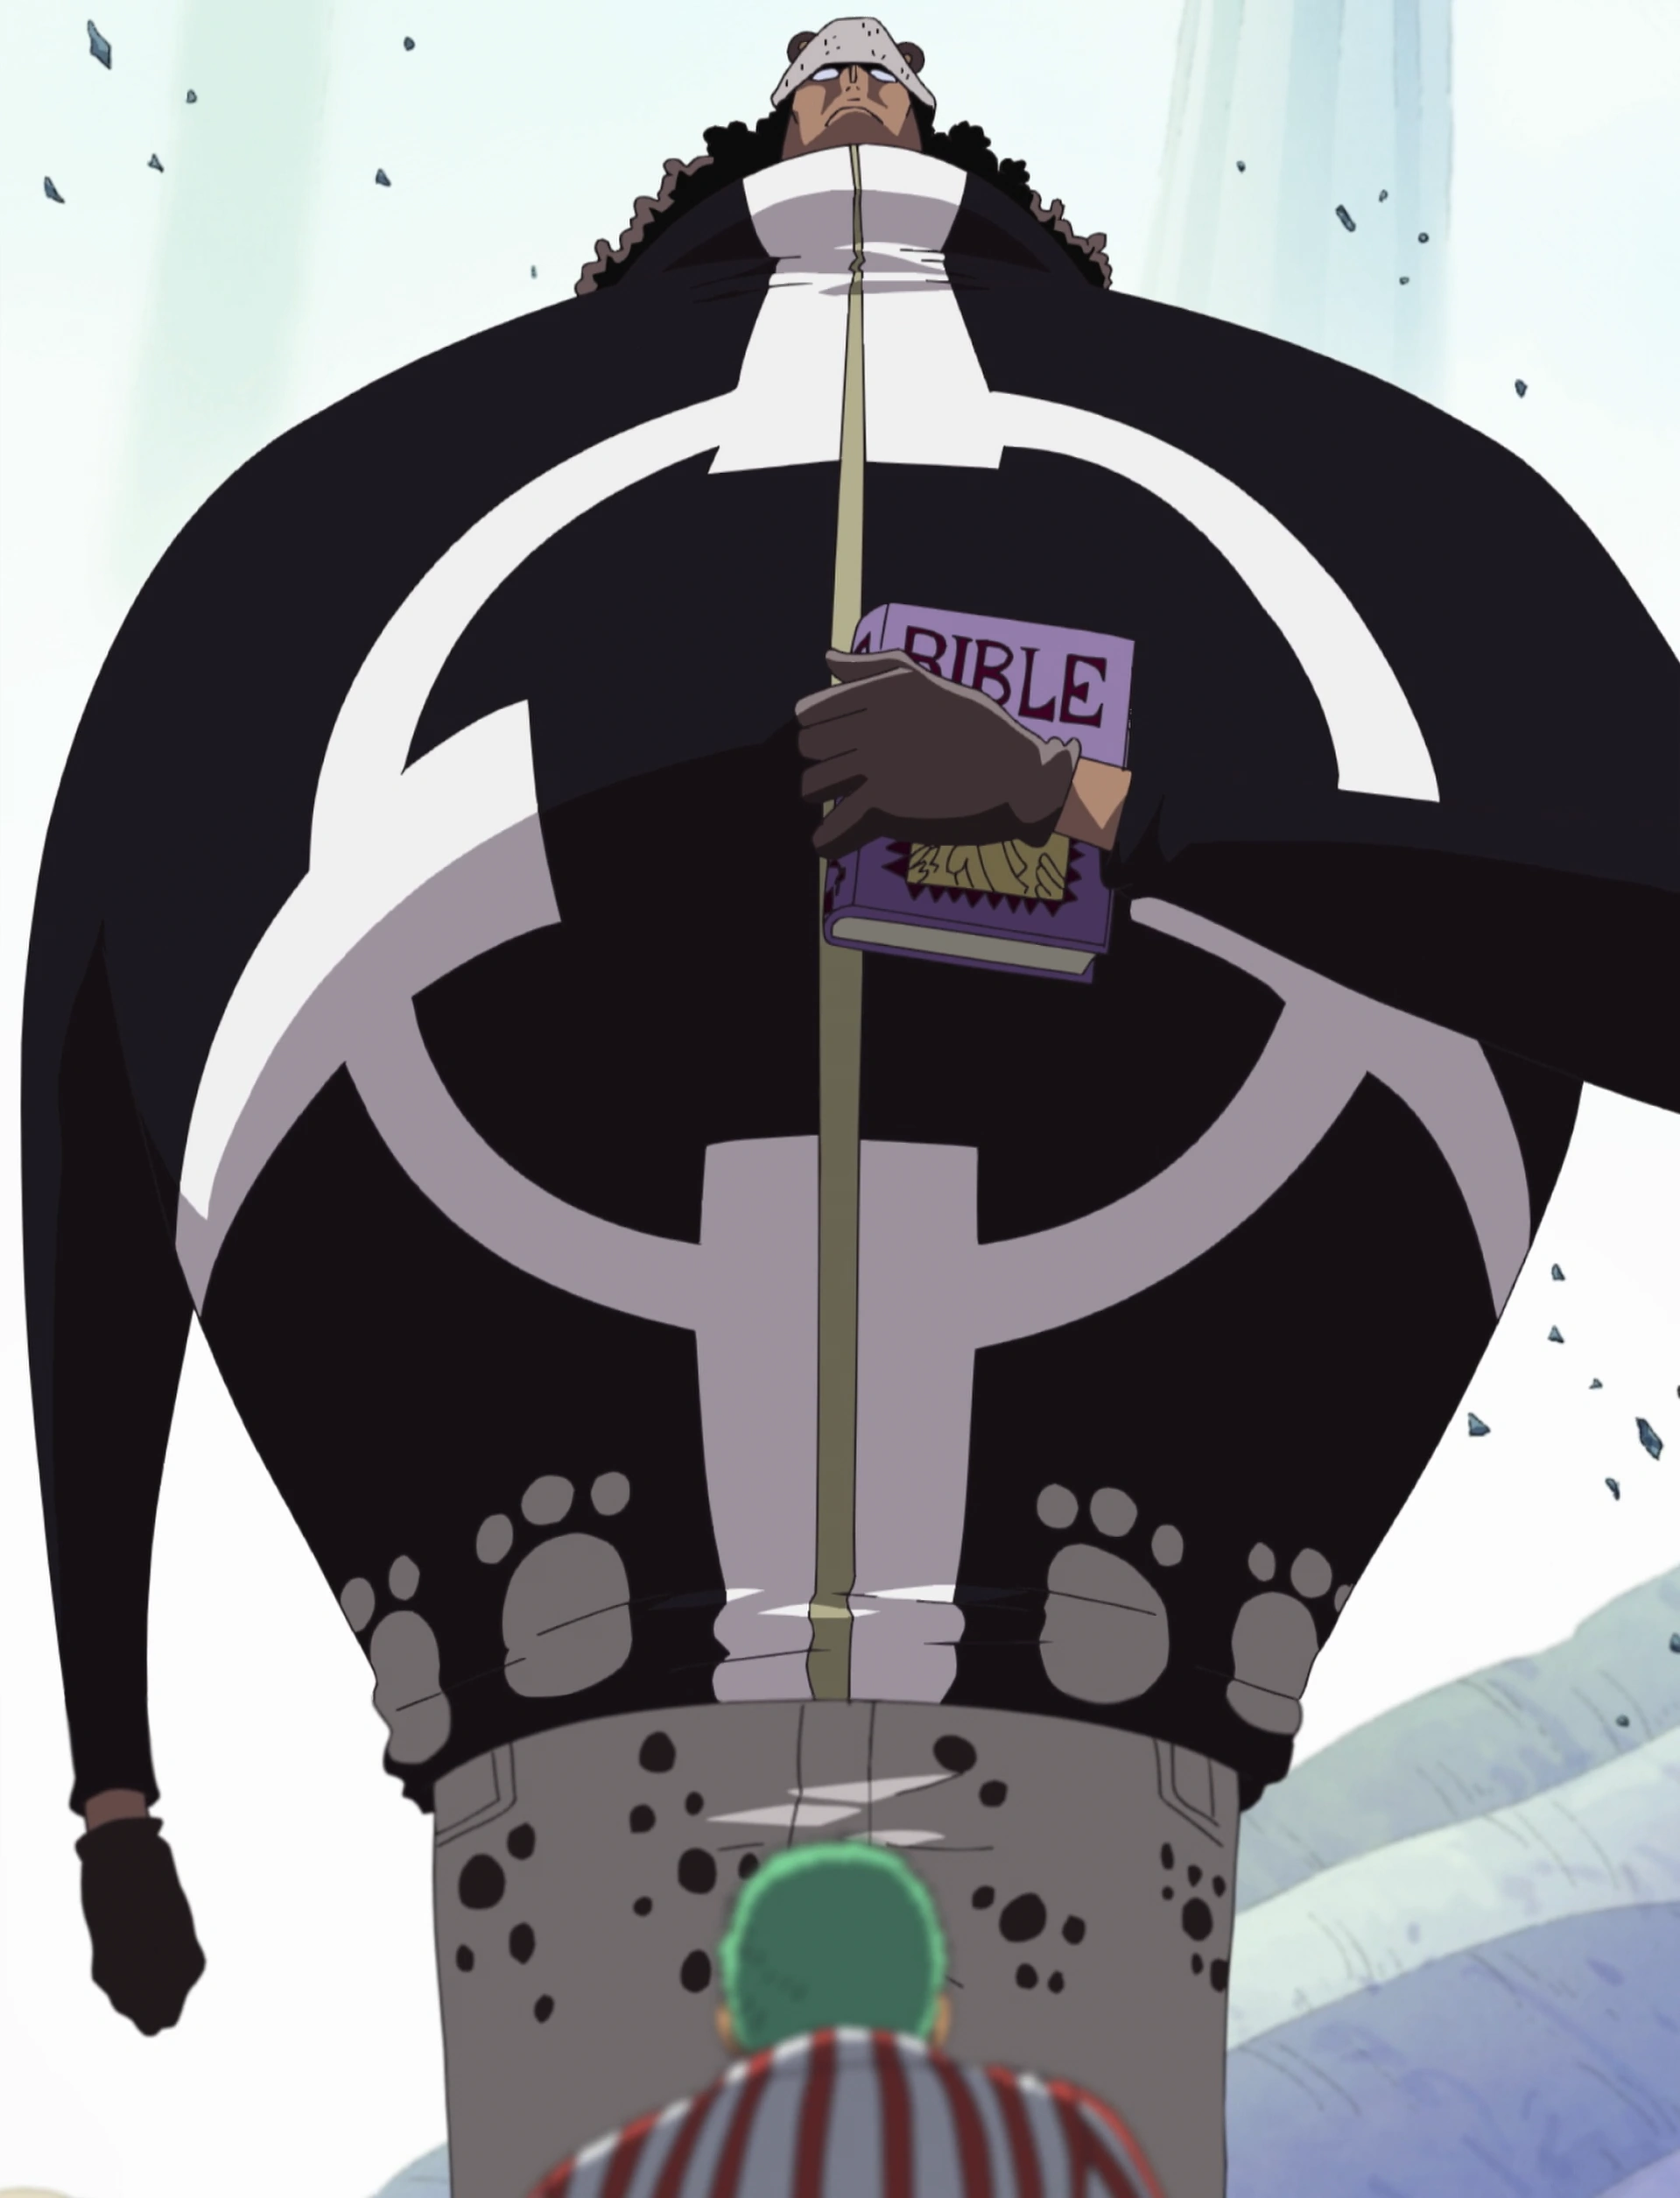
Before they could get up to run again, the real Bartholomew Kuma showed up and ordered the Pacifista to stop. Zoro instantly recognized him as the real one and they briefly talked. Kuma asked Zoro about where he would like to go, while removing his glove. He then swiftly touched Zoro with his hand, making him vanish.[155]
Straw Hat Separation Adventure: Kuraigana Island

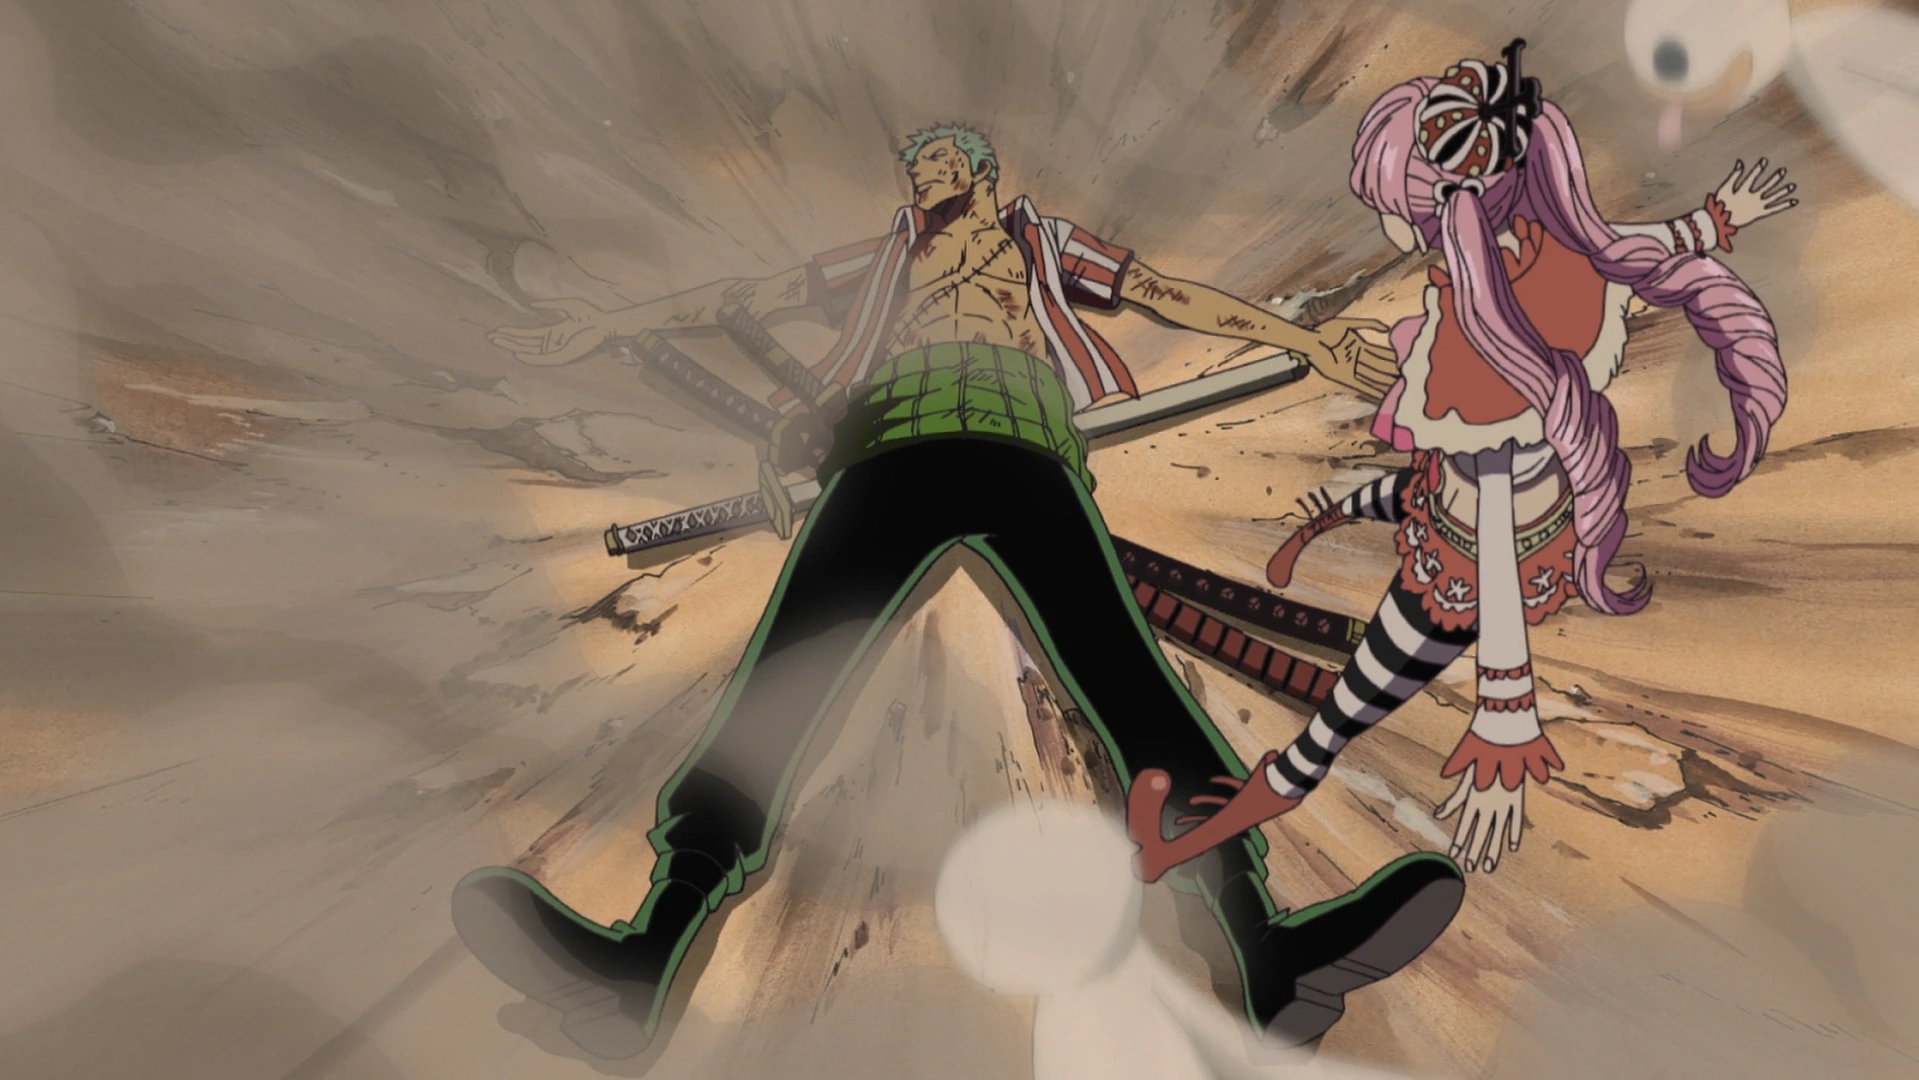
Zoro found by Perona.
Zoro landed in the ruins of Shikkearu Kingdom on Kuraigana Island in the Grand Line, the same island Perona was sent to. He woke up having been bandaged ridiculously by Perona. He asked for his swords, but Perona refused to give him his weapons back.[156] Eventually, Perona returned Zoro's swords to him. Zoro was walking through the ruins of the island as Perona floated overhead, and he encountered an unknown swordsman.[157]
Post-War Arc
The swordsman turned out to be a feral baboon known as a humandrill, whose tribe has learned to wield weapons from watching soldiers in a great war fought seven years earlier. The island also turned out to be the home of Mihawk, who upon returning to the castle informed Zoro of the events at Marineford. Mihawk then gave him a small boat to leave the island, though it was unfortunately destroyed by the humandrills. A while later, Mihawk went to the ruins to watch Zoro's battle with the humandrills. Mihawk commented on how Zoro was still far away from reaching the sea even though Zoro had been away from the castle for a long time. Mihawk added that the boat was useless in its current state, but Zoro stated that he would use a part of the boat to help him swim to his destination.
Mihawk explained to Zoro about the vicious, imitative nature of these humandrills and remarked that they would be difficult but good opponents for Zoro. He then offered Zoro a night at the castle, but Zoro refused, saying he needed to get to the ocean.
Zoro was then shown lying on his back making Perona hold a newspaper up for him to read. He explained that Luffy praying at Marineford and ringing the Ox Bell was out of character and guessed that Rayleigh was behind it. He asked her to hold still, maintaining that there was some kind of message hidden in the newspaper.
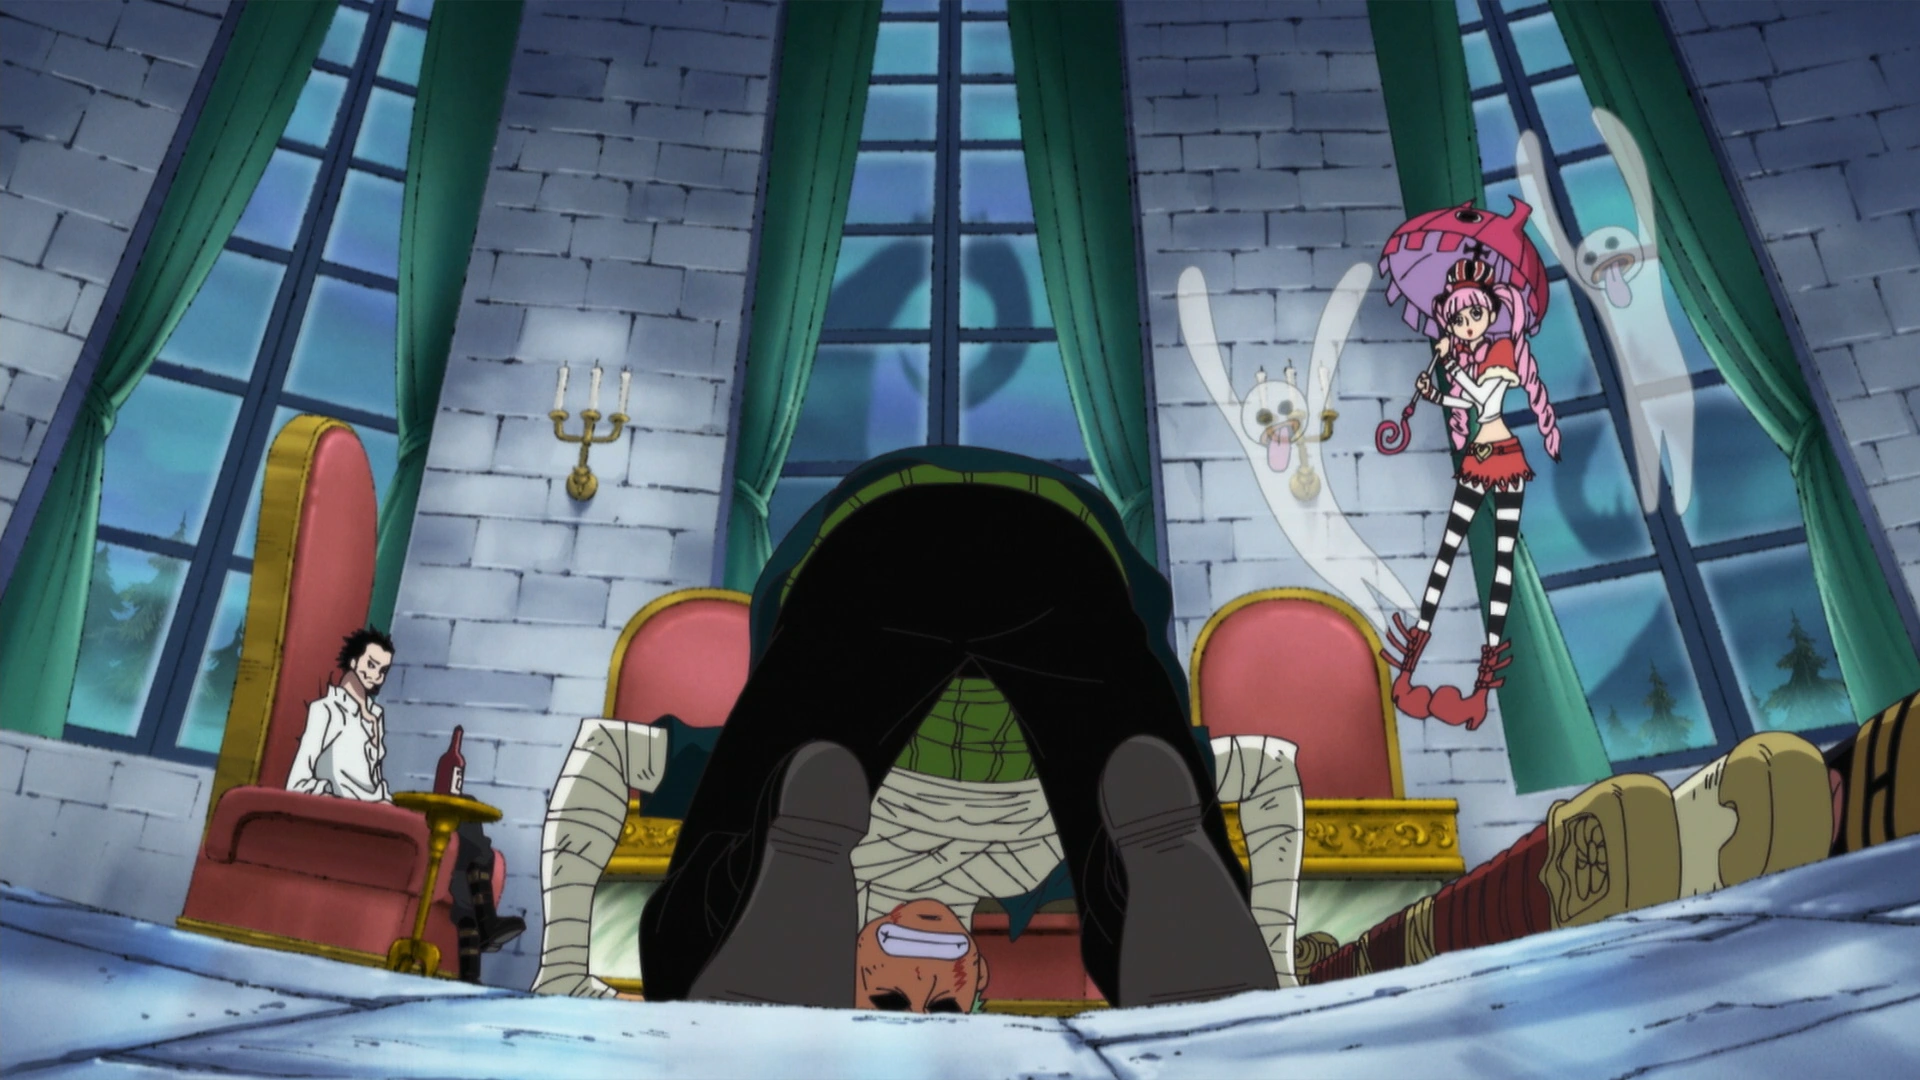

Zoro begs Mihawk to train him.
Zoro was next shown prostrating before Mihawk, requesting that he trained from the Warlord. Mihawk initially dismissed this request, thinking that Zoro was unable to defeat the humandrills and escape the island. He chided Zoro and expressed regret for "over-estimating" the swordsman. When Zoro explained that he had defeated the humandrills and required training from Mihawk to defeat him, the Warlord reconsidered while laughing at the absurdity of the request. Mihawk agreed to Zoro's request and ordered Perona to patch up Zoro so that the training could begin.
The reason for Zoro's request was then revealed in Luffy's hidden message. Zoro described this message to Perona, having translated it from the tattoo visible on Luffy's arm. The message ordered all members of the Straw Hat crew to regroup at Sabaody Archipelago in two years rather than the three days as initially planned. Zoro decided he would use the extra time to train under the world's greatest swordsman and become much stronger.
The story continues two years later.
References
- ↑ One Piece Manga and Anime — Vol. 1 Chapter 3 (p. 8) and Episode 1, Zoro makes his debut.
- ↑ 2.0 2.1 One Piece Manga and Anime — Vol. 1 Chapter 5 (p. 19) and Episode 3, Zoro decides to join Luffy's crew to survive against the Marines' 153rd Branch.
- ↑ 3.0 3.1 SBS One Piece Manga — Vol. 105 (p. 132), Zoro's parents and lineage are revealed.
- ↑ 4.0 4.1 One Piece Manga and Anime — Vol. 105 Chapter 1058 (p. 3-5) and Episode 1086, The Straw Hat Pirates' bounties post-Wano Country.
- ↑ 5.0 5.1 One Piece Manga and Anime — Vol. 90 Chapter 909 (p. 13-17) and Episode 892, Zoro's alias in Wano is revealed.
- ↑ One Piece Manga and Anime — Vol. 5 Chapter 42 (p. 16) and Episode 20, Zoro is revealed to have been a bounty hunter by Yosaku.
- ↑ One Piece Manga and Anime — Vol. 1 Chapter 5 and Episode 19.
- ↑ Vivre Card - One Piece Visual Dictionary (Card #0002), Zoro-juurou is romanized.
- ↑ One Piece Manga and Anime — Vol. 1 Chapter 3 (p. 1) and Episode 2, Both Zoro's epithet is seen in the title of the chapter and he is mentioned and recognized by Koby as the Pirate Hunter.
- ↑ SBS One Piece Manga — Vol. 4 (p. 28), Zoro's age is revealed.
- ↑ 11.0 11.1 11.2 One Piece Blue Deep: Characters World (p. 205), Zoro's profile after timeskip is revealed.
- ↑ 12.0 12.1 SBS One Piece Manga — Vol. 69 (p. 66), Zoro's age and height after timeskip are revealed.
- ↑ SBS One Piece Manga — Vol. 15 (p. 90), Zoro's birthday is revealed.
- ↑ SBS One Piece Manga — Vol. 10 (p. 46), Zoro's height is revealed.
- ↑ SBS One Piece Manga — Vol. 66 (p. 162), Oda explains the blood types of the world and reveals Zoro's blood type.
- ↑ Correction to Zoro's bounty. One Piece Staff (@Eiichiro_Staff) on Twitter.
- ↑ One Piece Manga and Anime — Vol. 80 Chapter 801 (p. 15-17) and Episode 746, The Straw Hat Pirates are given new bounties after Dressrosa.
- ↑ One Piece Manga and Anime — Vol. 45 Chapter 435 (p. 16-17) and Episode 320, The crew members' bounties for attacking Enies Lobby are revealed.
- ↑ One Piece Manga and Anime — Vol. 23 Chapter 213 (p. 22) and Episode 128, Luffy's and Zoro's bounties after Arabasta.
- ↑ 20.0 20.1 One Piece Manga and Anime — Vol. 102 Chapter 1033 (p. 11-15) and Episode 1060, Zoro as shown 13 years ago.
- ↑ One Piece Manga and Anime — Vol. 60 Chapter 589 (p. 7) and Episode 504, 12 years before the current storyline, Zoro and Kuina trained by moonlight, unaware of the Revolutionary Army's contact with their dojo.
- ↑ One Piece Manga and Anime — Vol. 21 Chapter 194 (p. 15-16) and Episode 119.
- ↑ One Piece Manga and Anime — Vol. 1 Chapter 5 (p. 9-15) and Episode 19, Zoro recalls his promise to Kuina to be the world's best swordsman.
- ↑ One Piece Manga and Anime — Vol. 1 Chapter 5 (p. 15) and Episode 19, Zoro's childhood.
- ↑ One Piece Manga and Anime — Vol. 1 Chapter 8 (p. 2) and Episode 4, Zoro tells Luffy his backstory.
- ↑ One Piece Manga and Anime — Vol. 5 Chapter 42 (p. 19) and Episode 20, Zoro learns of Mihawk and of his status as the world's greatest swordsman.
- ↑ 27.0 27.1 One Piece Manga and Anime — Vol. 21 Chapter 190 (p. 7-8) and Episode 116, Zoro talks to Mr. 1.
- ↑ 28.0 28.1 One Piece Manga and Anime — Vol. 12 Chapter 107 (p. 13) and Episode 64, Zoro reveals himself to know Baroque Works.
- ↑ One Piece Manga and Anime — Vol. 1 Chapter 3 (p. 19) and Episode 2, Zoro's reason for capture is revealed by Rika.
- ↑ One Piece Manga and Anime — Vol. 1 Chapter 6 (p. 6) and Episode 3, Zoro initially preferred to keep his good reputation in Marines' eyes.
- ↑ One Piece Manga and Anime — Vol. 1 Chapter 3 (p. 6-21) and Episode 2, Zoro's reason for capture is revealed by Rika.
- ↑ One Piece Manga and Anime — Vol. 1 Chapter 4 (p. 5-7, 18-19) and Episode 2, Luffy promises Zoro to join him if he returns his swords to him.
- ↑ One Piece Manga and Anime — Vol. 1 Chapter 5 (p. 3-8, 16-19) and Episode 2, Zoro and Koby are saved by Luffy's arrival before the former agrees to join Luffy's crew.
- ↑ One Piece Manga and Anime — Vol. 1 Chapter 6 (p. 1-23) and Episode 3, Zoro finishes Morgan for Luffy.
- ↑ One Piece Manga and Anime — Vol. 1 Chapter 7 (p. 2-20) and Episode 3, Zoro leaves the island with Luffy.
- ↑ One Piece Manga and Anime — Vol. 1 Chapter 8 and Episode 4.
- ↑ One Piece Manga and Anime — Vol. 2 Chapter 9 and Episode 4.
- ↑ One Piece Manga and Anime — Vol. 2 Chapter 10 and Episode 5.
- ↑ One Piece Manga and Anime — Vol. 2 Chapter 11 and Episodes 5–6.
- ↑ One Piece Manga and Anime — Vol. 2 Chapter 12 and Episode 6.
- ↑ One Piece Manga and Anime — Vol. 2 Chapter 14 and Episode 6.
- ↑ One Piece Manga and Anime — Vol. 2 Chapter 15 and Episode 7.
- ↑ One Piece Manga and Anime — Vol. 2 Chapter 17 and Episode 7.
- ↑ One Piece Manga and Anime — Vol. 3 Chapter 21 and Episode 8.
- ↑ One Piece Manga and Anime — Vol. 3 Chapter 22 and Episode 18.
- ↑ One Piece Manga and Anime — Vol. 3 Chapter 23 and Episode 9.
- ↑ One Piece Manga and Anime — Vol. 3 Chapter 24 and Episode 10.
- ↑ One Piece Manga and Anime — Vol. 3 Chapter 25 and Episode 10.
- ↑ One Piece Manga and Anime — Vol. 3 Chapter 26 and Episode 11.
- ↑ One Piece Manga and Anime — Vol. 4 Chapter 27 and Episode 11.
- ↑ One Piece Manga and Anime — Vol. 4 Chapter 28 and Episode 12.
- ↑ One Piece Manga and Anime — Vol. 4 Chapter 29 and Episode 12.
- ↑ One Piece Manga and Anime — Vol. 4 Chapter 30 and Episode 12.
- ↑ One Piece Manga and Anime — Vol. 4 Chapter 31 and Episode 12.
- ↑ One Piece Manga and Anime — Vol. 4 Chapter 32 and Episode 12.
- ↑ One Piece Manga and Anime — Vol. 4 Chapter 33 and Episode 14.
- ↑ One Piece Manga and Anime — Vol. 4 Chapter 34 and Episode 14.
- ↑ One Piece Manga and Anime — Vol. 4 Chapter 35 and Episode 15.
- ↑ One Piece Manga and Anime — Vol. 5 Chapter 36 and Episode 15.
- ↑ One Piece Manga and Anime — Vol. 5 Chapter 38 and Episode 16.
- ↑ One Piece Manga and Anime — Vol. 5 Chapter 39 and Episodes 16–17.
- ↑ One Piece Manga and Anime — Vol. 5 Chapters 40–41 and Episode 17.
- ↑ One Piece Manga and Anime — Vol. 5 Chapter 42 and Episodes 18–20.
- ↑ One Piece Manga and Anime — Vol. 5 Chapter 43 and Episode 20.
- ↑ One Piece Manga and Anime — Vol. 5 Chapter 44 and Episode 21.
- ↑ One Piece Manga and Anime — Vol. 6 Chapter 46 and Episode 22.
- ↑ One Piece Manga and Anime — Vol. 6 Chapter 47 and Episode 22.
- ↑ One Piece Manga and Anime — Vol. 6 Chapter 48 and Episode 23.
- ↑ One Piece Manga and Anime — Vol. 6 Chapter 49 and Episode 23.
- ↑ One Piece Manga and Anime — Vol. 6 Chapter 50 and Episode 24.
- ↑ One Piece Manga and Anime — Vol. 6 Chapter 51 and Episode 24.
- ↑ One Piece Manga and Anime — Vol. 6 Chapter 52 and Episode 24.
- ↑ One Piece Manga and Anime — Vol. 8 Chapter 70 and Episodes 31–32.
- ↑ One Piece Manga and Anime — Vol. 8 Chapter 71 and Episodes 31–32.
- ↑ One Piece Manga and Anime — Vol. 9 Chapter 72 and Episode 32.
- ↑ One Piece Manga and Anime — Vol. 9 Chapter 73 and Episode 33.
- ↑ One Piece Manga and Anime — Vol. 9 Chapter 74 and Episode 33.
- ↑ One Piece Manga and Anime — Vol. 9 Chapter 75 and Episodes 33–34.
- ↑ One Piece Manga and Anime — Vol. 9 Chapter 76 and Episode 34.
- ↑ One Piece Manga and Anime — Vol. 9 Chapters 77–79 and Episodes 34–36.
- ↑ One Piece Manga and Anime — Vol. 9 Chapter 80 and Episode 36.
- ↑ One Piece Manga and Anime — Vol. 9 Chapter 81 and Episode 37.
- ↑ One Piece Manga and Anime — Vol. 10 Chapter 82 and Episode 38.
- ↑ One Piece Manga and Anime — Vol. 10 Chapter 83 and Episode 38.
- ↑ One Piece Manga and Anime — Vol. 10 Chapter 84 and Episode 39.
- ↑ One Piece Manga and Anime — Vol. 10 Chapter 85 and Episode 39.
- ↑ One Piece Manga and Anime — Vol. 10 Chapter 86 and Episodes 39–40.
- ↑ One Piece Manga and Anime — Vol. 10 Chapter 87 and Episode 40.
- ↑ One Piece Manga and Anime — Vol. 10 Chapter 88 and Episodes 40–41.
- ↑ One Piece Manga and Anime — Vol. 10 Chapter 89 and Episode 41.
- ↑ One Piece Manga and Anime — Vol. 11 Chapter 94 and Episode 43.
- ↑ One Piece Manga and Anime — Vol. 11 Chapter 95 and Episode 44.
- ↑ One Piece Manga and Anime — Vol. 11 Chapter 96 and Episode 45.
- ↑ One Piece Manga and Anime — Vol. 11 Chapter 96 and Episode 48.
- ↑ One Piece Manga and Anime — Vol. 11 Chapter 97 and Episodes 48–49.
- ↑ One Piece Manga and Anime — Vol. 11 Chapter 98 and Episode 52.
- ↑ One Piece Manga and Anime — Vol. 11 Chapter 99 and Episode 52.
- ↑ One Piece Manga and Anime — Vol. 12 Chapter 100 and Episode 53.
- ↑ One Piece Manga and Anime — Vol. 12 Chapter 101 and Episode 61.
- ↑ One Piece Manga and Anime — Vol. 12 Chapter 102 and Episode 62.
- ↑ One Piece Manga and Anime — Vol. 12 Chapter 103 and Episode 62.
- ↑ One Piece Manga and Anime — Vol. 12 Chapter 104 and Episode 63.
- ↑ One Piece Manga and Anime — Vol. 12 Chapter 105 and Episode 63.
- ↑ One Piece Manga and Anime — Vol. 12 Chapter 106 (p. 6-11, 15, 18) and Episode 64, Zoro expresses suspicion toward the Baroque Works agents and arrive at Whisky Peak with the rest of the crew.
- ↑ One Piece Manga and Anime — Vol. 12 Chapter 107 (p. 4, 7, 12-18) and Episodes 64–65, Zoro confronts the bounty hunters at Whisky Peak.
- ↑ One Piece Manga and Anime — Vol. 12 Chapter 108 (p. 3-19) and Episode 65, Zoro defeats a majority of the bounty hunters.
- ↑ One Piece Manga and Anime — Vol. 13 Chapter 109 (p. 3-19) and Episode 65, Zoro defeats the remaining Baroque Works agents.
- ↑ One Piece Manga and Anime — Vol. 13 Chapter 110 (p. 6-7, 12, 15, 18) and Episodes 65–66, Zoro moves Luffy out of the combat zone and is asked to protect Vivi by Igaram.
- ↑ One Piece Manga and Anime — Vol. 13 Chapter 111 (p. 3-7, 13-14, 17-18) and Episode 66, Zoro saves Vivi from Mr. 5 and Miss Valentine.
- ↑ One Piece Manga and Anime — Vol. 13 Chapter 112 (p. 2-19) and Episode 66, Zoro begins fighting Luffy in earnest, and defeats Mr. 5 and Miss Valentine alongside him.
- ↑ One Piece Manga and Anime — Vol. 13 Chapter 113 (p. 2-19) and Episode 67, Zoro properly explains the situation to Luffy and prepares to leave Whisky Peak with the other Straw Hats.
- ↑ One Piece Manga and Anime — Vol. 13 Chapter 114 (p. 3-19) and Episode 67, Zoro, Vivi, and the rest of the Straw Hats leave Whisky Peak.
- ↑ One Piece Manga and Anime — Vol. 13 Chapter 115 and Episode 70.
- ↑ One Piece Manga and Anime — Vol. 13 Chapter 117 and Episode 72.
- ↑ One Piece Manga and Anime — Vol. 14 Chapter 120 and Episode 73.
- ↑ One Piece Manga and Anime — Vol. 14 Chapter 122 and Episode 74.
- ↑ One Piece Manga and Anime — Vol. 14 Chapter 123 and Episode 75.
- ↑ One Piece Manga and Anime — Vol. 14 Chapter 124 and Episode 75.
- ↑ One Piece Manga and Anime — Vol. 14 Chapter 125 and Episode 76.
- ↑ One Piece Manga and Anime — Vol. 14 Chapter 126 and Episode 76.
- ↑ One Piece Manga and Anime — Vol. 15 Chapter 128 and Episode 77.
- ↑ One Piece Manga and Anime — Vol. 15 Chapter 130 and Episode 79.
- ↑ One Piece Manga and Anime — Vol. 15 Chapter 131 and Episode 79.
- ↑ One Piece Manga and Anime — Vol. 15 Chapter 132 and Episodes 79–80.
- ↑ One Piece Manga and Anime — Vol. 15 Chapter 133 and Episode 80.
- ↑ One Piece Manga and Anime — Vol. 16 Chapter 139 and Episode 83.
- ↑ One Piece Manga and Anime — Vol. 17 Chapter 147 and Episode 88.
- ↑ One Piece Manga and Anime — Vol. 17 Chapter 148 and Episode 88.
- ↑ One Piece Manga and Anime — Vol. 17 Chapters 152–153 and Episodes 89–90.
- ↑ One Piece Manga and Anime — Vol. 17 Chapter 154 and Episode 91.
- ↑ One Piece Manga and Anime — Vol. 17–19 Chapters 155–168 and Episodes 92–105.
- ↑ One Piece Manga and Anime — Vol. 19–20 Chapters 169–177 and Episodes 106–110.
- ↑ One Piece Manga and Anime — Vol. 20–23 Chapters 178–208 and Episodes 110–125.
- ↑ One Piece Manga and Anime — Vol. 23–24 Chapters 209–218 and Episodes 126–144.
- ↑ One Piece Manga and Anime — Vol. 34 Chapter 327 and Episode 232.
- ↑ One Piece Manga and Anime — Vol. 37 Chapter 349 (p. 14-15) and Episode 246, Zoro tries to attack Lucci but blocks his attack with Tekkai and kicks him with brute force off the Galley-La Headquarters.
- ↑ One Piece Manga and Anime — Vol. 38 Chapter 360 (p. 19) and Episode 252, Zoro is seen stuck in a chimney.
- ↑ One Piece Manga and Anime — Vol. 38 Chapter 363 (p. 10-11, 15-17) and Episode 254, Zoro is given his Kitetsu back by Chopper and he destroys the chimney he was stuck in.
- ↑ One Piece Manga and Anime — Vol. 45 Chapter 435 and Episode 318, Zoro is thrown out for trying to buy swords with no money.
- ↑ One Piece Manga and Anime — Vol. 45 Chapter 438 and Episode 323, Zoro on Usopp.
- ↑ One Piece Manga and Anime — Vol. 46 Chapter 442 and Episode 337, Brook is introduced.
- ↑ One Piece Manga and Anime — Vol. 46 Chapter 443 and Episode 338, Brook joins the Straw Hats for dinner and explains his past.
- ↑ One Piece Manga and Anime — Vol. 46 Chapter 444 and Episode 339, Luffy, Zoro, Sanji, Robin, and Franky are kept from going ashore by Absalom.
- ↑ One Piece Manga and Anime — Vol. 46 Chapter 446 and Episode 341, Luffy, Zoro, Sanji, Robin, and Franky encounter the Cerberus.
- ↑ One Piece Manga and Anime — Vol. 46 Chapter 448 and Episode 342, Luffy and the Straw Hats with him defeat some zombies with a combo.
- ↑ One Piece Manga and Anime — Vol. 48 Chapter 467 and Episode 362, Zoro defeats Ryuma.
- ↑ One Piece Manga and Anime — Vol. 51 Chapter 502 and Episode 396, Luffy punches Saint Charlos in the face.
- ↑ One Piece Manga and Anime — Vol. 52 Chapter 503 and Episode 397, The Straw Hats finally meet Silvers Rayleigh.
- ↑ One Piece Manga and Anime — Vol. 52 Chapter 505 and Episode 399, The Straw Hats fight the Marines.
- ↑ One Piece Manga and Anime — Vol. 52 Chapter 506 and Episode 400, Rayleigh reveals the real reason of how Roger was caught.
- ↑ One Piece Manga and Anime — Vol. 52 Chapters 507–508 and Episode 401, A Pacifista ambushes the Straw Hats.
- ↑ One Piece Manga and Anime — Vol. 52 Chapter 509 and Episode 402, The Straw Hats continue to fight the Bartholomew Kuma clone.
- ↑ One Piece Manga and Anime — Vol. 52 Chapter 510 and Episode 403, The Straw Hats defeat the Bartholomew Kuma clone.
- ↑ One Piece Manga and Anime — Vol. 52 Chapter 511 and Episodes 403–404, The Straw Hats face off against Sentomaru, a Pacifista, and Kizaru.
- ↑ One Piece Manga and Anime — Vol. 52 Chapter 512 and Episode 404, Zoro is teleported to an unknown location.
- ↑ One Piece Manga and Anime — Vol. 54 Chapter 524 (p. 10-12) and Episode 421.
- ↑ One Piece Manga — Vol. 57 Chapters 559 and 560, cover story: Straw Hat's Separation Serial #8 Vol. 1-2.
| |||||||||||||
| |||||||||||||
| |||||||||||||
| |||||||||||
| |||||||||||
| |||||||||||
| |||||||||
| |||||||||
| |||||||||||
| |||||||||||
| |||||||||||
| |||||||||
| |||||||||
| |||||||||
| |||||||||
| |||||||||
| |||||||||
| |||||||||
| |||||||||||||
| |||||||||||||
| |||||||||||||
| |||||||||||||
| |||||||||||||
| |||||||||||||
| |||||||
| |||||||
| |||||||
| |||||||
| |||||||||||||||||||||||||||||||||||||||||||
| |||||||||||||||||||||||||||||||||||||||||||
East Blue Inhabitants | |||||||||||||||||||||||||||||
|---|---|---|---|---|---|---|---|---|---|---|---|---|---|---|---|---|---|---|---|---|---|---|---|---|---|---|---|---|---|
| |||||||||||||||||||||||||||||
| |||||||||||||||||||||||||||||
| |||||||||||||||||||||||||||||
Individuals with Bounties | |||||||||||||||||
|---|---|---|---|---|---|---|---|---|---|---|---|---|---|---|---|---|---|
| |||||||||||||||||
| |||||||||||||||||
| |||||||||||||||||
| |||||||||||||||||
| |||||||||||||||||
| |||||||||||||||||||||||
| |||||||||||
| |||||||||||
| |||||||||||
| |||||||
| |||||||
| |||||||
| |||||||||||||
| |||||||||||
| |||||||||||
| |||||||||||
| |||||||||||||||||
| |||||||||||||||||
| |||||||||||||||||
| |||||||