
|
Ahoy! This here is the 1st Featured Article.
"Monkey D. Luffy" has been featured, meaning it was chosen as an article of interest.
|
Past[]
| This is an empty section. Please help the wiki by adding information to it. |
East Blue Saga[]
One Piece - Defeat Him! The Pirate Ganzack[]
Adrift in a small dinghy on a sunny, windless day, Luffy, Nami, and Zoro sit paralyzed with hunger. As Nami berates the two men for squandering the month's provisions, a Plesiosaur suddenly attacks, snapping their dinghy in half. Overjoyed at this new source of meat, Luffy and Zoro prepare to counterattack, but are quickly overpowered and swept away in the tide; while a panicking Luffy drags Zoro deeper and deeper down, the monster carries Nami off.
Some time later, a half-drowned Luffy washes up on an island. Here two pirates, Alto and Chico, prepare to loot his body, only to be challenged by Medaka, a small, heavily armored girl who demands they return her father. Though unimpressed, the pirates are annoyed enough to give chase, and inadvertently trample Luffy enough times to force all the water from his lungs. Awakening in a rage, Luffy beats up the two pirates senseless, and promptly collapses from hunger. An awed Medaka brings Luffy and a hastily found Zoro into the local village, where an elder named Skid offers them food. While Luffy and Zoro eat (and speculate on Nami's fate), Skid warns them of Ganzack, a vicious pirate whose crew has enslaved the whole island. While the women, children, and elders have been left in the village as hostages, all the able-bodied men - including Medaka's father Herring - have been put to work in the Devil's Tower, a massive structure on the far side of the island.
When the tower starts shaking, it spills Luffy's meal. When he asks for more, Medaka sadly explains that the village has given the last of its food to Luffy and Zoro; only the tower, she adds, might contain more. On hearing this, Luffy immediately rushes off to the tower with Medaka, an exasperated Zoro following in their wake. As they reach the tower, the three of them discover that the Ganzack Pirates are forcing the villagers to make weapons, and that the shaking was coming from artillery fire. As Medaka cries out to her father as soon as she finds him, alerting dozens of hostile pirates, and unfazed Luffy and Zoro eagerly meet the challenge, until a masked figure suddenly swoops in and kidnaps Medaka. As the two prepare two give chase, Ganzack's men begin to attack, leaving Zoro to fend them all off while Luffy gets Medaka back. Luffy chases Medaka's kidnapper out of the tower and down to the shore, only for the kidnapper to reveal herself as Nami. At first puzzled, Luffy is shocked when the Plesiosaur reemerges with none other than Ganzack himself riding it.
Upset about everything that is happening, Luffy attacks the pair and proves an even match for both Ganzack and the Plesiosaur, but eventually falls when Ganzack's armor sprays a powerful foam that binds his entire body. Shortly after, Ganzack's men force Zoro's surrender by threatening to fire on the slaves; as Zoro is taken away in chains, Herring quietly reassures his fellow slaves, and shows that he has smuggled some dynamite out of the pirates' munitions.
Soon, Luffy, Zoro, and Medaka find themselves shackled to a wall, forced to watch the Ganzack Pirates - and a disinterested Nami - feast and party. When Luffy continues to defy him, an annoyed Ganzack seizes Luffy's hat and stomps on it. Enraged, Luffy shouts that the hat is a treasure entrusted to him by Shanks, and - to Medaka's shock - proudly proclaims himself a pirate. Moments later, an explosion rocks the tower, as Herring leads the other villagers out in open rebellion. While the Ganzack Pirates rush outside to quell the villagers, Nami cheerfully approaches the shackled trio, returns Luffy's hat, and flashes the keys to their shackles; all along, she had meant to double-cross Ganzack. As soon as Medaka is freed, however, she runs off by herself, now considering Luffy and his friends no better than the Ganzack Pirates.
Despite this, however, when Ganzack unsheathes the bladed pincers on his armor and gets ready to kill both Medaka and Herring; Luffy, Zoro, and Nami join the fray. Their arrival inspires the villagers to challenge the Ganzack Pirates anew, spurring Ganzack to reveal his ultimate weapon, which turns out to be the Devil's Tower itself. At his signal, the Plesiosaur tows the tower, along with him and his crew apart from the rest of the island, revealing it to be the main cannon on a massive warship. To the villagers' horror, a single shot from this cannon sinks a good part of the island - and Ganzack means to keep shooting until he sinks it all.
As Luffy and Zoro prepare to engage, Herring desperately tries to hold Medaka back; though touched by her father's concern, Medaka refuses to stay behind, and grabs on as Luffy rockets himself and Zoro onto the ship. Onboard, Zoro engages Ganzack's men, while Luffy confronts Ganzck himself atop the mainmast. Now prepared for the projectiles in Ganzack's armor, Luffy presses his advantage, until Ganzack binds him in a long, powerful chain.
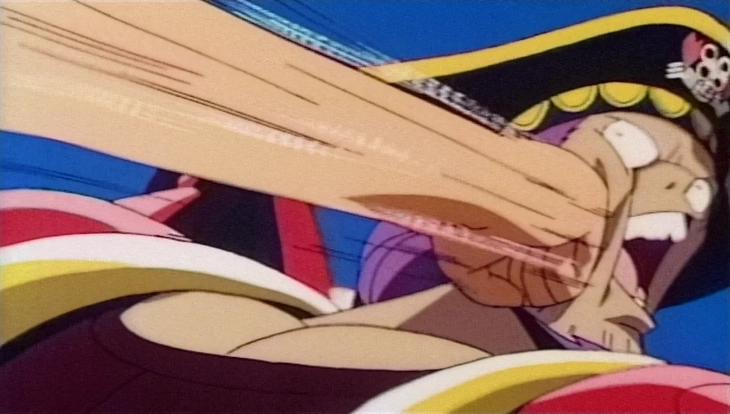

Luffy lands his first successful hit on Ganzack.
Gloating, Ganzack swings his pincers in for a killing blow, only for Medaka to once again block him - and fall, her armor unable to withstand the razor-sharp blades. Shocked by her sacrifice, an enraged Luffy shatters his chains and forces Ganzack into melee, quickly overpowering him and his armor with a Gomu Gomu no Tsuchi. Moments later, Luffy finds himself being applauded by Medaka, who cheerfully reveals that Ganzack had only sliced off the top half of her helmet.
As Zoro, Nami, Herring and the villagers deal with the rest of Ganzack's crew and the Plesiosaur, Luffy prepares to escape with Medaka and the others as they send off a boat filled with dynamite to finish the Plesiosaur and sink the Warship for good. Refusing to admit defeat, Ganzack clambers to his cannon and fires one last shot at the island, all the while proclaiming himself to be the future Pirate King. In response, Luffy scornfully punches him into the sky, on a collision course with his own shell. As Ganzack is swallowed by a huge explosion, Medaka helps Luffy off the sinking warship, and back to the island.
Sometime later, the crew prepare to depart, the grateful villagers having supplied them a new boat and plenty of food. To Luffy's surprise, Medaka runs up with a gift of her own: a life preserver. As she gently teases Luffy about his inability to swim, Nami and Zoro quietly smile at the "thank you" scrawled on the gift's underside.
With Medaka's encouragement, the crew sail off into the sunset, with their hopes aimed high as they head for the Grand Line.[26]
One Piece: The Movie[]
On the Going Merry, while Luffy and Zoro were starving to death, a group of thieves came to steal their treasure supplies. Luffy wrecked their getaway boat, which had a kid who was the hostage of the thieves. Suddenly, a pirate ship led by a large, ferocious, Aztec Indian-like man named Eldoraggo, appeared. The thieves worked for his pirate crew, so, Eldoraggo, using his Devil Fruit ability, while aiming at Luffy, destroyed the thieves' getaway boat. Luffy and the kid fell in the sea, and Zoro jumped in to save them. As a result, Luffy and Zoro were separated from Nami and Usopp.
The kid's name was Tobio, and he wanted to become a pirate like Woonan, the Great Gold Pirate, who, according to the legend, obtained almost one-third of the world's gold and disappeared with it to a remote island. Tobio lived with his grandfather, Ganzo, who owned a floating Oden stand, so Luffy and Zoro went there hastily to eat. There, Luffy and Zoro learned from Tobio that Eldoraggo was determined to find Woonan's loot, too. And he had the treasure map, which had the coordinates of the location of Woonan's treasure in possession. So, Luffy decided he also wanted to meet Woonan. When Luffy and Zoro were about to leave, Gonzo told them that it would cost them for all the Oden they ate. And they so happened not to have any money on them at all. So they were stuck with the bill, and Gonzo tied them in chains.
Then, while Tobio was daydreaming in the soars of the island they believed Woonan disappeared to, a small breeze threw Luffy's hat to him. Then, Tobio argued with his grandfather and ran in the forest with Luffy's hat. As a result, Luffy, while chained with Zoro, ran after Tobio, and when they found him, they were all lost in the forest. Meanwhile, Eldoraggo, who Usopp and Nami as hostages, found Woonan's castle and tried to bring it down so he could find the treasure. Luffy was able to find Eldoraggo and his crew with all the commotion, and while still chained with Zoro, he escaped with Usopp, Nami, and Tobio. Nami managed to steal the treasure map from Eldoraggo, unlocked the chains, and the crew realized where the treasure actually was. They all went to find it, and while climbing a mountain, they found Ganzo, who turned out to be a childhood friend of Woonan's, and realized where the treasure was. Luffy and company eventually found a house at the top of the mountain, but shortly afterwards they were attacked by Eldoraggo and his pirate crew. Luffy fought with Eldoraggo and managed to defeat him by throwing back his own attack.
Finally, with Eldoraggo's pirate crew defeated, Luffy and the others went inside the house, hoping to find Woonan and the treasure in a hidden chamber inside. It turned out it was the resting place of Woonan himself and that he returned all the gold he stole to its rightful owners. Luffy and the Straw Hats bid farewell to Tobio and Gonzo and sailed away to their next adventure.[27]
[]
It's a random day aboard the Going Merry, and Luffy is being yelled at by Nami for urinating in the ocean. While on fishing duty, Luffy catches something big and tries to reel it in, only for it to drag the ship backwards instead of forward. As the ship crashes, the fishing line, as well as the ship ends up caught at a rocky crater with a chest chained to it.
While Luffy is disappointed that he catch anything to eat, the others are more interested in the chest, namely Nami. She opens the chest, only find a skull inside. Usopp picks up the skull and reads the back of it, and finds an engraving about a treasure that can make anyone's dream come true. It also says that it can be located at a place called the Ocean's Navel. Then a large hole opens near the crater they crashed into, so while Usopp, Nami and Sanji prepare to explore it, they put Luffy in charge of the pull crank that will lower them into the hole. Unfortunately for them, Luffy gets distracted with a message in the bottle, and the fall faster into the crater. As Luffy manages to pull the rope in time, the trio reach the surface of the crater.
While the others explore the Ocean's Navel, the Going Merry begins to fall down into the crater, causing Luffy to almost drown, and for Zoro to have to save him. As they are doing this, they meet the one who sent the message in the bottle, Hamu as well as his guardian, Meroie. After being welcomed to their hidden village, they are immediately attacked by a monster, but Zoro manages to stop them with a polearm. Hamu and Meroie give them food, and asked them why the two of them are there, and Luffy explains they fell looking for treasure and that they are pirates. After hearing this, Hamu gets upset and leaves, when Luffy and Zoro asks what was wrong, Meroie explains the village's past and how it was destroyed by the pirate captain Joke.
She asks them if, even though they are pirates, they will help Hamu avenge his mother and protect his village. They reply that they will and decide to go to the mountain. As soon as they reach the end of the village, the monster they encountered before attacks them again. Zoro immediately starts fighting the monster and tells Luffy to go find Nami and Usopp. Meroie stays with Zoro while Hamu runs towards Luffy. As Luffy finally reaches the top of the mountain, he realizes Hamu was following him. Nami and Usopp ask him to help them and Luffy manages to hold the monster off until the Straw Hats leave the cave and Luffy explains to Hamu that if he wants friends, he must show them his strength. Hamu then realizes that they were his friends and he was not alone anymore. Luffy then starts breaking the monster's legs until it dies.
In the room where Joke's body is, Joke is very pleased that his body is coming back and despises his former crew members that are dead in front of him. The Straw Hats and Hamu then arrive, but Luffy is too tired to fight Joke. Nami, Hamu, and Usopp fight him instead but are easily defeated, but Hamu continues to fight back. Despite Joke mocking the boy for fighting back, Hamu continues, saying that he's not alone anymore, as the Straw Hats hold Joke's arms and legs while Hamu finishes him off. Joke laments his defeat, wishing that his dead crew was just as trustworthy, as the "treasure" disappeared after Joke was defeated, causing Nami much grief. When the Straw Hats leave the island, Hamu tells Meroie that he hadn't asked their names, but she states that it doesn't matter since they are just a bunch of pirates, to which Hamu agrees. He looks at the Straw Hats' ship sail away and smiles.[28]
Clockwork Island Adventure[]
Having found a sunny, peaceful island in the middle of their voyage, Luffy and the others relax on a beach, when Luffy finds a toy windmill washed ashore an begins playing with it, to the other's annoyance. Luffy then spots the Going Merry sailing away, but fails to tell the others in time to fully notice that the ship has been stolen, along with all of their possessions.
After renting a crude paddleboat and some clothes from a wedding shop, the Straw Hats try to chase their ship down only to come across a boy floating in the water. After stopping to help, they are suddenly trapped by a giant net, realizing that the boy, Akisu was luring them into a trap to rob them alongside another thief named Borodo. After determining that the Straw Hats had nothing to steal, the pair introduce themselves as the thieves brothers and announce that they plan to steal the legendary Diamond Clock, which is located on Clockwork Island.
After Borodo tells them that the stolen Going Merry was taken to Clockwork Island by the Trump Pirates, Luffy and the others decide to go with the brothers to the island, but are then suddenly attacked by small fleet of ships led by Boo Jack and Honey Queen, members of the Trump Pirates. Despite put up a decent fight against their enemies, a panicking Usopp rows the small boat away, but is stopped by an angry Akisu when his rowing causes a music box belonging to Akisu to fall into the water. After retrieving it, Borodo explains how important that music box is to Akisu. The conversation is cut short when Boo Jack and Honey Queen catch up and bomb the brother's boat, then during the chaos of the bombing the two kidnap Nami, claiming her as the perfect bride for their captain, Bear King.
After salvaging enough parts of the ship, plus a parachute to sail to Clockwork Island, and hearing about Akisu's past, they all land on a barren rock which leads to a massive staircase. This staircase leads to the "true" Clockwork Island, a hill town full of scientists and engineers. The hill is topped by a great castle, which houses the delicate engine keeping the island stable; for seven years, Bear King has commandeered it as his base, Trump Castle, holding the people hostage and using them to build a weapon to help Bear King achieve his dream of becoming the Pirate King, the King Cannon. While rushing through the staircase, going through trap after trap, the group eventually reach the top, but are exhausted in the process. The group stop by the nearby town to change clothes and eat, and end up meeting the chief engineers of the island, who explain the island's current situation to them. Despite them telling the group to leave, Luffy and the others head to the castle by parasail, but are attacked by the Trump Pirates again and are separated from Sanji.
As they crash land into the castle, the others are met with hundred's of the Trump Pirates' foot-soldiers, but Luffy and Zoro quickly make short work of them. When the group is attacked by another member of the Trump Pirates, Skunk One, Usopp decides to hurl himself towards him so the others can continue moving forward inside the castle. As they make their way through an upper floor of the castle, Akisu is stopped by a foot-soldier and knocked out. Seconds later, the floor springs a pressure-trap that threatens to crush them against the ceiling. Luffy and Zoro desperately try to hold the trap back, only for Borodo to slip away, taking himself and Akisu to safety. As the Straw Hats look on in shock, Borodo coldly deems them unfit to fight the Trump Pirates and reveals he had stolen their ship and planned to sail it to Clockwork Island so they would fight the Trump Pirates and hopefully save Akisu's hometown, but now has decided to defeat them on his own, leaving Luffy stuck holding the ceiling, while Zoro protects him from another Trump Pirate member, Pin Joker. Despite protecting Luffy from a grudge holding Pin Joker, Zoro ends up being taken as well, leaving Luffy alone to deal with the ceiling trap.
A while later, Akisu wakes up asking Luffy what happened and where Borodo was, and after Luffy explains what happened, Akisu rushes to help Borodo. While Borodo and later Akisu is being beaten by Bear King for their actions, the toy windmill from before fails down to the floor Luffy is on and breaks in front of his feet. Reminded of the Thief Brothers' integrity, Luffy finds the resolve to shove straight through the ceiling and every floor above, and after reaching the top, he randomly grabs a stick of dynamite and "plays" with it, causing everyone to freak out and make Luffy toss it away, causing an explosion, which accidentally frees the rest of the Straw Hats.
With the freed Straw Hats quickly launching a counter offensive against the members of the Trump Pirates and defeating them all, Luffy fights Bear King. Luffy's battle against Bear King, however, proves far more desperate; having eaten the Kachi Kachi no Mi, Bear King can not only resist blows with a rock-hard constitution, but generate a searing heat in his fists that easily bypasses Luffy's rubber defenses. Realizing Luffy's situation, Borodo mounts the King Cannon and turns it on Bear King, unleashing a corkscrewing shell of unmatched size and power. Unfortunately, Bear King handily dodges the shell and retaliates with a pistol, forcing Akisu to leap in the way and shield Borodo with his own body. After seeing Akisu sacrifice himself, Bear King taunts the boy's actions, which quickly enrages Luffy; who fights against Bear King even harder than before and grabs him despite his hot skin, and tosses him into the ground, only for him to reach the King Cannon and aim at Luffy. Luffy, however, uses his rubber limbs to catch the shell in mid-flight and improvises a new attack - the Gomu Gomu no Screw - that drives the shell back into Bear King. The impact sends both Bear King and the King Cannon through the floors below, all the way into the castle's engine chamber, where an explosion consumes them - along with Clockwork Island's only means of survival. As the Island falls apart, and the hill town evacuates, the Straw Hats make to the Going Merry and escape using a extra canvas as a parachute to land back into the water.
With the island destroyed, the islanders pledge to seize the future that the Thief Brothers and the Straw Hats staked their lives for, and build a new homeland elsewhere on the sea. Hearing this, and seeing an alive Akisu and his mother tearfully embrace, the Straw Hats and Borodo quietly sail their separate ways; despite the Straw Hats' questions, Borodo insists - through his own tears - that he and Akisu must separate; as they belong to worlds apart. By without any warning, Akisu boards Borodo's boat and tells him that he is now a man of the sea, and despite finding his family he is still going to travel with his brother. Happy with the brother's reunion, the Straw Hats happily sail away, off to their next adventure.[29]
Loguetown Arc[]
| This is an empty section. Please help the wiki by adding information to it. |
Warship Island Arc[]
Back on the Going Merry, Luffy asks Nami if they reached the Grand Line yet, and she tells him no. Usopp then spots a flock of birds off their starboard side and Luffy sees something in the water and stretches his hand out to grab what he thinks will be a fish. The crew are all surprised when he pulls in a girl instead and accidentally knocks Zoro off the edge of the boat. The girl is unconscious but wakes up when she smells Sanji's cooking. After learning that she is on a pirate ship, she freaks out and refuses to eat any food given to her.[30]
Later when she decides to sneak into the kitchen, she witnesses Luffy getting caught in a giant mousetrap set by Sanji to prevent people from stealing from the kitchen. As the rest of the crew hear the commotion, she tries to steal Luffy's food, only for Nami to tell her that they’re not evil and that she can have the food. The next morning, while Luffy is raising the anchor, the girl makes breakfast for everyone, but she makes it too spicy by accident. She introduces herself as Apis and says that she's from Warship Island. When asked why the marines want her, she refuses to speak, and later a marine fleet opens fire on the Going Merry. As they manage to get away the Marines stop following, and when the Merry finally stops moving, Nami realizes why; as she screams that they’ve entered the Calm Belt.
After realizing this, the Merry ends up atop the head of a Sea King and the group become surrounded by sea kings. As the ship gets attacked by the sea kings, Apis falls off the ship but is rescued by Luffy before she is swallowed. She notices that Luffy's arm stretched when he rescued her, and when she sees the Sea King's nose and asks Luffy to swing her back down. As she is going down, Apis grabs hold of the Sea King's nostril hair and pulls it out. Luffy finally pulls her back to the ship, and the others realize that she pulled out the Sea King's nostril hair and are panicking because the Sea King is about to sneeze, causing the ship to fall off its head. The force of the sneeze launches the ship across the Calm Belt past the Sea Kings and back to where they started outside the Calm Belt.
After making it back out of the Calm Belt, the group start sailing to Warship Island, an Island that appears to look like a massive Warship in the distance. As they reach the port, they are met with the locals, armed with weapons because they think they are about to be invaded by pirates, but Apis goes down and explains the situation to everyone. After doing so, her grandfather, Bokuden shows up, and tells Apis to come home, and invites the Straw Hats for dinner. While waiting, the group asks Bokuden why the marines are after Apis, to which he asks Apis the same question, only for her to refuse to answer. Bokuden then tells them about the island's old legend about the Lost Island, the millennial dragons, a substance called Dragonite, and the Elixir of Immortality.
Later in the night, a sleepy Luffy notices Apis grabbing some food and falls asleep in the kitchen before asking her where she was going. Later Nami finds him and notices that Apis accidentally left a trail, so the two follow it, leading them to a cave, where they hear Apis talking to someone called Grandpa Ryu. As they look closer, Nami and Luffy see that Grandpa Ryu is actually a dragon. Luffy is excited to see a dragon and asks him where he comes from, but despite no answer, Luffy seems to understand the dragon. Apis tells Luffy that Ryu is telling her that Luffy can be his friend, and Apis explains that she is able to read Ryu's mind and asks how Luffy is able to understand him to which Luffy replies that he doesn't know, he just can. Nami asks her how she can understand Ryu and Apis tells her that she ate the Whisper Whisper Fruit and can read the mind of any animal. She tells them how she met Ryu, and tells them that she wants to help Ryu get back to Lost Island, which will reappear any day now, and that the Marines want her pendant to get to Lost Island, find the Dragonite, and create the Elixir of Immortality. Despite Nami's worries about getting to Lost Island, Luffy says he wants to help Ryu get home.[31]
Now that the crew knows the reason why the Marines want Apis, they prepare to get her and Ryu off Warship Island, unfortunately the Marines have the Island surrounded, and a mercenary by the name of Eric has come to take Apis and Ryu both, under the orders of the Marine Nelson Royale of the 8th Branch. Everyone splits into groups, Usopp and Zoro move the ship into position, Nami and Apis get Ryu onto a cart, and Luffy and Sanji fight off the Marines. Despite all this, the group still have trouble shaking off Eric, as he hunts them with his Kama Kama no Mi, but manage to lose him in a mirage.[32]
After going into the mirage, the crew spot an island hidden in the mirage and go towards it. After reaching the island, Ryu is still unsure if the island they are on is the Lost Island, so they go to the top of the mountain to find the Dragon's nest. Instead, they find a building with a dragon emblem. Apis sees a hole shaped like her pendant, thinking it might be the key, but they end up falling down into a underground temple. After examining the temple ceiling and its paintings, Nami comes to the conclusion that the Lost Island is actually hidden beneath Warship Island, and a sleeping Ryu wakes up and confirms her theory after finally remembering where the island is. Eric appears after overhearing their conversation, Luffy and the others escape while Zoro fights him off. Once the crew gets Ryu's cart back to the Going Merry, Luffy stretches his arm and grabs Zoro back to the ship.[33]
Even after the crew escape the island and make it the Lost Islands' coordinates, Nelson's fleet manage to blockade them, with Eric and lieutenant Hardy's ship closing in.[34] As Eric comes and takes Ryu and Apis, an angry Ryu knocks Eric into the water after knocking Apis back. As Ryu starts to finally fly, Nelson has his ship fire several cannonballs at Ryu, to everyone horror. As Ryu falls to the water, he asks Luffy to keep Apis safe.[35] As this happens, Ryu lets out one final roar, leading to the Lost Island rising from the ocean, and multiple dragons flying from it. In addition to the roar, Luffy hears Ryu's final message to Apis, and promises to tell her, and then stretches towards a dragon flying near Nelson's ship and attacks the ship with a Gum Gum Battle Axe. Luffy's leg is able to break down the ship into two and all marines retreat running, scared by Luffy's powers. After landing on the island, Luffy tells Apis that Ryu died making his dream come true, but Apis cries, saying that Ryu was a liar, that he promised her once he could get to the nest, he will get better. Luffy tells Apis what Ryu's final message was; that sennenryus are reborn in the nest. Seconds later, a baby sennenryu hatches from an egg, with the baby supposedly being a reborn Ryu. The baby screeches at Apis, and she cries happily agreeing with what it's telling her.[36]
Unfortunately, both Nelson and Eric show up, however an angry Eric slashes Nelson and proposes a deal with the straw hats. He states that he wants to split the dragonite and the immortality with them, but a critical Nami points out that the fossilized sennenryus that make up the dragonite couldn't possibly be used to make the Elixir. That's when Eric states that the alive sennenryus could, which upsets Apis, who runs towards him out of anger. As Eric tries to attack her, Usopp and Zoro protect her, and Luffy tells them all to stop, and that he’ll be the one to beat him, because he promised Ryu he would. Despite Eric landing multiple slashes on him, Luffy takes them all and grabs Eric's arms, landing a blow of his own on him. After this, Luffy finishes him off with a Gum Gum Bazooka, which blows Eric away.
As the Straw Hats get ready to leave Warship Island again, they are met by Apis and Bokuden. Luffy asks Apis if she wants to come with them, to which she replies that she would like to but she will stay in the village to protect the Dragon's Nest. The Straw Hats set sail and say goodbye. Then Usopp asks the rest of the crew if Apis will be fine and Sanji, Luffy and Zoro all say that she will be okay. As the Straw Hats finally reach the entrance to the Grand Line, they have a rough time going through Reverse Mountain, which is made even worse by Eric showing up and telling them that any false move and he will tear the ship apart. Nami warns him that there is Dragonite besides him, and he falls for it and she kicks his leg, throwing him to the current. With Eric officially gone, the crew celebrate as they enter the Grand Line.[37]
Arabasta Saga[]
Chopper's Kingdom on the Island of Strange Animals[]
Following a lead from an old treasure map, the Straw Hats set sail for Crown Island, with everyone ready for a new adventure; except Chopper, who worries over every possible danger. While the others tease Chopper, the Going Merry suddenly begins shaking. Rushing above-deck, the Straw Hats find the sea erupting with dozens of massive geysers, one of which directly strikes the Merry and launches it high into the air. In midair, the crew can see the entirety of the island, and the crown-like ring of steam its surrounding geysers produce, but then the ship starts to fall and crash land on the island, accidentally Knocking Chopper off the ship in the process.
As Chopper vanishes in the forest, the others land in the far-off shore, with several bizarre animals surrounding them, including a Bald Parrot. The crew was taken aback when the Parrot started speaking english, but then listened as he explained that he was the elder of the island, and the island was filled with animals as intelligent as him. He then explains that for years, the creatures of the island lived peacefully under the rule of the Kirin Lion, but their ruler passed away and now the kingdom needs a new ruler, one that falls in line an ancient prophecy.
After listening to the story, the crew hears a celebration happening in the mountains, and they go to investigate, with Usopp giving everyone animal themed disguises to blend in. On the way though, the celebrating is cut short by the arrival of the islands natural predators, the Horn Eaters , a herd of armored beasts. As everyone runs away, Luffy gets targeted by the beasts due to his costume having fake horns. Panicked, Luffy snaps them off, but throws them straight ahead, leading the Horn-Eaters to trample him anyways, with the others watching annoyed.
Later, the Straw Hats stumble across a cliff-side camp where the Horn-Eaters have been trapping and trampling scores of horned animals. They soon come to learn that the beasts are being controlled by a man named Battler, who's collecting horns in an attempt to find a treasure on the island said to have power that could shake worlds. Realizing that he told the Straw Hats too much, he controls the Horn Eaters with a special hypnotic violin and orders them to attack, unfortunately Luffy was also effected by the hypnotic music and goes on a rampage knocking himself and the crew over a cliff and into a crocodile filled river. Once Luffy is out of range, he grabs everyone and breaks their fall with his rubber body.
The straw hats then see dozens of dehorned animals along the riverbanks. Realizing how much damage Battler has already done, the crew start to worry more about Chopper, while doing that they notice the Bald Parrot from earlier flying above. They ask for his help, and he agrees to take them to the mountain to meet the new king of the beasts, unaware that they are being followed by Battler and his men, Heaby and Hotdog. Once they reach the top of the mountain, however, they are surprised to learn that the new king is Chopper, and while Chopper is happy to see them, Mobambi; the only human resident of the island, and a talking bird named Karasuke, who thinks they are invaders, and asks Chopper to fight them. Chopper tells the animals that the Straw Hats are safe, and so he leads the Straw Hats over to a great feast so they can eat together. Mobambi demands what's so great about the Straw Hats, and when the animals hear that they are pirates and when Luffy asked for meat, the animals flee in terror thinking Luffy is going to eat them. Nami asks Karasuke about the treasure of Crown Island, but Usopp says that they should just grab Chopper and leave.
Then, a large blast is heard from the distance so the straw hats and the animals go to see what is going on. They see Battler and his men down below, and he states that the power he is looking for is in the horns of the King of the Beasts. Battler demands that they tell him where the king is and starts playing his violin, so the Horn Eaters start charging. An angry Chopper leaps down and lands in front of Battler declaring himself as the King. Battler stops playing the violin, unconvinced by Chopper's words. Chopper tells him to stop attacking the animals and to call off the Horn Eaters, but Battler says he will only if Chopper beats him. Luffy tries to help, butt is unable to leave the entrance, due to eating to much and becoming fat, which ended up blocking Zoro and Sanji as well.
As Chopper and the others try to divert the Horn Eaters away, Sanji, Zoro, and Luffy arrive, and Zoro and Sanji run off to go help Chopper. Luffy says that Mobambi should go help too, but Mobambi says that he is not strong enough, remembering that he was helpless when his father was killed by pirates. He and Usopp tell him that it doesn't matter if he's weak or strong, and that if he wants to help his friends he should. Luffy, Usopp, and Nami then go off after Chopper. As they catch up, Battler and his men on hot on their trail. Mobambi turns to the strange animals and suggests that if they all fought, they might be able to help out Chopper. The green bird says that they will pick a new King amongst themselves instead. Luffy, Nami, and Usopp continue pursuing Chopper, but end up running across fragile stone columns which collapse under their feet. As Battler and his men reach Chopper, Chopper tries to fight back, but Sanji and Zoro arrive, leading Chopper to start running. As Battler catches up to Chopper and grabs him by the horns, Luffy gets up and sends Battler flying. Battler retaliates by playing his violin again, hypnotizing the Horn Eaters and Luffy again, by Usopp and Nami snap Luffy out of it, only for the Horn Eaters to charge, and send Luffy flying this time.
Later Luffy looks for Chopper, wondering what happened, but arrives in time to see Chopper about to be finished off by Battler. As he is about to end it; Mobambi arrives, holding up the golden horn of the Kirin Lion. Mobambi runs, luring Battler away. Mobambi then leaps across a chasm with a lava pit at the bottom, and him and Battler plummet into it. Karasuke dives down and catches Mobambi, but Battler fires his chain and wraps it around Karasuke's leg. Karasuke cannot support the weight, and all three of them fall toward the lava below. Luffy stretches his arms down the chasm, grabbing onto Karasuke and lifting both of him and Mobambi out of the chasm, unfortunately Battler got the golden horn and began eating it, turning into a giant golden beast with fiery horns on his head.
As Battler turns into a beast, Luffy leaps with a Gomu Gomu no Pistol, but is struck down. Battler leaps through the air and plows down toward him, sending Luffy flying back. Battler proceeds to take several vicious swings at Luffy, with Luffy barely able to keep up. Battler then gores Luffy with his horns, then sends Luffy flying, who barely manages to cling onto the edge of the cliff. Battler demands to know why Luffy continues to fight, and Luffy replies that it is for Chopper. Luffy's handhold crumbles, and he plummets down to the chasm below, causing Battler to laugh. As Chopper, Mobambi, and several of the animals stand their ground against Battler, an angry Luffy rises, and lands a blow to Battler's face. Luffy then uses Gomu Gomu no Gatling Gun to strike Battler repeatedly in the chest, but Battler declares that it is no use. Luffy grabs Battler by the horns, lifting the great beast above his head, and smashes the horns in his hands. Battler quickly starts becoming a human again, and Luffy uses Gomu Gomu no Bazooka, sending Battler flying off into the distance, defeated at last.
With this, everyone cheers, and Mobambi thanks Luffy, but then starts to worry that he be exiled from the island for taking the golden horn. However, everyone called him a hero, and placed the King's crown upon his head. Despite Mobambi asking Chopper to stay, Chopper states that he is a pirate, then suddenly, there are more underwater eruptions, and a great bell begins to ring as the wind blows. The smoke around the island suddenly takes the shape of a golden crown, and the animals are shocked, declaring that the prophecy has come true, and that the heavens have acknowledged Mobambi as the new King. As Mobambi and Chopper say their tearful goodbyes, the next day the Straw Hats talk about the great party they had after the defeat of Battler. As they head toward their next adventure, Usopp jokes with Chopper about possibly seeing some monsters next, and Luffy happily yells that they will just keep moving, full steam ahead.[38]
Arabasta Arc[]
| This is an empty section. Please help the wiki by adding information to it. |
Post-Arabasta Arc[]
| This is an empty section. Please help the wiki by adding information to it. |
Episode of Arabasta: The Desert Princess and the Pirates[]
Vivi wakes up on the Going Merry to find Luffy and Usopp fishing with Karoo as bait, and she punishes them by bashing their heads together. They pull up a mysterious okama, who appears extremely grateful to be saved by pirates he does not know. The man reveals that he cannot swim because he ate the Mane Mane no Mi, which allows him to change himself into anyone he has touched the face of. He adds that he can also remember these faces, which allows him to take on the faces of those he touched before, showing several faces to the crew, one of which is Vivi's father Cobra, the king of Arabasta. The man then leaves as his crew arrives to pick him up, declaring the Straw Hats his friends despite not knowing them for long. As he leaves, he is called Mr. 2 Bon Kurei by his crew.
When Vivi realizes that the man was a member of Baroque Works and that he could turn into her father, she reveals that the Arabasta Kingdom is in a drought, and her father, King Nefertari Cobra had been framed for using Dance Powder, which forces rain onto the region it is used on at the expense of places downwind, for the capital. She states that the leader of Baroque Works is Crocodile, one of the Seven Warlords of the Sea, who is considered a hero in Arabasta for protecting the nation from pirates. In order to prove their identity should Mr. 2 transform into any of them, the crew each draw an X on their wrists and covers it with a bandage, which they will take off to prove their identity.
The crew reach Yuba, a ghost town that had once been a prosperous oasis before sandstorms ravaged it, causing many of the people to join the rebellion. They encounter an old man named Toto, who is the father of the rebellion's leader, Koza, a childhood friend of Vivi's. As the sun rises, Toto gives Luffy some of the water he dug up. During their travel, Luffy declares that he quits, saying that even if the rebels stop, the threat will continue as long as Crocodile is alive. He adds that Vivi is naïve to think that they can prevent everyone from dying in the battle, and he urges her to, rather than risk only her life, let them help her, which she agrees to. After this, the crew befriend a camel named Matsuge, and they begin to ride his Crab friend, Hasami. Vivi then thanks Luffy for helping her see the truth, and promises him a feast after they save the kingdom.
Crocodile then ambushes them almost immediately, using his devil fruit abilities to reach and capture Vivi. Pell shows up and attacks Crocodile and while he fails to injure him, manages to make him let go of Vivi. Crocodile's assistant, Miss All-Sunday uses her powers to ground Pell, then uses Clutch to severely wound him. Luffy intervenes, stretching out and throwing Vivi atop Hasami, staying behind to fight Crocodile. Crocodile uses his ability to turn into sand to render all of Luffy's attacks useless. He then attempts to drown Luffy in a quicksand pit he creates, but Luffy manages to escape. Crocodile dries out Luffy's leg, and Luffy restores himself to normal by drinking the water Toto had given him earlier. Crocodile impales Luffy with his hook and leaves him for dead. Miss All Sunday simply goes to Luffy and asks why people with the letter D. in their name fight. Luffy is then later saved by Pell, and even later when Crocodile attempts to drop Vivi off the roof of the palace, the two fly in and save her.
After saving Vivi, Luffy goes after Crocodile and ends up following him into a sanctuary containing a Poneglyph. When Luffy arrives, he sees that Crocodile has already attacked Cobra and Miss All-Sunday, with Luffy being upset due to her being the one that she saved his life in the desert. He attacks Crocodile once again and manages to injure Crocodile by using his own blood to wet the sand. Crocodile, however, reveals a new trick of his own - a poisoned hook, and injures Luffy with it. After injuring Luffy, Crocodile proceeds to cause the sanctuary to begin collapsing by destroying one of the pillars, but an undeterred Luffy simply rushes to finish his fight with Crocodile.
As Luffy and Crocodile's battle continues under the collapsing sanctuary, the rest of Luffy's crew manage to defeat the officer agents and deal with a Bomb about to go off in one of the clock towers. Luffy, despite being poisoned and still weak from his previous injuries, refuses to give up. While Crocodile considers him a naïve rookie, Luffy is determined to defeat him, and forces his hook into the ground, snapping it off. Crocodile reveals a knife blade hidden in his hook, and attempts to stab Luffy, but Luffy knocks him into the air. Crocodile attempts to use Sables Pesada to kill Luffy, but Luffy avoids the attack while protecting the wounded and immobile Miss All-Sunday. Luffy then sucks in air and twists his body to propel himself upward at high speed. Crocodile prepares to use Desert Espada on him to finish him off, but Luffy punches through with a new technique, Gomu Gomu no Storm, which sends out punches at high speed, punching Crocodile through the bedrock in the ground and sending him through a tower. Crocodile flies through the sky and lands in the main square, defeated.
As he falls through the holes in the bedrock he made, Luffy collapses from his wounds and the poison, and Miss All-Sunday gives Cobra an antidote for Luffy. As Vivi screams for the fighting to stop with all her might, for the first time in three years, it rains. Both sides then stop fighting as the King shows the people the defeated Crocodile, who is responsible for the war. Luffy regains consciousness long enough to carry Cobra and Miss All-Sunday out of the tomb before it collapses. Cobra then brings Luffy to his crew, meeting them for the first time. The crew collapse from their injuries and rest in the palace as Vivi stays up, watching the rain.
Three days later, Luffy awakens from his coma and Vivi returns his hat. Terracotta announces that the palace is holding a feast for the Straw Hats, and Luffy eats nearly everything he can get. Chaka then arrives, informing them that Marine ships have come for the Straw Hats. Nami tells Vivi that she can come with them if she wants, and if she does, she must come to the shore at noon the next day. That night, Vivi wonders if she can truly continue her journey with the Straw Hats. The next day, Vivi, who is supposed to be giving a speech at the palace, instead proceeds to the shore, where the Straw Hats are waiting, initially believe that she would not come. She tells the Straw Hats that she can no longer travel with them, but asks if they will consider her a friend if they meet again. Luffy is about to say yes, but Nami tells him that her being associated with them will make her a criminal, and as they sail away on the Going Merry, the crew says goodbye by showing her the marks on their arms, while Vivi and Karoo does the same, happily saying their goodbyes.[39]
Sky Island Saga[]
Goat Island Arc[]
While being chased by the Marines, led by Moore and Minchey, Luffy and his crew get lost in the fog and discover an uncharted island. They find that the island is inhabited only by an old man named Zenny and a multitude of goats. They also find a partially constructed ship on the top of the island.
Because of his bad heart, Zenny probably only has three days to live. Hoping to make his last days good ones, the Straw Hat Pirates help him out and they learn about Zenny's past as a money lender and his dream of becoming a pirate. But realizing that Zenny has outlived Chopper's predictions the Straw Hats decide that after helping him finish his pirate ship, they will leave the island. The Straw Hat Pirates help the old man out while hiding from the Marines and working to get his ship into the water.
With Luffy's help, Zenny and his goats were able to attack the Marines. The Straw Hat pirates then went forth to help him. They defeated Minchey and tied him up. Luffy, then, threw Minchey back on Captain Moore's ship, and Captain Moore allowed them to choose their battle location. Zenny decides to follow his dream and become a pirate, despite his age and they part ways. Luffy, then, pointed to the Marines a foggy area for battle location, which caused Captain Moore's ships to land in a shipwreck due to the rocks.
Ruluka Island Arc[]
Luffy and the Straw Hats are being chased by a small fleet of Marine ships led by Major Pasqua and Isoka. Luffy and his crew barely escape when the Marine's Major accidentally sinks one of his own ships. The crew then make their way towards an island named Ruluka.
They soon meet Flip, the son of the mayor and the commander of a troop who collects taxes from the people of Ruluka, the Collection Party and they find out the island is in fact ruled by a former pirate, mayor Wetton, that is over-taxing the people. Luffy, Usopp and Robin meet also Professor Henzo, who's doing research on something called the 'Rainbow Mist', sponsored by the scrupulous Wetton.
Suddenly, a huge galleon, the Tarielishin, appeared in the harbor and Luffy and the others go explore it and turns out to be the pirate ship of Wetton Pirates. When some of the mist shows up, Henzo borrows the Going Merry and Luffy, Usopp, Robin, Henzo and Zoro, who was sleeping on the ship, go inside it.
The inside of the Rainbow Mist is full of wrecked ships and treasure, and is guarded by five kids. The kids are actually friends of Henzo's that got lost in the mist over 50 years ago, along with the Tarielishin and Ian, a member, then, of the Wetton Pirates. Henzo states that the flow of time is different inside the Rainbow mist and the space is distorted, so Luffy and the others try to find a way out of the ship graveyard.
Finally, Flip communicates with Henzo with a Den Den Mushi and the company realizes they are still connected with the outside world. Then, Luffy accidentally propels himself and Rapanui, one of the kids, to the end of the mist. The Mayor, though, uses the Rainbow Tower to make a bridge to the Rainbow Mist and launches an attack inside it, along with Lake, the son of Flip and his grandson.
Luffy, goes back to the Rainbow Mist by throwing himself and Rapanui trough the Rainbow Tower. There he fights Wetton, but the mayor manages to escape and blows the Rainbow Tower away. Luffy and the others, though, escape the Rainbow Mist onboard Going Merry, with the help of Rapanui and the other kids who stayed behind to blow up a marine ship and give the Going Merry a boost to escape with the explosion.
Outside, the Mayor gets arrested by a bunch of powerful Marines that turn out to be older versions of Henzo's friends, who were thrown 50 years into the past by the Rainbow Mist's collapse. The marines let Luffy and the Straw Hats go and the crew departs onward to their next adventure.
Dead End Adventure[]
Luffy and the Straw Hats are now chased by a Marine ship, commanded by Drake. Due to the stormy weather and Nami's exceptional navigational skills, the ship sails away unscathed, leaving the marine pursuant behind.
Luffy and the crew has reached a town on Hannabal Island. Inside a pirate filled bar, they find out there is a great but very dangerous opportunity through a mysterious door in the bar. As the crew enters the mysterious door they are surprised to see it is the opening to a large tunnel. Inside they find themselves in a large cave filled with pirates, the site of the Dead End Race, a very dangerous anything goes sailing competition which the winner can win up to ![]() 300,000,000.
300,000,000.
The crew is introduced to the favorites to win that year, 2 giants, Bobby and Pogo, a Fish-Man and former rival of Arlong, Willy and the favorited to win, Gasparde, a former marine general who deserted after killing his crew. While Nami registers the crew for the race, Luffy gets involved in a fight against Gasparde's crew along with an infamous bounty hunter by the name of Shuraiya Bascùd, as well as meets Gasparde himself which of course ends on bad terms.
The next morning, Luffy and the crew set sail along with many other pirate ships for the parade start which involves sailing off a waterfall, fighting off other pirates, and navigating sharp turns. Before even reaching the ocean, several pirate crews are wrecked, luckily the Straw Hats manage. However while checking the ship, they find a stowaway, a kid by the name of Anaguma whose come to kill them for the bounty though find that's impossible after witnessing the crew's strength and power and thus sails along with them for the race.
After a few more encounters one involving the pirate ship of Bigalo the Hangman and sea kings, Luffy and the Straw Hats arrive at Partia, the supposed finish line of the race. However it turns out to be a Marine stronghold that quickly sinks any incoming pirate ships. Luffy realizes Gasparde rigged the race and the crew manages to escape the stronghold and track down Gasparde's ship using Chopper's nose.
Meanwhile onboard Gasparde's ship, the Salamander, Shuraiya, the bounty hunter from earlier tries to attack Gasparde but barely defeats his right hand man, Needless. Just when Gaparde is about to finish Shuraiya off, the Straw Hats arrive on the scene and Luffy makes his way onboard Gasparde's ship, taking down his crew angered about what the former Marine did. Shuraiya tries to intervene but Luffy knocks him out to keep from getting in the way. Luffy and Gasparde proceed to fight.

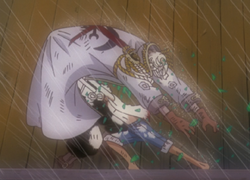
Luffy's Gomu Gomu no Bazooka against Gasparde.
Luffy's fight with Gasparde is not going well but Sanji realizes something and gives Luffy sacks of flour before rejoining the other Straw Hats. When Anaguma realized that his grandpa is still on Gasparde's ship, he begs the Straw Hats to go back but Zoro knocks him out and reveals that Anaguma is actually a girl. Meanwhile back in the ship, Grandpa overloads the boiler causing it to explode and sink the ship. Luffy manages to stay on the sinking remains as does Gasparde who shows Luffy that a cyclone is closing in on their position and that whoever wins can escape the ship and storm via lifeboats. The two strike one another with Luffy actually managing to hit him due to the counter-effects of the flour on Gasparde's syrup powers. Luffy then throws the remaining flour sack at Gasparde, coating him with it, and proceeds to pound on him and sends him flying into the cyclone.
Luffy, then, collapses from exhaustion but is saved by Anaguma's grandpa along with Shuraiya. As they head for the nearby island, grandpa reveals that Anaguma was adopted and her real name is Adelle Bascùd, Shuraiya's little sister whom he thought was dead. Despite the awkward reuniting, the two come to accept each other.
The Straw Hats close in on the real Partia as the winners of the race but the Marine ships suddenly appear and go after them, forcing them to flee from the island and forfeit their prize money. They let Adelle, Shuraiya, and Grandpa off then wish them good-bye individually before sailing off with the marines on their tail. Despite not getting the prize money the Straw Hats continue on for their next big adventure.[40]
The Cursed Holy Sword[]
When the Straw Hat Pirates dock at Asuka Island, Zoro and Usopp stay behind on the Going Merry to guard it, while the others head into town to restock their supplies. While in a restaurant, Nami tells the others about about the legend of the Shichiseiken, said to be the most beautiful sword in all of the Grand Line, and rumored to be on Asuka Island. Remembering something she read once, Robin tells of the legend of the red moon, a terrible disaster occurring once every one hundred years on the island. To protect the island, the king was given three magical gems to use as a shield, and the Seven-Star Sword, an unbreakable sword, to use as a weapon. While they learned more about the legend of the island, Zoro is fast asleep on the Merry, while Usopp is issuing repairs on the Merry. After Usopp asks a still sleeping Zoro to kick down some wooden boards for repairs, a knife is thrown through the wood, nearly hitting Zoro squarely in the face, if he had not moved his head. However, Zoro is shocked to see his name carved into the knife. As Usopp climbs above deck to get the wood himself, he notices Zoro is suddenly missing. As the rest of the crew return, they are shocked to notice that Zoro is gone as well.
Later, the crew are escaping a fleet of Marine ships, led by Commander Drake. They still have not found Zoro, but have no time to find him, due to the said Marine attack. At that moment, Luffy decides that they will look for Zoro. Just then, Nami tells the crew that they have to sail into a path surrounded by mountains. Despite Luffy's disagreement, they are forced to take said path, due to the Marines trapping them in a pincer attack. As they sail through the path, they come across a ramp which they are about to make contact with. However, instead of sinking, the Going Merry flies into the sky, while the massive Marine ships are left to crash into one another. However, as it turns out, Luffy has no idea where they would land, and as the ship starts descending, things seemed hopeless for the pirates. However, by chance, they bounce on a Hippo Rhino (which immediately falls in love with the ship), and the Straw Hats are sent flying into a river back on the island.
On the Merry, the Straw Hats are searching everywhere for Zoro, when Chopper discovers a giant lake right ahead of them. There, we see Maya swimming in the lake, before heading towards a shrine, carrying three orbs, and getting prepared to pray to a statue. Just then, she notices the Going Merry, and realizes that it's a pirate ship. She escapes with the orbs after the Straw Hats notice her. Luffy decides to stretch in order to ask about Zoro, and Usopp is dragged along in an attempt to stop him. However, the two lose track of her without noticing, and she runs away, but not before being noticed by the other Straw Hats present. After losing sight of Maya and the other straw hats, Luffy and Usopp eventually reach the Marine Dojo.
Inside, after noticing the many swordsmen practicing (which resulted in Luffy asking them for Zoro, without any response), then a marine named Toma shows up behind Usopp, frightening him. After asking Toma for Zoro, Luffy learns that Zoro should return any minute, before deciding to wait at the dojo until he shows up. At that moment, The leader of the Dojo, Saga reveals himself to the pair, but Luffy is more interested in the long sword he carries on his back. Toma asks for permission to test Luffy in order to find out if he really defeated Crocodile of the Seven Warlords of the Sea. Getting permission, Toma nearly cuts Luffy by unsheathing his sword at a high speed. Then, Saga reveals that Zoro will no longer be part of the Straw Hats, before Luffy starts attacking him for his statement. At that moment, Saga draws his long blade, which happens to be the Shichiseiken. Saying that the sword wants Luffy's blood, Saga attacks Luffy, before the battle is taken outside. As the battle rages on, it starts going in Saga's favor, and when he uses his special attack, Youkazan (a green flame erupting from his sword), Luffy is sent flying off a cliff. In fear of being killed by Saga, Usopp jumps after Luffy, and after a failed parachute attempt, he crashes into the valley below.
Usopp has successfully been caught in a tree due to his parachute, and starts looking for Luffy after finding his straw hat. However, he falls into a cave shortly afterwards. Once in the cave, he eventually finds Luffy and hands him back his straw hat. Unfortunately for the duo, Luffy activated a trap that sends a giant boulder after them, which Luffy destroys at Usopp's urging. However, he activates another trap that causes a cave-in, nearly killing them. Later inside the tunnels, Usopp and Luffy activate many traps before finding three peculiar towers, and as they were starving, the duo fall asleep.
The next day in the caves, Luffy and Usopp have just survived an arrow trap, before Luffy gleefully decides to go into another cave. However, Usopp protests, and leads them into a different cave, which ironically leads to another trap, this consisting of balls made out of rock. After getting through it, the pair come across a stream of water, where Luffy finds three orbs, before accidentally activating yet another trap, this one being a massive water stream that flushes Usopp and Luffy through the caves. Thanks to the massive spurt of water, Luffy and Usopp finally come out into broad daylight at long last, conveniently in front of the other Straw Hats, along with Maya and other villagers. After the pair introduce themselves to Maya, Izaya, and Lacos, Nami asks them what they have been doing. After Usopp explains their trek in the caves, she shoves it off as adventuring, much to the frustration of Luffy and Usopp.
As the others tell the duo what's been going on in the village, the others learn of Luffy's battle against Saga, while Luffy learns of Zoro's "betrayal", and Usopp confirms that Saga is indeed the wielder of the Shichiseiken. After hear that Maya is going to sacrifice herself in a ritual to stop the Shichiseiken, Luffy prepares to leave, in order to beat Saga, which Izaya says is futile, as Luffy cannot even scratch the blade. However, Luffy proclaims that they will not know if beating him will work unless they try. Despite this, Maya is more than willing to sacrifice herself, even though she is afraid of dying, saying that she decided to do so in order to save Saga. Deciding to cheer Maya up, Luffy reveals the orbs, much to everyone's (save Usopp's) surprise, especially Izaya. Now that they had the orbs, Maya could preform the ritual to stop the Shichiseiken without sacrificing her own life, but Maya asked Luffy where he found them. Learning where Luffy found them, she wonders why they were in the cave to begin with. However, even though the ritual can be performed, it is far too risky due to Saga's forces. Despite this, Luffy tells Maya that if she believes in Saga, then she should completely trust him, and that no one can decide her fate except for herself. With this, He and the other Straw Hats decide to aid Maya in her mission, as they will use the orbs despite all odds.
After Luffy asks what needs to be done, Izaya says that the orbs need to be taken to the three towers, called Komon, Tonroh, and Hagun, and then, a barrier can be erected, which will stop the sword from reviving. When Usopp reveals that he and Luffy saw the towers during their cave-trip, surprising Izaya once again. Eventually, the Straw Hats split up into groups as all three orbs get to their individual towers and the barrier is raised by Maya. Unfortunately, as Maya is praying to keep the barrier up, Saga comes and attacks, but is stopped by Luffy. This leads to a final battle between Luffy and Saga, as Luffy had the upper hand for a while, until Saga eventually loses full control of himself to the cursed sword, which merges with Saga's body, making him strong enough to get the upper hand on Luffy. As Luffy is about to challenge Saga again, he is stopped when Zoro arrived to fight Saga himself. As Zoro clashes with Saga, he manages to strikes the finishing blow, destroying the Shichiseiken and thus freeing Saga from the curse. Lying injured on the ground, Saga regained his consciousness and smiled up at his victorious friend before passing out.
Zoro and Luffy both pass out, with Luffy passing out due to being hungry as their friends come for them while Maya holds Saga in her arms. With the ritual complete, the cursed sword destroyed, and everyone under it's influence freed, and his old friend saved, Zoro apologizes to the crew for his earlier actions, with Luffy happy that he's back with his friends. As the crew happily reunite, Saga wakes up and swears to everyone that he will master the sword of justice for everyone's sake, as it is the only atonement he can make. Zoro then gives Saga his old knife back, as Saga makes Zoro the same promise, he walks away with his crew ready to leave the island. As the Straw Hat Pirates leave the island, Saga sits on a cliff with Maya, Izaya, Lacos, and Toma to see their departure. As the crew ready themselves for their next adventure, the Going Merry sails out with a Hippo Rhino continuously hitting it in a strange sort of mating ritual, with the crew trying to sail away from the smitten creature.[41]
Open Upon the Great Sea! A Father's Huge, HUGE Dream![]
The Straw Hats arrive onto Shellfish Island where they run into a mysterious group of people looking for treasure. The same group is then ambushed by the Bayan Pirates' second in command, Zap, who captures the oldest child, Amanda, along with a sleepy Luffy, who apparently had sleeping medicine put into his food by Sanji earlier to make him quiet.
Later on Zap's ship, Luffy wakes up, tied to a pole beside Amanda. He looks for his straw hat with no concern for being captured. Eventually getting free, Luffy finds his hat and begins to travel around the ship, and ends up on Bayan's ship wandering aimlessly until noticed by Zap and Bayan. They plan to throw Luffy a feast to distract him and then deceive him later, but Luffy ends up eating everyone's food, which upsets Bayan. Bayan then reveals his special skill to Luffy, as his whole crew begin to sing in a chorus like fashion, Bayan gains the ability to manipulate anyone who listens against their will, and uses this ability to make Luffy stop eating so his crew could chain him up. After which, Luffy and Amanda are both taken to the deck, where Bayan uses the same ability on Amanda to force her to reveal reveal the hidden map her father tattooed on her back. Bayan reveals to Amanda that he was the man who killed her father, which upsets both Amanda and Luffy.
As the Straw Hats arrive to save their captain, Bayan decides to force Luffy to fight his own crew. This tactic was successful until Usopp manages to shoot sleeping pellets into the singers' mouths, stopping them from singing. The Straw Hats then board Bayan's ship, easily defeating Zap and, using a combined attack against Bayan, send him off into the ocean, and rescuing Amanda in the process.
The Straw Hats then sail back to the island where the treasure is supposed to be. Afterwards, the island starts to "open" and reveals itself to be a giant clam. Inside is a gigantic pearl, which makes Amanda acknowledge her father's drive for adventure, as they all realize that the island itself was the treasure that the map leads to. Afterwards Bonney and Maccus offer to adopt the children, as the Straw Hats say farewell to the newly formed family.[42]
Protect! The Last Great Performance[]
One day on a random island, the Straw Hats decide to buy tickets to go see the farewell performance from a long time actor named Randolph. 30 minutes before the play is set to start, 3 actors decide to quit the play, leaving Randolph's play shorthanded. Nami makes a deal with the manager of the play to participate as the princess for ![]() 100,000, and the other Straw Hats decide to help as well.
100,000, and the other Straw Hats decide to help as well.
As the first act ended up being disastrous, due to the straw hats' individual performances, including Luffy dressing up in a monkey costume and dancing in front of the audience just for fun, Randolph, playing a marine officer, however performs a valiant speech which inspires the audience and keeps the show going. Before Act 2, Randolph finds out Luffy is a pirate and attacks him, due to his own past as a ex marine and the loss of his family to pirates. Knowing that Luffy was a pirate made Randolph angry and he attempted to fight him. Seeing as Act 2 was soon to come, Randolph decided to postpone the fight until after the play.
Just as everyone was about to start the 2nd act, a marine commander showed up and arrested Randolph for selling weapons to pirates. This turned out to be a lie however as this marine commander Governor had planted those weapons on Randolph's ship for revenge, as the commander was a former subordinate of Randolph who once tried to sell weapons to pirates to speed up his own promotion within the marines and to make money, but Randolph caught on and tried to get him kicked out by court martial. Although he failed to prove his guilt, Governor's plans to rise the ranks were greatly halted as a result of Randolph's actions for years, with the commander now back to get his revenge and arrested Randolph.
After falling into a cell, Randolph is freed by Luffy who tells him to go back to his ship and finish the act. Randolph refuses to accept help from a pirate but once they are discovered, Luffy grabs Randolph and fights through many marines until he escapes the marine ship and places Randolph back on his own ship and stage. Commander Governor tells the marines to fire and sink both the Going Merry and Randolph's ship but Luffy stops the cannonballs from reaching Randolph's ship. Luffy vows to protect Randolph's performance and yells to Randolph to hurry and finish the act.
While Randolph is performing the act, the marines send two ships around the Going Merry to try and sink Randolph's ships. As the rest of the crew deals with marines, Luffy and Chopper board the main marine ship during the confusion and knock out all of the marines on board. Commander Governor wonders why the pirates are so strong and finally realizes that they are facing the Straw Hat Pirates. He accuses an underling of making the mistake and threatens him with court martial, but the marine says go ahead and threatens to reveal the truth about Commander Governor.
Meanwhile, Randolph is just about to finish his play when he decides to change the last line. Instead of "I will fight until every pirate is dead at my feet", he tells the audience that the pirates in the play actually disposed of the cruel and greedy princess of the village. He says that he will fight against all who are despicable instead. He will fight against those with rotten souls and that even if your loved ones are slain by these evil people, you must forge ahead and live on.
The Straw Hat Pirates defeat all the marines that fight, while some decide to ditch the cowardly Commander Governor. With no men left, Governor states he will not give up and will just lie on his reports to his superiors about what happened. Luffy then drops down into the commanders room however, and punches him through the sky.
Randolph's new speech brings tears and cheers to the audience as his farewell performance comes to an end. As Luffy and the rest leave the island, Luffy yells to Randolph that he will be back to settle things and to not to forget about it and Randolph remarks that Luffy better not forget their postponed fight either as the Straw Hats sail off into the sunset.[43]
G-8 Arc[]
When the Straw Hats drop from the sky after their adventure in Skypiea, they land in the middle of the marine base known as G-8, they are forced to abandon their ship, as many marines immediately spring upon it. Separated, the crewmates are forced to disguise themselves and try to find a way out of the base, which is comprised of a huge mountain surrounded by water, and then a ring of sheer rock cliffs that form a wall of sorts.
As the crew separates, Luffy ends up on the base trying to pick a passage that will lead him to meat wishing he had Chopper with him to smell it for him. Later, he is caught by Sanji as he is seen literally shadowing a random marine for fun.[44] The following morning, Sanji and Luffy get by with some disguises, all whilst impersonating a pair of famous cooks named the Marley Brothers, who arrived at G-8 around the same time as the Straw Hats. There they meet Jessica, the head cook, whom Sanji promptly falls in love with and begins to fawn over. When she insults his cooking, however, he decides to show her the true meaning of "cooking from the heart". He impresses all of the cooking Marines with his skills and shows Jessica that a good chef avoids wasting food, while Luffy only eats what was already prepared. Both of them are accepted as the new cooks.[45]
In the kitchen, Sanji is wondering how to escape. He states that the reason they were stuck there was because of Luffy not doing anything. Jessica arrives and asks if he is finished with the onions yet and wants them to cut to the next three hundred onions. Sanji immediately complies, and with Luffy stating that Sanji was the real reason they were stuck.[46] They are later tasked with serving dinner to the Vice Admiral of the Base, Jonathan. Luffy, as the waiter, gives vice admiral Jonathan his meal, but he's immediately recognized and discovered. Sanji tries to save him but they're surrounded by cooks. Luckily a hundred marines enter in the kitchen in that moment and the two pirates run away in the crowd without being arrested. As they run away, they learn that Zoro and Usopp are now imprisoned, so Luffy and Sanji, try to reach the jail to free their friends.[47]
Luffy and Sanji sneak around the base, attempting to find the jail where Zoro and Usopp are being held. However, neither of them know where the jail is, thus they assume it is in the suspicious looking island surrounded by water. Luffy and Sanji attempt to infiltrate the prison leads to them racing down into an obvious trap. Luffy discovers the bars are made out of Seastone, whist Sanji attempts to kick down the bars, also discovering that they are practically unbreakable. However, Sanji takes Usopp's impact dial, only to find out it's the voice dial instead. He tries Usopp's other pocket, only for it to be the flavor dial. The gas sets off an explosion, and the Straw Hat's escape only to get lost while following Zoro.[48]
Luffy's group begins running around the base, being chased by Marines. In trying to escape, they end up in what seems like a dead-end at the side of the mountain and meet Jonathan again, who happened to be at the balcony of his office. Luffy tells Jonathan that he has freed his crewmates and declares that they were going to escape the base. This makes Jonathan laugh, asking him if he really thinks he can escape Navarone Island with their treasure, to which Luffy replies that they are pirates and that the Marines can't catch them. Suddenly a huge cannon fires at Luffy's group, and they run back inside the base.
Instead of going in pursuit of the Straw Hats, Jonathan decides to set a trap for them in Dock 88, where the Going Merry is moored, as he knows this is where they will surely go. He tasks Lieutenant Commander Drake to set up the ambush in Dock 88 and since it will take Drake some time to arrive at said dock, he orders Unit 55 to slow the Straw Hats down to stall for time. He stations them at the bridge which is the only way to get to the ship.
As Luffy's group arrives at the bridge leading to Dock 88, they see that the bridge is unguarded, they gather that it must be a trap. They decide that they don't care and go ahead and cross it. Unit 55 block their path and have them surrounded from all sides. Luffy's group easily defeats them but, in the process, Luffy destroys the bridge, and they all fall into the bay. Even with the damage caused, Jonathan in pleased with the result since it bought them the time they needed to set up the ambush in Dock 88. Luffy's group heads to the dock, straight into the trap, seemingly cornered. Luffy is shot with a Seastone net and is incapacitated. Just then, Nami and Dr. Kobato also arrive pushing a hospital bed, with Chopper hidden in the sheets pretending to be a patient.[49]
As Nami's group arrive in Dock 88 to help, Drake's men bombard Luffy's group with gun fire but he easily repels the bullets using his Devil Fruit powers. The Marines resort to using what seem like bazookas seeing that their guns are ineffective. They have fired instead, flash bombs to subdue the pirates which stings their eyes. Drake then has his Sword Unit attack the Straw Hats as they are still trying to recover from the effects of the flash bomb. The Crew are able to fight off the attacks. Luffy is then shot with a Seastone net and is instantly incapacitated. Drake demands that they surrender and tells them that while their Marine base policy is to take prisoners alive, he will not hesitate to change this policy if he is met with any resistance.
With Luffy in a weakened state, Sanji, Zoro and Usopp seem to be unable to resist the overwhelming number of the Marines in the dock and consider surrendering. Just as the Marines are about to capture them, Nami and Dr. Kobato, with Chopper still hidden under the sheets of the hospital bed, get up, and as the marines notice the doctor, Kobato then pretends to be a hostage and screams in feigned terror. She hints at Nami of her plan and in turn, Nami also pretends to be a nurse held hostage by Chopper, now in his Heavy Point form. Chopper acts like a tough and ruthless pirate and demands that the Marines stand down and let them board their ship. As Drake gives in and orders his men to stand down in return for the release of the hostages, Zoro releases Luffy from the Seastone net but Luffy remains weak.
Drake "accommodates" the Straw Hats and lets them board their ship, but Zoro senses another trap. He silently tells Luffy to sling them to their ship on his signal. A Marine covertly rescues Dr. Kobato and another also tries to rescue Nami, but she punches the Marine. This was their signal to rush towards the ship. Luffy slings the Crew onto the Merry. Mekao, with the safety of his daughter in mind, aides the pirates in their escape by releasing the Going Merry from the dock into the bay. Thinking that the Straw Hats are holding the "nurse" Nami as hostage, Drake orders them not to shoot at them, but instead to just give them warning shots. As the ship sails away, the Marines scope out the ship and notice Nami giving the crew orders and realize that she is not being held hostage. They realize that she is actually part of the Straw Hats. As Robin later arrives and rejoins the crew, She gives Nami a map of Navarone Island which she obtained in the library.
The Marines start shooting cannons at the Merry and start giving chase using warships. Nami refers to the map and sees the only way out of the base is the Sea Gate, to which they head. She notices that the water is too shallow and that the map doesn't make sense. They head to the Sea Gate anyway and try to think of a plan to open the gate. The Marines continue their barrage on the Merry while the Straw Hats don't have a way to retaliate since the Marines have confiscated all their cannon balls. Luffy devises a plan and catches all the cannon balls shot at them with his Gomu Gomu no Fusen ability and redirects them towards the gate. Just as the gate explodes, Nami realizes that if the Marines took all their cannon balls, they must have also taken the treasure they found on Skypiea.[50]
The Straw Hats decide to go back for the gold, as well as Nami's waver. They hide the Going Merry in an abandoned dock, since there are so many. Usopp uses the junk in the dock to disguise Merry as a Naval ship, and then splits the crew into two teams: one team to recover the treasure gained at Skypiea, and the other team to retrieve Nami's Waver. Chopper is left behind to guard the Merry.[51] Jonathan tricks the crew into another ambush, this one in a huge room that is locked from the outside. Drake is once again leading the attack, with countless marines backing him up, and things look bleak until Agent Shepherd foolishly opens the doors and allows Luffy, Robin, Zoro, and Usopp to escape.[52]
As Nami's group retrieves the Waver and return to the ship, she goes looking for Luffy and finds him, only to discover that they still do not have the gold. Nami suspects that it's in the Commander's office, so she and Luffy go alone while everyone else goes back to the boat. Using the Waver, she and Luffy scale the main mountain and break into Jonathan's office. Marines fill the room but Nami uses her Thunder Tempo attack to electrocute them all. She and Luffy grab the treasure and head back to the boat. However, Jonathan is not worried, because at 9 PM the "fangs of G-8" will appear. What he means is the inner lake becomes so shallow that the Going Merry is stranded on a reef. With no water, the Merry is stuck in the mud while the marines mobilize.[53]
When Luffy commands the ship to go full speed ahead, a hole was torn in the hull by the rocks on the harbor floor, so they stop. The harbor eventually reaches a very low tide, rendering the ship unable to move. Jonathan gloats via megaphone how he had captured the Straw Hat Pirates. However, the Straw Hat Pirates decide to launch a plan of their own; they use Usopp's Impact Dial to launch the ship into the air, then uses an Octopus Balloon inflated with Breath and Flame Dials to float in the air. Jonathan orders his men to fire a "warning shot" at the balloon. However, Shepherd also aims for the balloon with his bazooka, only to instead miss and shoot down the Marines' cannon, with the Straw Hats escaping, once and for all.
As the Straw Hats are seen flying towards the sunset. Usopp begins working on fixing the hole in the hull, as they continue to sail away from the base and onto the open sea.[54]
Water 7 Saga[]
Long Ring Long Land Arc[]
| This is an empty section. Please help the wiki by adding information to it. |
Ocean's Dream Arc[]
One night aboard the Going Merry, Robin is reading late at night while the others are sleeping. Suddenly, a mysterious figure appears in the ocean and plays an instrument resembling a seahorse.
Nami wakes up in the morning, but cannot recognize Robin. Chopper, Usopp, Sanji, and Luffy also wake up soon after, all of which are confused as to why they woke up on the ship; their memories were erased. Usopp lies and says that he was a famous pirate, but his lie is seen through.
The Straw Hats all meet at the deck and notice Chopper, wondering who he is. Robin explains that they were on the Grand Line, and that they were on a pirate ship led by Luffy. Nami then goes to her room and finds her logbook, finding that the notes were written in her handwriting.
Nami decides that she must return to Cocoyasi Village. She escapes the ship using a Waver. Zoro also decides to leave, and jumps in the water and swims. Meanwhile, the mysterious figure watches from a hill.[55]
Robin comes to a conclusion and informs the Straw Hats about their memories being erased from them. In the dining room, Robin tells everyone left what she remembers of their adventures, but being the latest member, she does not know the circumstances under which everyone joined. She then recounts what happened the previous day and says that she heard a strange sound. With a whistle from the tea kettle, everyone with memory loss realizes that they all had the same dream about a boy underwater blowing into an instrument, and only Robin was not affected because she was awake. They reach the conclusion that the boy is the cause of the memory loss and that he may strike again that night, possibly taking all of their memories this time.
Despite everyone being upset over this realization, Luffy simply figures that although their old memories had been lost, they would just make new memories through their adventures. Later that night, the boy stands on the ship's figurehead and blows the horn. Robin confronts him, waking up all the Straw Hats in the process. Angry, the boy attempts to blow into his horn again, but is confronted by Luffy for sitting on the figurehead. The horn emits a blue, sparkling dust that flows into Luffy's mouth. The boy escapes, but when Luffy wakes up, he regains his memory in the process.[56]
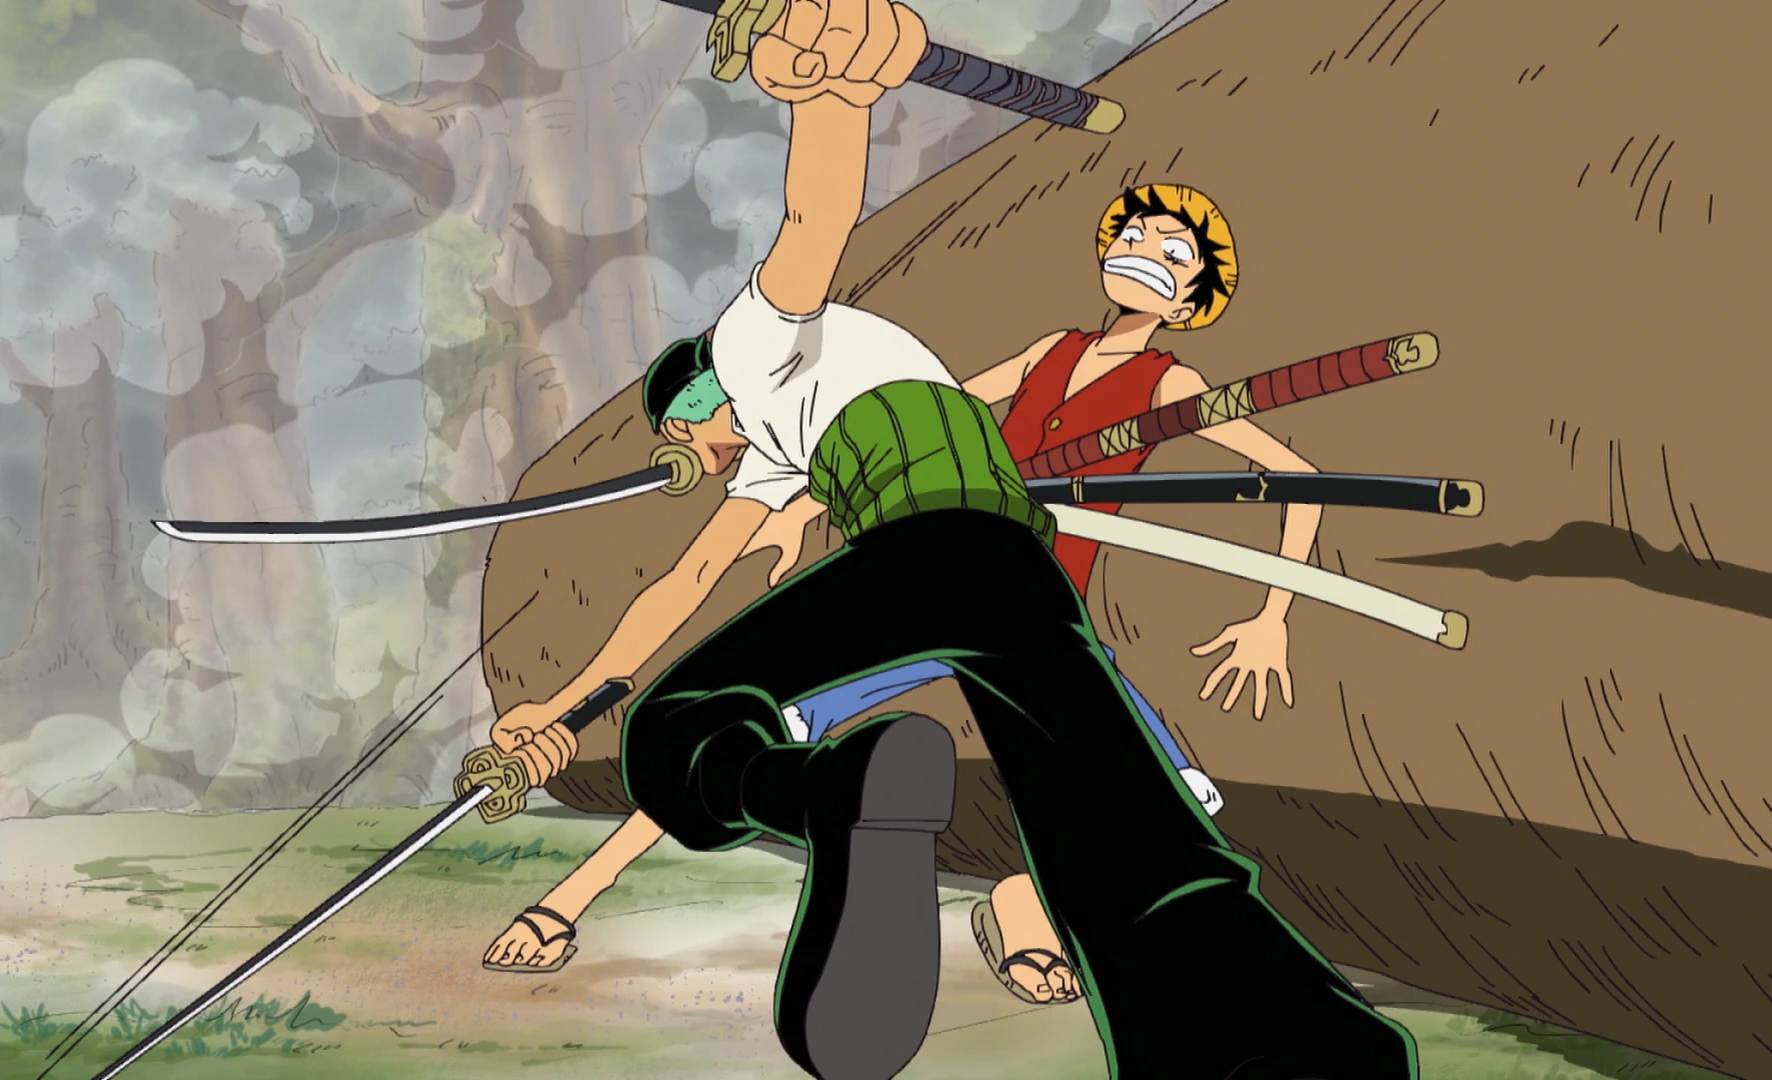

Zoro attacking Luffy
After regaining his memories, Luffy tells everyone what he remembers as well as their roles on the crew, but then tells them that he wants to bring back Zoro and Nami, though Robin convinces him to wait until morning. The next day, they come onto the island and immediately bump into Nami, and Luffy forces her to help them find Zoro. On their way, Robin comes across some ancient writing and, realizing the true cause behind the memory loss, and convinces everyone go to a place called the "Sea God's Palace".[57] Meanwhile, the boy hypnotizes Zoro into joining his side. After reaching the forest, Usopp and Chopper end up finding Zoro and brings him back to the others. However, as soon as they arrive, Zoro suddenly begins to attack Luffy. As the Straw Hats believe that Zoro was hypnotized, Luffy tells the others to go ahead to the temple, while he stayed behind to battle Zoro. As Luffy tries to avoid fighting Zoro, Zoro seemingly defeating Luffy with an Oni Giri move. However, Luffy gets up and they continue to their fight in the forest.
After the others reach the palace, they are approached by the mysterious boy. As Sanji kicks the boy to get everyone's memories back, which caused the seahorse horn to release the Straw Hats' memories and also play a sound. Because the boy was briefly unconscious from the kick, he lost his memories. The boy, confused as to where he was, flees.
Robin explains that the real thief was the seahorse horn. It tries to flee, but is caught by Sanji. Sanji beats the seahorse until it coughed up the Straw Hats' memories. Having regained their memories, they wonder if Zoro has regained his memories. Zoro approaches them, and Sanji is prepared to fight him. The seahorse communicates via Chopper that it still had its last resort.[58]
As Zoro approaches the Straw Hats, prepared to fight them, Sanji battles Zoro, but Luffy launches himself forward, hitting Zoro and Sanji both. When they wake up, Zoro reveals that he regained his memory when the seahorse coughed up his memory, with Luffy right behind him. Sanji was mad that Zoro still looked scary after regaining his memory. Zoro then jumps into the lake to chase the seahorse. After Zoro catches it, the seahorse uses his last resort: he sprays a gas into the air that makes the Straw Hats hallucinate people from their past memories (Bell-mere, Hiriluk, Kaya, Kuina, Zeff, Ace, and Shanks), then their past enemies (Arlong, Wapol, Kuro, Krieg, Crocodile, and Enel). The seahorse then steals the Straw Hats' memories, causing it to inflate and be able to float; claiming that it became a Sennenryu.
Despite having lost all of his memories, Luffy decides that he wants to ride the seahorse and unintentionally uses his Devil Fruit powers to fly into it and wrap his arms around it. This causes the seahorse to return Luffy's memories, so he beats up the seahorse until everyone's memory returns and sends it flying off the island.
As the crew comes down to the village thinking they will be rewarded for getting everyone's memories back, they are instead attacked. Drim, the boy who carried the seahorse around, misinterpreted the situation and thought the Straw Hat Pirates were the ones who took everyone's memories and warned the entire village, so the crew is forced to rush back to the ship and leave.[59]
Baron Omatsuri and the Secret Island[]
On a calm day, the Straw Hats receive a message in a bottle advertising Omatsuri Island as a resort, promising spas and salons, good food, and many beautiful women, with Grand Line Pirates being especially welcome, the stronger the better. The crew are delighted at their luck, and Luffy decides that this is an opportunity they could not ignore. They set a course for the island.
When they reach the island, they see an uninhabited jungle but the crew follow strange sounds throughout the jungle, which leads them directly to the resort, and they are in awe by its dazzling rides and attractions. Soon, the owner of the island, Baron Omatsuri comes out on an elephant with a small talking flower sprouting from his shoulder to greet his guests. The crew notices the flower, and also notice that the dancers and performers, all have a small plants sprouting out of their heads as well. As the Baron welcomes the crew to his island and says they are welcome to enjoy all the delights he is offering, Luffy and the others are happy to hear this, but first he suggests that they prove their worth by taking part in a competition called the 'Trial of Hell, which he explains is similar to the Davy Back Fight.
Despite the crew being unsure whether or not to consider the trial, Luffy is filled with excitement by this challenge, saying that it might be fun, and that his friends are capable of handling any trial, officially excepting the proposal. As he accepts the proposal, the plaza they are in mechanically converts into an enormous round pool with a platform in the middle, as the first competition is goldfish catching, with the rules being that the winning team will be the one who catches the most goldfish in three minutes using only the net they are given, which is about three inches long and made of water-soluble tissue paper.
When Usopp volunteers to take on the challenge, he immediately changes his mind when he sees his opponent, Muchigoro and the massive goldfish that they have to catch, Rosario. As Nami, Sanji, Zoro and Luffy all try to catch the giant fish using their normal attacks, but only succeed in breaking the tiny net. Just as they decide that it's an impossible task, Muchigoro takes his turn. He reveals that he was hiding a net big enough to catch Rosario all along, much to the crew's fury. He calls Rosario into his net and flings him toward his prize bucket, with Robin intervening with her powers to bounce the fish back into the platform, where Chopper knocks him into own bucket using his Guard Point, just as the time limit ends.
The Baron is furious at the Straw Hats for beating him, as well as insulting him and Muchigoro. He demands that they compete in another challenge. Nami had been hoping for a chance to relax at this island, and refuses on behalf of the rest. Luffy, however, overrules as before, having enjoyed the first trial and is looking forward to more. Nami, furious, tries to lead the crew back to the ship, but the forest seems to move around them and they become lost. Luffy, following them, continues to try to convince them to go back to the Trials. When they finally manage to leave the forest, they find themselves before the Baron again as he announces that they have arrived at the second trial - a complex game of ring toss, taking place between two teams of four people, each in two gondola-like waver boats. To win, a team must throw rings over every member of the other team. Due to being a devil fruit user, Luffy was forced to sit this trial out, and wait at the hotel with Robin and Chopper.

Luffy warning Brief.
As the second trial is going on, Luffy is waiting impatiently with Robin and Chopper in a large mansion. He goes wandering, and a succession of rocks hit him in the head. Luffy, annoyed, eventually looks up and sees a small man throwing them and decides to chase him. Luffy's chase for the mystery man continues, through hallways, dining rooms, up the stairs, and then finally stopping at a room with a shallow pond in the middle. As they stare each other down, anticipating each other's moves, Luffy gets fed up and asks for the reason of the man's actions. After some description of himself, the man introduces himself as Brief, captain of the Mustache Pirates. He reveals his plans to revolt against Baron Omatsuri. However, Luffy cannot help but notice that his short mustache looks like a bunch of snot hanging from his nose. Brief is immediately infuriated and decides to tell him that his short mustache is a symbol of his pirate crew, but Luffy just does not care. Brief gets right to the point and talks about Luffy's crew of 6. Then out of nowhere, he requests Luffy to be part of his own crew. Luffy makes it clear to him that none of the Straw Hats will be part of his crew. In response, Brief tells Luffy that the Baron will try to break his crew apart.
Not taking his message seriously, Luffy simply returns to the hotel later on, just in time for a feast being thrown in their honor at the pool. The water pool near them changes and one of Baron's men Kotetsu emerges from below, equipped with two giant grilling spatulas strapped on his back. The flooring underneath him becomes a giant iron grill as the grill itself is surrounded by walls of flames. As he prepares to a live show and plans to make teppanyaki, Sanji not impressed by the performance, finds the Kotetsu's wasteful and frivolous manner of cooking offensive to his idealistic chef ways. Food is tossed on and Kotetsu skates around on skakes made of grease, sliding the food around in an overtly flashy and pointless, albeit entertaining, manner. Luffy slobbers and thinks that all of it looks so good to eat. His sentence echoes in Sanji's head, enough to anger him. He takes off his jacket and leaps in and challenges Kotetsu to a cooking competition. They square off, each grabbing half of the grilling food. Luffy cheers them on as the cooking challenge gets more intense, with Sanji ultimately winning the contest, but saddened to see only Luffy cheer him on, as Luffy helps himself to the massive pile of food.
After noticing that Robin was gone, Sanji urges Luffy to help him look for her, only to then realize that Chopper and Usopp were also missing as well. As the crew begin to worry and argue amongst themselves, the Baron shows up and announces the start of the final trial, with Sanji and Zoro both demanding to know where their three missing crewmates are. After noticing that one of the Baron's men had Usopp's hat, the Baron demands that they accept another Trial of Hell, with Sanji backing away and decides to look for the three himself. Zoro runs off to the opposite direction to do the same, leaving a worried Luffy behind. The Baron announces that the third trial is Shooting, where the island residents ruthlessly hunt down the opposing pirate crew. The island's residents line up in front of the Baron ready their rifles. Luffy, feeling guilty about his missing crewmates and Sanji's disappointment in him, does not respond to Nami's pleas. For that, she abandons him and runs. The people chase after her with their guns, ignoring Luffy's somber presence.
Baron questions Luffy's relationship with his crewmates. Luffy shouts and demands for the return of the missing three, and charges towards him. Baron readies his bow, mysteriously generating an arrow from nothing. Luffy halts and dodges, only to realize that the arrow stopped and was changing directions to chase him. He dodges and dodges until he meets a dead end. Luffy turns around and sees the ground many meters below him. The arrow flies and causes an explosion, sending Luffy flying head down first towards the ground. A door on the ground's surface flips open, and Brief appears, calling for Luffy. Luffy was stuck, half of his body into the ground, and is suddenly pulled out of sight into Brief's tunnel network.
Luffy sees nothing but pitch black. There he laid with a cloth over his eyes, lying on a bright red carpet. He wakes up finding himself in Brief's house. Brief lived alone with his goat. Luffy tries to leave but confuses himself with the multiple doors. No matter which door he took, he came back to the same room. He decides to stay, hoping that Brief would eventually tell him the way out.
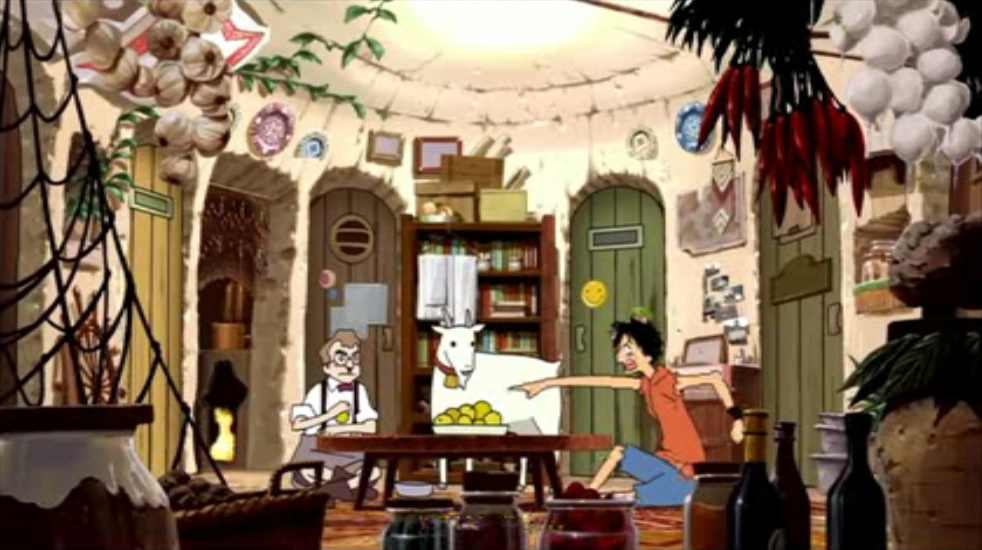
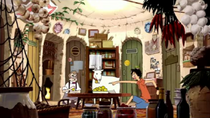
Brief's hideout where he explains to Luffy the Baron's past actions and his motives.
Brief then tells Luffy about the Baron's past as the captain of the Red Arrows Pirates, and explains what the kind of man the Baron now was, a disturbed man who only wants to bring the same suffering and hatred he felt unto everyone else, who hates happy and closely bonded crewmates with a vengeance. He had previously killed each and every crewmate of Brief's pirate crew. Now, Baron wants to do the same thing to Luffy, to make him feel the same loss. After hearing this and feeling that something was happening outside Luffy tried to leave once again. The maze does not work on Luffy a second time as he shoves the bookcase over, revealing the door to the surface. Brief tries to prevent him from going alone, but Luffy continues onwards.
As Luffy makes his way back to the surface he sees Baron Omastsuri along with a family of pirates, but not his crew. Luffy quietly walks towards the Baron and calmly asks for the whereabouts of his crewmates, as the Baron continually hints that each one is dying with each passing minute, hinting that he already got rid of Chopper. The Baron cannot help but laugh at Luffy's request. Strengthened by his anger, Luffy readies an attack with his right fist, but an arrow quickly flies towards Luffy, piercing his hand into the giant rock behind him. Baron tells him that another one is disappearing, which Luffy is now able to see as he now notices the monstrous Lily Carnation, as well as Robin slowly disappearing into it. Luffy desperately reaches out but Robin completely disappears into the Lily Carnation. The Baron tortures Luffy by stating the cook is next, with Luffy ready to fight back, only for another arrow to pierce his remaining hand, as Sanji disappears into the Lily Carnation. Blinded by rage, Luffy attempts to use his left leg to attack, but Baron sends the third arrow towards him. Luffy loses his footing and falls, while Usopp is the next to sink and disappear into the Lily Carnation. With one free leg left, Luffy tries a fourth time but fails again, with all of his hands and feet now pierced into the rock, symbolizing the death of each crewmate as Nami was the fourth to disappear in front of Luffy's eyes, with Zoro now being the last crewmate remaining.
With nothing left, Luffy stretches his neck in an attempt to save his last remaining crewmate. Because his extended neck was an easy target for Baron, he unleashes numbers of arrows which cut parts of Luffy's throat. Luffy manages to catch one of the arrows in his teeth and continues closer and closer to Zoro. Despite his efforts, Luffy reaches his limit. Upon impact with his head, his body gets pushed back to where the four arrows laid, as he watches Zoro be consumed by the Lily Carnation.
With his friends gone, Luffy lays on the rock in pain and silence as Omatsuri lectures him about being alone. As the Baron prepares to finish Luffy off, the ground below Luffy crumbles, and Luffy disappears below the earth's surface, as Brief rescues him from his fate. Brief secures the opening to his base and starts to head further in. The pirate family from earlier are tending to Luffy's wounds. Luffy has seriously lost the will to live, after losing all of his crewmates in front of his eyes. But, Brief ensures that they are probably still alive. It's because someone can hear them calling for him. That someone is Daisy, who encourages Luffy to save them, as Brief hands him his straw hat back. As the Baron continues firing at the ground to smoke them out, a newly determined Luffy goes back up to finish things with the Baron. Baron laughs and shoots at Luffy, but without effort he sways and dodges left and right, avoiding all the arrows. Luffy begins to leap and dodge, and when it looked like he was shot, Brief reveals to Baron that it was just a clone made of straw. He urges Luffy to continue and use one of his holes. Luffy leaps in just in time, and reappears from another hole. Noticing Brief's assistance, the Baron mocks him and fires a massive number of arrows at him, which Luffy shield him from with a giant rock in one hand, and a single arrow in the other. The rock crumbles and Luffy snaps the arrow in half. He takes that fist and with full force, sends it towards Baron's way. Baron gets punched really hard and is thrown back with force.
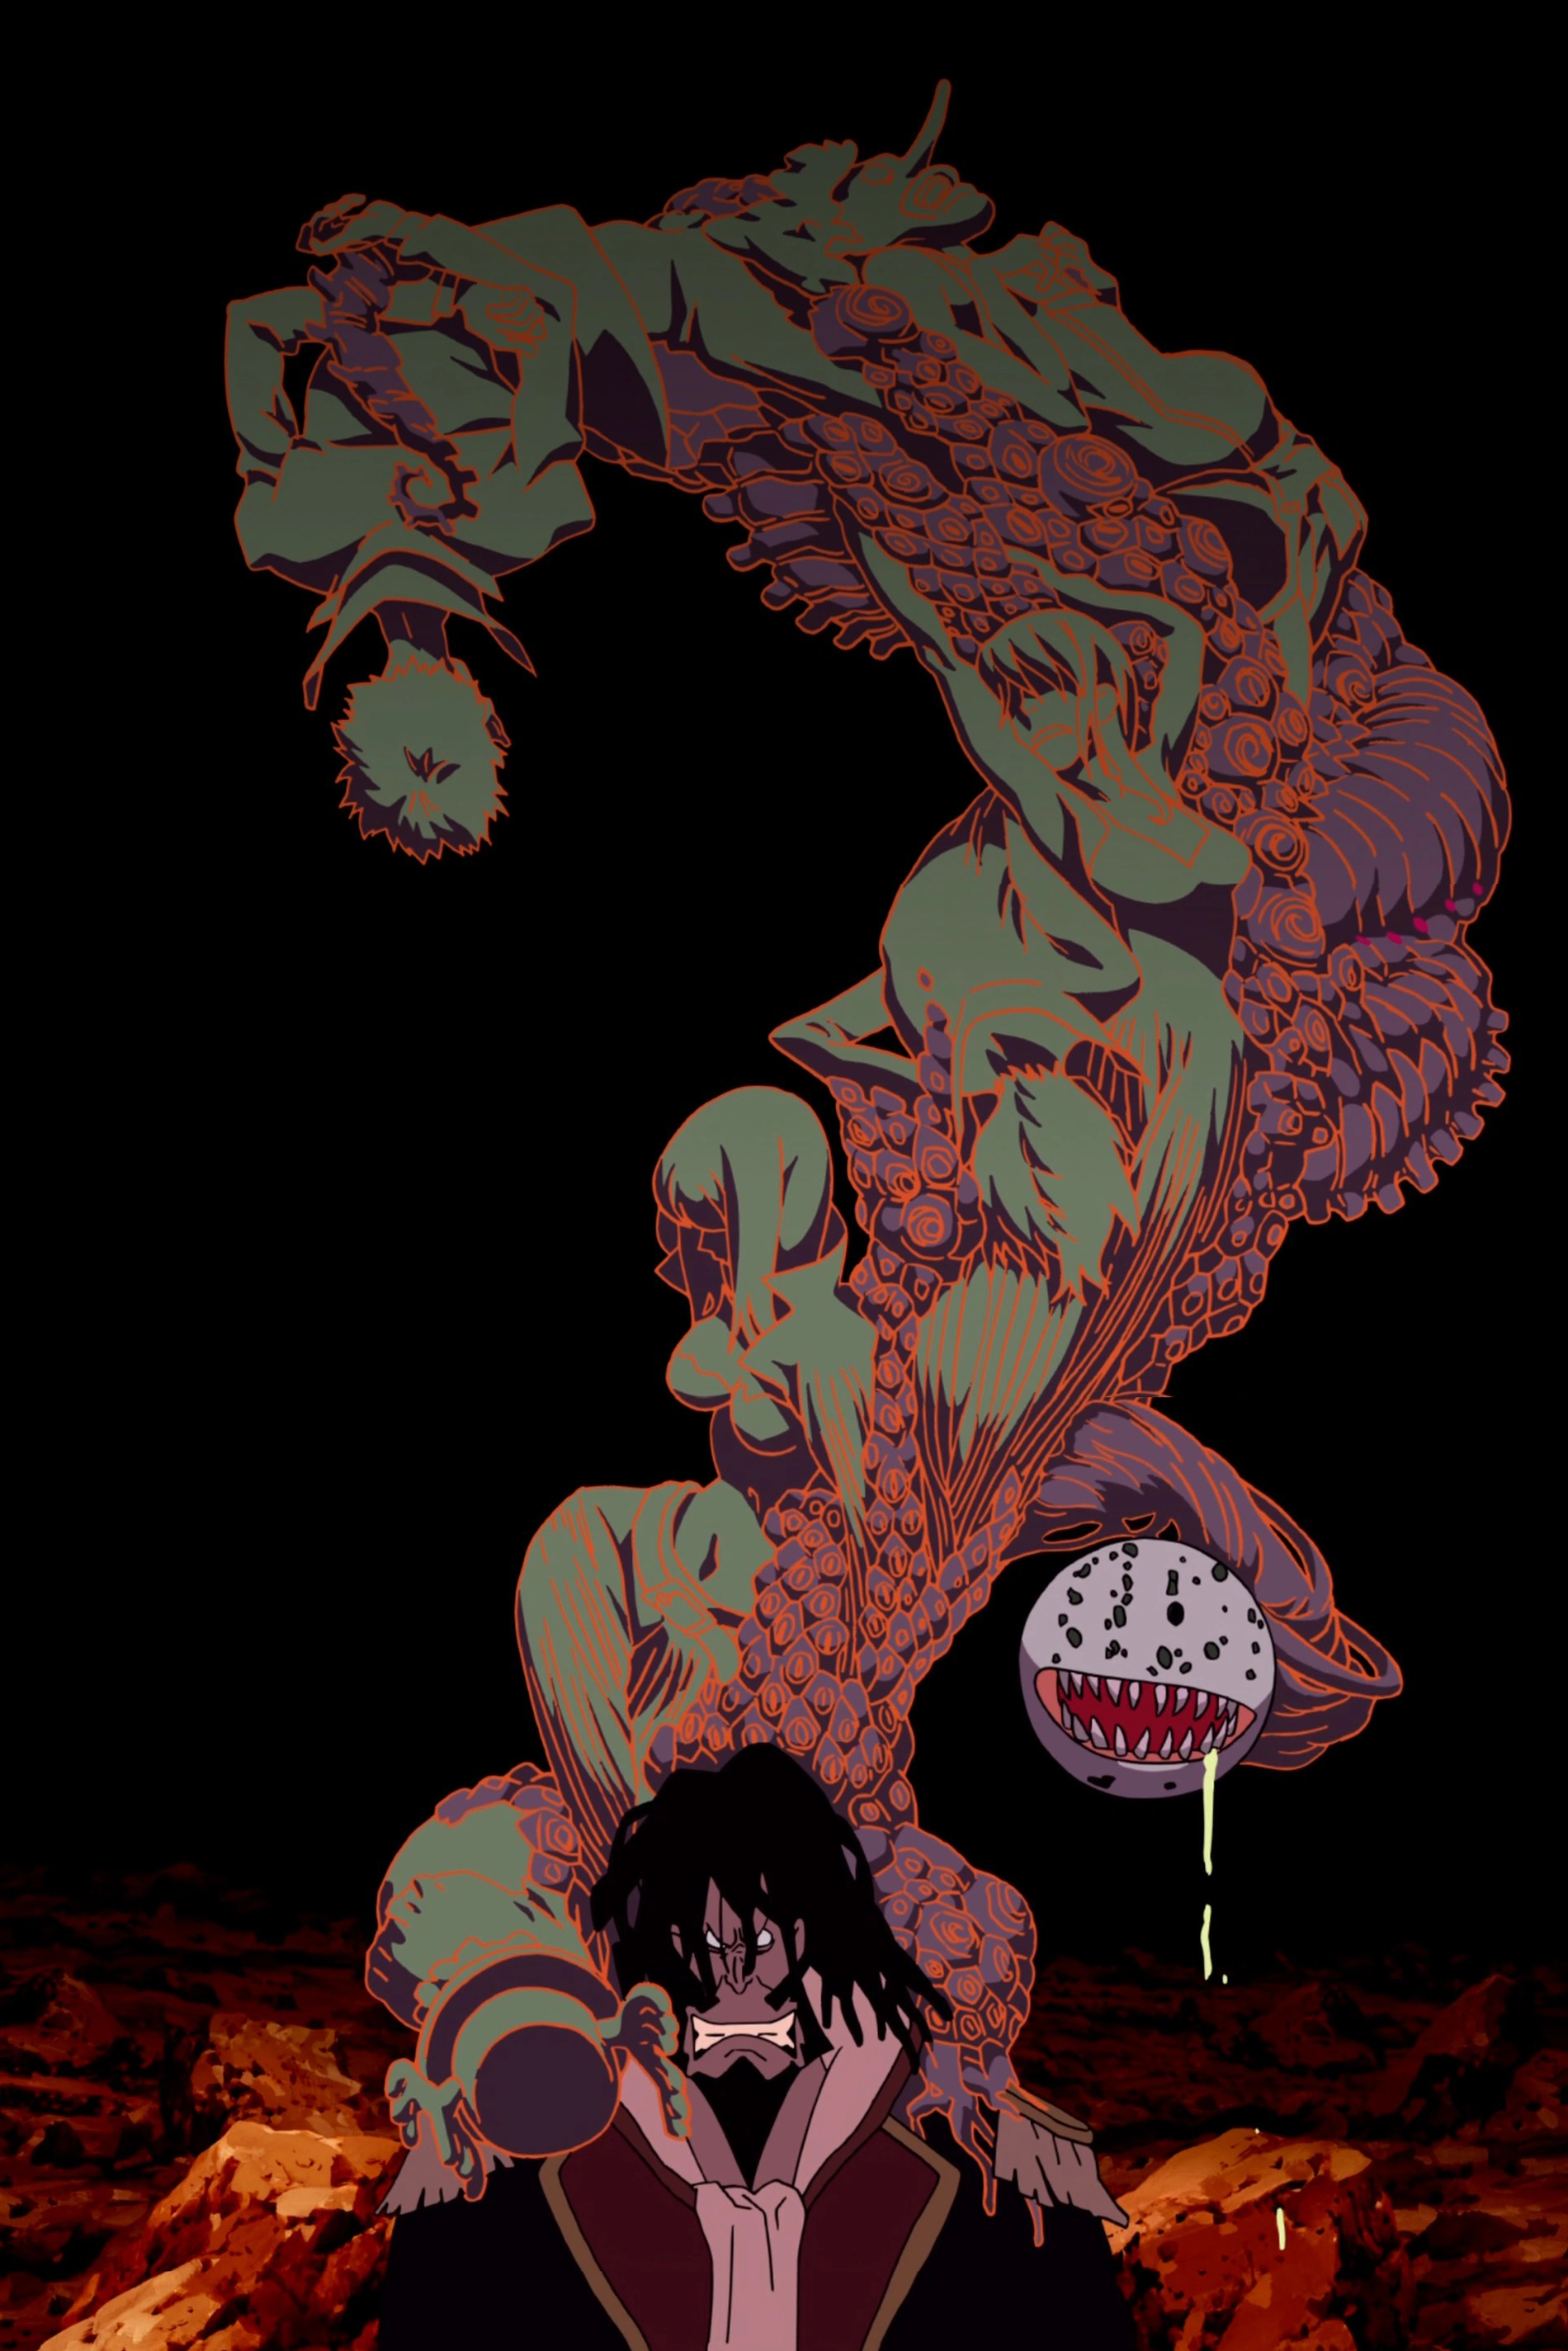

The Lily Carnation reveals its true form.
Luffy rushes to save everyone from the Lily Carnation. He sends one powerful kick down, then another hit upwards, and, now in the air, puts all his strength into his final punch. The tip of the flower waves in the air with swirling clouds up above. The sky shines a blinding white. The pirate family cheer assuming he's saved the day and won. However, Daisy notices something odd, and starts to hear the calling voices elsewhere. Luffy turns around and is shocked to see what the lily has become. The lily is completely broken up in the middle, but in front of the giant red moon in the pitch black sky, it is discovered the Lily has become thousands upon thousands of arrows, which seemingly assimilated together to form the full shape. The Straw Hats, now presumed to be dead, are nowhere to be found.
Baron stands up. The flower on his shoulder giggles, as black spots begin to form on its innocent face. Baron's face, almost inhuman, tells Luffy that they are right "here". Baron throws his bow away and lets the tiny flower evolve into a hideous monster. Its body on Baron's shoulder bursts to reveal the Straw Hats joined together forming the monstrous beast; the true Lily Carnation. Luffy is completely petrified by the unspeakable horror his crewmates have become a part of. Baron commands the thousands of arrows, the remnants of the tube-like Lily Carnation to kill Luffy. Luffy slowly turns around but does nothing to escape. Luffy stands there, motionless, with dozens of arrows piercing parts of his body. He sways, seemingly zombielike in appearance. Unnerved by the arrows, Luffy slowly walks towards the Baron, basically in a near-death state. As the Baron prepares to finish Luffy off for good, the Papa of the pirate family comes and shoots an arrow into the Lily Carnation, causing the combined structure of the Straw Hats to fall apart, as well as the Baron's servants and even the arrows. As Luffy collapses, so does the Lily Carnation. Baron weeps and relents as he tries to pick up the innards and organs of his Lily's body. He cries as he knows that his people relied on the Lily's existence. In an enraged state, Baron aims to take Papa's life. Before he takes a step further, Luffy steps into the puddle of the Lily's innards and strikes him with a death-rendering punch, sending the Baron into oblivion and ending the struggle, as Luffy falls to the ground unconscious.
Brief constantly calls out to Luffy, who lays motionless on his back. All of a sudden, Luffy wakes up coughing and breathing frantically, he thought he was going to die after all! He's happy that the pirate family and Brief aren't hurt! But he's hurt himself and is unable to move. Luffy just smiles. After hearing from the Pirate family that Chopper and the rest of the crew survived and are okay. As the crew had no memory of what had happened, nor of their previous state, they spot Luffy and quickly go to see him. As he is simply happy that everyone was safe and sound, Luffy smiles in relief and closes his eyes, with Nami calling out to him wondering what happened and how he could lay there and sleep in a place like this. Hearing this, Luffy cannot help but laugh, as the struggle on Omatsuri Island was finally over.[60]
The Giant Mechanical Soldier of Karakuri Castle[]
During a raging storm, the crew searches a wrecked pirate ship for any treasure only to find a single chest. On the Going Merry, they open it only to find an old woman who hid there to escape the storm. As they contemplate what to do with her, even suggesting to put her back in the box, the woman tells them about a legendary Golden Crown on her island that she will let them have if they return her there. Though the rest of the crew thinks this sounds suspicious, Luffy agrees. As it turns out, it is impossible to reach using a Log Pose, requiring the use of a "Turtle Pose", which uses a small turtle that always points to the island.
As they come up to the island, the crew hears a fisherman singing an old folk song about the Golden Crown known as the Yurari Uta. The woman explains that the island is known as Mecha Island and as the pirates get closer, they set off a defense system involving arrow-firing robots. When the island's leader, Ratchet, sees the old lady, his mother, on the ship, he launches a hand glider and retrieves her from the ship. Then, one of Ratchet's subordinates, General Maji, activates the robots, sending hundreds of arrows flying towards the ship, but Zoro deflects all of them. Maji then activates a giant fan to blow the ship away, but the arrow robots end up getting sucked into it. Though the metal parts being blown out of the fan wreck the Going Merry's main sail, the fan is destroyed while Maji gets his back broken by Robin's Clutch.
Due to this, the crew cannot leave the island, so they decide to stay and search for the Golden Crown. They realize that there may be hints in the song they heard earlier, which Robin had thankfully written down. The two possible clues they find in the song refer to "the white snake's eyes" and "the two moons". They manage to figure out that the white snake is referring to a rock shaped like a snake head, but cannot understand what the two moons refer to. Usopp suggests that maybe it is the moon and its reflection, but that is wrong too. As it turns out, Ratchet is also trying to figure out the same thing, but he decides to leave the Straw Hats alone for now, believing that it is impossible for them to solve the mystery. During a contest between him and Usopp, Luffy breaks off one of the snake rock's eyes, and Robin realizes that they may have misinterpreted the lyrics of the song. Luffy breaks off the other eye, revealing an entrance into the island. When Ratchet hears about this from Maji, who was watching the crew, he freaks out for a bit but eventually calms down and decides to use them to get the treasure for himself. Maji then invites the crew to a party at Ratchet's castle, which they begrudgingly accept.
As the Straw Hats reach the castle, Luffy happily begins eating as the crew look around the venue as the party starts. As they look around they notice that the entire staff are all robots dressed like maids, except for the Butler. At the party, Ratchet asks for the Straw Hats to help him find the treasure. Though the rest of the crew finds this suspicious, Luffy agrees to help. The next day, the crew along with Ratchet and his friends enter the cave. They pass through a narrow passage and fall down a waterfall before crashing their ship on land. Luffy comes across a beautiful lake surrounded by animal statues with light shining through the top, and Robin finds a pillar with the final part of the song written on it. At first, they think it means to say that it is time to drink up the lake, but they soon realize that it actually means that the Ibis statue can drink up the lake. Luffy unintentionally knocks down a giant statue of this bird into the lake, and all of the water drains away. At the bottom of the lake is a passage, which Robin, Chopper, and Sanji go through while the others stay to investigate the newly exposed surroundings.
As Robin's group manage to reach the top of the mountain and investigate the temple located there, they make a discovery that literally causes the entire island to shake and fall apart, as the island itself was actually a Giant sleeping turtle. As it turns out, the song actually serves as instructions to awaken the island-sized turtle, with the island itself onto of its shell, which Ratchet reveals he knew this entire time, though he also points out that he still has not figured out what the Golden Crown is referring to, so there may still be a treasure.
At this point, Ratchet reveals his true intentions: he will use the turtle to take over the world, which everyone immediately thinks is stupid. As his group manages to escape from the pirates, he activates his giant mechanical castle which takes the turtle and manipulates it using giant cables in order to force it to move, to advance his world domination plot. The Straw Hats gather together and break into the castle in order to stop him, but Chopper goes off on his own when the turtle starts speaking to him. The remaining six are caught in a trap, where they have to deal with Ratchet and one his inventions, a mechanized battle suit, which empresses Luffy, up until he easily destroys it and Ratchet escapes, leaving them trapped. The Straw Hats remain trapped, only to be released by Gonzo. He and Ratchet's mother arrive and beg the crew to stop Ratchet, as he uses the castle to take control of the turtle. At this point, Chopper learns that the turtle is to be awakened every 1000 years to lay its eggs. The island turtle starts moving, and when Usopp notices this, he starts to run back outside to make sure the Going Merry is alright.
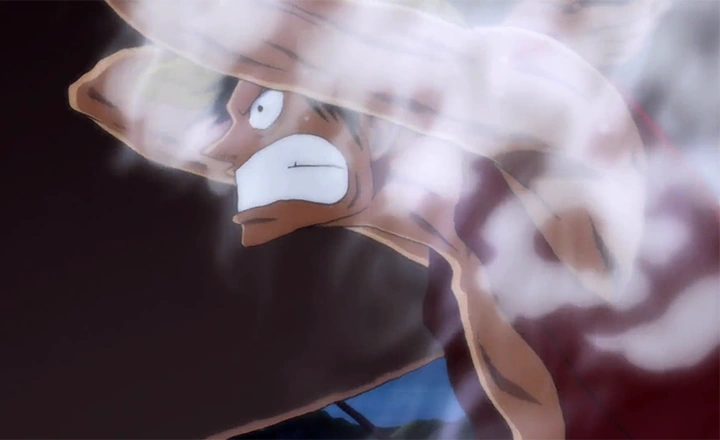

Luffy activates Gear 2 for the first time.
As Luffy runs on ahead, Zoro and Nami get separated from Sanji and Robin, landing in a roller coaster cart. As they travel along the track, getting farther away from the castle, they are attacked by Maji in a robotic cart. Meanwhile, Sanji and Robin are attacked by Ratchet's other henchman Honki in a mechanic suit. At the top of the fortress, Ratchet faces Luffy personally in another battle suit (which Luffy calls "cool"). After Luffy destroys it, Ratchet quickly comes back with another robot attached to a boat that can fight on both water and land (which Luffy calls "uncool"). Unfortunately it is a disaster when it could not even reach Luffy, so Ratchet then decides to get his ultimate battle suit. Luffy runs into Ratchet once again and battles his greatest robot battle suit. During the battle, Luffy accidentally activates Gear 2 and easily destroys the robot, wondering about what he did afterwards. Everyone in the castle then gathers at the wreckage, where Ratchet is defeated and subdued.
Nami's group, who had retrieved the ship, meet up with everyone and tell them that the turtle is going to crash into a nearby island. Using a combination of attacks from Usopp, Sanji, and Zoro, Luffy executes an attack called Gomu Gomu no Kaiten Ono on the castle. Luffy breaks the castle apart, releasing the turtle. The turtle stops and successfully lays its eggs. As the crew start to leave, one of the eggs hatched. Luffy sees this and realizes that the Golden Crown is referring to the broken turtle egg shells, which are literally made of gold. They take one of the shells with them as they leave what's left of Mecha Island, but it ends up sinking into the water as they sail off towards their next adventure.[61]
Foxy's Return Arc[]
| This is an empty section. Please help the wiki by adding information to it. |
Post-Enies Lobby Arc[]
| This is an empty section. Please help the wiki by adding information to it. |
Thriller Bark Saga[]
Ice Hunter Arc[]
Luffy and his crew, onboard their new ship, the Thousand Sunny encounter a damaged ship, whose members led by a man named Stansen they decide to help, but who then try to trick them. They are then revealed to be working for the Accino Family, a family of bounty hunters, led by a man named Don Accino.[62]
At the same time, Salchow of the Accino family receives Stansen's report and tricks the Straw Hats into moving into a field of icebergs near Hyokaido, an area that is sometimes known as the frozen highway. Once trapped in the Hyokaido, the two boats have nowhere to go as the icebergs seem to move according to the Sunny's movements and lock them in.[63]
Meanwhile, the Straw Hats learn that the former Phoenix Pirates reportedly sailed into the New World but were heavily beaten there, losing the life of Vigaro, a crew member and vice-captain. Thereafter, they lost their flag to the Accino Family and became their soldiers-though only Stansen shows any "loyalty" to them. When their heavily injured captain, Puzzle recovers, he says that Stansen's decision "wasn't bad", that they will no longer be pirates or sail to the New World and that they will stay the bounty hunters' underlings. No one in the crew agrees with this, especially the very young and passionate member named Jiro, but the captain is not moved at all. Luffy, who was with Chopper on the Phoenix's ship to look on the injured Puzzle, head back, but the rope that was used to hold the ship close to the Sunny breaks in a rampage of several mysterious underwater "eruptions", separating the two ships.[64]
Still on the broken ship with the Phoenix Pirates, Chopper and Luffy try to leave in a rowboat, but come back just in time to stop Brindo, who just arrived from severely injuring Stansen. When Brindo tells Luffy, how his family have already stolen their flag, he gets angry and begins to fight him.[65] As Luffy fights Brindo and after a while manages to pull him into the water, which worries Chopper until he is then chained up by Puzzle and pulled out of the water, along with Brindo, who they captured.[66]
On the Phoenix Pirates ship, Brindo is still captured. Puzzle offers a deal: himself for the crew. However, it is foiled by Jiro screaming into a Den Den Mushi to Campacino that should they do anything against them Brindo will be killed. Campacino then comes to the ship and frees his brother. Luffy and Chopper confront Brindo and Campacino in their "combination play," utilizing the power of magnetism. They plan to knock Luffy into the sea and manage to land him on an iceberg.[67] Luffy battles the twins but is unable to strike at them as they leave back to Lovely Land, the family's headquarters. Back on the Phoenix Pirates' ship, Luffy and Chopper decides to follow the twins and get their flag back. Jiro wants to go too, but his captain forbids him to. He gets into a "show" argument with Luffy, who then says he's got a strong will and tells him to go with them. On the rowboat, they follow the twins all the way to Lovely Land, to which Luffy demands out loud for them to give back their flag.[68] As most of the Accino Family, minus the Don and Lil go to confront Luffy, most of the crew show up to help him, as Sanji stops Salchow, Arbell, Hockera, and the twins from attacking him, with only Brindo left to fight Luffy. Luffy fights Brindo and manages to defeat him, as the others manage to defeat the other members, which left an angry Don left for Luffy to fight.[69]
Luffy confronts the Don and demands his flag. The Don becomes angry and "heats up". Luffy tries to punch him, but the Don can heat up any part of his body so he cannot land a single hit. He then uses a slab of ice and rams it into Don Accino with a Gomu Gomu no Bazooka. As the fight progresses, the Don gets even more angry and Lovely Land starts to melt. He utilizes his power at 5,500 degrees and begins throwing "atsuyaki eggs" (heatballs) at Luffy. When this proves still fruitless, the Don amazes Luffy with "Atsu Atsu Gatling", a somewhat copy of Luffy's technique, though the punches themselves do not hit Luffy, only the generated heatballs do.
After a long fight, Luffy enters Gear 2 in order to end it quickly. He punches Accino and manages to throw him into the Accino Family's castle building, destroying the Don's collection in the process. With the Don getting angrier, he heats himself up more and soon, the temperature heats up so much that a volcanic rift in the iceberg opens, into which the Don falls. However, thanks to the power of the Atsu Atsu no Mi, he is able to survive and heat up even more to 10,000 degrees. He then proceeds to attack Luffy, trying to make him fall into the lava. He does not succeed, thanks to Nami's cooling a small patch of lava into rock, but he then proceeds to laugh at Luffy's dreams and about pirates risking their lives for "such a stupid thing" like a pirate flag. This finally makes Luffy serious and somehow enables him to actually physically strike the Don without burning, hurling him into the ruins of Lovely Land and after a grueling fight, Luffy finally managed to defeat him.[70]
After the intense battle between Accino and Luffy ends, wherein the Don is defeated and Hyokaido was completely melted, The Straw Hats then depart as Hyokaido begins to fall apart, while ensuring to put the flag back on the ship before Luffy notices its actually gone. As they sail away from the area, with the defeated Accino Family sail away with the Don in tow, Campacino and the remaining grunts follow them and try to get revenge. Then suddenly, the Phoenix Pirates arrive and Puzzle challenges Campacino instead. While they sail off, Chopper is worried about them, but Luffy says to see how determined they are and that nothing will happen to them. As Puzzle promises to meet the Straw Hats again in the New World, the crew sail away from the once frozen area, and continue onward toward their next adventure.[71]
Romance Dawn Story[]
| This is an empty section. Please help the wiki by adding information to it. |
Spa Island Arc[]
As the Straw Hats relax on Spa Island, they met Lina, her sister Sayo, and her pet sea raccoon, Nukky, who can shape-shift. Sayo is holding a notebook, and when asked about it, she decides that she and her sister should leave. This is when Foxy, along his loyal crewmates, Porche and Hamburg suddenly appear much to the Straw Hats' surprise (though Luffy takes awhile to remember who he is). While still miffed at his defeat since their last meeting, Foxy's only concern is Sayo's notebook. With a new trick up his sleaves, Foxy incapacitates the straw hats and take girls, and takes the notebook. Just as Foxy is about to have them all fall down into the ocean, Franky and Brook show up, and Luffy asks them to beat Foxy up, to which they do, causing a panic on the island in the process. As Luffy and the others make back up, Foxy tries and fails to use his new trick against them, and Luffy sends him and his crewmates flying with a Gum Gum Bazooka.
As the situation dies down, the sister's explain that the notebook contain's their father's notes for creating a gem, and that the last clue to making it was somewhere on Spa Island. Overhearing the conversation, the owner of the island, Doran takes Sayo hostage, revealing that he was scheming to take the treasure for himself, having been the one that employed the Foxy Pirates and set them loose on the sisters. Doran then tells the crew to find the treasure if they want the girl back. The group panic over what to do until Luffy makes the suggestion of simply destroying the island much to Doran's panic.
As the whole crew, including Zoro, begin destroying the island, an angry Doran decides to stops the bunch by showing them Sayo tied to a stake and a gigantic cannon aimed at her. To show he was serious, he fires a warning shot that barely misses Sayo. Doran then demands the notebook for Sayo's life. Lina tempted to do it was stopped by Sayo, telling her not to give up on their father or his goal, and managed to convince Lina to refuse giving up the notebook. The Straw Hats then proceed to stop Doran and rescue Sayo. Luffy, with Lina and Nukky holding onto him, jumps into the air, uses Gear 3, and preform his Gum Gum Giant Axe, splitting the island in half and sinking it, which annoyed the crew since they weren’t out of harms way yet. After doing this, Luffy shrinks and he, Lina, and Nukky land in the ocean. As they are being rescued by Sanji, Lina sees an x-shaped crack in the ocean floor below the island. After telling the crew this, they all realized that the clue was under the island the whole time. The heat from the lava soon makes steam form around the group and the reflection from the sun causes a circular rainbow effect. The sisters then realize that the steam is the final clue to make the gem.
A few days later, the Straw Hats' continue their journey when Nukky flies in and delivers a letter to the crew from his owners. Sayo and Lina succeeded in making the rainbow gem and are living happily with their father who returned, alive and well, just in time to see the creation of the gem. They even sent the gem to the Straw Hats as a thank you, and while the crew gather around to look at the gem, it starts to rain candy out of nowhere, and the candy knocks the gem out of Luffy's hand, causing Nami to panic and demand that everyone search for it on the deck.
Summit War Saga[]
Little East Blue Arc[]
| This is an empty section. Please help the wiki by adding information to it. |
One Piece Film: Strong World[]
On board the Thousand Sunny, the Straw Hats read news of attacks on East Blue. Luffy said they would return to East Blue to protect it when Shiki's ship appeared overhead. After they warned him of the storm ahead, Shiki came down to meet them. There, he revealed his Devil Fruit power to make any inanimate object he touches ignore gravity and float. After learning it was Nami that delivered the warning and that they were heading to East Blue, Shiki offered to take them there and used his power on the Sunny.
Together, the two ships traveled to the floating island seen before where Shiki suddenly kidnapped Nami. Luffy and the others tried to rescue her, but by controlling the Thousand Sunny using his power, Shiki escaped them and scattered the Straw Hats among the fragments of the island.
Luffy inflated and landed safely on a nearby island. Almost immediately after landing, Luffy was chased through the forest by a Land Gator. Right after, a Forest Octopus pursued and assaulted it and began its chase after Luffy. As Luffy cleared the forest into an opening of ruins, the Forest Octopus was attacked by a giant Mantis. A Terror Bear snatched the Mantis in its paws and smashed it. It then began to charge at Luffy, who charged back as the two fought. The bear proved smart enough in dodging Luffy's moves, and Luffy used Gear 3 to overwhelm and defeat it.
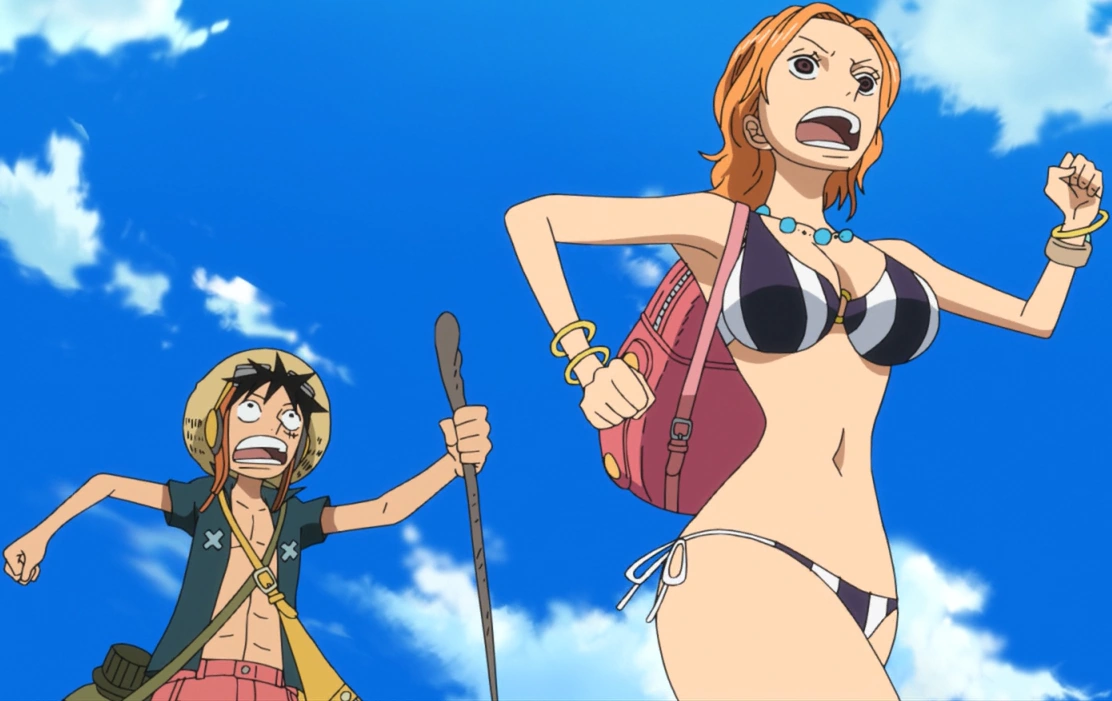
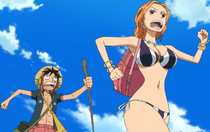
Luffy and Nami running from danger.
Afterwards, Nami managed to escape her captivity with the help of Billy, and found the Thousand Sunny. Luffy arrived moments later, being chased by several giant scorpions. Billy defeated the scorpions using electricity, and Nami and Luffy talked about what had happened. They soon decided to search for the others, using Billy for transportation.
Luffy and Nami joined Usopp, Chopper, Zoro, and Sanji at the village, and they learned of Shiki's plan from the village residents, who, not knowing where the Straw Hats originate, were relieved to be rid of the monsters. Shiki arrived sometime later and confronted the Straw Hats. Luffy told Shiki that he was going to defeat him and the crew began to fight. Shiki avoided most of Luffy's attacks but helped free Sanji at one point during the battle. Despite some initial success in fending him off, the Straw Hats were defeated. Nami was coerced into rejoining Shiki with him agreeing to spare the Straw Hats and her hometown.
Nami recorded a message, using the Tone Dial, which was supposed to be a farewell message. After leaving it, Shiki's men removed the poisonous plants around the village, and caused the animals to destroy it. Robin, Franky, and Brook later arrived and rejoined the rest of the crew. Xiao went to them and gave them the Dial. Her mother, who earlier had expressed relief about the animals being sent to East Blue, apologized for saying how happy she was for Shiki leaving for East Blue. They then played the message, and after hearing only the first bit of it, Luffy was angered to the point that he would not listen to the rest of the message.
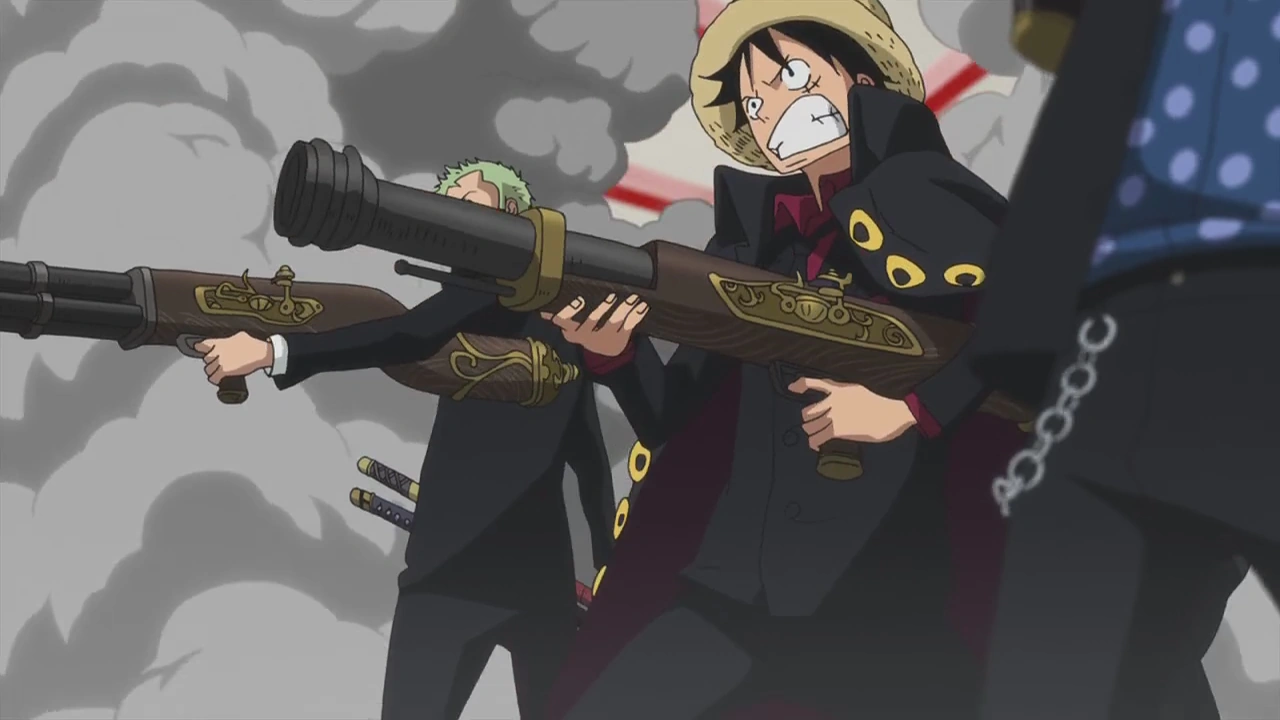

Luffy and the rest of the Straw Hats fight to rescue Nami.
The Straw Hats later arrived at Shiki's palace. They broke through the gates and made short work of the guards outside. While the Golden Lion Pirates prepared a toast to the commencement of the operation, the Straw Hats marched into the main meeting room brandishing various firearms and a new wardrobe. Shiki called them simply a suicide squad and revealed hundreds of men around them.
Luffy and his crew unloaded their firearms in the room, defeating most those gathered and then split up to defeat the rest. Luffy chased after Shiki, with the others helping fight off his minions and hordes of animals who began running wild in Shiki's fortress. Shiki later tried to attack Usopp and Chopper when they were trying to save Nami, but he was stopped by Luffy, who activated Gear 2.
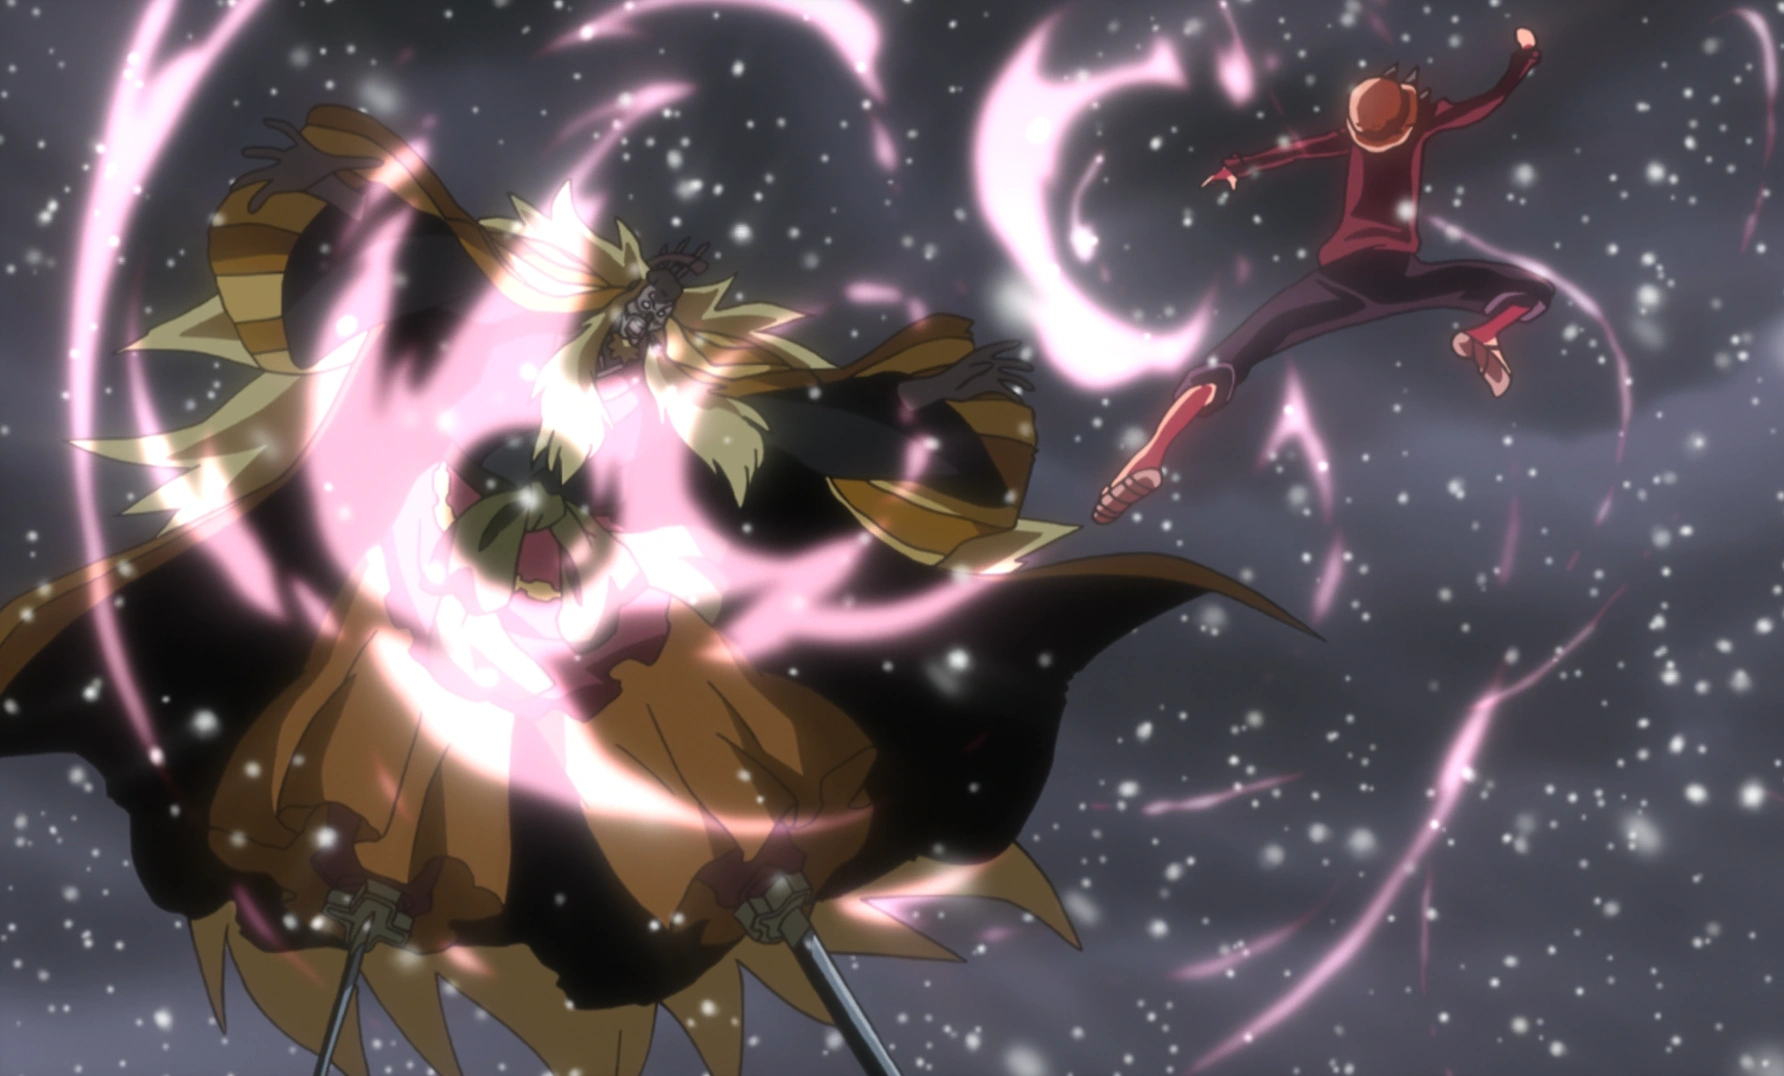
Luffy vs Shiki.
The battle began with Luffy striking Shiki off guard with a Jet Pistol attack, knocking him back in the air. Luffy then mounted Billy, taking their battle to the sky. They both flew through the different islands, destroying floating rocks and chunks of land in their way as they traded blows with one another. Shiki cut apart a chunk of the floating ocean around an island and used it to imprison Luffy and Billy, trapping them in the water. He then slashed it apart, sending Luffy and Billy falling to the island below.
Luffy picked himself back up and asked Billy to carry higher into the sky. Luffy asked Billy to save Nami from Shiki as he jumped high into the storm clouds raging above. Luffy used Gear 3 and inflated his leg, letting powerful bolts of lightning charge through it. Luffy yelled that he would not let Shiki go to the East Blue as he unleashed his devastating Gomu Gomu no Gigant Thor Axe attack. Shiki tried to hurl chunks of rocks to stop him but Luffy's attack smashed through his defenses and broke the main island in half underneath him, defeating Shiki.
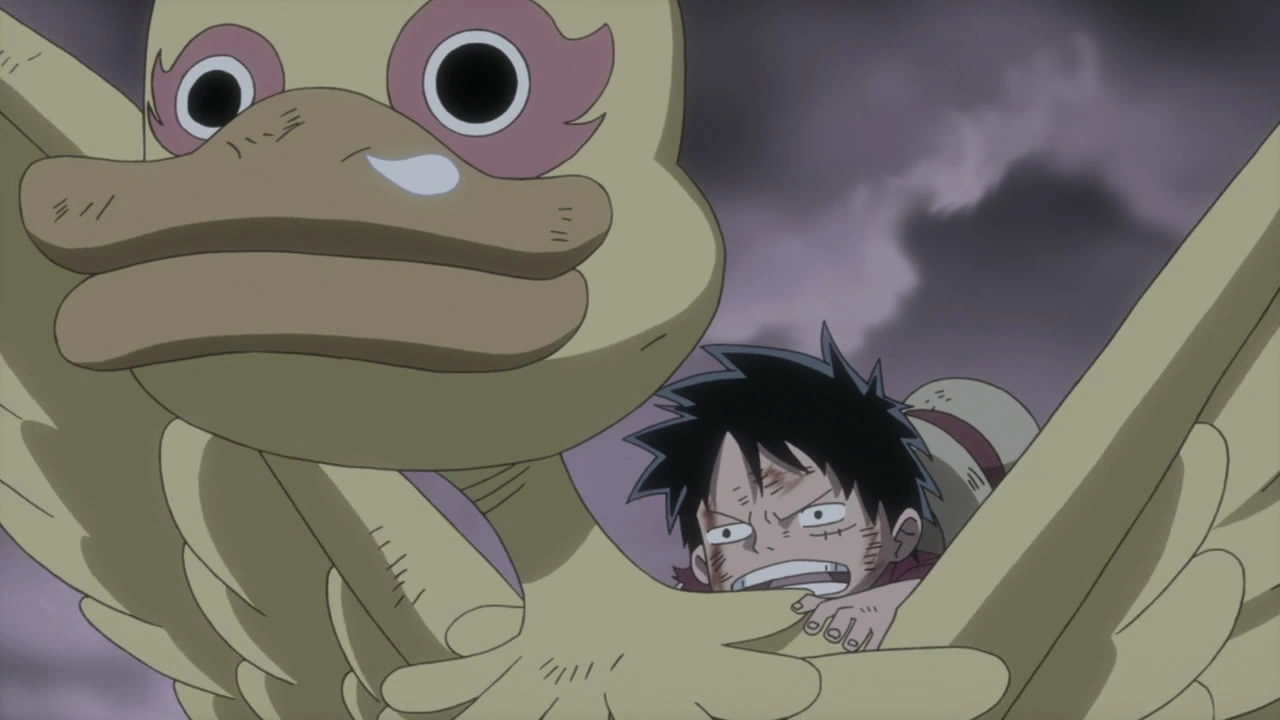

Luffy emerges victorious.
Luffy and his crew managed to escape and continued on with their adventure. Luffy confronted Nami about the message she left on the Tone Dial, angry that she seemingly did not have faith in them. When the others revealed that he did not hear the whole message, Nami tried to stop Luffy from playing it, feeling embarrassed of its content. She, Luffy, and Usopp wrestled over the Dial, but it was knocked off the ship. It was revealed that on the other half of the message, Nami indeed asked them to save her.[72]
One Piece 3D: Straw Hat Chase[]
| This is an empty section. Please help the wiki by adding information to it. |
Toriko x One Piece Collaboration Special[]
| This is an empty section. Please help the wiki by adding information to it. |
ONE PIECE 3D! Trap Coaster[]
| This is an empty section. Please help the wiki by adding information to it. |
During the Timeskip[]
3D2Y[]
Luffy continued his training with Rayleigh coaching him on how to use Haki by surviving the hostile environment of the island.
He later followed a scent to a buffet laid out for him by the Kuja (save Hancock still back at Amazon Lily). Just then, a pirate named Byrnndi World showed up and kidnapped Sandersonia and Marigold while defeating Luffy. Hancock heard all of this on a Den Den Mushi with Byrnndi challenging her to come after him for her sisters, leaving a Vivre Card for her to follow.
Rayleigh, Hancock, and Nyon managed to find Luffy. Hancock naturally wanted to go save her sisters and Luffy decided to tag along despite objections from Rayleigh since he was still in the middle of training. He eventually agreed only after Luffy promised not to make too much of a scene to keep himself hidden from the Marines.
The Kuja Pirates eventually reached their ship which was revealed to be a massive island base submarine. Luffy and Hancock jumped aboard to begin their rescue operation with the two first fighting against Sebastian, a fish-man and strongman of the World Pirates. Despite some difficulty, they managed to beat him.
Meanwhile Luffy and Hancock fell into a trapdoor into the interior of the ship. After running for a bit, they went into an open area and were separated when they tried to go down a hallway. Byrnndi confronted Luffy once more, mocking him on his failure to save Ace. Luffy fought but found that he was no match for Byrnndi, who knocked him around mercilessly, ending with him nailing Luffy to the floor and knocking him out with a Haki-imbued punch.
Buggy and his crew, who were watching the fight from outside the room tried to help Luffy recover while Hancock continued on, confronting Nightin. Luffy managed to recover after remembering the promise he made to his crew and Rayleigh and head off to find Byrnndi. However, he was hampered by Gairam's Kyubu Kyubu no Mi powers, which allowed him to shift the ship's hallways around to his whims. He eventually led Luffy to him and they battled with Luffy briefly incapacitated. Buggy's crew happened upon the area and Buggy bought Luffy time for him to run ahead.
Luffy arrived there and once more confronted Byrnndi in battle. He managed to stay on even ground against him but Byrnndi's speed and experience in Haki left Luffy at a disadvantage. Managing to form Haki over both his arms, he managed to knock Byrnndi down. Hancock soon arrived in the room to which Luffy ordered her to get her sisters off the ship while he fought with Byrnndi. She did so with an order of her own for Luffy to survive.
Luffy and Byrnndi engaged in one final battle with the latter once more mocking him for being unable to save Ace. Luffy acknowledged this but countered that he had friends waiting for him that he could still protect. After trading rapid fire blows, many of which managed to break through Byrnndi's defenses. Byrnndi rushed at Luffy, only for Luffy to stretch his arm and hit him with a Gomu Gomu no Red Hawk, which was finally able beat Byrnndi. With this, Luffy made his escape from the ship.
Luckily, he managed to get out and jump to the Kuja ship in time to which Hancock rushed over and hugged him in relief, much to the shock of her family, Luffy, and even herself. In the aftermath, Luffy returned to Rusukaina to continue his training and Buggy was given credit for Byrnndi's defeat.[73]
Fish-Man Island Saga[]
Episode of Nami[]
With Nami having stolen the Going Merry and headed back to Arlong Park. Zoro, Usopp and Johnny had already went after her earlier, and Luffy, Sanji, and Yosaku follow suit. In the meantime, it is revealed that Nami is a member of the Arlong Pirates as she reports back to Arlong, who soon celebrates her return with a rowdy party. Luffy, Sanji, and Yosaku eventually crash recklessly on the island and run into Zoro (literally). Johnny runs up to them shortly afterwards and tells of Nami's betrayal; Luffy doesn't believe him and angrily threatens to beat him up. Nami arrives, however, and tells Luffy coldly to leave the island; her words don't register with him, and he simply lays down to take a nap, claiming he refuses to listen to her. She runs away infuriated at his stubbornness, and when the crew refuse to budge, Johnny and Yosaku leave, wary of the situation.
Usopp then shows up at Luffy and the crew's location, alive, and tells them how Nami actually saved his life. Initially puzzled by her behavior, the crew then realizes that there must be some deeper motive and goal than just money going on in Nami's head, and just then, Nami's sister Nojiko comes up to them. Wishing to make them understand why they have to leave, she solemnly offers to tell her and Nami's backstory; Luffy opts not to listen and goes on a walk, and the rest of them stay behind to listen (although Zoro almost immediately falls asleep). Johnny and Yosaku also listen, hiding in the bushes. While the others listen to Nojiko and Nami's past, Luffy continues to go on a walk, eventually running in a distraught Nami. As Nami psychotically stabs her shoulder tattoo while crying and yelling Arlong's name. Luffy comes and stops her, and while she she initially rejects him again, she finally asks him for his help, which he agrees to give her.
Angry and pumped up, Luffy gets the crew and heads to Arlong Park. Upon arrival, he slips past the Fish-Men thugs and decks Arlong, who goes flying into the wall. Arlong, surprised at Luffy's strength but otherwise just annoyed, orders his crew to attack. Luffy dispatches all of the "small fry" using Gomu Gomu no Pinwheel, although he gets himself stuck in the cement using the technique. Usopp tries to free him, but accidentally slings Luffy at Chew, who then starts to chase him out of the park. Arlong then attempts to throw Luffy in the water, although he is stopped by Sanji, who frees Luffy by kicking the cement.
As Arlong's crew is taken down one by one, Arlong becomes enraged at their defeat, and he and Luffy viciously trade blows, eventually ending up Nami's cartography room. Luffy notices Nami's blood-stained pen while Arlong talks on his intent to use Nami; both of which get Luffy very, very angry. Luffy then begins to destroy the room while Nami watches from below. Arlong attempts to stop him by biting him. But then, Luffy uses a single Gomu Gomu no Axe to defeat Arlong and completely destroys Arlong Park in the process, and he emerges from the rubble and screams to Nami that they are friends. The village celebrates Arlong's defeat, and the crew promptly beats up Nezumi and the Marines (which contributed to Luffy's first bounty).
Everybody celebrates at a village wide festival, and later that day, Genzo makes Luffy promise to always keep Nami happy, which he complies with. Nami then gets her Arlong tattoo replaced with her own symbol, and the crew sets sail from Cocoyasi Village, to which an older Nami finishes reminiscing about her past two years ago, as everyone is on the coated Thousand Sunny at the Sabaody Archipelago, as she and the crew, Luffy included, prepare to sail to Fish-Man Island.[74]
Toriko x One Piece Collaboration Special[]
| This is an empty section. Please help the wiki by adding information to it. |
Dressrosa Saga[]
Episode of Luffy[]
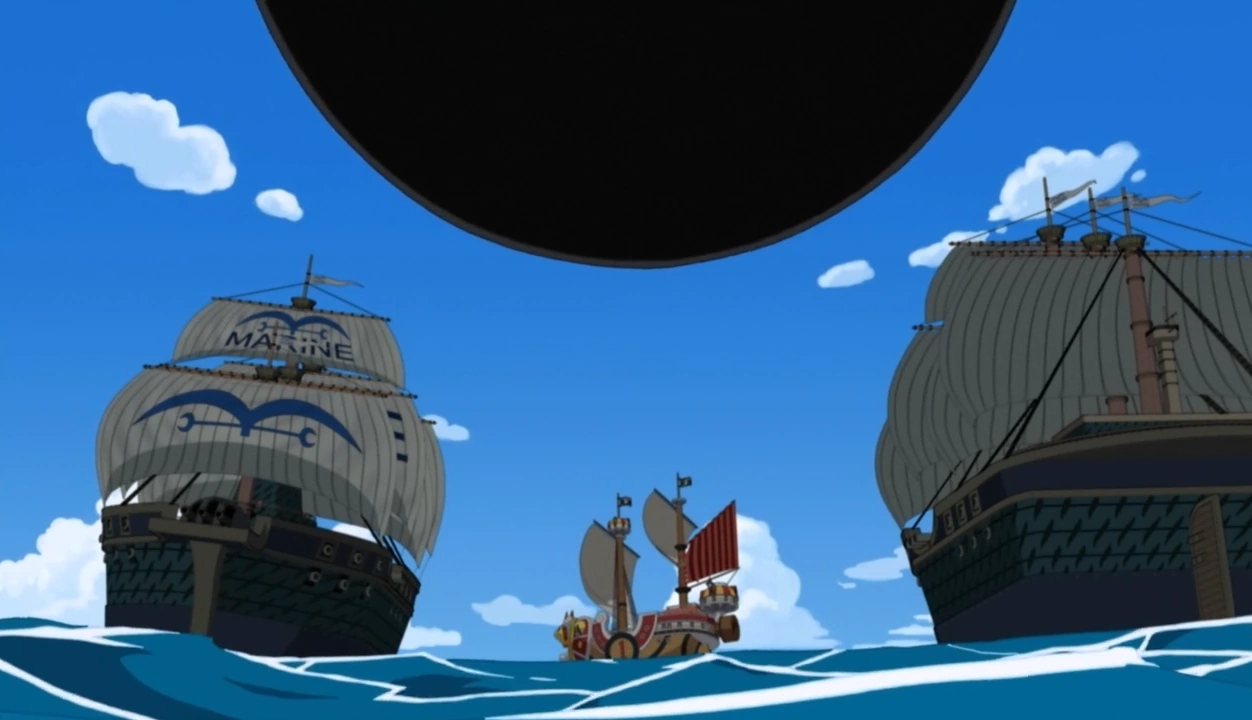

The Straw Hat Pirates attacked by Bilić.
During some spare time on the Thousand Sunny, the Straw Hats have a mock introductory show with Usopp hosting. Once Luffy's turn was done, they are interrupted by an attack from several Marine battleships. During the battle, the Straw Hats are forced to make an emergency Coup de Burst in order to escape a sudden attack from above, in the form of an immensely large cannonball. Crash landing on a nearby island, they decide to explore while Franky repairs and moves the ship. While Franky works on a way to move the ship back into the water, the rest of the Straw Hats explore the local town to re-supply what was broken or lost in the landing. However they all notice that the town is in short supply of everything and that only women, children or the elderly run the shops.
Later, Luffy comes across what appears to be a fruit stall on the outskirts of the town. Trying to eat several pieces, he quickly discovers that they are actually fake fruits made of wax. From behind, an old man approaches and quickly bursts into laughter over Luffy's mistake, then introduces himself as Diego, the man who had sculpted the fruits. Going inside, Diego is suddenly left dumbstruck as the entirety of his home had been blown away except the front wall and, upon looking over the hill discovers that it was the Thousand Sunny which had caused the damage in its crash landing. Apologizing for the destruction they had caused, Luffy is then led underground where he discovers the pride of Diego's collection, a multitude of life-like wax sculptures of famous pirates.
Luffy recognizes many of the sculptures in the collection room, but after seeing Shanks' sculpture, he is reminded of his childhood and the days when Shanks and his crew had visited Foosha Village, which culminated with his consumption of the Gomu Gomu no Mi and a near lethal encounter with the mountain bandit Higuma where Shanks had sacrificed his arm to save Luffy, earning the boy's eternal respect and admiration. Later, Usopp and Chopper discover the underground section and marvel at the wax figures, leading Diego to show them how his particular wax was created. Noting a poorly crafted figure of Whitebeard on a nearby shelf, Diego mentions that the wax itself is of a much higher quality then the one he can create and demonstrates this by easily destroying his own wax by knocking the sculpture against it though notes that it is weak against fire. Asking who had created it, Diego admits that the man was no longer around and had left him to join the Marines, which was his son, Regis.
Diego then explains the island's situation. Hand Island is an island of artisans that was once under the protection of Whitebeard. However, after he died in the Summit War of Marineford, rival pirates quickly set their sights on his territory. Marines quickly stepped in and built a base nearby which restored peace. Eventually, during mid-construction, Commodore Bilić was put in command. He called for a meeting of the townspeople and asked that they help build a cannon to help ward off pirate attacks which the people happily agreed to. Among them was Regis, who had joined the Marines to help the island, much to the dismay of Diego, who had hoped he would follow in his footsteps. However, once the cannon was completed, Bilic fired on the town as "practice", destroying several buildings and killing a few innocents as well. It soon became obvious that he just wanted the cannon for his own ends and used the families of the builders as his own hostages lest he fire the cannon on the rest of the town.
After telling this tale, Diego starts to head off to the Marine base to give Regis the Whitebeard figurine. But Luffy offers to go instead. Luffy later regroups with the entire crew and tells them his intention. After hearing this the others draw lots to see who'll go with him with Sanji and Usopp chosen. The next day the three head for the Marine base on the Mini Merry. Once they reach the base, the marines open fire once they notice Luffy forcing Sanji and him to invade the base which quickly leads into a chase. Eventually, the two find Regis and give him the figurine but Luffy is captured in a seastone cage once he steps on the platform where Regis's cell is. The wheel turns towards the water submerging the two. Sanji manages to jump in and free the pair and they escape into ocean via a sewer fan where they regroup with Usopp. The four rest on a reef where Regis explains he made the doll when he was six. When he went to join the Marines, Diego tried to at least have him take the figurine with him but he declined. Regis feels that he disappointed his father for not following the path he wanted. But after seeing the figure and being told that Diego always treasured it, he realizes that his father still believes in him. Likewise Diego, after being told why Regis was thrown in jail, is happy of his conviction to protect the island.
After hearing this, the four then notice that Bilic has started firing on the town, thinking the villagers are hiding the Straw Hats and demands they turn them over or he will destroy the town. Luffy's group head back to the base and make their way inside with Usopp and Sanji distracting the Marines while Luffy and Regis sneak in. As Zoro defends the town from Bilic's cannon, Luffy and Regis make their way into the base and gather as much wax as they can. The Straw Hats fight against the Marines while Regis makes his way up to the cannon's barrel and activates the wax, causing it to backfire and destroy itself.
Bilic emerges from the rubble of the cannon, obviously angered. He burns Regis's Whitebeard figure to mock Luffy as well as him then reveals he has a mobile cannon as a back up. Luffy faces off against him, but suffers trouble due to the cannon's speed, the constant bombardment Bilic fires into his rubber body and the spinning tops fitted with blades sent after him. His crew (along with some help from Koby) help take out the tops and Luffy finally manages to beat Bilic by getting in close enough to grab his snake puppet and pummel him with an Elephant Gatling, destroying his cannon in the process.


A Wax figure of Luffy is made.
Kizaru suddenly shows up much to the shock of everyone. The Marines believe he was the one who stopped Bilic and cheer for him as the Straw Hats make a hasty exit. However it turns out the Kizaru is really another wax sculpture created by Diego who made it on the request of Koby. Using the charade (as well as Diego throwing his voice to imitate the Admiral), Koby places Bilic under arrest and states he is likely to be court martialed while declaring that it was never the Marines' intention to enslave the island. He orders the Marines to help rebuild the island while Diego and Regis reconcile. Koby watches the Straw Hats go, promising he'll catch up to Luffy soon to which Luffy, seemingly hearing this, laughs in agreement. However as the crew flees, they realize they accidentally left Zoro on Hand Island, as Regis returns to his duties as a marine, and Diego finishes his latest wax sculpture; which is Monkey D. Luffy.[75]
Z's Ambition Arc[]
| This is an empty section. Please help the wiki by adding information to it. |
Episode of Merry[]
| This is an empty section. Please help the wiki by adding information to it. |
Glorious Island[]
As the crew leisurely mess around on the Thousand Sunny, Luffy, Nami and Brook are seen relaxing in the inflatable pool outside the Sunny, and Nami enjoying her swim reminds Brook that he can't swim and that he should be careful, with Brook stating that he being in the pool is a nice feeling for his bones. As Luffy enjoys the pool, he soon notices the presence of a Sea Monster with the appearance of a horse towering the Sunny. As everyone notices the monster, they start to panic, except for Luffy, who happily listens to Sanji telling him to get the sea monster for dinner, and then begins fighting and defeating the monster. After Luffy defeats the monster, he accidentally knocks his away, forcing everyone to chase after it with the Sunny. As the chase begins, they eventually reach where the monster landed, with Luffy excited to eat it.
As Zoro reminds Sanji not to forget the booze as well, Sanji comments on how that's all he thinks about, leading to the two of them arguing. Franky gets involved and tries to calm Zoro down, which only makes him annoyed at Franky, until Franky suggests that they should have a party. As Franky starts to talk about having a cherry blossom party, everyone is confused but interested. Later, Franky explains to the other guys that their party should be a buffet. With everyone originally against the idea, Franky goes on to list the different number of foods that they can have thanks to the sea monster meat, which gets the others dreaming and imagining the food as well.
After getting everyone excited about the idea, Luffy starts imagining an whole island filled with meat, with Zoro imagining a waterfall made of booze to go with it. Franky adds the idea of gigantic hamburgers with fries and cola, and Chopper wants clouds of cotton candy and cow milk bath. Brook gets so excited about this glorious dream island that he boldly asks Nami if he could see her panties, making her mad enough to kick him and tell him to come back to reality. As Brook lays on the ground, Sanji shows up telling everyone that the real meat is ready.
As Sanji hands everyone the food, Luffy states that real food is still the best and then Luffy yells at Usopp to hurry up so he can teach him how to imagine stuff as the cherry blossoms start to rain down and the party starts, with Luffy watching in amazement as Franky makes cherry blossoms rain down across the Sunny.[76]
One Piece Film: Z[]
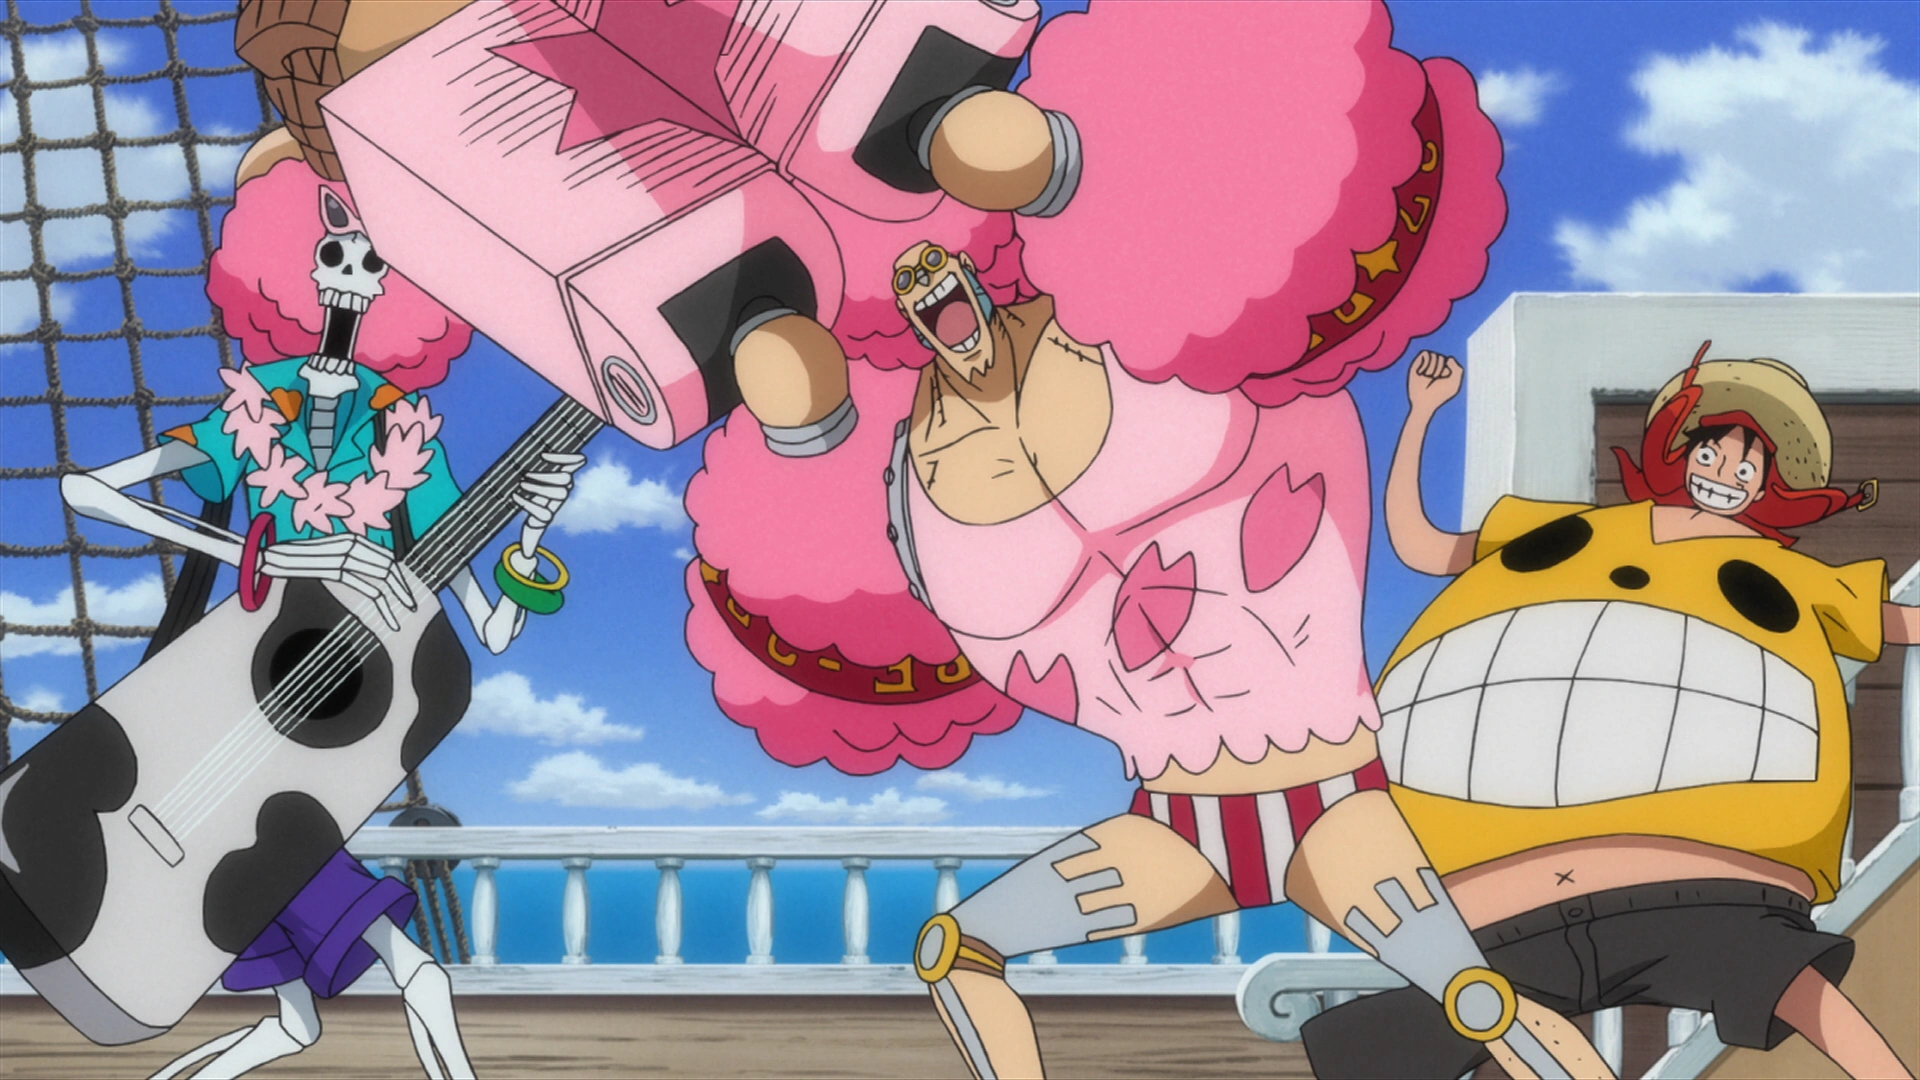
Luffy and the crew celebrating Cherry Blossom season.
Luffy and the Straw Hat Pirates are having a cherry blossom party. Luffy is goofing off, stuffing himself with meat while Brook is singing. Chopper becomes distressed when inhaling poison drifting in the air, while Brook is inspired to write a song about it. The smell is shown coming from Usopp spraying poison over his Pop Greens, as Robin happily waters some of the plants. Usopp reassures Luffy that the poison is merely meant for killing worms with Zoro showing a liking to the tainted flavor of his alcohol.
Chopper finds his milk still tastes bad and worries it's because he's growing up into an adult. Luffy tries it and finds it tasted horrible too. Volcanic ash begins to rain from the sky, with Chopper pouting it's ruining his fur. Nami studies her log pose and finds the needle spinning where the volcano had erupted from. Usopp whispers to her that they have to hide this from Luffy, and choose a safer route. Luffy notices it anyway, deciding to head in that direction.
Luffy spots the battered body of Z clinging to life on a piece of wood out at sea, and tries to rescue him. When he grabs ahold of his mechanical arm he becomes weak with Sanji and Usopp having to help pull him aboard. Chopper examines him, but finds that he should be fine. Robin notices his arm is built out of Seastone, the reason why Luffy became weak when he touched him. Nami finds it a dangerous thing, but Luffy and the others are in awe over it. Sanji reminds them all that Seastone is used against Devil Fruit users with him and Zoro debating whether to throw him overboard. Chopper defends him, with Luffy ordering him to save his life and that he'd deal with him if he was an enemy.
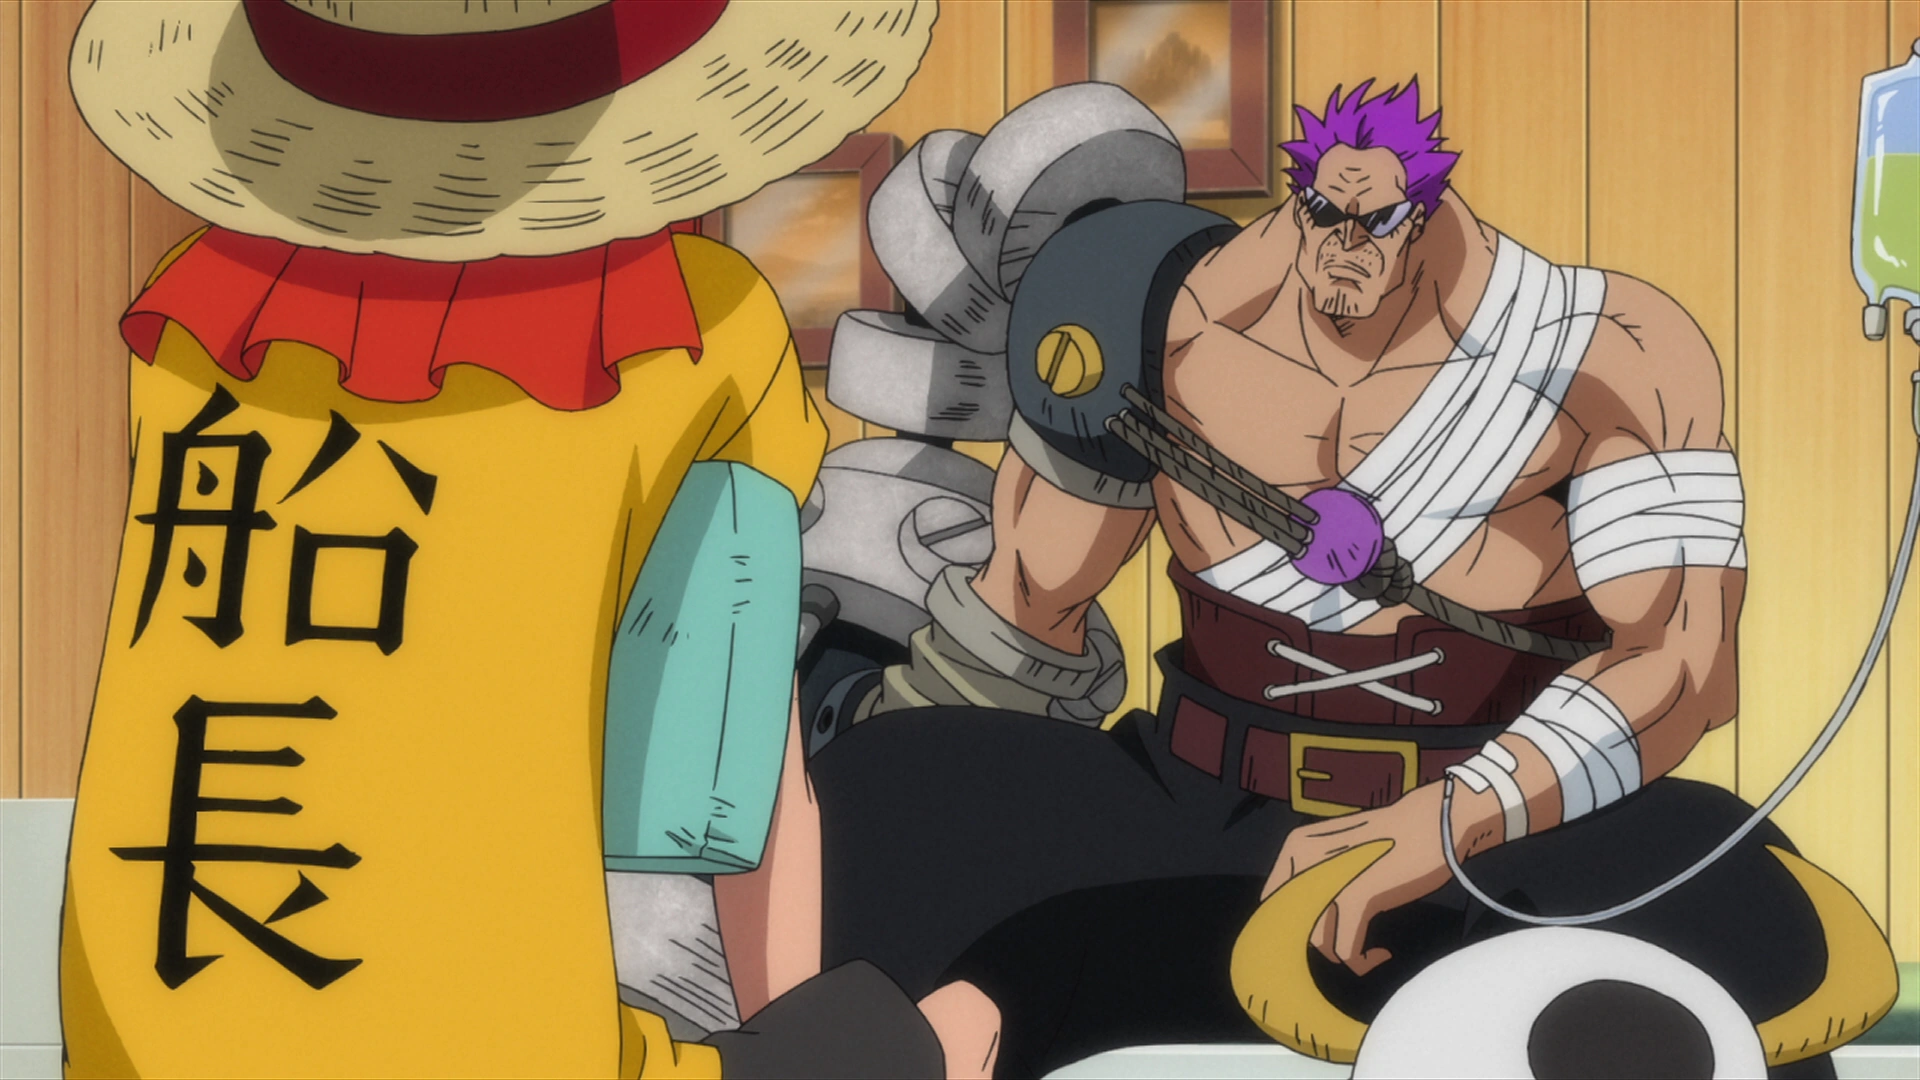

Luffy and Z meet.
Z meets Luffy and immediately tags him as the ships captain. Luffy asks him what he plans to do next, as Z tells him he is carrying a Vivre Card and his comrades should find him soon. Luffy begins asking questions about his mechanical arm, asking where he bought it. He tells them how when he lost his arm to a pirate, a Marine scientist helped build it for him. He tells Luffy its use against Devil Fruit users, able to weaken any foe once he gets a grip on them.
He does comment that due to its heavy weight, it would be hard to survive if he fell into the ocean and only a special key can take it off him. Luffy asks if he is a Marine, to which he responds he had left them for being too old and is pursuing a different goal. Luffy comments it would be bad if he was a Marine, telling him they are pirates.

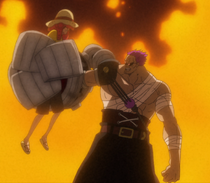
Z subdues Luffy.
Z is angered by this, and throws Luffy through the wall. He asks Luffy why he is a pirate, as Luffy proudly responds he will be the Pirate King. This comment infuriates him, as he madly swings his Battle Smasher around. Luffy, Zoro, and Sanji all begin fighting him with Z able to hold them all off with relative ease. Ain and Binz then arrive with a fleet of ships and board the Sunny, announcing they will be confiscating it.
Z overpowers the Monster Trio, as he holds Luffy in his grip, helpless against him. He chastises Luffy's dream, telling him he'll never be Pirate King with his strength. Curiosity piqued, he asks Luffy his name. When he tells him, Z connects him as Garp's grandson and spares his life. He announces to the Straw Hats he will destroy all pirates, as the Neo Marines begin to attack the Sunny. With the ship being damaged and most of the crew unable to fight back, Luffy has them retreat. He frees Franky from his bonds, as he uses a Coup de Burst to escape.
Luffy and the Straw Hats are recovering on a nearby island, where Franky goes to work on fixing the Sunny. He tells Luffy to go after Z while he repairs the damage done. Chopper regrets saving Z's life, but Sanji tells him a pirate should live without regrets of what he believes in. Nami tells him that they must track them down, or else she will never get her original body back. She would not be as helpful a Navigator to them without her full grown body. Nami proposes gathering intel on their enemy as the first place to start.
Mobston, an old man approaches them and asks if they had a run in with Z. He tells them many pirate ships that have come to the island have been attacked by him. He tells that many who had been attacked by him, lost their will to continue and left the New World. He is pleasantly surprised Luffy still wishes to fight him, after losing so badly to him and offers up his finest equipment to use in their quest. Nami tells the crew to not arouse suspicion, they need a new change of clothes first. They are told their best place to start is to take the Sea Train to Secon Island.
As they head to their next destination, they split up their search. Luffy, Brook, Sanji, and Zoro, all relax in a local hot spring to rest, recover, and prepare for the upcoming fight. Sanji comments Devil Fruit users are a pain, seeing Luffy and Brook become quite weak. Sanji tells Luffy to keep a low profile since the island is crawling with Marine soldiers.
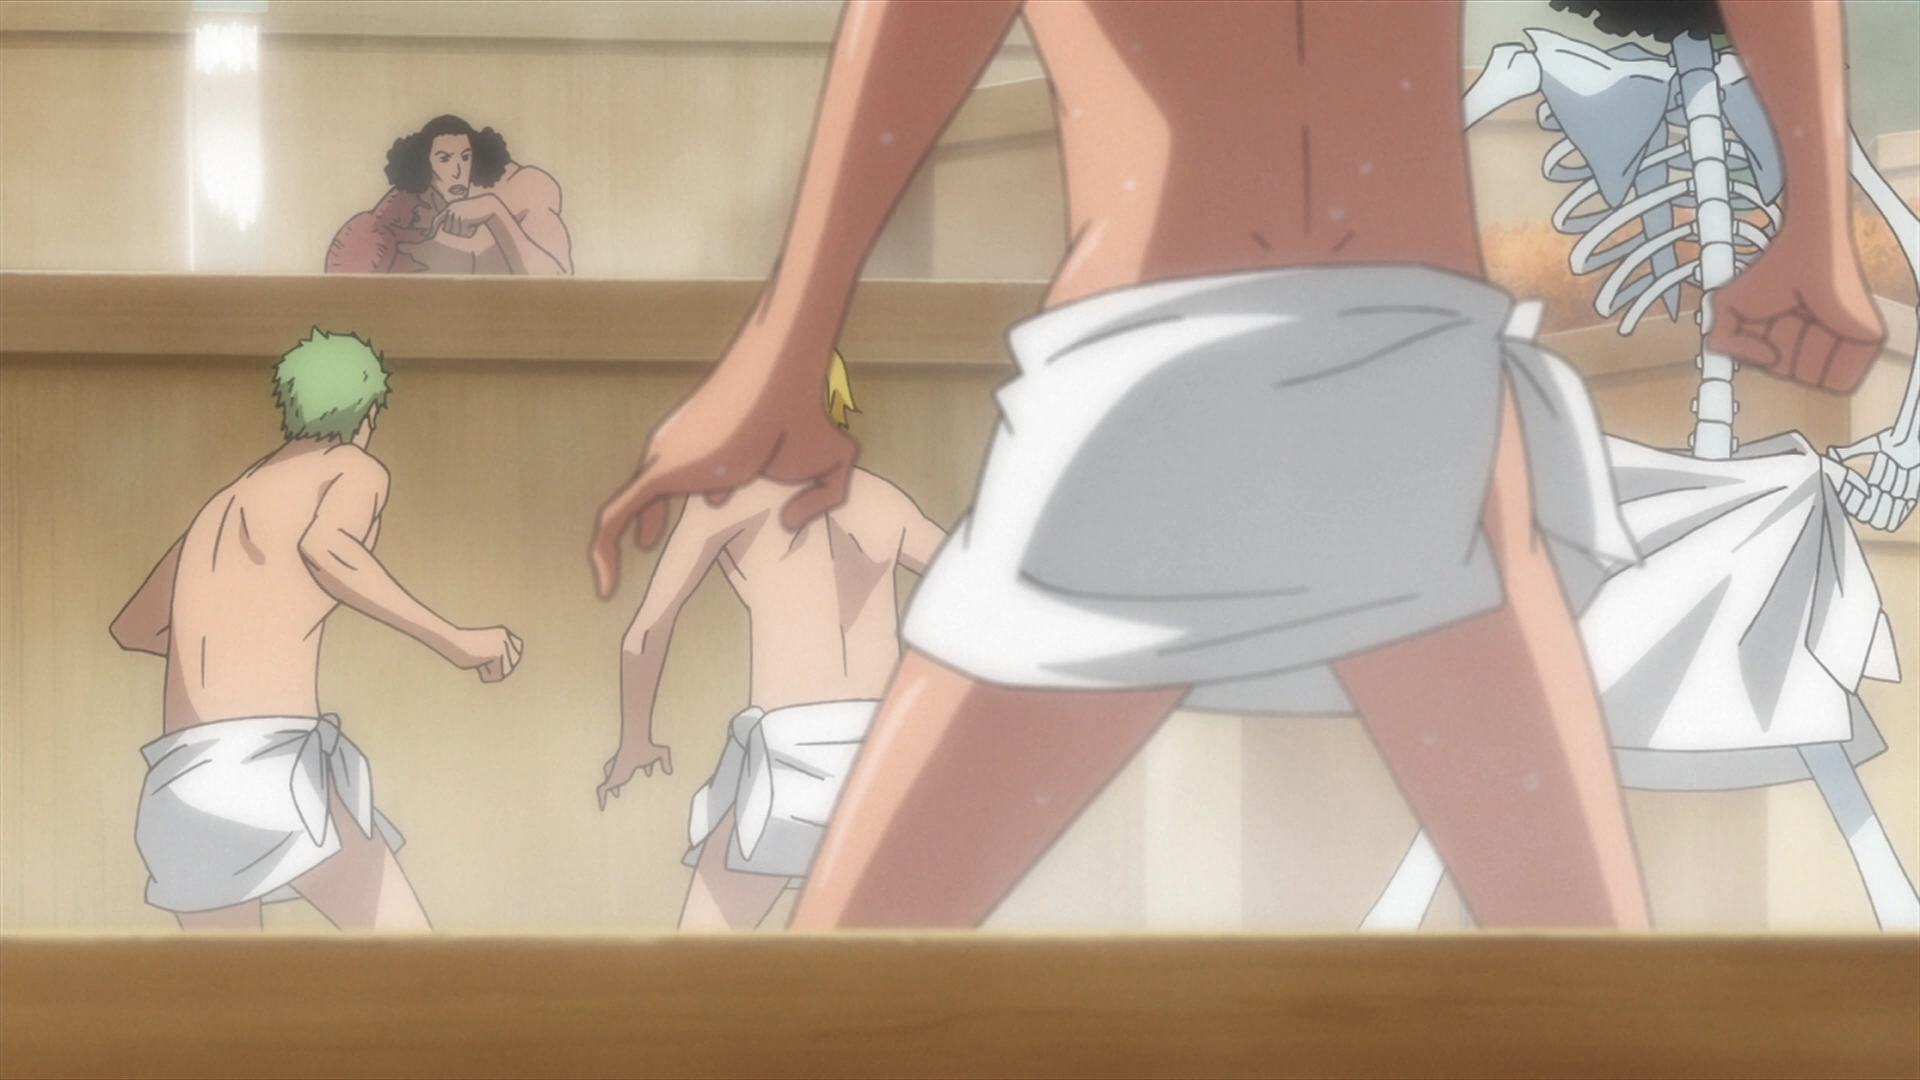
Kuzan with the Straw Hats.
As Luffy and the others relax in the hot springs, Luffy vows to not let his guard down around Z again. Sanji tells him as long as he is a Devil Fruit user and lets himself get caught by his arm he will lose, offering him and Zoro to fight him instead. Luffy turns him down, knowing to avoid his arm for their next fight. Among the other people in the bath is Kuzan who was eavesdropping in on their conversation. He chimes in saying he was getting tired waiting for them, leaving them to all immediately panic.
Kuzan reassures them he is not there to capture them, and had given up being an Admiral. He tells them again he is not their enemy anymore and reminds them if he was he would not be in a hot spring where he cannot use his powers. As Kuzan gets out of the water, the Straw Hats see his battle scarred body, and his missing leg that he regrows with his ice powers. He merely says he got carried away, when explaining this.
Kuzan and the Straw Hats talk some more, with Luffy asking him what happened to his leg. Kuzan takes offense and tells him there are some things that should not be asked. Luffy tries to change the subject and asks about Akainu on why the two of them fought, believing they were friends. Kuzan refuses to comment on that. He does go on say that he wishes his only reason for coming was to enjoy the hot springs, but is chasing Z. He guessed that they had gone against him, remarking how strong he is.
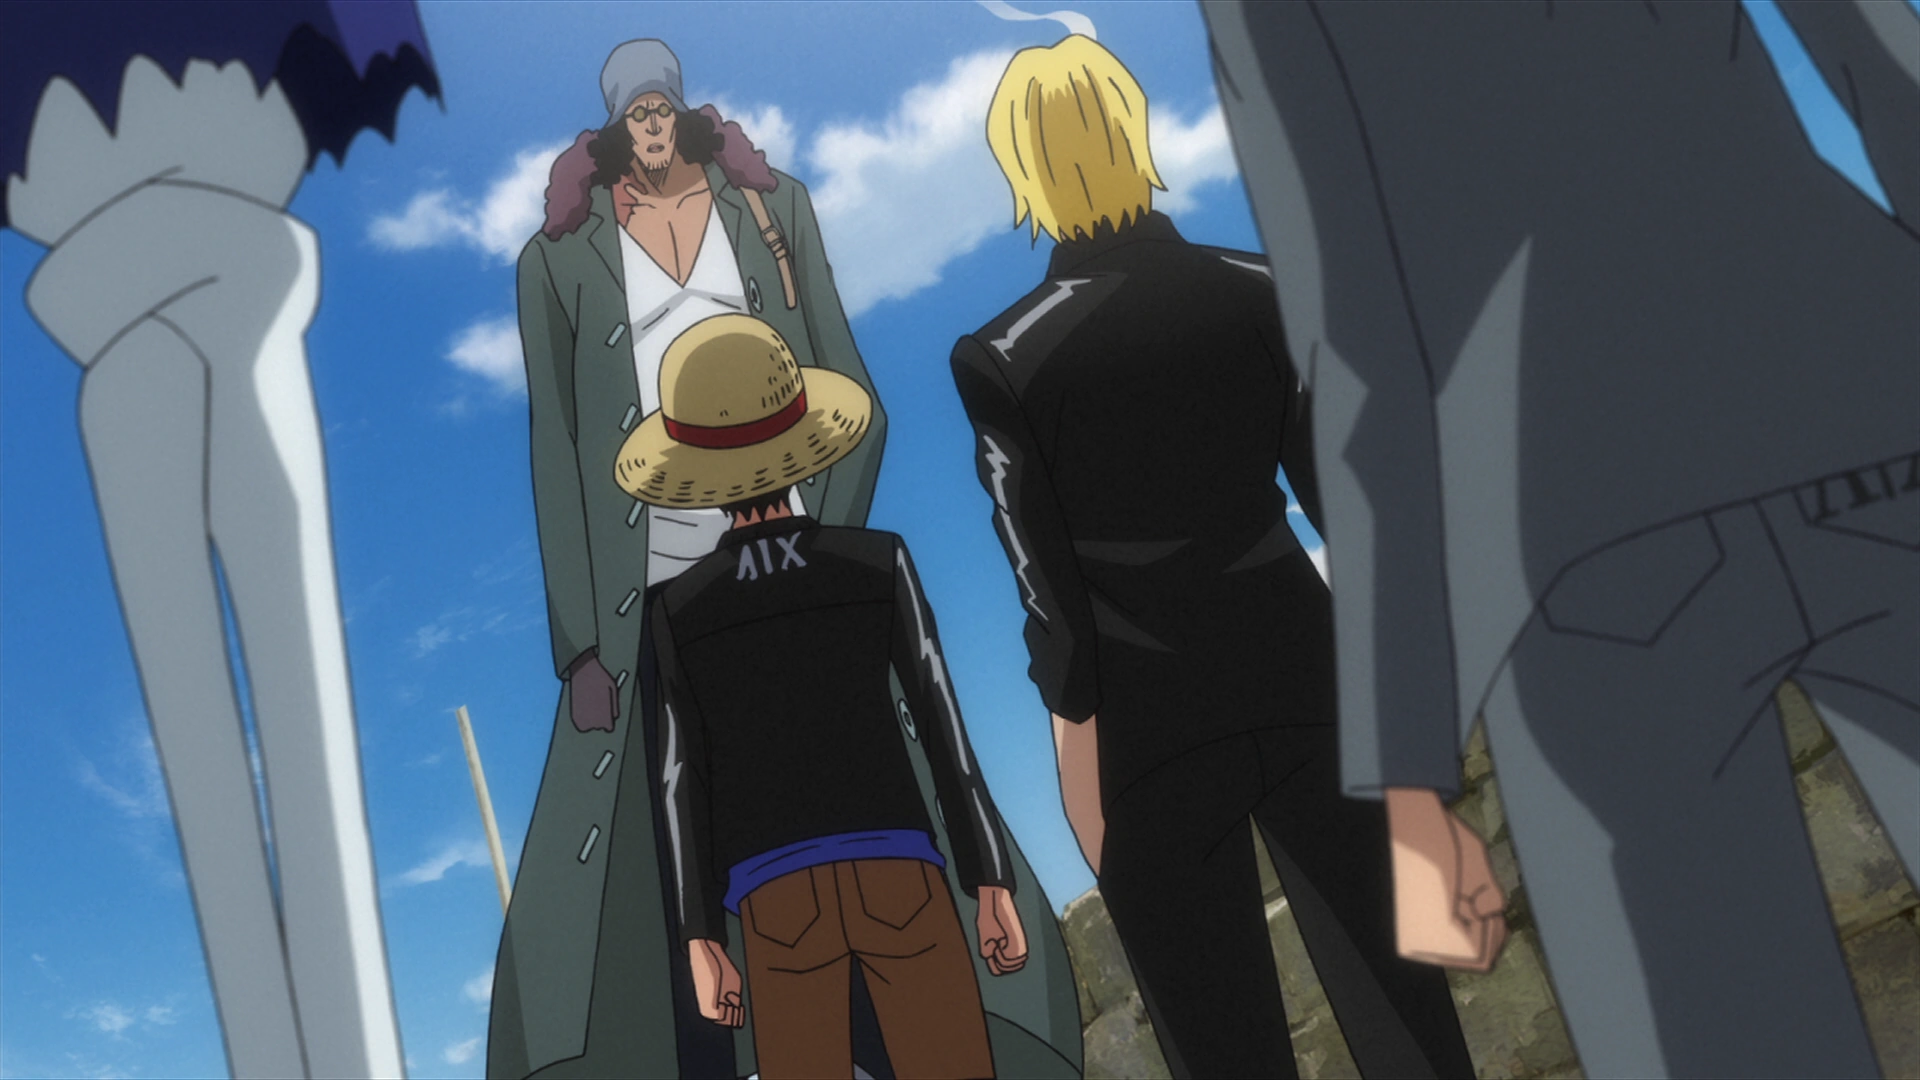

Kuzan warning the Straw Hats about Z.
Afterwards, Kuzan and the Straw Hats are seen making their way to port. He tells them that Z plans to destroy piracy by destroying the One Piece. He has chosen to follow Z's journey, but is unsure what actions he himself must take. He then departs, telling Luffy he will find Z on the island.
Luffy thinks back to his encounter of Z pondering over him, until the rest of the Straw Hats catch up with them with a group of Marines chasing them. Luffy dispatches them all with his Haoshoku Haki. Reluctantly, the Marine Captain tells him the location of Z. The Dyna Stones on the island explode, causing the volcano to erupt. Z informs his men the destruction the Second Point has been a success and they need only destroy one more island.


Luffy's second fight with Z.
Luffy charges forth and attacks with his Gomu Gomu no Rifle technique. Z blocks it, showing mild surprise to see Luffy. Luffy demands Z change his friends back to normal, as Ain and Binz attack. Sanji and Zoro intercept them, fiercely battling them both. Z tells Luffy if he wants something, he has to take it like a pirate. Luffy and Z both strike, the shock setting off the volcano to explode forth with magma. Kuzan saves the lives of some civilians by knocking away a volcanic rock and tells them to get to the Sea Train. Kuzan looks on at the devastation, wondering if Z has finally lost his mind.
Luffy tells Z he would not be able to catch him this time, entering Second Gear. Z sends a volley of bullets at Luffy that he dodges before attempting once again to land a hit. Z blocks him again, but this time using the power of his Armament Haki on his normal arm. He asks Luffy to become Pirate King if he has the determination to risk his life, and his friends. He knocks Luffy back, sending him running with more shots from his arm cannon. Growing more angry, he asks Luffy if he is willing to walk over his friend's corpses to achieve his dream before sending out a powerful blast.
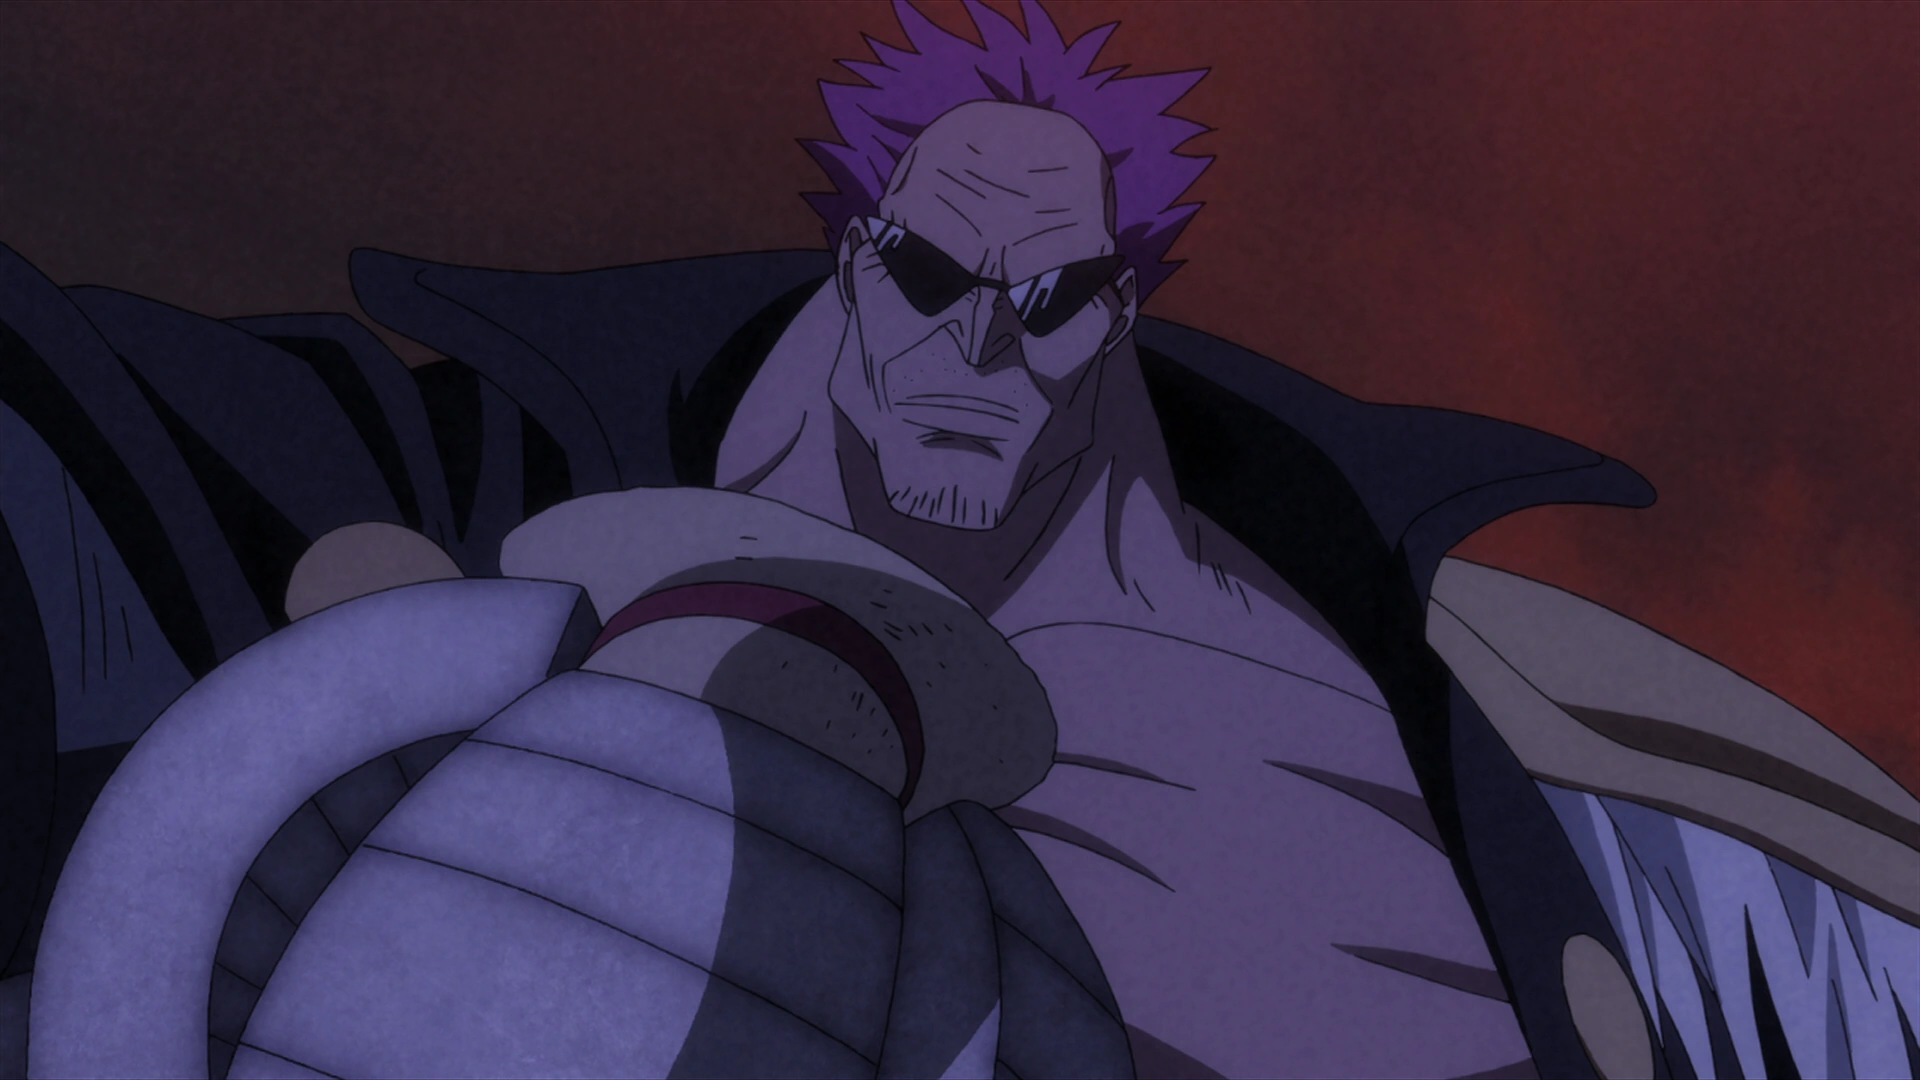
Z takes Luffy's straw hat.
Luffy and Z clash furious blows, with Z mocking Luffy telling him if he keeps being afraid of his Battle Smasher, he'll never land any hits on him. He strikes the ground, sending Luffy flying away. He catches up and fires more bullets at Luffy that he deflects back at him. Luffy tells him his bullets will never harm him, until Z pulls out a small pistol and fires a bullet into his shoulder made from Seastone. Mocking Luffy further, he tells him the strongest people in the New World would have never have let themselves be hit with it and he relies too much on is Devil Fruit power. He takes Luffy's hat, promising to bury it himself once he has finished destroying the age of pirates.
Luffy tries to grab it from him, telling Z the hat was given to him by Shanks. He grabs Luffy in his powerful grips and tells him Shanks, along with the rest of the Four Emperors will all die before they know what is happening. Luffy is enraged, screaming at him to not mock Shanks as Z blasts Luffy away. Zoro and the others find Luffy, and help carry him to safety as the deadly ash cloud rolls down the mountain.
Usopp uses one of his Pop Greens to make a banana shaped boat they ride against the wind with. They are unable to escape and just as their deaths seemed imminent, Kuzan encases the magma and ash in a gigantic layer of ice giving them time to escape. Luffy and the Straw Hats board the sea train and flee, just before the island blows.
The Straw Hats return to Dock Island, as Luffy is patched up and has the Seastone bullet removed. Kuzan appears before the crew again, telling Luffy to stop moping. Robin is shown terrified, but Luffy assures her it's alright. Kuzan tells them how Z was a former Admiral, and how he stole the Dyna Stones. He goes on to tell him his plan is to destroy the three Endpoints with the Dyna Stones to release the Grande Imbuto, killing all pirates and destroying the One Piece.
Now that two of the Endpoints have been destroyed, Z is about to go to the last one, Piriodo, and unless the Straw Hats stop him, the Pirate Era will end. The Endpoints had been considered a legend, with most thinking it was nonsense. The government covered up the truth about them, to dissuade pirates from using it. That only the World Government and highest ranking officers of the Marines know about it. He laments that it is an Admiral abusing this knowledge above all else. He reminds them that he is not doing this out of power, but to punish pirates.
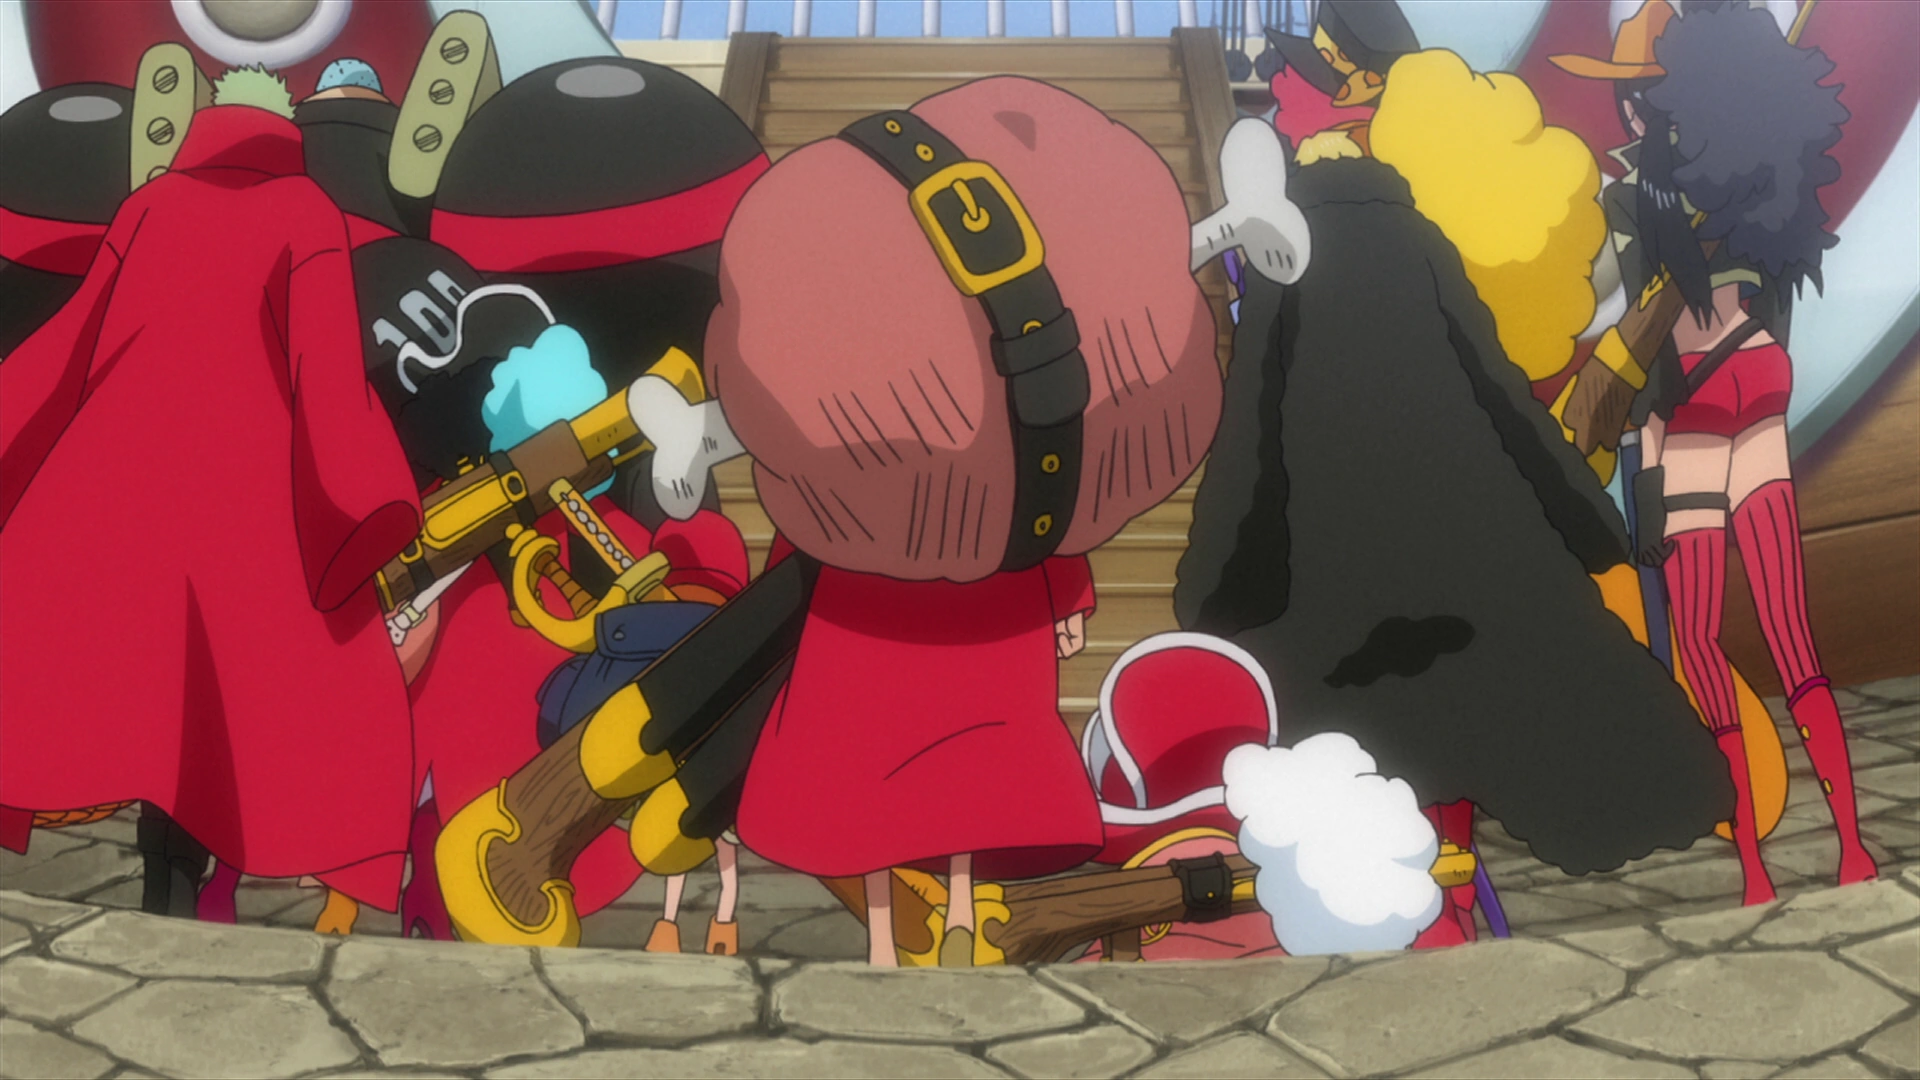

Luffy and the Straw Hats head out to battle.
Luffy remains undeterred despite being defeated twice by Z, vowing to chase him down and get his hat back. If he lets Z keep his hat, he could never face Shanks or be worthy of the Pirate King title. Kuzan then gives the crew an Eternal Pose leading to Piriodo. If they lose to Z, they will be destroyed along with the New World. Or, if they win they will be attacked by the Marines. With that said he leaves them to their own fates.
Luffy and the others suit up in new battle uniforms, brandishing two swords and a large stick of meat on his back. As they are leaving, Gari approaches Luffy telling him he wants to grow up to be a hero but cant decide whether he wants to be an Admiral or a pirate. Luffy flatly states pirates are not heroes. Sanji chimes in saying if both feel the same, then it's okay. Gari watches the Straw Hat Pirates leave, filled with admiration for him.

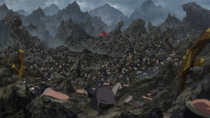
Luffy victorious over the Neo Marines.
The Straw Hats intercept a blockade of Neo Marine warships guarding Piriodo. They blast through their defenses with the ship's main cannon. They land on the beaches with an army waiting for them. The Straw Hats begin fighting, using their new weapons to help. Luffy tries fighting with two sabers, but he quickly discards them shouting for Z to appear. Luffy finishes fighting off a large group of Neo Marines, as he had used his large meat stick as a club. Feeling tired, he eats the emergency food gaining his stamina back for the fight ahead.
Meanwhile, Z himself is sitting in the mouth of the volcano surrounded by Dyna Stones placed to blow. After a swig of his wine, he stares eagerly at Luffy's straw hat awaiting his inevitable arrival. Luffy is shown fighting off more Neo Marines, trying to stop his advances. He uses his Haki, dodging multiple shots from cannons gradually getting closer.


Luffy and Z fighting.
Luffy finally finds Z waiting for him inside the volcano. He discards his jacket, as the two engage in a furious battle. Luffy pounds away against his Battle Smasher arm, with Z calling his efforts useless. Their fight grows more intense, Luffy's shirt incinerating off him from Z's Smash Buster. He tells Luffy he cannot defeat his justice. Luffy unleashes his Gatling Gun punches, able to land a few brief hits on Z's body but he shows no sign of any harm.
He compliments Luffy on having courage for a pirate, remarking he is far braver than the Marine. Luffy inflates his fist to Gear 3, using his Gigant Pistol move at Z. Z matches Luffy's hit with his Battle Smasher, both unable to push each other back. Z begins showing signs of fatigue, as the two rush and smash each others fists against one another as hard as they can. The force of the impact sends rippling shock waves along the volcano.
The Straw Hats catch up to the battle, seeing Luffy had managed to leave an imprint of his fist inside Z's giant metal fist. Z asks him why he wants to fight him so much. That even if he defeats him, nobody will thank him for his efforts for the stigma of being a pirate. Luffy responds if he cannot defeat him, he will never be able to become the Pirate King. Z then discards his cracked Battle Smasher, revealing a smaller mechanical arm he can still use. Z tells Luffy he is going to dedicate his life to ending his ambition, challenging him for their final bout.
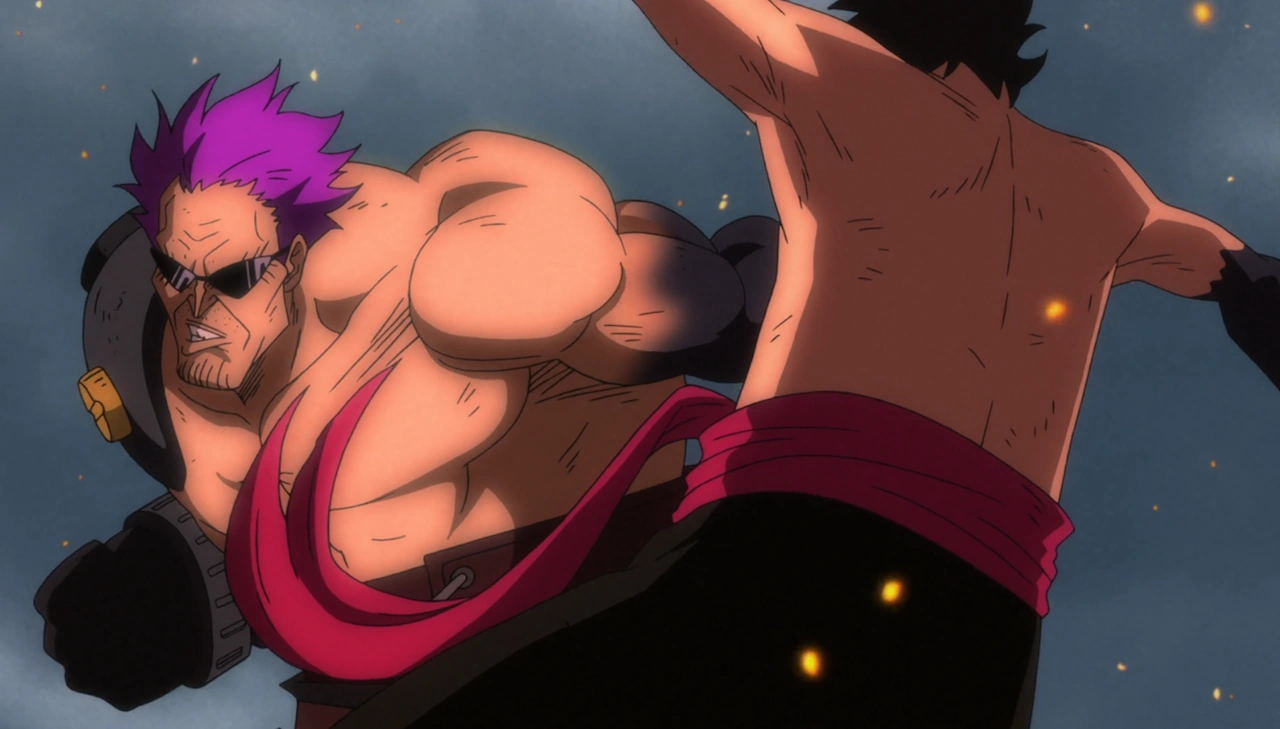

Z and Luffy battle with their Haki.
Z and Luffy activate their Armament Haki, their arms turning a hardened black. The two engage in a brutal fist fight, both striking each other with imbued Haki. Kuzan is seen watching their match from a distance, stating "Black Arm" Zephyr has returned. Z and Luffy both give each other hard punches to the chest and stomach, giving Luffy a moment to recoil and puke. Luffy strikes back a punch that knocks Z's glasses right off.
A brief flashback is seen in his mind of his early childhood, rattling his early memories. Z becomes elated, that he is being given such a good fight. Both Luffy and him are worn out, still pushing each other with punches back and forth. He corners Luffy and begins pounding on him, with Luffy showing little sign he can defend himself anymore. As Z begins to gain the upper hand, Luffy pushes him back with a kick.
Fighting on their last reserves, Luffy shouts he is going to be the Pirate King with Z shouting his name in absolute confidence. After exchanging a few more blows to one another, Luffy finally collapses from exhaustion. Z falls to the ground after, unable to fight anymore too. Z bitterly says he's gotten old, and his body cannot keep up with him anymore. He finds it disappointing, telling Luffy he was enjoying fighting him.
As the battle ends, the Straw Hats rush over to Luffy's aid, with Ain and Binz doing the same for Z. Z tells Luffy to finish him, but Luffy merely tells him he's already satisfied, giving him a smile. He offers to continue fighting him, if he wants but Z turns him down, also being satisfied.
Kizaru then arrives with his army, telling them he is going to kill them all. Z says he's done everything he's wanted to do, and now will face the price for it as he marches towards the Marine army. He dismisses Luffy, and tells him to leave the rest to him. Ain tries to rush to his side, but Kuzan summons a giant wall of ice dividing everyone from him. Luffy silently looks on, honoring his sacrifice.
The Straw Hats depart the island, watching the battle unfold in grim silence as Z gives up his life to save them. During the credits, it is revealed that after Z's defeat, the Straw Hats returned to Dock Island one last time, to return the gear and weapons Mobston had given them. They bid them farewell, and Gari decided to become a pirate, wearing Luffy's borrowed attired.[77]
Toriko x One Piece x Dragon Ball Z Collaboration Special[]
| This is an empty section. Please help the wiki by adding information to it. |
Caesar Retrieval Arc[]


Luffy clashes with the Kung Fu Dugong.
After the Straw Hats and Trafalgar Law leave Punk Hazard with Caesar Clown captured, they are wary of being attacked by Doflamingo. As the ship's residents sleep, a mysterious figure named Breed boards the ship with his animal forces and attacked everyone on board. As everyone begins fighting them off, one of the animals makes off with Caesar. With Breed having kidnapped Caesar, Luffy attacks him, but he is stopped by a Kung Fu Dugong using a Busoshoku Haki-infused fist. As Law tries to stop him, Sea Lapahns begin rocking the ship, with Breed successfully kidnapping Caesar in the process. When everyone turns around, they see a massive ship the size of an island, with Sanji noticing a Jolly Roger resembling Breed. Law, Luffy and Chopper decide to board the Shark Submerge III to go after Breed.
As they leave, Chopper askes Luffy if he recognizes the Sea Lapahns, noting they look identical to the Lapahns back on Drum Island, with Law correcting him saying that they’re from the North Blue. When they notice that the Sea Lapahns enter the ship, they follow into the ship. Despite Law warning Luffy to be careful, Luffy begins yelling about where he is, with Law and Chopper following him to the middle of the ship, but they are suddenly attacked by Sea Laphans, an Octopus Boxer, and other sea creatures.
They successfully fight off the sea creatures when the Kung Fu Dugong from earlier arrives and attempts to attack Luffy. Luffy defeats the Dugong, when the Dugong remembers losing to Luffy in a fight while in the Arabasta Kingdom. Excited, he jumps towards Luffy and begins hugging him. With everyone confused, Chopper begins explaining that the Kung-Fu Dugong is the same one Luffy befriended in Arabasta. Via Chopper's interpretation, the Dugong tells them that after the Straw Hats left Arabasta, he left to form his own pirate crew of animals, but eventually Breed had kidnapped them and began forcing them to do his bidding. After this, Breed arrives and attacks Chopper with a green substance that, upon hitting him, transforms into a collar. Breed then commands Chopper to attack Luffy and Law, and Chopper eats a Rumble Ball, transforming into Monster Point. Powered up, he attacks his former allies, distracting them and allowing Breed to collar them as well.[78]
Afterwards, Law and Luffy were imprisoned in a Seastone cell next to Ceasar and the animals. Breed explains that he wants Ceasar to produce more SMILES so he can turn every human into an animal and control them with his devil fruit power. As he plays with Chopper, Chopper gets upset and scratches Breed in the process. When Breed whips Chopper in frustration, Luffy angrily tells him to stop and begins insulting him, enraging Breed enough to command Luffy and Law to fight each other to the death. As the Dugong tries to get Breed to stop, he whips him and then decides to force him to fight Luffy and Law. Depite being hit, Luffy is patient, and tells the sad Dugong that nothing will happen to them. The Dugong strikes Law and Luffy with a punch, and they fall through the glass wall into the water.[79]
As Breed congratulates the Dugong for his actions, Chopper and the Dugong prepare to fight, only for Breed to order the remaining animals to attack them. Suddenly, there is an explosion, as Luffy and Law return. Law explains how they survived the fall and managed to recapture Caesar. Breed tries to control Law and Luffy again, but fails, because the two pirates are wearing ear plugs. Law talks about how Breed's commands have to be heard to have any effect, and explains that he was only pretending to follow orders before.
Breed, maddened with rage, uses his ability on himself, and gives himself a command to destroy the pirates. He controls his pets, making them attack Luffy and Law as well, however, his control over the other animals fades, which gives them the opportunity to work together and hold Breed still. Luffy and the Dugong then both attack Breed together with their punches, defeating him. Luffy, Law, and Chopper return to the Thousand Sunny, Luffy begins saying farewell to the Dugong. As dawn breaks, the Straw Hat Pirates receive the morning newspaper saying that Doflamingo has resigned from the Seven Warlords of the Sea.[80]
Episode of Chopper Plus: Bloom in Winter, Miracle Sakura[]
While sailing the ocean, Nami notices a storm coming in, and alerts the rest of the crew, allowing them to quickly take action and launch the Thousand Sunny away with a Coup De Burst. Almost immediately afterward, Nami collapses from a high fever, and as none of the crew know enough about medicine, they decide to find a doctor to save her, leading them to sail to Drum Island.
Upon arrival, the residents give them a cold reception, as they demand that the crew leave because they are pirates. Luffy begs them to save Nami, and they allow the crew to take her to the shore, but they soon learn about the the island's king, Wapol and how he took all of the doctors on the island away with him during a pirate invasion. They also learn that there is only one doctor left on the island, Dr.Kureha, and that she lives on a mountain.
As Luffy and the others climb up the mountain, Luffy and Sanji get attacked by some Lapahns, and they are unable to fight back, fearing that the shock of any blows given or received will kill Nami. An avalanche buries the mountain in snow, and Sanji kicks Luffy out of the way to save him and Nami, being buried in the process. After he does this, Luffy continues climbing the mountain, barely able to keep himself alive in the extreme cold. Just before losing consciousness, he reaches the top of the mountain, where Chopper saves him and brings him, Sanji and Nami in for treatment, curing Nami of her disease.
As Luffy and the others are being treated at Drum Castle, they learn more about Chopper's past, and about Dr. Hiriluk, and thank Chopper and Kureha for saving them and Nami. Unfortunately, they soon come under attack from Wapol and his men, who have come to take back the island. While Chopper and Sanji fight off Wapol's men, Wapol attempts to shoot down Hiriluk's flag with his Baku Baku no Mi powers. As he does this, Luffy gets to the top of the castle and protects the flag, but soon ends up in a fight with Wapol's brother, Musshuru. Musshuru initially has the advantage in speed and easily defeats Luffy with his Noko Noko no Mi powers, poisoning him with his spores. Chopper tries to fight back, but he is defeated, too. Before Musshuru can give the final blow he stopped by the arrival of the rest of the Straw Hats, who stop him and manage to give Luffy an antidote to the poison.
As he finishes recovering, Luffy then uses Gear Second allowing him to keep up with Musshuru and ultimately dominates Musshuru in battle. Wapol escapes into the castle and eats Musshuru, fusing with him and the Bliking Cannon, in an attempt to gain his power and combine it with his own to make a poison bomb to annihilate everyone in Drum so he can replace them with his soldiers. As he tries to fire the bomb, Chopper uses Arm Point and manages to launch Wapol into the roof. Despite managing to fire the bomb, it is destroyed by the Straw Hats before it can explode, then Luffy manages to defeat him and send him flying with Gear Third's Gum Gum Gigant Pistol. Some of Musshuru's poisonous spores drift down, but Franky incinerates them before they can do any damage.
After the battle, Luffy asks Chopper to join his crew, and despite initially not trusting humans before, Chopper decides to go with Luffy. Chopper tells Kureha, who berates him, claiming that he is not ready to leave home, and chases him out of the castle. As he leaves with the Straw Hats off the mountain, Kureha then orders the Drum guards to fire off Hiriluk's Sakura mixture, which mixes with the snow, resulting in a pink snowfall and causing the mountain on which the castle stands to resemble a Sakura tree. As Chopper sees this, he realizes that Hiriluk's dream has been accomplished, and starts to cry. With the Cherry Blossoms in the distance, the Straw Hats sail away from Drum Island, with Chopper now a member, as they go toward their next adventure.[81]
Adventure of Nebulandia[]

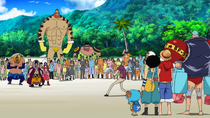
The Straw Hats confront the Foxy Pirates again.
The Straw Hats spent a lazy day at sea in the New World, with Luffy eating some meat. Suddenly, the crew noticed a distress signal coming from nearby Mushroom Island, and when Sanji saw that the crewmembers appeared to be young women, he frantically led the Straw Hats there. However, the women turned out to be the Foxy Pirates in disguise, and Foxy confronted Luffy again. However, Luffy did not recognize him, causing Foxy to get depressed. Foxy showed Luffy how his crew grew in strength over the past two years, including the additions of former Marine Komei and expert shipwright Dojaku. Foxy then challenged Luffy to a Davy Back Fight, which the pirate quickly accepted.
The Davy Back Fight then began, and Luffy eagerly bought things from the various establishments set up by the Foxy Pirates. After the Davy Back Fight rituals concluded, the games commenced, starting with the Eating Contest. Luffy, Sanji, and Brook got ready to eat a large pile of mushrooms, which Luffy was excited about despite Chopper not being able to identify the mushrooms. Due to a complaint made by Komei, Brook was switched out with Zoro, and the Eating Contest then began. However, Luffy, Zoro, Sanji, Porche, and Hamburg all collapsed, only to get up devoid of any motivation. Luffy did not even react to meat that Franky threw at him, shocking the Straw Hats.
Komei then revealed that this was all part of his plan, as an undercover Vice Admiral, to capture the Straw Hats. Dojaku, also a Marine, transforms the stage into a giant cage, and Luffy, Zoro, Sanji, Porche, and Hamburg are brought up to the Sexy Foxy. Komei revealed that the competitors ate the Drowsy Mushroom, and the only antidote to it was the Rebound Mushroom. However, Robin stole the Rebound Mushroom from Dojaku and fed it to Luffy, who immediately regained his strength. Luffy bended the bars of the cage and told Zoro and Sanji to come on, but he was knocked onto the beach by Dojaku. Luffy then attempted to pull himself back onto the cage to rescue Zoro and Sanji, but Komei poured oil on his handhold, causing Luffy to slip and fly into the ocean. Usopp went to save Luffy, but everyone was immobilized after the Sexy Foxy reflected Foxy's Noro Noro beam, allowing Komei and Dojaku to escape with their prisoners. Komei taunted Luffy as he escaped, but left behind an Eternal Pose.
After they were freed from the Noro Noro beam, the Straw Hats made preparations to follow the Eternal Pose and save Zoro and Sanji. As they prepared to leave, Foxy came and laid prostrate before Luffy, begging the pirate to let him come and save Porche and Hamburg. Luffy grinned and accepted Foxy into the Sunny, although the rest of the Foxy Pirates stayed behind at the Straw Hats' request with Chopper and Brook, who were tasked to look for the Rebound Mushroom However, a Foxy Pirate named Kansho joined his captain in the mission.
The Straw Hats, Foxy, and Kansho followed the Eternal Pose as Luffy talked to Foxy, who told the Straw Hat about what he went through after their last encounter. Foxy gave Luffy a trinket of his head, which Luffy excitedly accepted. The Thousand Sunny then neared a rocky island, where they were intercepted by Marine battleships. However, with Foxy's help, they managed to escape the ambush and land on the island, which is called Nebulandia. Komei then broadcasted himself to Luffy and the others, saying he would give them until sunrise the next day to rescue Zoro and Sanji.

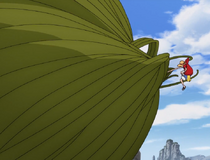
Luffy is caught by a plant that reacts to Devil Fruit users.
Luffy grew impatient and attacked the nearest rock formation, which contained a Marine outpost. However, he was stopped by a mysterious plant wrapping around his hands, which caused him to become weak. Luffy's crewmates struggled to keep him from flying into the Marine base and the Marines opened fire on them, although Franky managed to shield Luffy from the blast. Komei then told the pirates that during the attack he captured Robin, and revealed that Nebulandia contained many traps for Devil Fruit users. Luffy pressed his attack on the Marine outpost, but was trapped by the plant, which was revealed to be attracted to Devil Fruit users. The plant left Luffy a sitting duck as he was hit with cannon fire, sending him crashing to the ground. Franky, Usopp, and Kansho succeeded in bringing down the outpost, but the Straw Hats were still under attack by three outposts behind it.
Later, Franky reported to the Straw Hats that he discovered a hole where the outpost used to be that led underground. Luffy volunteered to go, but was told that there was seawater underground and so Usopp went in his stead. As night fell on Nebulandia, a seawater fog rose up that caused Luffy to become weak due to his Devil Fruit powers. Komei mocked Luffy for his weakness and revealed that Franky, Usopp, Brook, and Chopper were captured. The Vice Admiral told the pirates that he would be changing the game and bringing their captured comrades outside, so that Luffy could try to rescue them before sunrise. Luffy then pressed on to where his friends were, intent on going despite the fog rendering him barely able to stand.

Komei traps Luffy.
Luffy reached the clearing where his crewmates were tied up, and pressed on toward them despite them saying it was a trap. Suddenly, Luffy fell into a pitfall, and barely managed to hang onto the ledge. Komei confronted Luffy and knocked him into the hole, which contained seawater at the bottom. Luffy managed to stop himself before he fell into the seawater, but Komei used Haki to turn his fan into a long sword and forced Luffy into the water.
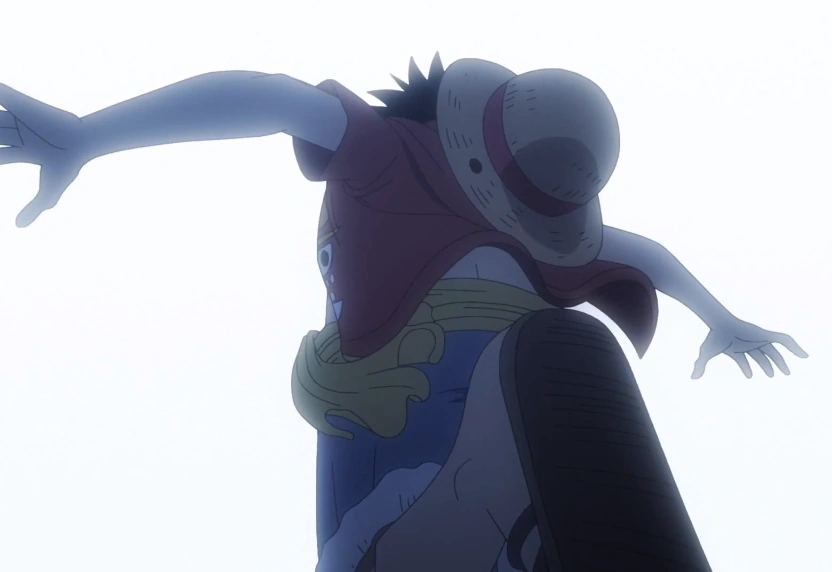

Luffy is shot.
Luffy was rescued by Nami, but had stopped breathing. Eventually, Foxy managed to resuscitate Luffy, but as Luffy leaped to rescue his friends, he was shot by Kansho, who was also an undercover Marine. With Luffy dead and his crewmates captured, Komei and the Marines celebrated their victory. However, Brook, Chopper, and the Foxy Pirates then arrived, having managed to trick Komei into believing they were captured. As the Straw Hats were freed, they tended to Luffy, trying to find any signs of life. Suddenly, Luffy stood up, revealing that the bullet had luckily hit the Foxy trinket. Kansho attempted to shoot Luffy again, but his shot was deflected by Usopp and he was defeated by Foxy.
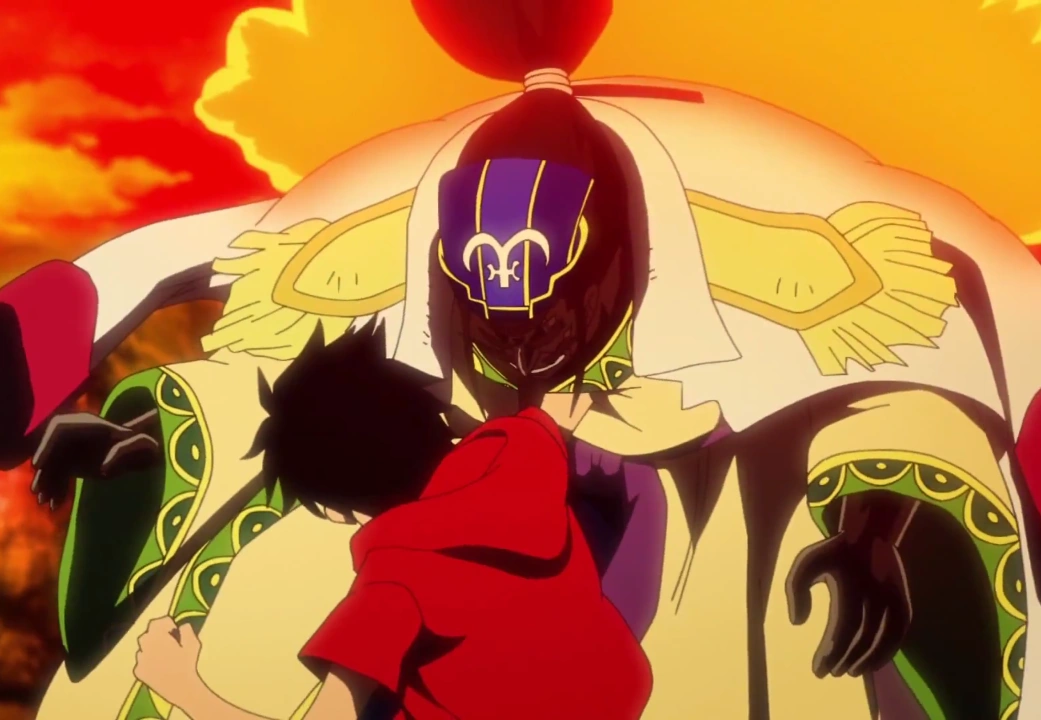

Luffy defeats Komei with Gomu Gomu no Red Hawk.
As a battle broke out between the pirates and Marines, Luffy confronted Komei along with Nami. However, Komei broke one of the outer edges of the island, causing seawater to flood in. Luffy ordered Nami to gather everyone up as he took on Komei. The two duked it out, with Komei using his sword and a bazooka to drive Luffy into disadvantageous positions. However, before Komei could fire a finishing shot, Foxy slowed down the ball, telling Luffy to hit it repeatedly. Luffy did so, creating a hole in the basin that drained the seawater. Luffy mocked Komei for underestimating Foxy as the two battled again. Komei managed to drive Luffy back, but Kinoconda suddenly arrived, giving Luffy a foothold in the air. Luffy then sprung toward Komei and finished him off with Gomu Gomu no Red Hawk. Komei flew into the basin and his impact cracked the ground, and Luffy stood over his defeated foe.
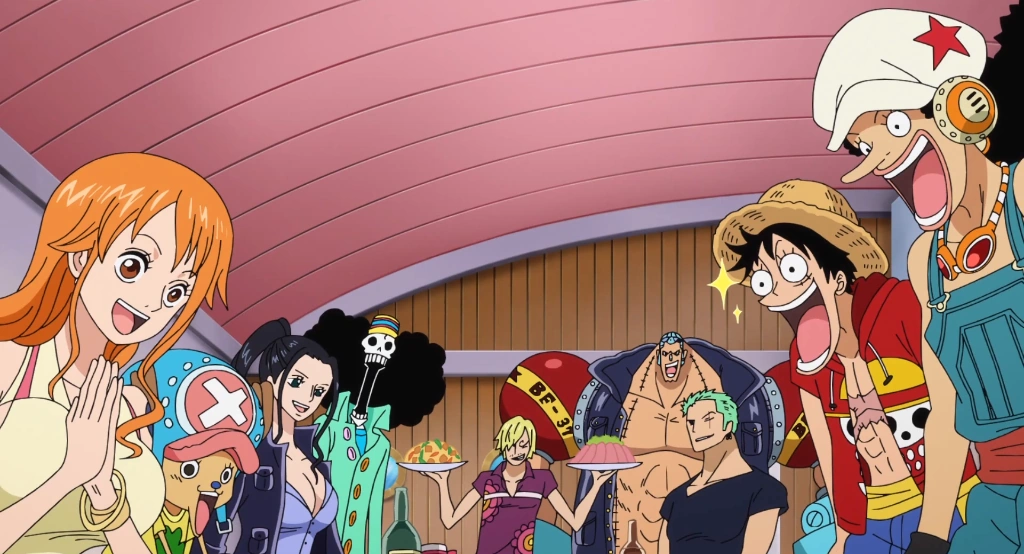
The Straw Hats celebrate their victory.
The Straw Hats and Foxy Pirates had gone to the Thousand Sunny, and Luffy came to them with a smile on his face. They then departed for Mushroom Island, where Foxy held out his hand to Luffy to thank the pirate for fighting with him. However, Foxy used this as an opportunity to call off their truce and fire a Noro Noro beam at Luffy. Luffy was not affected by the beam, however, and it was revealed that he was an illusion created by Nami, who knew that Foxy would do that. After Nami electrocuted Foxy, the Straw Hats departed from the island and waved goodbye to the Foxy Pirates. Luffy and the other Straw Hats then had a banquet to celebrate their victory.[82]
Whole Cake Island Saga[]
Silver Mine Arc[]
As night fell during the voyage to Zou, Luffy got up to eat something, with Bartolomeo following him. He then saw a giant piece of meat flying over him and grabbed onto it, pulling him and Bartolomeo onto a platoon of Battle Boats commandeered by the Sweet Pirates, which took him and Bartolomeo to Silver Mine.
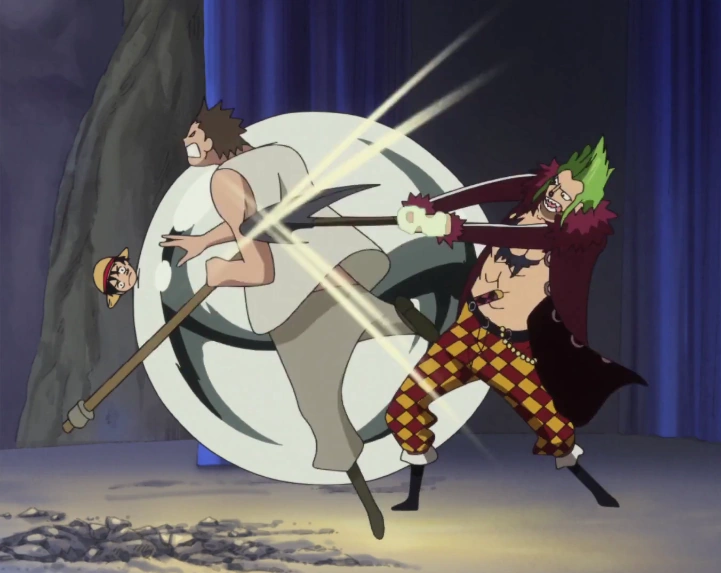
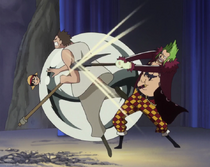
Luffy is saved from execution by Bartolomeo.
Luffy's entire body except his head was encased in a silver ball, and he was put in a prison cell. Desire and the Sweet Pirates came to visit him, and Luffy managed to convince her to give him some of her chocolate. The Sweet Pirates then took Luffy out to an auditorium where the Silver Pirate Alliance gathered, and their leader Bill prepared to kill him. However, Bartolomeo arrived to protect Luffy, although the two were cornered by the Silver Pirate Alliance. However, Luffy made a charge, rolling over the enemy pirates. However, the energy Desire's chocolate bar gave him wore off, and he rolled back down the stage into the opposite exit, taking him and Bartolomeo outside.

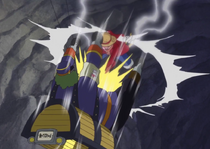
Luffy defeats Aveyron.
Luffy and Bartolomeo were pursued by the Sweet Pirates, but Desire accidentally created a chasm which Luffy, Bartolomeo, and she fell into.[83] The trio emerged alive, but they were pursued and attacked by Bill's subordinate Aveyron. Bartolomeo and Desire rolled Luffy's ball down the mine tracks, but the trio accidentally rolled into a large chasm. Down below, they encountered a group of miners who revealed that they were enslaved by Bill due to not being useful. The miners tried to free Luffy, but failed. Aveyron then arrived at the mining colony and fought Desire, who accidentally deflected one of his bombs into Luffy's group. The explosion sent Luffy rolling into the train tracks, where Aveyron stabbed at him with a spinning drill. However, Aveyron missed Luffy's body, and the force of his attack shattered the silver ball, freeing Luffy. Aveyron attacked Luffy with cannonballs, but Luffy deflected them back. Luffy and Bartolomeo pursued Aveyron into a tunnel, and kept up the chase despite Aveyron making sudden turns. Luffy unsuccessfully attacked Aveyron, but Bartolomeo used his barriers to send Aveyron flying off the track, allowing Luffy to fly over and defeat him. Luffy then returned to the mining colony and prepared to escape.[84]
Luffy, Bartolomeo, Desire, and the miners went up a train track leading outside, but they were attacked by Peseta and his men, who destroyed the track. Luffy cushioned the group's fall with Gomu Gomu no Fusen, and the group renewed their escape on Bartolomeo's barrier staircase, barely escaping Peseta's cannonballs. Silver Pirate Alliance members then appeared at the exit and poured molten ore down the staircase, but Kin'emon suddenly appeared and cut through the ore, allowing Luffy to punch the pirates away and clear the path to freedom. Outside, the pirates and miners were confronted by Peseta again, but Zoro arrived and took him on. When Peseta mocked Zoro, Bartolomeo attempted to attack him, but Luffy held him back, saying this was Zoro's fight. Zoro defeated Peseta, and the Straw Hats and Barto Club prepared to leave the island, but Bill cut off Luffy and Bartolomeo's path. Luffy decided to stay behind on the island and confront Bill along with Bartolomeo and Desire.[85]
Luffy suddenly rushed in and attacked Bill as the latter was taunting Desire, and he easily overwhelmed Bill despite the latter pulling out weapons. Some Silver Pirate Alliance members then arrived, and Bill ordered them to attack Luffy and his allies, but Luffy knocked them all out with a blast of Haoshoku Haki. Luffy then attacked Bill again and sent him flying into the underground mine. Luffy, Bartolomeo, and Desire prepared to leave Silver Mine, but Bill suddenly returned, now giant sized and exuding waves of molten ore due to eating a lot of ore. The trio struggled to navigate through the encroaching flow of molten ore, but Bartolomeo managed to push it back onto Bill, causing him to be coated in silver. As Bill prepared to attack the trio, Luffy hit him with Gomu Gomu no Grizzly Magnum, causing him to fly into the fortress. Luffy, Bartolomeo, and Desire then escaped Silver Mine as it sank, and returned to the Going Luffy-senpai as they prepared to head for Zou.[86]
Heart of Gold[]
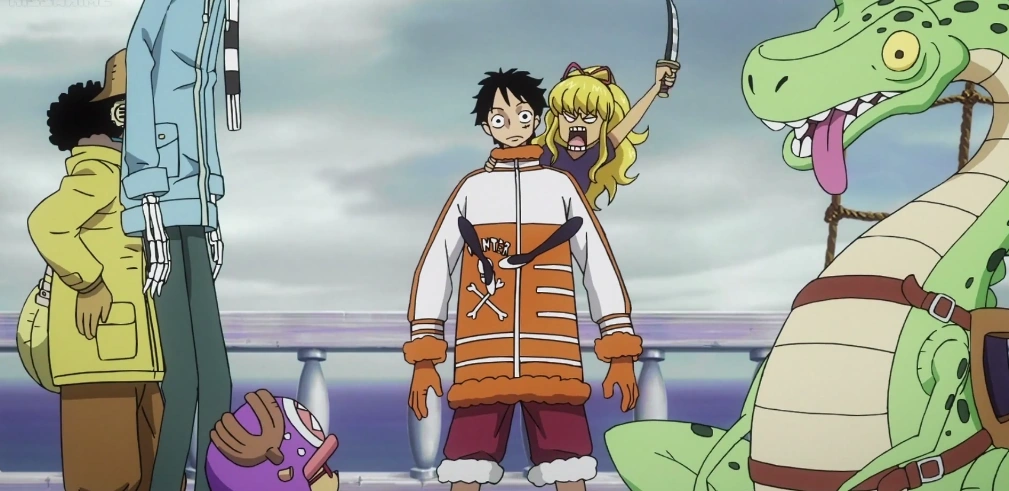
The Straw Hats meet a girl named Olga.
Luffy, Usopp, Chopper, and Brook were fishing in a wintry sea, and they saw a seemingly unconscious girl named Myskina Olga riding on a water lizard named Elizabeth. Luffy fished the two of them out of the water, and tried talking to Olga. However, Olga stopped her ruse as she grabbed hold of Luffy and held him hostage in order to get food and water. However, Luffy and the Straw Hats failed to take Olga seriously, and she was fed. The Straw Hats talked to Olga, who revealed where she was from as well as the existence of the treasure Pure Gold, which they got excited about and agreed to help her find.
The Straw Hats were then attacked by Mad Treasure and his crew, who were also after Olga and the Pure Gold. The Straw Hats battled Treasure's men and defended Olga, but during the battle Olga's ring slipped off her finger. This caused a giant fish named Bonbori to arrive and consume the ring, and the Straw Hats attempted to escape from it, but turned around into its mouth after Olga revealed that the Pure Gold was inside it. Treasure's crew followed them into Bonbori and rammed their ship into the Sunny, causing it to nearly hit its uvula. However, Luffy ballooned himself and cushioned the Sunny's impact. As he reached to get back on the Sunny, he was hit by one of Naomi Drunk's arrows, sending him spiraling into the water below. Olga rode Elizabeth to rescue Luffy, and the three of them fell down Bonbori's throat.
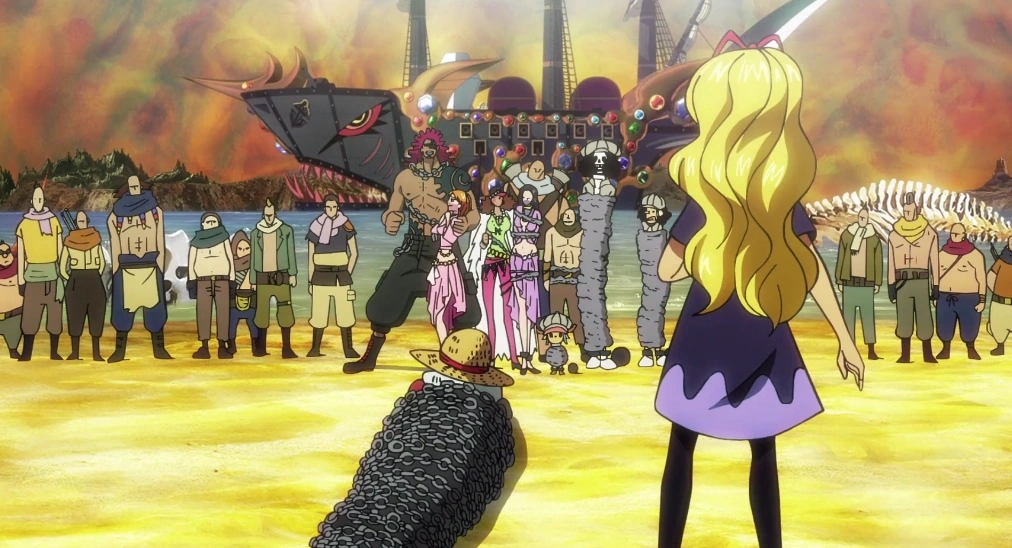

Treasure binds Luffy and captures Olga.
Luffy woke up on an island inside Bonbori's first stomach, and Olga revealed what Bonbori's insides contained. They were then attacked by a pack of dinosaurs, but Luffy drove them away by knocking the leader out, and he and Olga ate the leader. Olga revealed her true age and why she lived in Bonbori, shocking Luffy. The two of them were suddenly attacked by Mad Treasure, and Luffy briefly brawled with him. However, Treasure revealed that he had captured Nami, Usopp, Chopper, Robin, and Brook, and tied Luffy up with his chain ability. Treasure then captured Olga, and left Luffy on the coast to be dissolved once the tide of stomach acid reached his location.
Right as the acid tide reached Luffy, he was suddenly snatched away by a dinosaur, who took him to a cave to feed its young. However, Luffy escaped from the dinosaur, and he met a man who was posing as a young dinosaur. The man revealed himself to be Olga's father, Myskina Acier, and Luffy revealed that Olga was alive and that Treasure had captured her. Luffy and Acier went to work building a ship to get to Alchemi, but Luffy saw a water lizard nearby and wanted to use him. Luffy had to tame it by causing it to laugh, but failed, although Acier managed to succeed. Luffy named the water lizard Chavez as they set off into the sea of acid.
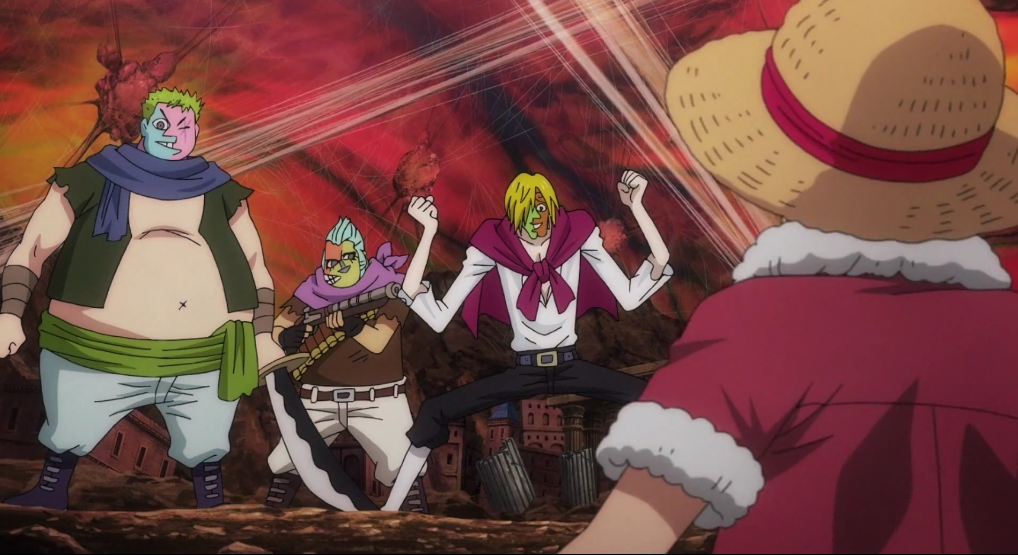
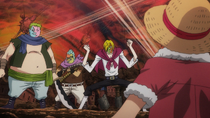
Luffy confronts people disguised as his crewmates.
The trio crossed into Bonbori's second stomach, but the acids inside were too strong for Chavez to handle. While Acier tended to Chavez, Luffy confronted three men poorly disguised as Zoro, Sanji, and Franky. He eventually managed to see through their ruse and defeated them, causing Mad Treasure's subordinate Psycho P to reveal himself. Psycho P disguised more of his men as Luffy's crewmates, but Luffy took down all of them. Psycho P then disguised his men as Acier, and Luffy could not tell them apart from the real one. Unable to just attack all of them, Luffy found the real Acier by having him make his "smug face", and took down all the fakes, causing Psycho P to retreat. Luffy later met the real Zoro, Sanji, and Franky, and Zoro and Sanji accompanied him and Acier as they set off to Alchemi.
The four of them arrived on Alchemi, and Luffy pulled him and Acier straight into an underground mine containing the Pure Gold while Zoro and Sanji battled Treasure's forces outside. Luffy reached Treasure, Olga, and his imprisoned crewmates at the Final Gate, saving his crewmates from being crushed. Acier then opened a trapdoor underneath the Straw Hats and Olga, and they found themselves inside his old lab. They then discovered the Pure Gold, but were forced to escape the mine as Acier blew it up.
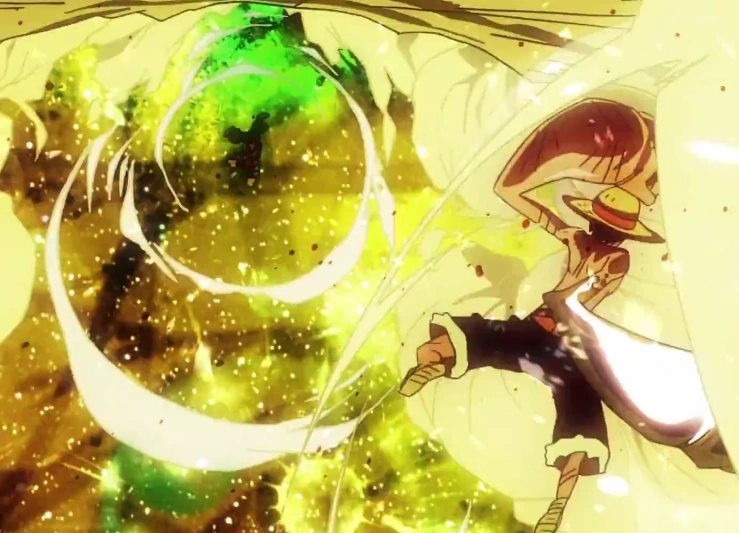
Luffy defeats Mad Treasure.
Treasure and a captive Acier followed them out, and Treasure claimed the Pure Gold. However, Luffy confronted Treasure over his ideologies and him capturing his crewmates, and the two battled again. Despite Treasure covering himself in a chain armor, Luffy managed to overpower him by combining Gear 2 and Gear 3, sending him crashing into the wall of Bonbori's stomach and causing the Pure Gold to fall into the acid below. The Straw Hats and the Myskina family then escaped Bonbori on the Sunny as the giant fish vomited them out. Back at sea, they saw Bonbori's esca glow brighter due to absorbing the Pure Gold. The next morning, the Straw Hats dropped Olga, Acier, Elizabeth, and Chavez onto an island, and they were disappointed at their failure to get the Pure Gold. However, Nami revealed that she stole a vivre card leading to the entertainment city Gran Tesoro, and the Straw Hats excitedly headed there.[87]
One Piece Film: Gold Episode 0[]
On the Thousand Sunny, the Straw Hats were having a barbecue. After a volleyball game between Nami and Chopper versus Robin and Franky, the Straw Hats began talking about what they will once they reach Gran Tesoro. When Usopp heard Nami was going to bet in the casino, he became concerned, so he suggested hosting a show in case betting failed. Usopp demonstrated his show with Luffy, having him play as Kintaro Yokozuna and Usopp portrayed a rabbit that played with Kintaro Luffy, along with Chopper, Franky, and Brook. Both Luffy and Usopp were participating in sumo wrestling matches to see who would become the Yokozuna, but were not taken seriously. Franky then challenged Luffy and requested that they both use their brute strength. After a long and fierce match between, Luffy and Franky decided to use their signature attacks, but Nami interrupted and punched the two because they could have destroyed the ship. Doing this, Nami was crowned Yokozuna, but she declined. Moments later, the Straw Hats approached the City of Dreams.[88]
One Piece Film: Gold[]
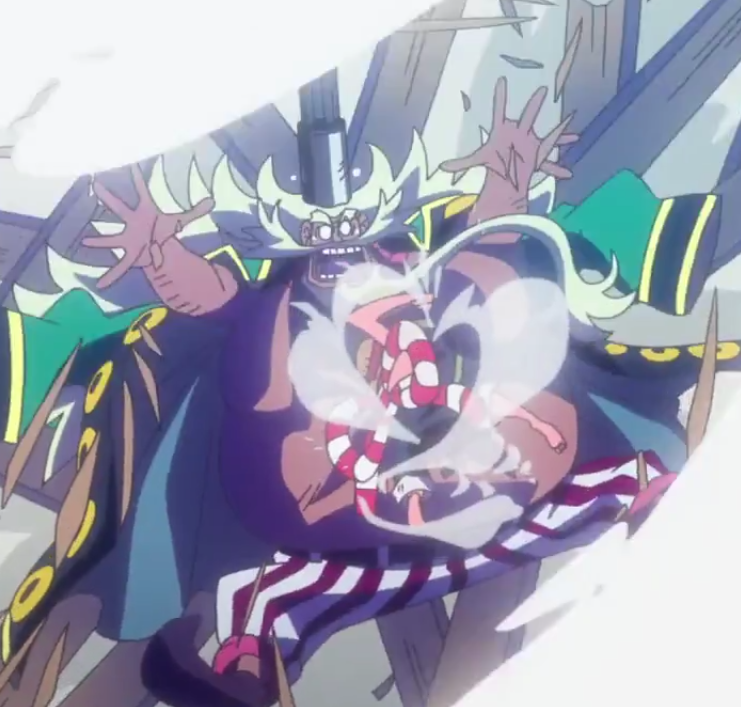

Luffy defeats Long Long.
The Straw Hats sailed into Gran Tesoro, where they were showered with gold dust at the entrance. They emerged into a harbor filled with liquid gold that was also a concert venue. However, they were suddenly attacked by the Long Long Pirates, who sought to rob them in order to pay off their debt. Luffy confronted the captain, Long Long, and wrapped his arm around the Thousand Sunny's mast. He then released himself and spun around the mast, and Long Long shot at him with a bazooka. However, Luffy's rubbery body shot the bullets back, and Luffy flew at Long Long, smashing him through the ship and defeating him with Gomu Gomu no Jet Pistol. The Straw Hats then watched as the proprietor of Gran Tesoro, Gild Tesoro, encased the remaining pirates in gold.

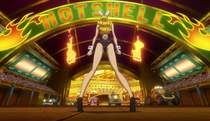
Luffy, Usopp, and Chopper take part in a Turtle Car Race.
The Straw Hats docked, and were approached by Baccarat, who offered them a VIP vacation at Gran Tesoro due to their fame. Baccarat drove them through Gran Tesoro on a turtle car, and took them to the VIP hotel at the heart of Gran Tesoro. The Straw Hats donned new outfits and were ready to enjoy their vacation, although they were approached by a group of children selling flowers in order to repay their debts. Baccarat then took the Straw Hats to the casino, and gave them ![]() 20,000,000 worth in casino chips. Luffy, Usopp, and Chopper immediately entered a turtle car race, and they managed to keep steady during the first part. However, as they drew near to the lead, the Whitejack's assistant, Kiruko, sprayed a liquid onto the track, causing them to skid and stop. The Straw Hats resumed driving, and approached Kent Beef Jr.'s car, but Pork threw a bale of hay at them, causing them to lose their vision and drive off the track onto a golf course. As they skidded around, Luffy managed to pull the car back onto the track with Gomu Gomu no Rocket, close to the remaining competitors. They then managed to narrowly beat the other racers across the finish line and win.
20,000,000 worth in casino chips. Luffy, Usopp, and Chopper immediately entered a turtle car race, and they managed to keep steady during the first part. However, as they drew near to the lead, the Whitejack's assistant, Kiruko, sprayed a liquid onto the track, causing them to skid and stop. The Straw Hats resumed driving, and approached Kent Beef Jr.'s car, but Pork threw a bale of hay at them, causing them to lose their vision and drive off the track onto a golf course. As they skidded around, Luffy managed to pull the car back onto the track with Gomu Gomu no Rocket, close to the remaining competitors. They then managed to narrowly beat the other racers across the finish line and win.
The Straw Hats continued getting lucky in casino games, and Baccarat took them to the VIP lounge, where they had the chance to become millionaires. The Straw Hats played a dice game hosted by Dice and won, and Gild Tesoro suddenly appeared and challenged the Straw Hats to a game. Luffy accepted, and Baccarat touched him on the shoulder, which unbeknownst to him took away his luck. Luffy lost the game, and Tesoro asked for the Straw Hats' money. However, Baccarat's deception was revealed, and the Straw Hats refused, causing Tesoro and his men to retaliate with force. With his luck removed, a series of unfortunate events plagued Luffy, preventing him from fighting. Tesoro managed to capture Zoro, and gave the Straw Hats until 12:00 the next night to repay their debt, or else he would kill Zoro.
The Straw Hats left the hotel, and ran into an old acquaintance of Nami's named Carina. They and Carina went to a diner to eat, and Carina revealed to them that a large amount of money was kept in a room in the hotel, which the Straw Hats could steal to repay their debt. The Straw Hats agreed to this plan, and witnessed some of Tesoro's men harass two children, whom no one was able to stop. They then slept in a hotel room and donned disguises before their mission began.

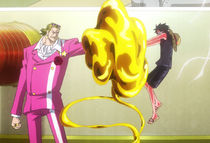
Tesoro overpowers Luffy and encases his arms in gold.
The group congregated outside the hotel, where Carina revealed the plan. Luffy and Franky would sneak into the hotel and go to the room containing a Host Den Den Mushi. They would then disconnect the Host from several Eizo Den Den Mushi overseeing the staircase to the room containing the treasure, which would allow Carina and the other Straw Hats to enter the room undetected. Luffy and Franky then scaled the hotel exterior by climbing on plungers that Franky had shot out of his shoulder. However, while they were very high up, the plunger they were grabbing on lost its grip, causing them to fall. Franky managed to grab Luffy and propel the two of them up with Coup de Boo, and they reached the giant clock near the top of the hotel. They entered the inside of the clock, and went into the air vents. Eventually, they were right above the Host Den Den Mushi room, and Luffy stretched down to grab a pipe that connected the Host to the Eizo Den Den Mushi. However, he lost his grip on the vent above and fell, causing him to be noticed by security. As Luffy and Franky battled the security guards, Tesoro and Tanaka arrived. After Tesoro brought Franky down, Luffy engaged him in battle, but Tesoro encased Luffy's arms in gold and blocked all of his attacks with gold. However, Luffy refused to bend to Tesoro's will, and an angry Tesoro gave him the chance to continue entertaining him. Tanaka then opened a giant hole underneath Luffy and Franky, sending them falling a long distance.
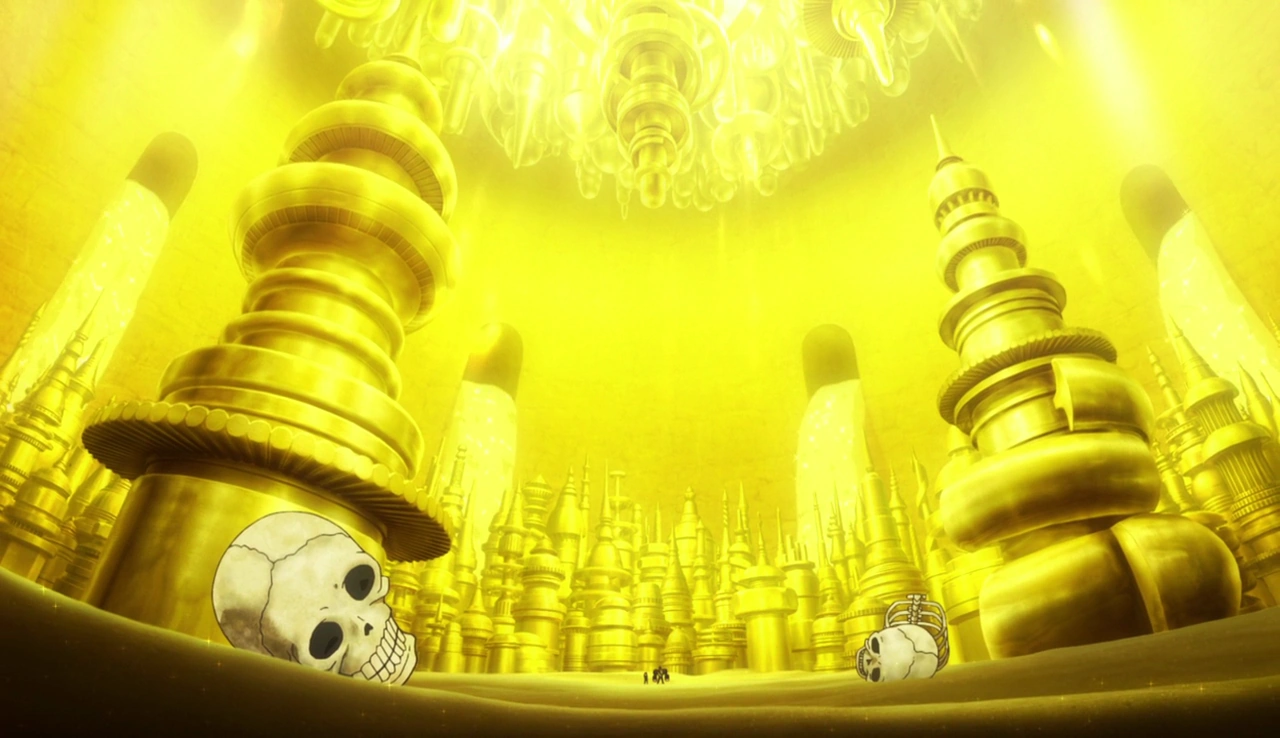
Luffy and Franky trapped in the Golden Prison.
Luffy and Franky fell into a massive golden chamber, where they met prisoners that had no food or drink. They then met the former Revolutionary, Raise Max, who revealed that the only way out of the chamber was through a pipe system, which led to a room containing a seawater tank that Luffy could use to wash away the gold encasing his arms. However, Max warned them that the room was nearly impossible to reach, but Luffy decided to go there since he had nothing to lose, and Max and the other prisoners reluctantly tagged along. They traveled through the pipes and battled bats, until they reached a vertical pipe with a rapidly spinning fan down below. Max tried convincing Luffy to go back, but Luffy kept pressing on and jumped into the fan. The fan batted Luffy around and injured him, forcing him to be rescued. However, after seeing Luffy's resolve, Max took it upon himself to stop the fan, and together with the other prisoners, they managed to stop the fan. Luffy, Franky, and the prisoners then reached the room with the seawater tank, and they opened a hole in it, allowing Luffy to wash the gold off his arms. However, Tesoro intended for them to reach the room as a trap, and he filled the room with seawater to drown them.
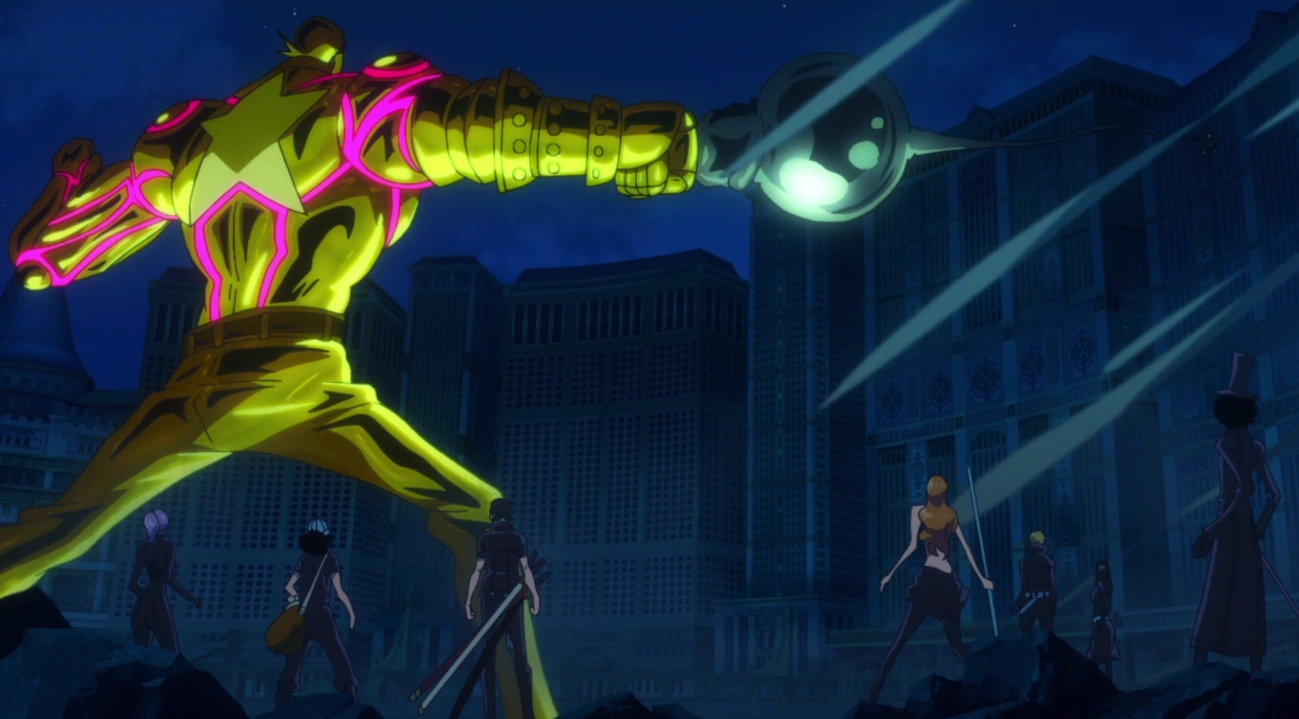

Luffy clashes with Tesoro inside a giant gold golem.
However, Tesoro's plot was all a part of a larger plan by Carina, who directed the seawater out of Gran Tesoro's fountains, freeing everyone on Gran Tesoro from Tesoro's control. Luffy, Franky, and the prisoners emerged from the fountains, and Luffy and Franky reunited with the rest of their crew. Tesoro then blew up the hotel and sent a deluge of liquid gold crashing down on them, but Sanji, Robin, and Franky flew their crewmates to safety. Tesoro then confronted the Straw Hats inside a giant gold golem, and Luffy attacked him, but Tesoro managed to overpower Luffy with his massive strength.

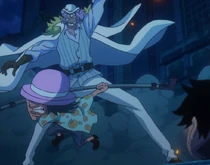
Ricca prevents Spandam from killing Luffy.
Luffy was sent flying into the ground, where he was approached by Spandam. Spandam wrapped Luffy in Seastone chains, but as he prepared to deal the finishing blow, a young boy named Rikka ran in and intercepted the strike. Luffy then freed himself from the chains and punched Spandam into the ground, defeating him.

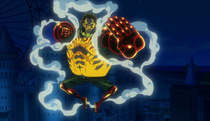
Luffy in Gear 4 ready to finish his fight with Tesoro.
As Tesoro attacked the Straw Hats, Luffy confronted him again, though his blows dealt no damage, and Tesoro continued to overpower him. Luffy then leaped on Tesoro's arm and ran towards his head, though was suddenly in the midst of a barrage of Marine cannon fire as they shot at Tesoro. Tesoro turned his attention to the Marine fleet, allowing Luffy to take him by surprise and hit him in the face with Gomu Gomu no Red Hawk. However, Tesoro was unharmed and returned the favor by hitting Luffy with Gon Inferno. Luffy was sent flying a great distance back, and received a large amount of injuries. Tesoro then attacked Nami and Carina, and Luffy resumed challenging Tesoro as he ran back to the battle, managing to rescue Nami and Carina and throw them to safety. Tesoro punched him into the ground immediately afterwards, but Luffy activated Gear 4 and shattered Tesoro's arm. Luffy then flew up to Tesoro's face and hit him with Gomu Gomu no Kong Gun, finally knocking Tesoro to the ground.
However, Tesoro turned his golem into liquid gold and brought it down on Gran Tesoro, swamping and trapping everybody except Luffy, who was in the air. Tesoro stood on a mountain of gold tendrils and declared himself a god, and an angry Luffy flew up to him. Tesoro attacked him with Gon L'ira di Dio, but after a great struggle Luffy managed to shatter it with Gomu Gomu no Leo Rex Bazooka and finally reach Tesoro, dealing a finishing blow that sent him flying into the Marine fleet. Everyone on Gran Tesoro rejoiced at Tesoro's defeat, but a timer suddenly appeared, and Carina stated that the ship would sink once it reached zero. The Straw Hats returned to the Thousand Sunny, and quickly discovered that the timer was a ruse in order for Carina take over Gran Tesoro, but held no hard feelings as the Marine fleet chased after them and they were forced to sail away.[89]
Zou Arc[]
| This is an empty section. Please help the wiki by adding information to it. |
Marine Rookie Arc[]

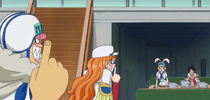
Luffy and Carrot go undercover in a Marine base to eat food.
The team began to get hungry after Luffy depleted all their rations, with the starving Luffy even trying to eat Chopper. They then came across Fron Island and decided to look for food there, despite Pekoms warning them that a Marine base was located there. Luffy, Nami, Chopper, Brook, and Carrot went to Fron Island on the Shark Submerge III. Once they landed, Brook scared a group of Marines into unconsciousness, allowing Luffy and the others to steal their clothes (although he was reluctant to wearing a Marine coat). Instead of going with Nami's planned raid of a food warehouse, Luffy and Carrot headed toward a Marine cafeteria, where they feasted on curry and rice. When Luffy finished his serving, he took an entire pot of curry to eat, which caused an uproar. During the uproar, Luffy was spotted by Vice Admiral Prodi through Video Den Den Mushis, and Prodi raised the alarm and told everyone about the Straw Hat Crew's presence. Luffy was then confronted by the Marines in the cafeteria, with the newly arrived Captain Grount preparing to fight him.[90]

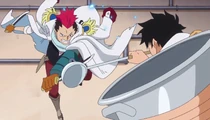
Luffy clashes with Grount.
Luffy was uninterested in fighting and tried to leave with a bowl of curry in tow, but was attacked by Grount. Luffy managed to hold Grount off with the curry ladle, and eventually bested him. Bonham then tried to attack Luffy, assaulting him with several rapid Rokushiki attacks. Luffy dodged all of them, and tried to leave, but Bonham blocked the exit and activated Tekkai. Luffy managed to blow Bonham away with Gear 2, and he and Carrot ran into the hall. They were soon confronted by Zappa, who attempted to woo Carrot and attacked Luffy out of jealousy. Luffy managed to block Zappa's strikes with Haki-imbued arms, before Carrot brought him down with Electro. Brook's detached soul then approached them and guided them to Nami and Chopper, but accidentally led them to a dead end, where they were confronted by Grount and Bonham. As Grount and Bonham argued on who would fight Luffy, Luffy punched a hole in the wall, allowing him and Carrot to escape.
Luffy and Carrot followed the scent of food to the food storage warehouse where Nami and Chopper were. As they gorged on food, they reunited with Nami and Chopper, but were confronted by Grount, Bonham, and Zappa again. Luffy managed to dodge Bonham's and Zappa's attacks on him, but Zappa pursued Luffy in order to get Nami and Carrot for himself. Nami and Carrot attacked Zappa, but he refused to stay down, and unleashed a fiery whirlwind at Luffy. Luffy redirected the whirlwind with Haki, causing it to hit a giant water basin and knock it over, taking out Zappa and flooding the warehouse. The Sanji retrieval team washed outside and attempted to escape, but Grount confronted them. Luffy managed to overpower Grount in a brawl, and he and his comrades escaped to the shore. However, they were then confronted by Vice Admiral Prodi and his men.[91]


Luffy and Grount face off for the final time.
The team tried to escape to the Submerge, but Prodi shot at it with his bazooka before confronting them. Prodi shot his bazooka at them, but Luffy pulled most of his crewmates out of the blast as they began battling the Marines. Prodi shot his bazooka at Luffy several times, but Luffy dodged all of the shots. Luffy then defeated Prodi with Jet Bazooka, but was immediately confronted again by Bonham and Zappa. After a short fight, Luffy defeated the two of them, but as the team tried to escape, Luffy was ambushed by Grount. Luffy told his teammates to go ahead to the Submerge, which survived Prodi's blast, as he confronted Grount. Grount revealed the true appearance of his left arm, which was monstrous and hairy like an animal's. Grount initially managed to overpower Luffy with his left arm, but Luffy clashed with him evenly upon activating Gear 3. Grount hit Luffy up into the air, but Luffy came down and clashed against him with Thor Elephant Gun. After a tremendous clash, Luffy managed to overpower Grount and send him flying into the ground, defeating him. The pirates then departed from Fron Island on the Sunny, but ended up eating all the food rations they had taken within 10 minutes.[92]
Wano Country Saga[]
Cidre Guild Arc[]
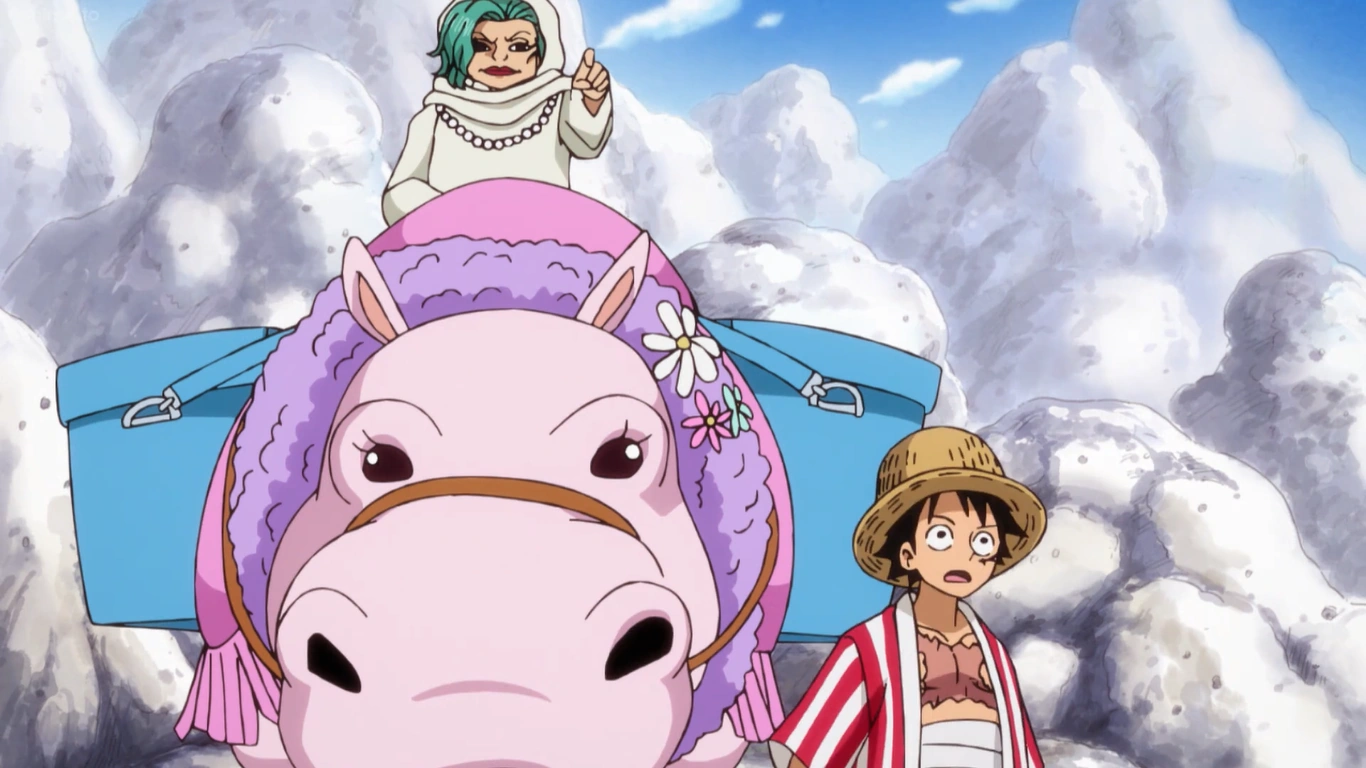
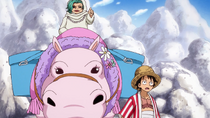
Caramel points Luffy in the direction of the Cidre Guild's factory.
Out at sea, the Straw Hats were under attack by a group of bounty hunters known as the Cidre Guild and their guns that shot powerful blasts of carbonated water. They managed to escape by blasting off with Coup de Burst, but upon stopping at an island afterward they found that the Sunny's cola supply had run out. Luffy volunteered to go to the island to buy some cola, and found that it was dotted with pools of carbonated water. A ramune saleswoman named Caramel told Luffy that he could get cola from the factory, but warned him that it was controlled by the Cidre Guild. Luffy raced toward the factory, but was confronted by a Cidre Guild platoon led by Ginger. Ginger overwhelmed Luffy with a powerful carbonation blast, causing him to fall into a sinkhole and get swept away by an underground river.
The river took Luffy to a pool where Boa Hancock was bathing, and the two reunited. Cidre found out that the two of them were on his island, and sent Ginger's squad to take them out. The group broke into the bathhouse, but were overwhelmed as Elder Nyon, Boa Sandersonia, and Boa Marigold assisted Luffy and Hancock. However, Ginger released carbon gas into the air, forcing Hancock to split up from her companions and escape with Luffy. Guarana reports to Cidre that Luffy and Hancock are heading toward the factory, and Cidre decides to go after them himself. Near the factory, Luffy apologizes for getting Hancock involved in the recent fight, but Hancock is happy to see him, thinking they would not reunite until the Pirates Festival. Luffy does not know what that is, and she reveals that it is an event that happens at random intervals where powerful pirates gather from all over the world. Luffy is intrigued by this, but Cidre then flies in and attacks, blowing a hole in the ground with a carbonation-powered punch. Luffy tells him he just wants cola, but Cidre says he will not sell any to pirates. He and his subordinates confront Luffy and Hancock, and he charges toward Luffy to acquire his 100th kill.[93]
His subordinate Guarana came to back him up, and she battled Hancock while Luffy took on Cidre. Cidre increased his attack power by boosting his attacks with carbonation, but Luffy still overwhelmed him, reminding Cidre of when Douglas Bullet destroyed his hometown. Cidre decided to retreat into the factory and upgrade his equipment, leaving Guarana and Ginger outside to take on Luffy and Hancock. While Hancock and her sisters hold off Ginger and Guarana, Luffy races through the factory until he finds Cidre putting on his rig. With this rig, Cidre dons barrels on his arms that rapidly spin, and he hits Luffy with an attack so powerful it sends him crashing through several walls. Luffy is barely hurt by the attack, though Cidre's power remains an issue. However, Cidre does quickly run out of carbonated water and is forced to replenish his barrels. Eventually, he hits Luffy out of the factory, and as he stands over the pirate, he declares his intention of bringing down every pirate to get his revenge as well as money. Luffy is not impressed by Cidre's weakness and lack of resolve, and attacks him with Gomu Gomu no Elephant Gun. After a brief clash, Luffy overpowers Cidre and defeats him. He then sees an invitation to the Pirates Festival land on the ground and Luffy picks it up.
The liberated Cidre Guild slaves gave the Straw Hats barrels of cola in repayment for their freedom. Luffy reveals to Hancock that he received an invitation to the Pirates Festival, and bids her a temporary farewell. As the Straw Hats sail back out to sea, Luffy reveals the invitation to his crew, and to their shock, Robin reads that this year's Expo will include a hunt for Gol D. Roger's treasure. Luffy is excited to go there, and the crew sets sail to Delta Island where the Expo will be taking place, along with the other crews of the Worst Generation.[94]
One Piece: Stampede[]
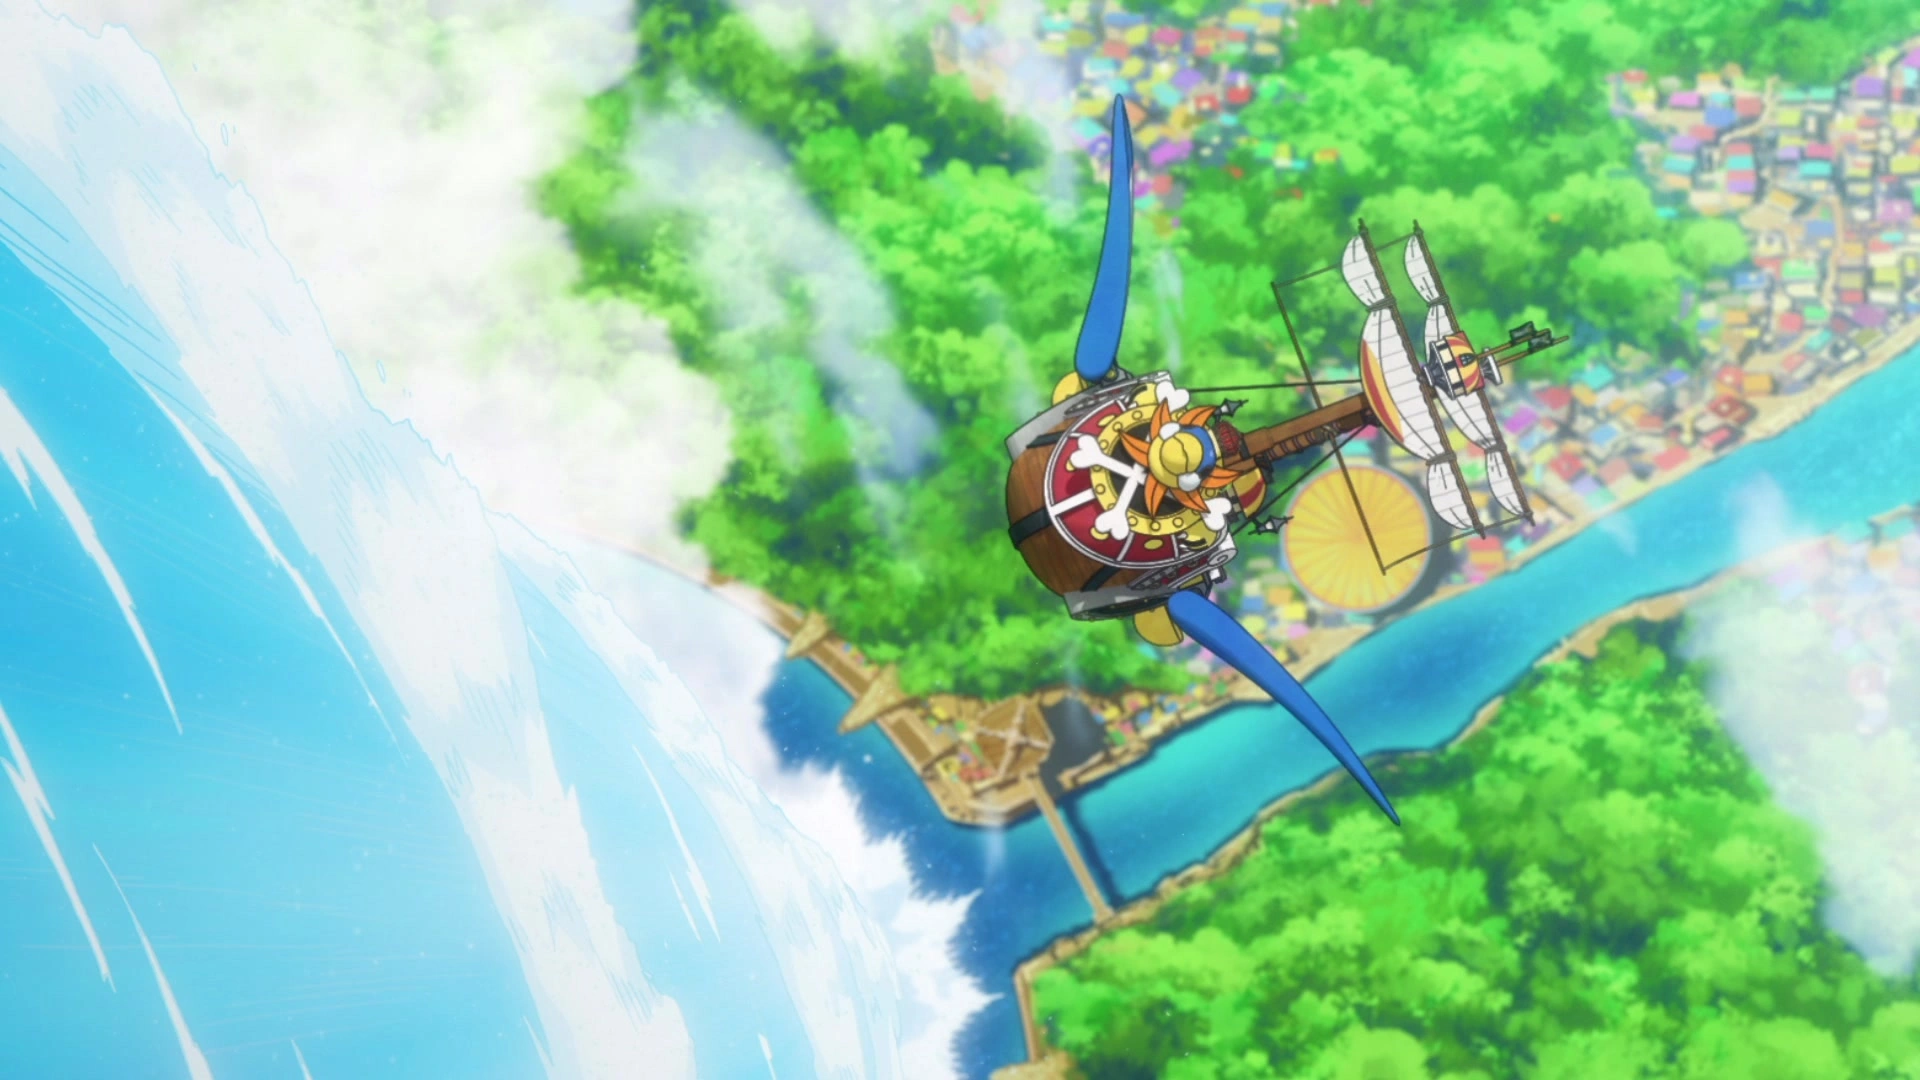

The Straw Hats climb up to Delta Island.
After receiving an invitation for the Pirates Festival; which was being hosted by Buena Festa, the Straw Hats headed to Delta Island. After exploring and playing around a bit, they decided to take part in the main event, a Treasure Race for Gol D. Roger's treasure. After the Straw Hats started to ascend the Knock Up Stream, they then noticed that Law has boarded their ship, who reveals he's been chased due to coming close to a secret behind the Festival. Robin, Sanji, Chopper, and Brook go with him, and they depart on the Shark Submerge III, while the rest of the crew finish the Treasure Race.
The rest continued to the Treasure Island atop the Stream, where an all out brawl occurred with the other contestants as they raced towards the treasure, and Luffy gets into fights with both Scratchmen Apoo and Urouge. However, the race ended when both the island and the Knock Up Stream were destroyed and the contestants were forced back into the bay of Delta Island by Douglas Bullet, who was holding a defeated Usopp. Despite everyone fleeing in terror from Bullet, as well as an incoming Buster Call fleet from the Marines closing in, Luffy was more concerned with Usopp.

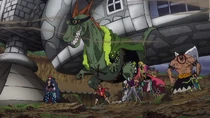
Luffy and the Worst Generation fight Bullet.
Luffy immediately confronts Bullet as the pirate attempts to kill Usopp, and Bullet ends up throwing Usopp at Luffy as he overwhelms Luffy with sudden speed. Bullet says that he wants to challenge the Worst Generation after hearing of their exploits, and he unleashes a massive blast of Haoshoku Haki that knocks out most of the pirates. Luffy unleashes his own blast of Haoshoku Haki in response, ready to accept his challenge alongside Eustass Kid, Killer, Basil Hawkins, Capone Bege, Jewelry Bonney, X Drake, Scratchmen Apoo, and Urouge. Bullet begins fighting the Worst Generation and quickly overwhelms them with his sheer speed and immense strength. Even after an onslaught of attacks from the Worst Generation, Bullet remained in control of the fight, with all of them left utterly overwhelmed.
However, Luffy gets up and activates Gear 4: Snakeman. In this form, he barrages Bullet with rapid, direction-changing punches, though Bullet returns many of the punches. Their fight ends with each fighter giving the other a powerful punch to the face and sending them flying far away. However, as Luffy lays on the ground exhausted, Bullet gets up and is not any worse for wear. Bullet mocks the Supernovas' strength, saying they have not done nearly enough to reach his level. He then decides to step it up a notch and brings out his ship, the Catapult, from underground. He uses his Gasha Gasha no Mi abilities to change the composition of the ship and the iron weapons inside of it, forming them into a gigantic robot of his control. While in the robot, Bullet states that the treasure of Roger that he currently possesses is equivalent to having the One Piece, shocking the Supernovas. With the Catapult, Bullet utterly overwhelms the Supernovas, who have no way to stop him. Bullet is able to make his already powerful root even stronger by imbuing it with his Haki, and the battle ends as all of the Supernovas lying on the ground thoroughly defeated. Bullet prepares to kill Luffy by stomping on him, but Usopp tries to stop him by shooting projectiles at the exoskeleton. They appear to have no effect until one of them sprouts into a plant that tears off one of the robot's fingers, and Bullet responds by creating a cannon which he fires on Usopp.
With everyone out of his way, Bullet makes his way to the town in the Catapult, where he begins to notice the Marine Fleet surrounding him. This is when he reveals that he awakened his devil fruit power, spreading the composition of the his exoskeleton and having it cover most of the island, including the marine and pirate ships as well. As he rips it all apart and assimilates it into an enormous colossus, the Marines try and fail to combat the colossus, as Bullet then raises the coast of the island into a large wall, preventing the pirates and the marines from escaping the island.
Meanwhile, a heavily injured Usopp carries an unconscious Luffy to find help. They stop in the path of a falling building, and Usopp stops a large burning pole from falling on Luffy, but collapses as the rest of the building start to fall on them. However, Brook then arrives and stops the collapse by freezing the building, and Chopper arrives to treat their injuries. Usopp tells him to focus on treating Luffy, as he had lost a lot of blood. After receiving treatment, Luffy wakes up soon afterward. Usopp tearfully apologizes to him for not being strong enough to protect him, but Luffy has no issue with it and wants to go after Bullet right now. Despite Chopper's protests, Luffy activates Gear 4 and flies toward Bullet.
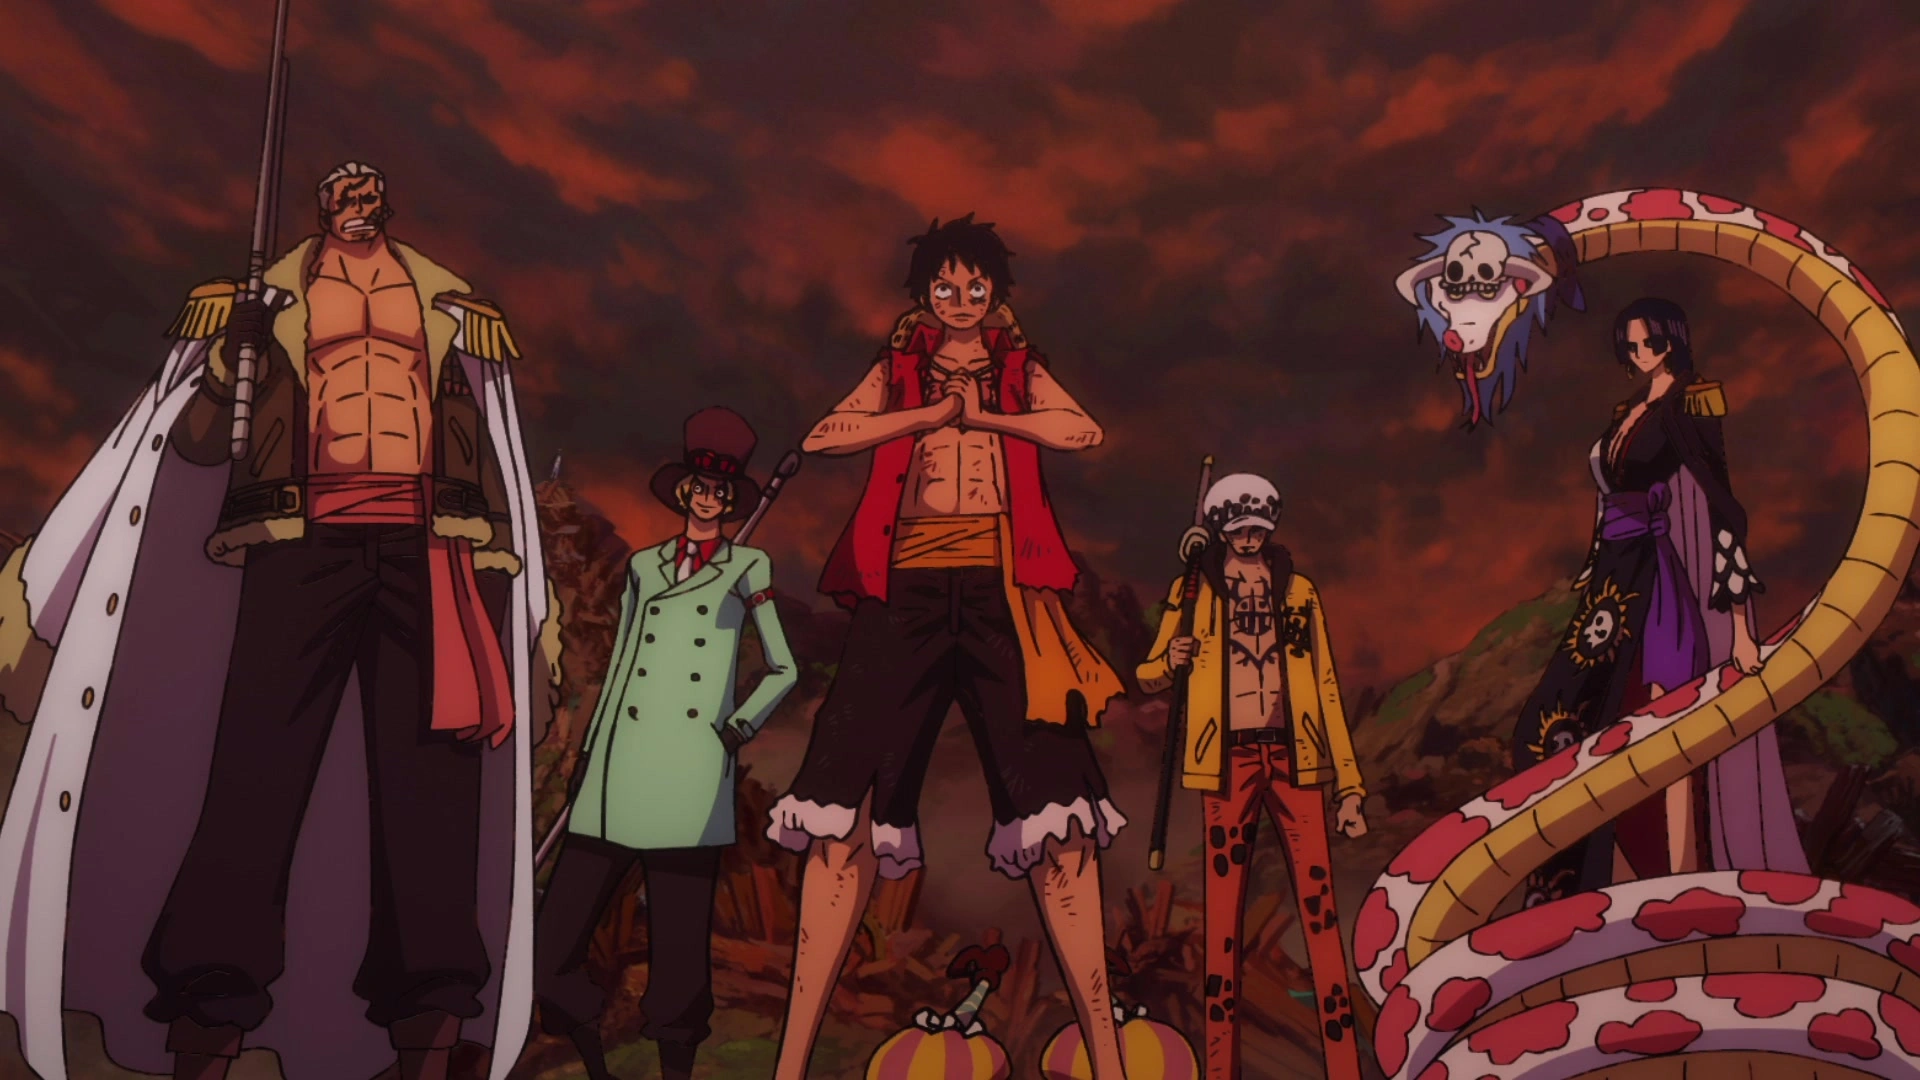
Luffy joins Smoker, Sabo, Law, and Hancock.
As Luffy flies toward Bullet, Bullet spots him and sends him flying in the direction of Law, Smoker, Sabo, Hancock, and Buggy, who were all heading towards Bullet as well. Law tells the group about his plan to take down Bullet. He reveals that Bullet's creations could be weakened if they were broken apart, but Bullet's powerful Haki made them difficult to damage. Law says that he can cut a gap in Bullet's Haki with his abilities, but before he can go over the rest of the plan, Luffy flies off to attack Bullet again. With Luffy fighting Bullet head on, the others began Law's plan to break the colossus piece by piece, with the assistance of Law's devil fruit ability, but Bullet remained confident in his ability to take them all on. Though the allies are briefly discouraged, after noticing Luffy activing Gear 4, preparing a powerful attack, Law's group performs one more combined attack which blows away a portion of the torso. This allows Luffy, who inflated his fist to a massive degree and flew toward Bullet to attack him with it, resulting in their giant fists clashing. After a long and powerful clash, Luffy managed to overpower the colossus and force Bullet out of it, however the Catapult still remained. Fortunately, the force of Luffy's punch causes the seeds Usopp had fired earlier to sprout into "Hebi Hanabi", thick powerful vines that wrapped around and cracked open the Catapult, severely injuring Bullet in the process.
With Bullet now out of his ship and out in the open, Luffy decides to finish the fight, with Zoro and Sanji arriving to prevent Crocodile and Rob Lucci from interfering. Bullet takes on Luffy in a brutal fistfight, and both fighters trade punches with impunity. Bullet uses his Haki to keep up with Luffy's ferocity, eventually covering his entire body in it. Luffy charges toward Bullet and inflates both of his fists, barraging him with Gomu Gomu no King Kong Gatling. This barrage eventually overwhelms Bullet and sends him crashing into the ground, defeated.
With Bullet finally defeated, Luffy stands with the Festival's treasure, which was revealed to be an Eternal Pose to Laugh Tale in his possession. With Crocodile and Lucci once again trying to get it, Luffy destroys it by crushing it in his hand, claiming he does not need it to reach Laugh Tale. He and his crewmates make it back to the Sunny, but their escape route is blocked by the Buster Call fleet. Together with the other members of the Worst Generation, as well as several other pirate crews, the Straw Hats try to move through the blockade. In the end they were all able to escape thanks to Sabo and Ann creating a blazing path for them to go through. Later as the Straw Hats find out what the treasure is and that Luffy destroyed it, most of them except for Usopp are shocked at what Luffy did, but Luffy simply says that he did not want to miss out on any adventures, as the crew continue to sail away.[95]
Episode of East Blue[]
| This is an empty section. Please help the wiki by adding information to it. |
Episode of Sky Island[]
| This is an empty section. Please help the wiki by adding information to it. |
Wano Country Arc[]
| This is an empty section. Please help the wiki by adding information to it. |
Uta's Past Arc[]
| This is an empty section. Please help the wiki by adding information to it. |
One Piece Film: Red[]
Uta organized a concert on Elegia in order to realize her dream of performing for the whole world. Luffy was present during the concert.[96]
References[]
- ↑ 1.0 1.1 One Piece Manga and Anime — Vol. 1 Chapter 1 (p. 5) and Episode 4, Luffy is first introduced.
- ↑ 2.0 2.1 One Piece Manga and Anime — Vol. 1 Chapter 2 (p. 8) and Episode 1, Luffy debuts in the present.
- ↑ 3.0 3.1 One Piece Manga and Anime — Vol. 5 Chapter 44 (p. 2-20) and Episode 21, Luffy works off his debt to Zeff.
- ↑ One Piece Manga and Anime — Vol. 104 Chapter 1053 (p. 17) and Episode 1080, Luffy became recognized as one of the Four Emperors.
- ↑ One Piece Manga and Anime — Vol. 71 Chapter 703 (p. 16) and Episode 633, Luffy's alias in Dressrosa is revealed.
- ↑ 6.0 6.1 Vivre Card - One Piece Visual Dictionary (Card #0001), Luffy-tarou is romanized.
- ↑ One Piece Manga and Anime — Vol. 91 Chapter 914 (p. 7) and Episode 900, Luffy's first alias in Wano is revealed.
- ↑ One Piece Manga and Anime — Vol. 91 Chapter 916 (p. 8) and Episode 903, Luffy's second alias in Wano is revealed.
- ↑ One Piece Manga and Anime — Vol. 103 Chapter 1043 (p. 16-17) and Episode 1070, Zunesha declares Joy Boy's return.
- ↑ One Piece Manga — Vol. 1 Chapter 2 (p. 3), Luffy's epithet is written in the title of the chapter.
- ↑ SBS One Piece Manga — Vol. 4 (p. 28), Luffy's age is revealed.
- ↑ 12.0 12.1 One Piece Blue Deep: Characters World (p. 186), Luffy's profile after timeskip is revealed.
- ↑ 13.0 13.1 SBS One Piece Manga — Vol. 69 (p. 66), Luffy's age and height after timeskip are revealed.
- ↑ SBS One Piece Manga — Vol. 15 (p. 90), Luffy's birthday is revealed.
- ↑ SBS One Piece Manga — Vol. 10 (p. 46), Luffy's height is revealed.
- ↑ SBS One Piece Manga — Vol. 66 (p. 162), Oda explains the blood types of the world and reveals Luffy's blood type.
- ↑ One Piece Manga and Anime — Vol. 104 Chapter 1053 (p. 4-5) and Episode 1080, Luffy's bounty as one of the new Four Emperors.
- ↑ One Piece Manga and Anime — Vol. 90 Chapter 903 (p. 16-17) and Episode 879, Luffy's sixth bounty after Whole Cake Island.
- ↑ One Piece Manga and Anime — Vol. 80 Chapter 800 (p. 7) and Episode 745, Luffy's bounty is stated to have risen after Dressrosa.
- ↑ One Piece Manga and Anime — Vol. 61 Chapter 601 (p. 12) and Episode 521, Luffy's fourth bounty after the Summit War of Marineford.
- ↑ One Piece Manga and Anime — Vol. 45 Chapter 435 (p. 16-17) and Episode 320, The crew members' bounties for attacking Enies Lobby are revealed.
- ↑ One Piece Manga and Anime — Vol. 23 Chapter 213 (p. 22) and Episode 128, Luffy's bounty is raised after Arabasta.
- ↑ One Piece Manga and Anime — Vol. 11 Chapter 96 (p. 6) and Episode 45, Luffy's first bounty is put by Brannew in the wanted list.
- ↑ SBS One Piece Manga — Vol. 30 (p. 104), Gomu Gomu no Mi is confirmed to be a Paramecia.
- ↑ One Piece Manga and Anime — Vol. 103 Chapter 1044 (p. 4-6) and Episode 1071, The Five Elders discuss the nature of Luffy's Devil Fruit.
- ↑ One Piece OVA — Defeat Him! The Pirate Ganzack.
- ↑ One Piece Movie — One Piece: The Movie.
- ↑ One Piece Special — Luffy Falls! Adventure in the Uncharted Ocean's Navel.
- ↑ One Piece Movie — Clockwork Island Adventure.
- ↑ One Piece Anime — Episode 54.
- ↑ One Piece Anime — Episode 55.
- ↑ One Piece Anime — Episode 56.
- ↑ One Piece Anime — Episode 57.
- ↑ One Piece Anime — Episode 58.
- ↑ One Piece Anime — Episode 59.
- ↑ One Piece Anime — Episode 60.
- ↑ One Piece Anime — Episode 61.
- ↑ One Piece Movie — Chopper's Kingdom on the Island of Strange Animals.
- ↑ One Piece Movie — Episode of Arabasta: The Desert Princess and the Pirates.
- ↑ One Piece Movie — Dead End Adventure.
- ↑ One Piece Movie — The Cursed Holy Sword.
- ↑ One Piece Special — Once Upon the Great Sea! A Father's Huge, HUGE Dream!.
- ↑ One Piece Special — Protect! The Last Great Performance.
- ↑ One Piece Anime — Episode 196.
- ↑ One Piece Anime — Episode 197.
- ↑ One Piece Anime — Episode 198.
- ↑ One Piece Anime — Episode 199.
- ↑ One Piece Anime — Episode 200.
- ↑ One Piece Anime — Episode 201.
- ↑ One Piece Anime — Episode 202.
- ↑ One Piece Anime — Episode 203.
- ↑ One Piece Anime — Episode 204.
- ↑ One Piece Anime — Episode 205.
- ↑ One Piece Anime — Episode 206.
- ↑ One Piece Anime — Episode 220.
- ↑ One Piece Anime — Episode 221.
- ↑ One Piece Anime — Episode 222.
- ↑ One Piece Anime — Episode 223.
- ↑ One Piece Anime — Episode 224.
- ↑ One Piece Movie — Baron Omatsuri and the Secret Island.
- ↑ One Piece Movie — The Giant Mechanical Soldier of Karakuri Castle.
- ↑ One Piece Anime — Episode 326.
- ↑ One Piece Anime — Episode 327.
- ↑ One Piece Anime — Episode 328.
- ↑ One Piece Anime — Episode 329.
- ↑ One Piece Anime — Episode 330.
- ↑ One Piece Anime — Episode 331.
- ↑ One Piece Anime — Episode 332.
- ↑ One Piece Anime — Episode 333.
- ↑ One Piece Anime — Episode 334.
- ↑ One Piece Anime — Episode 335.
- ↑ One Piece Movie — One Piece Film: Strong World.
- ↑ One Piece Special —
3D2Y: Overcome Ace's Death! Luffy's Vow to his Friends. - ↑ One Piece Special — Episode of Nami: Tears of a Navigator and the Bonds of Friends.
- ↑ One Piece Special — Episode of Luffy: Adventure on Hand Island.
- ↑ One Piece Special — Glorious Island.
- ↑ One Piece Movie — One Piece Film: Z.
- ↑ One Piece Anime — Episode 626.
- ↑ One Piece Anime — Episode 627.
- ↑ One Piece Anime — Episode 628.
- ↑ One Piece Movie — Episode of Chopper Plus: Bloom in Winter, Miracle Sakura.
- ↑ One Piece Special — Adventure of Nebulandia.
- ↑ One Piece Anime — Episode 747.
- ↑ One Piece Anime — Episode 748.
- ↑ One Piece Anime — Episode 749.
- ↑ One Piece Anime — Episode 750.
- ↑ One Piece Special — Heart of Gold.
- ↑ One Piece Special — One Piece Film: Gold Episode 0.
- ↑ One Piece Movie — One Piece Film: Gold.
- ↑ One Piece Anime — Episode 780.
- ↑ One Piece Anime — Episode 781.
- ↑ One Piece Anime — Episode 782.
- ↑ One Piece Anime — Episode 895.
- ↑ One Piece Anime — Episode 896.
- ↑ One Piece Movie — One Piece: Stampede.
- ↑ One Piece Movie — One Piece Film: Red.
[]
| |||||||||||||
| |||||||||||||
| |||||||||||||
| |||||||||||
| |||||||||||
| |||||||||||
| |||||||||||
| |||||||||||
| |||||||||||
| |||||||||||
| |||||||||||
| |||||||||||
| |||||||
| |||||||
| |||||||
| |||||||
| |||||||||||
| |||||||||||
| |||||||||||
| |||||||||||
| |||||||||||||
| |||||||||||||
| |||||||||||||
| |||||||||||||
| |||||||||||||
| |||||||||||||
| |||||||||||
| |||||||||||
| |||||||||||
| |||||||||||||
| |||||||||||||
| |||||||||||||
| |||||||||||||
| |||||||||||||
| |||||||
| |||||||
| |||||||||||
| |||||||||||
| |||||||||||
East Blue Inhabitants | |||||||||||||||||||||||||||||
|---|---|---|---|---|---|---|---|---|---|---|---|---|---|---|---|---|---|---|---|---|---|---|---|---|---|---|---|---|---|
| |||||||||||||||||||||||||||||
| |||||||||||||||||||||||||||||
| |||||||||||||||||||||||||||||
| |||||||||||
| |||||||||||
| |||||||||||
| |||||||||||
| |||||||||||
| |||||||||||
| |||||
| |||||||||||||||||
| |||||||||||||||||
| |||||||||||||||||
| |||||||||||||||||
| |||||||||
| |||||||||
| |||||||||
Individuals with Bounties | |||||||||||||||||
|---|---|---|---|---|---|---|---|---|---|---|---|---|---|---|---|---|---|
| |||||||||||||||||
| |||||||||||||||||
| |||||||||||||||||
| |||||||||||||||||
| |||||||||||||||||
| |||||||
| |||||||
| |||||||||||||
| |||||||||||||
| |||||||||||||
| |||||||||||||
| |||||||||||||||||
| |||||||||||||||||
| |||||||||||||||||
| |||||||||||||||||
| |||||||||||||||||
| |||||||||||||||||