
|
Ahoy! This here is the 1st Featured Article.
"Monkey D. Luffy" has been featured, meaning it was chosen as an article of interest.
|
During the Timeskip
Training
At some point in the time skip, Luffy developed Gear 4 in order to help him subdue the beasts on Rusukaina.[26] He later asked Rayleigh how to improve his attack power with it, and Rayleigh warned him about the consequences of using it. However, Luffy later learned how to properly utilize Gear 4.[27]

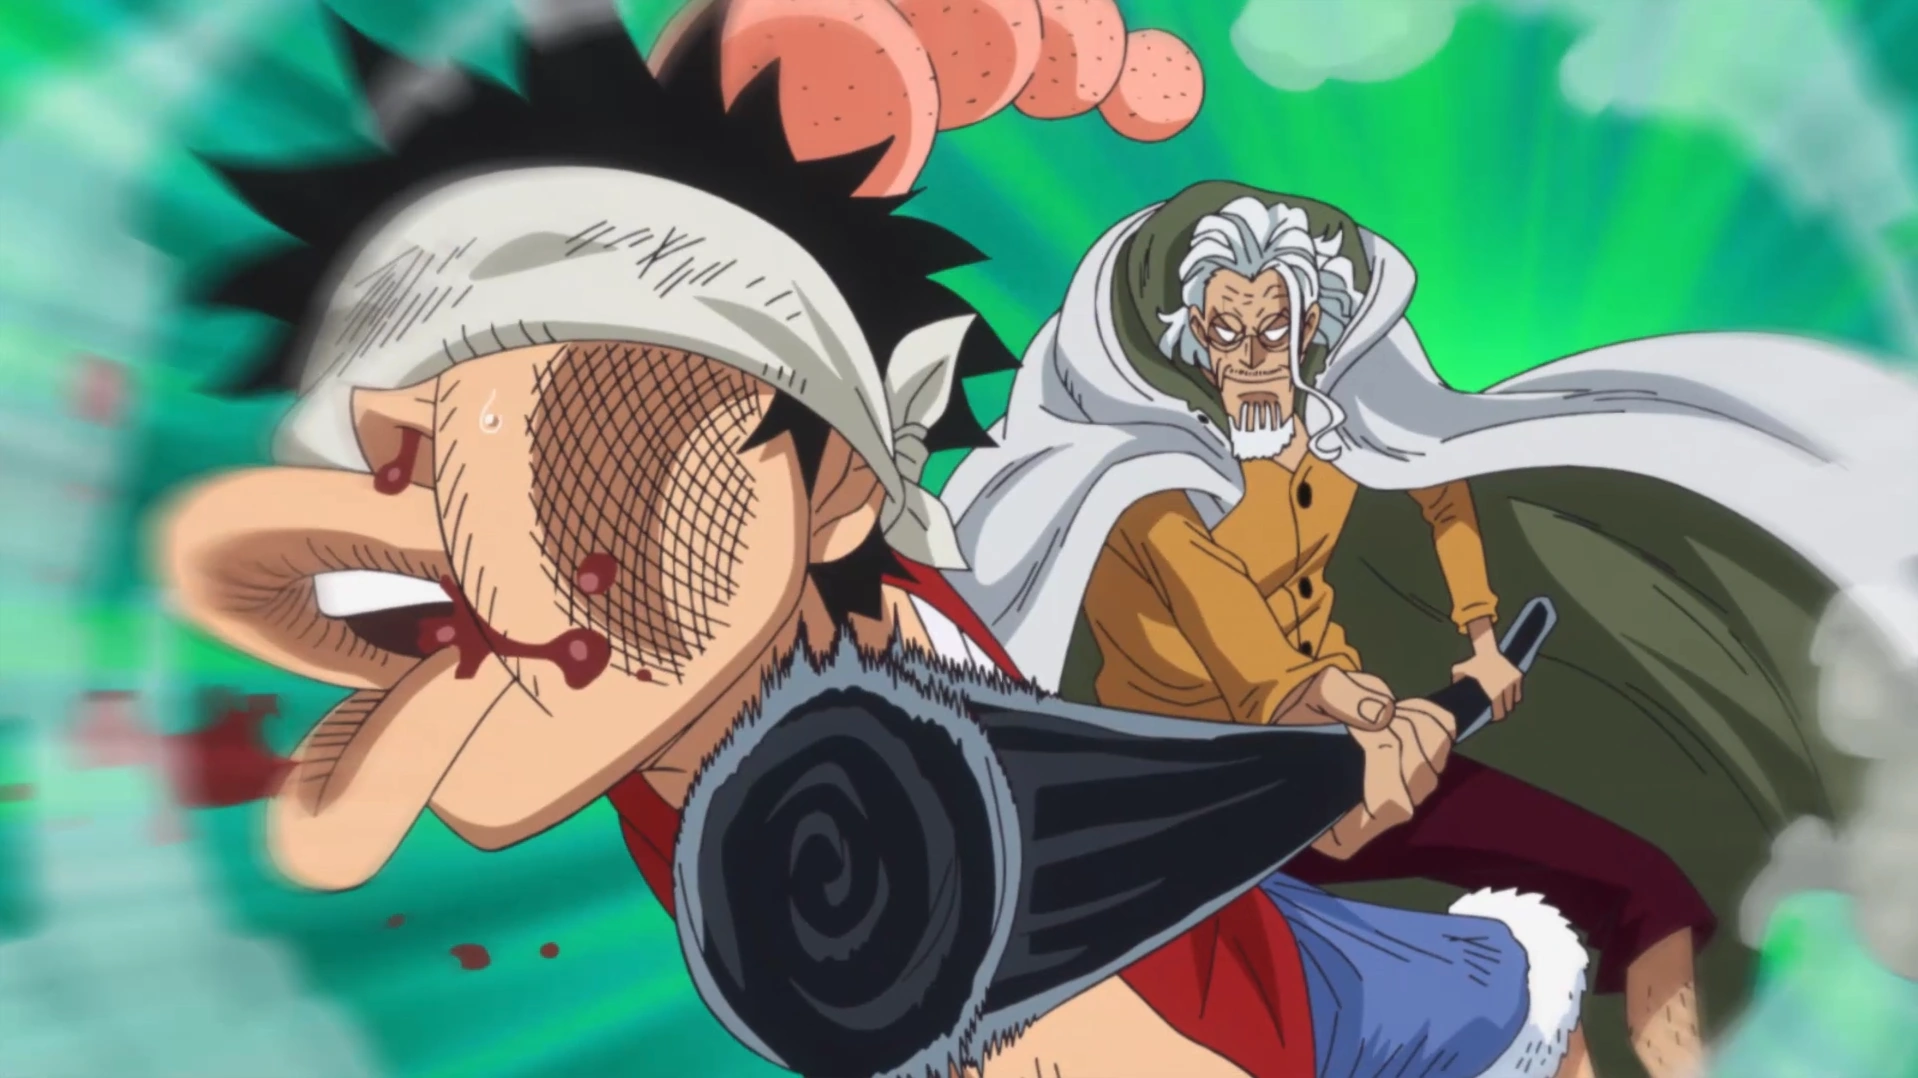
Rayleigh training Luffy to use Haki.
While teaching Kenbunshoku Haki to Luffy, Rayleigh challenged Luffy to dodge 100 times while blindfolded or he would not be allowed to eat. When Luffy was attacking blindly, he accidentally hit Rayleigh's dinner, causing him to hit Luffy. While lying on the ground hungry, some animals gave him food, but Luffy refused to eat what they offered. During a later conversation, Rayleigh remarked on how Luffy was proficient in sensing the feelings of living things. He also mentioned that there are people who can see a glimpse into the future and asked Luffy what would he do if he met one of these people.[28]
After teaching Luffy the basics of Haki, Rayleigh informed him that Haki grows stronger when one faces a stronger opponent.[29]
Fish-Man Island Saga
Return to Sabaody Arc

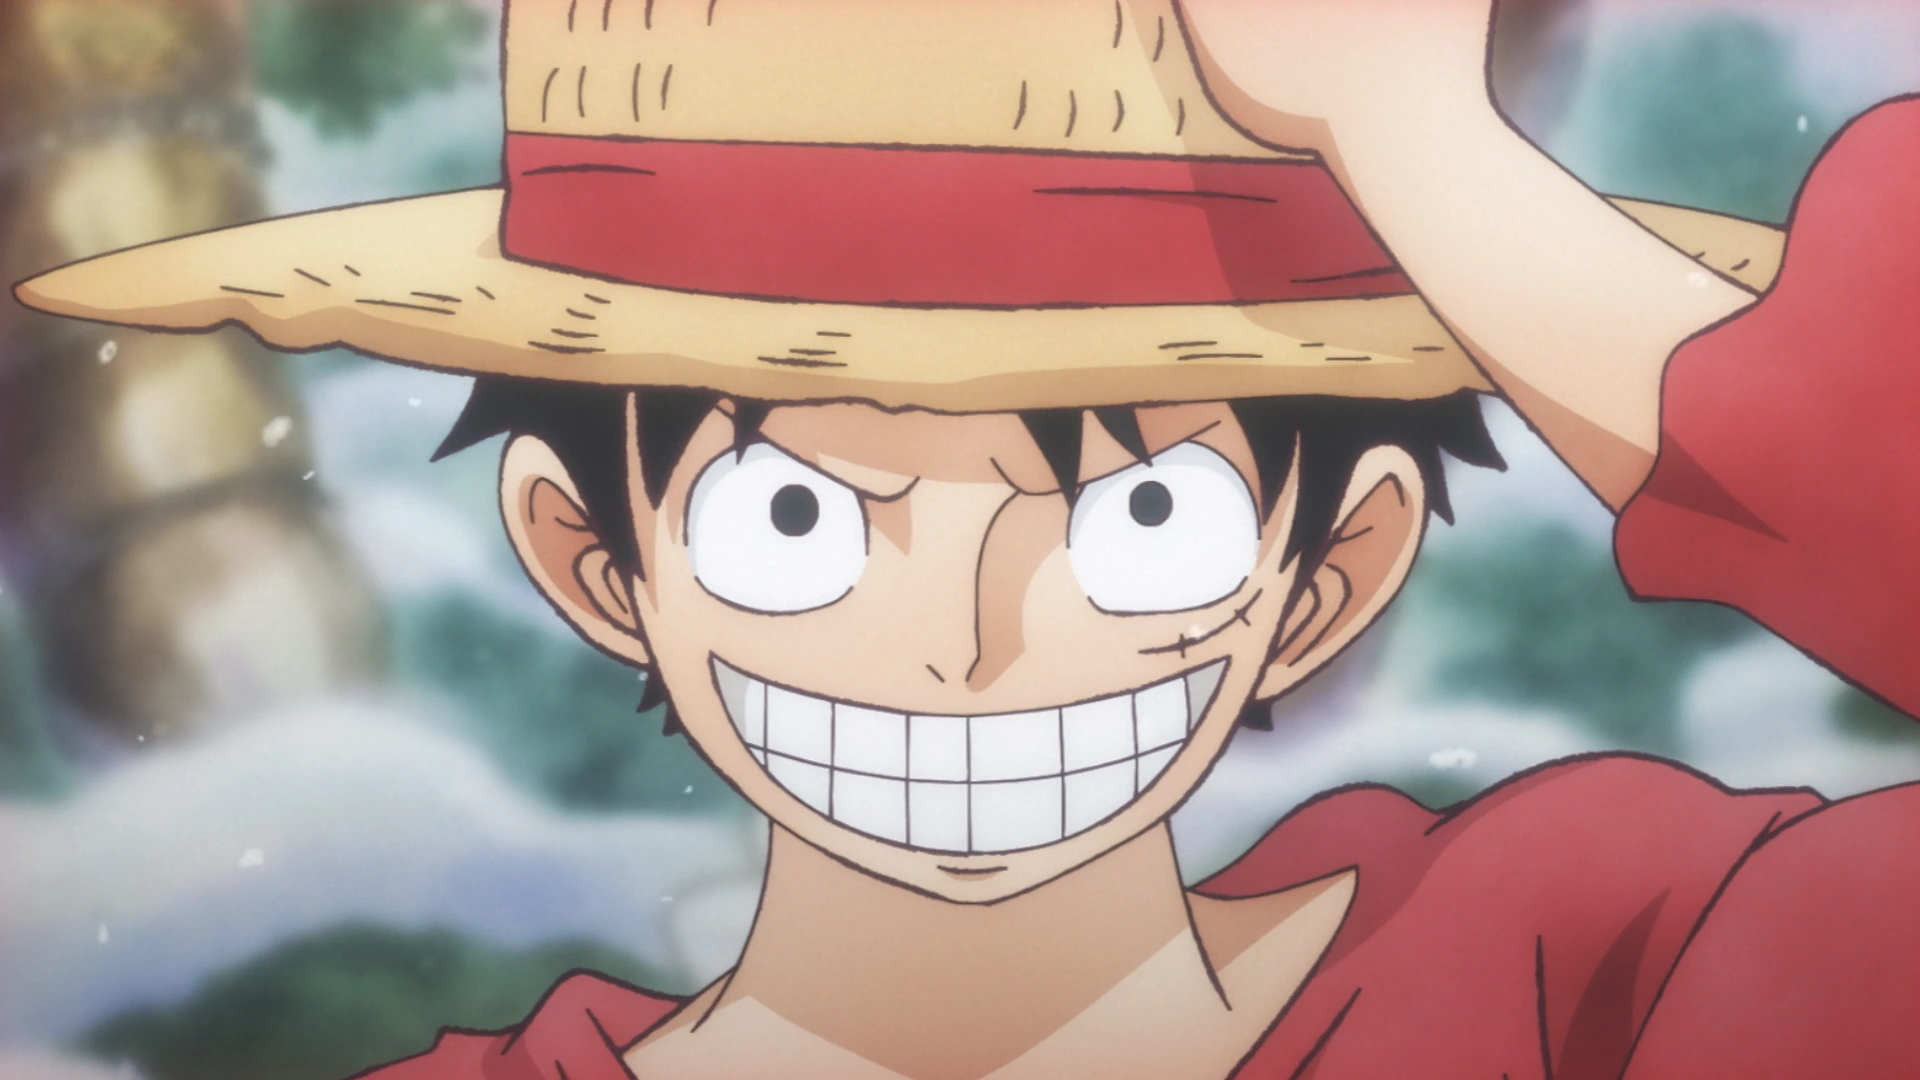
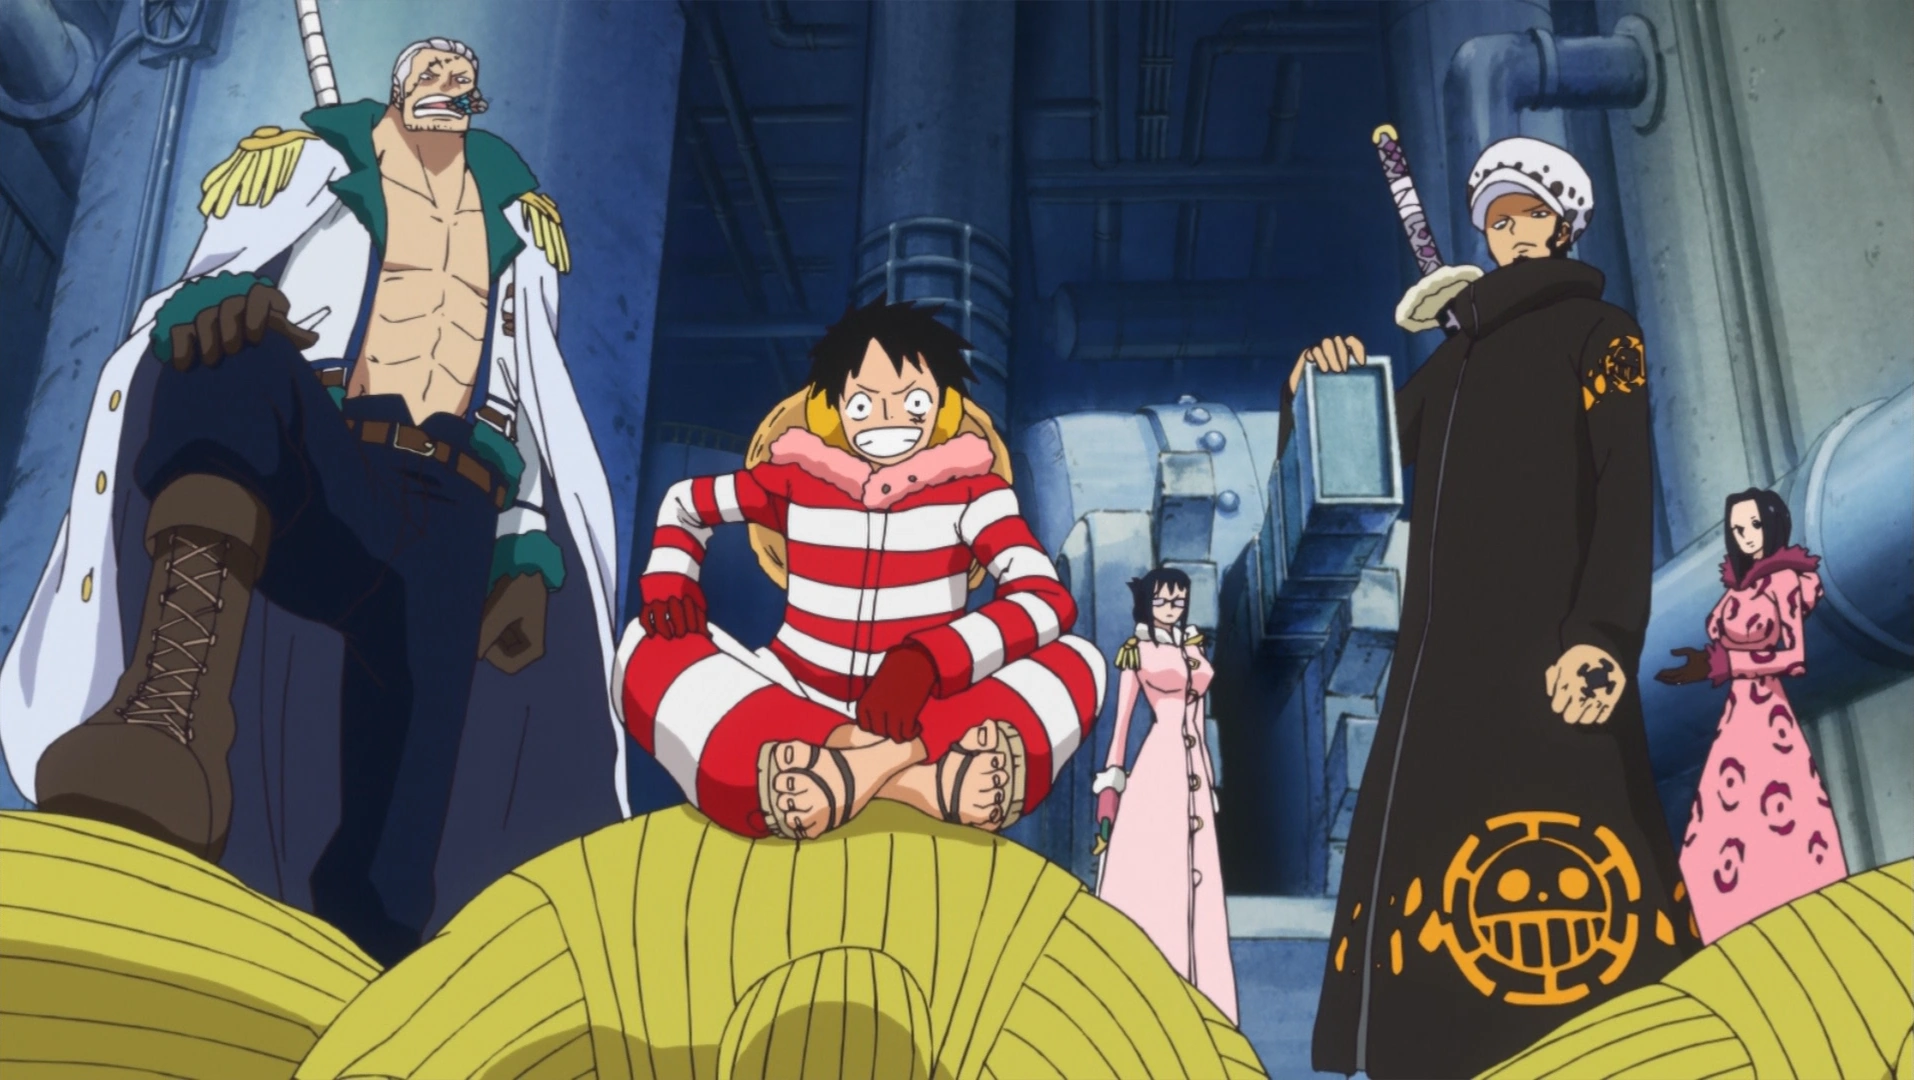
Straw Hat Luffy is back.
When the two years of training were up, Luffy was called by the Gorgon Sisters, Nyon, and Marguerite, who had prepared a ship for him to sail to Sabaody. Luffy collected his straw hat and bid farewell to the animals, who were now his friends.[30]
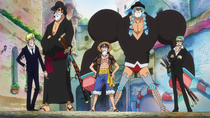
Upon arriving near Sabaody, Hancock gave Luffy a coat to shroud himself as well as a large backpack with an obscene amount of supplies. Luffy bid farewell to her and the Kuja, promising to see them again as he headed for land on a rowboat.[31] After landing, Luffy accidentally bumped into Demaro Black, who unbeknownst to him was impersonating him.[32] This made Black extremely angry and, not recognizing Luffy, he held the pirate at gunpoint and told him to prostrate himself for forgiveness. Luffy shrugged him off, causing him to pull the trigger, but Luffy dodged the bullet with ease using Kenbunshoku Haki before unleashing a blast of Haoshoku Haki that knocked Black, as well as the rest of his Fake Straw Hat Crew, unconscious.[31]
Luffy then ran into Manjaro and Drip, who were impersonating Zoro and Sanji in Black's crew, and mistook them for the real item. Recognizing him as the one who attacked Black, the duo took Luffy to Grove 46 where their captain was gathering new recruits.[33] Luffy was brought onstage to be made an example of, but the event was suddenly disrupted by the arrival of the Marines and Pacifista led by Sentomaru. Luffy discovered that Black had been impersonating him, and the Pacifista PX-5 began targeting him after Black's defeat, revealing the real Luffy to the crowd. However, Luffy dodged PX-5's laser blast before hitting its face into the ground, causing it to explode. The real Zoro and Sanji then arrived and defeated another Pacifista, and Luffy greeted them before seeing Rayleigh off in the distance; Rayleigh told him to get to his crew, and Luffy proclaimed to the Dark King that he would become the Pirate King.[34]

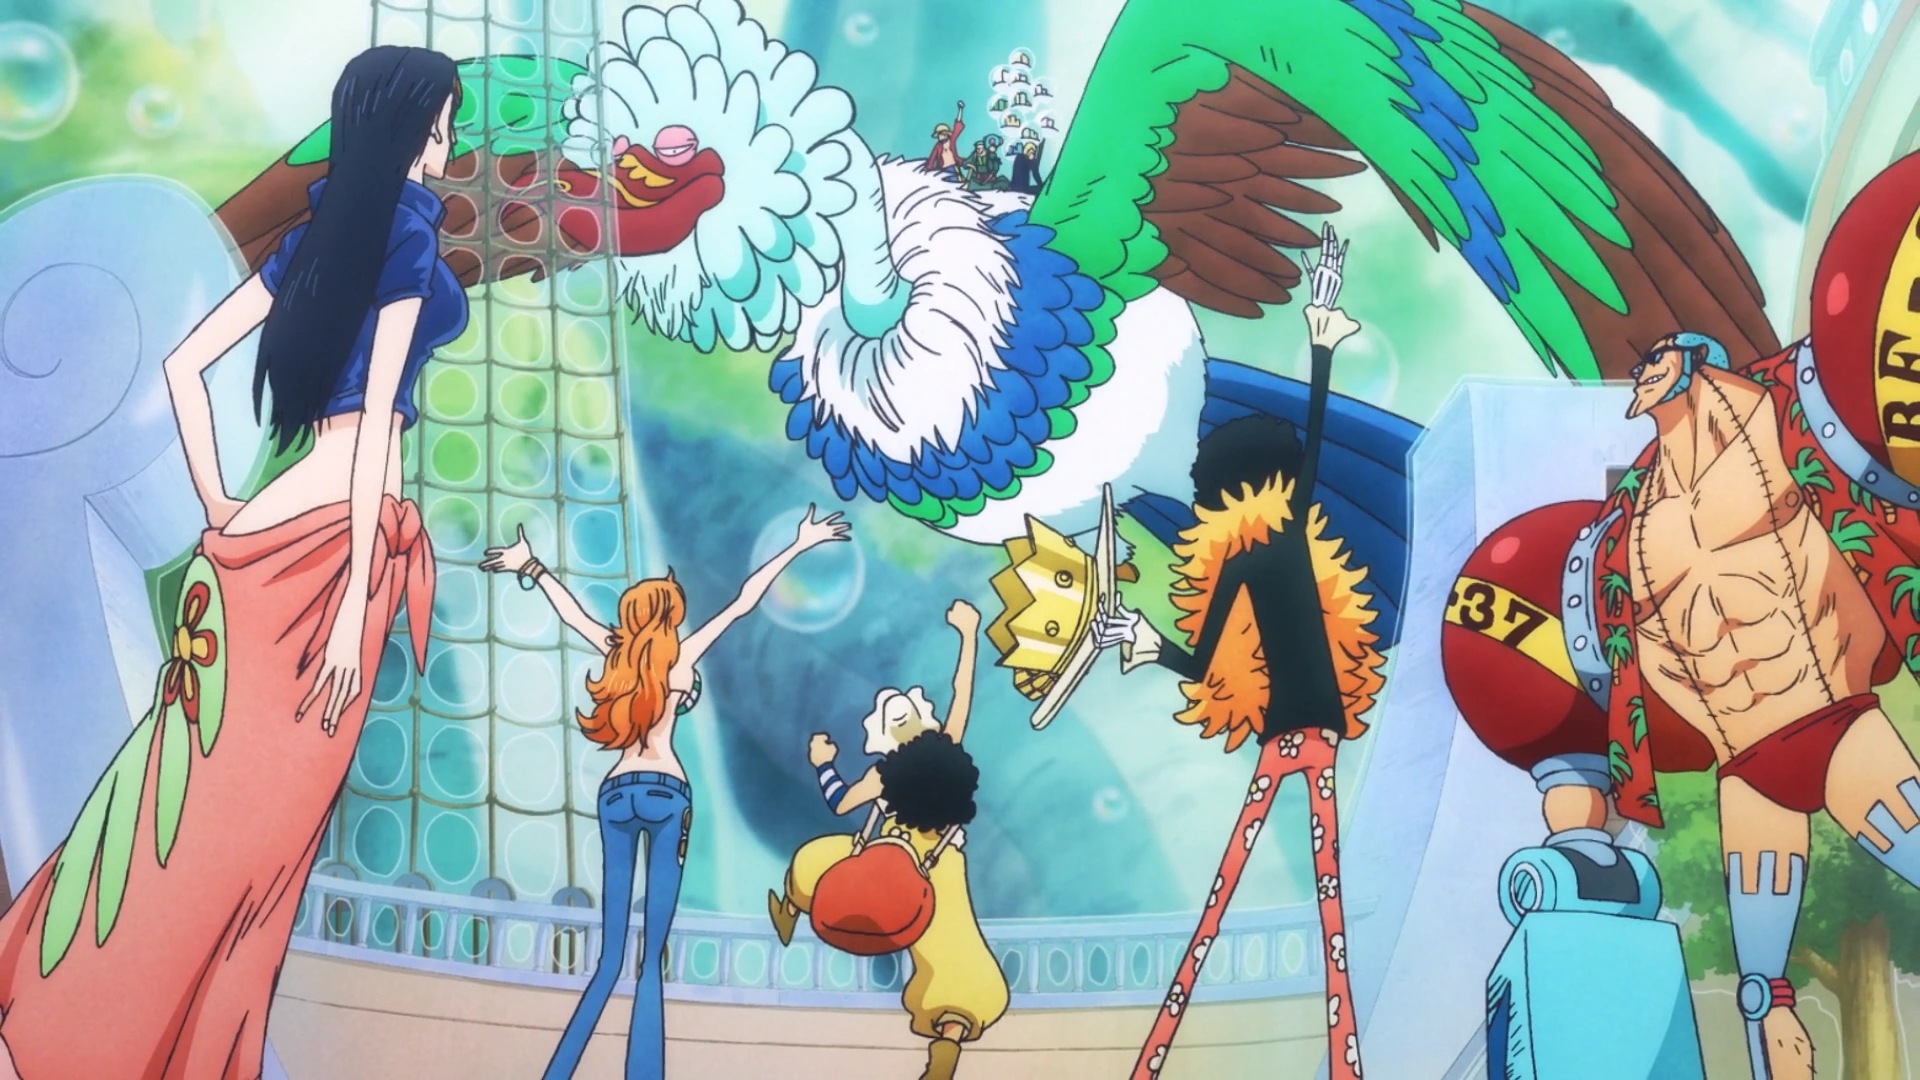
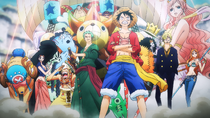
Luffy, Zoro, and Sanji reunite with the rest of the crew.
Aided by Perona and a Masukeredomo Goayu Bird from the Torino Kingdom, Luffy, Zoro, and Sanji reached the Thousand Sunny and Luffy reunited with the rest of his crew. They quickly found themselves under attack by a Marine battleship, but the Kuja arrived to intercept it. As the coating began to take effect for the Sunny to submerge, Luffy thanked his crew for going with his request to train for two years and shouted to set sail as their voyage to Fish-Man Island was now beginning.[35]
Fish-Man Island Arc
The Undersea Voyage
The Straw Hats admired the wonders under the sea and learned how the coating bubble worked. Franky told the others that Hatchan had been wounded and would be waiting for them on Fish-Man Island; he then revealed that Bartholomew Kuma had taken over protecting the Sunny during their training for reasons that were mostly unknown, but may have involved his ties to the Revolutionary Army.[36] The Straw Hats were then attacked by the Caribou Pirates, whose ship was being pulled by Momoo. However, when Momoo saw Luffy and Sanji he became fearful and fled, allowing only Caribou to board the Sunny. The Straw Hats promptly tied him up and began preparing to ride the currents down into the deep sea. As they started plummeting down, they encountered a giant kraken, and Luffy got the idea to tame it and have it pull their ship.[37]


Luffy uses Gomu Gomu no Elephant Gun to defeat the kraken.
To keep the kraken at bay without threatening the Sunny's coating, Caribou had Luffy, Zoro, and Sanji wear smaller bubbles around them that would allow them to move and breathe away from the ship. The trio headed out, and after Zoro and Sanji attacked the kraken's tentacles, Luffy unleashed a Gear 3 punch hardened with Busoshoku Haki called Gomu Gomu no Elephant Gun which knocked the kraken unconscious with a single blow. However, the trio were then pulled down by the current into the Underworld of the Sea before they could return to the Sunny.[38] Luffy and Sanji's bubbles popped, but they managed to get into Zoro's bubble and narrowly evade death. Luffy successfully tamed the kraken and gave it the name Surume, and had it attack the giant fish-man Wadatsumi after finding him threatening the rest of the crew. Luffy, Zoro, and Sanji returned to the Sunny and had Surume carry it to Fish-Man Island.[39]
Their voyage was soon threatened again by the eruption of an undersea volcano, causing a landslide as Surume took the Sunny down the final trench. Usopp managed to hold back most of the avalanche with his special Pop Green ammunition, but a rock hit Surume on the head and knocked him out, causing the Sunny to sink down to the ocean floor.[40]
Trouble in the Underwater Paradise
The Straw Hats were unharmed following this and celebrated upon seeing Fish-Man Island a short distance away. However, they were then confronted by Hammond, who told the Straw Hats to submit to his crew the New Fish-Man Pirates or be attacked. The Straw Hats quickly planned to blast into Fish-Man Island with Coup de Burst, and Luffy bluntly rejected Hammond's demand.[41] Hammond had his Sea Beast army attack in response, but the Straw Hats were able to blast away just in time. They went through a barrier that stripped the remaining coating off the Sunny before entering another layer of seawater, which swept the whole crew off the ship in different directions and left the Devil Fruit users powerless.[42]
Luffy, Usopp, Sanji, and Chopper were rescued by Camie and the Medaka Mermaid Quintuplets and taken to the former's apartment where they eventually regained consciousness. Camie took them up to show them around Fish-Man Island and meet Pappag at his mansion in Gyoverly Hills, and they first stopped at Mermaid Cove.[42] While there, Luffy told Camie that he wanted to see Jinbe on the island, but she revealed that he had left. The three princes of the Ryugu Kingdom, the Neptune Brothers, then suddenly came to the cove to search for the Straw Hats. Camie and the mermaids attempted to hide them, but Sanji had a massive nosebleed which exposed the pirates and left him critically short of blood. Hammond and his crewmates Hyouzou and Kasagoba then arrived as Luffy asked for someone to donate blood, and Hammond told him that even though humans and fish-men had the same blood, it was illegal for the races to give each other transfusions. He then fired a net at Luffy, but Luffy easily dodged it with Gear 2 before knocking out the three pirates with a single strike. Hammond's Sea Squirrel then charged at Luffy, but he stopped it with just a look. Camie told the Straw Hats to join her onboard the Neptune Brothers' ship Ryugu, and they got on and headed for town.[43]
The group arrived at the port town Coral Hill and desperately looked for any humans with Sanji's rare blood type. They finally found two okama who agreed, and Sanji recovered in Madame Shyarly's room. Luffy noticed a nick on his arm and realized he had been poisoned by Hyouzou; however, he was unaffected due to immunity built up after his fight with Magellan. Luffy, Usopp, and Camie headed to the Mermaid Cafe, where they ran into Brook and Pappag. Pappag then took them to his home via Fish Taxi, and they passed by a candy factory with the Big Mom Pirates' jolly roger on it; Pappag explained that the Emperor Big Mom now protected the island following Whitebeard's death, but demanded large amounts of candy in return.[44] The group arrived at Pappag's mansion and reunited with Nami at a Criminal store; Pappag allowed them to take whatever they wanted from it. King Neptune then arrived unexpectedly and invited the Straw Hats to his palace.[45]
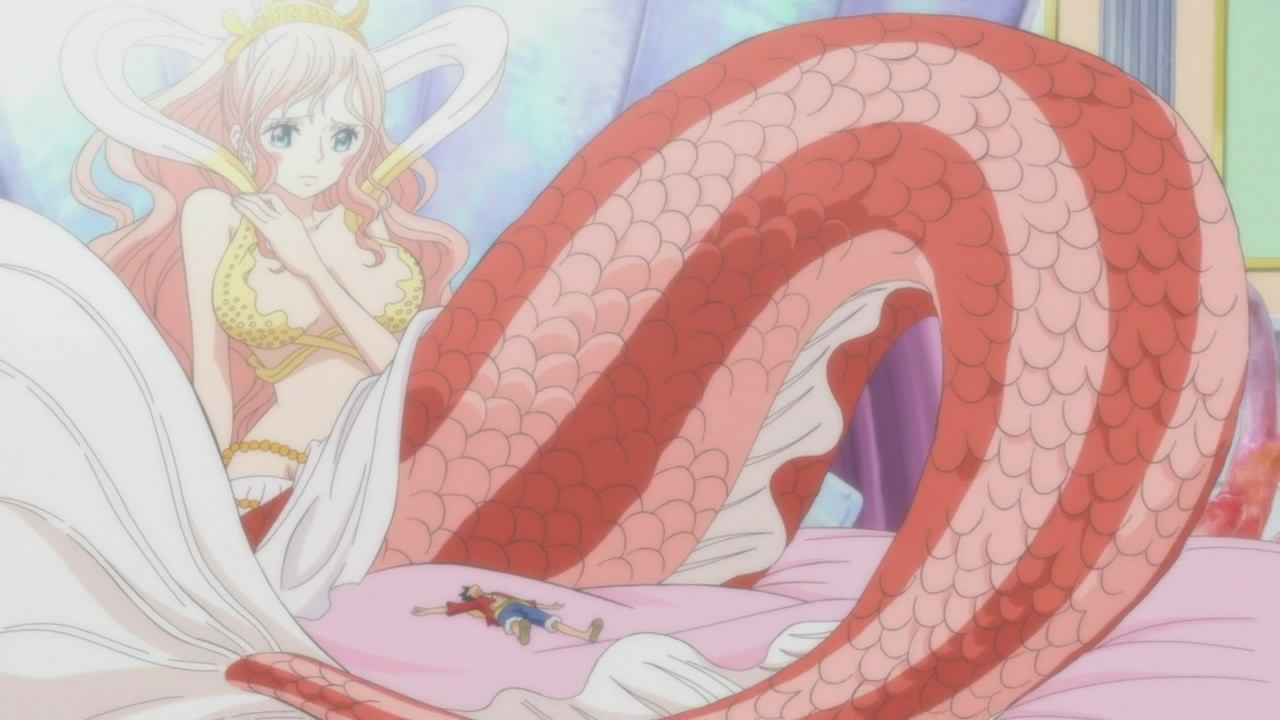
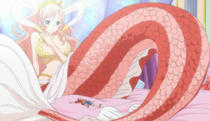
Luffy meets the Mermaid Princess.
The Straw Hats rode aboard Megalo, a shark belonging to Neptune's daughter whom they had unwittingly saved from Surume, and Neptune and his sons had intended to come to thank the Straw Hats for this. Neptune revealed that Zoro was already at the palace, and Nami told the others that Franky had gone to look for a relative of Tom while Robin went to look for a historical item. Upon arriving at Ryugu Palace, Luffy smelled food and wandered away from the others. His scent led him to a tower room with large metal doors; he opened the doors and spotted the food, but ended up stepping on something soft. The lights then turned on as Luffy found himself facing the Mermaid Princess Shirahoshi, who cried out for her father and brothers.[46] While trying to calm her down, Luffy noticed an axe flying through the door at Shirahoshi and jumped up to intercept it, managing to redirect it into the floor. The Minister of the Right then led a group into the room to check on Shirahoshi, and she hid Luffy behind her as she lied that she only had a bad dream. The Minister of the Right then revealed that they had canceled the banquet thanking the Straw Hats and would be arresting them instead, as they were suspected of kidnapping mermaids and it was prophesied that they would destroy Fish-Man Island. Once they left, Luffy was unfazed as he believed his crewmates would easily handle the palace guards. Shirahoshi told Luffy that the one responsible for throwing the axe was Vander Decken IX, who wanted to kill her for not marrying him. He possessed an ability allowing anything he threw to reach his target, which was why she had been locked up inside this tower for the last ten years.[47]


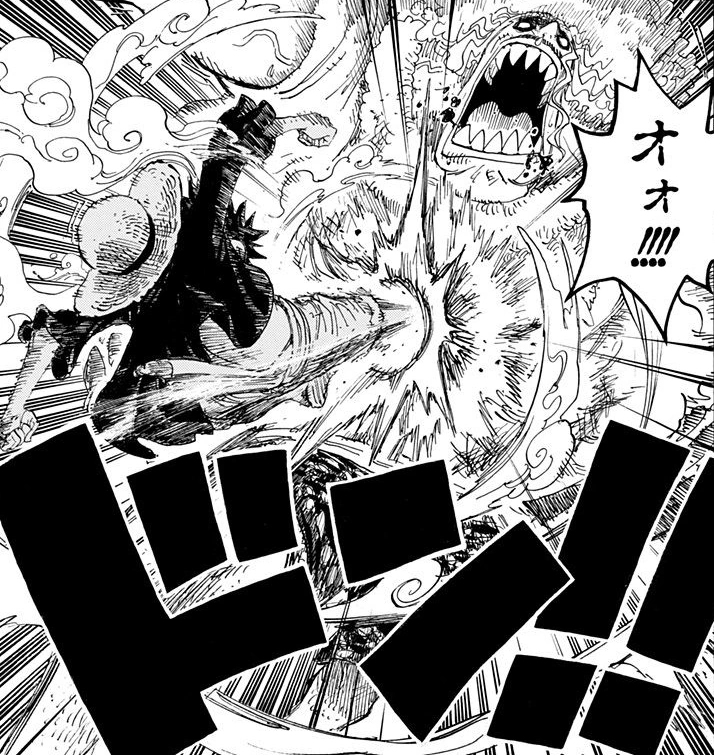
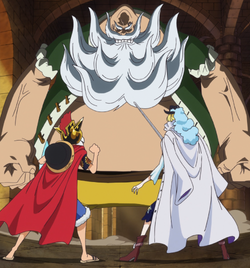
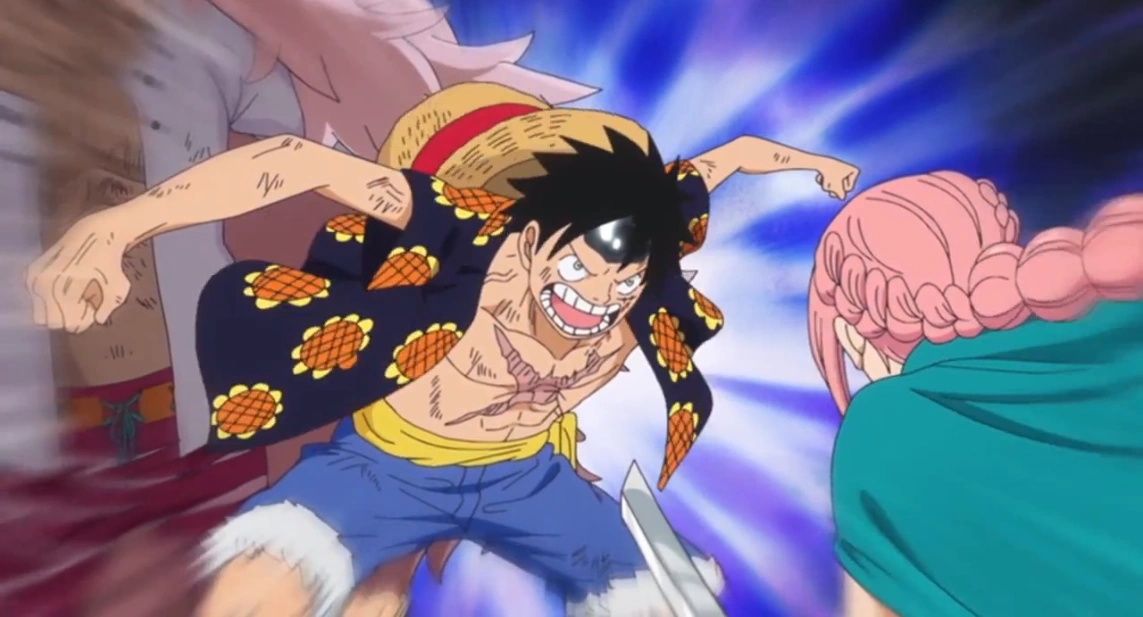
Luffy pummels Decken into the ground.
As Shirahoshi inquired about Luffy's adventures as a pirate, Luffy noted that she was a weak crybaby, which upset her. However, Luffy then offered to take her on a walk outside the palace, saying he would protect her from Decken.[47] Shirahoshi was conflicted, but ultimately asked Luffy to take her to the Sea Forest. Luffy got the idea to sneak her out by stuffing her in Megalo's mouth, and the trio headed out of the tower.[48] As they traveled to the Sea Forest, Shirahoshi told Luffy that she wanted to go to a grave there.[49] When they passed over Coral Hill, Luffy saw Sanji and Chopper with an injured Hatchan laying on the ground, and hopped off to check on Hatchan. However, Megalo could not hold Shirahoshi in his mouth any longer and threw her up, leaving the populace in shock.[50] The citizens tied up Luffy, Sanji, and Chopper while they were distracted, but Vander Decken then came flying toward Shirahoshi. Luffy used Haoshoku Haki to get the citizens out of the way and though tied up, he was able to get to his feet and leap into the air, breaking the coral Decken was riding on with a kick before unleashing a Gear 2 kick called Gomu Gomu no Jet Hammer that struck Decken and sent him crashing to the ground, defeating him. Shirahoshi untied the Straw Hats before they and Hatchan escaped on Megalo, and Decken summoned Wadatsumi to attack the group. However, Luffy hit Wadatsumi in the tooth with a Gear 2 punch, sending him recoiling in pain and allowing the group to escape.[51]
The group arrived at the Sea Forest, reuniting with Franky before encountering Jinbe. Shirahoshi went to the grave she wanted to see, which was for her deceased mother Otohime. Nami and Camie then arrived, revealing that the New Fish-Man Pirates led by Hody Jones had invaded Ryugu Palace. Jinbe then confessed to the Straw Hats that it was he who had released Arlong into the East Blue.[52] He proceeded to explain to them how there were two leaders that recently tried to change the course of a long history of racism and violence between humans and fish-men: Queen Otohime, and the pirate Fisher Tiger, whose crew he and Arlong were a part of.[53] Tiger had died after being led into a Marine ambush and refusing a blood transfusion from a human. Following this, Jinbe joined the Seven Warlords of the Sea and arranged for Arlong to be freed from Impel Down, allowing him to break off from the crew and go to the East Blue.[54] However, Luffy fell asleep and barely heard any of this.[55]
Battle for Fish-Man Island
Hody then broadcast himself all over Fish-Man Island, showing Neptune in chains and saying he would execute the king in three hours at Gyoncorde Plaza. He then addressed the Straw Hats, showing Zoro, Usopp, and Brook in a cage and saying that they would soon be submerged in water. Following this, Luffy began heading to Ryugu Palace, but Jinbe told him to wait. Jinbe wanted to deal with Hody himself to avoid exacerbating tensions between humans and fish-men, but Luffy did not want to stand by while his crewmates were in danger.[56] Jinbe began attacking to keep Luffy put, hitting him with a Fish-Man Karate attack that hurt him despite his rubbery body. Luffy retaliated with a Gear 2 punch, but could only knock Jinbe back a little. Robin then summoned a clone to appear and try to break them up, but Sanji tried to save her and Luffy and Jinbe punched each other as well as him. As they all recovered, the real Robin arrived to calm things down, and Jinbe tried getting Luffy to hear him out but Luffy still remained unconvinced.[57]

Jinbe and the Straw Hat Pirates face off against the New Fish-Man Pirates at Gyoncorde Plaza.
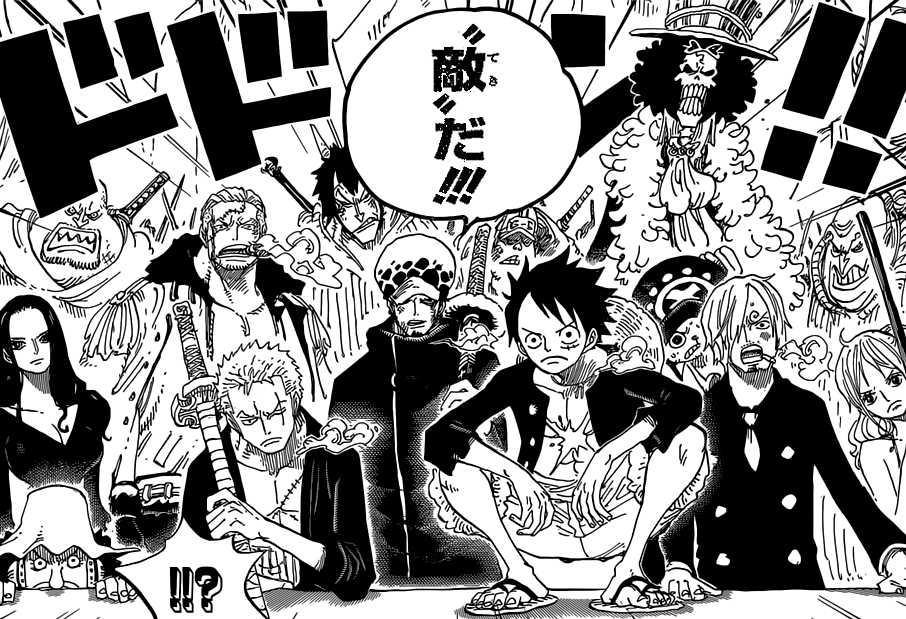
Jinbe said that Luffy could still fight Hody, but needed to to do as a hero rather than an angry human. Luffy had no desire to be a hero, so Jinbe offered him meat instead. Jinbe devised a plan for Luffy to stow away inside Megalo's mouth and have himself and Megalo captured intentionally; he would then call out for Luffy's help after rescuing Neptune, believing that his status among the populace would cause them to support Luffy.[58] Luffy then rode inside Megalo alongside Jinbe and Shirahoshi, but a wrinkle in their plan occurred when Shirahoshi went to a trap that resulted in her being captured along with them. They were brought before Hody to Gyoncorde Plaza, and as Hody announced his plot to execute the Neptune Family, the populace began to grow desperate and plead for Luffy to arrive, even if the pirate would indeed destroy Fish-Man Island. When Hody moved to kill Neptune, Luffy emerged from Megalo's mouth ahead of schedule and kicked Hody with Gear 2, sending him flying back. The rest of the Straw Hats, including Zoro's group, then revealed themselves and prepared to do battle against Hody's crew; an onlooker then asked Luffy if he was a friend or foe of Fish-Man Island, and Luffy said that they should decide that for themselves.[59]

Luffy strikes Hody.
After recovering, Hody boasted against the Straw Hats, saying he would take over the surface world and become Pirate King with his army of 100,000 behind him. He then unleashed this army against the Straw Hats, but Luffy immediately took down 50,000 of them with his Haoshoku Haki. He then told Hody that he would be the Pirate King as he activated Gear 3 and took out even more of the fish-man's forces with a single punch.[58] The Straw Hats proceeded to overwhelm Hody's hordes with their new abilities, and Hody ordered Surume, whom he had brought to the region as a slave, to attack. However, Luffy then called out to Surume, instantly causing the kraken to turn against Hody's crew.[60] Luffy told Surume to protect Shirahoshi, but Hody then threatened the kraken, saying he would kill his brother in the North Pole if Surume did not obey him. A distressed Surume started crushing Shirahoshi, but Luffy quickly stopped this, saying he would protect Surume's brother. Luffy then walked straight toward Hody, with Zoro attacking anyone who tried to stop him, and kicked the fish-man in the face in a rage.[61]
Hody quickly recovered from this and tried blowing Luffy's head off with Fish-Man Karate, but Luffy's neck merely stretched back. Luffy then coated his forehead in Busoshoku Haki and broke through iron shields set up to protect Hody, then proceeded to use his Haki to counter Hody's attacks and hit the fish-man with powerful blows. However, the giant ship Noah then arrived outside Fish-Man Island, and it was discovered that Decken had sent it after Shirahoshi. Shirahoshi proceeded to exit the island's protective bubble and put herself in harm's way to protect everyone, and Luffy told his crew to let him handle this. Jinbe gave him a piece of coral to produce bubbles, and Luffy had Sanji launch him toward Noah.[62] Luffy grabbed onto one of Noah's chains, and when it exited the barrier and into the ocean, he got in a bubble. Hody swam up to him to capitalize on this advantage, but Fukaboshi then arrived to carry Luffy to safety. Hody resumed heading toward Noah, where he stabbed Decken to send the ship sinking straight down onto Fish-Man Island.[63]
Hody then moved to attack Shirahoshi, but Luffy was able to punch him away even with the seawater weakening his outstretched arm. Hody said that Luffy could not protect anyone underwater, but Luffy proclaimed that he had trained for two years to protect everything.[64] Shirahoshi attempted to redirect Noah's course, but Decken passed out before she could do so, causing Noah to begin its descent.[65] Luffy decided he would destroy Noah to save Fish-Man Island, but Fukaboshi argued against this as Noah possessed extreme historical importance to his people. Luffy then moved to attack Hody and hit him toward Noah, but suffered a bite wound to the shoulder in the process. Hody deduced that Luffy was heading toward Noah to fight inside its bubble and so used his sword Kirisame to inflict a large slash that broke the bubble. Fukaboshi then took on Hody, but was defeated.

Luffy striking Hody with Gomu Gomu no Red Hawk.
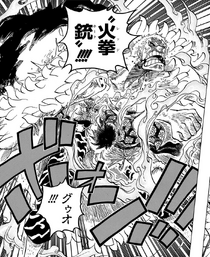
In the meantime, however, a group of Ryugu Palace workers were able to extract a large bubble from their air tank and fired it at Noah to let Luffy access it again. Hody then charged at Luffy and Shirahoshi again, but Luffy was able to break Kirisame off his back.[66] Fukaboshi then made a call to Luffy and the rest of the island via Den Den Mushi, revealing he now knew Hody's true nature. Hody never faced any discrimination or suffering at the hands of humans, but had grown up learning only the hate of those who had. Fukaboshi lamented that his mother's efforts to foster peace had neglected to quell the hatred festering in the populace, and said that the way to move forward was to reduce Fish-Man Island to nothing. However, Luffy reaffirmed his promise to not let anyone on the island be hurt, and prepared a Gear 2 Busoshoku punch which caught fire. Calling it Gomu Gomu no Red Hawk, Luffy struck Hody in the midsection with an explosive punch.[67]
Luffy had Shirahoshi take him to Noah as Hody got up once again and attempted a last-ditch Fish-Man Jujutsu attacked, but Luffy dodged the assault and activated Gear 3, hitting Hody with Gomu Gomu no Elephant Gun and finally defeating the fish-man. Luffy then continued pummeling Noah with Gear 3, intending to destroy the ship.[68] However, in the midst of his barrage, he heard a mysterious voice telling him to stop. Shirahoshi then intervened and told Luffy to stop, revealing that Sea Kings had arrived and were now holding Noah in place. Luffy relaxed, knowing that everything was now all right, before losing consciousness due to blood loss.[69]
The After Battle Party, Huge News, and Departure
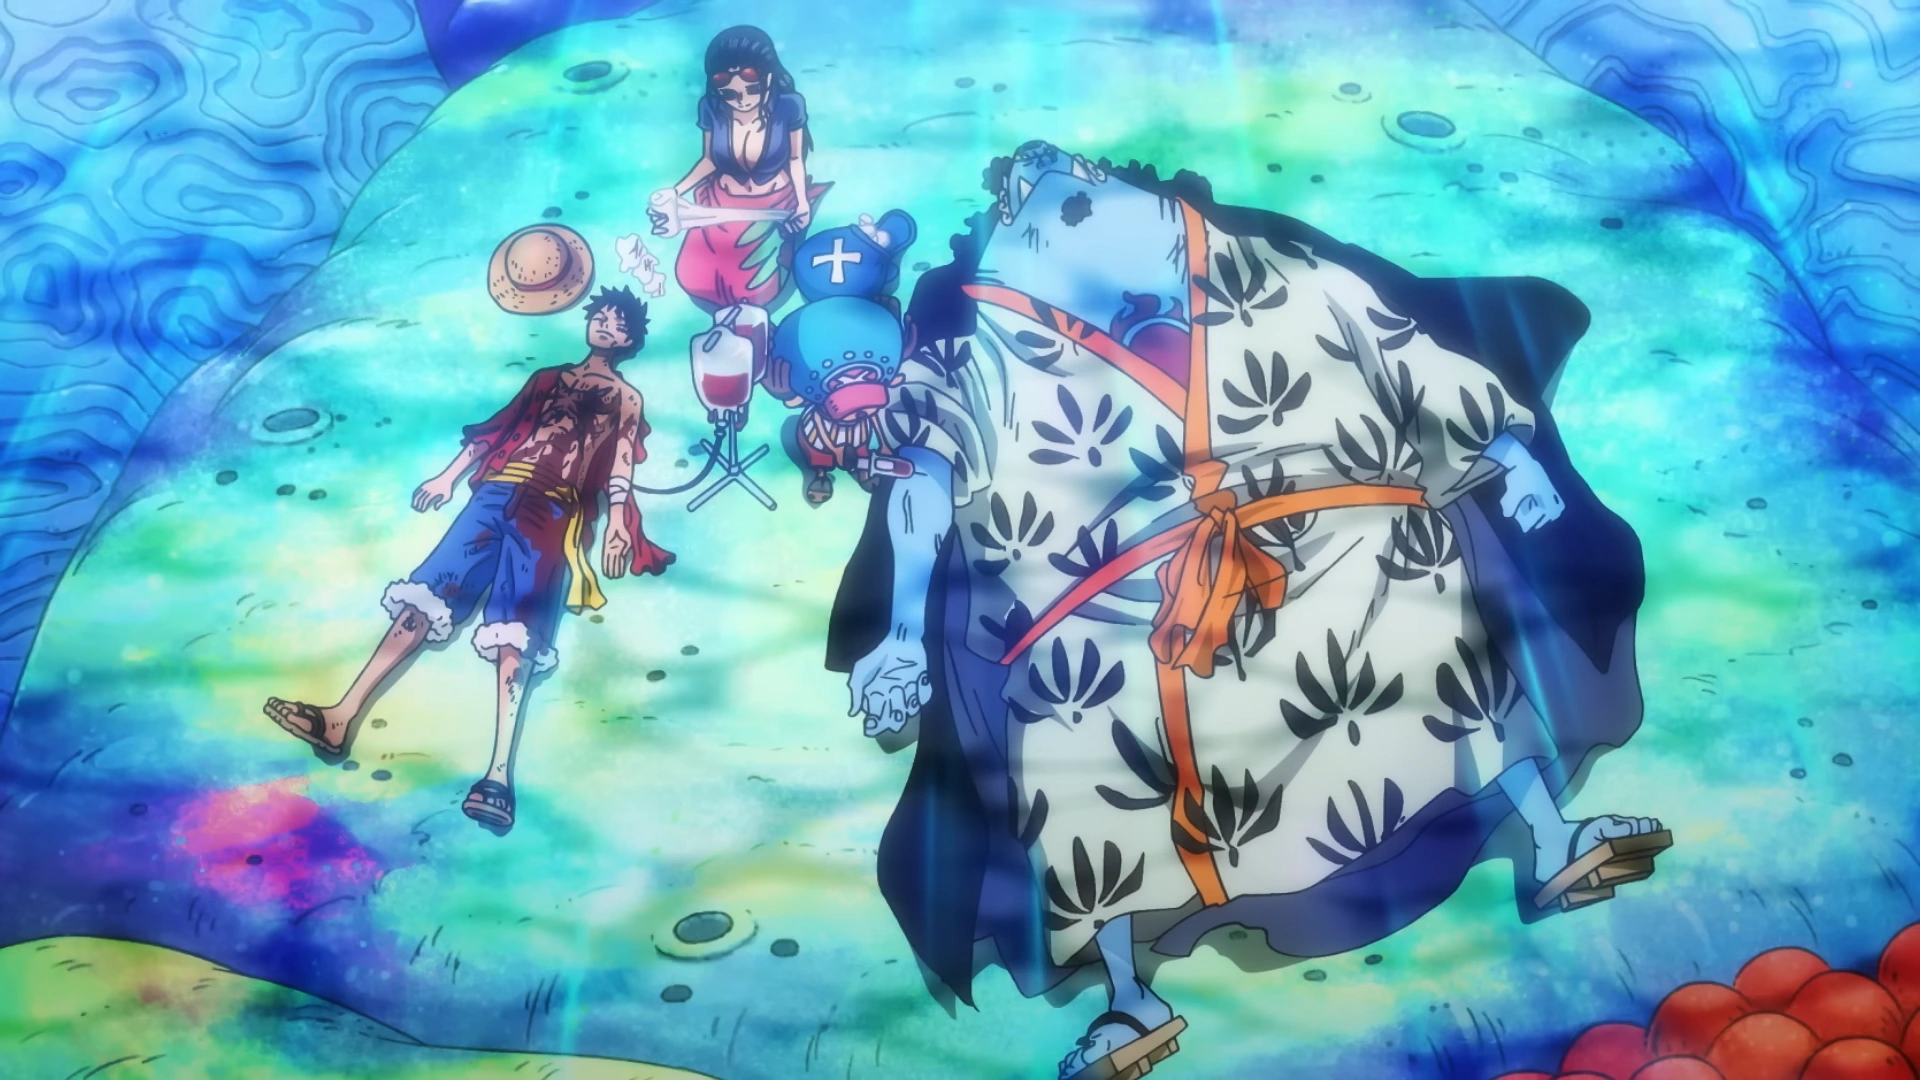
Jinbe saves Luffy's life by donating blood.
Shirahoshi took Luffy down to Gyoncorde Plaza, begging for help with his bleeding. Chopper said that Luffy would need a transfusion to survive, but the fish-men backed off due to the law. However, Jinbe revealed he had the same blood type and offered to give his blood in spite of the law. The transfusion was successful, and Luffy soon woke up. Once he did, he told Jinbe that the fish-man should join his crew.[70] The Straw Hats promptly departed on the Sunny, and Jinbe said that he could not join at the moment, but agreed to do so once he had resolved certain outstanding responsibilities of his current position. They then received a call from Neptune inviting them to a proper feast, and headed to Ryugu Palace after picking up Camie and Hatchan, where they ate and danced to their heart's content.[71]
Jinbe told Luffy about some developments in the world over the past two years, namely that Aokiji and Akainu had battled to become Fleet Admiral, with Akainu emerging victorious and Aokiji leaving the Marines. Despite this loss, the Marines had since grown in strength, along with the Blackbeard Pirates whose captain Teach had taken Whitebeard's spot among the Four Emperors; the crew was now hunting powerful Devil Fruit users. However, Luffy did not pay attention to all of this. The Straw Hats then heard Shirahoshi crying out, and Luffy arrived at Shell Tower to find Caribou trying to kidnap her. Luffy promptly hit Caribou out of the palace toward the mainland, and the Minister of the Right revealed that Caribou had also stolen the palace's treasure. Wanting the treasure for their crew, Nami sent Luffy, Zoro, and Sanji down to the mainland to get Caribou.[72]
The trio found Caribou passed out on the ground with heaps of treasure all around him, having been ejected from his body. They collected the treasure and were heading back to the palace when they passed by the Candy Factory, where Luffy proclaimed that he had just eaten a lot of sweets at the palace party. This piqued the interest of Pekoms and Baron Tamago, who had come on behalf of the Big Mom Pirates to collect Fish-Man Island's monthly candy tribute. With the island missing its tribute, Tamago explained that Big Mom's forces would come and destroy it. Big Mom then called Pekoms and Tamago via Den Den Mushi, and while they argued over who should answer, Luffy picked up the call. He introduced himself to Big Mom and claimed to have eaten all the candy tribute; he offered to give her the treasure instead. Big Mom did not believe his claim and did not want the treasure, but was intrigued by Luffy's character and so agreed to place her target on him instead of Fish-Man Island. However, Luffy was just as aggressive, proclaiming that he would defeat Big Mom and make Fish-Man Island his territory. [73] Following this, he did give the treasure to Pekoms and Tamago.
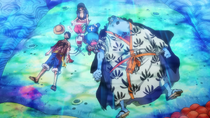
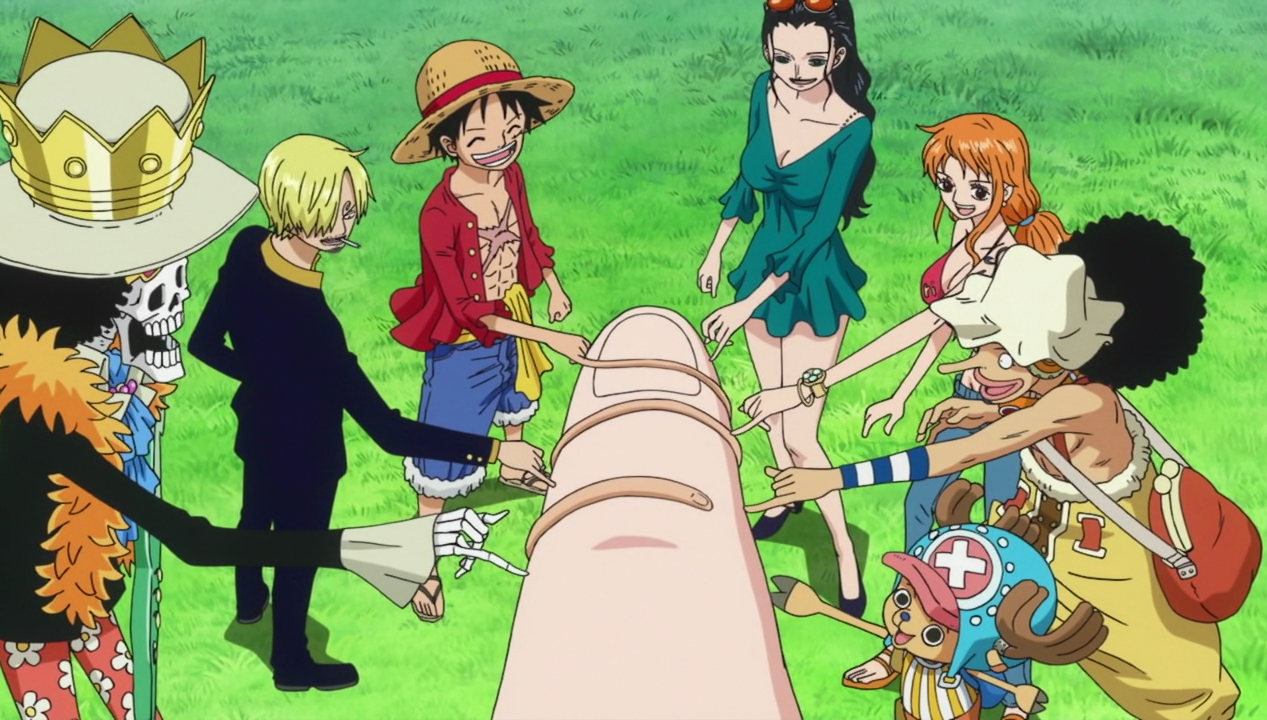
Luffy and his crew make a promise with Shirahoshi that they'll return and visit her again.
Upon returning to the palace, Luffy told the others what he had done; they were not very pleased, especially Nami due to losing the treasure.[74] Later, the Straw Hats prepared to depart Fish-Man Island, and Shirahoshi tearfully pleaded for Luffy to stay longer. Nami was given a new Log Pose by the Minister of the Left which pointed to three islands; upon seeing it, Luffy wanted to go to the island that the shakiest needle was pointing to even though this signified the most dangerous one, causing an argument between him and Nami. Luffy bid farewell to everyone as the Sunny set sail, and Shirahoshi went up to the ship again. She promised that the next time Luffy saw her, she would no longer be a crybaby and they could take a walk up on the surface world. Luffy wrapped his pinky around hers to signify their promise, which the other Straw Hats joined in as well. When the Sunny entered the depths, Luffy stared up, remembering everything he had been told about the New World and how he would meet Shanks in this sea; he proclaimed his eagerness to get there.[75]
Dressrosa Saga
Punk Hazard Arc
Arriving at Punk Hazard and Forming an Alliance
As the Sunny made its ascent, Luffy, Zoro, Usopp, and Franky made a fishing line to catch a large deep sea fish to eat. The fish they caught was then eaten by two successive bigger fish, causing the ship to be weighed down and dragged toward a White Strom current that blasted them away at a dangerous speed. However, the current was broken up by a large pod of Island Whales, and one of them let the Sunny ride on it after hearing Brook play Binks' Sake. The whales took the Straw Hats to the surface of the New World, leaving them in tumultuous waters.[76]
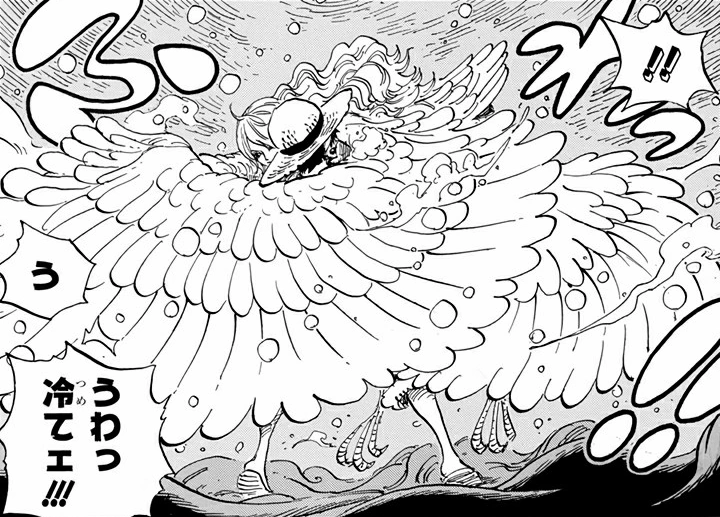
The crew soon came across an island with a volcano that was so ablaze even the nearby ocean was on fire. Luffy wanted to disembark there, even though none of the Log Pose's needles were pointing to it. Suddenly, the crew received an emergency call on their Den Den Mushi, and Luffy answered it despite warnings that it was likely a Marine trap. The person on the other end of the line pleaded for help, saying he and his comrades were being attacked by a samurai on the island, which he called Punk Hazard. Luffy decided to go and look for the man in distressed, and Zoro, Usopp, and Robin were assigned by a draw to accompany him. They rode the Mini Merry II on a Milky Road created by Nami's new Clima-Tact, and upon landing on the island they found it was sealed off by a fence established by the Marines and World Government, though Zoro cut through it without a second thought.[77]


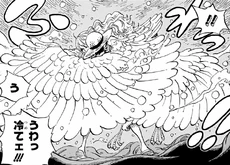
Luffy, Zoro, Usopp, and Robin encounter a dragon.
As the group struggled to cope with the intense heat, they noted that the caller mentioned it being cold. They then encountered a dragon which appeared to be able to talk.[77] The dragon started attacking them by breathing fire, and Luffy tried punching it, but did not do much damage against its hard scales. Luffy was able to hurt it by hitting its soft underbelly, but the dragon then began flying. The voice appeared again asking if the Straw Hats were with the Warlord of the Sea, and Luffy pulled himself onto the dragon's body to knock it out of the sky. While on the dragon's back, he spotted what appeared to be a man stuck inside the top of the dragon's head with his legs sticking out, which was the source of the voice. The dragon moved to attack Luffy with a bite, but Luffy lured it to bite its own wing instead, sending it falling to the ground. Zoro then decapitated the dragon, killing it.[78]
Luffy then tried to pull the man out of the dragon, but when he did so there was nothing above his waist, causing Luffy to think he killed him. However, the pair of legs then got up and started talking, throwing a kick at Luffy before running off to attack the Warlord in the area.[79] Luffy apprehended the legs and attached them to his own body, pretending to be a centaur as his group cooked and ate the dragon's corpse. Zoro then discovered that the other side of the island was covered in ice, meaning the samurai and his victims were likely there.[80] Despite Robin claiming that centaurs were not real, Luffy then encountered one, who possessed the lower half of a leopard. The centaur became hostile, causing Luffy to defeat him; Robin then defeated his companion, a giraffe centaur. While Luffy was occupied, the group had received a call from Brook revealing that intruders had invaded the Sunny, captured the others, and taken them to the Ice Lands.[81]


Usopp creating a boat using his Pop Greens.
The group headed for the Ice Lands and came to a lake at the center of the island. Usopp brought out his Pop Green ammunition which he used to create a boat out of plant material. As the group rowed across the lake, they were confronted by the leopard centaur, who called out to his boss Brownbeard and centaur patrol that stood on the opposite shore.[82] Luffy's group recognized Brownbeard as affiliated with the person they were trying to rescue and thought he would be a friend, but Brownbeard had his men fire bazookas at them, capsizing the boat and sending them in the water. Usopp was forced to hold Luffy and Robin above water while Zoro got sidetracked by sharks, leaving them defenseless. However, Brook then arrived to hold off the centaurs, allowing the group to make it across, and they eyed the centaurs' warm coats for themselves.[83]
After wiping out the centaur patrol, Luffy's group forced Brownbeard to take them through the Ice Lands, and as they rode Luffy heard a crashing sound from far away. They came to the source of the noise near a lab, where they found Trafalgar Law who was now a Warlord.[84] Luffy was happy to see Law as he was grateful to the Warlord for saving his life in Marineford, but Law brushed it off, saying he acted on a whim and that being pirates meant they may become enemies later. A horde of Marines from G-5 then entered the scene to see to their commanderss, Smoker and Tashigi, who had just been defeated by Law. The Straw Hats quickly departed, and Law told Luffy he would find what he was seeking at the back of the lab.[85]
Upon reaching it, the Straw Hats reunited with Nami, Sanji, Chopper, and Franky, though their souls were in the wrong bodies due to Law's powers. The four were accompanied by a group of large children and the head of a samurai, which belonged to the pair of legs. Hiding out inside ruins, the crew went over what they had figured out. The distress call had been sent by one of Brownbeard's centaur subordinates who was being attacked by the samurai, Kin'emon, who was doing so to find his missing son Momonosuke. However, Kin'emon was then cut into three pieces by Law's powers.[85] The captive Brownbeard then decided to tell the Straw Hats about Punk Hazard, revealing that his master was a man named Caesar Clown who helped him and people who were formerly test subjects here to walk again after a chemical weapon explosion under the supervision of Dr. Vegapunk; Law had joined forces with Caesar a few months ago and made them centaurs to fully restore their ability to walk. Brownbeard boasted that the Straw Hats would never escape the island and would become test subjects for his master.[86] Kin'emon went off to find his torso, and Zoro, Brook, and Sanji (in Nami's body) went out to retrieve him. The giant children then began to shake and ask for candy, but Chopper soon discovered that the candy contained an addictive substance and that Caesar Clown appeared to have been drugging them to make them grow unnaturally large. Upon learning this Luffy refused to get the candy, causing one of the children, Sind, to get violent and hit him with incredible force. Usopp was able to neutralize the children afterwards with a special sleep-inducing shot, and Luffy decided to go and confront Caesar over what he had done to the children.[87]
Luffy departed with Usopp, Robin, and Franky (in Chopper's body), but they quickly turned around after seeing an explosion back where they had come from. Upon returning to the ruins, they encountered the massive Yeti Cool Brothers Rock and Scotch, who fired at Luffy with their bazookas. Luffy managed to avoid the blasts, but the brothers suddenly vanished before he could attack them. Chopper (in Sanji's body) then told Luffy's group that the duo had captured Nami (in Franky's body).[88] Luffy went to go save her, and Franky decided to accompany him, but immediately ate the Rumble Balls Chopper had given him causing him to enter Monster Point, resulting in him losing his mind and attacking Luffy. Luffy ran toward Nami with Franky in pursuit until the duo fell into a gorge the brothers set as a trap, where they careened toward a sheet of ice spikes. However, Luffy was able to use Busoshoku Haki to punch through the spikes. Rock then fired bazooka shots at him, but Luffy was able to counter them with Gomu Gomu no Fusen and use his training to redirect them straight at Rock. Franky continued to go after Luffy as Scotch sent a large mountain peak falling down toward them, but was able to regain his mind just in time to catch the peak and throw it at Rock, defeating him. Luffy then knocked out Franky with Gomu Gomu no Elephant Gun to neutralize him, but Scotch then took Nami and climbed up the gorge to escape. However, Law then appeared and defeated Scotch, allowing Luffy to break Nami out of her chains.[89]
Law told Luffy he had come to talk with him, saying that this island harbored a key powerful enough to throw the New World into disarray and give one the chance to take power. He offered to form an alliance with Luffy to take down one of the Four Emperors,[89] Kaidou. Luffy agreed, as he aimed to take down all four of the Emperors, even though Law said this plan would have low odds of succeeding.[90] Luffy, Law, Nami, and Franky returned to the hideout in the lab ruins and Law returned Chopper and Franky to their original bodies, placing Nami in Sanji's for the time being. Luffy explained to Law that he and his crew wished to save the children from Caesar's drugging, which Law reluctantly agreed to help with. Law told the Straw Hats that their main objective here was to capture Caesar, and warned them that he was a powerful criminal who had the Logia-type Gasu Gasu no Mi.[91]
Invading Caesar Clown's Laboratory

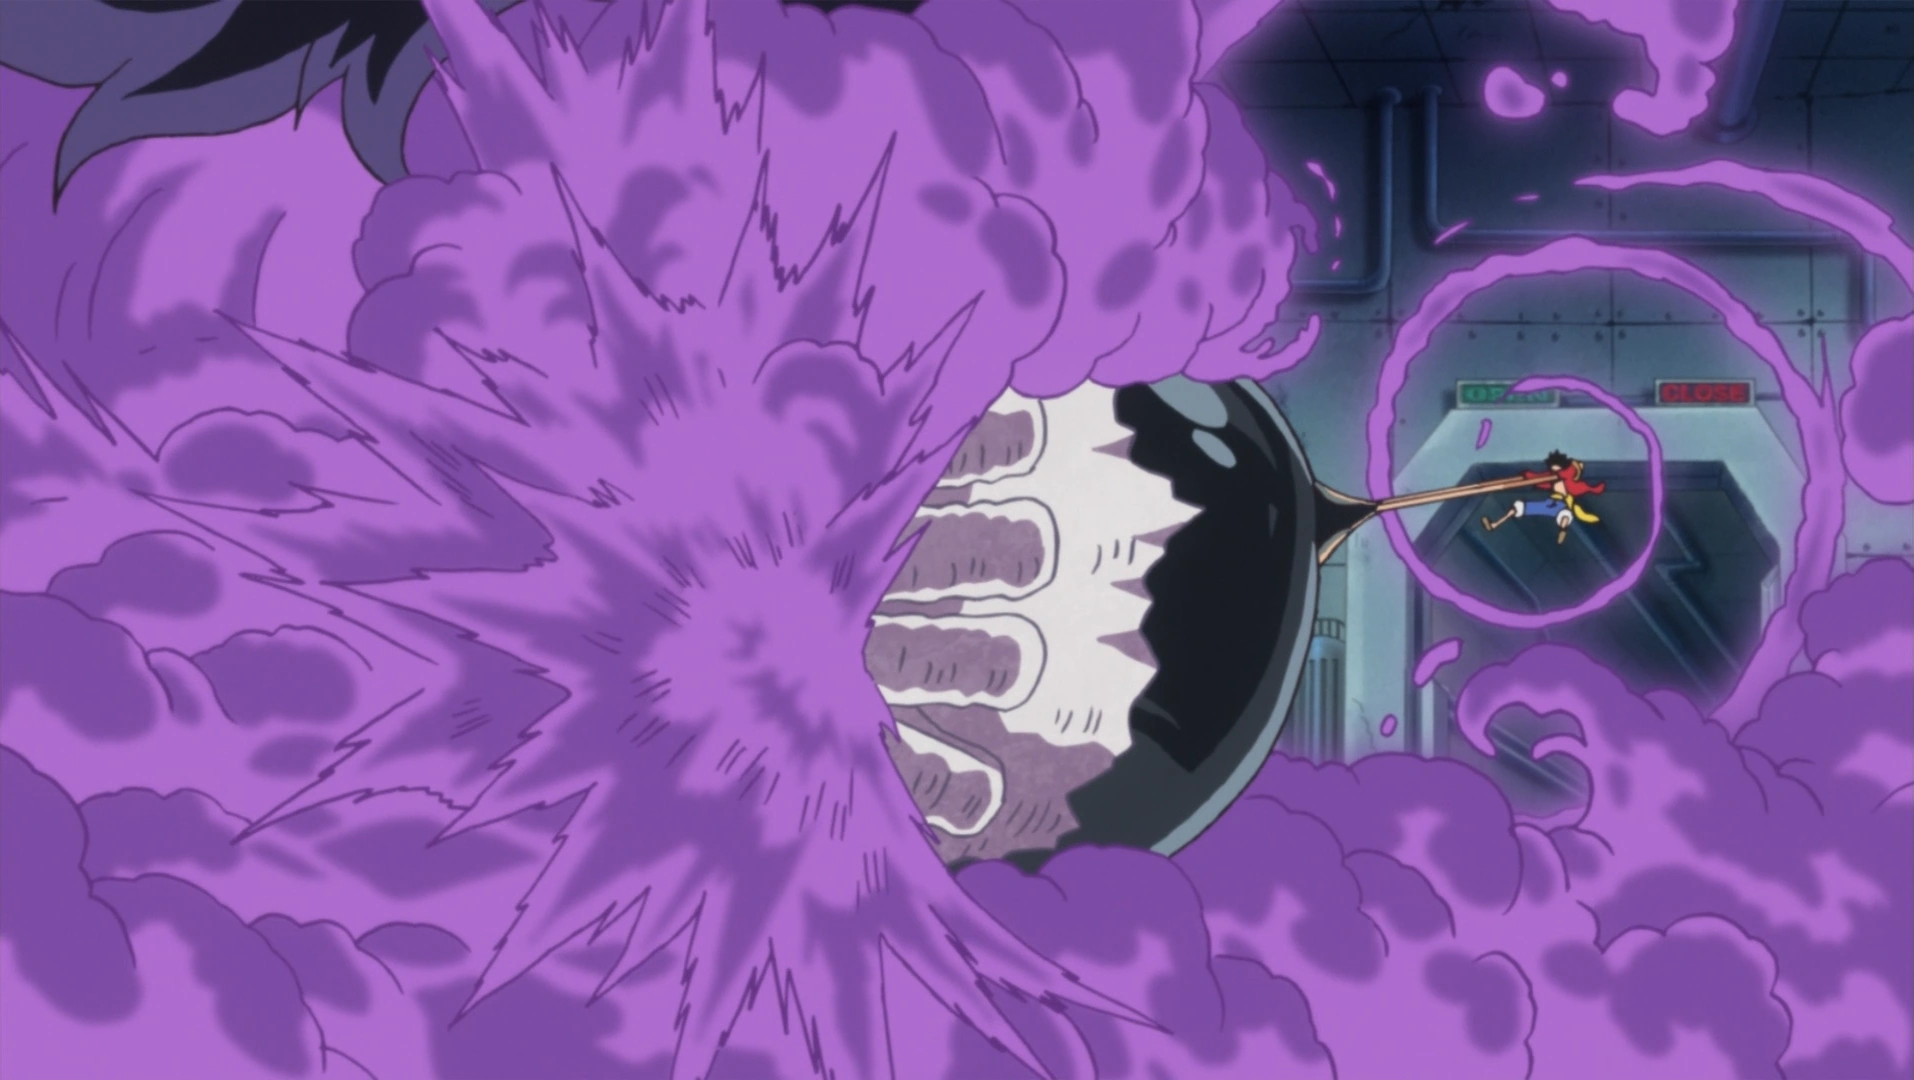
Luffy grabs Caesar.
Luffy launched himself, Franky, and Robin into a Marine battleship at the rear entrance of Caesar's laboratory and loudly proclaimed that he had come to beat and kidnap Caesar.[92] Luffy was then attacked by Smoker and Tashigi; to his confusion the former was quite weak while the latter was much stronger, but Robin deduced that Law must have switched their bodies as well. Despite Smoker's attempts to fight, Luffy told him they should hold off on it until the vice admiral regained his body. They were then interrupted by large globs of slime falling from the sky; this slime appeared to be alive and moved to combine into a larger mass, and caused a large explosion on another G-5 ship when set alight. Caesar then arrived and started to explain what the slime was, but Luffy immediately moved to grab him.[93] Though apprehended with Luffy's Haki, Caesar could still use his powers and so forced Luffy to breathe in poison gas; however, it had no effect on the pirate due to the immunity he gained from fighting Magellan. Luffy then struck Caesar with a kick, but Caesar retaliated by creating an explosion. Caesar then combined his gas with the slime globs to create a much larger explosion, but Luffy was able to dodge this one and kick Caesar in the midsection. However, as he moved to grab Caesar again, the scientist gained the upper hand by removing the oxygen around Luffy, causing him to lose consciousness.[94]
Caesar quickly defeated Robin, Franky, Smoker, and Tashigi following this and had them and Luffy taken to a cage inside the lab alongside Law, with all Devil Fruit users bound in Seastone. When everyone regained consciousness, they found themselves with Caesar's comrades Vergo and Monet. Law explained that Vergo was a Marine Vice Admiral who was actually undercover in service of "Joker", the codename of the Warlord Donquixote Doflamingo.[95] Caesar then arrived, revealing he had long known about Law's treachery and using the Warlord's disembodied heart to attack him. He then began a broadcast to the Underworld, announcing that his living slime, Smiley, was made from the chemical weapon that exploded four years ago; he was now about to transform it into an even more powerful weapon known as Shinokuni.[96] Luffy and the other captives watched as Smiley ate a special candy that transformed it into a gas which petrified in ash anyone it touched. Caesar told his captives that all of their groups would be killed by this gas, including them; he then activated machinery to move their cage outside the lab. However, Law was not worried and told Luffy to stick to his counterattack plan.[97]
The counter attack begins.
Law had Franky set a ship below them on fire to shroud the cage in smoke, allowing him to get him and the pirates out of their chains as he revealed he had switched out his Seastone chains with regular ones. Luffy immediately broke out of the cage without bothering to wait for Law, and looked for a way to get into the lab. Law teleported the group inside, and they opened the shutters to allow the G-5 Marines to get in, and they were followed by the rest of the Straw Hats (except Chopper) alongside a fully intact Kin'emon and Brownbeard.[98] Law told everyone that they had two hours to make it to Section R-66, the only place where it was possible to escape from Shinokuni. Luffy then started racing toward Caesar to resume their battle, and easily beat his henchmen aside with a new attack called Gomu Gomu no UFO.[99] Luffy continued fighting through Caesar's henchmen as he and Smoker raced into the corridor leading to Section B of the lab.[100] The duo quickly reached the entrance to Section C where Caesar was, and Luffy immediately punched the scientist upon getting inside.[101]
Monet hugging Luffy.
Luffy and Caesar resumed fighting, and Luffy was able to avoid the latter's oxygen depletion by moving out of his ability's range. Luffy managed to get behind Caesar and was about to pummel him with a Haki-hardened Gear 2 attack, but the attack was blocked by Monet who created a wall out of snow. Monet told Caesar to flee while she handled Luffy, saying that Doflamingo would eliminate her if she failed.[102] Monet created a ten-layer igloo of snow around Luffy before hugging him, with her snow Logia body quickly depleting his stamina. However, Luffy was able to muster enough energy to escape by breaking through the floor. Though he successfully got out, he ended up falling into the trash heap far below the rest of the lab, with no way to get back up besides flying.[103]
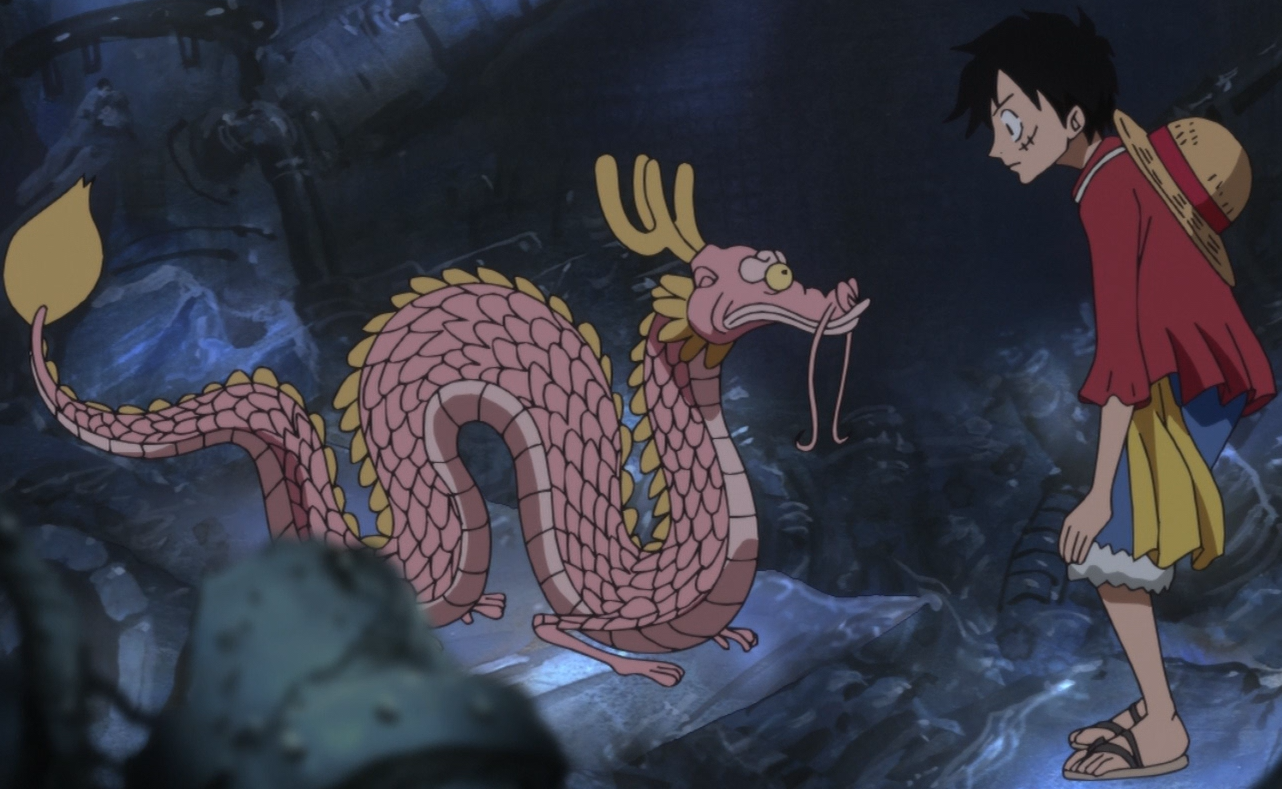
Luffy meets Momonosuke.
Luffy soon encountered a small talking pink dragon inside the trash heap who introduced himself as Momonosuke. Momonosuke explained that he had been taken to Punk Hazard alongside other kids to be experimented on by Caesar, but he had refused any food offered to him. However, in a fit of hunger he ended up eating a Devil Fruit locked away in a secret room which turned him into a dragon. Momonosuke told Luffy that he had overheard Caesar talking about how the children in his lab would perish from his tests within five years, causing Luffy to become angry at Caesar and grow determined to climb out of the trash heap. However, Luffy shouted at Momonosuke which caused the young dragon to exclaim in fear and summon clouds that propelled the two of them up and out of the chamber.[104] After exiting, Luffy ordered one of Caesar's henchmen to tell him where the scientist was, and the henchman immediately responded that he was in Section R.[105]
Final Battle with Caesar and Aftermath

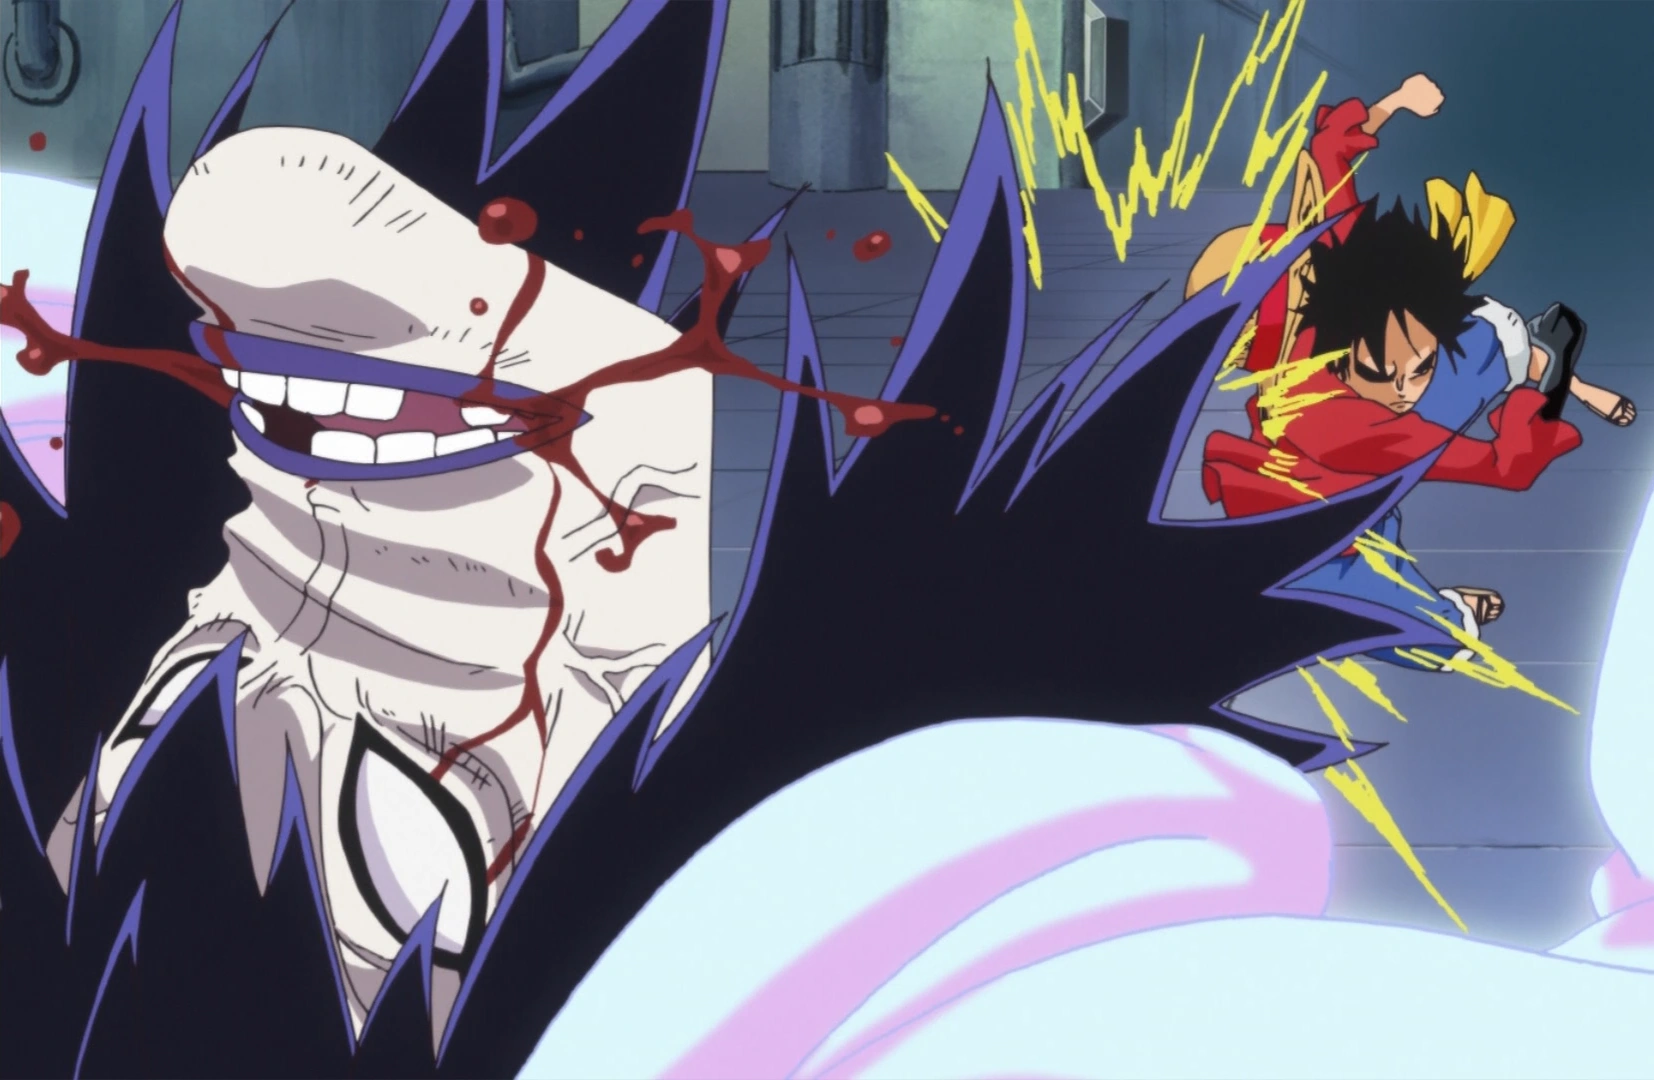
Luffy breaks Caesar's face by punching him.
Luffy broke into Section R as Caesar was attacking Brownbeard, and asked what this place was where Caesar had lied to everyone who served him. Caesar told Luffy that this island was backed by powerful forces, as he produced a substance called SAD here which Doflamingo used to turn into artificial Zoan-type Devil Fruits known as SMILE, which was sold to Kaidou to form a massive army of Zoan users. Caesar warned Luffy that attacking him would incite the wrath of the most powerful figures in the New World, but Luffy replied that this had not stopped him before as he struck Caesar in the face.[106] Caesar continued threatening Luffy with Doflamingo's wrath as he fired an explosive beam, but Luffy dodged it and continued attacking the scientist.[107]

Luffy defeating Caesar with a massive attack.
Caesar ordered for vents to be opened to send Shinokuni into Section R, and once it did he merged with the gas to make himself big and powerful, not caring about any of his henchmen being caught in it. Luffy started running back toward Section B, but then came running back while stretching his arms behind him, inflating them with Gear 3 and imbuing them with Busoshoku Haki.[108] Caesar immediately became fearful at what was heading for him and made a last-ditch offer for Luffy to work with him before Luffy launched both enlarged fists into him in an attack called Gomu Gomu no Grizzly Magnum; the attack blasted Caesar all the way out of the lab. Zoro, Nami, Sanji, and Robin then arrived with the children, Tashigi, and G-5 Marines, and Law and Smoker arrived soon after. Law asked where Caesar was, and when Luffy told him what he had done, Law said they needed to go and find him immediately.[109] The children, Marines, and Caesar's men all gathered into a large SAD cart, and Luffy agreed to move out through the escape corridor once all of his crew was accounted for.[110]
The Straw Hat Pirates, Kin'emon, Smoker, and the G-5 Marines stand united.
As they traveled, an explosion from the SAD room suddenly rocked the corridor and forced Luffy and others to protect the cart from falling rubble,[111] but they eventually emerged unharmed on the coast. There, they found Franky battling Buffalo and Baby 5 of Doflamingo's crew, who had been sent to retrieve Caesar. Upon seeing the arrival of this large force, the duo quickly apprehended Caesar and started flying off. However, Nami and Usopp assured everyone that they could handle this, and quickly neutralized Buffalo and Baby 5 before Usopp trapped Caesar by firing a pair of Seastone handcuffs at him.[112]
Once Caesar, Buffalo, and Baby 5 were apprehended, the pirates and Marines split up to regroup. Brownbeard and his men were arrested by the Marines; Kin'emon appeared to have been killed by Shinokuni but emerged alive after his petrification shattered, and he and his son Momonosuke reunited; Law rid the kids of Caesar's drugs. Sanji made some food for Kin'emon and Momonosuke to eat, and despite Law saying that they needed to leave at once as more enemies would surely come for them, a large party soon broke out as the pirates and Marines ate and drank together.[113] Afterwards, the Marines and children departed on the SAD tanker, and thanked the pirates for their help.[90]
The Straw Hats, Law, and the samurai then departed Punk Hazard on the Sunny and set sail for Dressrosa, where Doflamingo was based. Luffy and Law got everyone on the crew caught up on their plan to ally and take down Kaidou, and Law explained their next steps. With Caesar captive and his SAD production halted, Doflamingo lost the ability to make SMILE; their goal now was to destroy the Warlord's SMILE Factory and fully cut off Kaidou's access to artificial Zoan fruits. Kin'emon revealed that he and Momonosuke wished to go to Dressrosa as well, as one of their comrades was being held there.[114] Night fell with nobody arriving to attack, and the next morning, the pirates found out from the news that Doflamingo had indeed left the Seven Warlords and his throne in order to meet Law's demands to get Caesar back; additionally, the news had learned about Luffy and Law forming an alliance.[115]
Dressrosa Arc
The Next Objective
Law contacted Doflamingo to discuss the next part of the negotiation. Luffy suddenly interrupted the call and angrily asked Doflamingo if he is the boss of Caesar. Doflamingo stated his desire to see Luffy and informed the Straw Hat captain that he has something that he would want to get which Luffy thought it was meat. Luffy was then put into a trance until Usopp snapped him out of it. After Law told Doflamingo that he will bring Caesar to Green Bit, he and the Straw Hat planned on how to destroy the SMILE factory on Dressrosa. Luffy then got more excited to see Dressrosa and the crew have a big meal. While eating, Luffy heard Law and Kin'emon talking about a place called Zo. Luffy then listened to Kin'emon and Momonosuke's story about how they were shipwrecked and drifted to Dressrosa as well as how Momonosuke was separated from his father. After hearing about how Kanjuro helped Kin'emon escape, Luffy excitedly declared that they should save him too. The Thousand Sunny soon approached Dressrosa.[116]
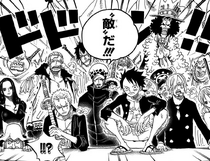
Luffy and his group incognito.
After disembarking, the group began their next phase of their operation. Luffy thought about using Momonosuke, in his dragon form, to fly. However, Momonosuke refused to do so. When Luffy asked him if he is afraid of heights, they got into a small fight until Kin'emon broke them up. The group split into three teams and Luffy went into Dressrosa with Zoro, Sanji, Franky, and Kin'emon to destroy the factory and rescue Kanjuro. While exploring, they saw the things that the country is famous for including living toys. After getting disguises, they stopped at a restaurant to get something to eat. There, they found some thugs taking advantage of a blind man while taking away his money in roulette.[117] The man then demonstrated his gravity-like ability when the thugs attacked Luffy for calling their bluff.[118]
As the man left, Luffy asked who he was, only for the man to say it was better for both of them if he did not know. After one of Zoro's swords is stolen, he chased after the thief with Sanji and Kin'emon in tow. Luffy attempted to follow them for fun, but was stopped by Franky. Instead, they interrogated one of the thugs, who happened to be a subordinate of Doflamingo, for the location of the SMILEs factory. The thug claimed that he did not know anything about it. He then said that most of Doflamingo's crewmembers were at the colosseum where there was a tournament being held for a big prize. At first, Luffy thought it was meat, thinking back to his conversation with Doflamingo, only for the thug to inform them that the prize was actually Ace's former Devil Fruit.[119]
Corrida Colosseum
Luffy decided to compete for the fruit, not wanting just anyone to eat it. He offered the fruit to Franky, but he declined, not wanting to lose his ability to swim. Even though the initial objectives were to find the factory and Kanjuro, Franky felt Luffy deserved the chance to fight for the fruit. Luffy and Franky later arrived at Corrida Colosseum where they met a one-legged toy soldier called Thunder Soldier.[120] While Franky told Luffy that he could go full out in the tournament, it was best to keep his identity secret. He nearly gave himself away when he almost signed his own name, but thanks to Franky stopping him, he ended up signing in as "Lucy". He was then taken to the waiting room, where he met all the contestants. One of them called Spartan attacked Luffy, thinking he was a weakling. Much to the other contestants' surprise, Luffy easily defeated Spartan.[121]
One of the staff members of the colosseum was about to disqualify Luffy. Luckily, Sai and Boo from the Chinjao Family stepped in and spoke on Luffy's behalf, saying that Spartan was the one who started the fight. After thanking the Chinjao family for saving him from disqualification, Luffy learned that he has been assigned to C Block. Once he was inside the battle preparation room, Luffy got excited seeing all the armor and decided to put some on to make himself look cooler. While learning about the colosseum's weight restriction on protective gear, Luffy was greeted by Cavendish, captain of the Beautiful Pirates.[122] Luffy accidentally told him his own name, but the other contestants thought he was mispronouncing his alias "Lucy". Cavendish then proceed to tell Luffy his backstory such as how he came to resent the Eleven Supernovas, but Luffy ignored him during the middle of the conversation. He then sees a bronze statue of a man named Kyros. While admiring the statue, he met a female gladiator named Rebecca, who told him the story of Kyros. Luffy then sees that Rebecca was determined to win the Mera Mera no Mi to defeat Doflamingo. After Luffy and Rebecca finished their conversation, the winner of A Block was announced and Luffy was shocked to see that it was Jesus Burgess.[123]
Before B Block began, Luffy took a look at the warriors defeated by Burgess. He was then approached by Bellamy,[124] who told him that he also visited Skypiea. Bellamy said that his reason for joining the tournament was a chance to join Doflamingo's crew. He went on saying that he has no grudge against Luffy and that he would not laugh at him again.[125] Luffy then watched B Block with Cavendish. As the fights in B Block went on, Chinjao approached Luffy and asked him about Garp, revealing Luffy's identity to Cavendish in the process.[126]

Luffy and Cavendish fight the furious Chinjao.
Luffy kept denying his true identity, but Cavendish drew his sword, preparing to attack Luffy anyway. However, Chinjao made the first move, striking at Luffy with a headbutt. Right after Luffy dodged the attack, Cavendish tried to force Luffy to take off his fake beard. Chinjao then launched another attack, but Cavendish wards off the second headbutt with his sword. Chinjao continuously assaulted both Luffy and Cavendish with his headbutts until Luffy punched him into the ground. When Chinjao became very furious, Boo and Sai came to stop him. While the two managed to calm down Chinjao, Luffy hid himself by hanging from a window sill. Luffy continued to watch the match and witnessed Bartolomeo deflecting Hack's attack, which also damaged Hack's hand as well.[127]
As he continued to watch the battle in the arena, he was wondering how Bartolomeo was able to damage Hack like that. He then witnessed that even Bellamy could not stand up against Bartolomeo's strange power. He then cheered Bellamy on, urging him to give it his all. After that, King Elizabello finally threw his legendary "King Punch" which took out all the remaining gladiators in the arena. Even Luffy said that it was an incredible punch and that he had never seen anything like it. Before the King was declared the winner of B Block's "Battle Royale", Bartolomeo emerged unharmed and revealed that he had eaten the Bari Bari no Mi and had created a barrier to protect himself. He then took out the King and was declared the winner of B Block much to Luffy's surprise.[128]
As an injured Bellamy was moved out of the ring, he and Luffy had another friendly chat and commented on how the other had changed. Meanwhile, Bartolomeo overheard Bellamy calling him Straw Hat.[129]

Luffy defeats Hajrudin with a single punch.
When C Block started, Luffy entered the ring before Cavendish could confront him. When the gong was heard, Luffy was excited to start fighting.[130] As the battle royale went on, Luffy was seen defeating an opponent effortlessly.[131] Some time during the battle royale, Luffy tamed and befriended the Fighting Bull, naming him Ucy.[132] Luffy rode on top of him as he rampaged around the ring. The bull was eventually stopped and crushed by Hajrudin. Luffy then avenged Ucy by eliminating Hajrudin from the competition with a knock-out punch.[133]
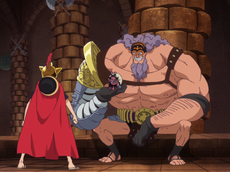
Afterwards, Luffy removed Ucy from the fighting area by carrying him over his right shoulder. When he was finished, Luffy entered the fight again only to have his helmet stolen by Jean Ango who heard a rumor that he was Straw Hat Luffy, forcing him to use his cape to hide his identity.[134] Jean Ango then threw multiple weapons at him, which Luffy was able to dodge with ease. The weapons aimed at Luffy hit Chinjao instead. Luffy then took back his helmet before Chinjao knocked the bounty hunter out of the ring. Seeing that Chinjao was hell bent on taking his grudge out on him, Luffy decided to fight him head on. Before clashing with Chinjao, he knocked out Sai while Chinjao knocked out Ideo. As the two remaining fighters in the battle royale, Luffy and Chinjao clashed their fists against each other, causing a large wave of Haoshoku Haki to burst throughout the arena.[135]
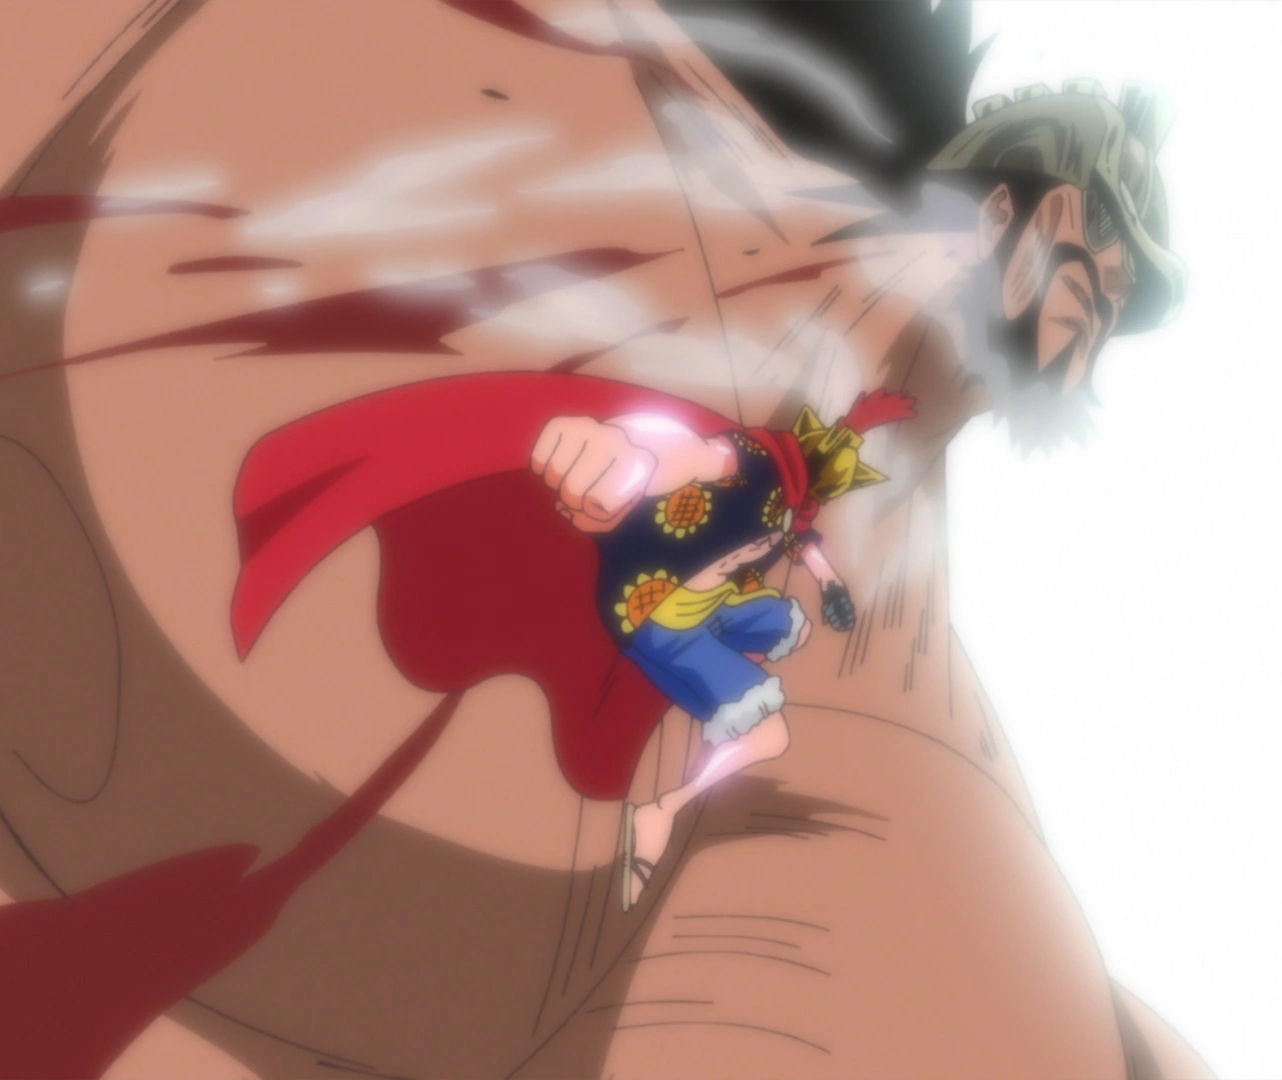
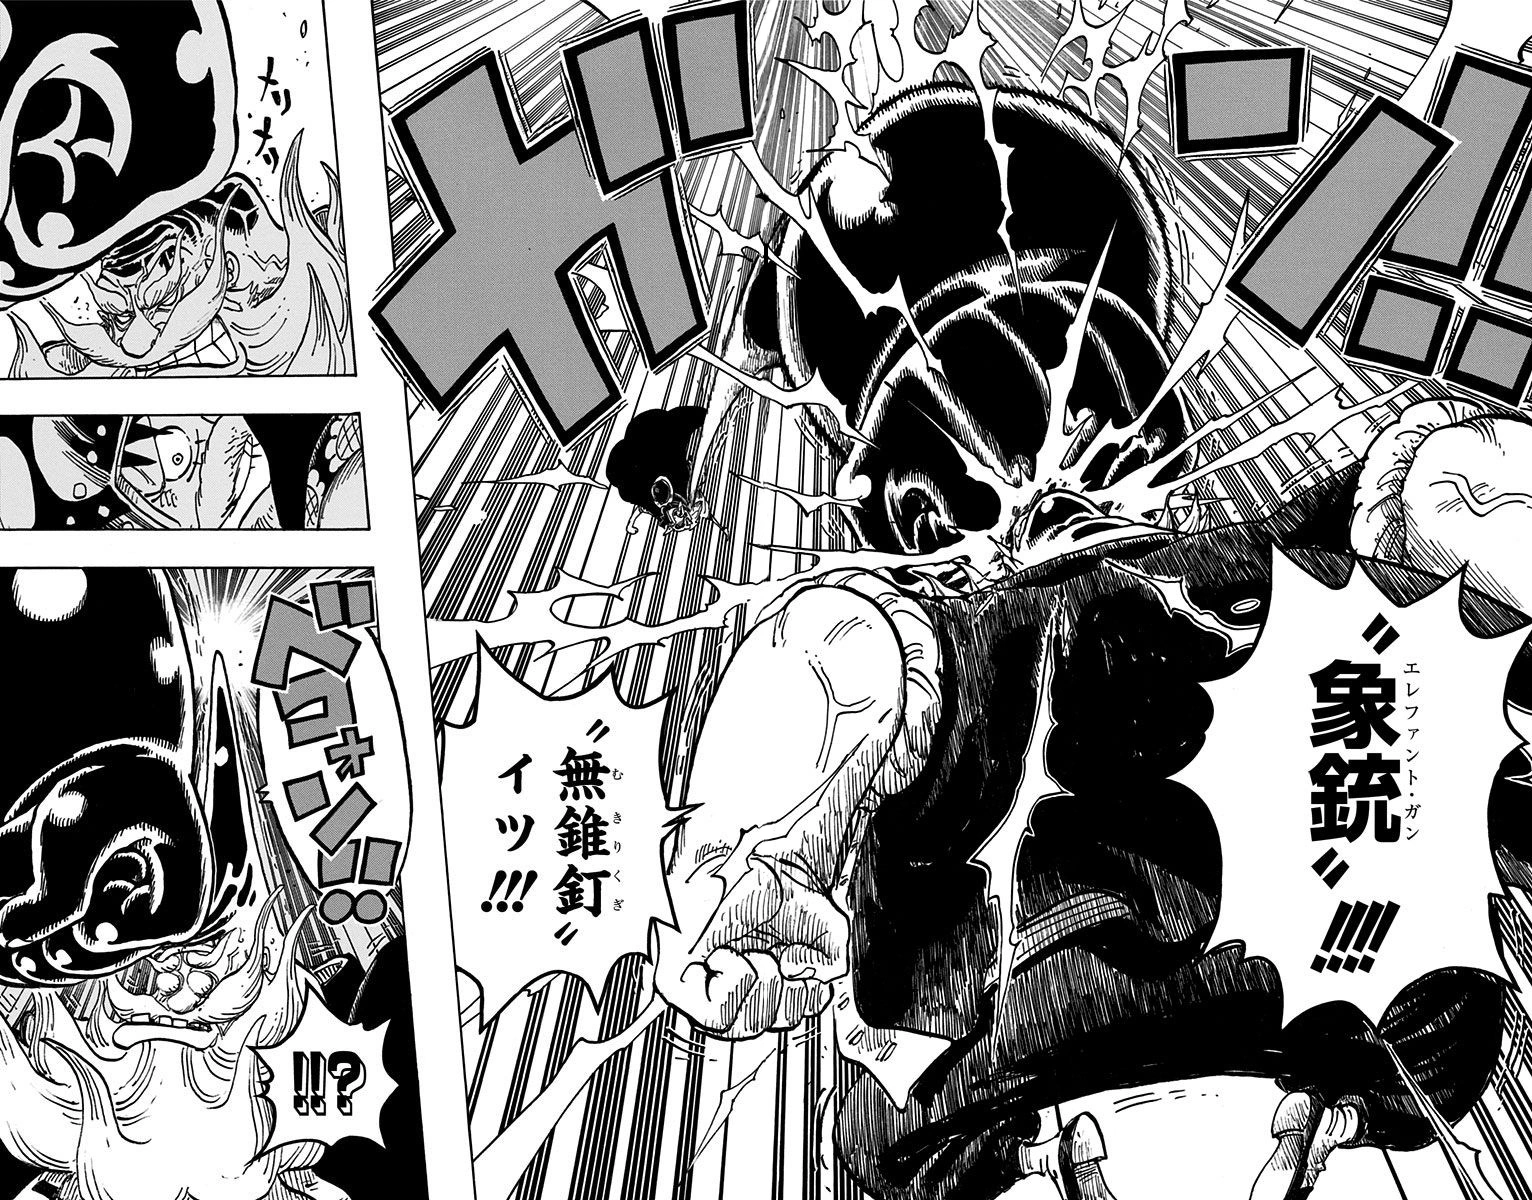
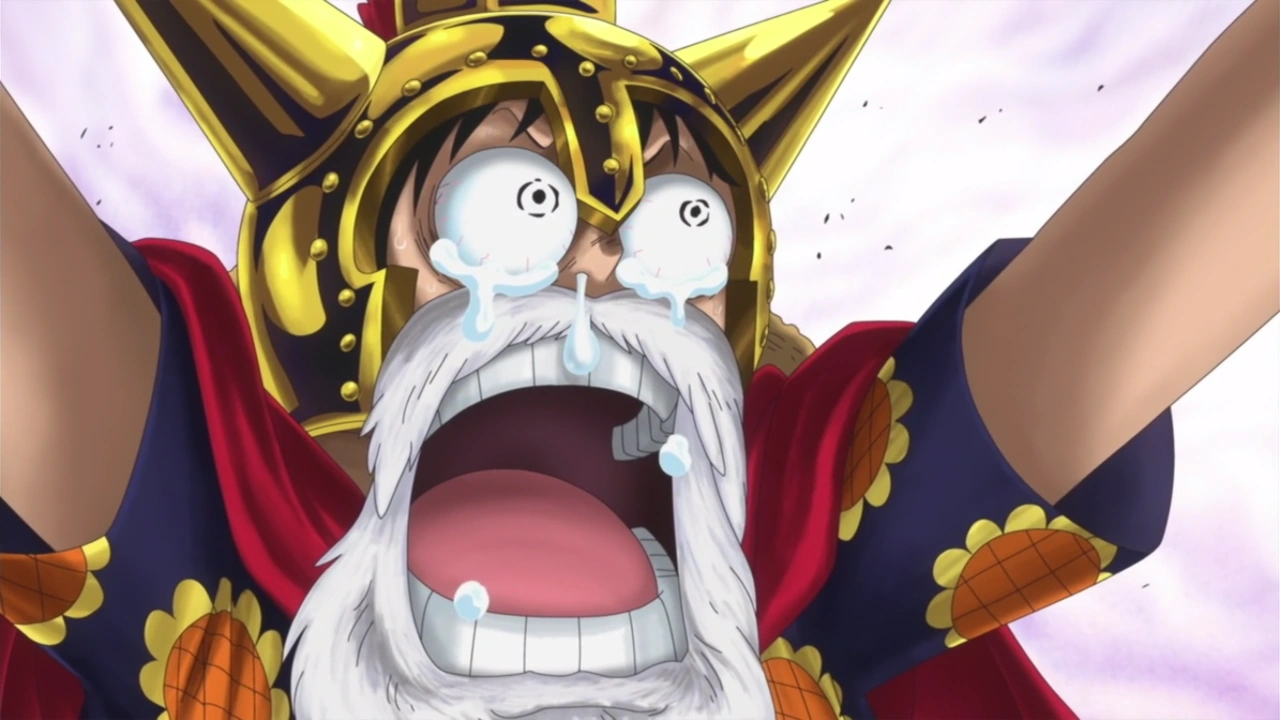
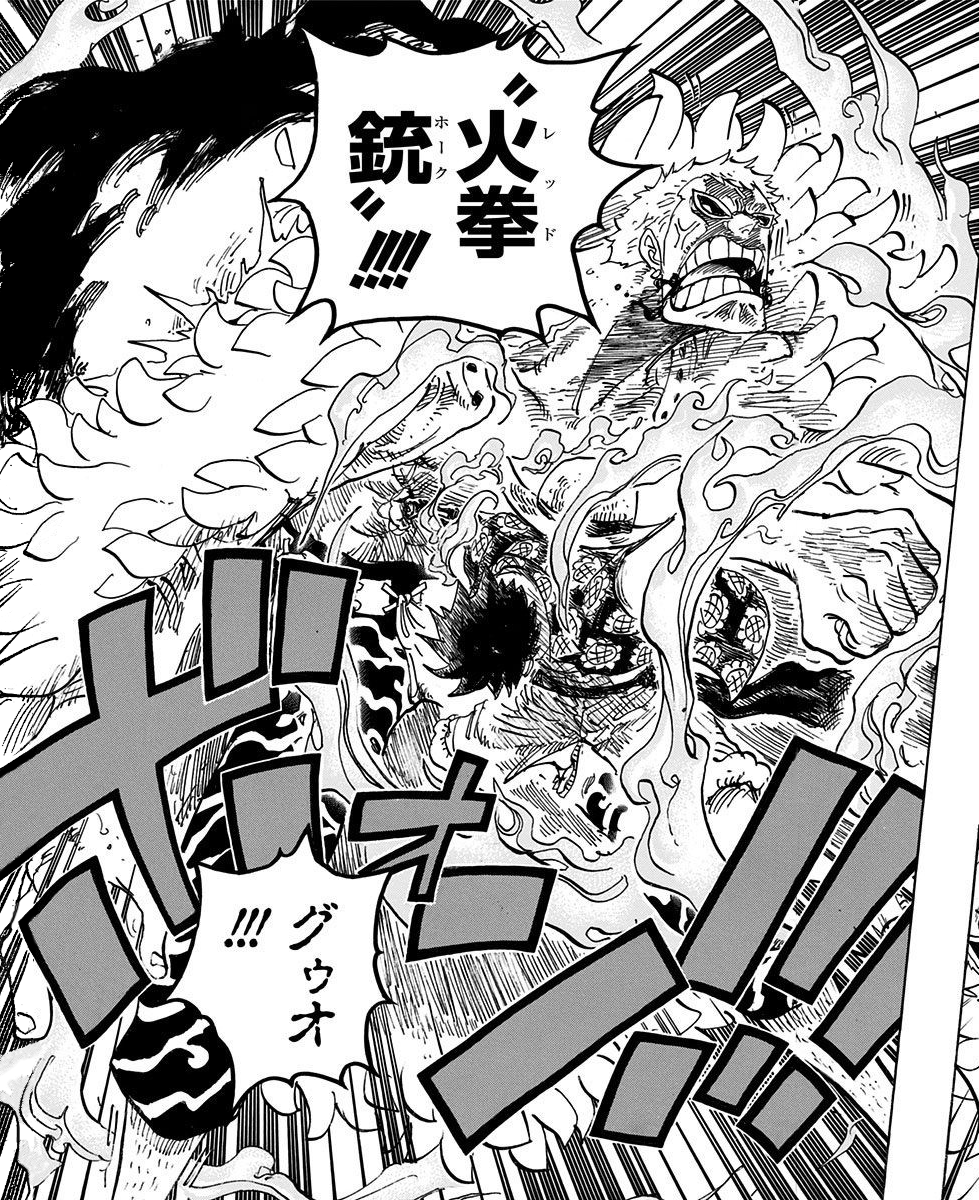
After Luffy declared his goal of becoming the Pirate King, Chinjao asked him who taught him Haki and Luffy answered that it was Rayleigh. Chinjao then bursts into tears, mentioning about a treasure he was not able to acquire. Luffy told Chinjao to stick to either crying or getting angry and then continued his clash with him.[136] After taking some punches from Chinjao,[137] Luffy struck back with a powerful attack of his own, hitting him in the chest with his Gomu Gomu no Hawk Rifle.[138]

Luffy defeats Chinjao and inadvertently restores his pointed head.
After recovering, Chinjao began mocking Luffy, telling him that those known as the Worst Generation are greenhorns who do not know anything of the world and saying that his attempts to surpass Roger are laughable. He then enraged Luffy by saying executing Ace was a smart move by the Marines. Luffy then proceeded to launch himself in the air with Gomu Gomu no Rocket using Chinjao as leverage. He then activated Gear 3 and launched his Gomu Gomu no Thor Elephant Gun while Chinjao took the attack head on with a headbutt. The two collided, seemingly matched up until Luffy managed to gain the upper hand, which coincidentally restored Chinjao's head to the shape it was before his final battle with Garp. Chinjao was then knocked out and fell down to the arena, splitting it in half with his newly reformed head. Chinjao then sank into the water, unconscious, and Luffy officially won C Block. Luffy stood victorious as the audience cheered for him.[139]

Luffy speaks with Blackbeard.
After Luffy left the arena, Cavendish thrust his sword at him, but he caught the sword effortlessly and held on to it tightly. Chinjao arrived wanting to thank Luffy for restoring his head but accidentally broke the floor when trying to bow in respect. Luffy ran away from both Cavendish and Chinjao and was saved by Rebecca. He then ran into Burgess, who was communicating with Blackbeard through Den Den Mushi. Luffy declared that he will not allow Ace's power to fall into Blackbeard's hands. At the Gladiator's quarters, Rebecca bought him some food and sat next to him. Some gladiators behind prison bars caught Luffy and after some hesitation, she tried to kill him with her sword. Luffy dodged the attack and pinned her down. Rebecca asked him why he did not seek retribution. Luffy answered that he would not do anything to someone who bought him food. Rebecca then proceeded to tell him about the convict gladiators and how they were imprisoned in the colosseum for opposing Doflamingo. She said that she wanted to win the Mera Mera no Mi in order to be able to protect herself and not have to rely on the Thunder Soldier, who was planning an attack against Doflamingo.[140]
Rebecca then explained to Luffy about how the toys are no different from humans, how her mother died and Thunder Soldier was her guardian after her mother's death, which is why he is so important to her. The conversation was interrupted by Gatz announcing that the ring is repaired and D Block is about to commence. When Rebecca entered the arena, the audience booed and jeered at her. Luffy angrily wondered why and one of the convict gladiators informed him that Rebecca is the previous king's granddaughter.[141]
Having also been wrongly judged by Chinjao due to his relation to Garp, Luffy responded by saying that Rebecca has nothing to do with her grandfather, which the convict gladiators agreed. When Cavendish stood up for Rebecca and stopped the audience's booing and jeering, Luffy commented that while he still disliked Cavendish, he was not so bad.[142]
As he watched Rebecca's fights during the D Block battle royale, he commented that Rebecca can use Kenbunshoku Haki. He continued to cheer Rebecca on.[143] He later decided to move to a different place to watch the fight. Before leaving, he was told by the convict gladiators about the country's dark side that the public knew nothing about. As he exited the Gladiator's quarters, he encountered Bartolomeo.[144]
Invading the Palace
Bartolomeo guided Luffy to Zoro and Kin'emon, with the former being annoyed at the fact that he was not invited to fight in the colosseum. He then informs Luffy that the colosseum is surrounded by Marines, who quickly dismisses the fact besides Kin'emon's shock. They then engage in a conference call with Sanji and Franky's group. Everyone is then brought up to speed on the current situation as they learn about the true situation on Dressrosa. When Franky plead to Luffy to allow him to help the dwarves and toys, Luffy quickly gave his permission to assist with the revolution. Just as the call ends, a battle between Law and Doflamingo which raged across Dressrosa abruptly ended right outside the colosseum with Doflamingo standing above his opponent. Luffy cried out to Law in horror as Doflamingo shot him three times at close range.[145]
Luffy then angrily yelled at Doflamingo, who responded by saying that it was his duty to discipline Law. Zoro and Kin'emon rushed to save Law. Zoro was intercepted by Issho, the blind man they encountered earlier and Kin'emon was kicked away by Doflamingo before he could retrieve Law. Luffy tried to help his friends, but realized that the bars in the windows of the colosseum are made of Seastone. The entire crew was shocked to be told by Kin'emon that the blind gambler was actually an admiral.[146]
Both Doflamingo and Issho float above their opponents using their abilities, taking Law with them and head towards the palace. After the Marines started pursuing Zoro and Kin'emon, Zoro told Luffy to find the exit. As Luffy informed the two swordsmen that Law is still alive, they heard that the Sunny is under attack by the Big Mom Pirates, who are after Caesar Clown. During the commotion, Nami told Luffy that Law tried so hard to keep Caesar and Momonosuke away from Doflamingo and cannot allow them to fall into his hands. Luffy gave Sanji's group permission to head for Zo and also allowed Sanji to counterattack against the Big Mom Pirates. While leaving Franky's group in charge of destroying the SMILE factory, Luffy decided to head to the palace with Zoro and Kin'emon to rescue Law and fight Doflamingo.[146]

Luffy reacts upon seeing Sabo after twelve years of thinking he was dead.
While looking for an exit out of the colosseum, he found Bartolomeo carrying a wounded Bellamy. Luffy said that he was leaving the tournament since rescuing his friend comes first. Bartolomeo proudly declared that he will get the Mera Mera no Mi for him, but someone interrupted them and declared that the fruit could not be given to Luffy. Luffy then talked to this person and recognized him as his older brother Sabo, whom he believed to be dead.[147] Luffy began crying in happiness and disbelief and embraced his brother. Sabo was glad that Luffy was alive, and Luffy gave him permission to eat the Mera Mera no Mi at his request.[148] Before leaving, Luffy gave Sabo his gladiator costume so he can take his place in the tournament. Luffy later escaped the colosseum and met up with Zoro and Kin'emon. The trio wore disguises to elude the Marines. As they ran away from the colosseum, Luffy was still crying over the revelation that his brother was alive.[149]
Luffy, Zoro, and Kin'emon later arrived at the lift that leads to the royal palace alongside the dwarf, Wicca. There, they encountered Viola, who offered to guide them to the palace.[150] After getting acquainted with her and learning about her ties with the Riku Family, Luffy's group was then led to a secret passage. Once inside the passage, Zoro suggested that they use a basket used for lifting supplies and that Luffy should climb up carrying a rock and hang from the chain to act as a counterweight for the basket to move up. Luffy gladly accepted the suggestion.[151]
They later arrived at the palace rampart tower. Viola was about to sneak them in, but Luffy went ahead and smashed his way through the gate, much to her chagrin. After Luffy took off his disguise, the group charged in.[152] Once Luffy, Zoro, and Viola reached the Rampart Tower B-1, they were intercepted by Pica.[153]
After Viola explained about Pica's Devil Fruit ability, Pica attempted to crush Luffy and his group with the palace walls.[154] They managed to avoid it and Zoro held off Pica while Luffy and Viola rushed on ahead, though they were hampered by Pica's power to create dead ends. They eventually ran into Thunder Solder as he was about to be destroyed by Gladius. Luffy knocked away Gladius with a Jet Stamp and caught the toy soldier.
Luffy was about to continue the fight with the officer, but Viola pulled him away, stating that Gladius was too dangerous. Gladius attacked the group, managing to wound Viola which forced Luffy to carry her. Seeing no stairs to advance further up, Luffy jumped out a window and used his leg to stretch to the second floor conveniently outside the Room of Suits. As they overheard Doflamingo trying to get Law to tell him what the Straw Hats' plan was, Luffy asked if he can attack Doflamingo, only to be denied and told to wait by Viola.[155] They later saw Gladius and his men approaching the second floor. Thunder Soldier also spoke to Luffy about his realization that he and his crew were pirates but also commented that it was reassuring that they share the same goal.[156]
After Thunder Soldier transformed back into a human, Viola revealed to Luffy about Kyros and everything that happened in Dressrosa. After Kyros decapitated Doflamingo, Luffy grabbed Viola and charged in to save Law.[157] While rushing to Law, Viola gave Luffy the keys to Law's cuffs. Law told Luffy that their alliance already ended, but Luffy ignored him. His rescue of Law was interrupted by Pica's sudden appearance. Luffy was then surprised to see Doflamingo still alive.[158]
It was then revealed that the Doflamingo that was decapitated was only a copy. As Kyros attempted to attack the copy again, the real Doflamingo appeared behind Kyros and attempted to behead him with a kick, slicing the palace in the process. Luffy managed to save Kyros from a fatal blow. Doflamingo and his copy then tried to attack both Luffy and Kyros but they jumped out of the way. Luffy retaliated by using Jet Gatling but Doflamingo blocked the attack. His copy then struck Luffy from behind and he followed by giving Luffy a punch to the face, knocking him back. Pica then threw Luffy, Law, Kyros, Viola, and Riku Dold III out of the palace. They watched as Doflamingo initiated his "bird cage" plan, trapping everyone on Dressrosa.[159]
Torikago
After Pica relocated the royal palace to the top of the Flower Hill, Doflamingo forced everyone imprisoned into a survival game and put a price on the heads of twelve people. Luffy and his crew were included in Doflamingo's hit list. After reuniting with Zoro, Luffy spoke to Rebecca through Den Den Mushi and informed her that the toy soldier was her father. He told her not to cry and stay close to Usopp, Robin, and Sabo. After declaring that he will defeat Doflamingo and end his game, Luffy grabbed Zoro and Law and pursued Doflamingo.[160] Luffy jumped down from the King's Plateau and they landed in the middle of a crowd of enemies. After a brief scuffle with Senor Pink, Machvise, and Dellinger, the Dressrosa citizens started attacking Luffy and his group. Luffy was about to use Haki but Issho arrived to confront them. Pica then appeared as a massive stone giant, looking for Doflamingo's enemies. Luffy laughed at his voice, making him angry.[161]

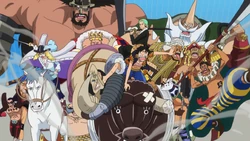
Luffy, Zoro, Law, and their new allies are on their way for Doflamingo.
Pica then threw a punch which sent Luffy, Zoro, and Law flying to the square in front of the colosseum. They were soon approached by Cavendish, who explained that he had ceased his grudge against Luffy. Cavendish offered to defeat Doflamingo for Luffy, but the Straw Hat captain was adamant about defeating Doflamingo himself. They were then joined by those who also wished to fight Doflamingo: the Chinjao Family, Hajrudin, Elizabello II, Dagama, Abdullah, Jeet, Orlumbus, Ideo, Suleiman, and Blue Gilly. After the allied colosseum fighters fought off the former toys who are after Doflamingo's prize money, Luffy was reunited with Ucy. Luffy and his allies then marched towards the royal palace and began to battle against Pica.[162]
When Pica attempted to strike Luffy and his allies, Chinjao and Elizabello II shattered Pica's stone hand, enabling Luffy to move forward. Pica then attacked with his other arm, causing Luffy's allies to fall back. However, Luffy, Zoro, Law, Abdullah, Jeet, and Ucy jumped on and climbed on Pica's arm. Pica regrew the arm that was shattered and prepared to attack Luffy again. Luffy responded by shattering Pica's stone head with Grizzly Magnum. Zoro discovered Pica's real body, which appeared in front of Luffy's group. Pica took out his sword and tried to attack the group riding on Ucy, but Luffy carried the bull and evaded the sword strike. Zoro intercepted Pica when he attempted to strike Luffy again. As Ucy ran on the stone giant's back, Law revealed to Luffy that the plan to defeat Kaidou was a trick to get revenge on Doflamingo for killing Corazon, a former executive officer of the Donquixote Family, Doflamingo's brother, and Law's benefactor.[163]
Luffy, Law, Ucy, Abdullah, and Jeet eventually reached the first level of the new King's Plateau. While charging, Luffy repelled the Donquixote Pirates' troops standing in the way.[164]
After Luffy saw that the other colosseum fighters went ahead of them, Kelly Funk (while fused with Bobby Funk) appeared seemingly to aid them. Law asked Luffy what to do about his seastone handcuffs, but Luffy assured him that things will work out. Kelly then showed them a tunnel that is supposed to go directly to the fourth level. While entering the tunnel, Luffy and Law were shocked to see Abdullah and Jeet fell off. After leaving those two behind, Luffy and Law were contacted by Robin through Den Den Mushi. Robin informed them that she will meet them at the fourth level. Luffy, Law, and Ucy later reached a dead end. While the bull stood on top of a pool of water, a string clone of Doflamingo appeared behind them.[165]
The clone attacked Ucy with bullet thread, knocking him unconscious. As the bull collapsed, Law and Luffy fell into the water and became powerless. Before the clone could kill them, Abdullah and Jeet struck the clone from behind, destroying it. After recovering, Luffy punched a hole to the second level with Elephant Gun and carried Law with him as he moved ahead of the allied colosseum fighters. Cavendish approached Luffy and told him that he has a plan.[166]
Luffy and Law then rode on Cavendish's horse. During the fray, Kyros managed to hitch a ride on Farul as well. Luffy was happy to see him while Cavendish was displeased. Kyros was shocked when Luffy informed him that Rebecca was heading for the fourth level. Kyros reminded Luffy that Rebecca is on Doflamingo's hit list, but Luffy assured him that one of his crewmates was with her. When the other colosseum fighters banded together, they created an opening for Luffy, Kyros, and Cavendish to go through.[167] As Farul charged towards the third level, Luffy continued to repel any Donquixote Pirates' troops along the way. Luffy, Law, Cavendish, and Kyros then briefly argued over who will be the one to defeat Doflamingo.
Once they reached the third level, they found giant toy soldiers standing in their way.[168] One of the toy soldiers bit Farul on the head until Luffy punched it away. With Farul gravely injured, Luffy and his group prepared to battle the toy army. Just then, Robin, Bartolomeo, and Gladius fell from the sky and landed in front of them. Robin and Bartolomeo held back Gladius and the toys to enable Luffy's group to continue towards the fourth level, where Rebecca would be waiting.[169] Bartolomeo used his ability to create a stairway to the fourth level. Luffy thanked him, causing Bartolomeo to shed tears of joy. Kyros went ahead while Cavendish decided to remain on the third level to avenge his horse. As Luffy, while carrying Law, ran up towards to the fourth level, Gladius launched rupture bullets at him. Bartolomeo protected Luffy by jumping into the line of fire.
Once Luffy and Law reached the fourth level, Rebecca quickly gave them the key to Law's handcuffs. After removing the handcuffs, Kyros told Luffy and Law to go ahead while he fights Diamante.[170] Luffy then told Rebecca that he was glad that she could see her father again. Rebecca then asked him if he would really defeat Doflamingo, while still calling him "Lucy". Luffy answered that his name is not Lucy and told her his real name. Diamante tried to stop Luffy and Law, but Law teleported himself and Luffy to the palace pool garden. They were then approached by Sugar, who intended to turn them into toys. Just as she got close to them, Usopp sniped at her from the old King's Plateau and made her lose consciousness, saving both Luffy and Law. With Sugar out of the way, Luffy and Law finally reached Doflamingo.[171]
Confronting Doflamingo
Luffy hits Doflamingo with Red Hawk.
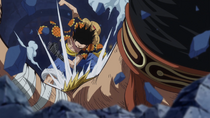
After seeing at how Doflamingo treated Bellamy like trash, Luffy was enraged. Law warned him not to let his emotions get the better of him. Luffy attacked Doflamingo with his foot, but he used Bellamy as a shield. Doflamingo then created another string clone to fight Law while controlling Bellamy to fight Luffy. Bellamy begged Luffy to stop him, but Luffy refused as he considered Bellamy a friend. Luffy then aimed an attack at Law. Law activated Room and used Shambles to switch places with Doflamingo, allowing Luffy to strike him with Red Hawk.[172]
Once Doflamingo recovered from Luffy's attack, he stopped Law from attacking Trebol and incapacitated him with Fulbright. He then struck Luffy with a Haki-imbued kick, tied his hands, and then have Bellamy slashed him. When both Luffy and Law are down, Doflamingo mentioned to them his past as a World Noble.[173] Doflamingo then sent his string clone and a controlled Bellamy to confront Luffy, and though Luffy attacked them with Octopus Gatling, the Doflamingo string clone got him from behind and slammed him through the floor into the palace interior. The Doflamingo clone spoke to Luffy about the cruelty of man, confusing Luffy.[174]
Luffy eventually managed to defeat the string clone, sending it flying through the roof with Jet Gatling. He then demanded Doflamingo to release Bellamy. Doflamingo decided to set Bellamy free and Luffy asked him to rest. He was about to go help Law, but Bellamy got up on his feet and continued on with the fight, refusing to betray his own principles and prepared to assault Luffy with his new and improved Spring Hopper.
Luffy yelled at Bellamy for siding with the man who betrayed him and said it wasn't worth fighting, but Bellamy ignored him and drove into Luffy using Spring Hopper, punching him with a Haki-imbued fist and causing Luffy to cough up blood.

Luffy defeats Bellamy with one blow.
In spite of Luffy's pleas to not fight, Bellamy refused to back down and Luffy eventually decided to finish their fight, knocking out Bellamy in the same manner as he did at Jaya. Luffy then yelled out Doflamingo's name in anguish.[175]
Luffy then returned to the palace rooftops and resumed his battle with Doflamingo. As they clashed, Luffy stumbled upon Law's body, which was covered in blood. When Luffy tried to speak to Law, he was unresponsive and Doflamingo stated that he was dead. Luffy refused to believe Doflamingo, who proceed to taunt Luffy by mocking Law's last words, stating he claimed that the Straw Hats could create miracles. Luffy screamed out in rage as Doflamingo prepared to end his game.[176]
Doflamingo then informed Luffy that his Torikago is shrinking and in about one hour, it will destroy everything in Dressrosa. Luffy declared that he will stop it by defeating Doflamingo. As Luffy charged at his opponent, Law suddenly appeared in front of the latter and used Gamma Knife to damage Doflamingo's internal organs. Doflamingo grabbed onto Law's face, but Luffy kicked him away with Jet Stamp. As Doflamingo lied injured at Law's feet, Trebol attempted to attack Law only to be kicked away by Luffy. Law used Counter Shock on Doflamingo and collapsed from exhaustion. However, Doflamingo stood back up, revealing that he can use his string powers to fix his internal injuries. Doflamingo attempted to stomp on Law's head, but Luffy quickly intervened.[177]
Doflamingo and Luffy battled intensely using Busoshoku and Haoshoku Haki. Though Luffy's first attacks were blocked, he managed to exploit an opening and punch Doflamingo repeatedly, ending with Gomu Gomu no Eagle Bazooka. However, Doflamingo evaded the Eagle Bazooka and kicked Luffy using Athlete's Thread, sending Luffy crashing into the ground, right into Trebol's trap. Trebol held Luffy down so that Doflamingo could finish off Law once and for all. Luffy got mad at the executive and attempted to hit him with a Busoshoku Haki-imbued fist. However, the attack had no effect, despite Luffy thinking Trebol was a Logia. Law then told Luffy to stop attacking Trebol, and Trebol left a trapped Luffy to go to Law. Luffy witnessed Law wounding Trebol and was caught in the explosion Trebol created.[178]

Luffy saves Law from Trebol's explosion.
However, Luffy managed to escape the explosion and carried Law with him. Luffy then threw Law down towards Robin and her group on the Flower Field, telling them to help Law. Not willing to let Law get away, Doflamingo shot at Robin with Tamaito, despite Luffy kicking him with Gomu Gomu no Hawk Whip. However, Doflamingo's bullet was deflected by Cavendish. Luffy then told him to take Law and the others out of the Flower Field. Cavendish initially refused, but Luffy told him that he entrusted their lives to him, making Cavendish think that Luffy was his fan. Luffy then resumed his battle against Doflamingo, and hit the Shichibukai with Busoshoku Haki-imbued fists, sending him flying off the roof. However, Doflamingo laughed it off, saying that Luffy's attacks were quick but lacked power. He then attacked Luffy with Overheat, sending Luffy flying. Doflamingo mentioned to Luffy how he had followed the young pirate's career before kicking Luffy into the palace wall, causing a large chunk of it to fall away. However, Luffy quickly got back up and continued fighting, attacking with Gomu Gomu no Grizzly Magnum. Doflamingo easily avoided his attack and exploited the opening it left, kicking Luffy into the ground. Doflamingo then taunted Luffy about the shrinking Torikago and how it would kill all his friends, all because the Straw Hats stepped foot on Dressrosa. Luffy became enraged at Doflamingo for hurting his friends and prepared to activate Gear 4.[179]

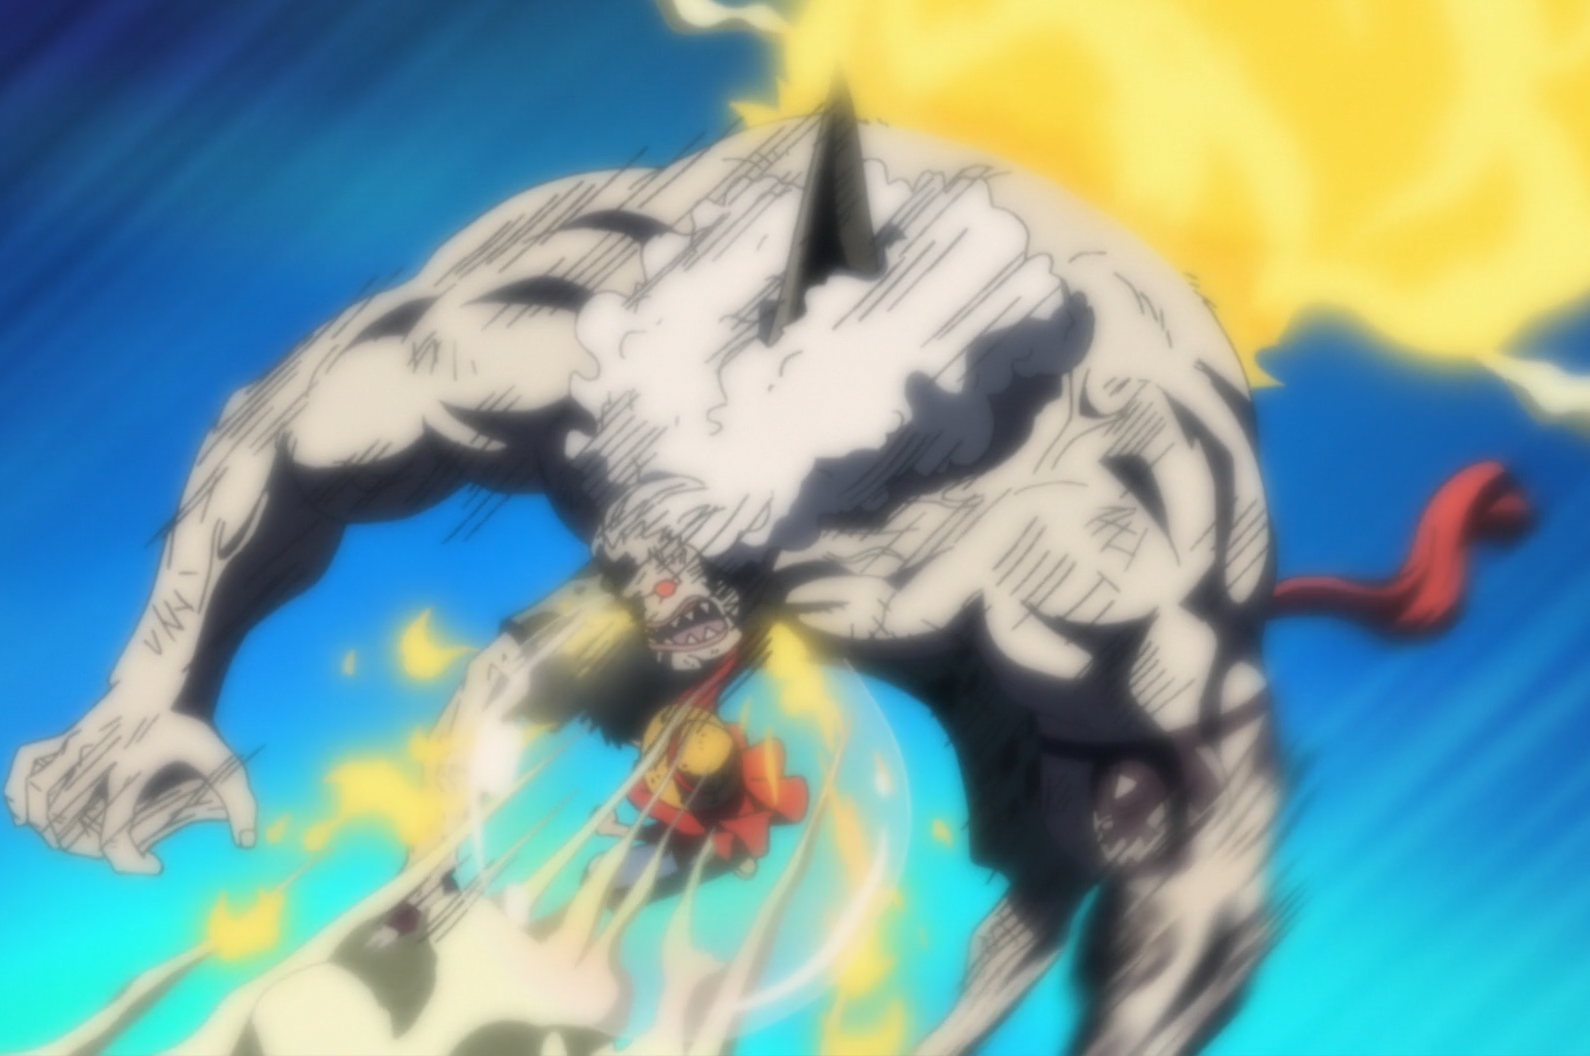
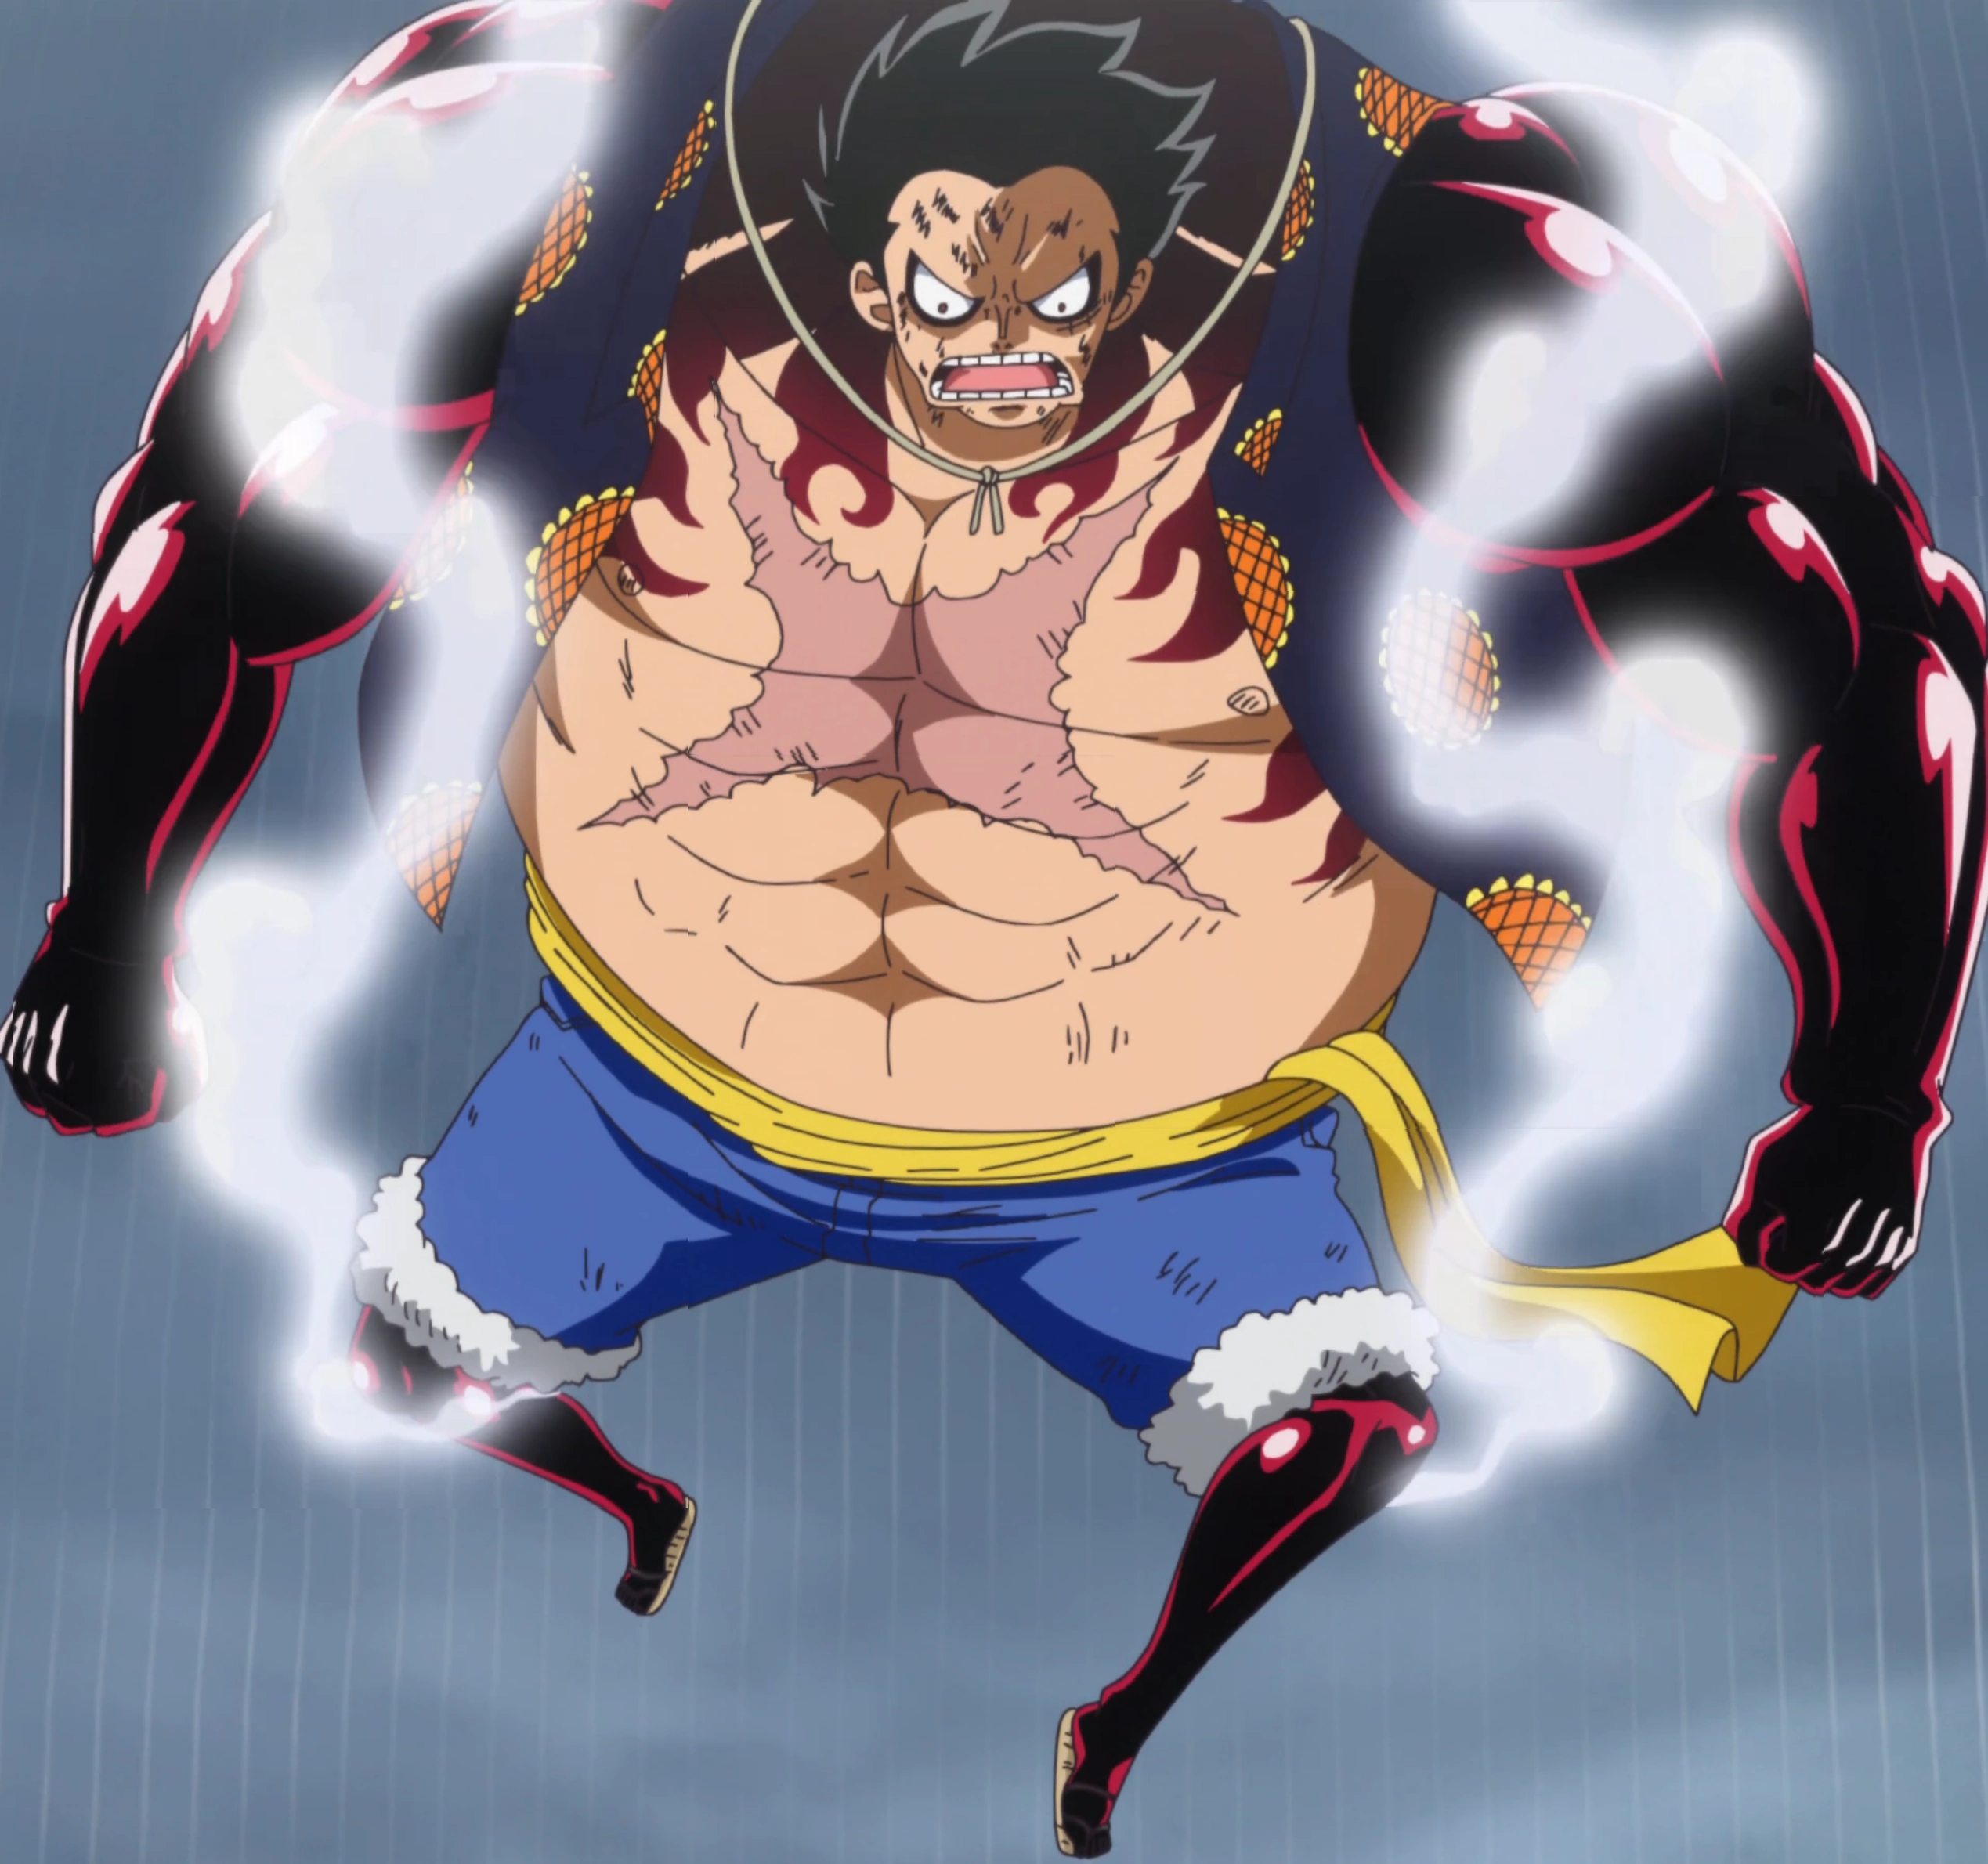
Luffy using Gear 4
Luffy activated Busoshoku Haki in his left arm and blew into it, inflating the muscles and exponentially increasing his arm's size. He continued blowing until Boundman was activated. In this form, Luffy's entire torso became massive and he could only bounce, not stand. Doflamingo mocked his form, but Luffy revealed that he had subdued beasts with this form. Luffy then sunk his arm into his body and hit Doflamingo with Gomu Gomu no Kong Gun, which sent Doflamingo flying far away into the streets. Luffy then sunk his legs into his body and flew toward Doflamingo. With precision, Luffy speedily maneuvered behind Doflamingo and dropkicked the Shichibukai using Gomu Gomu no Rhino Schneider, sending Doflamingo crashing through several buildings. An enraged Doflamingo then flew up to the sky and Luffy rose to meet him, attacking Doflamingo with Gomu Gomu no Culverin Cannon. However, Doflamingo managed to avoid the attack and kicked Luffy with Athlete. However, Luffy's rubber managed to absorb the blunt attack despite being covered in Busoshoku Haki, and Luffy shook Doflamingo off. Luffy then used Culverin Cannon again, but this time he changed its direction several times to follow Doflamingo, and eventually succeeded in punching Doflamingo in the face.[180]
Luffy then flew toward Doflamingo, knowing that Gear 4 was about to end. He attacked Doflamingo with both fists, but Doflamingo countered by summoning strings from the ground. Doflamingo revealed his Devil Fruit awakening powers to Luffy, shocking the Straw Hat, who wondered if Doflamingo was even a Paramecia anymore.[181]
Twenty minutes later, Luffy continued battling against Doflamingo's strings as he listened to Riku's speech to the citizens of Dressrosa. Doflamingo turned much of the town into string to attack Luffy, but Luffy evaded the string, pulling his head and arms into his body as he attacked Doflamingo with Gomu Gomu no Leo Bazooka, sending the Shichibukai crashing into the palace mountain.[182]
Luffy noticed that the Torikago remained active, meaning that Doflamingo was not utterly defeated. Luffy quickly flew to the palace mountain and attempted to finish Doflamingo off. However, before he could reach him, his Gear 4 wore off and he was completely exhausted. Gatz arrived and helped Luffy up and revealed that all the gladiators from the colosseum were there to aid Luffy. Luffy asked Gatz to give him 10 minutes to recover and Gatz proceeded to take Luffy to safety. They were then attacked by Burgess but were saved when Sabo kicked Burgess away.[183]

Luffy intercepts Rebecca's unwilling attack.
With Sabo holding Burgess back, Luffy assured him that he will defeat Doflamingo once his Haki recharges. Sabo then entrusted Gatz to Luffy's safety.[184] As Gatz ran away with Luffy, Law suddenly used Room to teleport to their location. With three minutes left for Luffy to recharge, Law took over protecting him. Luffy then lay on the ground near Law as his Haki regenerated.[185] Eventually, Luffy's Haki fully recharged, and with the help of Law and his Shambles, Luffy prevented Rebecca from being forced to cut down Viola and confronted Doflamingo once more.[186]
Doflamingo attacked both Luffy and Rebecca with his strings, but Law saved Rebecca, so he turned his attention solely to Luffy. Doflamingo then turned an entire portion of the town into string to attack Luffy with a thousand "Flap Thread" string arrows.
Doflamingo immobilized Luffy and taunted him by saying that all the slaughter could have been avoided had the people of Dressrosa just accepted their manipulation. This enraged Luffy to the point where he instantly reactivated Gear 4 and broke the strings holding him, taking the remainder of the fight into the skies above.
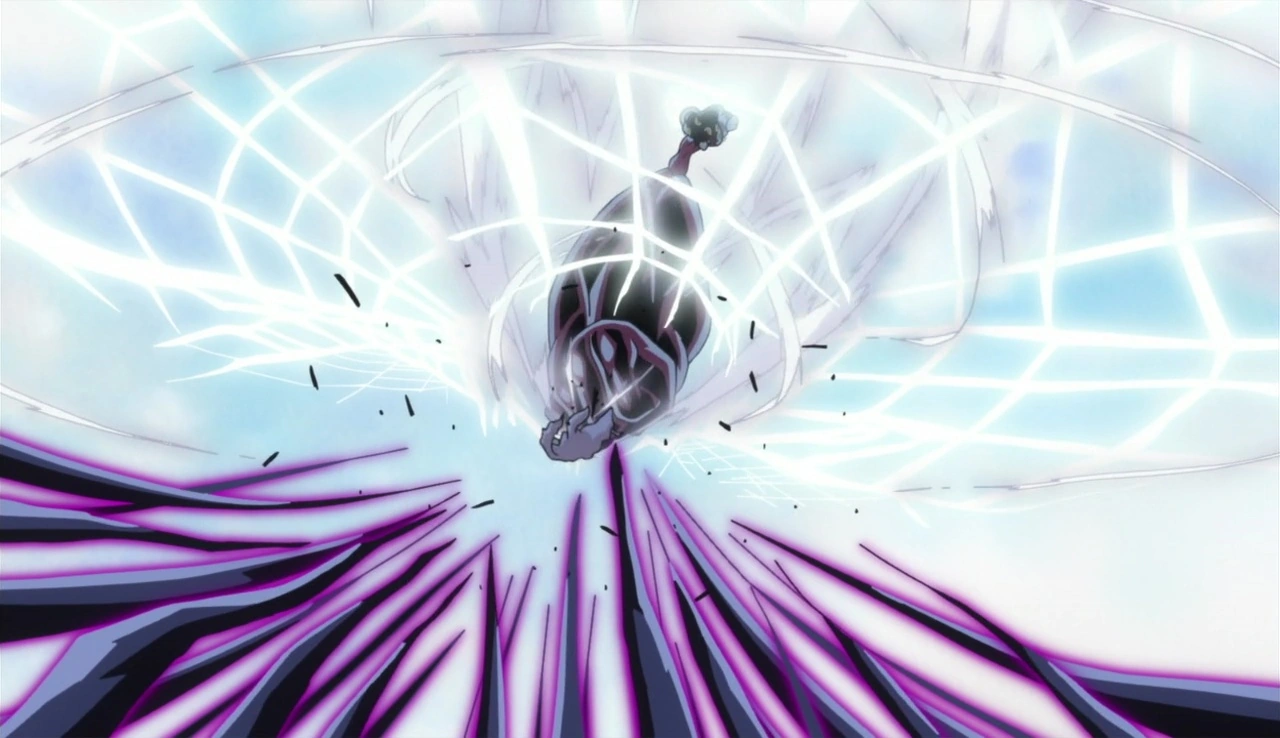

Luffy finishes off Doflamingo with King Kong Gun.
After once again saying Luffy stood no chance against him due to his "commoner's blood", Doflamingo attempted to trap him in his Spider's Net. As Luffy enlarged his right arm and readied his final attack, Doflamingo unleashed 16 Godthreads in a last ditch effort to kill Luffy. Despite this, Luffy's King Kong Gun broke through and slammed him into the ground, destroying several buildings and shattering his trademark sunglasses.[187]
This time, Luffy's attack successfully defeated Doflamingo and the Torikago collapsed. While still in mid-air, Luffy deflated and started falling. Law saved him by instantly teleporting him to the ground. Having passed out from injury and exhaustion, Luffy's head was placed onto Rebecca's lap as the latter began to cry in happiness.[188]
After Doflamingo's Defeat
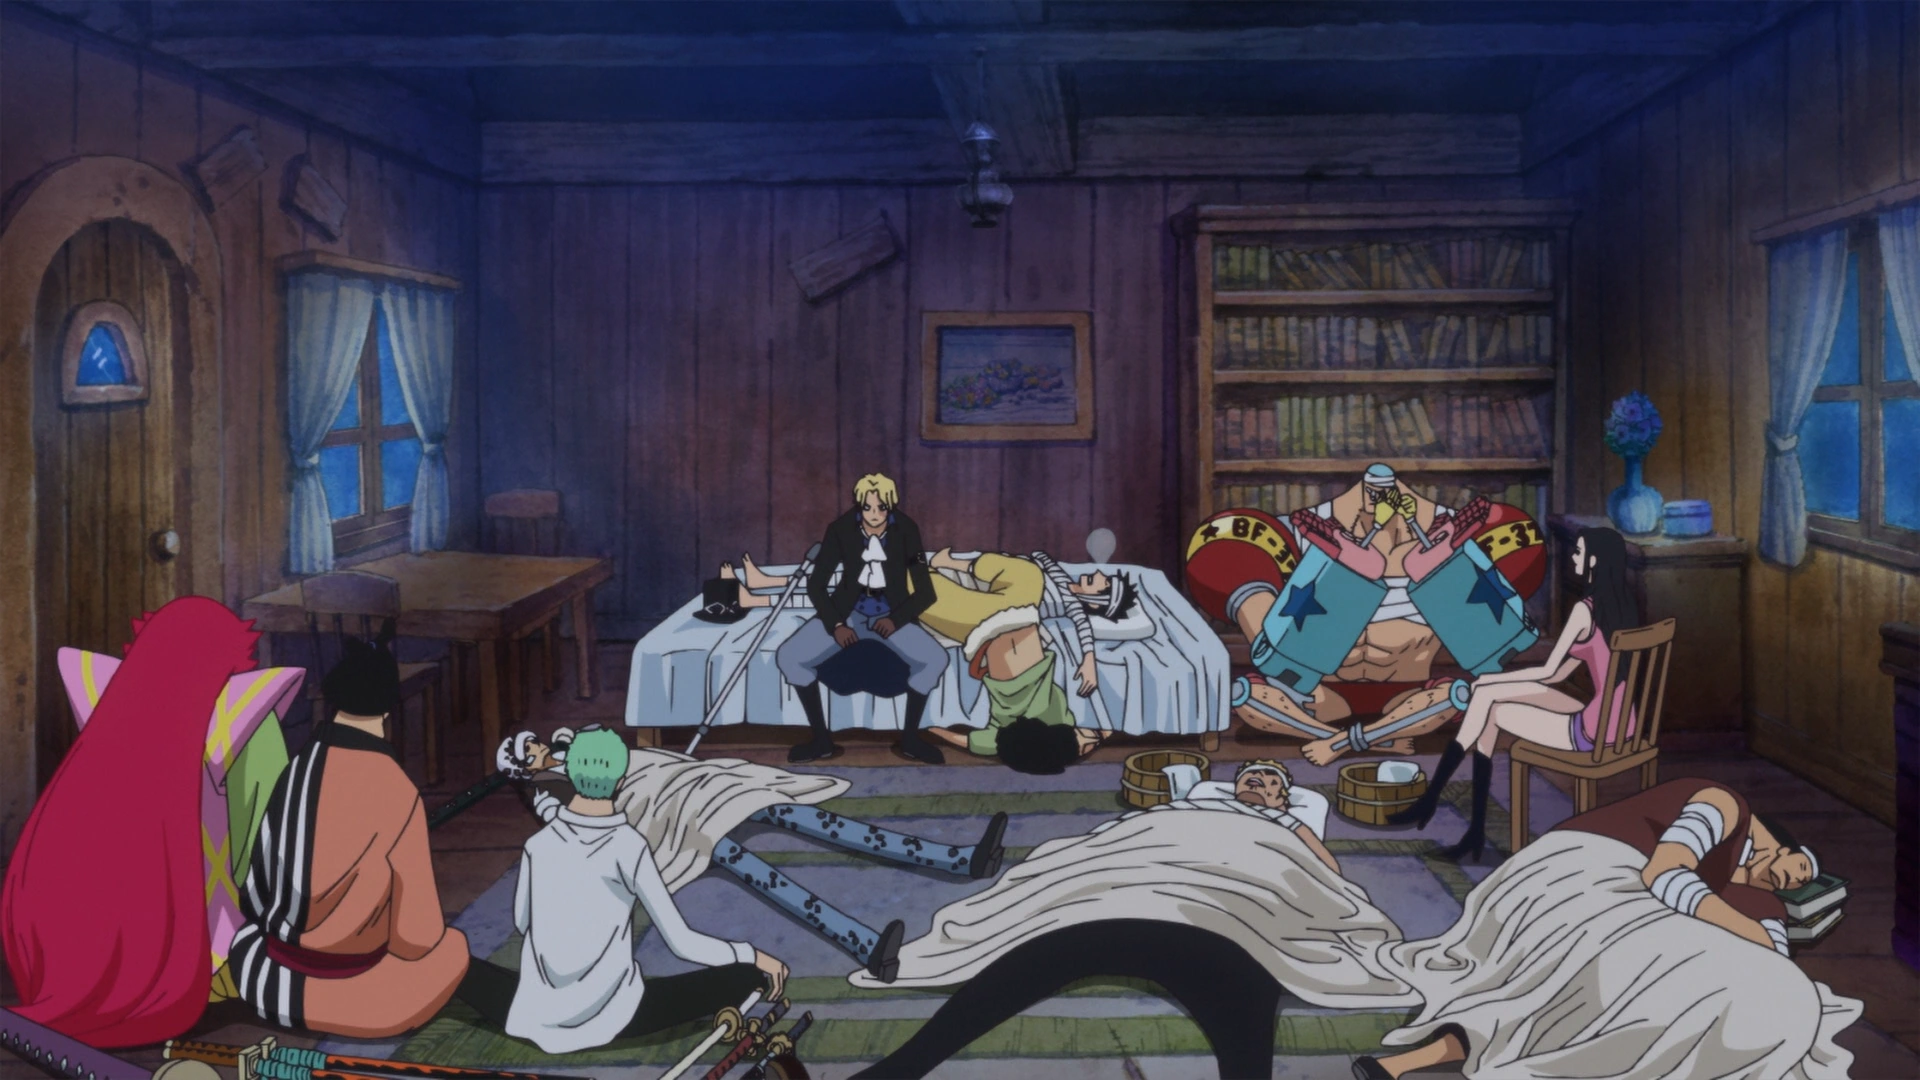

Luffy and his crewmates rest at Kyros' house.
After Doflamingo's downfall, Luffy and his group went to the palace, but later went to Kyros' old house to rest and recover.[189] Three days after Doflamingo's defeat, Luffy continued his recovery as he heard about the rumor about Rebecca's father. He was not pleased with the rumor even after Kyros explained that he started it. Bartolomeo then entered the house, revealing that the Marines were mobilized to pursue the Straw Hats. He also explained that he and the other gladiators planned an escape route for them. Luffy then ran out of the house with the others, but suddenly stayed behind, saying that he still had something left to do.[190]
Zoro then told Luffy to hurry with his business and they will be waiting for him at the eastern port. Luffy then dashed to the royal palace and called out Rebecca. Once Luffy found Rebecca, he asked her if she was okay with Kyros leaving her. Rebecca answered "no" and Luffy offered to take her to him. Luffy then took Rebecca and made his way to the hill where Kyros' house is located. After dropping off Rebecca there, Luffy ran towards the eastern port.[191]
Luffy reached the eastern port just when Issho was about to attack his allies with the all the rubble from Dressrosa. Luffy then attacked the Admiral with a Haki-imbued Gear 3 attack, pushing him back. Luffy declared that he grew tired of running away from an Admiral and prepared for a fight.[192]
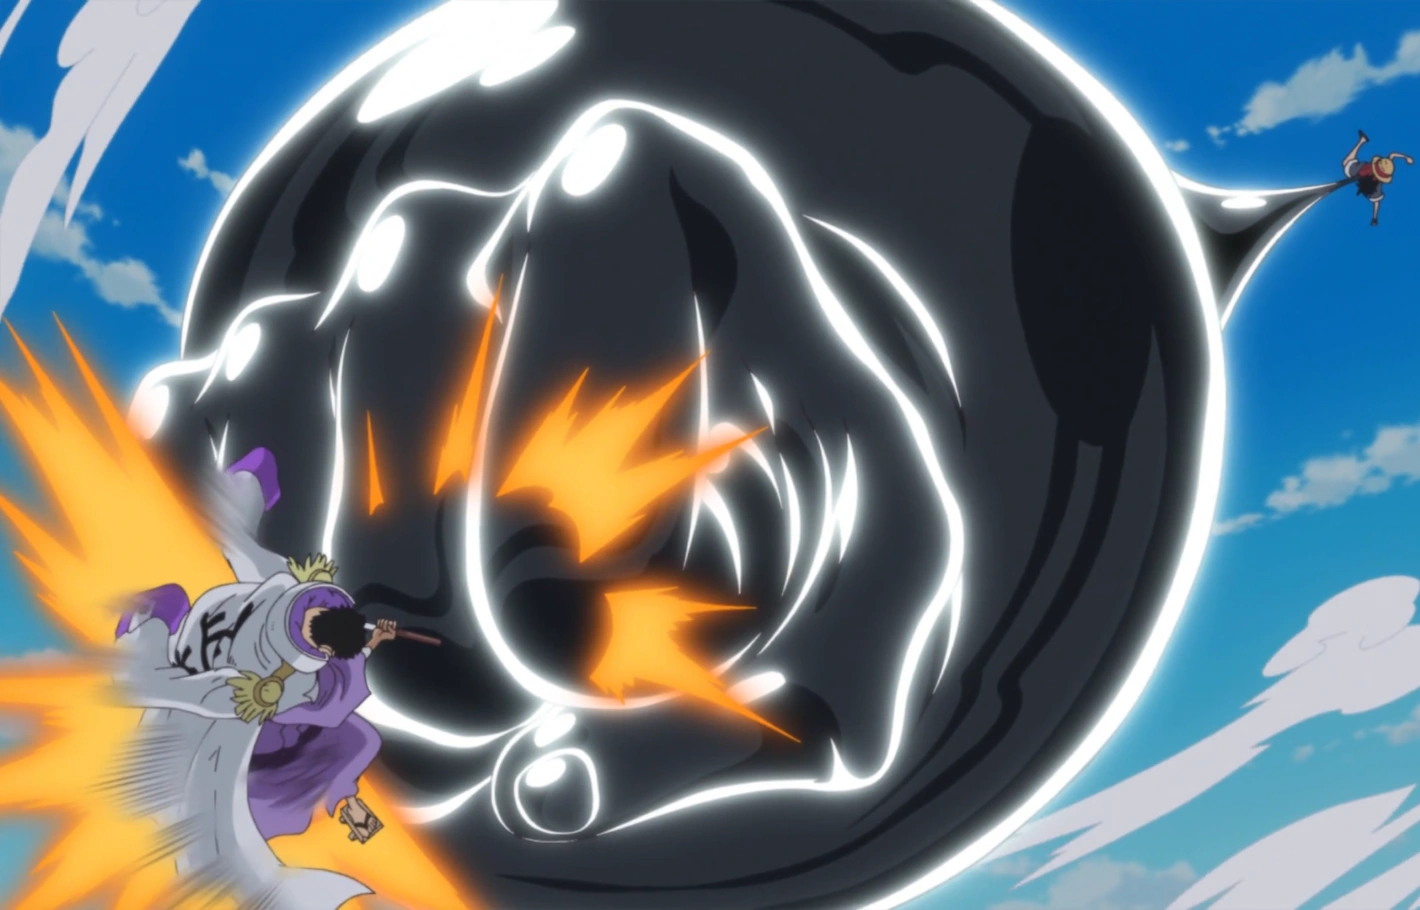

Luffy punches Fujitora.
As they clashed, Luffy announced every single one of his attacks and where he was aiming before striking. Fujitora wondered if Luffy was taking pity on him due to his blindness. Luffy declared that he would not attack without saying anything, given that his opponent was blind. Fujitora laughed, explaining that they were supposed to be sworn enemies and no one is supposed to fight an admiral like that. Annoyed and slightly angered, Fujitora blew Luffy with his gravity ability. Hajrudin caught Luffy and the Straw Hats, Law, and Luffy's other allies quickly fled across a bridge leading to a gigantic ship in the distance. As Fujitora prepared to bombard the all the nearby ships with floating rubble, the citizens of Dressrosa arrived to "chase" after the pirates. Not wishing to harm the citizens, Fujitora halted his attack, allowing his targets to get away.
Luffy and his allies eventually reached Orlumbus' flagship, the Yonta Maria. After boarding the ship, the following pledged their allegiance to Luffy: Cavendish of the Beautiful Pirates (including Suleiman), Bartolomeo of the Barto Club, Sai of the Happo Navy, Ideo of the XXX Gym Martial Arts Alliance (including Blue Gilly, Abdullah, and Jeet), Leo of the Tontatta Tribe, Hajrudin of the Giant Warrior Pirates, and Orlumbus of the Yonta Maria Grand Fleet.[193]

The newly-formed Straw Hat Grand Fleet celebrates their victory over the Donquixote Family.
When Luffy was asked to drink a sake cup to complete the agreement for an alliance, Luffy declined, much to the others' shock. He did not wish to become someone great and powerful, but someone who is free, as well as not take away the freedom from his fellow allies. Once Luffy explained that they can do whatever they want, the allies decided to forge the alliance anyway, forming the Straw Hat fleet. To Luffy's surprise, Sai, Bartolomeo, Leo, Cavendish, Ideo, Orlumbus, and Hajrudin sat down and drank their sake cups, and Zoro ended up drinking the rest of the sake in what was supposed to be Luffy's cup. Afterwards, they held a feast to celebrate their victory over Doflamingo. As the group left Dressrosa, a multitude of pirates who had suffered great blows to their business ventures because of Doflamingo's defeat came after the Yonta Maria Grand Fleet, seeking to bring down Luffy. However, Fujitora dropped the rubble from Dressrosa on the enemy ships as a final thanks to Luffy for what he had done in the kingdom, while Kyros and Rebecca watched from afar and officially began their new life as a family together.[19]
After the feast, each of the leading allies received Luffy's vivre card and parted ways. Bartolomeo then brought the Straw Hats, the samurais, and Law to his ship, the Going Luffy-senpai. After Zoro noticed the Straw Hats' increase in bounty from a newspaper, Bartolomeo proudly showed Luffy's group their new wanted posters.[194]
References
- ↑ 1.0 1.1 One Piece Manga and Anime — Vol. 1 Chapter 1 (p. 5) and Episode 4, Luffy is first introduced.
- ↑ 2.0 2.1 One Piece Manga and Anime — Vol. 1 Chapter 2 (p. 8) and Episode 1, Luffy debuts in the present.
- ↑ 3.0 3.1 One Piece Manga and Anime — Vol. 5 Chapter 44 (p. 2-20) and Episode 21, Luffy works off his debt to Zeff.
- ↑ One Piece Manga and Anime — Vol. 104 Chapter 1053 (p. 17) and Episode 1080, Luffy became recognized as one of the Four Emperors.
- ↑ One Piece Manga and Anime — Vol. 71 Chapter 703 (p. 16) and Episode 633, Luffy's alias in Dressrosa is revealed.
- ↑ 6.0 6.1 Vivre Card - One Piece Visual Dictionary (Card #0001), Luffy-tarou is romanized.
- ↑ One Piece Manga and Anime — Vol. 91 Chapter 914 (p. 7) and Episode 900, Luffy's first alias in Wano is revealed.
- ↑ One Piece Manga and Anime — Vol. 91 Chapter 916 (p. 8) and Episode 903, Luffy's second alias in Wano is revealed.
- ↑ One Piece Manga and Anime — Vol. 103 Chapter 1043 (p. 16-17) and Episode 1070, Zunesha declares Joy Boy's return.
- ↑ One Piece Manga — Vol. 1 Chapter 2 (p. 3), Luffy's epithet is written in the title of the chapter.
- ↑ SBS One Piece Manga — Vol. 4 (p. 28), Luffy's age is revealed.
- ↑ 12.0 12.1 One Piece Blue Deep: Characters World (p. 186), Luffy's profile after timeskip is revealed.
- ↑ 13.0 13.1 SBS One Piece Manga — Vol. 69 (p. 66), Luffy's age and height after timeskip are revealed.
- ↑ SBS One Piece Manga — Vol. 15 (p. 90), Luffy's birthday is revealed.
- ↑ SBS One Piece Manga — Vol. 10 (p. 46), Luffy's height is revealed.
- ↑ SBS One Piece Manga — Vol. 66 (p. 162), Oda explains the blood types of the world and reveals Luffy's blood type.
- ↑ One Piece Manga and Anime — Vol. 104 Chapter 1053 (p. 4-5) and Episode 1080, Luffy's bounty as one of the new Four Emperors.
- ↑ One Piece Manga and Anime — Vol. 90 Chapter 903 (p. 16-17) and Episode 879, Luffy's sixth bounty after Whole Cake Island.
- ↑ 19.0 19.1 One Piece Manga and Anime — Vol. 80 Chapter 800 (p. 7) and Episode 745, Luffy's bounty is stated to have risen after Dressrosa.
- ↑ One Piece Manga and Anime — Vol. 61 Chapter 601 (p. 12) and Episode 521, Luffy's fourth bounty after the Summit War of Marineford.
- ↑ One Piece Manga and Anime — Vol. 45 Chapter 435 (p. 16-17) and Episode 320, The crew members' bounties for attacking Enies Lobby are revealed.
- ↑ One Piece Manga and Anime — Vol. 23 Chapter 213 (p. 22) and Episode 128, Luffy's bounty is raised after Arabasta.
- ↑ One Piece Manga and Anime — Vol. 11 Chapter 96 (p. 6) and Episode 45, Luffy's first bounty is put by Brannew in the wanted list.
- ↑ SBS One Piece Manga — Vol. 30 (p. 104), Gomu Gomu no Mi is confirmed to be a Paramecia.
- ↑ One Piece Manga and Anime — Vol. 103 Chapter 1044 (p. 4-6) and Episode 1071, The Five Elders discuss the nature of Luffy's Devil Fruit.
- ↑ One Piece Manga and Anime — Vol. 78 Chapter 784 (p. 6-19) and Episode 726, Luffy fights Doflamingo using Gear 4.
- ↑ One Piece Manga and Anime — Vol. 79 Chapter 790 (p. 10) and Episode 733, Luffy recalls training with Rayleigh to improve his own Haki.
- ↑ One Piece Manga and Anime — Vol. 89 Chapter 894 (p. 2-5) and Episode 869.
- ↑ One Piece Manga and Anime — Vol. 88 Chapter 886 (p. 19) and Episode 860.
- ↑ One Piece Manga and Anime — Vol. 61 Chapter 598 (p. 1-3) and Episode 517.
- ↑ 31.0 31.1 One Piece Manga and Anime — Vol. 61 Chapter 599 (p. 2-7) and Episode 518.
- ↑ One Piece Manga — Vol. 61 Chapter 598 (p. 24).
- ↑ One Piece Manga and Anime — Vol. 61 Chapter 600 (p. 5, 11) and Episodes 519–520.
- ↑ One Piece Manga and Anime — Vol. 61 Chapter 601 (p. 3-19) and Episode 521.
- ↑ One Piece Manga and Anime — Vol. 61 Chapter 602 and Episode 522.
- ↑ One Piece Manga and Anime — Vol. 61 Chapter 603 (p. 7-17) and Episode 523.
- ↑ One Piece Manga and Anime — Vol. 62 Chapter 604 and Episode 524.
- ↑ One Piece Manga and Anime — Vol. 62 Chapter 605 and Episode 525.
- ↑ One Piece Manga and Anime — Vol. 62 Chapter 606 (p. 14-15) and Episode 526.
- ↑ One Piece Manga and Anime — Vol. 62 Chapter 607 and Episode 526.
- ↑ One Piece Manga and Anime — Vol. 62 Chapter 607 and Episode 527.
- ↑ 42.0 42.1 One Piece Manga and Anime — Vol. 62 Chapter 608 and Episode 527.
- ↑ One Piece Manga and Anime — Vol. 62 Chapter 609 and Episode 528.
- ↑ One Piece Manga and Anime — Vol. 62 Chapter 610 and Episode 529.
- ↑ One Piece Manga and Anime — Vol. 62 Chapter 611 and Episode 530.
- ↑ One Piece Manga and Anime — Vol. 62 Chapter 612 and Episode 531.
- ↑ 47.0 47.1 One Piece Manga and Anime — Vol. 62 Chapter 613 and Episode 532.
- ↑ One Piece Manga and Anime — Vol. 62 Chapter 614 (p. 11-12, 15-17) and Episode 533.
- ↑ One Piece Manga and Anime — Vol. 63 Chapter 615 (p. 16) and Episode 534.
- ↑ One Piece Manga and Anime — Vol. 63 Chapter 617 and Episode 536.
- ↑ One Piece Manga and Anime — Vol. 63 Chapter 618 and Episode 537.
- ↑ One Piece Manga and Anime — Vol. 63 Chapter 619 and Episode 538.
- ↑ One Piece Manga and Anime — Vol. 63 Chapter 620 and Episode 539.
- ↑ One Piece Manga and Anime — Vol. 63 Chapters 623–624 and Episodes 543–544.
- ↑ One Piece Manga and Anime — Vol. 64 Chapter 627 and Episode 547.
- ↑ One Piece Manga and Anime — Vol. 64 Chapter 628 and Episode 548.
- ↑ One Piece Manga and Anime — Vol. 64 Chapter 629 and Episode 549.
- ↑ 58.0 58.1 One Piece Manga and Anime — Vol. 64 Chapter 634 and Episode 554.
- ↑ One Piece Manga and Anime — Vol. 64 Chapter 633 and Episode 553.
- ↑ One Piece Manga and Anime — Vol. 64 Chapter 635 and Episode 556.
- ↑ One Piece Manga and Anime — Vol. 64 Chapter 636 and Episode 557.
- ↑ One Piece Manga and Anime — Vol. 65 Chapter 637 and Episode 558.
- ↑ One Piece Manga and Anime — Vol. 65 Chapter 638 and Episode 559.
- ↑ One Piece Manga and Anime — Vol. 65 Chapter 639 and Episode 560.
- ↑ One Piece Manga and Anime — Vol. 65 Chapter 640 and Episode 561.
- ↑ One Piece Manga and Anime — Vol. 65 Chapter 641 and Episode 562.
- ↑ One Piece Manga and Anime — Vol. 65 Chapter 644 and Episode 564.
- ↑ One Piece Manga and Anime — Vol. 65 Chapter 645 and Episode 566.
- ↑ One Piece Manga and Anime — Vol. 66 Chapter 647 and Episode 567.
- ↑ One Piece Manga and Anime — Vol. 66 Chapter 648 and Episode 568.
- ↑ One Piece Manga and Anime — Vol. 66 Chapter 649 and Episode 569.
- ↑ One Piece Manga and Anime — Vol. 66 Chapter 650 and Episode 570.
- ↑ One Piece Manga and Anime — Vol. 66 Chapter 651 and Episode 571.
- ↑ One Piece Manga and Anime — Vol. 66 Chapter 652 and Episode 572.
- ↑ One Piece Manga and Anime — Vol. 66 Chapter 653 and Episode 573.
- ↑ One Piece Manga and Anime — Vol. 66 Chapter 654 and Episode 574.
- ↑ 77.0 77.1 One Piece Manga and Anime — Vol. 66 Chapter 655 and Episode 579.
- ↑ One Piece Manga and Anime — Vol. 66 Chapter 656 and Episode 580.
- ↑ One Piece Manga and Anime — Vol. 66 Chapter 656 and Episode 581.
- ↑ One Piece Manga and Anime — Vol. 67 Chapter 657 (p. 2-5) and Episode 581.
- ↑ One Piece Manga and Anime — Vol. 67 Chapter 658 (p. 14-19) and Episode 582.
- ↑ One Piece Manga and Anime — Vol. 67 Chapter 659 (p. 5-9) and Episode 583.
- ↑ One Piece Manga and Anime — Vol. 67 Chapter 661 (p. 2-11) and Episode 586.
- ↑ One Piece Manga and Anime — Vol. 67 Chapter 662 (p. 10, 19) and Episode 587.
- ↑ 85.0 85.1 One Piece Manga and Anime — Vol. 67 Chapter 663 and Episode 588.
- ↑ One Piece Manga and Anime — Vol. 67 Chapter 664 and Episode 589.
- ↑ One Piece Manga and Anime — Vol. 67 Chapter 665 and Episode 591.
- ↑ One Piece Manga and Anime — Vol. 67 Chapter 666 and Episode 592.
- ↑ 89.0 89.1 One Piece Manga and Anime — Vol. 67 Chapter 667 and Episode 593.
- ↑ 90.0 90.1 One Piece Manga and Anime — Vol. 70 Chapter 697 and Episode 623.
- ↑ One Piece Manga and Anime — Vol. 68 Chapter 668 and Episode 594.
- ↑ One Piece Manga and Anime — Vol. 68 Chapter 669 (p. 16-17) and Episode 595.
- ↑ One Piece Manga and Anime — Vol. 68 Chapter 670 and Episode 596.
- ↑ One Piece Manga and Anime — Vol. 68 Chapter 671 and Episode 597.
- ↑ One Piece Manga and Anime — Vol. 68 Chapter 673 and Episode 599.
- ↑ One Piece Manga and Anime — Vol. 68 Chapter 675 and Episode 601.
- ↑ One Piece Manga and Anime — Vol. 68 Chapter 676 and Episode 602.
- ↑ One Piece Manga and Anime — Vol. 68 Chapter 677 and Episode 603.
- ↑ One Piece Manga and Anime — Vol. 68 Chapter 678 and Episode 604.
- ↑ One Piece Manga and Anime — Vol. 69 Chapter 679 and Episode 605.
- ↑ One Piece Manga and Anime — Vol. 69 Chapter 680 and Episode 606.
- ↑ One Piece Manga and Anime — Vol. 69 Chapter 681 and Episode 607.
- ↑ One Piece Manga and Anime — Vol. 69 Chapter 683 and Episode 609.
- ↑ One Piece Manga and Anime — Vol. 69 Chapter 685 and Episode 611.
- ↑ One Piece Manga and Anime — Vol. 69 Chapter 688 and Episode 614.
- ↑ One Piece Manga and Anime — Vol. 69 Chapter 689 and Episode 615.
- ↑ One Piece Manga and Anime — Vol. 69 Chapter 690 and Episode 616.
- ↑ One Piece Manga and Anime — Vol. 70 Chapter 691 and Episode 617.
- ↑ One Piece Manga and Anime — Vol. 70 Chapter 692 and Episodes 617–618.
- ↑ One Piece Manga and Anime — Vol. 70 Chapter 693 and Episode 619.
- ↑ One Piece Manga and Anime — Vol. 70 Chapter 694 and Episode 620.
- ↑ One Piece Manga and Anime — Vol. 70 Chapter 695 and Episode 621.
- ↑ One Piece Manga and Anime — Vol. 70 Chapter 696 and Episode 622.
- ↑ One Piece Manga and Anime — Vol. 70 Chapter 698 and Episode 624.
- ↑ One Piece Manga and Anime — Vol. 70 Chapter 699 and Episode 628.
- ↑ One Piece Manga and Anime — Vol. 70 Chapter 700 and Episode 629, Luffy talks with Doflamingo and they soon approach Dressrosa.
- ↑ One Piece Manga and Anime — Vol. 71 Chapter 701 and Episode 630.
- ↑ One Piece Manga and Anime — Vol. 71 Chapter 701 (p. 16-19) and Episode 631.
- ↑ One Piece Manga and Anime — Vol. 71 Chapter 702 and Episode 631.
- ↑ One Piece Manga and Anime — Vol. 71 Chapter 703 and Episode 632.
- ↑ One Piece Manga and Anime — Vol. 71 Chapter 703 and Episode 633.
- ↑ One Piece Manga and Anime — Vol. 71 Chapter 704 and Episode 633.
- ↑ One Piece Manga and Anime — Vol. 71 Chapter 704 and Episode 634.
- ↑ One Piece Manga and Anime — Vol. 71 Chapter 706 and Episode 634.
- ↑ One Piece Manga and Anime — Vol. 71 Chapter 706 and Episode 635.
- ↑ One Piece Manga and Anime — Vol. 71 Chapter 707 and Episode 636.
- ↑ One Piece Manga and Anime — Vol. 71 Chapter 708 and Episode 637.
- ↑ One Piece Manga and Anime — Vol. 71 Chapter 709 and Episode 638, Luffy is surprised upon seeing Bartolomeo win in the B Block.
- ↑ One Piece Manga and Anime — Vol. 71 Chapter 710 and Episode 639.
- ↑ One Piece Manga and Anime — Vol. 72 Chapter 712 and Episodes 641–642, C Block begins.
- ↑ One Piece Manga and Anime — Vol. 72 Chapter 713 (p. 13) and Episode 643, Sanji sees a Visual Den Den Mushi feed of the colosseum in the plaza.
- ↑ One Piece Manga and Anime — Vol. 72 Chapter 714 (p. 13) and Episode 643.
- ↑ One Piece Manga and Anime — Vol. 72 Chapter 714 and Episode 644.
- ↑ One Piece Manga and Anime — Vol. 72 Chapter 715 and Episode 645.
- ↑ One Piece Manga and Anime — Vol. 72 Chapter 716 and Episode 646.
- ↑ One Piece Manga and Anime — Vol. 72 Chapter 717 and Episode 647.
- ↑ One Piece Manga and Anime — Vol. 72 Chapter 718 and Episode 648.
- ↑ One Piece Manga and Anime — Vol. 72 Chapter 718 (p. 18-19) and Episode 649.
- ↑ One Piece Manga and Anime — Vol. 72 Chapter 719 and Episode 649.
- ↑ One Piece Manga and Anime — Vol. 72 Chapter 720 and Episode 650.
- ↑ One Piece Manga and Anime — Vol. 72 Chapter 721 and Episode 651.
- ↑ One Piece Manga and Anime — Vol. 73 Chapter 722 and Episode 652.
- ↑ One Piece Manga and Anime — Vol. 73 Chapter 725 and Episode 656.
- ↑ One Piece Manga and Anime — Vol. 73 Chapter 726 and Episodes 657–658.
- ↑ One Piece Manga and Anime — Vol. 73 Chapter 729 and Episode 661.
- ↑ 146.0 146.1 One Piece Manga and Anime — Vol. 73 Chapter 730 and Episode 662.
- ↑ One Piece Manga and Anime — Vol. 73 Chapter 731 and Episode 663.
- ↑ One Piece Manga — Vol. 79 Chapter 794.
- ↑ One Piece Manga and Anime — Vol. 73 Chapter 731 and Episode 663.
- ↑ One Piece Manga and Anime — Vol. 74 Chapter 734 and Episode 666.
- ↑ One Piece Manga and Anime — Vol. 74 Chapter 735 and Episode 667.
- ↑ One Piece Manga and Anime — Vol. 74 Chapter 736 (p. 11-15) and Episode 668.
- ↑ One Piece Manga and Anime — Vol. 74 Chapter 736 (p. 18-19) and Episode 669.
- ↑ One Piece Manga and Anime — Vol. 74 Chapter 737 (p. 2-3) and Episode 669.
- ↑ One Piece Manga and Anime — Vol. 74 Chapter 740 (p. 2, 8-12, 14-16) and Episodes 672–673.
- ↑ One Piece Manga and Anime — Vol. 74 Chapter 742 (p. 14) and Episode 676.
- ↑ One Piece Manga and Anime — Vol. 75 Chapter 743 (p. 12-16) and Episode 677.
- ↑ One Piece Manga and Anime — Vol. 75 Chapter 744 (p. 16-19) and Episode 679.
- ↑ One Piece Manga and Anime — Vol. 75 Chapter 745 (p. 5-13, 16-19) and Episode 680.
- ↑ One Piece Manga and Anime — Vol. 75 Chapter 746 (p. 7-10, 14-19) and Episodes 681–682.
- ↑ One Piece Manga and Anime — Vol. 75 Chapter 747 (p. 11-17) and Episode 683, Luffy makes fun of Pica's voice.
- ↑ One Piece Manga and Anime — Vol. 75 Chapter 748 (p. 4-16) and Episode 684, The Colosseum fighters join up with Luffy.
- ↑ One Piece Manga and Anime — Vol. 75 Chapter 749 (p. 2-17) and Episodes 685–686, Luffy rides on Pica's statue with Ucy.
- ↑ One Piece Manga and Anime — Vol. 75 Chapter 750 (p. 16-17) and Episode 687, Luffy reaches the first level of the King's Plateau.
- ↑ One Piece Manga and Anime — Vol. 75 Chapter 751 (p. 12-17) and Episode 688, Luffy and Law are trapped by Doflamingo.
- ↑ One Piece Manga and Anime — Vol. 75 Chapter 752 (p. 2-11, 16-17) and Episodes 688–689.
- ↑ One Piece Manga and Anime — Vol. 76 Chapter 753 (p. 12-17) and Episodes 690–691.
- ↑ One Piece Manga and Anime — Vol. 76 Chapter 754 (p. 6-11) and Episode 691.
- ↑ One Piece Manga and Anime — Vol. 76 Chapter 756 (p. 12-17) and Episode 694.
- ↑ One Piece Manga and Anime — Vol. 76 Chapter 757 (p. 2-8, 16-17) and Episodes 695–696.
- ↑ One Piece Manga and Anime — Vol. 76 Chapter 758 and Episodes 696–697.
- ↑ One Piece Manga — Vol. 76 Chapter 759.
- ↑ One Piece Manga — Vol. 76 Chapter 760.
- ↑ One Piece Manga — Vol. 76 Chapter 761.
- ↑ One Piece Manga and Anime — Vol. 78 Chapter 779 (p. 11-16) and Episode 720, Luffy defeats Bellamy.
- ↑ One Piece Manga — Vol. 78 Chapter 780 (p. 9-15), Luffy fights with Doflamingo and finds Law's unconscious body.
- ↑ One Piece Manga — Vol. 78 Chapter 781 (p. 3-19), Luffy and Law continue fighting Doflamingo, with Law getting defeated.
- ↑ One Piece Manga — Vol. 78 Chapter 782 (p. 2-19), The fight with Doflamingo and Trebol continues, with Trebol getting wounded by Law.
- ↑ One Piece Manga — Vol. 78 Chapter 783 (p. 2-19), Luffy ensures Law's safety and activates Gear 4.
- ↑ One Piece Manga — Vol. 78 Chapter 784 (p. 6-19), Luffy overwhelms Doflamingo with Gear 4.
- ↑ One Piece Manga — Vol. 78 Chapter 785 (p. 2-8), Luffy encounters Doflamingo's Awakened abilities.
- ↑ One Piece Manga — Vol. 78 Chapter 785 (p. 16-19), Luffy seemingly defeats Doflamingo.
- ↑ One Piece Manga — Vol. 79 Chapter 786 (p. 2-17), Luffy is forced out of Gear 4 and is protected from Burgess by Sabo.
- ↑ One Piece Manga — Vol. 79 Chapter 787.
- ↑ One Piece Manga — Vol. 79 Chapter 788.
- ↑ One Piece Manga — Vol. 79 Chapter 789 (p. 18-19), Luffy intercepts Rebecca's attack and confronts Doflamingo again.
- ↑ One Piece Manga — Vol. 79 Chapter 790.
- ↑ One Piece Manga — Vol. 79 Chapter 791.
- ↑ One Piece Manga — Vol. 79 Chapter 794.
- ↑ One Piece Manga — Vol. 80 Chapter 796.
- ↑ One Piece Manga — Vol. 80 Chapter 797.
- ↑ One Piece Manga — Vol. 80 Chapter 798.
- ↑ One Piece Manga — Vol. 80 Chapter 799.
- ↑ One Piece Manga — Vol. 80 Chapter 801.
| |||||||||||||
| |||||||||||||
| |||||||||||||
| |||||||||||
| |||||||||||
| |||||||||||
| |||||||||||
| |||||||||||
| |||||||||||
| |||||||||||
| |||||||||||
| |||||||||||
| |||||||
| |||||||
| |||||||
| |||||||
| |||||||||||
| |||||||||||
| |||||||||||
| |||||||||||
| |||||||||||||
| |||||||||||||
| |||||||||||||
| |||||||||||||
| |||||||||||||
| |||||||||||||
| |||||||||||
| |||||||||||
| |||||||||||
| |||||||||||||
| |||||||||||||
| |||||||||||||
| |||||||||||||
| |||||||||||||
| |||||||
| |||||||
| |||||||||||
| |||||||||||
| |||||||||||
East Blue Inhabitants | |||||||||||||||||||||||||||||
|---|---|---|---|---|---|---|---|---|---|---|---|---|---|---|---|---|---|---|---|---|---|---|---|---|---|---|---|---|---|
| |||||||||||||||||||||||||||||
| |||||||||||||||||||||||||||||
| |||||||||||||||||||||||||||||
| |||||||||||
| |||||||||||
| |||||||||||
| |||||||||||
| |||||||||||
| |||||||||||
| |||||
| |||||||||||||||||
| |||||||||||||||||
| |||||||||||||||||
| |||||||||||||||||
| |||||||||
| |||||||||
| |||||||||
Individuals with Bounties | |||||||||||||||||
|---|---|---|---|---|---|---|---|---|---|---|---|---|---|---|---|---|---|
| |||||||||||||||||
| |||||||||||||||||
| |||||||||||||||||
| |||||||||||||||||
| |||||||||||||||||
| |||||||
| |||||||
| |||||||||||||
| |||||||||||||
| |||||||||||||
| |||||||||||||
| |||||||||||||||||
| |||||||||||||||||
| |||||||||||||||||
| |||||||||||||||||
| |||||||||||||||||
| |||||||||||||||||