- Introduction
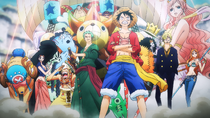
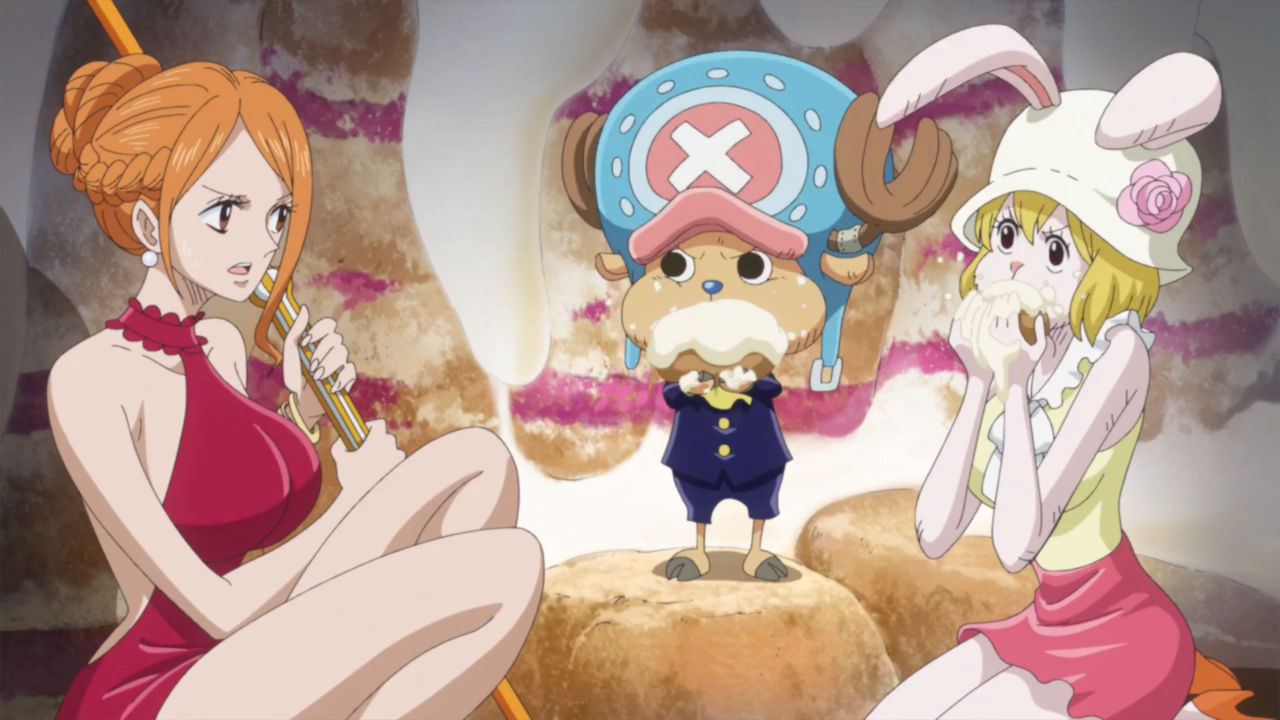
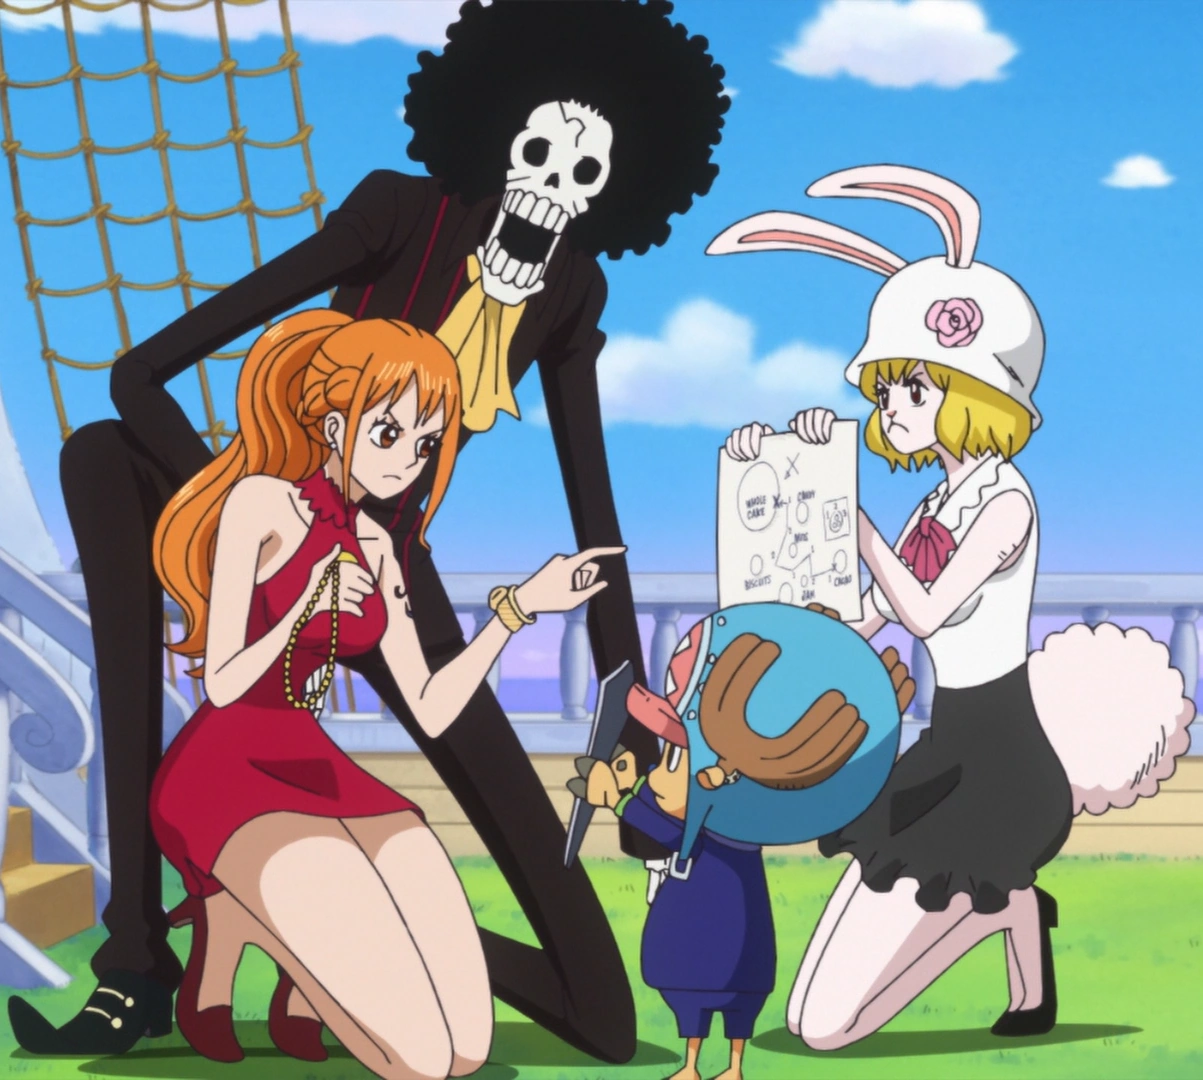
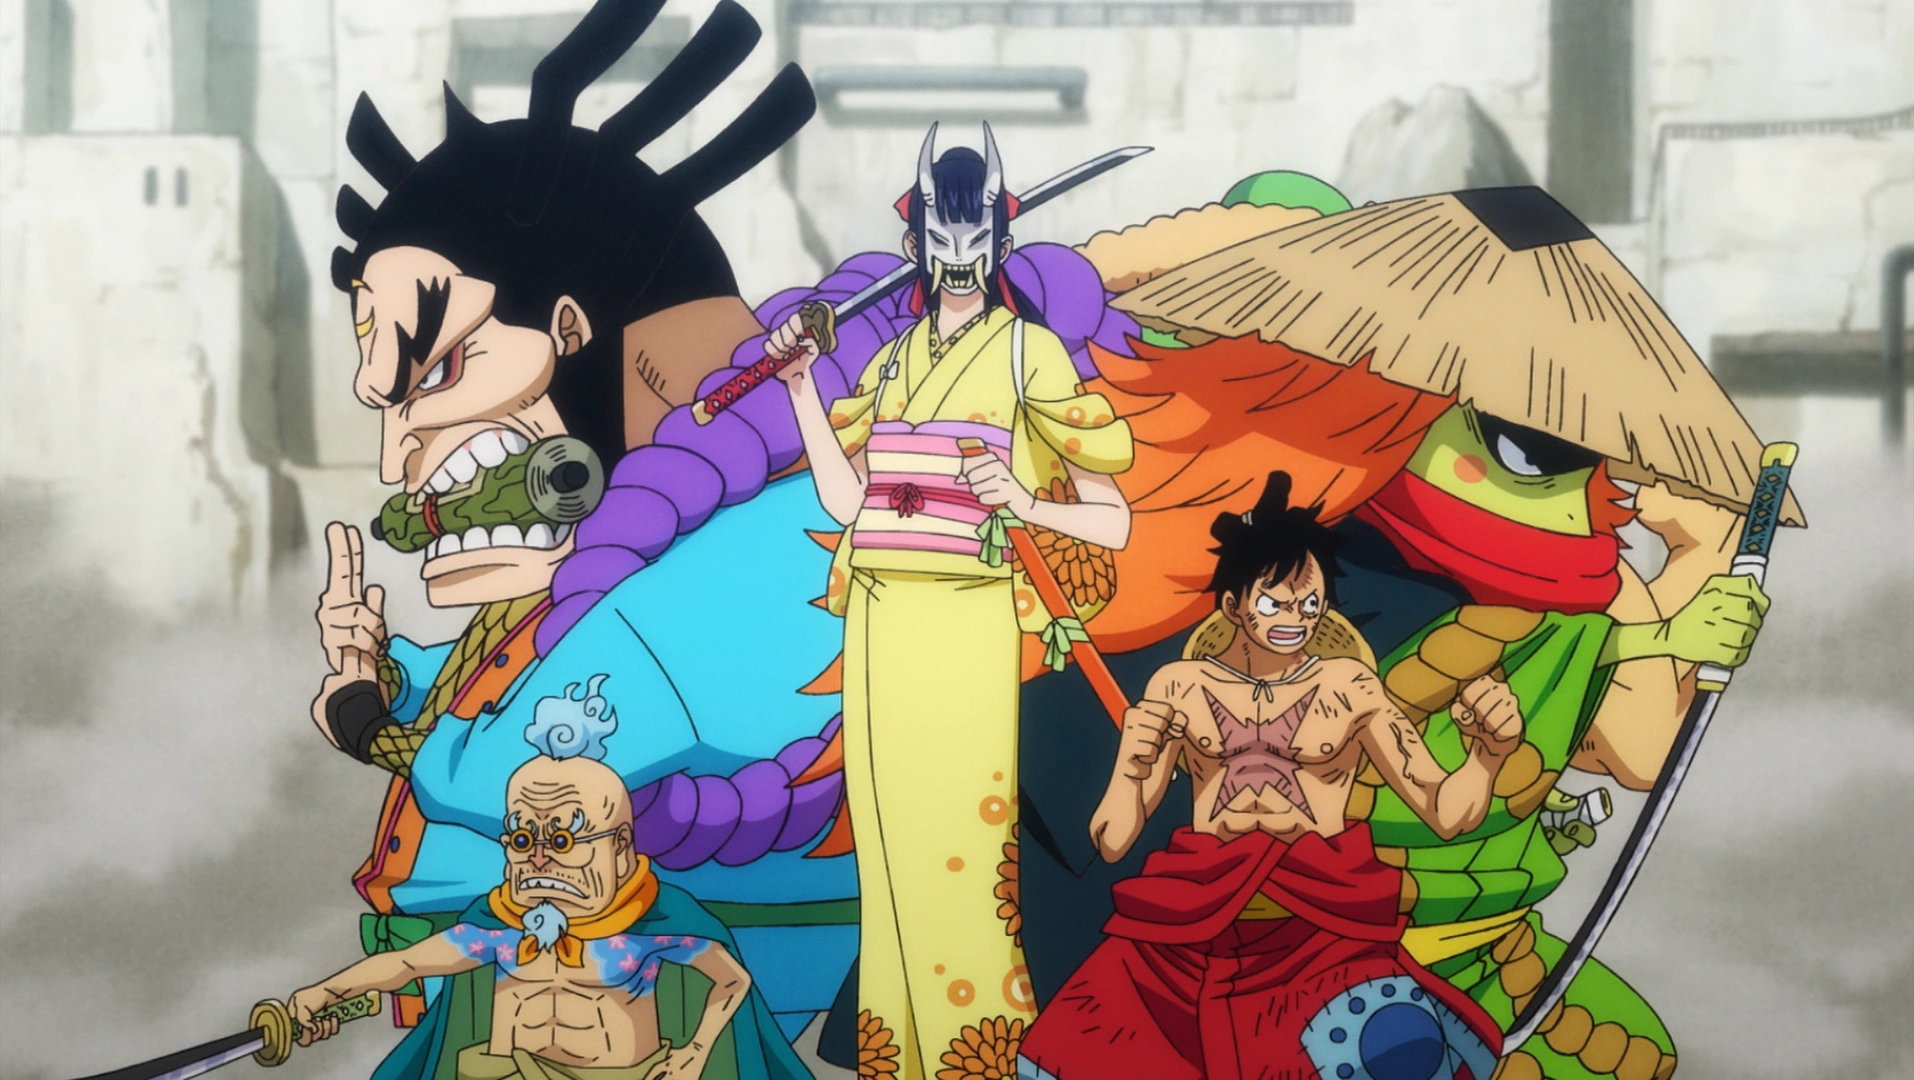
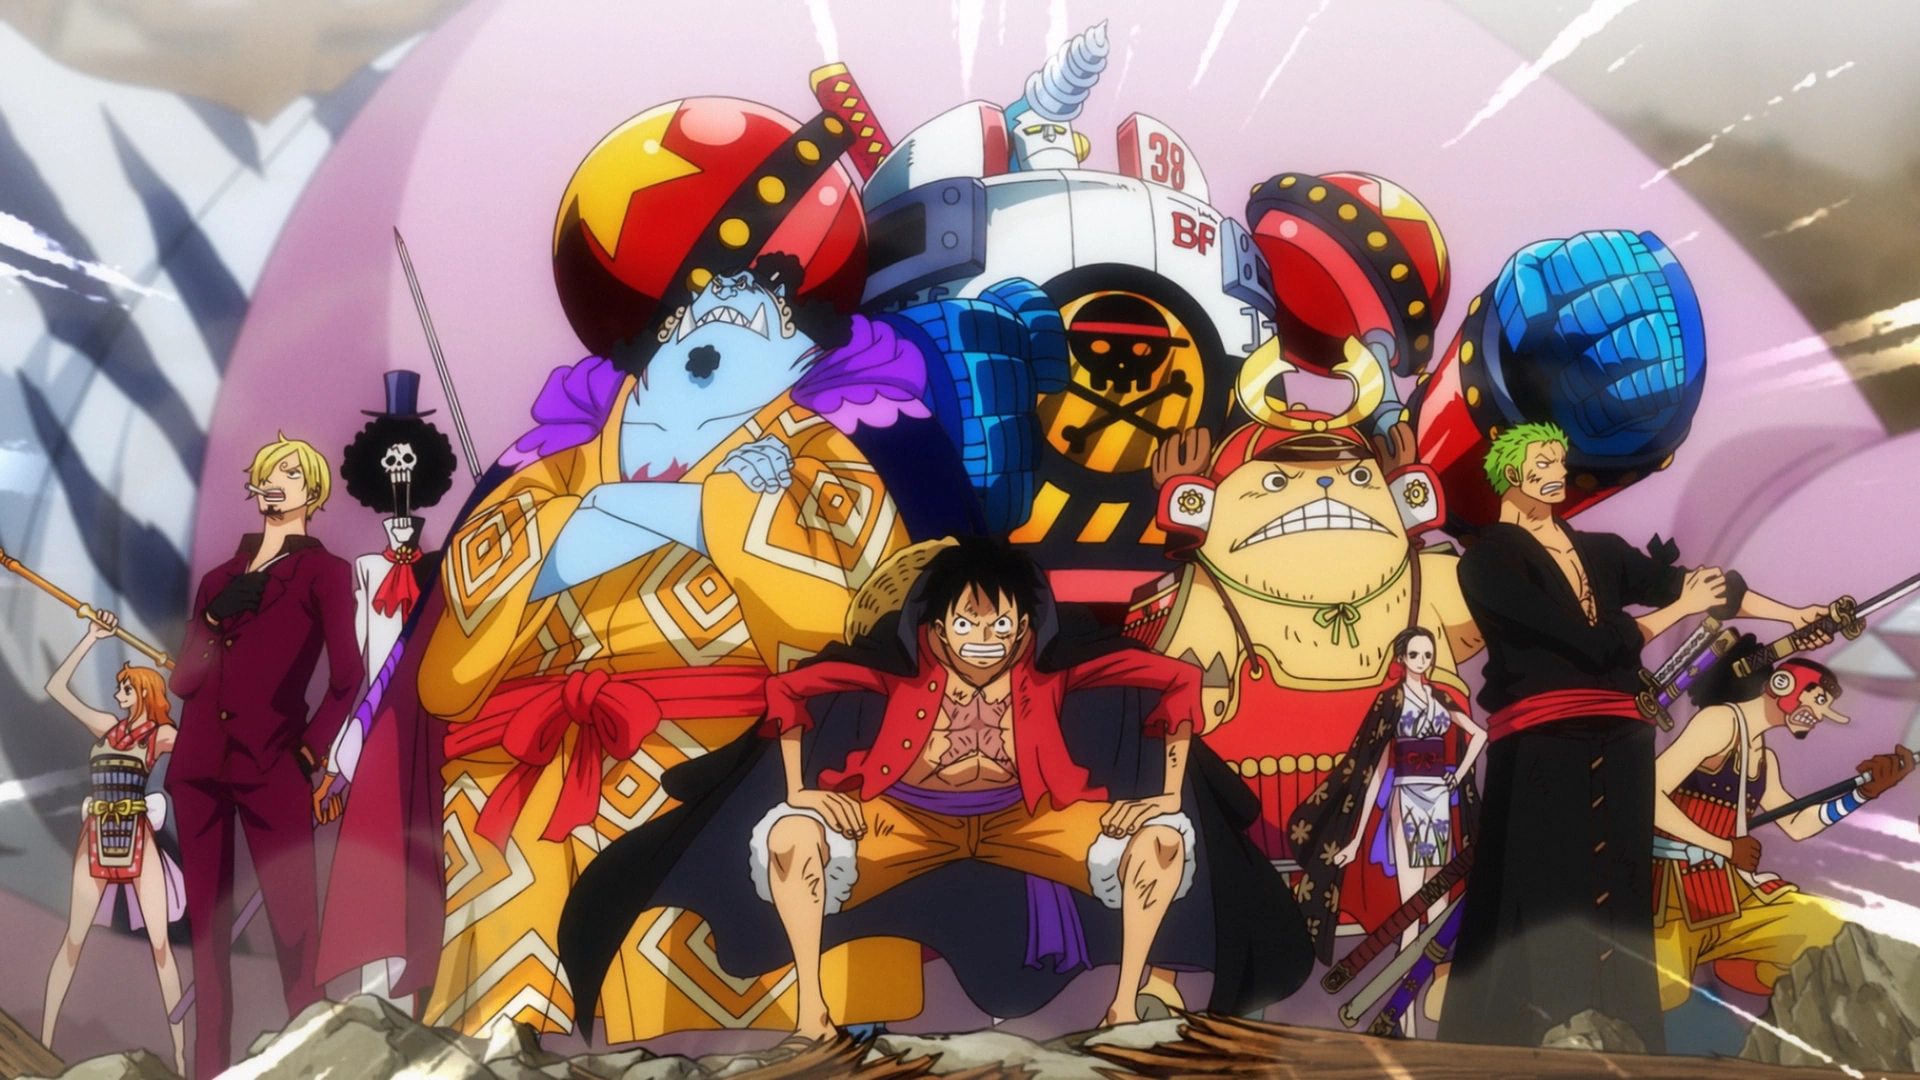
- Gallery
- Personality and Relationships
- Abilities and Powers
- History
- Past and Before the Timeskip
- During and After the Timeskip
- Non-Canon
- Misc.

|
Ahoy! This here is the 179th Featured Article.
"Tony Tony Chopper" has been featured, meaning it was chosen as an article of interest.
|
Fish-Man Island Saga[]
Return to Sabaody Arc[]
After two years, Chopper returned to Sabaody Archipelago. He was following Fake Zoro, Fake Sanji, Fake Robin, and his own counterpart, believing them (excluding Fake Chopper) to be the real ones. After Fake Robin tried to lure Chopper to them with a cucumber, Chopper then witnessed the fake Robin getting kidnapped by some mysterious men.[13] Later when he saw the Fake Straw Hat Crew, he was disappointed in his "captain" because they were not going to save "Robin", and he left crying and saying that he would save her himself.[14]
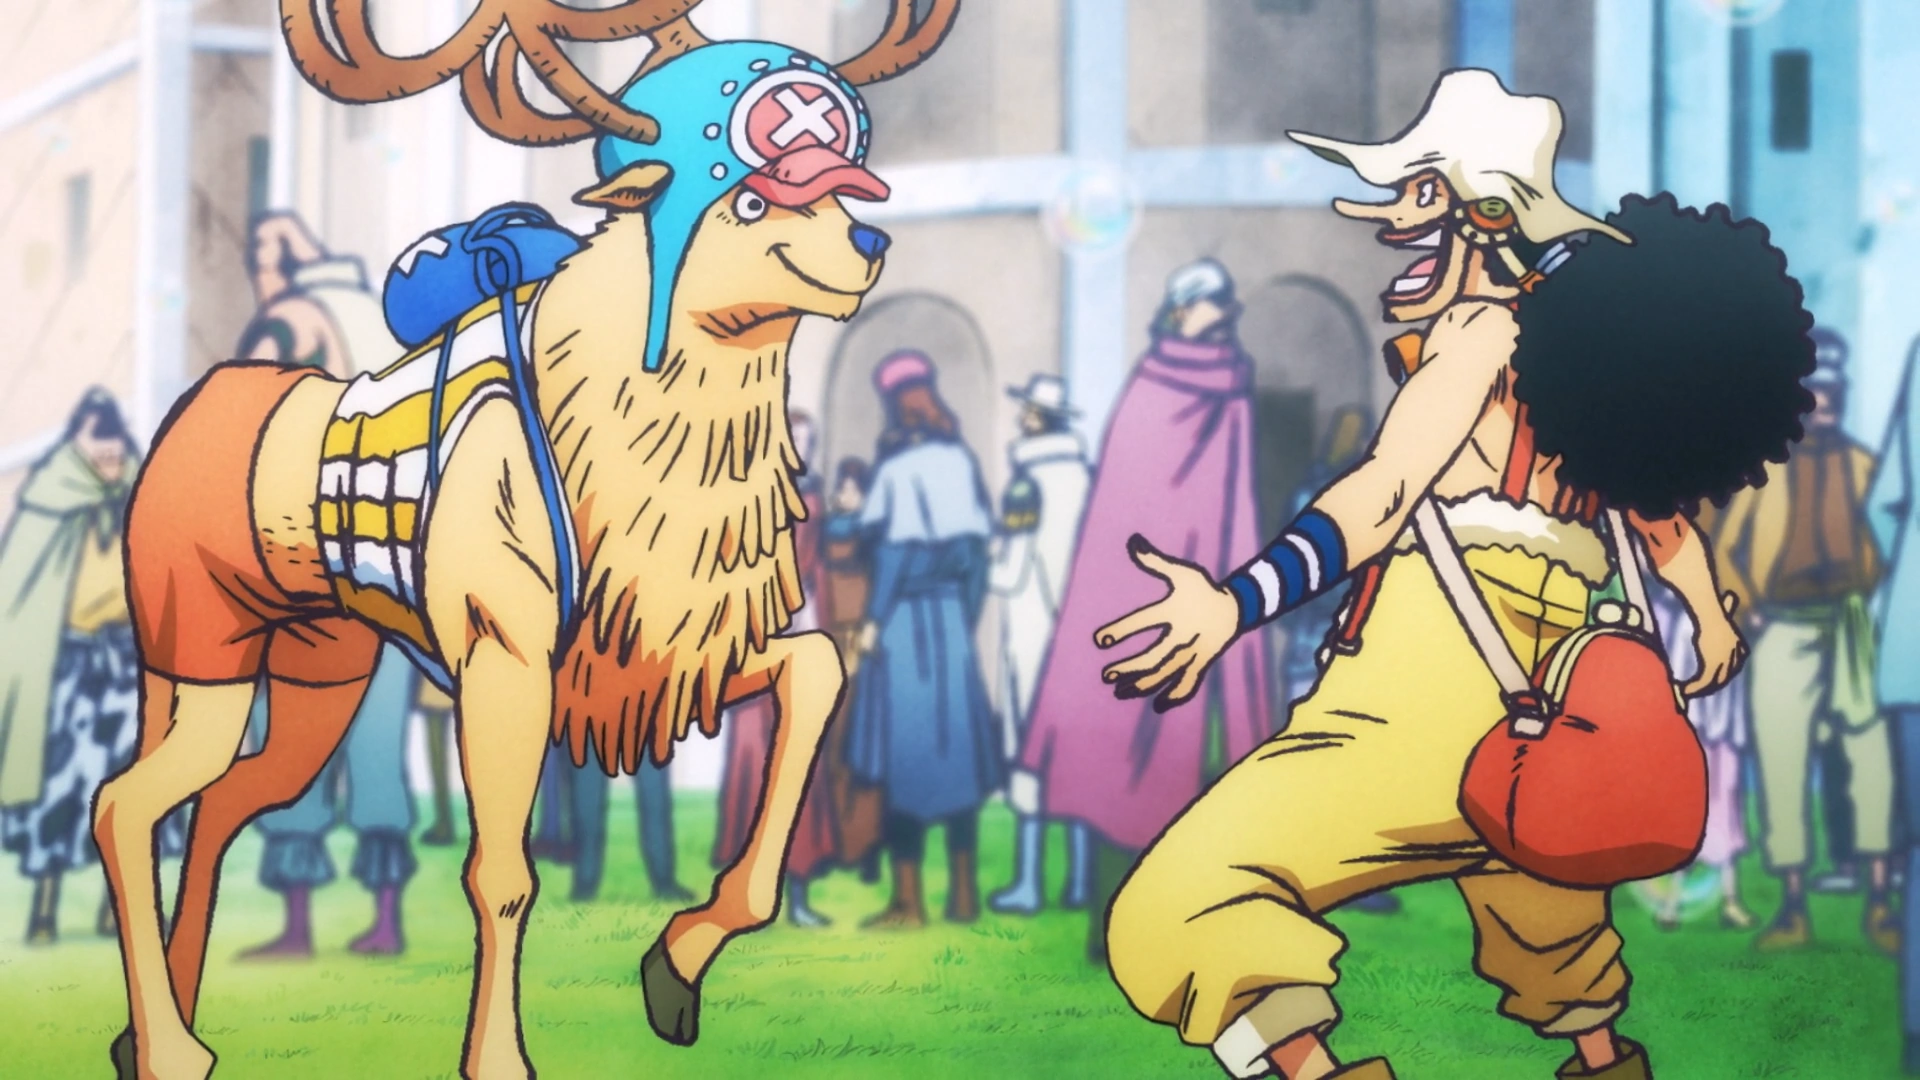

Chopper meets Usopp again.
While searching for "Robin", Chopper ran into Usopp and Nami, who were very happy to see him. After he was informed that the Straw Hats he encountered were fakes, he returned to the Thousand Sunny with Usopp and Nami. Franky then amazed Chopper and Usopp with his new upgrades. Chopper got excited wondering what Franky's new weapons are. He was pleasantly surprised when he heard from Rayleigh that Luffy was already in the archipelago.[15]
After arriving at Grove #42, Chopper departed atop one of his enormous bird friends from Torino Kingdom to bring Luffy, Zoro, and Sanji back to the Thousand Sunny. With the assistance of the Straw Hats' new allies, Chopper and the rest of the crew descended into the ocean with their coated ship, finally resuming their adventure after two years.[16]
Fish-Man Island Arc[]
Undersea Voyage[]

While sailing under the ocean, Chopper and the crew marveled at the site of the underwater world. He and Usopp also had to keep Luffy and Zoro from doing anything that might endanger the crew. He attended to Sanji after he received a massive nosebleed. Chopper along with the rest of the crew decided to have lunch, while Franky explained how their ship was in one piece after two years thanks to Bartholomew Kuma. As the ship descended even deeper, the crew marveled at how dark it had become. With their seacow, the Caribou Pirates soon caught up with the Straw Hats and prepared for battle.[17] Caribou jumped onto the Thousand Sunny, but before his crew could follow, Momoo fled in fear from seeing Nami, Sanji and Luffy, leaving Caribou behind. The Straw Hats then tied up Caribou as he begged for mercy. He claimed that he was an unfortunate victim and not a pirate, and Chopper believed him until Usopp pointed out that he was lying.
Chopper then attended to Sanji as he experienced another massive nosebleed, suggesting that they try to rehabilitate Sanji. He listened as Nami, with the help of Brook, Franky, and Robin, explained about the Sea Currents, but quickly lost interest when Nami started talking about how salinity affected them.
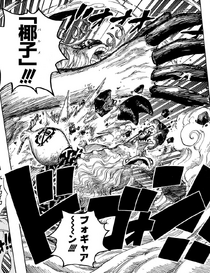
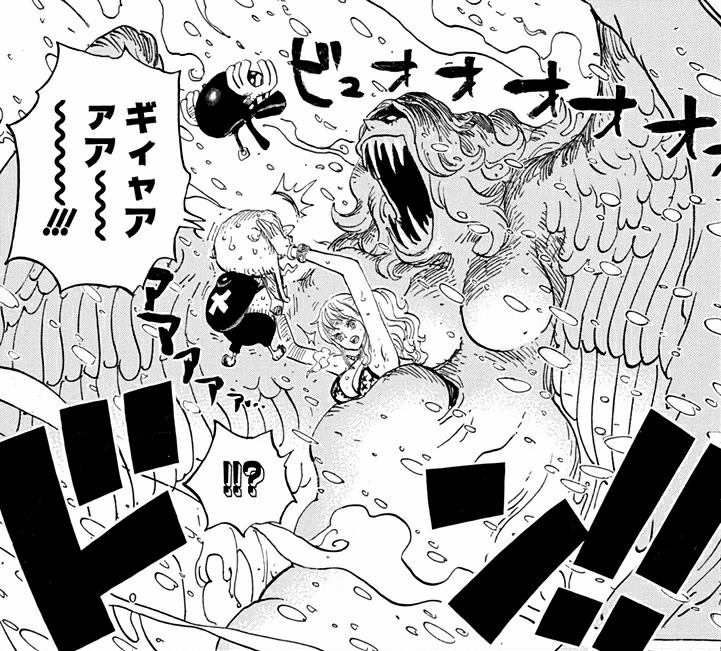
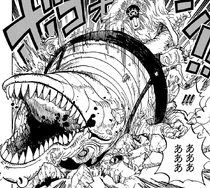
He reacted with shock when he saw the Kraken.[18] He then screamed in terror when he witnessed the Kraken destroying Caribou's ship. Even though the Monster Trio left the ship using Flutter Kick Coating to fight the Kraken, the sea monster aimed for the Thousand Sunny. Franky used his rocket launcher to repel one of the tentacles which amazed Chopper, Usopp, and Luffy.

Chopper saves the Straw Hats with his New Guard Point.
Chopper then blocked another tentacle with his new and improved Guard Point. When Luffy hit the Kraken with Gomu Gomu no Elephant Gun, Chopper spotted a shark freed. Because they were not wearing life-lines, the Monster Trio got separated from the rest of the Straw Hats as the ship went down the underwater current.[19]
When the crew reached the "Underworld of the Sea", Chopper immediately started to look for the missing Monster Trio along with Usopp and Brook. He then noticed the gargantuan size of a school of jellyfish that were floating around the ship. One of the jellyfish put one of its tentacles through the bubble coating. Chopper reached out to touch it but Robin stopped him, saying it was probably poisonous, much to Chopper's stunned surprise. When an even larger fish ate the jellyfish that he almost touched, it died as a result, confirming to Chopper that Robin's theory about the jellyfish probably being poisonous was correct. The reindeer commented on how scary and dark the Deep Sea is and how the fish in it cannot see too well.
When the crew realized Caribou was gone, Chopper thought one explanation was that he was thrown overboard while going through the downward current. Chopper was scared when Nami suggested that Caribou might still be hiding on the ship. After Franky trapped Caribou in the barrel, Chopper was the first to notice a sudden rise in temperature. He then moaned about how hot it is, saying he could not go on living this way, and how after waiting two years to see Luffy, Zoro, and Sanji, they disappeared. When the ship was about to be eaten by a gigantic angler fish, Chopper foamed at the mouth in shock.
When Wadatsumi and the Flying Dutchman appeared, Chopper started to cry from sheer terror. He and Usopp were shocked by Brook's frightened reaction to the ghost ship. He was shocked to see Surume suddenly show up and knock out Wadatsumi, and overjoyed that the Monster Trio came back safely. When they were on board, Chopper tackled Luffy, telling him how scared he was.[20]
When the underwater volcano started to erupt, Chopper panicked and was thrown back by the rest of the crew. Chopper exclaimed how hot it was when Nami said the water temperature was rising. When Sanji suffered a nosebleed while talking to Nami, Chopper remarked that it was a bad time to have a guilty conscience. When the crew reached the trench, Chopper noticed how the water was making steam from the heat. When the rocks fell into the trench, he marveled at Usopp's new attack. When a stray rock hit Surume, Chopper fell with the rest of the crew to the bottom of the sea.
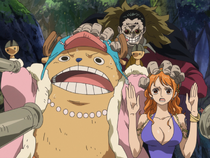
Upon finally reaching Fish-Man Island, Sanji suffered another nosebleed thinking about mermaids. Chopper told him that it would be best if he did not see any actual mermaids, as doing so could kill him. He was impressed with Sanji's fiery resolve to die while seeing mermaids. When Hammond approached with his group of Sea Beasts, Chopper is shocked by their gargantuan size. Hammond gave the crew two options: join the New Fish-Man Pirates or die. Chopper and the rest of the crew then prepared to enter Fish-Man Island with a Coup de Burst.[21]
Trouble in the Underwater Paradise[]
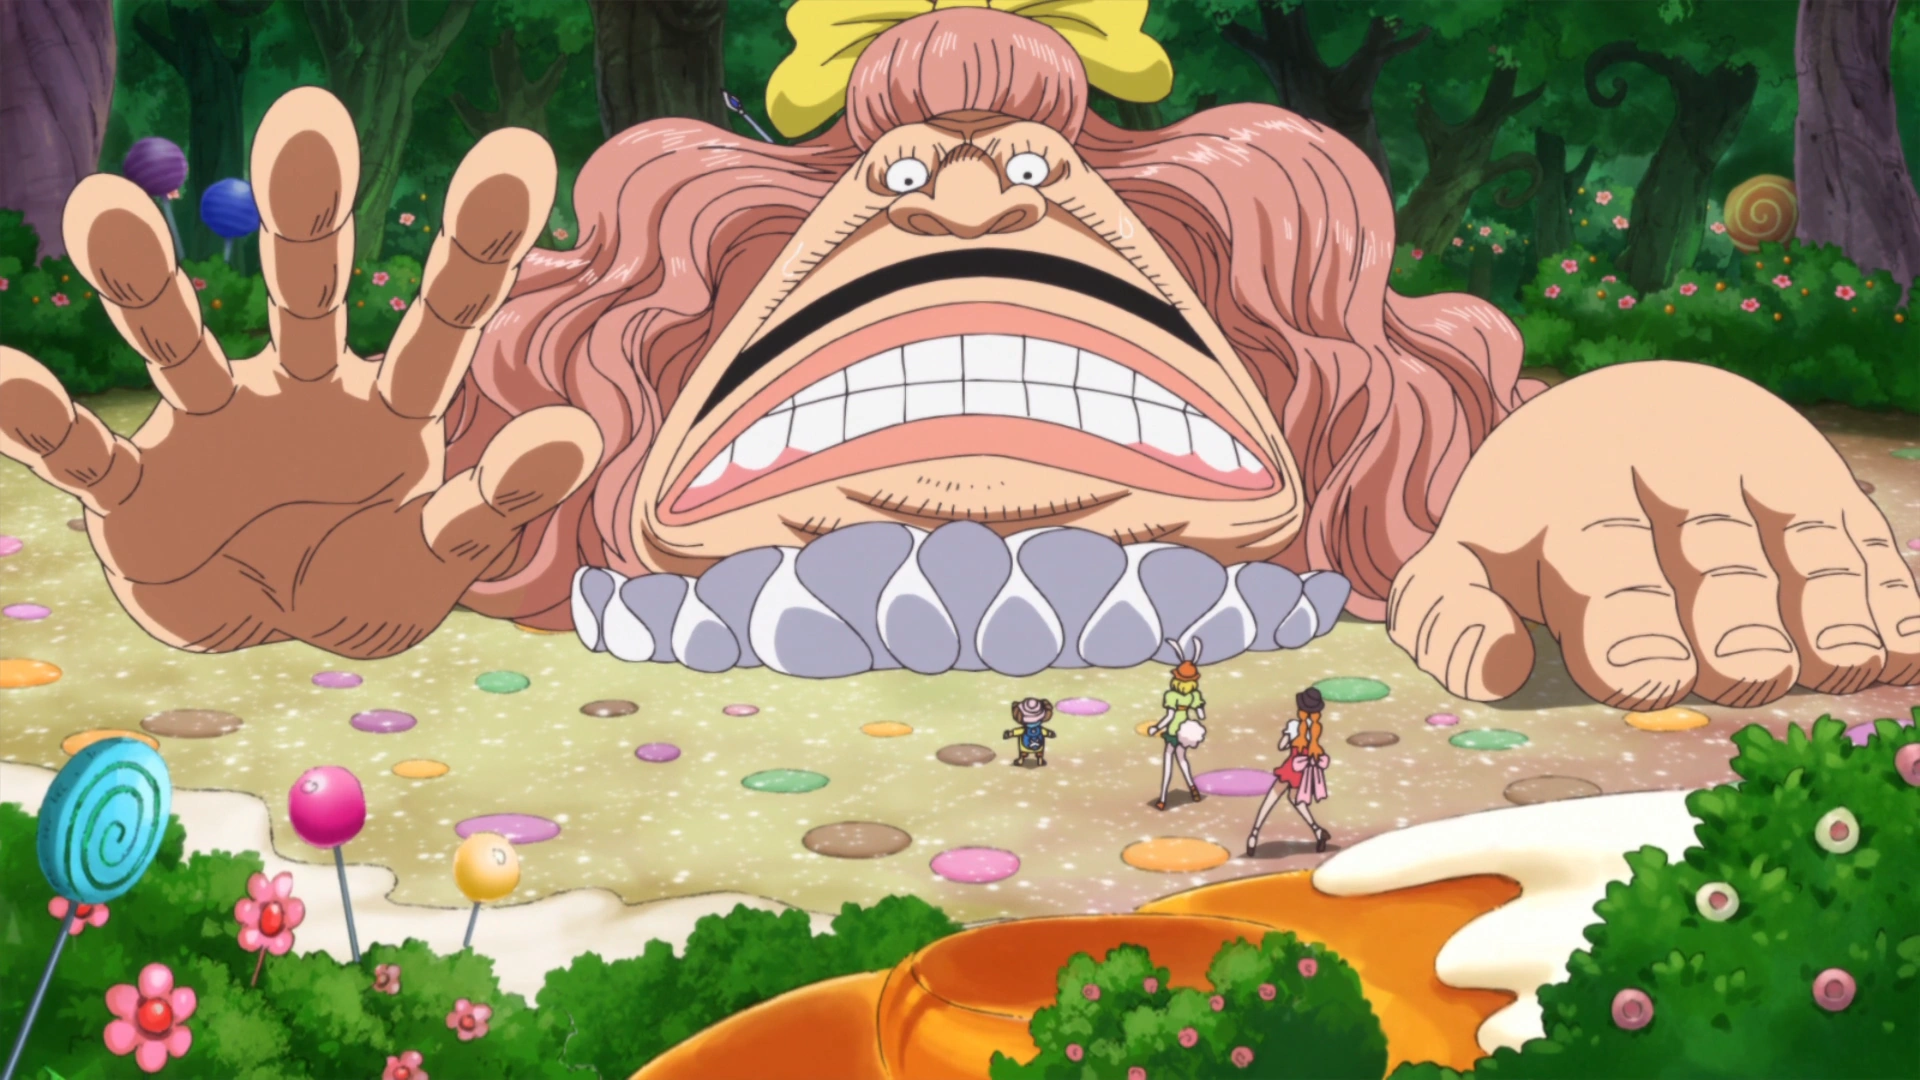
Luffy rejected Hammond's offer of joining the New Fish-Man Pirates and the fish-man prepared to attack. Franky activated Coup de Burst and the ship flew through the bubble surrounding Fish-Man Island. The ship then fell into a current and the crew got separated. Chopper, Luffy, Sanji, and Usopp were seen again in Camie's house meeting and getting reacquainted with Camie. Camie introduced them to some of her friends, the Medaka Mermaid Quintuplets, and took them to Mermaid Cove where they met more mermaids.[22]
As Sanji swam with the mermaids, Luffy, Usopp, and Chopper relaxed. Chopper expressed his surprise that Sanji is back to his normal self, wondering if it was in the chef's nature. He also said that he is glad that Sanji was feeling better, as he had run out of Sanji's blood-type in his blood stock. Chopper states that Sanji has a rare blood-type and that he would not be able to treat any more nosebleeds. While Camie was telling Luffy that Jinbe is not present on Fish-Man Island, Chopper was shocked when a sea serpent appeared behind Usopp. When the Medaka Mermaid Quintuplets informed them that a royal gondola was approaching, Chopper, Luffy, and Usopp hid behind cover while Sanji was being covered by a mermaid. The three brothers of the Neptune House appeared, searching for the people who entered Fish-Man Island illegally. The mermaids denied that they had seen any intruders.
As the three brothers are leaving, Sanji suffered his worst nosebleed to date, forcing the Straw Hats to reveal themselves. As the Ammo Knights started advancing, Chopper pleaded for them to stop and help Sanji, asking if anyone could donate blood. He explained that if they did not get blood for Sanji, he would die in half an hour. Chopper asked if there is anyone who has a blood type of S RH-, going on to say that it is extremely rare. Camie told Chopper that fish-men and merfolk have the same blood as humans and it is transferable. She was about to explain further, but Hammond interrupted her, continuing her explanation. He explained that there has been a rule in place for a long time stating it is forbidden for humans and fish-men to share blood. He went on to say how Fisher Tiger supposedly died. After a gruesome battle, Fisher Tiger suffered a critical blood lost and could have been saved with a blood transfusion, but humans refused to help him. Hammond added that the rule was put in place by humans ages ago so that their bloodline would not mix with "monsters."
Hammond and his group attempted to capture the four Straw Hats, but Luffy repelled them. When a Sea Beast tried to attack Luffy, the Straw Hat captain subdued it with Haoshoku Haki, and Chopper and Usopp were shocked by how the monster acknowledged its loss without actually fighting. Camie stole the royal gondola and helped the four Straw Hats escape. After Usopp noticed Sanji's smirk and Chopper yelled at Sanji not to think about anything as every second matters, Camie then took the group to Coral Hill.[23]
At the port town, Camie and the four pirates found shelter in Madam Shyarly's Mermaid Cafe. Madam Shyarly provided them a room where they could treat Sanji with blood donated by Splash and Splatter, two okama pirates found at a nearby bar. Chopper checked Luffy's blood, saw that Luffy got poisoned by the octopus merman, and was amazed that Luffy's body was able to fight against it. Chopper stayed with Sanji to ensure his recovery while Luffy, Usopp, and Camie went out to see Pappag.[24]


Chopper using his Kung-Fu Point.
When the Ammo Knights tried to arrest him and Sanji because of Madam Shyarly's premonition, the false accusation for mermaid kidnappings, and some of the Straw Hats taking over Ryugu Palace, Chopper used his new Kung Fu Point to fight them off, something that the soldiers and citizens thought was a weird animal. Having slightly recovered, Sanji told Chopper that he was going to see the Mermaid Princess, even if it would cost him his life. Chopper scolded him, telling him that if she was beautiful, Sanji might die instantly.[25]
Sanji then defeated the rest of the Ammo Knights and expressed his disappointment of having to give up his chance of going to Ryugu Palace since they were trying to handcuff him. Chopper scolded Sanji for overdoing things, but Sanji snapped back saying what is done is done. Sanji then complimented him on his Kung Fu Point, and the reindeer happily danced while claiming not to be happy about that compliment. When they heard people screaming that a bloodied person was found and needed a doctor, Chopper turned to their direction and said that he is a doctor. Chopper and Sanji then found a wounded Hatchan, who warned them of an impending attack by the New Fish-Man Pirates.[26]
As Chopper tended to Hatchan's wounds, he and Sanji were met with accusations from the Fish-Man Island citizens. While hovering above Coral Hill on top of Megalo, Luffy saw them and jumped down to meet them. Megalo, who was holding Princess Shirahoshi in his mouth, reached his limit and spat her out. While the Fish-Man Island citizens instantly concluded this as a Mermaid Princess kidnapping, Chopper yelled at Sanji not to turn around or else he might die from another nosebleed.[27]
For the sake of his dream, Sanji decided to turn around even if it meant death, much to Chopper's horror. However, instead of getting a nosebleed, Sanji became petrified. Chopper said that it must have been the effects of the okama blood transfer. The citizens then tied up Chopper and the group, but were interrupted by the arrival of Vander Decken IX. After Luffy pummeled Decken into the ground, he checked on Sanji. Chopper informed him that Sanji had reverted to his normal state. The princess and the entire group then hopped on Megalo and flew away. After Luffy knocked back Wadatsumi, the entire group headed for the Sea Forest.[28]

Much to Chopper's relief, Sanji is back to his old usual self towards Shirahoshi.
After reaching the Sea Forest, Chopper decided it was safe for him to take his time to treat Hatchan's wounds. The group then got acquainted with Franky, Den, and Jinbe. Chopper then told Franky that he was going to lower Hatchan down from Megalo, and he should be ready to grab him. After Hatchan was lowered, Chopper was surprised to see that Sanji is acting like his old usual self in front of Shirahoshi. Nami and Camie soon arrived and Chopper happily realized that Sanji is finally cured of his nosebleed tendencies.[29] Chopper made medicine and listened to Jinbe as he explained the dark past of the fish-men and merfolk as well as the ideals of Queen Otohime and Fisher Tiger.[30]
After Jinbe finished his story, Chopper and Nami had a friendly conversation with Princess Shirahoshi. When Hatchan started explaining Hody's plan, a large Visual Den Den Mushi appeared and the group watches a broadcast by Hody himself.[31] Hody explained his plan of recreating the Ryugu Kingdom with himself as the ruler and then addressed the Straw Hat Pirates. Once he showed the imprisoned Zoro, Usopp, and Brook, Chopper was shocked. After Hody finished his speech, Luffy resolved to fight him. However, Jinbe told him not to. Chopper and Franky then correctly guessed that it was because they are humans.[32] Chopper then watched Luffy and Jinbe trying to settle their dispute on how to deal with Hody.[33]
Battle for Fish-Man Island[]

Jinbe, Shirahoshi, and the Straw Hats confronting the New Fish-Man Pirates at Gyoncorde Plaza.
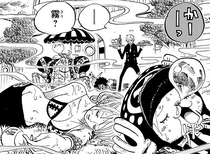
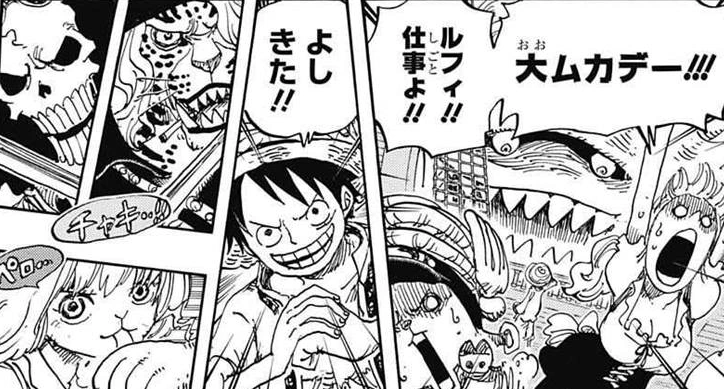
Chopper later appeared in Gyoncorde Plaza with the rest of the Straw Hats preparing to fight against the New Fish-Man Pirates.[34] When Franky mentioned a new weapon in the Soldier Dock System,[35] Chopper got on board along with Usopp, Nami, and Pappag. He kept asking Usopp if he could drive it. He then rode out on the Brachio Tank V, calling himself "Commander Chopper."[36]
When the Brachio Tank IV fell in a pitfall created by Daruma, Chopper was thrown out with the others by Franky. He then went underground, using his new Horn Point and hindered Daruma in making more pitfalls. He launched him back to the surface and when arrived there, Luffy mistook his new form for a stag beetle. Chopper then faced off against Daruma.[37] Everyone panicked when they saw Noah bearing down on Fish-Man Island.[38]
Chopper was underground with Daruma when Usopp called out for him. Dosun got behind Usopp and tried to take him by surprise, but Chopper intervened using Horn Canon: Elf to push Dosun back. While Usopp prepared to fight Daruma, Chopper prepared to fight Dosun.[39]
Chopper countering Dosun's hammer.
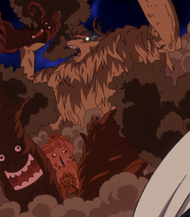
Later, Chopper commented on the new attack from General Franky, but was shocked to see that Franky was the attacker instead of the robot. Dosun tried to take advantage of this distraction, but Chopper transformed into his new Heavy Point and matched Dosun's T-Shot with a Heavy Gong. As Chopper recoiled from the force of the attack, Zoro commented on the new monstrous appearance of the transformation, which Chopper willingly accepted.[40]
Later, Chopper rampaged in his Monster Point, much to Usopp's surprise. Usopp nervously told Chopper that the situation was not that serious for him to go like that. Then, Chopper turned to him and said that he was alright, meaning that Chopper was in fact still conscious.[41]
Chopper defeating Dosun.
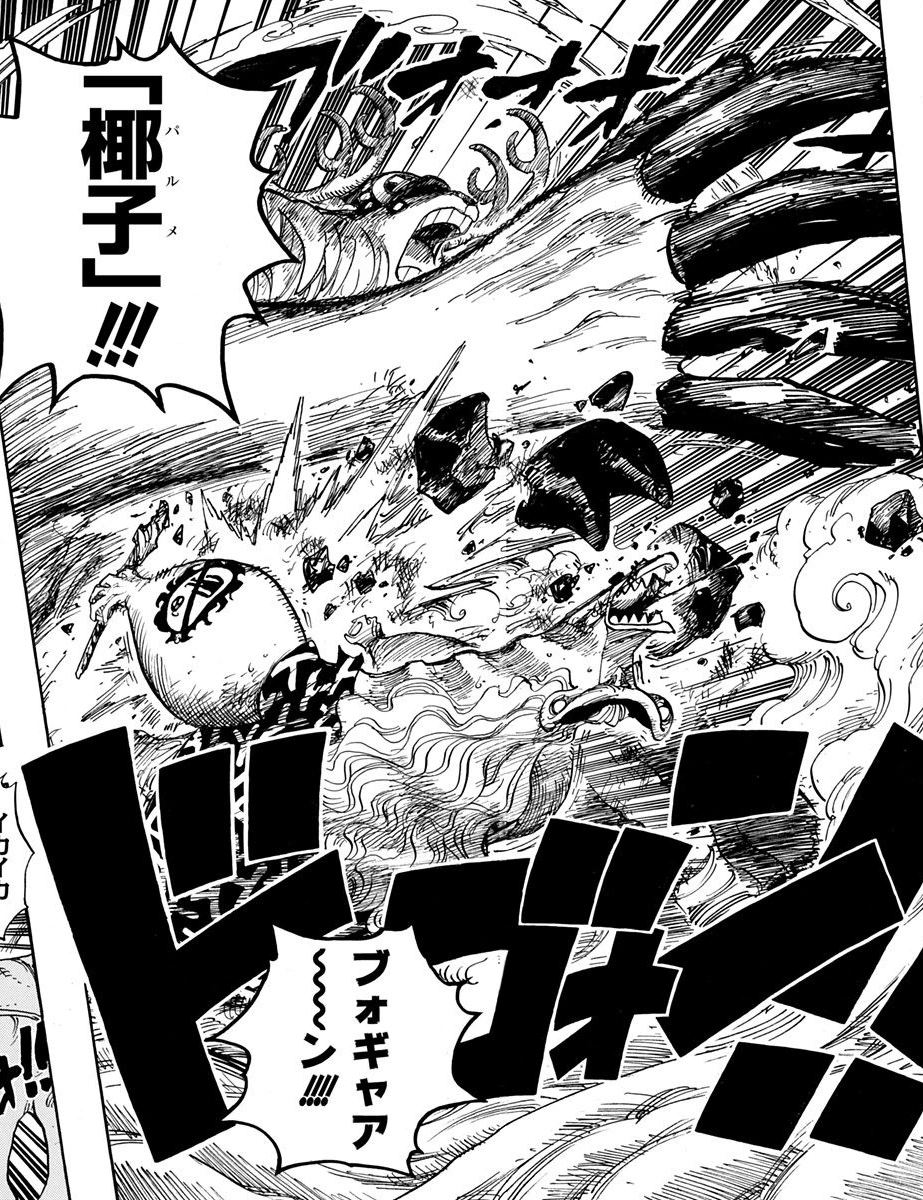
After explaining to Usopp that he can use one Rumble Ball to stay in Monster Point for three minutes, he turned back to Dosun and easily knocked out the fish-man with his Kokutei Parmei attack.[42] After all the leaders of the New Fish-Man Pirates had been defeated, the Straw Hats looked into the sky as Luffy tried to destroy Noah. When the Sea Kings appeared and stopped Noah from falling, saving the ship and the island at the same time, everyone on Fish-Man Island celebrated.[43]
The After Battle Celebration and Departure[]
Moments later Shirahoshi brought Luffy to the plaza, dismayed to inform everyone that Luffy had lost a lot of blood. Chopper then asked the citizens if any of them had type F blood. He recalled the law prohibiting fish-man-human blood transfusions, but Jinbe stepped up and volunteered to donate blood, saying that he does not need to follow the law, since he is a pirate. Chopper carried out the procedure.
Luffy invited Jinbe to join the crew,[44] but Jinbe declined, saying that he has some unfinished business. Chopper and the rest of the crew informed Jinbe he is welcome to join whenever he is ready.
Neptune invited the crew to a banquet and the crew partied at Ryugu Palace with the royal family.[45] After partying for a while, Chopper was enjoying himself, when Jinbe recounted the conflict between Aokiji and Akainu. Chopper proudly stated he had already heard about it. He then expressed dismay at the statement that the Blackbeard Pirates are hunting strong Devil Fruit users. He believed that he would be a target, but Usopp pointed out that they would not need the Hito Hito no Mi.[46] After the party ended, Chopper was talking with Usopp about the treasure stolen by Caribou that Luffy, Zoro, and Sanji went to collect. He suggested they help them search and was surprised about how high Caribou's bounty is.[47] Chopper and the rest of the crew were later shocked that Luffy challenged Big Mom.[48]
Afterwards, Chopper and the rest of the crew bid the citizens of Fish-Man Island farewell and promised (except Franky and Zoro) Shirahoshi to take her to the surface someday. The crew began to set sail with the Thousand Sunny and head towards the New World.[49]
On their way to New World, Nami put Chopper to guard while she took a shower using her Shower Tempo. Chopper remarked how the Shower Tempo clouds look sweet and yummy like cotton candy and showed his concern if the crew would be alright with Nami not on the deck. After the crew reached the New World, Chopper commented on how the sea of New World looks red.[50]
Dressrosa Saga[]
Punk Hazard Arc[]
Arrival at Punk Hazard[]
Soon after entering the New World, the crew spotted an island surrounded by a sea of flames. The Straw Hats received a distress call from someone who seemed to be in trouble and mentioned something about a samurai. After Luffy decided to go rescue the person, Chopper expressed relief that he was not one of those chosen to accompany Luffy on his exploration mission, stating that he is not good with heat.[51]

Sanji finds Chopper and the remaining crew knocked out by sleeping gas.
While Usopp, Robin, Luffy, and Zoro fought a dragon, Chopper and other Straw Hats that remained on the Thousand Sunny were knocked out by sleeping gas and all, except for Brook, were abducted. The captured Straw Hats later woke up in a cell and found parts of a samurai's still-living head. After putting the pieces of the head back together, the group got information from Kin'emon. Once they decided to break out, Franky used his Radical Beam to blast a hole in the wall, allowing the crew to escape. They ran down through the halls of the complex and stumbled upon a room filled with giant children. The children were excited to see them, but Sanji just wanted to escape the room before they are recaptured.[52]
While their pursuers came after them, the children begged the pirates to help them escape. Nami could not ignore their cries and decided to help them. Sanji, Franky, and Chopper attacked the men in the gas masks. Nami and Chopper ran away with the children while Sanji and Franky held the enemy back. Since he was entrusted with protecting the children, Chopper was determined to live up to Sanji and Franky's expectations. As they ran, the children told Nami and Chopper about how they were abducted and that they were inflicted with some kind of disease. Nami was suspicious and told Chopper to investigate the children later. They then ran into a room with corpses frozen in the walls, floor, and ceiling.[53]

Chopper (in Sanji's body) gratefully accepts the headbands Usopp made to identify the scrambled crewmembers.
Frightened, the group escaped and met up with Franky, Sanji, and Kin'emon, and they all ran out of the building and into the shocked view of the Marines of G-5, Smoker, Tashigi, and Law. They immediately turned around and tried to find another exit to avoid any combat. As they were running away, Law used his ability to rearrange the personalities of the Straw Hat Pirates, putting Chopper in Sanji's body and Franky in Chopper's body. After escaping, Chopper (in Sanji's body) helped keep Nami (in Franky's body) from hurting Sanji anymore than she can. The group reunited with Zoro, Luffy, Robin, Brook, and Usopp at the back side of the Punk Hazard facility. The Straw Hats tied up Brownbeard and brought each other up to speed on the current situation. After interrogating Brownbeard, they learned about the scientist Caesar Clown.[54]
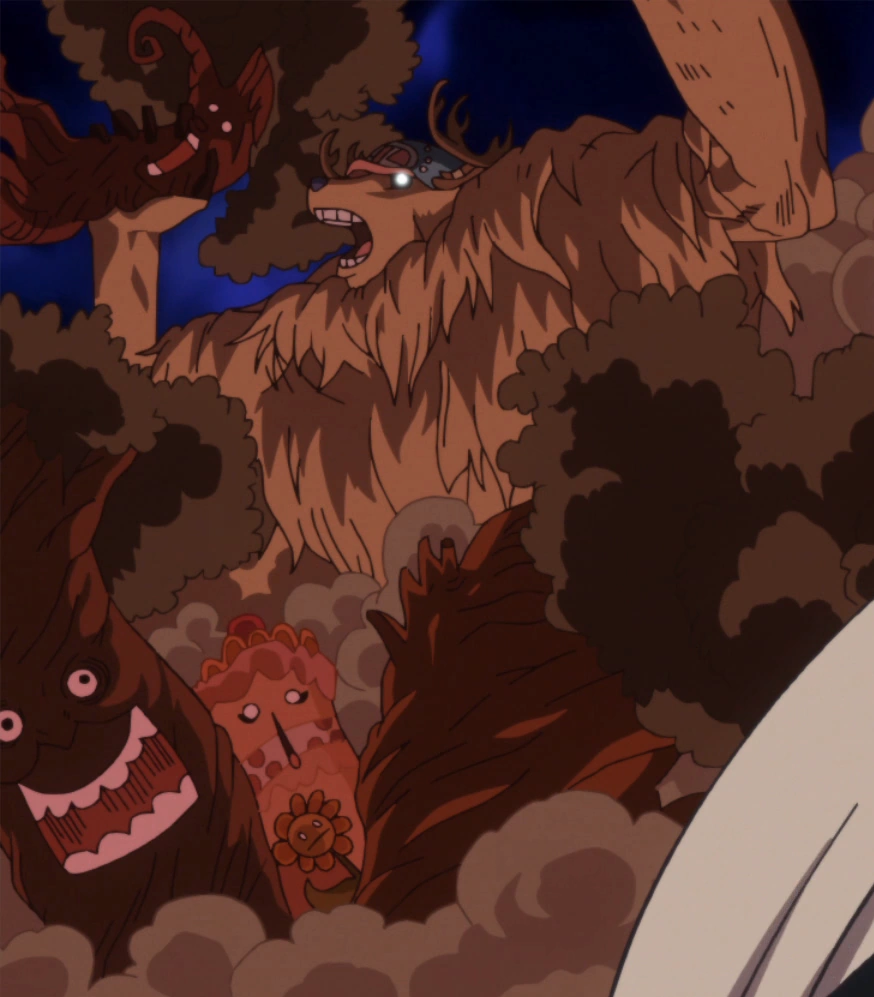
Kin'emon later left the group to find his torso and Sanji, Brook, and Zoro go out to find him. In the meantime, Chopper began to examine the children and the source of their sicknesses, while Franky (in Chopper's body) experimented with Chopper's abilities and made weird faces. Before long, several of the giant children started to feel pain, saying that they need the candy usually given to them in order to make the pain go away. However, Chopper stated that the candy contains a drug that the children became addicted to, and Luffy's group learned that the children had been experimented on. One of the giant children hit Luffy and the others went on a rampage, forcing Usopp to put them to sleep. Chopper expressed his sympathy towards the children, and Luffy's group decided to help the children and found Caesar. The group tied up the giant children so that they could not destroy anything else. Luffy, Usopp, Franky, and Robin left Chopper and Nami to watch the children while they headed to Caesar's lab. While they were gone, the Yeti Cool Brothers attacked and gunned down Brownbeard. By the time Luffy's group returned, they had kidnapped Nami.[55]
Luffy and Franky decided to go after the brothers. Franky asked Chopper to give him some Rumble Balls. Chopper gave him one and advised him on how to use it. However, Franky immediately took one, transformed into Monster Point, and went on a rampage while chasing after Luffy.[56]
Alliance with Law and a Plan to Defeat Caesar Clown[]

Chopper tied to Law's hat.
After the defeat of the Yeti Cool Brothers, Luffy, Franky, Nami, and Law returned to the hideout. Chopper and the rest were shocked that Luffy formed an alliance with Law. Law then returned Chopper to his body and Franky to his. Chopper scolded Luffy and Franky for causing damage to his body. When the Straw Hats insisted for Law to assist them in helping the children, Law asked to take Chopper with him to help find the medicine that was used on the children. Usopp tied Chopper to Law's hat, while the rest laughed at Law. Chopper was tied to his nodachi instead.[57]
Law later warped both himself and Chopper to the back side of the facility to began their part of the plan. The two briefly discussed on how they are going to investigate the drugs. They were later seen inside, where Law managed to lead Monet away while Chopper (hiding inside Law's bag) is left in the room unnoticed. Chopper then left his hiding spot and started sneaking around in the facility.[58]
He later found Luffy's group in Caesar's clutches. Before Caesar sent them outside to die by the poisonous gas cloud created by Smiley, a piece of paper was hurled at Chopper. Chopper read a note, which told him not to do anything. He later ran passed Caesar's location, planning to escape the facility. Chopper managed to acquire enough information of the drug and even got a sedative. As he ran through the hallway, Monet noticed him.[59]
Chopper later met up with Mocha and explained to her about Caesar's deception and using the kids for his experiments and how if Caesar continued to use them, the children would die before they reach adulthood. Mocha remembered her friends promising to each other that when they get older, they would reunite and go on an adventure. The gravity of the situation became clear to Mocha and Chopper promised that he and the rest of the Straw Hat Pirates would save her. While Mocha guarded the candy in the Biscuits Room, Chopper attempted the hold back the children. He later entered Monster Point and was fending off the children in Building B. However, Chopper was unable to fight without hurting the children and was beaten down. When the Rumble Ball wear off, the children ran past him and made their way to the Biscuits Room. At this point, Brook, Kin'emon, Zoro, Nami, Usopp, and Robin came to his aid. Chopper told them that he was trying to prevent the children from getting their candy with the aid of Mocha. The group quickly ran after the children to the Biscuits Room. Regardless of Robin's attempt to hinder them, they went after Mocha, who was holding a piece of candy. After Chopper told Mocha to run, Monet appeared and told Mocha not to keep the candy all to herself and that she should share the candy with the other children.[60]
Monet ensnaring Nami and Chopper with her demonic like snow body.
Chopper and Nami then tended to Robin, but she assured them that her wound was only a cut. Monet tried to attack them when they attempted to run after the children, but Zoro quickly blocked her. After getting hit by Nami's Heat Egg, Monet dove into the snow and stopped Nami, Chopper, and Robin from leaving by creating a wall to block their path. An enraged Monet suddenly ensnared Nami and Chopper and prepared to bite Chopper. Nami swiftly moved Chopper out of harm's way and Robin used her Hana Hana no Mi abilities to shatter Monet, saving Chopper and Nami from another attack. Zoro then cut down the snow barrier, allowing Robin, Nami, and Chopper to go after the children.[61]
Chopper, Nami, and Robin then tried their best to keep the berserk children from catching up to Mocha. While Nami and Robin hinder them, Chopper sedated them one at a time. Despite their efforts, some of the children managed to get around the Straw Hat Pirates and caught Mocha. Having no choice, Mocha put the entire batch of candy in her mouth as Chopper, Nami, and Robin watched in horror. Despite Chopper's pleas, she swallowed all the candy. Mocha then began coughing up blood, due to the serious overdose of the drug. As the children were shocked at what they saw, Chopper yelled at them, saying that Mocha sacrificed herself to save them. As they rushed to Mocha, Sanji and the G-5 Medical Team finally arrived to help. Some of the Marines had Mocha moved to an examination room so Chopper could tend to her condition. Chopper complimented Mocha on her bravery and hoped that he could save her.[62]
Nami, Robin, Sanji, the children, and the G-5 with them went on ahead to Building R as Chopper and the Marines with him treated Mocha.[63] Once Chopper was finished with the treatment, they proceeded to Building R as well. They later ran into Brook and a petrified Kin'emon.[64] Once everyone reached Building R safely, they boarded a rail car and made their escape.[65]
Aftermath[]

Chopper celebrating at the party.
Sometime after Baby 5 and Buffalo's defeat, Law treated the children's conditions in a nearby tanker. When Chopper thought that Law had done something horrible to the children, he screamed and repeatedly called Law a murderer. After Law came out of the ship, Chopper demanded to know what he had done to the children, and Law answered by telling him to mind his own business, and that he had just finished cutting them into pieces. Frightened by this blunt answer, Chopper ran inside and was relieved to see that the children were okay. The kids told Chopper that Law took out all the NHC10 from their bodies and that they felt great, although being cut into pieces was pretty scary. They then talked about Mocha and what she did to save her friends, and asked Chopper if she would wake up. He assured them that she would wake up and that everyone would return home, away from this nightmare. He then left as Tashigi came in and told the children the Marines would take care of them from then on. Later, after Mocha woke up, an overjoyed Chopper hugged her in relief.[66] Everyone then had a feast together.
After the party ended, Chopper and the rest of the Straw Hats began to prepare to set sail again. As they were leaving, Nami told Chopper that Vegapunk would help cure the kids from the effects of the candy. Chopper reacted by saying that it that was very good news. While they made their way, the G-5 Marines put up a banner to prevent the kids from seeing the Straw Hats while yelling things like Marines are justice and pirates are scum. The kids, however, said that they were the ones who saved them, while remembering all the Straw Hats did for them. The G-5 Marines continued to speak ill of pirates and praised the Marines, but Tashigi interrupted them and said that they were a disgrace. The G-5 Marines responded by saying that if they did not badmouth the pirates, they would come to admire and respect them. Eventually the Marines lowered their voices and banners to let the kids say their goodbyes, while Chopper and the rest of the Straw Hats waved them goodbye, as they made their way to their ship.[67]
Chopper and the Straw Hat Pirates were later seen on a Sea Slope, which Law mentions is pretty common in their current area. A little while later, Luffy started to explain that they formed an alliance to take down an Emperor. Chopper continued to treat Caesar's injuries, until he began to say that they are practically making themselves targets to the big shots of the New World. He continued to taunt them, and called them a larger group of idiots and that only death awaited them. Sanji responded by kicking Caesar, which in turn angered Chopper, saying that he was still treating his wounds, and that Sanji could kick him after he was done with that.[68]
Law then proceeded to explain the operations and underworld deals of all the major pirates of the New World and that Doflamingo, also known as Joker, is the one with the most influence in the underworld.[68] Law continued on, saying that Doflamingo's biggest client is Kaidou, which greatly shocked Kin'emon and Momonosuke. Law continued to explain the next goal of their plan, which is to cut down Kaidou's forces as much as possible, specifically his army of synthetic devil fruit users. When Law informed the crew that the current number of Synthetic devil fruit users is about 500, Chopper, Usopp, and Nami voted against the plan but without success. Law assured the crew that the number would not grow any time soon, due to the capture of Caesar Clown. Chopper complimented Caesar about his manufacturing of the synthetic devil fruits which made Caesar quite happy and Usopp quite angry. Law then said that it was really Vegapunk that developed a theory on the devil fruits, and that Caesar only applied it, which made Chopper lose all interest in Caesar. Law concluded by saying that the devil fruits are being made on their next destination, Dressrosa, and also warned the crew to not underestimate Doflamingo. Luffy then asked Kin'emon if he had business on Dressrosa and Kin'emon revealed that one of his comrades was being held prisoner there.[69]
Later that evening, Chopper and Usopp went on guard duty while wearing samurai armor.[70] The next morning, everyone read the news about Doflamingo's resignation from the Shichibukai. They saw that the paper also explained Luffy and Law's alliance and the alliance among Eustass Kid, Basil Hawkins, and Scratchmen Apoo.[71]
Dressrosa Arc[]
The Next Objective[]
After Law contacted Doflamingo to inform him that they would bring Caesar to Green Bit, Chopper had a meal with the rest of the crew while Kin'emon and Momonosuke told them the story about how they were shipwrecked and drifted to Dressrosa, how Momonosuke was separated from his father, and how Kanjuro was captured. The Thousand Sunny later approached Dressrosa.[72]
After disembarking, the group split into three teams. Chopper was part of the team that guarded the Thousand Sunny. Chopper freaked out when he saw that Sanji was not part of his group.[73]
Momonosuke later played shogun with Chopper, Nami, and Brook. When Brook started singing a song, they heard strange noises and a voice coming from the men's room.[74]

Nami, Brook, Chopper and Momonosuke transformed into art.
The voice belonged to Giolla of the Donquixote Pirates, who had invaded the ship along with several of her subordinates. Using her Devil Fruit power, she turned the men's room into abstract art and then did the same to Nami, Chopper, Brook, and Momonosuke. Hoping to lure Giolla away from the ship, Chopper and Brook left on the Shark Submerge III while Nami and Momonosuke rode the Shiro Mokuba I, but Giolla transformed the ship into art anyway, rendering it unable to sail.[75]
Chopper, Nami, and Brook attempted to fight back and managed to defeat Giolla's men and destroy her ship. Giolla used her Devil Fruit powers to turn Chopper's hooves and horns into art, rendering them useless. The three Straw Hats then received a call from Law. They begged Law to come save them, but instead, Law ordered them to bring the Thousand Sunny to Green Bit.[76]
Giolla later trapped Chopper, Momonosuke, and Nami in a deadly painting that would slowly suffocate them in ten minutes. Brook acted nonchalant, seemingly caring more about the art that was being created than his friends' lives. The skeleton asked Giolla to turn his violin and cane back to normal so that he could add accompaniment to their death. Once Giolla complied, Brook then slashed her using Drawing Song Hitoyogiri, defeating her and causing her power to wear off, turning everyone back to normal.[77]
Nami's group incapacitating Giolla.
Later on, Nami's group kept attacking Giolla to ensure she was completely incapacitated.[78] They discussed what to do with Giolla and wondered why Law was not handing Caesar back to Doflamingo. Giolla proudly informed them that Doflamingo never quit the Shichibukai and explained his gambit to them, leaving them shocked and worried. As they got close to Green Bit, Nami's group was horrified to see Fighting Fish attacking the Sunny. When they saw Doflamingo approaching the ship, they cried in terror but were overjoyed and relieved when Sanji intercepted him.[79]
A Change of Plans[]
When Sanji was overwhelmed and immobilized by Doflamingo's strings, Nami's group panicked. Doflamingo was about to deal a lethal blow to Sanji, but Law intervened by using Shambles and teleported Sanji, Caesar, and himself to the Thousand Sunny. Law then instructed Nami's group to head for Zou. Nami's group was reluctant to leave behind the other Straw Hats, but they complied when they realized that the ship was facing threats from both Doflamingo and Fujitora. After blocking an attack from Doflamingo, Law informed the Straw Hats about Doflamingo's Devil Fruit powers and instructed them to go to a place without clouds. Law then took Giolla hostage, giving Nami's group enough time to escape using Coup de Burst.[80]
After sailing far away from Dressrosa, Chopper expressed his concern for Law.[81] When Zoro finally made contact with Luffy at the Corrida Colosseum, the group on the Sunny engaged in a conference call with both Luffy and Franky's group. After everyone was brought up to speed and learned about the true situation on Dressrosa, Sanji decided to sail back to Dressrosa to carry out their assault on Doflamingo, much to Chopper's dismay.[82]
Through the Den Den Mushi, the group on the Sunny heard the skirmish occurring at the Corrida Colosseum and was shocked to hear that an Admiral was also present in Dressrosa. To make matters worse, the return trip was cut short by the appearance of the Big Mom Pirates, who were after Caesar Clown. Since returning to Dressrosa was not a wise option, Chopper and the others on the Thousand Sunny continued on to Zou.[83]
The Next Island[]

Chopper uses Caesar to guard against enemy fire.
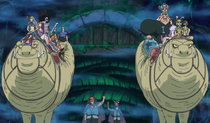
Chopper and the others managed to deal some damage to the enemy pirate ship when Chopper assumed Monster Point and used Caesar as a net to catch incoming cannonballs that Brook had slashed and frozen with Soul Solid, allowing Sanji to kick them back with Diable Jambe, igniting Caesar's gas and sending the fiery cannonballs crashing into the side of Big Mom's ship. Since none of the crew present knew how to use the Coup de Burst, they eluded the Big Mom Pirates thanks to a fog Nami created.[84] They arrived at Zou the next day. After forcing Caesar to take them on the giant elephant's back, they came across Sheepshead chasing after Tristan. After saving Tristan and running from Sheepshead, they found Zou's ruined city covered in poison gas and the devastated Mink Tribe. Pedro begged Chopper's group to help Inuarashi and Nekomamushi.[85] When Caesar acted pleased on how destructive the poison gas weapon used by the Beasts Pirates was, Chopper angrily beat him up.[86]
Some time later back on the Thousand Sunny, Chopper was eager to go and save Tristan, and had to berate Caesar for wanting to stay on the ship. After the brief conflict with another band of pirates, Chopper yelled at everyone to come to his location quickly.[87]

Chopper and Caesar creating an antidote to treat the Mink Tribe from the effects of Koro.
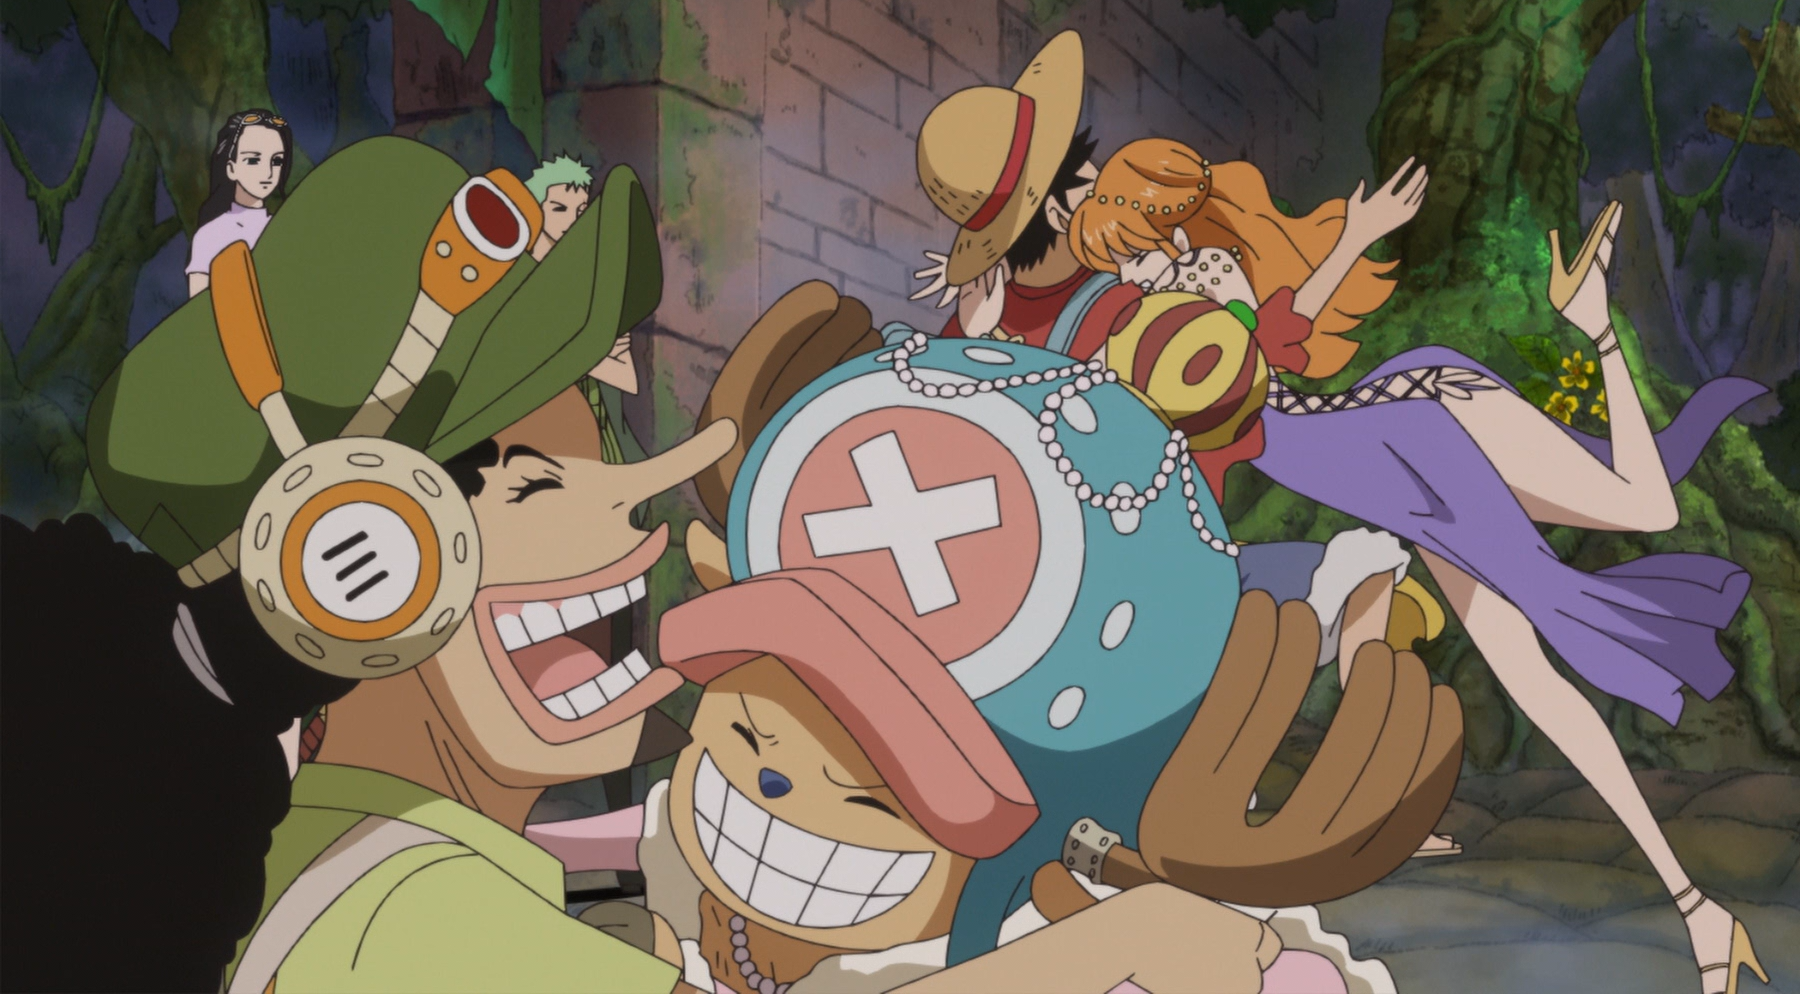
After fending off Zou's enemies and forcing Caesar to neutralize the poison gas, Chopper and his group then get to work on treating the injured minks, saving them from certain death and gaining their gratitude.[88][86]
Whole Cake Island Saga[]
Zou Arc[]
Big Mom's Invitation[]

Vito captures Chopper and Nami.
Several days later, they discovered that two members of the Big Mom Pirates, Pekoms and Capone Bege, had arrived at Zou. Sanji and Brook then spoke with the Big Mom Pirates members in private. After Bege shot Pekoms in the back for agreeing to let the Straw Hats go, he summoned his men from his body and captured Caesar and Sanji's group, except Momonosuke, who had locked himself inside his room. Bege then took them inside his body to continue the conversation with the Straw Hats. While talking to Sanji, Bege gave him an invitation to the Big Mom Pirates' wedding Tea Party. Bege also identified him as the third son of the Vinsmoke Family and indicated he would be marrying Pudding, the 35th daughter of the Charlotte Family.[89]
Sanji frees Chopper, Nami, and Brook from Bege's captivity.
As the other Straw Hats reacted to the news, they remembered Sanji's mysterious comment that he was born in the North Blue. After writing a note, Sanji gave it to his friends. He apologized to his crew, explaining it was not his intention to hide things from them. He then threw Nami, Chopper, and Brook out of Bege's body.
Sanji snatched a rifle from one of the Fire Tank Pirates and held Caesar at gunpoint to prevent Bege's crew from going after his comrades. As Nami, Chopper, and Brook plead for Sanji to stay with them, Sanji promised that he would return before Bege fled with him and Caesar. His disheartened friends were now left with just a note which made light of the situation.[90]
Reunion with Luffy[]

Chopper and Nami reunite with the rest of the crew.
After Luffy and his group arrived at Zou, Chopper and Nami resided in Rightflank Forest. Nami was sleeping on a giant sheep mink when Chopper informed her that Luffy and his group arrived. Chopper and Nami then quickly went to greet them.[91]
While feasting with the minks, Chopper and Nami explained to Luffy's group about how the Thousand Sunny group escaped the Big Mom Pirates. When Chopper heard that Duke Inuarashi regained consciousness, Chopper and two mink doctors, Miyagi and Tristan, went to check up on him.[92]
After Wanda brought the rest of the Straw Hats to Duke Inuarashi's home, Chopper welcomed them. When Wanda mentioned about a weapon Jack used against the Mink Tribe, Chopper revealed that it was one of Caesar's poison gas weapons.[93]
When Wanda finished with her recollection on the devastation Jack caused and the Mink Tribe's salvation, Chopper decided to visit Nekomamushi and the Guardians. The Straw Hats, Wanda, and Carrot then traveled to the Whale Forest.[94]

The Straw Hats go off to see Nekomamushi.
After explaining about the circumstances concerning Sanji's departure from Zou, Chopper wondered if they will never get to see Sanji again. Zoro expressed apathy for the situation, much to Chopper's anger. After Luffy declared that he would ask Sanji himself, Chopper told them that Pekoms was left behind, so they could ask him some questions.
After arriving at the Whale Forest, Chopper was told by a reindeer mink, Milky, with whom he is entranced, that Nekomamushi was inside his home taking a bath, which shocked him.
When Chopper found Nekomamushi eating lasagna while taking a bath, he yelled at the feline mink that he was not allowed to take baths, as his wounds would reopen, and was supposed to eat light foods and not use his left hand. Nekomamushi replied that he loved freedom as he walked out of the bath, and Chopper yelled at him for ignoring his orders. When he started playing with a ball, his wounds reopened. Nekomamushi ended up in bed, which he claimed was because he wanted to be. Chopper gave him an injection while he played with a foxtail. Nekomamushi claimed that he felt better already, but Chopper smacked him and told him to lie down.[95]
Chopper, Robin, Usopp, and Brook then went to see Luffy, who was visiting Pekoms alongside Nami and Zoro. Chopper was in disbelief to see Nekomamushi following them. After Nekomamushi carelessly injured himself while greeting Luffy and Zoro, Chopper panicked and once again tended to his wounds as Law and his crew arrived. After Law warned them about the threat of Kaidou, Nekomamushi partied with both the Straw Hats (except Robin, Franky, and Brook) and the Heart Pirates.[96]
Revelations and a New Alliance[]
On the next morning, Chopper and his group heard a bell ringing and realized that Kin'emon and Kanjuro had arrived. They quickly rushed to find them, fearing what would happen if the Mink Tribe meets the samurais. The Straw Hats managed to intercept Kin'emon, Kanjuro, and Momonosuke just as they arrived at Kurau City and tried desperately to keep them hidden. However, as Nekomamushi and Inuarashi were fighting, Kin'emon and Kanjuro revealed themselves. Contrary to what the Straw Hats expected, the Mink Tribe welcomed the samurais and revealed that Raizo is safe. The Straw Hats were stunned to learn that the minks knew about Raizo all along and went to great lengths to keep him hidden despite the abuse they suffered.[97]
The Straw Hats were further shocked when Kin'emon revealed that Momonosuke was not his son, but rather the heir to the daimyo of Kuri. Inuarashi and Nekomamushi then took the Straw Hats, Law, and the samurais to Raizo's location in a secret area inside the whale-shaped tree. As they journeyed there, Chopper and the male pirates began fantasizing on what Raizo would be, imagining him to be a stereotypical ninja. When they saw Raizo, they were shocked at his ugly appearance, but still begged him to perform tricks. Raizo initially refused, but relented after the Straw Hats began sulking. They were then awestruck as Raizo performed his ninja arts.[98]
Chopper, Luffy, and Usopp then accompanied Kin'emon, Kanjuro, and Raizo as they stood outside the Whale Tree, expressing their sorrows as they saw the state Zou was in after Jack's attack. When Robin deciphered the red poneglyph hidden in the Whale Tree, Nekomamushi called them back in. Inuarashi then explained to the Straw Hats about the four Road Poneglyphs and they listened in anticipation as he revealed how they can lead to Laugh Tale. When Nekomamushi revealed that Kaidou and Big Mom each possessed one Road Poneglyph, Chopper, Usopp, Nami, and Brook were deeply shocked. The Straw Hats were then surprised when Nekomamushi revealed that Momonosuke's ancestors created the poneglyhs. However, the samurais explained that Momonosuke never inherited the knowledge of the poneglyphs due to the execution of Lord Oden at the hands of Kaidou and the shogun of Wano. The Straw Hats also learned that Oden was part of Roger's crew and had been on Laugh Tale with him as well as the Beasts Pirates' objective in obtaining the secret that Oden knew.[99]
Right after Luffy agreed to form an alliance with the samurais and the Mink Tribe,[100] the group left the secret room. Afterwards, Chopper and the others learned that Inuarashi and Nekomamushi traveled with Oden and had been on the ships of both Whitebeard and Gol D. Roger. The alliance decided to split up to accomplish different tasks and meet up again at Wano. Chopper, Nami, and Brook chose to accompany Luffy in his mission to rescue Sanji. However, before they could start their operation, they felt Zou shaking and heard Zunesha crying.[101]
As everything shook around them, they witnessed Luffy and Momonosuke's ability to hear Zunesha's voice. They then heard from Momonosuke that Jack returned to Zou and started attacking Zunesha. On Momonosuke's command, Zunesha sank Jack's fleet with one blow. With the threat of Jack ended, everyone became calm again.[102]

Chopper and the minks treat Zunesha's injured leg.
Chopper, Miyagi, and many other minks then treated Zunesha's injured leg. After Luffy retrieved Pekoms and Pedro volunteered to join the Sanji Retrieval Team, Luffy's group departed from Zou. Everyone, except the Straw Hat members left behind, were shocked when Luffy jumped off Zunesha with his party.[103]
Journey to Whole Cake Island[]
As they sailed towards Whole Cake Island on the Thousand Sunny, Chopper, Nami, and Brook were still recovering from the shock of Luffy's stunt at Zou. They were then surprised to see Carrot has snuck aboard the ship. After she begged them not to turn back, the group allowed her to come along. When the crew got hungry, Luffy insisted on preparing a meal himself because Nami was going to charge them money for the food.[104]
Chopper and the rest of the Sanji Retrieval Team then learned from a newspaper about the Blackbeard Pirates' attack on the Revolutionary Army's headquarters on Baltigo, surprising everyone on board. After passing through a storm, Luffy presented his dish, which the group did not enjoy in the least. Luffy then admitted that he used up all the food they had and the group found themselves in a food shortage crisis.[105]
Whole Cake Island Arc[]
Entering Totto Land[]

Chopper panics when Luffy is brought to the brink of death.
A few days later, the group was famished from the lack of food and overheated as they passed through boiling waters. They were saved from starvation when Luffy managed to catch a gigantic fish. Chopper quickly get the encyclopedia with information on the fish. The group, except for Luffy, enjoyed a meal prepared by Nami using Sanji's recipe. Luffy was incapacitated by food poisoning after eating the fish's toxic skin, causing Chopper to worry for him. After entering Big Mom's waters, the group was approached by a ship belonging to Germa 66.[106]
When they saw a hooded man aboard the ship, the group mistook him for Sanji until the man revealed himself to be Sanji's younger brother, Vinsmoke Yonji. Chopper was deeply shocked due to Yonji's resemblance to Sanji. When Luffy's condition worsened, Chopper begged Yonji for an antidote. Yonji then taunted the group to try to take the antidote by force. Sanji's older sister, Vinsmoke Reiju, appeared and kicked Yonji for his rudeness. She then boarded the Thousand Sunny and cured Luffy by sucking the poison out of him. With Luffy's life saved, Chopper was overjoyed. Yonji and Reiju then departed without reporting the Sanji Retrieval Team's presence.[107]

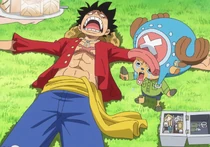
Chopper and Luffy eat an entire cafe at Cacao Island.
The group later docked at Cacao Island, an island close to Whole Cake Island. After seeing buildings made of chocolate, Chopper and Luffy went ahead to explore the island. When they ate a café, a policeman confronted them and was about to arrest them. The owner of the café, Charlotte Pudding, arrived and came to their defense, saying that they were hired to dismantle the café. After she saved Chopper and Luffy, the Sanji Retrieval Team accompanied her home where she offered them food.[108]
The Sanji Retrieval Team was then shocked to learn that the woman they were conversing with was Sanji's bride-to-be, who in turn, was surprised to discover that the group was from the Straw Hat crew. After calming down, Chopper and the team listened as Pudding explained more about the Charlotte Family and her thoughts about Sanji. Chopper was shocked to hear that Sanji turned her down. Pudding then showed them a secret route to Whole Cake Island and told them where to meet her while promising to bring Sanji to them. The Sanji Retrieval Team then left in a hurry when guards arrived for Pudding and quickly returned to the Thousand Sunny. Pekoms was nowhere to be seen and they found a message telling them to turn back.
Chopper and Nami run in fear from a centipede.
After leaving Cocao Island, the team sailed on Pudding's route. When Pedro announced that they were approaching the next island, Chopper and Carrot were excited, but Nami decided not to approach the island. The Thousand Sunny was later attacked by a giant aquatic centipede, causing Chopper and Nami to run in fear as the rest of the team prepared to battle it.[109]
The team later battled a swarm of giant ants before getting trapped in a frozen sea of syrup as night fell. As they worked to unfreeze the sea, Chopper and the rest of the team listened as Pedro revealed his past history in Totto Land and his plan to steal Big Mom's Road Poneglyph.
The next day, the team reached Whole Cake Island.[110]
Quest in the Mirro-World[]

Chopper, Nami, and Carrot encounter a large buried man.
After docking at the southwestern coast of Whole Cake Island, the team split into two groups, with Pedro and Brook departing to find Big Mom's Road Poneglyph. Right after Chopper's group disembarked on the island, Luffy saw what appeared to be Sanji in the nearby forest. Luffy, Chopper, and Carrot ran after him with Nami following them, but Sanji mysteriously disappeared. Chopper, Luffy, and Carrot headed into the woods to look for Sanji, but kept getting distracted by their sweet environment. They were nearly eaten by a talking crocodile, and things only grew more shocking as Luffy encountered his living reflection. Chopper, Carrot, and Nami saw Sanji on a tree branch, which disappeared, and they pursued a fleeing figure. They encountered a large man buried up to his neck, whose lack of sense deeply infuriated Chopper. They were then suddenly attacked by a rabbit named Randolph riding a crane, and were thrown into chaos as everything in the Seducing Woods came alive to trap and kill them.[111]
Chopper, Nami, and Carrot continued running from Randolph, although Carrot managed to stop the rabbit's steed using Electro. Randolph hurled its spear at the Sanji Retrieval Team, but they dodged it as they returned to the fighting Luffys. Chopper, Nami, and Carrot unwittingly took the reflection Luffy back to the shore, but to their surprise they ended up in the exact same location after crossing the river, as though the forest had been mirrored. The reflection Luffy then revealed herself to be Charlotte Brûlée and prepared to attack Nami and Carrot.[112]
Chopper is overwhelmed by several tree homies.
After Brûlée trapped Carrot in the Mirro-World, she explained to Chopper and Nami that Big Mom was well aware of their movements and had given orders to prevent them from meeting up with Sanji. When Brûlée ordered the living trees in the Seducing Woods to subdue the two Straw Hats, Chopper ate a Rumble Ball and transformed into Monster Point. Chopper fought off the trees to help Nami escape so she could go search for Luffy.[113] Chopper was later captured by Brûlée and trapped in the Mirro-World alongside Carrot. After Brûlée arrived at the scene where Charlotte Cracker was confronting Nami and Luffy, Brûlée smashed her mirror into pieces. However, Chopper and Carrot remained unharmed.[114]
Inside the Mirro-World, a shackled Chopper told Carrot, also shackled, that he had a plan, and so she should call him "Brother Chopper". Carrot referred to him as "Choniki" and asked what the plan was. Chopper explained his realization that the Mirro-World is connected to every mirror on Whole Cake Island. Thus, instead of trying to escape, they should use Brûlée's power against her.[115]
Eleven hours later, Carrot and Chopper were running from Brûlée inside the Mirro-World, but began to grow tired.[116] As they ran, Chopper and Carrot contacted Nami through a mirror shard and told her not to worry. However, their conversation abruptly ended.[117]

Chopper defeats the Noble Croc.
Chopper and Carrot were caught by Brûlée and taken to her house.[118] However, they managed to trick Brûlée into capturing a frog that she had made into a body double of Carrot instead of Carrot herself, and Chopper was chained in Heavy Point, so he planned to have the real Carrot come in and attack while he escaped by returning to his normal form. From there, he could activate Monster Point and help take down all the enemies. When Carrot ambushed Brûlée's group and defeated Brûlée, Chopper freed himself and activated Monster Point, allowing him to flip the Noble Croc on top of several of Brûlée's subordinates, defeating them. After he and Carrot defeated everyone in the house, they celebrated and prepared to visit their allies through the mirrors.[119]

Chopper and Carrot look for their teammates in Mirro-World.
With Brûlée as their prisoner, Chopper and Carrot raced through the Mirro-World using Diesel to find Luffy and the others.[120] After Carrot woke Brûlée up, Brûlée revealed that they could ask the mirrors to show the way to the castle. Chopper then asked the mirrors to show the location of their friends.[121] Chopper and Carrot located Pedro and made a plan for him to end his battle with Tamago. As Pedro blew up a large amount of explosives inside his jacket, Chopper and Carrot pulled him into the Mirro-World. As they continued traveling in the Mirro-World, Chopper and Carrot were informed of Luffy and Nami's capture but were later told by the mirrors that Nami was with Jinbe.[122] Once they located Jinbe and Nami, Chopper attempted to retrieve them but was accidentally shocked by Nami's thundercloud. After taking Nami and Jinbe into the Mirro-World, the group went on searching for Luffy, Brook, and Sanji.[123]
Chopper's group located Brook inside Big Mom's bedroom, being held in her hands as she slept. Brûlée tried to alert her mother, causing the team to bind and gag her and Diesel. Upon witnessing Big Mom and her three homies attacking a fly, the team became terrified, wondering how they were supposed to save Brook. The team then made a skeletal lookalike for Brook, which they planned to use to make a stand-in for the real Brook. Chopper snuck into the room, but accidentally sneezed, causing Big Mom to semi-consciously slam her hand down on where he was standing. After Jinbe and Nami rescued Brook from Big Mom's clutches, Chopper was surprised to see that Brook successfully copied the poneglyphs and hid the copies inside his skull. The team celebrated Brook's accomplishment, and Chopper declared that they have only one objective remaining: to retrieve Sanji.[124]
Chopper was worried when none of the mirrors were able to locate Sanji and Luffy. He started crying and seemed devastated to learn from Nami that the two of them had a fight.[125] They managed to contact Luffy and Sanji through a mirror shard and they were surprised when Luffy decided to ruin the wedding ceremony. Chopper then listened as Jinbe explained more about Bege, such as his backstory and him plotting against Big Mom. He was shocked when Jinbe proposed to form an alliance with Bege. Luffy agreed to meet with Bege even though Chopper voted against this.[126]
The Wedding[]

The Sanji Retrieval Team meets with the Fire Tank Pirates.
Chopper and his group arrived at Bege's hideout before Luffy and Sanji. After taking a bath, Chopper greeted Luffy and Sanji once they arrived. After the rest of the team finished with their baths, Chopper accompanied them inside the meeting room.[127] During the meeting between the two groups, Chopper heard about how Bege planned to exploit a certain weakness of Big Mom. The meeting adjourned once Bege finished going over his assassination plan.[128]

Chopper, Nami, and Carrot wait inside the wedding cake for their cue.
Bege took the alliance members to the wedding in his castle, and Chopper slept for the first time in three days.[129] After the wedding ceremony began, the team initially encountered a small problem when Jinbe had difficulty waking Luffy up. After they woke Luffy with food, the team went into the Mirro-World and prepared to charge into the venue.[130] Once they heard the signal, the team unleashed duplicates of Luffy into the venue, causing chaos at the ceremony. After releasing all the duplicates, the team charged in. Chopper, Nami, and Carrot then hid inside the ruined wedding cake, waiting for the photo of Mother Carmel to be destroyed. They then watched in amazement as Jinbe officially declared to Big Mom his intention to leave the Big Mom Pirates in order to join Luffy's crew.[131]

Chopper gives the Vinsmoke Family earplugs as Sanji frees them.
Three seconds after Brook destroyed Carmel's portrait, Chopper, Carrot, and Nami were confused as to why Big Mom did not already start screaming. However, they were later told by Bege to put on their earplugs as he initiated his assassination operation.[132] When Luffy caused Big Mom to start her strange scream, Chopper's group came out of hiding. Chopper then gave earplugs to the Vinsmokes right after Sanji freed them from their restraints.[133]
Chopper then watched as Bege, Vito, and Gotti fired their KX Launchers at Big Mom. However, Big Mom's scream detonated the rockets before they could reach her. With the assassination attempt a failure, Caesar flew into the venue with the escape mirror and Bege signaled the alliance members to retreat. Before they could escape into the mirror, Big Mom's scream shattered it, leaving them trapped in the venue. After Bege transformed into Big Father, he instructed the alliance to retreat inside.[134] Before he could do so, Chopper was restrained by Oven, but was released after Niji attacked Oven. Chopper then retreated successfully into Bege's fortress, along with the rest of the alliance. Inside, Chopper and Nami shivered in terror as Bege explained about the dire situation they were in.[135]
Escape from Totto Land[]
As Bege's fortress suffered damage from Big Mom's attacks, Luffy prepared to fight her, but Nami had Chopper restrain him. Chopper then listened as Bege came up with a plan to escape with Caesar's help. After the Vinsmoke Family exited Bege's body to distract the Big Mom Pirates, Chopper cried in shock when Luffy and Sanji engaged Big Mom in combat to save Reiju.[136] While Caesar was evading the Big Mom Pirates with Bege in tow, Chopper cheered for him.[137]
Just when the Big Mom Pirates routed Luffy's group, Bege's crew, and the Vinsmokes, the Tamatebako dropped to the base of the Whole Cake Chateau and exploded, causing the castle to topple over. As the castle collapsed, Luffy's group, Bege's crew, and the Vinsmoke Family got away. The Sanji Retrieval Team and the Fire Tank Pirates rendezvous at the northwest part of Whole Cake Island, where Luffy and Bege agreed to go their separate ways. After Bege left, Chopper and Brook volunteered to retrieve the Shark Submerge and take it back to the Thousand Sunny.[138]

Chopper and Brook fight to take back the Sunny.
After retrieving the Shark Submerge, Chopper and Brook navigated through the juice river back to the coast where the Sunny was located. While eating some of the cream from the transformed Whole Cake Chateau, Chopper spotted a merman fishing underwater. Once they returned to their ship, they found Charlotte Perospero, Charlotte Katakuri, and an army of chess soldiers on board. The two Straw Hats then prepared to fight to take back their ship.[139] On the Sunny's deck, Chopper and Brook fought and defeated numerous Chess Soldiers. Knowing that the soldiers were coming from the mirror in Nami's room, Brook told Chopper to smash it.[140]
Perospero then took direct action against Chopper and Brook, covering them with candy and intending to kill them by turning them into candy. However, the Sanji Retrieval Team managed to return to the ship, but they were still chased by Big Mom. After Perospero trapped the ship in candy, Chopper and Brook watched in shock as Pedro attempted to take out Perospero with a suicidal explosion.[141]
Thanks to Pedro's sacrifice, the candy encasing Chopper and Brook dissolved, freeing them. They then helped Nami and Jinbe prepare the ship. After Luffy grabbed and dragged Katakuri into the Mirro-World, Chopper and his group on the Thousand Sunny escaped Whole Cake Island with a Coup de Burst.[142]
As the team mourned Pedro's self sacrifice and lamented on their inability to save him, Jinbe encouraged them to press on and keep their guard up. With the team spurred into action, Chopper gained some confidence and Nami had him take the helm as they sailed to Cacao Island.[143]

The Sanji Retrieval Team plan their next move.
While under siege by the Big Mom Pirates, the team encountered another dire predicament when Big Mom created a massive wave homie to engulf the Thousand Sunny.[144] However, thanks to Jinbe's skills as a helmsman, the team managed to come out of that situation unharmed. They then contacted Luffy through a mirror shard and told him to find a mirror connecting to Cacao Island so they could meet him there.[145]
On the way to Cacao Island, the group on the Sunny was puzzled when they saw no pursuers. Chopper and Carrot kept a vigilant lookout.[146] As they were getting closer to Cacao Island, Jinbe told the group to prepare for a battle. Carrot informed Chopper that a full moon was coming.[147] The group on the Sunny was later surprised to find themselves once again pursued by Big Mom and a fleet of Tarteships.[148] They were initially able to hold their own, but they later discovered another fleet of Tarteships led by Daifuku in front of them. As they were about to be surrounded by the Big Mom Pirates, they thought about a counterattack. Carrot told the rest of the team to leave this to her, and they watched with amazement as Carrot transformed into her Sulong form and launched an attack on Daifuku's crew.[149]


Chopper uses Guard Point to protect Nami from Big Mom.
Chopper continued to watch in awe of Carrot's strength, but Jinbe revealed that Carrot faced the risk of severe exhaustion if she used the Sulong form for too long. After Brook carried Carrot back to the Thousand Sunny, Chopper and his group later faced despair after Big Mom summoned Zeus and Prometheus back to her and went to attack the Sunny.[150] Chopper watched as Big Mom tore the Sunny apart looking for the wedding cake and sent Jinbe flying into the ocean. When she tried attacking Nami, Chopper blocked her attack using Guard Point. After Jinbe returned and knocked Big Mom off the ship using Fish-Man Karate, Chopper was amazed. Big Mom then prepared to slice the entire Sunny in half, but Nami and Brook managed to manipulate Zeus into discharging all its power, engulfing Big Mom in a massive blast of lightning, which gave the Straw Hats the chance to flee.[151] As Big Mom continued to chase after the Thousand Sunny with Prometheus in gigantic size, Chopper (in his Monster Point) struggled to defend the Sunny from Big Mom's onslaughts.[152] As the Nostra Castello approached the Thousand Sunny, Chopper was overjoyed to see Sanji again. After Pudding brought Sanji to the Straw Hats' ship, the group happily welcomed him back. With the Fire Tank Pirates luring Big Mom away with the cake, the Straw Hats continued on to Cacao Island to retrieve Luffy. On the way, the group on the Sunny learned from Sanji that the Big Mom Pirates were aware of their rendezvous point.[153]
After Sanji and Pudding went ahead to Cacao Island to help Luffy, the group on the Sunny evade Smoothie's attacks. Chopper asked Carrot if Inuarahsi and Nekomamushi could transform like she did.[154] As the promised rendezvous time drew near, Nami pointed out that Luffy needed Brûlée in order to leave the Mirro-World, causing the group to become concerned, given Luffy's absent-mindedness. With a few minutes remaining, Cacao Island was in sight.[155] As they approached the island, they saw the massive fleet that the Big Mom Pirates assembled there. They were overjoyed to hear from Sanji that Luffy made it out of the Mirro-World. The group was then bewildered when they saw the Big Mom Pirates' fleet suddenly engulfed in flames.[156]
As they witnessed Germa 66 attacking the Big Mom Pirates, Sanji told them to sail past the port at full speed. The Sunny group did so and they were overjoyed to see Sanji and Luffy coming towards them.[157] Luffy and Sanji returned to the Sunny and Chopper quickly tended to Luffy's injuries. The group was then besieged by Smoothie's fleet, but Judge came to their rescue. After the Sunny passed by Judge's castle, the group later saw enemy ships approaching them from the front and when the situation grew more dire, they were surprised when Wadatsumi appeared and attacked the enemy.[158]
The Sun Pirates cleared a path for the Sunny. However, despite their efforts, the Sunny was intercepted and attacked by the Queen Mama Chanter.[159] Wadatsumi saved the Sunny by switching it with the Sun Pirates' ship and hid the Sunny in his mouth. Wadatsumi tried swimming away, but Oven attacked him with heat waves, forcing him to spit out the Sunny. As the Sun Pirates held back the Big Mom Pirates, Jinbe decided to stay behind to help them and Luffy consented to his decision. After Jinbe joined his former crew in battle, the Sunny group sailed far away from Cacao Island.[160]
With the Big Mom Pirates unable to pursue, the Sunny group successfully escaped Totto Land. After some rest, Sanji cooked a meal for them.[161]
Levely Arc[]
Journey to Wano[]
After Sanji realized that he received a raid suit from Niji during the escape from Cacao Island, Chopper and Luffy begged him not to throw it away. Carrot received a newspaper and showed it to the group. They then saw that Sanji and Luffy received new bounties. Initially, the group misread Luffy's new bounty as ![]() 150,000,000. Brook later took a closer look at the poster and the group was then shocked to hear that Luffy's bounty actually increased to
150,000,000. Brook later took a closer look at the poster and the group was then shocked to hear that Luffy's bounty actually increased to ![]() 1,500,000,000.[162]
1,500,000,000.[162]
Wano Country Saga[]
Wano Country Arc[]
Infiltration in Wano Country[]
As the Thousand Sunny continued towards Wano Country, the group was informed of the Levely through a newspaper and Chopper was overjoyed to see Kureha on the newspaper. He even cut out parts of the newspaper to keep for himself. The group then encountered an unusual weather disturbance in their direction, followed by an octopus on their ship as well as a school of huge carp on their side. After a bumpy ride across a river, the ship climbed up a waterfall. Once they reached the top, they came across a whirlpool.[163] Sanji carried Nami, Chopper, Carrot, and Brook away from the ship, but Luffy got dragged into the whirlpool along with the Sunny.[164]
After Luffy got separated, the group searched for him, but they only found his Vivre Card. They later got in touch with Kin'emon and they reunited with Luffy at the ruins of Oden Castle. With Law, Momonosuke, and Kiku also present, Kin'emon explained how he and his group traveled through time to escape Orochi's attack twenty years ago.[165] Chopper then listened as Kin'emon explained more about the past such as the story of Oden, the time of his execution, the rumor about Toki, and what Kin'emon's group did right after arriving at present time. Kin'emon then went over a plan to attack Onigashima, the island where Kaidou resided, in two weeks.[166]


The Sanji Retrieval Team receives appropriate clothing for Wano thanks to Kin'emon's powers.
Kin'emon explained more about the Fire Festival and how the decisive battle would play out. He then gave the group specific tasks to do. He asked Chopper and Carrot to go with Kiku to Inuarashi's current location. After giving the group new clothes, he introduced them to Shinobu. When Kaidou arrived at Kuri, Law alerted the group.[167] The group was surprised to see Kaidou and they learned that Luffy, Zoro, and Law were already exposed. Luffy rushed off to protect Okobore Town and Law chased after him and told the rest to remain unseen. After Kin'emon and Kiku left to rescue Tsuru, the rest at Oden Castle noticed Kaidou coming to their direction and tried to flee as Kaidou destroyed the castle with a fire breath.[168] Shinobu saved the males of the group by using her Devil Fruit power to sink them into the ground while Sanji carried Carrot and Nami away. Kiku then returned and told them what happened to Luffy.[169]
Chopper was next seen in Tama's house at Amigasa Village tending to Tama. Chopper assured her that Luffy has incredible recovery speed and his will would not be broken and that Raizo was planning on rescuing him.[170]
An Unexpected Visitor and Raid at Udon[]
Chopper, Tama, Kiku, and Momonosuke went to Kuri Beach, where they found Big Mom lying unconscious. Chopper panicked upon seeing her, and when she woke up, Chopper was surprised that she lost her memories.[171] On the following morning, Chopper's group took Big Mom to Okobore Town. Though Chopper was worried about Big Mom regaining her memories, Tama insisted on taking her to Udon. Chopper then told Big Mom that she could find more food in that region, making her eager to go there.[172]
The group then traveled to Udon, with Big Mom having tamed a Wanizame to carry them there. On the way there, Big Mom soon started to get hungry, asking how far Udon was while hungrily eyeing Chopper, much to his discomfort.[173] As Tama and Big Mom were talking about oshiruko, Chopper worried what would happen if Big Mom did not find any at Udon.[174] After night fell, the group eventually arrived at Udon.[175]
On the next day, Chopper's group entered the Prisoner Mines after Big Mom broke through the front gate. Kiku informed Chopper that Queen was in charge of the prison and told him to proceed with caution. As Chopper and Kiku were sneaking in, they witnessed Big Mom attacking Queen.[176] Chopper and Kiku were amazed to see Big Mom overpowering Queen. They then became worried for Luffy when he invoked Big Mom's wrath by admitting he ate the oshiruko that Big Mom was looking for.[177] Chopper and Kiku were shocked when Big Mom sent Luffy and Hyogoro flying into a wall.[178]

Chopper and his allies prepare to take over Udon.
After Queen left with a captured Big Mom, Kiku asked Chopper about rescuing her, but he had no intention of going after her and said that getting Luffy was more important. Chopper and Kiku then heard Kawamatsu's voice coming from a nearby cell. After Raizo freed Kawamatsu, Chopper joined up with Luffy and their allies. Chopper was surprised to learn that Kiku is actually a man.[179] As Chopper and his allies fought against the Beasts Pirates, Chopper was angry that they used viruses as weapons. The group was then cornered by prisoners who were infected with the Mummy virus. Chopper was worried when Luffy made contact with the infected prisoners.[180]
After the prison takeover, Chopper worked on treating Luffy's condition and reprimanded Luffy for his recklessness. He also threw Momonosuke out of the room.[181] Chopper successfully developed a cure for the Mummy virus and treated Luffy and all those infected.[182]
Raid On Onigashima[]
Two days before the raid on Onigashima, Chopper returned to Amigasa Village with Luffy and Tama.[183] Chopper was also given a new armor by Tenguyama Hitetsu.[184]
On the day of the Fire Festival, the Straw Hats sailed to Tokage Port on the Thousand Sunny to join the Scabbards and enter the battle with the Beasts Pirates.[185]
While Kanjuro fled to Onigashima with Momonosuke in tow, the Straw Hats learned that Kanjuro was a spy working for Orochi. As the alliance was attacked by a Beasts Pirates ship with long ranged cannons, the Straw Hats were overjoyed to see Jinbe arriving and joining the battle.[186] With Jinbe officially part of the crew, the Straw Hats proceeded to take over the torii in front of Onigashima; however, Chopper, Nami and Usopp hid on the ship while the others fought.[187] The crew then arrived at Onigashima with the rebels. After disembarking, Chopper received a Beasts Pirates disguise from Kin'emon.[188]

Chopper fleeing from Big Mom.
As the Straw Hats made their way into Kaidou's stronghold, Chopper traveled in the Brachio Tank V.[189] The group in the tank and Kin'emon's forces reached the Pleasure Hall owned by Black Maria. After Nami, Carrot, and Shinobu volunteered to go look for Momonosuke, Chopper was later spotted by Big Mom when she was looking out of a window from one of the nearby buildings.[190] Chopper and Usopp fired a shot at Big Mom with the tank's cannon before fleeing from her.[191] The two managed to get away from Big Mom with minor injuries and the Brachio Tank V intact.[192]

The Straw Hats stand together against the Beasts Pirates.
Later upon hearing of Momonosuke's upcoming execution, the two decided to go and rescue him but accidentally enter the room with the Numbers.[193] While still inside the tank, Chopper and Usopp were caught by Jaki, one of the Numbers, but they were later freed by Franky at the Live Stage, where upon exiting the tank, they rejoined the rest of the Straw Hats onstage.[194]
After Queen entered the fray, Chopper and Robin were alarmed when Queen used Excite Bullets on the rebels.[195] Chopper, Robin, and Brook soon found themselves besieged by those infected by the Ice Oni virus. When Queen tossed the antidote to Apoo, Chopper told Zoro to take the antidote from him.[196] When Chopper began working on analyzing the virus' distribution factors, he was horrified to learn from Robin that he too had been infected when his right arm began to freeze.[197] Just as Zoro defeated Apoo and gave Chopper the antidote, Chopper finished his analysis and told everyone that exposing the victims to heat could prevent the spread of the virus. He also promised to produce enough antibodies for everyone.[198]
After Marco arrived, he used his flames to revert the effects of the Ice Oni, which also restored Chopper's arm back to normal. Once Tristan and Miyagi arrived, they began to work on mass-producing the antidote, while X Drake and the yakuza bosses volunteered to protect them as Queen ordered his men to steal back the antidote.[199]
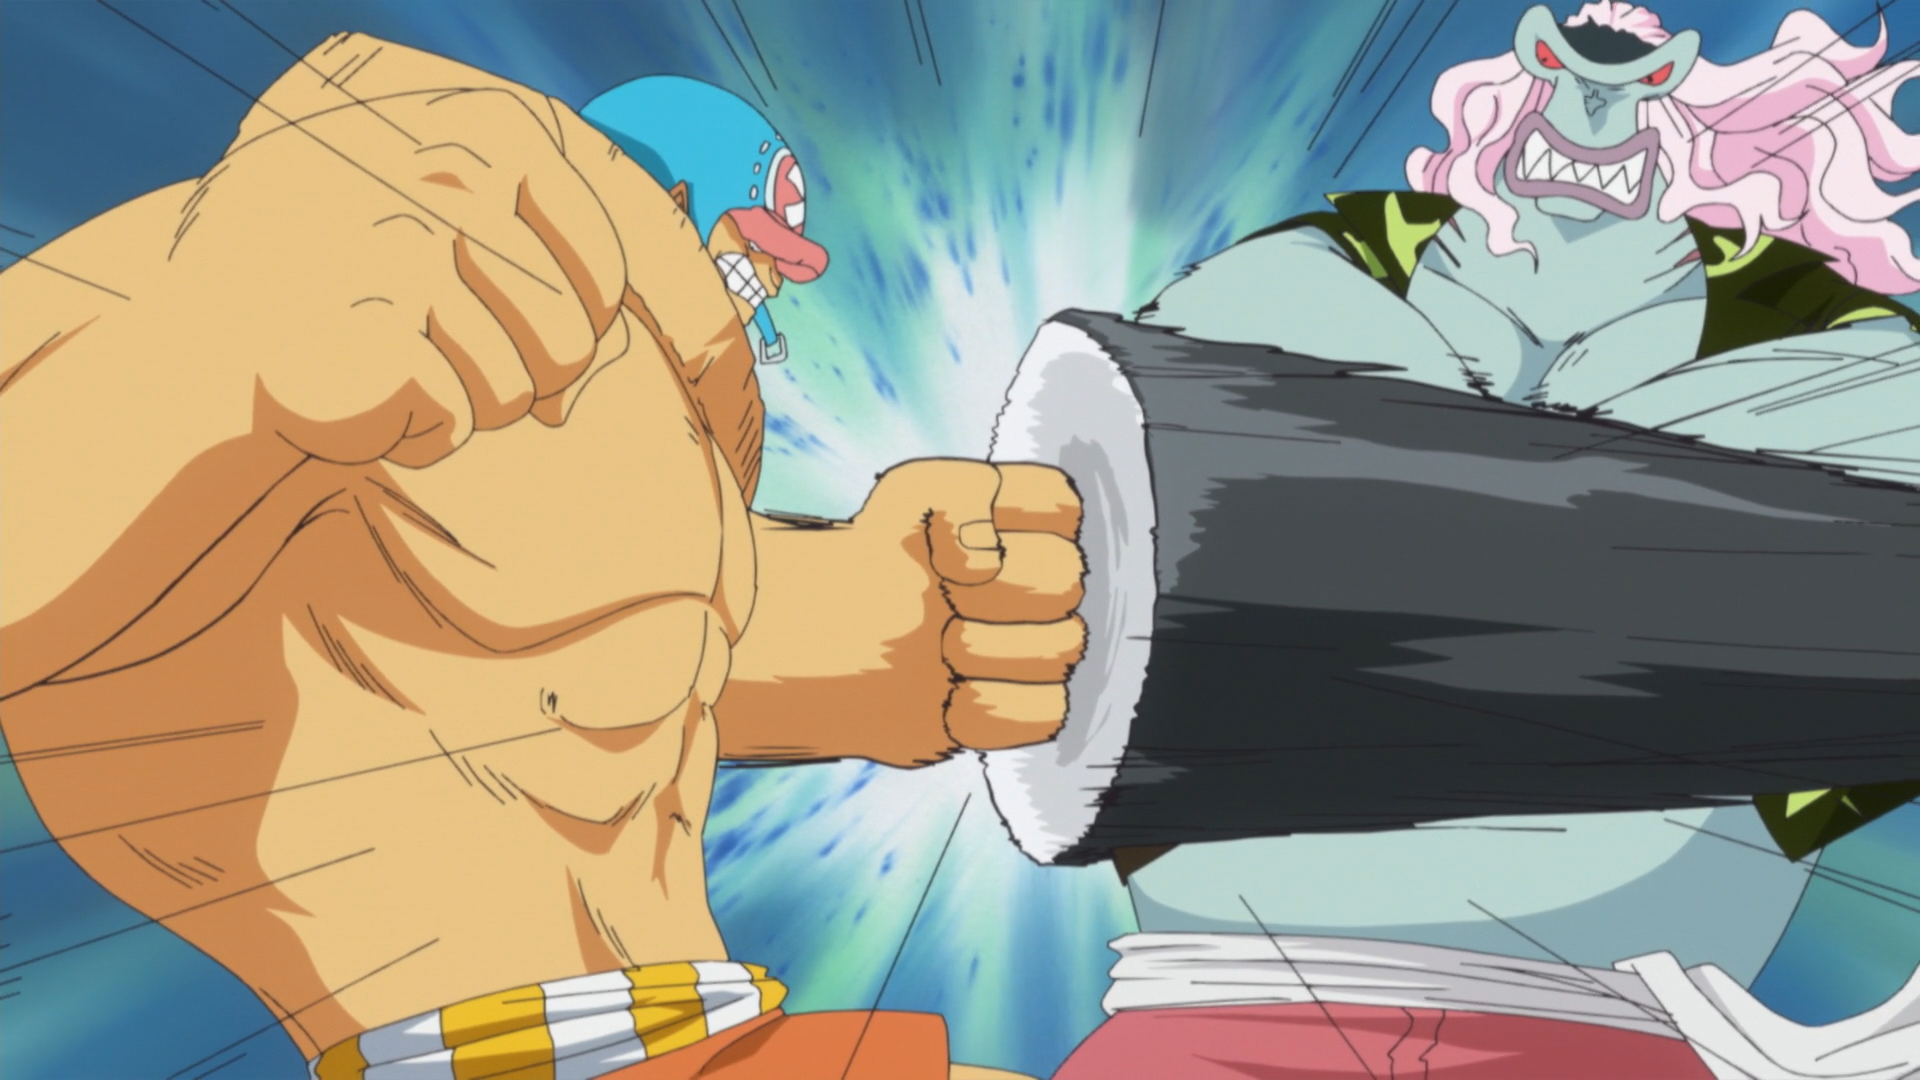
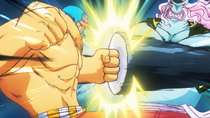
Chopper attacks Queen.
Later, Chopper managed to finish mass-producing the antidote, Chopperphage. In the nick of time, he saved the infected Hyogoro when Yatappe was about to kill him. Chopper put the antidote in Hyogoro's mouth and cured him. Miyagi and Tristan came in and distributed the antidote with a cannon, curing all the infected. Chopper then explained to Queen how he was able to mass-produce the cure. When Queen angrily asked why he bothered to cure his subordinates, Chopper said that viruses were not meant to be weaponized, as even the user would lose control. Queen refused to be lectured by Chopper and tried to kill him, but the Pleasures used themselves as shields for him. Marco took this opportunity to grab Queen by the neck, giving Chopper an opening to strike. Chopper thanked Marco and took a Rumble Ball, changing into his Monster Point form. He then struck Queen while also yelling to everyone present that he is not a "Tanuki", which they had been calling him constantly.[200]
However, as the battle continued, even though he had extended the duration of the effect of Rumble Balls to 30 minutes, and despite landing several strong blows on Queen, it is clear that the Plague was just playing with the reindeer. Furthermore, Charlotte Perospero joined the battlefield in support of Queen, raining a shower of Candy arrows all over the battlefield, which worsened the situation for the Alliance.[201] Chopper's motivation took a dip when the news about Luffy's defeat and apparent death was broadcasted via the Marys. At this point Queen came in for a fatal strike on the depressed reindeer, while Perospero unleashed another arrow rain. Suddenly Sanji appeared and kicked the Brachiosaurus zoan, sending Queen spinning which simultaneously knocked away the arrows as well as Peresporo with its gigantic body. Sanji praised Chopper for holding out against the All-Star before telling him to stop crying for Luffy, reminding the reindeers of all their captain's miracles. He then casually chucking the heavily wounded Zoro to Chopper for the doctor to attend to. When Momonosuke used the Marys to announce Luffy's message, Chopper was immensely relieved, now crying tears of joy.[202] Chopper transformed into a new Babyjiji form due to the side effects of the improved Rumble Ball, which turned his body into an infant hybrid form, while he starts talking like an old man. Having learnt that Miyagi possessed a super recovery medicine that would instantly heal a person, he is quite surprised, though the goat Mink cautioned that there would be powerful side effects.[203]
Chopper then observed as the Mink injected the shot into Zoro, [204] a fact Chopper would later share with Sanji when Sanji advised Chopper to flee if the medicine should not work to which Chopper replied it was just taking longer due to Zoro's condition.[205] Together with the two Minks, Chopper witnessed Zoro and Sanji engaging in fierce combat with King and Queen[206] and after the duo split to fight their separate battles, was very nervous when he saw Queen being able to crush Sanji's bones with his Brachiojaurus technique, but was even more stunned when Sanji was able to walk away with a body full of broken bones, before mending said broken bones in a matter of moments. Chopper was again shocked when Sanji's face broke Queen's sword leaving Chopper surprised that Sanji survived this attack.[207][208] Eventually, the side effects of the Rumble Ball would fade, turning Chopper back into his normal form. Chopper had, however, concerns about Zoro's well being, as he was worried that, if Zoro won his fight, the medicine he was given earlier would double the damage he would receive from his fight with King, worrying that Zoro might die from the fight and the medicine.[209]
Unknown to him, Luffy lost his fight against Kaidou and when Kaidou descended to the castle declaring he killed Luffy, Chopper started to cry hearing these words.[210] He was later in tears and in shock when he witnessed Luffy's gigantic arm descending from the ceiling and pulling Kaidou back to the rooftop.[211] As the island was burning, Chopper reunited with Nami and told her that he can't find the rest of the crew with Nami replying that with the giant fire, they can't go anywhere. Chopper asked Zeus if he could use his rain to put out the fire, but Zeus responds that he would only get himself burned. Later, as Onigashima grew unstable, Chopper, alongside everyone else, tumbled throughout the Live Floor of the Skull Dome.[212]
After the Raid on Onigashima ended, Usopp brought the unconscious Kin'emon and Kikunojo, alongside Franky who brought Zoro to Chopper for treatment. Miyagi and Tristan reported to Chopper that several others needed his attention, which prompted Chopper to ask for help with.[213] Chopper then treated Luffy's and Zoro's injuries.[214]
A New Dawn in Wano Country[]
A week later, Chopper and with most of the crew gathered in the shogun's castle. After Luffy and Zoro woke up, Chopper jumped onto Zoro's head. Later, Chopper joined the men's bath.[215] He later joined Yamato and Luffy at the second festival, having fun and eating, and cheered when the alliance celebrated their victory.[216] A few days later, Chopper was with the rest of crew when Robin explained her discovery of the Poneglyph and of Pluton being in Wano.[217]
A couple of days later, the crew left the castle in the middle of the night and by morning were prepared to leave from Tokage Port, only to be met by Yamato and an angry Momonosuke and Kin'emon, who were upset that nobody had given them a proper goodbye. As the two tearfully thanked the crew for everything and finally said there goodbyes, Nami planned for the crew to go to Mogura Port so they could leave safely, which pleased Chopper. However, after being taunted by Kid for playing it safe, Luffy forced the ship to go over the waterfall again, much to everyone's frustration.[218] After a rough landing, the crew began to sail away from Wano.
Final Saga[]
Egghead Arc[]
Days after leaving Wano, an angry Nami locked Luffy in a cage as punishment for endangering the crew again. When Jinbe tried to get her to go easier on him, she scolded Jinbe, and Chopper warned Jinbe not to mess with Nami when she is angry. As Robin read out their new bounties and status in the world, Chopper was upset about his bounty, but Robin made him feel better by giving him some cotton candy.[219] Chopper became upset again when he heard the news about the Levely, including Vivi's disappearance and Sabo's assassination of Cobra. Chopper immediately wanted to go rescue Vivi along with everyone else, and was very upset when Zoro tried to talk all of them out of it due to the danger of doing so, with all of them childishly stating that they were still allowed to be worried about her. Despite hearing the news, Luffy was convinced of his brother's innocence, and told everyone about the promise he, Sabo, and Ace had made as children, even stating the ultimate goal of their dream, which shocked everyone. After hearing that, Chopper smiled in amazement at what Luffy had said, while Sanji laughed and asked Chopper to check Luffy's head.
A few days later, the group experienced harsh weather, at which point they discovered a massive column of water in the air, which Nami claimed was a warm eddy that was being pushed upward. As the others began to notice someone was trapped in the eddy, Chopper came out of the cabin and was immediately blown away by the strong winds. As Luffy tried to grab Chopper and pull him back, he was blown away with him into the ocean, alongside the girl who was freed from the eddy by Zoro.[220] As this happened, Jinbe went after them, and ship was attacked while he rescued them, leading to Jinbe taking them all ahead to the island. As the group reached a cave and dried themselves off, the girl began to grow into a young woman and then introduced herself as Jewelry Bonney. After telling all three of them that the island they were on was called Egghead, she explained that she had come alone without her crew to find Dr. Vegapunk and get him to undo what he had done to her father, which surprised them.[221]
After reaching the island's surface, they stopped and were amazed by the island's futuristic look, with Bonney and Chopper trying to eat a dessert that they had found. When they all failed to touch the objects, Jinbe realized that they were holograms, to the annoyance of the others. As Jinbe began questioning why the island's weather was so different from the outside, Atlas arrived and began explaining why. When Luffy touched her to see whether she was another hologram, she angrily punched him away, right into a machine that produces food. As Luffy, Bonney and Chopper began stuffing their faces, Jinbe asked her who she is, and she introduced herself as Dr. Vegapunk, specially Vegapunk #5, Atlas, which shocked and confused the others.[222]
As the three finish stuffing themselves, Atlas leaves to finish her work, and then more people begin to suddenly appear, with a confused Chopper wondering were they all came from. When Luffy finds a machine that gives him new clothes, Chopper and the others try it for themselves. As Bonney prepares to leave the three of them, Luffy tells them that Bartholomew Kuma is coming. As Luffy prepares to fight the Pacifista, he is stopped by Bonney, tearfully tells them that Kuma is her father and begs them not to hurt him. As Luffy tries to tell her that it's not the real Kuma, the Pacifista fires a laser at them, causing an explosion.[223] They avoid the blast and then manage to allude the Pacifista, due to Bonney's abilities, and eventually end up at a junkyard. There, Jinbe and Luffy explain the situation to Bonney, and Chopper, feeling bad for her, explains that they have their own bad history with Pacifistas. Jinbe then goes on to tell Bonney and the others everything he knows about Kuma, wondering what the tyrant did to end up as a cyborg. An angry Bonney defends her father, telling them that everything about him being a tyrant is false, and that he was forced into his current situation because he's a part of special race and the government just wanted to use him. She then picks up a beam saber and turns everyone back to their normal ages.[224] The group goes deeper into the junkyard and finds a giant, ancient rusted robot. As Chopper and Luffy try to get it to work, they hear someone in the junk ask for help, and Luffy pulls an elderly man out, who turns out to be Dr. Vegapunk.[225]
Vegapunk thanks them and begins telling them all about himself, and his Nomi Nomi no Mi power, and how his head and brain are constantly growing to the point that he had to cut parts of it off, which shocked Chopper. Chopper then listened to Vegapunk explaining that he took the removed part of his brain and turned it into a knowledge repository known as Punk Records. As Chopper listened in amazement at Vegapunk's dreams and achievements, he was interrupted by an angry Bonney, who held the beam saber to his head and demanded that he turn Kuma back to normal or else she’ll kill him. However, the weapon Bonney tries to use on Vegapunk ends up being defective, attracting a large number of insects, which shocks Bonney into unconsciousness. As Chopper checks on her, Vegapunk talks to Luffy about one of his old inventions, and then asks him if he'd help him escape from Egghead. As Vegapunk tries to explain why he needs to leave and he and Jinbe discuss the matter further, the group becomes aware of CP0's arrival to the island.[226] Running out of time, he asks Luffy again for help, to which he agrees.
A thankful Vegapunk tells the Straw hats where to go, and asks them to bring Bonney along, before teleporting away, which surprises Chopper and Luffy. As they head to the lab with Bonney, the group runs into CP0, with Luffy and Rob Lucci staring each other down.[227] Despite Chopper's protest, Luffy sees an injured Atlas and decides to help her, leading to another fight with Lucci, causing Chopper to run off with Bonney and Jinbe to carry Atlas to safety.[228] As the fighting continues, Sentomaru and the Seraphim arrives to the scene, with Chopper and Jinbe realizing that they are clones of the ex-Warlords, however, instead of helping Lucci, Sentomaru orders the Seraphim to help the Straw Hats into the lab and to hold off the government agents, leading to Lucci striking down Sentomaru to take control of the seraphim.[229] Despite this, Luffy still overwhelms Lucci, and Sentomaru regains consciousness long enough for the Seraphim to finish helping Luffy's group to the Labophase.
After entering the lab, and leaving Atlas for repairs, Bonney, now awake, goes off after Vegapunk again. As Chopper and Luffy try to find her and stop her they met up with the others, who tell them that not only is she not there but nether is Vegapunk; and then they all watch as CP0 and the Seraphim reach the labophase and try to attack it. However, they are stopped by Zoro and Brook, who end up receiving help from one of the agents, Stussy, who turns out to be Vegapunk's spy.[230] As CP0 is taken out, and the Seraphim are neutralized, the groups reunite as Shaka informs everyone that the main Vegapunk is still missing, and that the building is on lockdown. As everyone splits up to find Vegapunk (except for Luffy and Zoro who stay behind to watch Lucci and Kaku), Robin and Chopper are paired up with Atlas, who takes them looking on a floor filled with machines producing artificial organs for medical purposes.[231] When the other groups are attacked by the Seraphim, Robin noticed the seraphim might be on the loose again and might be trying to stop the search for Vegapunk by killing everyone. After hearing this, Atlas then suggested that she might know where Vegapunk could be, with Robin and Chopper following her to the location.[232] Afterwards Chopper regrouped with Vegapunk and the rest of the crew and went to eat Sanji's food.[233] Chopper tended to Robin's injuries, getting flustered as usual from her compliments.[234]
Later, Chopper, Nami, and Usopp attempted to leave the Labophase while carriying Robin in a pod with them.[235] When Sanji informed them of the incoming Buster Call, Chopper panicked, but continuing to treat Robin.[236] Shortly after Chopper spotted the Giant Warrior Pirates, namely Oimo and Kashii and was happy to see the two again.[237] Afterward, Chopper and the others caught wind of Vegapunk's pre recorded message being signaled across the island, questioning where came from and why it started now.[238]
References[]
- ↑ 1.0 1.1 One Piece Manga and Anime — Vol. 15 Chapter 134 and Episode 81, Chopper makes his debut.
- ↑ 2.0 2.1 One Piece Manga and Anime — Vol. 105 Chapter 1058 (p. 3-5) and Episode 1086, The Straw Hat Pirates' bounties post-Wano Country.
- ↑ Vivre Card - One Piece Visual Dictionary (Card #0006), Chopa-emon is romanized.
- ↑ One Piece Manga and Anime — Vol. 71 Chapter 705 (p. 16) and Episode 635, Momonosuke refers to Chopper as Chopa-emon.
- ↑ One Piece Manga and Anime — Vol. 92 Chapter 931 (p. 16) and Episode 926, Chopper's alias in Wano is revealed.
- ↑ 6.0 6.1 One Piece Manga and Anime — Vol. 45 Chapter 435 (p. 16-17) and Episode 320, Chopper's bounty for attacking Enies Lobby is revealed alongside the other crewmembers'.
- ↑ SBS One Piece Manga — Vol. 19 (p. 26), Chopper's age is revealed.
- ↑ One Piece Blue Deep: Characters World (p. 111), Chopper's profile after timeskip is revealed.
- ↑ 9.0 9.1 SBS One Piece Manga — Vol. 69 (p. 66), Chopper's age and height after timeskip are revealed.
- ↑ SBS One Piece Manga — Vol. 16 (p. 88), Chopper's birthday is revealed.
- ↑ SBS One Piece Manga — Vol. 66 (p. 162), Oda explains the blood types of the world and reveals Chopper's blood type.
- ↑ One Piece Manga and Anime — Vol. 80 Chapter 801 (p. 15-17) and Episode 746, The Straw Hat Pirates are given new bounties after Dressrosa.
- ↑ One Piece Manga and Anime — Vol. 61 Chapter 598 (p. 20-22) and Episode 518.
- ↑ One Piece Manga and Anime — Vol. 61 Chapter 599 (p. 12-13) and Episode 519.
- ↑ One Piece Manga and Anime — Vol. 61 Chapter 600 (p. 2-4, 16-19) and Episodes 519–520.
- ↑ One Piece Manga and Anime — Vol. 61 Chapter 602 (p. 6-17) and Episode 522.
- ↑ One Piece Manga and Anime — Vol. 61 Chapter 603 (p. 7-17) and Episode 523.
- ↑ One Piece Manga and Anime — Vol. 62 Chapter 604 and Episodes 523–524.
- ↑ One Piece Manga and Anime — Vol. 62 Chapter 605 and Episodes 524–525.
- ↑ One Piece Manga and Anime — Vol. 62 Chapter 606 and Episodes 525–526.
- ↑ One Piece Manga and Anime — Vol. 62 Chapter 607 and Episodes 526–527.
- ↑ One Piece Manga and Anime — Vol. 62 Chapter 608 and Episode 527.
- ↑ One Piece Manga and Anime — Vol. 62 Chapter 609 and Episode 528.
- ↑ One Piece Manga and Anime — Vol. 62 Chapter 610 and Episode 529.
- ↑ One Piece Manga and Anime — Vol. 62 Chapter 614 (p. 9-10) and Episodes 533–534.
- ↑ One Piece Manga and Anime — Vol. 63 Chapter 615 and Episode 534.
- ↑ One Piece Manga and Anime — Vol. 63 Chapter 617 and Episode 536.
- ↑ One Piece Manga and Anime — Vol. 63 Chapter 618 and Episode 537.
- ↑ One Piece Manga and Anime — Vol. 63 Chapter 619 and Episode 538.
- ↑ One Piece Manga and Anime — Vol. 63 Chapter 620 and Episode 539.
- ↑ One Piece Manga and Anime — Vol. 64 Chapter 627 and Episode 547.
- ↑ One Piece Manga and Anime — Vol. 64 Chapter 628 and Episode 548.
- ↑ One Piece Manga and Anime — Vol. 64 Chapter 629 and Episode 549.
- ↑ One Piece Manga and Anime — Vol. 64 Chapter 633 and Episode 553.
- ↑ One Piece Manga and Anime — Vol. 64 Chapter 634 (p. 19) and Episode 556.
- ↑ One Piece Manga and Anime — Vol. 64 Chapter 635 and Episode 556.
- ↑ One Piece Manga and Anime — Vol. 64 Chapter 636 and Episode 557.
- ↑ One Piece Manga and Anime — Vol. 65 Chapter 637 and Episode 558.
- ↑ One Piece Manga and Anime — Vol. 65 Chapter 640 and Episode 561.
- ↑ One Piece Manga and Anime — Vol. 65 Chapter 642 and Episode 564.
- ↑ One Piece Manga and Anime — Vol. 65 Chapter 645 and Episode 565.
- ↑ One Piece Manga and Anime — Vol. 65 Chapter 646 and Episode 566.
- ↑ One Piece Manga and Anime — Vol. 66 Chapter 647 and Episode 567.
- ↑ One Piece Manga and Anime — Vol. 66 Chapter 648 (p. 13-19) and Episode 568.
- ↑ One Piece Manga and Anime — Vol. 66 Chapter 649 and Episode 569.
- ↑ One Piece Manga and Anime — Vol. 66 Chapter 650 and Episode 570.
- ↑ One Piece Manga and Anime — Vol. 66 Chapter 651 and Episode 571.
- ↑ One Piece Manga and Anime — Vol. 66 Chapter 652 and Episode 572.
- ↑ One Piece Manga and Anime — Vol. 66 Chapter 653 and Episode 573.
- ↑ One Piece Manga and Anime — Vol. 66 Chapter 654 and Episode 574.
- ↑ One Piece Manga and Anime — Vol. 66 Chapter 655 and Episode 579, the Straw Hats go to investigate Punk Hazard.
- ↑ One Piece Manga and Anime — Vol. 67 Chapter 658 and Episode 582, Chopper and the others discover the Biscuits Room.
- ↑ One Piece Manga and Anime — Vol. 67 Chapter 660 and Episode 585, Chopper finds out about the children's "sickness".
- ↑ One Piece Manga and Anime — Vol. 67 Chapter 664 and Episode 589, Chopper, in Sanji's body, listens to Brownbeard's story.
- ↑ One Piece Manga and Anime — Vol. 67 Chapter 665 and Episode 591, Chopper and Nami tend to the children.
- ↑ One Piece Manga and Anime — Vol. 67 Chapter 667 and Episode 593, Chopper gives Franky some Rumble Balls.
- ↑ One Piece Manga and Anime — Vol. 68 Chapter 668 and Episode 594, Chopper accompanies Law to Caesar's lab.
- ↑ One Piece Manga and Anime — Vol. 68 Chapter 671 and Episode 597, Chopper infiltrates Caesar's lab.
- ↑ One Piece Manga and Anime — Vol. 69 Chapter 679 and Episode 605, Chopper runs through the facility.
- ↑ One Piece Manga and Anime — Vol. 69 Chapter 685 and Episode 611, Chopper tries to keep the children from eating the candy.
- ↑ One Piece Manga and Anime — Vol. 69 Chapter 686 and Episode 612, Chopper, Nami and Robin chase the kids
- ↑ One Piece Manga and Anime — Vol. 69 Chapter 688 and Episode 614, after Mocha eats all the remaining candy, Chopper treats her condition.
- ↑ One Piece Manga and Anime — Vol. 70 Chapter 691 and Episode 617.
- ↑ One Piece Manga and Anime — Vol. 70 Chapter 692 and Episode 618.
- ↑ One Piece Manga and Anime — Vol. 70 Chapter 693 and Episode 619, Chopper and the others board the rail car.
- ↑ One Piece Manga and Anime — Vol. 70 Chapter 696 and Episode 622, Chopper is relieved the children are okay and cured of the NHC10.
- ↑ One Piece Manga and Anime — Vol. 70 Chapter 697 and Episode 623.
- ↑ 68.0 68.1 One Piece Manga and Anime — Vol. 70 Chapter 698 and Episode 624.
- ↑ One Piece Manga and Anime — Vol. 70 Chapter 698 (p. 15-17) and Episode 625.
- ↑ One Piece Manga and Anime — Vol. 70 Chapter 699 (p. 14) and Episode 626.
- ↑ One Piece Manga and Anime — Vol. 70 Chapter 699 (p. 15-19) and Episode 628, the group reads about Doflamingo's resignation in the newspaper.
- ↑ One Piece Manga and Anime — Vol. 70 Chapter 700 and Episode 629, the Straw Hats, Law, Kin'emon and his son approach Dressrosa.
- ↑ One Piece Manga and Anime — Vol. 71 Chapter 701 and Episode 630, Chopper is revealed to be in the team that guards the Sunny.
- ↑ One Piece Manga and Anime — Vol. 71 Chapter 705 (p. 16-18) and Episode 635, Chopper hears a strange voice from inside the Thousand Sunny.
- ↑ One Piece Manga and Anime — Vol. 72 Chapter 714 (p. 2-6) and Episode 644, Chopper is transformed into artwork reminiscent of cubism.
- ↑ One Piece Manga and Anime — Vol. 72 Chapter 718 and Episode 648.
- ↑ One Piece Manga and Anime — Vol. 73 Chapter 722 and Episode 653.
- ↑ One Piece Manga and Anime — Vol. 73 Chapter 723 and Episode 653.
- ↑ One Piece Manga and Anime — Vol. 73 Chapter 723 and Episode 654.
- ↑ One Piece Manga and Anime — Vol. 73 Chapter 724 and Episode 655.
- ↑ One Piece Manga and Anime — Vol. 73 Chapter 725 and Episode 656.
- ↑ One Piece Manga and Anime — Vol. 73 Chapter 729 and Episode 661.
- ↑ One Piece Manga and Anime — Vol. 73 Chapter 730 and Episode 662.
- ↑ One Piece Manga and Anime — Vol. 81 Chapter 807 (p. 8-11) and Episode 756.
- ↑ One Piece Manga and Anime — Vol. 81 Chapter 810 (p. 11-17) and Episode 760.
- ↑ 86.0 86.1 One Piece Manga and Anime — Vol. 81 Chapter 811 (p. 3-14) and Episode 761.
- ↑ One Piece Manga and Anime — Vol. 79 Chapter 795 (p. 4-9) and Episode 739.
- ↑ One Piece Manga and Anime — Vol. 81 Chapter 807 (p. 12-13) and Episode 756.
- ↑ One Piece Manga and Anime — Vol. 81 Chapter 812 and Episodes 762–763.
- ↑ One Piece Manga and Anime — Vol. 81 Chapter 813 and Episodes 763–764.
- ↑ One Piece Manga and Anime — Vol. 80 Chapter 806 (p. 12-17) and Episode 755.
- ↑ One Piece Manga and Anime — Vol. 81 Chapter 807 (p. 3-4, 6-14) and Episode 756.
- ↑ One Piece Manga and Anime — Vol. 81 Chapter 808 (p. 15-17) and Episode 758.
- ↑ One Piece Manga and Anime — Vol. 81 Chapter 811 (p. 15-19) and Episodes 761–762.
- ↑ One Piece Manga and Anime — Vol. 81 Chapter 814 (p. 4-16) and Episodes 764–765.
- ↑ One Piece Manga and Anime — Vol. 81 Chapter 815 (p. 10-14) and Episode 766.
- ↑ One Piece Manga and Anime — Vol. 81 Chapter 816 and Episode 767.
- ↑ One Piece Manga and Anime — Vol. 82 Chapter 817 and Episodes 768–769.
- ↑ One Piece Manga and Anime — Vol. 82 Chapter 818 and Episodes 769–770.
- ↑ One Piece Manga and Anime — Vol. 82 Chapter 819 and Episode 771.
- ↑ One Piece Manga and Anime — Vol. 82 Chapter 820 and Episodes 772–773.
- ↑ One Piece Manga and Anime — Vol. 82 Chapter 821 and Episodes 773–774.
- ↑ One Piece Manga and Anime — Vol. 82 Chapter 822 and Episode 776.
- ↑ One Piece Manga and Anime — Vol. 82 Chapter 823 and Episodes 777–778.
- ↑ One Piece Manga and Anime — Vol. 82 Chapter 824 and Episode 779.
- ↑ One Piece Manga and Anime — Vol. 82 Chapter 825 and Episodes 783–784.
- ↑ One Piece Manga and Anime — Vol. 82 Chapter 826 and Episodes 784–785.
- ↑ One Piece Manga and Anime — Vol. 82 Chapter 827 and Episodes 785–786.
- ↑ One Piece Manga and Anime — Vol. 83 Chapter 828 and Episode 787.
- ↑ One Piece Manga and Anime — Vol. 83 Chapter 830 (p. 11-17) and Episode 790.
- ↑ One Piece Manga and Anime — Vol. 83 Chapter 831 and Episode 791.
- ↑ One Piece Manga and Anime — Vol. 83 Chapter 832 and Episode 792.
- ↑ One Piece Manga and Anime — Vol. 83 Chapter 835 (p. 6-13, 15) and Episode 796.
- ↑ One Piece Manga and Anime — Vol. 83 Chapter 836 (p. 9) and Episode 797.
- ↑ One Piece Manga and Anime — Vol. 83 Chapter 838 (p. 13-14) and Episode 800.
- ↑ One Piece Manga and Anime — Vol. 84 Chapter 842 (p. 6) and Episode 805.
- ↑ One Piece Manga and Anime — Vol. 84 Chapter 843 (p. 11-12) and Episodes 806–807.
- ↑ One Piece Manga and Anime — Vol. 84 Chapter 847 (p. 2-3) and Episode 812, Brûlée prepares to put Carrot in a pot of soup.
- ↑ One Piece Manga and Anime — Vol. 85 Chapter 849 (p. 3-10) and Episodes 814–815.
- ↑ One Piece Manga and Anime — Vol. 85 Chapter 850 (p. 2-3) and Episode 816.
- ↑ One Piece Manga and Anime — Vol. 85 Chapter 851 (p. 10-11) and Episode 818.
- ↑ One Piece Manga and Anime — Vol. 85 Chapter 853 (p. 8-11) and Episodes 820–821.
- ↑ One Piece Manga and Anime — Vol. 85 Chapter 854 (p. 3-5) and Episodes 821–822.
- ↑ One Piece Manga and Anime — Vol. 85 Chapter 855 (p. 4-9, 14-16) and Episodes 823–824.
- ↑ One Piece Manga and Anime — Vol. 85 Chapter 856 (p. 2-3) and Episode 824.
- ↑ One Piece Manga and Anime — Vol. 85 Chapter 857 (p. 3-16) and Episodes 826–827.
- ↑ One Piece Manga and Anime — Vol. 85 Chapter 858 (p. 7, 14-19) and Episodes 827–828.
- ↑ One Piece Manga and Anime — Vol. 86 Chapter 859 (p. 2-13) and Episodes 828–829.
- ↑ One Piece Manga and Anime — Vol. 86 Chapter 861 (p. 10-11) and Episode 831.
- ↑ One Piece Manga and Anime — Vol. 86 Chapter 862 (p. 2, 8, 14) and Episode 832.
- ↑ One Piece Manga and Anime — Vol. 86 Chapter 863 (p. 8-9, 12, 18-19) and Episode 833.
- ↑ One Piece Manga and Anime — Vol. 86 Chapter 864 (p. 11, 16) and Episode 834.
- ↑ One Piece Manga and Anime — Vol. 86 Chapter 865 and Episode 835.
- ↑ One Piece Manga and Anime — Vol. 86 Chapter 868 and Episodes 838–839.
- ↑ One Piece Manga and Anime — Vol. 86 Chapter 869 and Episodes 839–840.
- ↑ One Piece Manga and Anime — Vol. 87 Chapter 870 and Episodes 840–841.
- ↑ One Piece Manga and Anime — Vol. 87 Chapter 871 (p. 4, 13) and Episodes 841–842.
- ↑ One Piece Manga and Anime — Vol. 87 Chapter 872 (p. 8, 16-18) and Episodes 842–843.
- ↑ One Piece Manga and Anime — Vol. 87 Chapter 875 (p. 2, 15) and Episodes 846–847.
- ↑ One Piece Manga and Anime — Vol. 87 Chapter 876 (p. 15-16) and Episode 848.
- ↑ One Piece Manga and Anime — Vol. 87 Chapter 877 (p. 2-4, 6-7, 14-17) and Episodes 848–849.
- ↑ One Piece Manga and Anime — Vol. 87 Chapter 878 (p. 6-9, 15-17) and Episode 850.
- ↑ One Piece Manga and Anime — Vol. 87 Chapter 879 (p. 2-5) and Episode 851.
- ↑ One Piece Manga — Vol. 88 Chapter 880.
- ↑ One Piece Manga — Vol. 88 Chapter 881.
- ↑ One Piece Manga — Vol. 88 Chapter 884.
- ↑ One Piece Manga — Vol. 88 Chapter 886.
- ↑ One Piece Manga — Vol. 88 Chapter 887.
- ↑ One Piece Manga — Vol. 88 Chapter 888.
- ↑ One Piece Manga — Vol. 88 Chapter 889.
- ↑ One Piece Manga — Vol. 89 Chapter 890.
- ↑ One Piece Manga — Vol. 89 Chapter 891.
- ↑ One Piece Manga — Vol. 89 Chapter 892.
- ↑ One Piece Manga — Vol. 89 Chapter 894.
- ↑ One Piece Manga — Vol. 89 Chapter 896.
- ↑ One Piece Manga — Vol. 89 Chapter 897.
- ↑ One Piece Manga — Vol. 89 Chapter 898.
- ↑ One Piece Manga — Vol. 89 Chapter 899.
- ↑ One Piece Manga — Vol. 89 Chapter 900.
- ↑ One Piece Manga — Vol. 90 Chapter 901.
- ↑ One Piece Manga — Vol. 90 Chapter 902.
- ↑ One Piece Manga — Vol. 90 Chapter 903.
- ↑ One Piece Manga — Vol. 90 Chapter 910.
- ↑ One Piece Manga — Vol. 91 Chapter 911.
- ↑ One Piece Manga and Anime — Vol. 91 Chapter 919 and Episode 909.
- ↑ One Piece Manga — Vol. 91 Chapter 920.
- ↑ One Piece Manga — Vol. 91 Chapter 921.
- ↑ One Piece Manga — Vol. 92 Chapter 922.
- ↑ One Piece Manga — Vol. 92 Chapter 924.
- ↑ One Piece Manga — Vol. 92 Chapter 925.
- ↑ One Piece Manga and Anime — Vol. 92 Chapter 931 (p. 14-17) and Episode 926.
- ↑ One Piece Manga and Anime — Vol. 93 Chapter 933 (p. 17) and Episode 928.
- ↑ One Piece Manga and Anime — Vol. 93 Chapter 934 (p. 4-7) and Episode 929.
- ↑ One Piece Manga and Anime — Vol. 93 Chapter 937 (p. 3) and Episode 933.
- ↑ One Piece Manga and Anime — Vol. 93 Chapter 940 and Episode 937, page-17
- ↑ One Piece Manga and Anime — Vol. 94 Chapter 945 (p. 13, 15) and Episode 944.
- ↑ One Piece Manga and Anime — Vol. 94 Chapter 946 (p. 2, 10, 12) and Episode 945.
- ↑ One Piece Manga and Anime — Vol. 94 Chapter 947 (p. 5) and Episode 946.
- ↑ One Piece Manga and Anime — Vol. 94 Chapter 948 (p. 2, 7, 14) and Episodes 947–948.
- ↑ One Piece Manga and Anime — Vol. 94 Chapter 949 and Episodes 948–949.
- ↑ One Piece Manga and Anime — Vol. 94 Chapter 950 (p. 6) and Episode 950.
- ↑ One Piece Manga and Anime — Vol. 94 Chapter 952 (p. 8) and Episode 953.
- ↑ One Piece Manga and Anime — Vol. 95 Chapter 955 (p. 10) and Episode 956.
- ↑ One Piece Manga and Anime — Vol. 95 Chapter 959 (p. 4-5) and Episode 959.
- ↑ One Piece Manga and Anime — Vol. 97 Chapter 975 and Episodes 978–979.
- ↑ One Piece Manga and Anime — Vol. 97 Chapter 976 and Episode 980.
- ↑ One Piece Manga and Anime — Vol. 97 Chapter 977 and Episodes 981–983.
- ↑ One Piece Manga and Anime — Vol. 97 Chapter 978 and Episode 983.
- ↑ One Piece Manga and Anime — Vol. 97 Chapter 979 (p. 6-9) and Episode 984.
- ↑ One Piece Manga and Anime — Vol. 97 Chapter 981 and Episodes 987–988.
- ↑ One Piece Manga and Anime — Vol. 97 Chapter 982 (p. 14) and Episode 989.
- ↑ One Piece Manga and Anime — Vol. 97 Chapter 983 (p. 3) and Episode 991.
- ↑ One Piece Manga and Anime — Vol. 98 Chapter 986 (p. 10) and Episode 995.
- ↑ One Piece Manga and Anime — Vol. 98 Chapter 989 (p. 6-8, 11, 15-17) and Episodes 999–1000.
- ↑ One Piece Manga and Anime — Vol. 98 Chapter 993 (p. 5-6) and Episode 1005.
- ↑ One Piece Manga and Anime — Vol. 98 Chapter 994 (p. 10-13) and Episode 1007.
- ↑ One Piece Manga and Anime — Vol. 99 Chapter 995 (p. 12) and Episode 1008.
- ↑ One Piece Manga and Anime — Vol. 99 Chapter 997 and Episode 1010.
- ↑ One Piece Manga and Anime — Vol. 99 Chapter 998 and Episode 1012.
- ↑ One Piece Manga and Anime — Vol. 100 Chapter 1007 and Episode 1023.
- ↑ One Piece Manga and Anime — Vol. 100 Chapter 1014 and Episodes 1034–1035.
- ↑ One Piece Manga and Anime — Vol. 100 Chapter 1015 and Episodes 1036–1037.
- ↑ One Piece Manga and Anime — Vol. 101 Chapter 1017 (p. 12) and Episode 1039.
- ↑ One Piece Manga and Anime — Vol. 101 Chapter 1019 (p. 3) and Episode 1041.
- ↑ One Piece Manga and Anime — Vol. 101 Chapter 1022 and Episodes 1045–1046.
- ↑ One Piece Manga and Anime — Vol. 101 Chapter 1023 and Episode 1046.
- ↑ One Piece Manga and Anime — Vol. 102 Chapter 1028 (p. 10, 13, 16-17) and Episodes 1052–1053.
- ↑ One Piece Manga and Anime — Vol. 102 Chapter 1029 (p. 3) and Episode 1055.
- ↑ One Piece Manga and Anime — Vol. 103 Chapter 1038 (p. 4) and Episode 1065.
- ↑ One Piece Manga and Anime — Vol. 103 Chapter 1043 (p. 9) and Episode 1070.
- ↑ One Piece Manga and Anime — Vol. 103 Chapter 1044 (p. 13) and Episode 1071.
- ↑ One Piece Manga and Anime — Vol. 103 Chapter 1046 and Episode 1073.
- ↑ One Piece Manga and Anime — Vol. 104 Chapter 1050 (p. 10) and Episode 1077.
- ↑ One Piece Manga and Anime — Vol. 104 Chapter 1051 (p. 6) and Episode 1078.
- ↑ One Piece Manga and Anime — Vol. 104 Chapter 1052 and Episode 1079.
- ↑ One Piece Manga and Anime — Vol. 104 Chapter 1053 and Episode 1080.
- ↑ One Piece Manga and Anime — Vol. 105 Chapter 1056 and Episode 1083.
- ↑ One Piece Manga and Anime — Vol. 105 Chapter 1057 and Episode 1085.
- ↑ One Piece Manga and Anime — Vol. 105 Chapter 1058 and Episode 1086.
- ↑ One Piece Manga and Anime — Vol. 105 Chapter 1060 and Episodes 1088–1089.
- ↑ One Piece Manga and Anime — Vol. 105 Chapter 1061 and Episodes 1089–1090.
- ↑ One Piece Manga and Anime — Vol. 105 Chapter 1062 and Episode 1091.
- ↑ One Piece Manga — Vol. 105 Chapter 1063.
- ↑ One Piece Manga — Vol. 105 Chapter 1064.
- ↑ One Piece Manga — Vol. 106 Chapter 1066.
- ↑ One Piece Manga — Vol. 106 Chapter 1067.
- ↑ One Piece Manga — Vol. 106 Chapter 1068.
- ↑ One Piece Manga — Vol. 106 Chapter 1069.
- ↑ One Piece Manga — Vol. 106 Chapter 1070.
- ↑ One Piece Manga — Vol. 106 Chapter 1073.
- ↑ One Piece Manga — Vol. 106 Chapter 1075.
- ↑ One Piece Manga — Vol. 107 Chapter 1078.
- ↑ One Piece Manga — Vol. 108 Chapter 1089.
- ↑ One Piece Manga — Vol. 108 Chapter 1090.
- ↑ One Piece Manga — Vol. 108 Chapter 1094 (p. 11).
- ↑ One Piece Manga — Chapter 1105 (p. 6).
- ↑ One Piece Manga — Chapter 1107 (p. 5).
- ↑ One Piece Manga — Chapter 1109 (p. 3).
[]
| |||||||||||||
| |||||||||||||
| |||||||||||||
| |||||||||||
| |||||||||||
| |||||||||||
| |||||||||||||||
| |||||||||||||||
| |||||||||||||||
| |||||||||||
| |||||||||||
| |||||||||||
| |||||||
| |||||||
| |||||||
| |||||||||||
| |||||||||||
| |||||||||||
| |||||||||||
| |||||||||||
| |||||||||||
| |||||||||||||
| |||||||||||||||||
| |||||||||||||||||
| |||||||||||||||||
| |||||||||
| |||||||||
| |||||||||
| |||||||||
| |||||||||
| |||||||||
| |||||||||||||||||
| |||||||||||||||||
| |||||||||||||||||
| |||||||||||||||||||||||||||||||||||||||||||
| |||||||||||||||||||||||||||||||||||||||||||
| |||||||||||||||||||||||
Individuals with Bounties | |||||||||||||||||
|---|---|---|---|---|---|---|---|---|---|---|---|---|---|---|---|---|---|
| |||||||||||||||||
| |||||||||||||||||
| |||||||||||||||||
| |||||||||||||||||
| |||||||||||||||||
| |||||||||||
| |||||||||||
| |||||||||||
| |||||||||||||
| |||||||||||||
| |||||||||||||||||
| |||||||||||||||||
| |||||||||||||||||